Home Home Home Home Home Home Home
CakeSpy

Featured: 

My adventure at Ben & Jerry's in Vermont!


Unicorn Love: the Eating Disorder Recovery Blog


 Buy my brilliant books!

Buy my new book!

Buy my first book, too! 

CakeSpy Online Retail!


Archives
Gallery

Fantastic appliance for cake making on DHgate.com

everyrecipe.co.nz

Craftsy Writer

Entries in recipes (704)

Tuesday
Mar302010

Sticky Business: Sandra Lee Pillsbury Sticky Buns Recipe

Some people may rankle at the idea of using pre-packaged cinnamon rolls, but not me. I have some fond memories of them from growing up, and choose to take the "just don't read the ingredients or nutritional info" point of view.

But if you do need a way to justify them, fancying them up a bit can't work.

So I have to admit I was intrigued when I heard of the recipes for Pillsbury that Sandra Lee had created starting with their sweet rolls (you know, the ones in the tube that pop open) and adding a few simple ingredients to make them unique--it kind of seemed like Pillsbury's answer to The Cake Mix Doctor. And when they sent me a coupon for some free Pillsbury products so I could test 'em out, I figured: why not?

So I tested out the Apple Walnut Sticky Buns recipe...only, because I had neither apples nor walnuts, mine substituted blueberries and almonds. It worked out fine in terms of quantities and very nicely in terms of flavor, too.

And you know what? Even that small bit of baking really did make the store-bought rolls better and a bit more grandiose than simply poppin' and baking. Not a bad option for a quick brunch side or impromptu sweet breakfast.
Adapted from Sandra Lee's Apple Walnut Sticky Buns from Pillsbury.com

Ingredients

  • 2 tablespoons butter, softened
  • 1/2-1 cup blueberries (or, per the original recipe, 1 medium Granny Smith apple, peeled, cut into 1/2-inch cubes)
  • 3/4 cup chopped almonds (or, per the original recipe, walnuts)
  • 1/2 cup packed brown sugar
  • 1 can (12.4 oz) Pillsbury refrigerated cinnamon rolls with icing

  1. Heat oven to 375°F. Generously butter 8 regular muffin cups with softened butter.
  2. In bowl, mix blueberries and almonds (or apples/walnuts) and brown sugar; divide evenly among muffin cups. Separate cinnamon rolls; reserve icing.
  3. Place 1 cinnamon roll in each cup. Bake 12 to 14 minutes or until tops are golden brown.
  4. Cool 5 minutes. Place cookie sheet upside down over muffin pan; turn over. Remove pan.
  5. Remove lid from icing; microwave on Medium (50%) 5 to 10 seconds or until thin enough to drizzle. Drizzle over warm buns. Serve warm.

Monday
Mar292010

Sweet Sandwich: Peeps Fluffernutter for Serious Eats

Oh, don't act surprised. It was really only a matter of time before Peeps, those pillowy pastel harbingers of spring, met the classic marshmallowy sandwich called Fluffernutter.

What may surprise and delight you, however, is that in my version, the peanut butter-and-Peeps mixture is sandwiched between two hefty slices of pound cake rather than white bread, to form a delectably decadent dessert sandwich.

The pound cake works beautifully on several levels—the sweetness works harmoniously with the Peeps, and the rich butteriness is perfect with the peanut butter. In fact, I'd like to humbly submit that it just may be the perfect lunchtime followup to a breakfast of Cadbury Creme Eggs Benedict.

Sunday
Mar282010

King Corn: Cornmeal Blueberry Cookie Bars

So, when I first encountered a review copy of the book Good to the Grain: Baking with Whole-Grain Flours, I have to confess, I had my doubts. The concept--a book of recipes for baked goods (both sweet and savory) using whole grain flours sounded vaguely...virtuous.

But once assured that they still did include plenty of sugar and butter, I figured it was worth a try.

And after looking through the book (and lovingly, at some of the pictures), I decided to try the cornmeal blueberry cookies. Why? Well, for one thing, I like cookies, and I like corn muffins, and these kind of sounded somewhere in between. Plus, I happened to have all of the ingredients on hand.

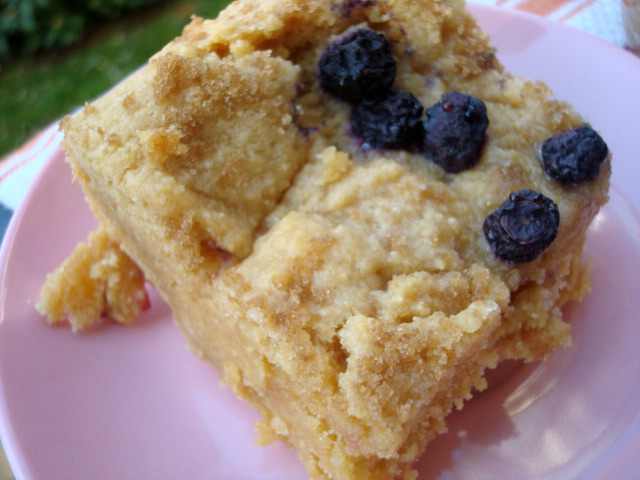
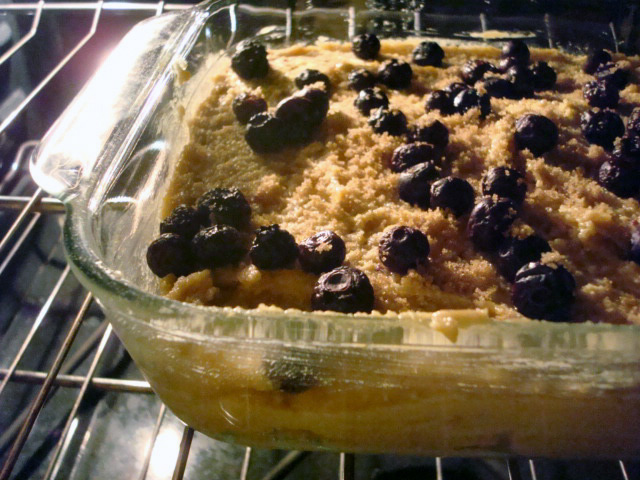
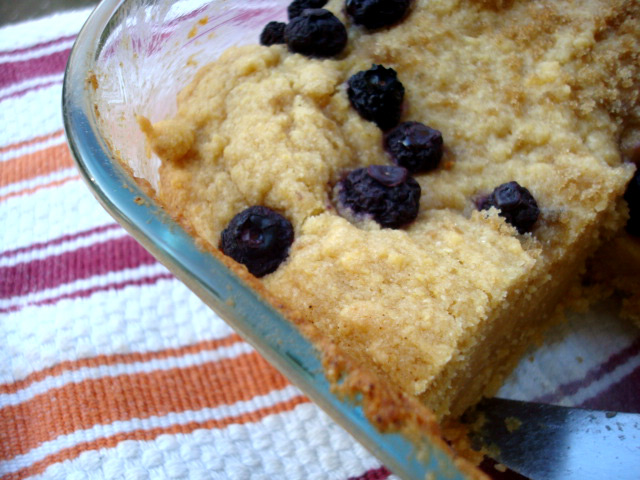
Well, I veered a little from the original recipe: for one thing, I used frozen instead of dried blueberries, dehydrating them by baking them at 200 degrees farenheit for a few hours to dry them out; and second, instead of cookies I made my batch as bars, using an 8x8-inch pyrex baking sheet. Because I had dehydrated the berries and they weren't completely dried, I placed them on top of the batter rather than mixing it in; however, even with these changes, the yield was a very dense and pleasing bar, like cornbread meets sugar cookie, with a nice tart edge from the berries.

Here's the recipe.

Cornmeal Blueberry Cookie Bars

Adapted from Good to the Grain: Baking with Whole-Grain Flours

Dry mix:

  • 2 cups corn flour
  • 2 cups all-purpose flour
  • 1 cup finely ground cornmeal
  • 1 1/2 teaspoons baking soda
  • 2 teaspoons cream of tartar
  • 2 teaspoons kosher salt (I used Secret Stash Sea Salt's Pistachio cherry)

Wet Mix:

  • 8 ounces (2 sticks) cold unsalted butter, cut into 1/2 inch cubes
  • 2 cups dark brown sugar
  • 1 cup dried blueberries (I had frozen; I baked them for a couple of hours at 200 degrees to dehydrate them)

Finish:

1/2 cup sugar (I used brown sugar)

Procedure

  1.  Preheat the oven to 350 F. Rub your baking pan with butter.
  2. Sift the dry ingredients into a large bowl and set aside.
  3. Add the butter and brown sugar to the bowl of a standing mixer fitted with a paddle attachment. Turn the mixer to low speed and mix until the butter and sugar are combined, then increase the speed to medium and cream for 2 minutes. Use a spatula to scrape down the sides and the bottom of the bowl.
  4. Add the eggs, one at a time, mixing until each is combined. Add the flour mixture to the bowl and blend on low speed until the flour is just barely combined, about 20-30 seconds (it's very pretty to watch). Scrabe down the sides and bottom of the bowl. Add the milk (and if you're using dried, add the blueberries now). Slowly mix until the dough is evenly combined.
  5. Spoon your batter (it will be thick) into your prepared pan, spreading with a spatula to even out the top. Sprinkle the dehydrated blueberries and finishing sugar on top. (or, if you want to make cookies, pour the sugar into a bowl scoop mounds of dough, each about 3 tablespoons in size, form into balls, and set on a plate; dip each ball into the sugar, coating it lightly; arrange the balls on baking sheets, leaving about 3 inches between them--balls that don't fit on the first baking sheet can be dipped in the sugar and chilled til ready to bake).
  6. Bake the bars for somewhere between 20-30 (possibly a few more) minutes depending on your pan size (more minutes for a taller pan, less for a shallower pan); (20-22 for cookies), rotating the sheet at about 10 minutes. The bars will puff up and crack at the top and are ready to come out when the sugar crustis golden brown and the cracks still faintly yellow.
  7. These bars / cookies are best eaten warm from the oven or the same day. But, if you must, they'll keep in an airtight container (at room temperature) for up to 3 days.
Monday
Mar222010

Spring in Your Step: Springtime Cutout Sandwich Cookies for Serious Eats

In case you couldn't tell by the proliferance of Cadbury Creme Eggs, Peeps, and pastel-hued jelly beans in grocery stores, Easter is coming.

Now, it's not to say that I don't enjoy these adorable seasonal sweets, but when push comes to shove, I simply prefer baked goods. So, in an effort to get a piece of that pastel-hued cuteness while also enjoying a delicious, buttery, and substantial sugary treat, I've created these Springtime Cutout Sandwich Cookies.

These were made using an adorable Springtime Linzer Cookie kit I found at Cookies, a thimble-sized shop chock full of all manner of cookie cutters in Seattle, but I veered a bit from the traditional Linzer cookie construction. These sweet sandwiches start with a buttery sugar cookie cutout recipe, filled with lemon curd for a sweet and rich zing, and topped with pastel sugar for a sweet springtime palette.

For the full writeup and recipe, visit Serious Eats!

Sunday
Mar142010

Tartelets of the Table: Chocolate Tartelet Recipe from Alabama Studio Style

When I received a sample copy of Alabama Studio Style: More Projects, Recipes, & Stories Celebrating Sustainable Fashion & Living in the mail, I was initially perplexed--although it is beautiful, it seemed like it was a book of sewing and home projects.

But then I found it: the recipes. Scattered throughout the creative sewing and home projects are several delicious recipes--most notably this one, for chocolate tartelets. Filled with creamy chocolate that falls somewhere between custard and ganache, these are an extremely delicious dessert, and they've definitely made me curious about some of the other recipes in the book, including coconut cupcakes. And there is a DIY project for homemade cake plates...

Chocolate Tartelets

Adapted from Alabama Studio Style by Natalie Chanin

You'll need: one pie crust, separated into 12 3-inch tartlet servings (use your favorite recipe for a 9-inch pie)

Note: a similar full size pie recipe is on the Alabama Studio Style site!

For the filling:

  • 1 cup granulated sugar
  • 1/3 cup all-purpose flour
  • 1 cup buttermilk
  • 2 large egg yolks, beaten
  • 1/3 cup unsweetened cocoa
  • 1 tablespoons unsalted butter
  • 1/4 teaspoon vanilla

For the meringue

  • 2 large egg whites
  • 1/4 teaspoon cream of tartar
  • 1/4 cup granulated sugar
  • 1/4 teaspoon vanilla

Filling procedure

In the top of a double boiler, combine 1 cup sugar and the flour. Add buttermilk and simmer over boiling water for about 15 minutes, until thick. Remove from heat. Beat the egg yolks, and then add them to the milk mixture. In a separate bowl, mix cocoa with enough boiling water to form a paste, and then whisk this paste into the double boiler mixture. Return to heat and simmer over boiling water until thick. Remove from heat, and add butter and vanilla. Cool, then transfer to prebaked pastry tartlet shells.

Meringue topping procedure

While filling is cooling, preheat oven to 325, and prepare meringue as follows: in a medium sized bowl, beat the egg whites and cream of tartar until mixture stands in a peak. Beat in 1/4 cup sugar, 1 tablespoon at a time, and continue beating until stiff and glossy. Gently fold in 1/4 teaspoon vanilla. Spread on top of prepared tartlets and bake until lightly browned, about 5-10 minutes.

Tuesday
Mar092010

Big Funfetti: Funfetti Cake Mix Cookie Sandwiches for Serious Eats 

Cookie sandwiches involve so much awesome. In one single unit, you to get two cookies and delicious filling, and you get to eat them all at once.

But there's always room for more awesome at the cookie sandwich party, as I learned when I prepared a batch of sweet sandwiches using Betty Crocker's Cooky Book and the finest of cake mixes—the kind with a built-in rainbow. What better pick-me-up for dull winter days than a double dose of dense, moist, lightly tangy, cakey cookies sandwiched with rich, sweet, buttery frosting?

Here's the recipe, but you can also find it (and more) over at Serious Eats!

Funfetti Cake Mix Cookies

Ingredients

For the cake mix cookies

  • 1/4 cup butter, softened
  • 1 package (8 ounces) cream cheese
  • 1 egg
  • 1/4 teaspoon vanilla
  • 1 package funfetti or rainbow chip cake mix

For for the filling (optional):

  • 1 1/2 sticks of butter
  • 1 teaspoon vanilla
  • 2 to 4 cups confectioners' sugar, depending on your desired consistency

Procedure


  1. Preheat oven to 350°F. Note: the original cookie recipe called for 8 to 10 minutes at 375°F, but I found that baking slightly longer at 350°F worked better for my cookies.
  2. Cream the butter and cream cheese. Blend in egg and vanilla.
  3. Add cake mix in two parts, mixing well (it will be a super thick batter—if it is too stiff, add a small quantity of heavy cream to the batter and mix well).
  4. Using a small cookie scoop, drop balls of cookie dough on an ungreased baking sheet. Leave about 2 inches between the cookies.
  5. Bake for 8 to 12 minutes, or until lightly browned. Cool cookies for at least 15 minutes on the cookie sheet before transferring to a wire cooling rack; the cookies are very delicate when they first come out of the oven and they will break if you try to transfer them too soon.
  6. Once completely cool, add a generous dollop of frosting to the bottom of half the cookies, and then sandwich the rest of the cookies on top to form something that vaguely resembles a whoopie pie, but tastes like something else entirely.
  7. If you want the filling, go ahead and prepare it by mixing the butter until fluffy in your electric mixer; add the vanilla and then the confectioners' sugar, bit by bit, until it has reached your desired consistency. Thin with cream or milk if desired, and adding a few drops of pink food coloring never hurts.


Monday
Mar082010

Gimme More: Pisco-Infused Alfajores Recipe

C is for Cookie, but A is for Alfajor.

Say what?

If you've never heard of them, alfajores are definitely one to add to your alphabet of sweets: a delectable type of crumbly cookie commonly sandwiched with indulgent dulce de leche.

Though most commonly associated with South American countries such as Argentina, Uruguay, Ecuador, Paraguay, Chile, Perú and the South of Brazil, these cookies actually take their roots in the Arab World: per Wikipedia, "the name alfajor is derived from Arabic الفاخر, which means "fancy" or "great" sweets. The archetypal alfajor entered Iberia during the period of al-Andalus."

Though this sweet treat has a long history, I took a more modern approach by making a Pisco-infused batch (with thanks to Gran Sierpe, who kindly donated some Pisco, a Peruvian brandy, with which to test out some recipes). The brandy adds a slightly sophisticated bite to the sweet cookies, compelling you to take bite after bite to try to figure out the source of the je ne sais quoi.

Want to make your own? Here's the recipe I used.

Alfajores

Adapted from About.com's South American Food

Ingredients

  • 1 cup cornstarch
  • 1 3/4 cups flour
  • 1/2 teaspoon baking powder
  • 1 teaspoon salt 1 cup butter
  • 1/2 cup powdered sugar
  • 1 tablespoon Pisco (I used Gran Sierpe)
  • 1 teaspoon vanilla
  • 1 cup dulce de leche, OR 1 cup vanilla buttercream, for filling
  • 1/2 cup toasted coconut, finely chopped (optional)


Procedure


  1. Preheat oven to 350 degrees.
  2. Place the cornstarch, flour, baking powder, and salt in a bowl and mix briefly.
  3. Cut the butter into small pieces and add to the flour mixture, blending with your fingers until the mixture is smooth.
  4. Add the powdered sugar, vanilla, and Pisco, and mix with your hands until the dough is homogeneous and smooth. Let the dough rest in the refrigerator for 30 minutes.
  5. For this step, either follow the original recipe by rolling out dough to 3/8" thickness, and cutting into 2 inch circles--OR, do as I did and roll the dough into a log and then slice cookies to your desired thickness (I liked fat ones, maybe 1/4 inch thick).  Place cookies on baking sheet lined with parchment paper.
  6. Bake cookies for 10-15 minutes, until they are barely golden brown. Let cookies cook 5 minutes, then carefully transfer to rack to cool completely (they are quite fragile until they cool).
  7. To fill the cookies, spread one cookie with dulce de leche and top with second cookie (note: as I found out, buttercream works beautifully too--picture below). If desired, roll the edges in the coconut. Store in an airtight container.

Monday
Mar082010

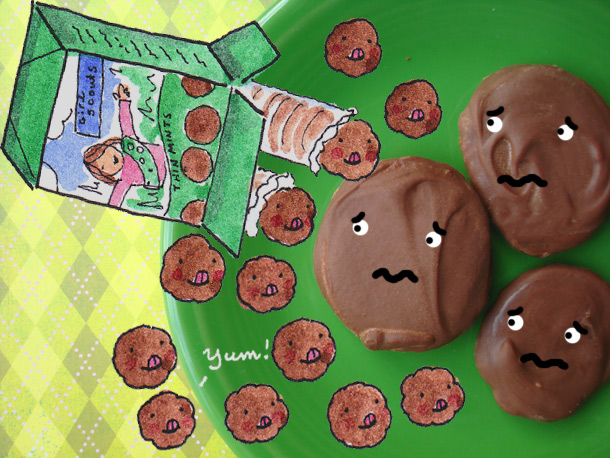
Peppermint Sweet: Homemade Thin Mints a la Baking Bites for Serious Eats

Smug, smug little Girl Scouts. Those sweet little sugar pushers can be found all over around this time of year, lurking outside of drugstores and markets with their addictive little missives of sweet cookies.

Oh, they seem so friendly and accommodating now. But what happens in a month or so, when they're gone and you've got a serious jonesing for some Samoas or Thin Mints?

You make your own, that's what you do.

Armed with a recipe from Baking Bites, I tested out a batch of my favorite, Thin Mints. While I wouldn't say that they're a clone version of the boxed kind (the texture is a little different, and the taste a little...fancier), they will indeed give you that much needed fix. Now if only I could figure out how to make a little plastic sleeve for them to fit in...

For the full writeup and recipe, visit Serious Eats!

Saturday
Feb272010

An Educaketion: An Oscar-inspired Battenberg Cake for Serious Eats

Really, Battenberg Cake is a perfect food analogy for the film An Education.

It starts out with an unlikely pairing—only instead of May-December lovers, it's two cakes, one a light, girly pink; the other a rich, refined Madagascar vanilla (which in my version includes worldly splash of amaretto).

And like the film's main characters, both flavors breathe new life when put together. You get a delicious shot of sweetness from the pink cake paired with the intensity of the amaretto-infused cake. It's beautifully rounded out by a thick slather of preserves (and, if you're feeling decadent, a smear of buttercream frosting), all blanketed in a rich layer of marzipan.

Of course, unlike the film, you don't have to take the bitter with this sweetness. Dramatic, layered with sweet subtleties, and ever-so-British: consider this An Educaketion.

For the full writeup and recipe, visit Serious Eats!

Friday
Feb262010

Cinematic Sweets: Inglourious Custards for Serious Eats

In the film Inglourious Basterds, a group going by the same name is set on taking down an evil regime in a blaze of glory. It's pretty intense.

And should you desire something intensely delicious as you watch, I couldn't imagine a more enjoyable treat than these Inglourious Custards.

These mini custards are an ideal cinematic snack: perfect portions of smooth, creamy vanilla custard in lightly crunchy phyllo cups which act as a vessel (a forgiving one, at that, if your custard hasn't set completely) as well as adding taste and flavor contrast. They're compulsively eatable: in fact, they go down so easily you'll be ready for a sequel in no time.

For the full scoop and recipe, visit Serious Eats!

© Cakespy, all rights reserved. Powered by Squarespace.