Home Home Home Home Home Home Home
CakeSpy

Featured: 

My adventure at Ben & Jerry's in Vermont!


Unicorn Love: the Eating Disorder Recovery Blog


 Buy my brilliant books!

Buy my new book!

Buy my first book, too! 

CakeSpy Online Retail!


Archives
Gallery

Fantastic appliance for cake making on DHgate.com

everyrecipe.co.nz

Craftsy Writer

Entries from July 1, 2010 - July 31, 2010

Saturday
Jul312010

Morning Mix: Peanut Butter Streusel Morning Bread Recipe

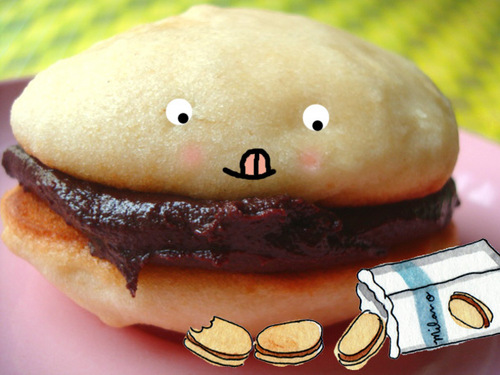
Confession: I sometimes, ah, mix it up.

It's true: I'm not adverse to using a mix every now and again. And I kind of have a guilty little spot of love in my heart for Cinnamon Streusel Quick Bread, a recipe made with Betty Crocker's Streusel Muffin Mix. 

It's not that streusel bread would be so hard to make without a mix...but there's something special about this one. What is it that you've hidden in the mix, Betty Crocker?

And as I discovered recently, when you add a generous helping of Mighty Maple peanut butter to the streusel topping, its deliciousness factor is increased, like, tenfold.

So here it is: my dirty little secret, my favorite mix for making a sweet breakfast bread.

Peanut Butter Streusel Morning Bread

-makes about 4 servings, in my house-

Adapted from Betty Crocker

Ingredients

  • 1 Box Betty Crocker cinnamon streusel muffin mix
  • 1/3 cup all-purpose flour
  • 1/2 cup water
  • 1/3 cup butter
  • 2 eggs
  • 4-6 tablespoons fairly smooth-textured, full fat peanut butter (I love it with Mighty Maple by Peanut Butter and Co.)

 Procedure

  1. Heat oven to 375ºF. Grease bottom of 9x5-inch loaf pan with shortening, or spray bottom with cooking spray.
  2. In medium bowl, stir Muffin Mix, flour, water, oil and eggs just until blended (batter may be lumpy). Spread batter in pan. 
  3. Melt the peanut butter in the microwave until it is thick but pourable. Mix the streusel topping in, give it a quick stir (it doesn't have to be completely incorporated) and pour it on top of the batter. Don't worry about making your coverage super-even: it's nice to find big chunks of peanut butter here and there.
  4. Bake 38 to 43 minutes or until top is golden brown and springs back when lightly touched. Cool 15 minutes. Run knife around edges of pan before removing; remove from pan. Cool completely before slicing, about 45 minutes.
Friday
Jul302010

CLOSED: Sweet Giveaway: Win a $100 Gift Card For CSN Stores!

We have Corelle to thank for this giveaway, friends.

Yup--you saw that dishware text link. For that, CSN Stores has kindly offered something that is of much interest to cake lovers and bakers: a $100 gift card good to be redeemed at any of their online stores! After reviewing the products available at their Cookware.com website, I find it worth the link, as all sorts of products of interest to bakers and baked-good enthusiasts are available there, including cake pans, cake plates, pastry molds, and my favorite Emile Henry Pie plates!

Want to be entered in the running? OK! Here's what you do: simply leave a comment on this post stating your opinion on this important baked-good subject: if you had to choose your "last meal" dessert, what would it be?

Chocolate cream pie? A banana split? Pop-tart ice cream sandwiches? An entire birthday cake? Inquiring minds need to know! This giveaway will close and a winner will be announced at 12 p.m. PST next Friday, August 6. Entrants only in the US and Canada this time, please!


UPDATE: THE WINNER! 

The randomly chosen winner is MEG, who says that "My last meal dessert would have to be the biggest peanut butter cup in the world." Well chosen, Meg! Congratulations!

Friday
Jul302010

Baker's Dozen: A Batch of Sweet Links

OMG! Baked Alaska Cookies! Photo credit: King Arthur FlourTotally Sweet! Learn more about the brains behind CakeSpy (um, that would be me) via this interview about my art and work.

Don't waffle..Make waffle cones! At home! Stef tells us how.

Baked Alaska Cookies! I'll repeat it: BAKED! ALASKA! COOKIES! Via King Arthur Flour.

In San Francisco, Black Jet Baking Company makes homemade pop-tarts. (via DailyCandy)

Tis the Season...for Mad Men! The weather's hot, but everyone loves Gingerbread Mad Men (or Mad Men cupcakes!)

Eat Your Veggies: It's a pleasure, when they're delivered in Zucchini Pecan Cake with Cream Cheese Frosting form.

San Francisco Treats: A list of 50 treats in SF to try before you die (or, "A To Do List").

Cute (and free!) PDF pattern for a cupcake pillow!

Chocolate Heaven: A cool video about Brooklyn's Mast Brothers Chocolate.

KakeLove: Learn some new facts about TastyKake here.

Pretty in Pink: cupcakes that look like sweet, sugary perfection.

Whoopie! Did you know that in NYC, there is a place called Flex Mussels that makes a Deep Fried Whoopie Pie? (who has tried it?)

Oh, Joy: A Sweet roundup of Joy the Baker's visit to Seattle (including her visit to CakeSpy Shop!)

Wednesday
Jul282010

The Lovely Cones: An Examination of Waffle, Wafer, and Sugar Cones

There's no I in Team, but there is one in Ice Cream, and when it comes to delivery method, people certainly do have strong individual preferences.

I'm talking, of course, about ice cream cones, and which is superior within the accepted holy trinity: waffle, wafer, or sugar cone?

First things first. What is the difference between these three types of cones? As I found on this site,

Three main dry ingredients compose all types of cones. Wheat flour, tapioca flour, and sugar are chosen for baking quality, strength, and relative sweetness, respectively.

The quantity of sugar is a major distinguishing feature between cone types. Sugar and waffle cones are made of one-third sugar. Not only does this influence the sweet flavor, but it affects the brown finished color and the crispy texture. Cake cones have less than 5% sugar.

Who would have thought that such subtle differences could have such a big effect on the ice cream eating experience? But indeed they do, and so let's briefly talk about each cone type and its advantages and disadvantages.

Waffle Cone

What it is: A waffle-patterned cone, generally larger in scale. Texture-wise, generally the softest of the varieties.

Advantages: The size: generally waffle cones are fatter and bigger, and thus accomodate more delicious ice cream. This is a favored cone variety at artisan ice cream shops, so fancy varieties are often found, and likely for the same reason, this style of cone is one of the more flavorful varieties all on its own.

Waffle cones

Photo: Flickr user Joey Wan

Disadvantages: If you don't eat fast, they get soggy and tend to leak toward the end, or to break apart at the seam. Also, sometimes handmade ones have a hole in the bottom, and this equals bad times (though, if they line the bottom with chocolate, this is a delicious solution).

Wafer (or cake cone)

What it is: A flat-bottomed cone with an intricate infrastructure to capture ice cream.

Advantages: Easier to balance (and to set down for a moment, if needed), and it holds more ice cream (esp. soft serve). It's also the go-to cone type for cupcake cones (pictured above), and the visual inspiration for the famous ice cream cone floor lamp (shown below). Though fairly bland on its own, it absorbs ice cream flavors nicely. Also, generally less expensive than the other varieties.

Disadvantages: Relatively flavorless on its own, so if you eat your ice cream too fast and it hasn't absorbed the flavor, the bottom of the cone is kind of like eating lightly sweetened cardboard. Sides can become soggy, although the bottom generally doesn't leak like cornet shaped cones. 

Sugar Cone

What it is: A darker-hued cornet-shaped cone, generally smaller and crunchier than a waffle cone.

Advantages: Sturdy--they generally don't get soggy from the ice cream. Iconic in appearance--for most people, if asked to picture an ice cream cone in their mind, they will likely think of this format.

Disadvantages: Sometimes too crunchy--they can break off in shards as you bite into them, leaving exposed craggy bits where ice cream can escape onto your hand (and maybe not make it into your mouth). Also, they tend to be smaller than waffle cones and may accomodate less ice cream than wafer cones. If you eat it too fast, you may experience a "mourning period" where you've finished the ice cream but still have the end of the cone left.

Of course, simply discussing the pros and cons of each style doesn't resolve the question of which cone is the best. But is there an answer?

According to a poll (via Twitter, the only news and information source), respondents overwhelmingly preferred waffle, with sugar the second choice, and wafer trailing with but a small handful of devotees. 

However, upon further digging, it seemed that this was the favored type of cone when eating ice cream from an ice cream shop. Because seriously, who makes their own waffle cones at home? And they're not generally an easy to find product in grocery stores, unlike wafer and sugar cones.

So it seems to me that ultimately, each type has its time and place. For instance, it's hard to imagine soft-serve ice cream being served in anything other than a wafer cone; if you want a whole lot of ice cream (and maybe a topping to boot), a waffle cone is going to give you the best coverage; if you have a delicate appetite or crave crunch, you will probably go with sugar.

Of course, another--and perhaps the most important--aspect to cone preference is also nostalgia. For me, having grown up by the Jersey shore, where soft-serve is king, it's hard for me to even fathom passing up a wafer cone. But for those who grew up with hard ice cream in sugar cones, I have a feeling they might have more of an affinity for sugar cones.

Of course, if all of this is too much for you to digest, you could always just go for your ice cream in a cup (or better yet, buy a sundae).

Which kind of cone do you favor?

Wednesday
Jul282010

Short and Sweet: Canestrelli Semolina Shortbread Recipe

In October, a big ol' brick of a book will be hitting the shelves in a bookstore near you: The Essential New York Times Cookbook, Classic Recipes for a New Century. It's an updated version of the classic Craig Claiborne-edited New York Times Cookbook , with plenty of classic recipes as well as a large variety of newer ones. 

Now, there are several reasons why you should be excited about this book: more than a thousand, in fact, which is how many recipes you'll find, culled from the venerable newspaper's archives, each of which has a witty and interesting intro by she's-kind-of-a-big-deal editor Amanda Hesser

But right now, we're just going to focus on one: the recipe for Canestrelli, a semolina shortbread featured in the book. Lightly nutty and gritty but plenty buttery, these cookies couldn't be simpler to make (I lightly adapted the recipe to make them as bars instead of cookies), and are a perfect light dessert, and made even more delectable with a sprinkling of fancy sea salt.

I served these at a picnic with buddies Tea and Megan, and they went over quite well!

Canestrelli

(Shortbread from Ovada, adapted from Rona Deme's ''Country Host Cookbook'', As seen in the NY Times Cookbook; originally from this article)

Ingredients

  • 1 1/2 cups unbleached, all-purpose flour
  • 1/2 cup semolina
  • 1/2 pound lightly salted butter
  • 1/2 cup sugar

Procedure

  1. Preheat oven to 325 degrees.
  2. In a bowl, sift together the flour and semolina and set aside.
  3. In another large bowl, with the electric mixer on high speed, add the butter in small pieces, beating until it is uniformly softened.
  4. Add the sugar and continue beating until the two are creamed together.
  5. Lower the speed of the mixer and add the flour mixture a cup at a time, continually scraping down the walls of the mixer bowl, and working quickly until the ingredients are just blended. Be careful not to overmix, because the semolina, high in gluten, can toughen the canestrelli. The dough will be somewhat crumbly.
  6. Press the dough together into an 8x8 or 9x9-inch baking pan lined with parchment on the bottom.
  7. Bake for approximately 15 to 20 minutes, or until they begin to blush with color.
  8. Let cool in the pan; when lightly cooled but still warm, score into strips of your desired size. Let cool completely and then remove from pan. They may be stored for two weeks in airtight tins.
Wednesday
Jul282010

Getting Down to Biscuit: Vegan Jam Biscuits at Watertown Coffee, Seattle

There's nothing like a good biscuit, especially when it's tender, flaky, and extremely buttery.

But wait, what's this? At Watertown Coffee, their biscuits pack a delicious punch, and have the ability to challenge my buttery-biscuit desires, because you see, they're vegan.

On a recent visit the baker mentioned that her biscuits had received high praise--"better than Macrina's" was, I believe, the phrase tossed around--and after that, well, we had to try them.

But as for the superior biscuit, I really can't go down that road, because these are simply two different specimens of biscuit--and both delicious. Where the Macrina jam-filled biscuit is buttery and lightly crumbly, the Watertown biscuit is a little more...almost cookielike, or shortcake-y, and a little less crumbly. It is perfectly paired with a generous dollop of jam, and makes for an exceedingly sweet little morning treat (sizewise, they qualify more as breakfast accompaniment than main dish).

Biscuits from Watertown Coffee, 550 12th Ave., Seattle; online here.

Watertown Coffee on Urbanspoon

Wednesday
Jul282010

Cutting Up: Tips on How to Cut Bar Cookies

Recently, New West Knife Works sent me a product sample of their most excellent Fusionwood Petty Knife. Now, the first thing I noticed is that it's really a beautiful knife--and they had kindly sent me the "Jessica" style, you know, since that's my name. I knew this was going to be the knife for cutting bar cookies.

But having a great knife in hand isn't worth much if you don't actually know the correct method--and this raises the question--wha is the correct method for cutting bar cookies?

With fancy knife in hand, I set out to find out. Here are some of the valuable tips I have found:

One tip, which I have found through trial and error, is that bar cookies are always easier to remove from the pan if you line it with parchment paper and leave a bit extra trailing up the side of the pan so that you have a "tab" to pull up after baking. No matter how well you may grease the pan, it's always easier to pull up the parchment from the sides, especially for the first few slices, which are notoriously hard to remove.

A tip I found on What's Cooking America is that to make cutting easier once brownies have cooled, score the bars right out of the oven--I recently tried this with a batch of the Baked brownie recipe, and it worked like a charm.

However, you want to wait until the bars have cooled entirely to cut them all the way through. Sometimes I will even let bars chill in the fridge for a half hour or so to get more firm so they don't come apart when cut.

When it comes to actually cutting, make long cuts the length of the pan with your knife--don't make a sawing motion, but rather move the knife in a line until it has made a clean cut. Between cuts, clean knife by dipping it in hot water and wiping with a clean, dry kitchen towel.

For easier serving, remove a corner piece first--this will give you an in to the rest of the goodness in the pan.

As for the knife? Some suggest serrated, but I always like a smooth finish, and think that investing in a nice knife is a good investment--and the New West one has become my go-to knife for cutting bars.

Wednesday
Jul282010

Orange You Glad? The Orange Glazed Cake Donut from Family Donut, Seattle

I like fruit, really I do.

Just not in dessert, where my philosophy is "if you're gonna do it, do it". I don't like the creeping suspicion that my sweet treat might be a little healthy. 

However, when it's in glaze form on a cake donut, as in the case of the Orange Donut at Family Donuts, a greasy spoon of a donut shop if there ever was one, I find it acceptable.

First off, it's a cake donut, which means that it's delightfully oily and decidedly not low-fat. Believe it or not, the citrus flavor permeating the fried dough is actually kind of nice--it cuts through the flavor of "fry" which can sometimes be lacking in dimension. The orange flavor is in the cake donut but also the glaze, which is applied liberally.

To put it mathematically? Crisp citrus orange flavor + hefty round of fried dough = TOTAL YUM.

Family Donut Shop, 2100 N. Northgate Way, Seattle.

Family Donut Shop on Urbanspoon

Tuesday
Jul272010

Chess Pieces: Yellow Chess Cake Recipe

Is it just me, or does the phrase "light summer dessert" seem like a fancy way of saying "low fat, dull suffering"?

Luckily, there's an antidode: Aimee's Chess Cake, a recipe I found in The Cake Mix Doctor Returns . Similar to that St. Louis specialty called Gooey Butter Cake, this dessert is decadently, deliciously, delightfully, thick as a brick.

The recipe I adapted suggests cutting "into small bars because it's so rich"--but my vote goes for big, fat slices. Topped with candied nuts. Take that, low-fat dessert!

Yellow Chess Cake

Adapted from Aimee's Chess Cake from The Cake Mix Doctor Returns

Ingredients

  • Vegetable oil for the pan
  • Flour, for dusting the pan
  • 1 package plain yellow cake mix
  • 1 stick (8 tablespoons) butter, melted
  • 3 large eggs
  • 4 cups confectioners' sugar, sifted
  • 1 package cream cheese, at room temperature
  • 2 teaspoons vanilla
  • 1 cup candied walnuts (I used these ones ) --these are optional but I like the texture and flavor they add

Procedure

  1. Preheat oven to 350 degrees F. Grease and flour one 9 x 13 inch pan.
  2. In a large bowl mix together cake mix, butter and 1 egg. Pat batter into greased 9x13 inch pan.
  3. In a medium size mixing bowl mix together cream cheese, 2 eggs and sugar. Pour the cream cheese mixture over the cake mix batter. Sprinkle the nuts on top.
  4. Bake for 35 minutes or until golden brown on the edges (the middle will still be soft but will set to a solid but gooey consistency as the cake cools).

CakeSpy Note: Like this cake? You might also enjoy Houdini Bars.

Monday
Jul262010

Role Reversal: Reverse Whoopie Pies for Serious Eats

What's a Reverse Whoopie Pie?

Basically, if you can imagine a Milano cookie going through a Hulk-like transformation into a supersized sweet treat, you've got the right idea.

That's right: these cakey whoopie pies pack all the flavor of the classic chocolate-filled buttery cookie sandwich, but without making any pretense of daintiness. This is treat of such proportion that it requires two hands to hold and all of your stomach to handle. Of course, if you want an even Hulkier variation, add peppermint extract instead of vanilla (and maybe a dash of green food coloring for good measure) for a chocolate-mint variation.

For the full entry and recipe, visit Serious Eats!

© Cakespy, all rights reserved. Powered by Squarespace.