Home Home Home Home Home Home Home
CakeSpy

Featured: 

My adventure at Ben & Jerry's in Vermont!


Unicorn Love: the Eating Disorder Recovery Blog


 Buy my brilliant books!

Buy my new book!

Buy my first book, too! 

CakeSpy Online Retail!


Archives
Gallery

Fantastic appliance for cake making on DHgate.com

everyrecipe.co.nz

Craftsy Writer

Entries in recipes (704)

Sunday
Apr262015

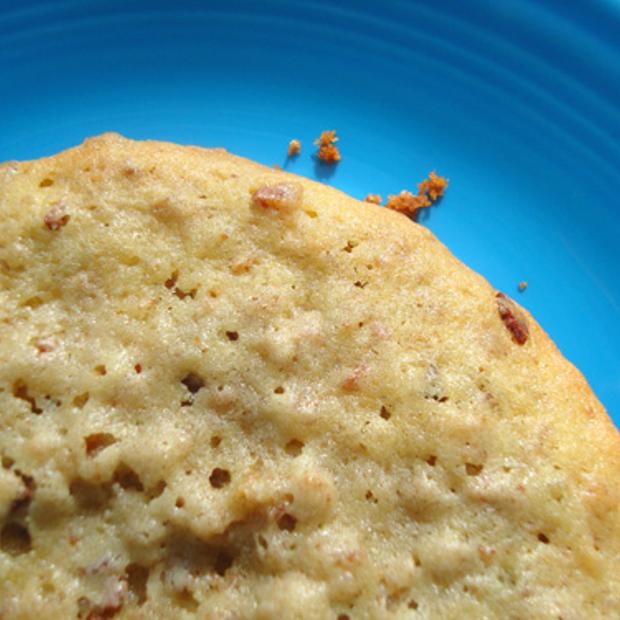
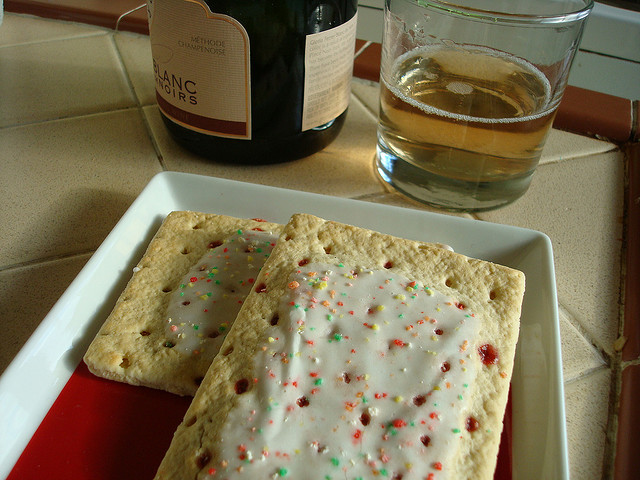
Brunch Cookies

I thought it was about time to bring back a favorite recipe. I originally posted a "breakfast cookie " recipe on Serious Eats, which was then adapted for my first cookbook, CakeSpy Presents Sweet Treats for a Sugar-Filled Life.

Well, I have brought it back again, and this one is the brunch edition. It has a touch of champagne where most cookies would have vanilla extract. "One tablespoon of champagne?!?" you may exclaim. "What shall I ever do with the rest of the bottle?". Um...it's brunch. I think you'll figure out something, my friend. If all else fails, there's this:


Brunch cookies 

Printable version

Makes 12 jumbo cookies

  • 3/4 cup butter, softened (1.5 sticks)
  • 1/2 cup packed light brown sugar
  • 1 large egg
  • 1 tablespoon orange juice concentrate
  • 1 tablespoon champagne
  • 1 1/4 cups all purpose flour
  • 1 teaspoon baking powder
  • 2 strips of bacon, cooked very crisp and crumbled
  • 1/2 cup small-piece cereal (Grape nuts) or larger piece cereal crushed into small pieces, or quick-cook rolled oats
  • Sea salt, for sprinkling on top 

Procedure

  1. Preheat oven to 350 degrees F. Line two baking sheets with parchment paper; set to the side.
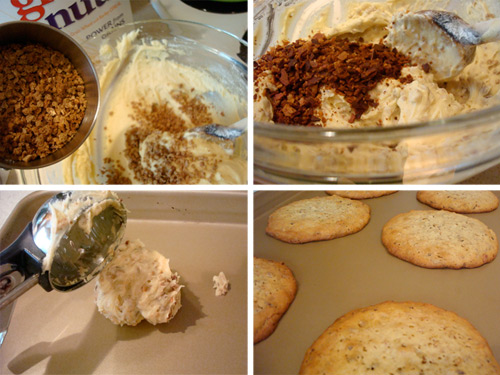
  2. Beat the butter, sugar, egg, OJ concentrate, and champagne in a medium bowl with an electric mixer at medium speed til light and fluffy.
  3. Whisk the flour with the baking powder; add to the butter mixture, beating on low speed until blended. Stir in the bacon and cereal, stirring just until incorporated.
  4. Using an ice cream scoop, drop mounds of dough 3 inches apart on to the prepared baking sheets (they'll spread a bit). Add a little salt on top of the cookies--they already have salty bacon, but I personally say the more the merrier when it comes to delicious salt. 
  5. Bake 12-15 minutes, or until the edges are golden. Let sit on the rack until you can easily move the cookies, and transfer to a wire rack to cool completely. 

Breakfast is served!

Thursday
Apr232015

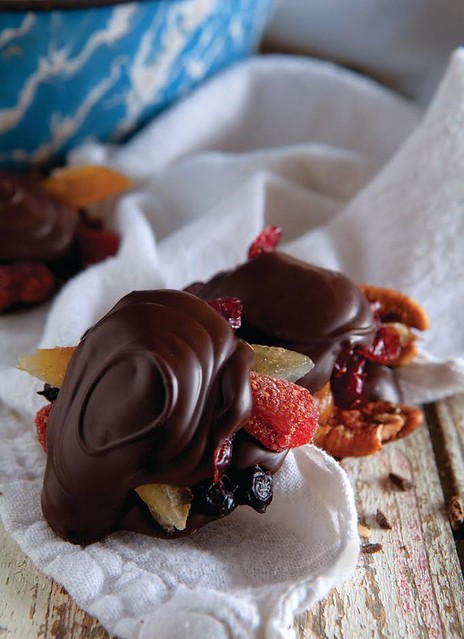
Turtles Without Nuts: Fruit Cup Turtles Recipe

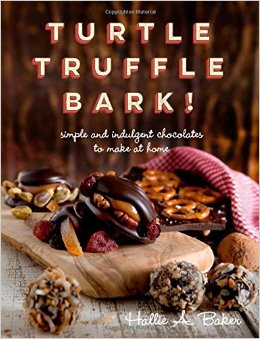
Turtle Tuffle bark

A turtle without nuts? Believe it. This controversial confection is a key player in the new book Turtle, Truffle, Bark: Simple and Indulgent Chocolates to Make at Home.

Is it ok to make turtles with fruit instead of nuts? I say as long as the caramel is present, proceed. What do you think? Here's the recipe. 

Turtle Tuffle bark

Fruit Cup Turtles

Eek! A turtle without nuts? Well, why the hell not?
These days, we’ve got such an assortment of dried fruits to choose from, it boggles the mind. I can’t get

enough of those dried tart cherries, so let’s throw those in, along with chopped papaya and a bit of chopped, candied lemon peel. Let’s pretend these turtles are health food, and top them with toasted pumpkin seeds.

Chocolate color? Choose your poison. There is absolutely no way to do these wrong. Take two of these and call me in the morning!


  • 2 cups dried tart cherries
  • 2 cups chopped papaya
  • 1 cup chopped lemon peel
  • 3/4 pound caramel
  • 1 pound tempered chocolate
  • 1/2 cup roasted, salted pumpkin seeds


Line a sheet pan with parchment paper. Spread cherries in an even layer on the parchment. Layer papaya on top of the cherries. Sprinkle lemon peel on top of cherries and papaya. Set aside.

Place prepared caramel into a bowl. Put bowl in microwave, and heat on high for 45 seconds to 1 minute. Take out of microwave, stir well with medium­sized spatula, and put back in for 30 seconds. At this point, your caramel should be in liquid form.

Scoop a dollop of caramel from the bowl with your small silicone spatula, and using your other spatula, ease the caramel off the spatula and onto the fruit. Try to make them anywhere from 1 1/2 to 2 inches in diameter, depending on the size of the turtles you’d like to make. You’ll end up with 20 to 24 caramel turtle middles.

When caramel is completely cooled, you can start assembling your turtles.

Line one or two 18x13 sheet pans with parchment paper. Using a candy funnel, deposit dollops of chocolate on the parchment paper. Each one should be approximately 1 1⁄2 inches in diameter and there should be about an inch between each dollop. Make about six dollops, then place a caramel middle on each one. Continue making bottoms, topping with caramel, every six or so. When you have all your bottoms and middles done, go back to where you started and top the caramel with chocolate. You want to use enough chocolate to mostly cover the caramel. Sprinkle pumpkin seeds on top.

When turtles are completely hardened, they will last in an airtight container for three weeks. 

Excerpted with permission from Turtle, Truffle, Bark: Simple and Indulgent Chocolates to Make at Home

Tuesday
Apr212015

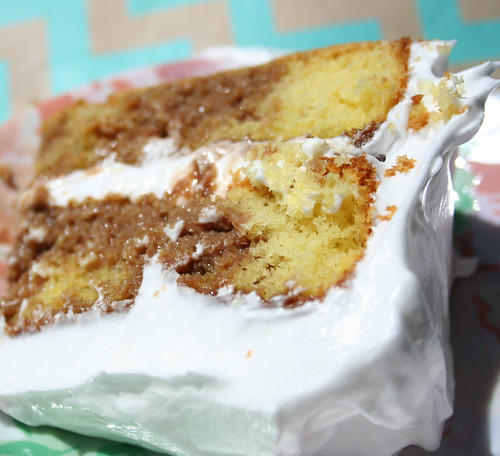
Chocolate Milk Poke Cake 

Seven minute frosting

I don't like the term "poke cake" because quite frankly, it sounds kind of dirty. Like, I feel like I should be blushing when I talk about them. But I love, love, love eating them. Because poke cakes aren't anything dirty at all: they're simply cakes which have been poked with a skewer of some sort so that they can be more receptive to delicious soaking liquids (tres leches cake would be a famous poke cake, btw. So would Better than Sex Cake).

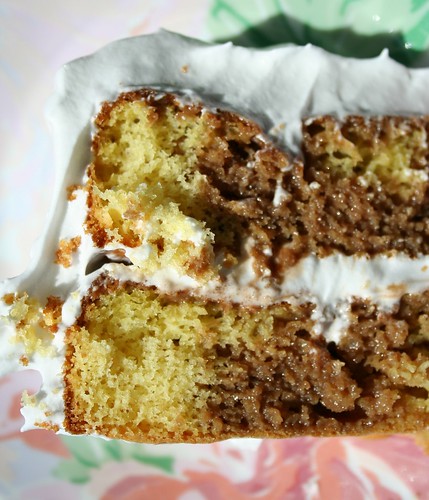
Seven minute frosting

And I have to say: this poke cake is spectacular. It starts with a cake mix, but it's fancied up right quick by using melted butter and milk instead of the water and oil called for on the package, and then once baked, it's poked and soaked (see? dirty-sounding!) with an absolutely dazzling chocolate and sweetened condensed milk mixture. Even served just like that, this cake could make you cry with joy.

But save the tears, because there's still frosting! I used seven minute frosting, but you can use whatever type of buttercream or topping you'd prefer.

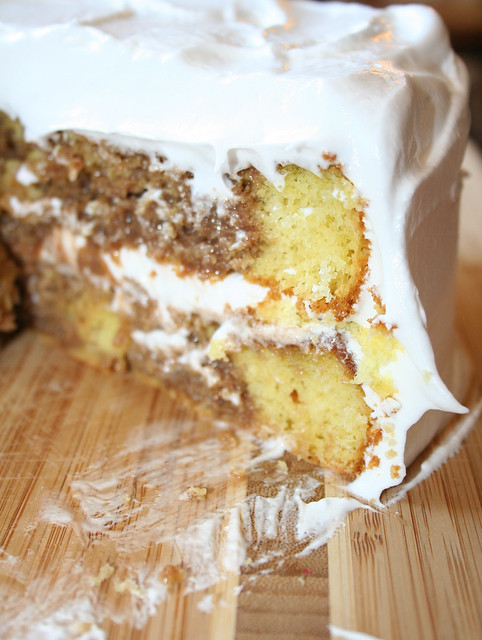
Seven minute frosting

It's a joy to dig into this cake, because it has all the joy of a yellow cake but the moisture and decadence of a gooey chocolate dessert. 

I'll leave it at this: it's a great cake. And anyone you make it for should consider themselves very lucky! 

Chocolate milk poke cake

Printable version here

Makes one, two-layer, 8-inch cake

For the cake

  • 1 box cake mix (I used Pillsbury yellow cake)
  • 1 stick butter, melted
  • 3 eggs 
  • 3/4 cup milk
  • pinch salt

For the topping

  • 4 ounces dark chocolate
  • 1 can (14 ounces) sweetened condensed milk 
  • Pinch salt 

To top it all off

  • 1 batch seven minute frosting (recipe here) or buttercream of your choice

Procedure

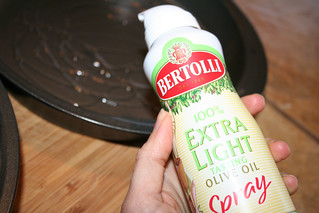
  1. Preheat the oven to 350 degrees F. Generously grease two 8-inch cake pans. I greased mine with some Bertolli spray because it had recently been sent to me and I thought it would be nice to say thanks. They didn't pay me to say that. 
  2. Poke cake
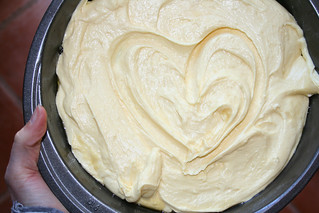
  3. Combine all of the cake ingredients in the bowl of a stand mixer. Blend on medium speed until smooth and lump-free.
  4. Poke cake
  5. Divide into the two cake pans, and bake for 30 minutes or until golden and a cake tester inserted in the center comes out mostly clean.
  6. Poke cake
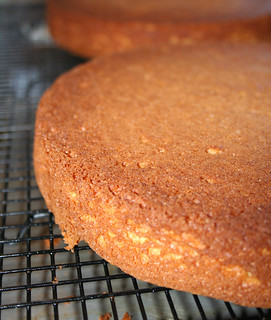
  7. Remove from the oven, and after a few minutes, invert on to a wire rack set above a baking pan (to catch drips in the next step). 
  8. Poke cake
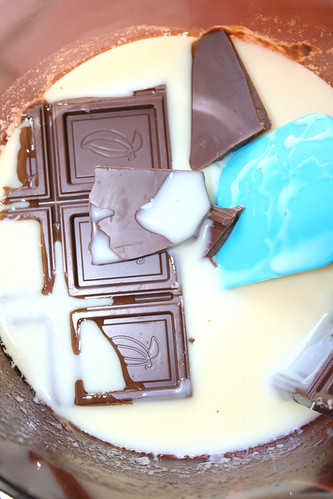
  9. In a medium saucepan over medium heat, combine the sweetened condensed milk and chocolate, stirring frequently, until the chocolate has melted. Remove from heat and stir in the salt. You can also do this while the cake bakes (that's what I did). 
  10. Poke cake
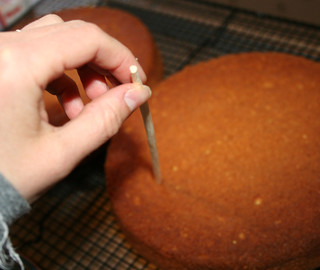
  11. Poke the cake all over at 1 inch intervals using a chopstick--but don't go all the way to the bottom. Poke cake
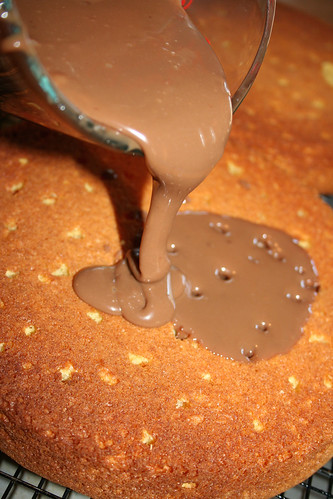
  12. Pour the chocolate mixture gently on top. If you're careful you shouldn't have too much loss of chocolate goo. Because it is tasty, and you want it in your mouth, not on the bottom of a pan. 
  13. Poke cake 
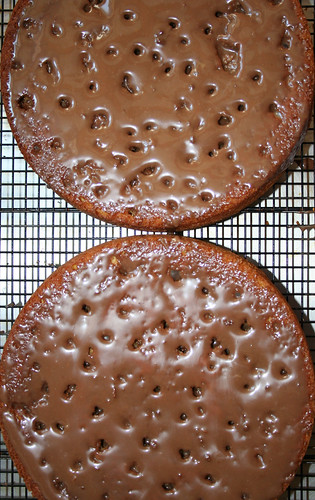
    See how interesting they look?
    Poke cake
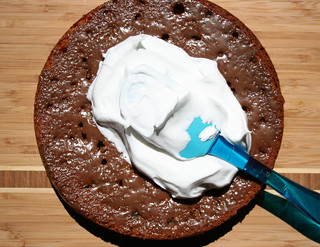
    Let the cakes set for a while. Meantime, make some frosting. I used seven minute frosting but you can use whatever kind you like.
    Frost the top of one of the layers, stack the second, and frost the sides and top. Enjoy! 

Seven minute frosting

Have you ever tried a poke cake?

Monday
Apr202015

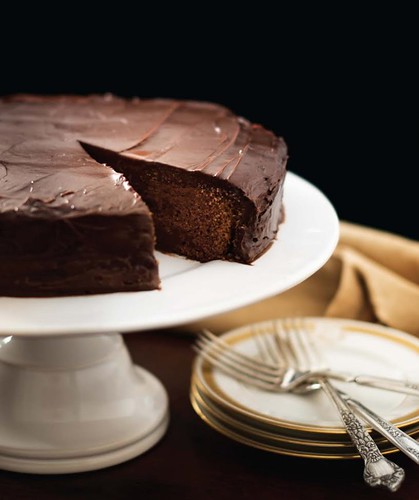
Grandma's Killer Chocolate Cake from Author James Patterson

Mystery Writers of America cookbook excerpt

Here's a riddle: what kind of cakes do mystery writers like?

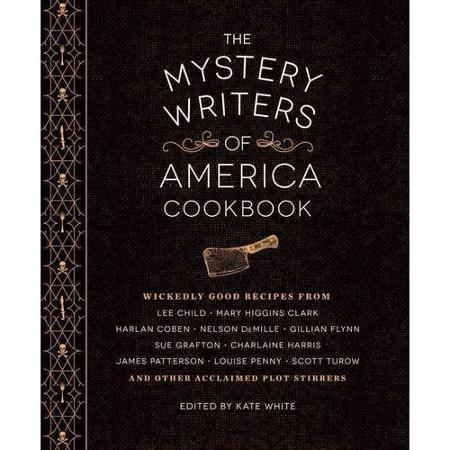
Happily, the new book The Mystery Writers of America Cookbook: Wickedly Good Meals and Desserts to Die For is ready and willing to answer this question in the most delicious way. It is a collection of recipes culled from famous mystery writers, and it makes for mighty sweet eating. 

When choosing an excerpt recipe to feature here, my eye was drawn right away to "Grandma’s Killer Chocolate Cake: via mystery writer James Patterson. I hope you'll enjoy!

Grandma's Killer Chocolate Cake

Recipe headnote:

Here’s one “killer” Alex Cross always loves to catch—Grandma’s Killer Cake! A special family recipe dating from the 1940s, this decadent cake seems to get better with age; it is tastier on day two. And you need to be a good detective around the house after it has been made, sitting there in its glass­domed cake stand, staring back at you with deadly temptation, because a piece seems to mysteriously disappear every time I go into the kitchen. Not to be caught red­handed, so looms the “Killer Cake Killer”!

YIELD: 1 SINGLE­ LAYER 9x12 INCH CAKE OR 1 DOUBLE LAYER 9­ INCH CAKE

CAKE

  • 2∕3 cup butter
  • 2 cups granulated sugar
  • 2 eggs
  • 2 cups flour
  • 11∕3 cups buttermilk
  • 11∕3 teaspoons baking soda dissolved in 2 ∕ 5 cup hot water 31∕2 squares bitter chocolate, melted gently
  • 1 teaspoon vanilla extract

FROSTING

  • 1∕2 cup butter
  • 3 squares bitter chocolate
  • 2 cups granulated sugar
  • 2∕3 cup milk 1 teaspoon vanilla extract
  • 1 teaspoon almond extract


1. Preheat oven to 350°F. Cream butter and sugar together. Add eggs.

2. Blend in flour and buttermilk in alternating additions, starting and ending with the flour. Add baking soda mixture, followed by chocolate and vanilla extract.

3. Pour batter into one 9­by­12­inch pan or two round 9­inch springform pans. Bake for 30 minutes, or until a toothpick inserted into the center comes out clean. Remove from oven and let cool.

4. Combine all frosting ingredients in a saucepan, bring to a full boil, and boil for 2 minutes. Let cool. You can put saucepan on ice if necessary to cool quickly.

5. Remove the cake from the pan, frost, and serve.

About the author: James Patterson has sold 300 million books worldwide, including the Alex Cross, Michael Bennett, Women’s Murder Club, Maximum Ride, and Middle School series. He supports getting kids reading through scholarship, Book Bucks programs, book donations, and his website, readkiddoread.com. He lives in Palm Beach with his wife, Sue, and his son, Jack.

Excerpted from The Mystery Writers of America Cookbook: Wickedly Good Meals and Desserts to Die For edited by Kate White. Reprinted with permission from Quirk Books. 

Thursday
Apr092015

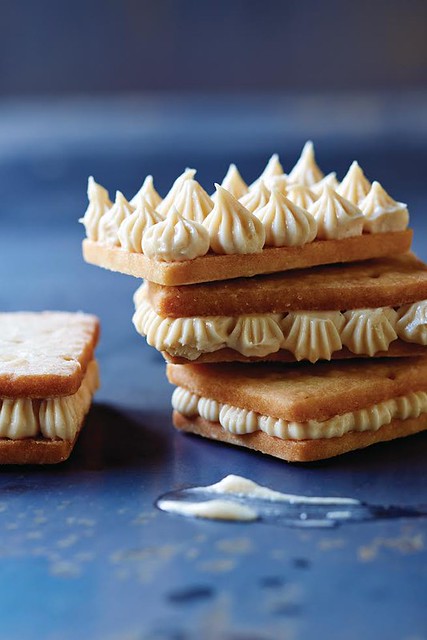
Fleur de Sel Shortbread with Vanilla Halvah

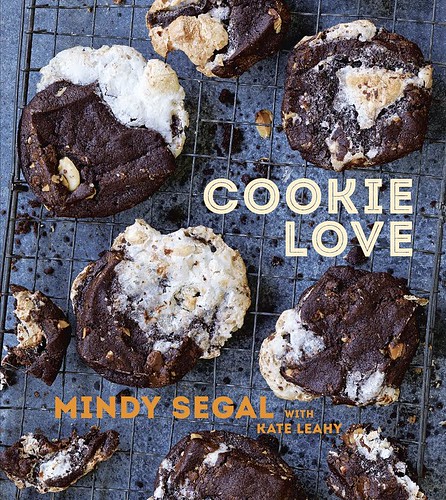
Cookie Love by Mindy Segal

You guys. I was super excited to receive a review copy of Mindy Segal's new book, Cookie Love. Why?

Well, a few reasons. 

For one, she's the proprietress of Chicago foodie landmark Hot Chocolate. Even if you've never been there, if you go to their website, the establishment is explained thusly: "Restaurant. Dessert Bar. Pastries." You should already be halfway in love. If you ever go, I promise you'll be the rest of the way in love.

Second, the recipes look AWESOME. You could seriously just buy this book and look at the pictures for the rest of your life, it would be worth the investment just for that.

But your life would be even better still if you made these cookies: Fleur de Sel Shortbread with Vanilla Halvah. 

Discover them here with this awesome excerpt recipe. 

A note from Mindy: 

I AM ALWAYS ON a quest to find more ways to use halvah in desserts. Coffee, chocolate, and cocoa nibs are my usual pairings with the Middle Eastern sesame confection, but one day I shifted gears in favor of vanilla and fleur de sel. It worked—halvah anchored the vanilla-flecked frosting, for a sweet, salty, nutty result. To finish the cookies, I dip them partially in dark milk chocolate and then place a shaving of halvah on top. The frosting is seasoned well to balance its sweetness, but because the cookies themselves carry a noticeable salt level, you may prefer to add less. 

Fleur de Sel Shortbread with Vanilla Halvah

makes approximately 28 sandwich cookies

SHORTBREAD
11⁄2 cups plus 2 tablespoons (13 ounces) unsalted butter, at room temperature 11⁄4 cups confectioners’ sugar, sifted
2 extra-large egg yolks, at room temperature
2 teaspoons pure vanilla extract
3 cups unbleached all-purpose flour
2 tablespoons sea salt flakes

FROSTING
8 ounces plain or vanilla halvah, cubed
2 ounces white chocolate, melted
11⁄4 cups (10 ounces) unsalted butter, at room temperature 1 cup confectioners’ sugar, sifted
1⁄2 teaspoon pure vanilla extract
1⁄2 teaspoon kosher salt
1⁄2 teaspoon sea salt flakes, or to taste

TO FINISH
Piece of plain or vanilla halvah, for garnish 8 ounces milk chocolate, melted

Step #1: Make the Shortbread
In the bowl of a stand mixer fitted with the paddle attachment, mix the butter on medium speed for 5 to 10 seconds. Add the sugar and mix on low speed to incorporate. Increase the speed to medium and cream the butter mixture until it is aerated and looks like frosting, 3 to 4 minutes. Scrape the sides and bottom of the bowl with a rubber spatula to bring the batter together.

Put the yolks in a small cup or bowl and add the vanilla. In a bowl, whisk together the flour and salt.

On medium speed, add the yolks, one at a time, and mix until the batter resembles cottage cheese, approximately 5 seconds for each yolk. Scrape the sides and bottom of the bowl with a rubber spatula to bring the batter together. Mix on medium speed for 20 to 30 seconds to make nearly homogeneous.

To cut out the cookies, you will need a rectangular cutter approximately 13⁄4 by 21⁄2 inches. To pipe the frosting, you will need the Ateco tip #32. 
Cookie Love by Mindy Segal page1image22832

Add the flour mixture all at once and mix on low speed until the dough just comes together but still looks shaggy, approxi- mately 30 seconds. Do not overmix. Remove the bowl from the stand mixer. With a plastic bench scraper, bring the dough completely together by hand.

Stretch two sheets of plastic wrap on a work surface. Divide the dough in half and place each half on a piece of the plastic wrap. Pat each half into a rectangle, wrap tightly, and refrigerate until chilled throughout, at least 2 hours or preferably overnight.

Let the dough halves sit at room tempera- ture until the dough has warmed up some but is still cool to the touch, 15 to 20 minutes.

Put a sheet of parchment paper the same dimensions as a half sheet (13 by 18-inch) pan on the work surface and dust lightly with flour. Put one dough half on top.

Using a rolling pin, roll the dough half into a rectangle approximately 11 by 13 inches and 1⁄4 inch thick or slightly under. If the edges become uneven, push a bench scraper against the dough to straighten out the sides. To keep the dough from sticking to the parchment paper, dust the top with flour, cover with another piece of parchment paper, and, sandwiching the dough between both sheets of parch- ment paper, flip the dough and paper over. Peel off the top layer of parchment paper and continue to roll. Any time the dough starts to stick, repeat the sand- wiching and flipping step with the parchment paper.

Ease the dough and parchment paper onto a half sheet pan. Repeat with the remaining dough half and stack it on top. Cover with a piece of parchment paper and refrigerate the layers until firm, at least 30 minutes.

Heat the oven to 350°F. Line a couple of half sheet pans with parchment paper.
Let the dough sit at room temperature for up to 10 minutes. Invert the dough onto a work surface and peel off the top sheet of parchment paper. Roll a dough docker over the dough or pierce it numerous times with a fork. Using a 1 3⁄4 by 2 1⁄2-inch rectangular cutter, punch out the cookies. Reroll the dough trimmings, chill, and cut out more cookies.

Put the shortbread on the prepared sheet pans, evenly spacing up to 16 cookies per pan.

Bake one pan at a time for 10 minutes. Rotate the pan and bake until the cookies feel firm and hold their shape when touched, 3 to 5 minutes more. Let the cookies cool completely on the sheet pans. Repeat with the remaining pan.

Step #2: Frost the Cookies
Blend the halvah in a food processor until fairly smooth. Drizzle in the white chocolate and blend until incorporated. The halvah will turn into a thick paste.

In the bowl of a stand mixer fitted with the paddle attachment, mix the butter briefly on medium speed for
5 to 10 seconds. Add the sugar and beat until the butter mixture is aerated and pale in color, 3 to 4 minutes. Scrape the sides and bottom of the bowl with a rubber spatula to bring the frosting together. Briefly mix in the vanilla and salts until incorporated, approximately 1 minute. Add the halvah paste and mix until smooth, with a little texture left from the halvah.

Fit a pastry bag with the Ateco tip #32 and fill with the frosting.
Make pairs of similar-size cookies. Turn half of the cookies over. Leaving an 1⁄8-inch border, pipe rows of dots 
onto the cookies. The frosting should be approximately as thick as the cookie. Top each frosted cookie with a second cookie and press lightly to adhere.

Step #3: Finish the Cookies
Freeze the piece of halvah until chilled, 30 minutes.

Line two half sheet pans with parchment paper. Dip a quarter of the long side of each sandwich cookie into the milk chocolate, shake off the excess, and place on the prepared pans. Using a vegetable peeler, shave
a piece or two of halvah and place onto the chocolate- dipped part of each cookie. Refrigerate until the chocolate is firm, approximately 1 hour.

The cookies can be refrigerated in an airtight container for up to 1 week. 

Enjoy! 

Buy the book here: Cookie Love

Wednesday
Apr082015

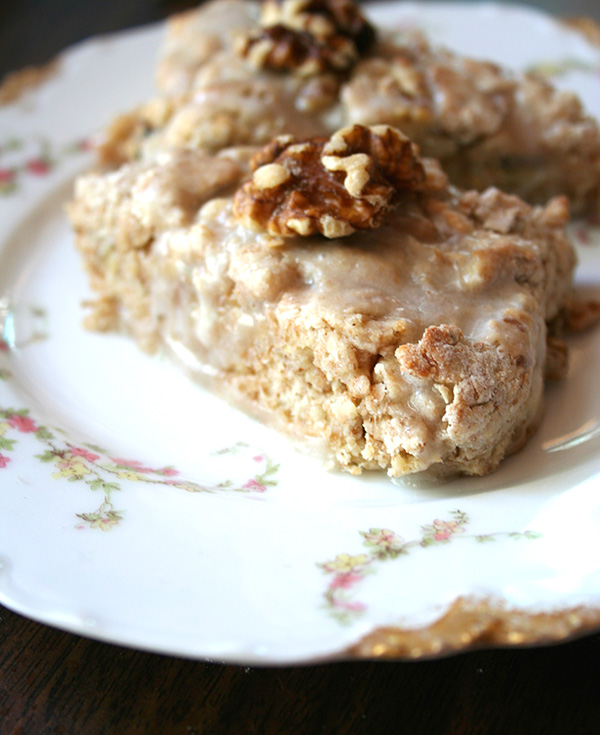
CakeSpy for Craftsy: Delicious Maple Walnut Scones Recipe

In general, I don't like scones. Because most of them are like cardboard with icing, especially at commercial coffee shops.

But homemade is a different thing entirely. Homemade scones are biscuit-y, crumbly, and nice and hefty and rich. And this recipe, for maple walnut scones with maple glaze (made using the good stuff, from Vermont!), is a winner.

They're easy to make and will make your mouth happy, so what are you waiting for?

Find the recipe here. 

Thursday
Apr022015

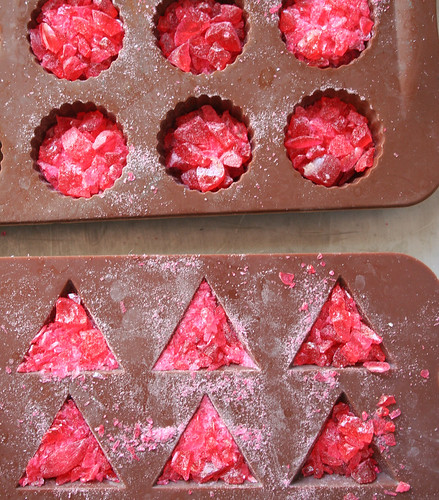
Homemade Ruby Gem Candy a la Erin Bakes

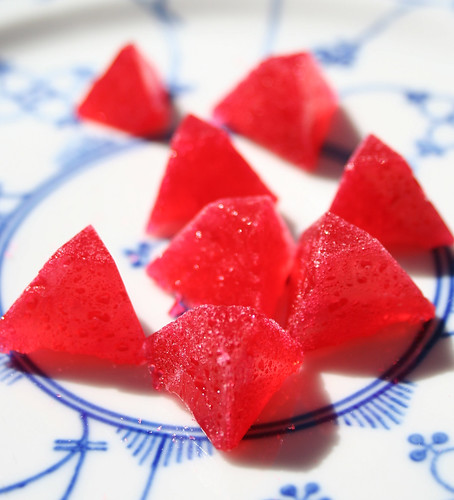
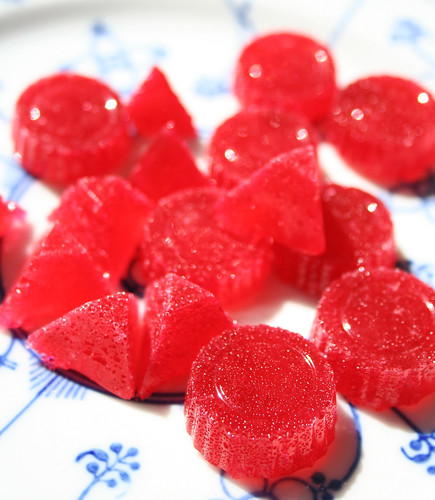
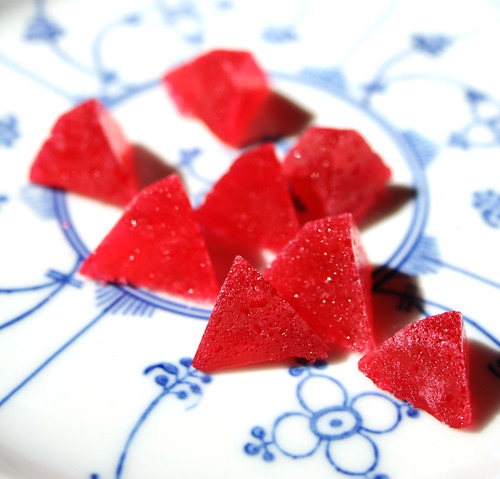
Homemade candy gems

Your snacks should be just as fancy as you are. And you're fancy, I can just tell.

While diamonds are dandy, rubies make a more delightful inspiration for candy. These bright red candy gems look super fancy, but don't require a trip to Tiffany or Cartier to obtain. All you need is a candy mold, a little time, and hopefully some aggression (don't worry, I'll explain). 

Homemade candy gems

This easy and fun craft/snack is inspired by Erin Gardner, a cake decorator extraordinare who led me through the process on her awesome blog, Erin Bakes.

Homemade candy gems

Candy gems

Adapted from Erin Bakes

  • red translucent hard candies (I used Brach's cinnamon candies, but you could use jolly ranchers or life savers)
  • Small zip-top bags
  • Rolling pin
  • a heatproof candy mold with gem-like vessels

Procedure

  1. Position a rack in the middle position of your oven. Preheat the oven to 275 degrees F.
  2. Unwrap a bunch of candies and place them in your sturdy bag.
  3. Using the rolling pin, take out your aggression (remember? You need it now!) on the poor candy that never did anything to you. Go ahead, show it who's boss. 
  4. Since I used a silicone mold, I didn't grease the vessels, but Erin Bakes suggests that if you use a more firm candy mold, you should "Spray pan spray onto a paper towel and use the greased towel to wipe the cavity of your gem mold. This provides enough of a barrier to pop the gem out later, but not so much grease that it makes your gems cloudy."
  5. Fill the molds with your candy bits. 
  6. Gently place the filled molds on top of a cookie sheet, then pop it in the oven. Heat for as little as 5 minutes, or as much as 15 minutes, depending on the sturdiness of the candy you use (start checking after 5 minutes). It will progress from droopy candy to totally melty. Once totally melty, remove the pan from the oven. Erin advises, "If the gem is not as full as you’d like, sprinkle in a little more candy and place the tray back into the oven for another minute or so. Just long enough for the additional candy to melt."
  7. Let the molds cool for several minutes before handling the molds. About 10-20 minutes after they've been removed, your candies will be ready to remove. I simply inverted the mold and kind of squeezed them out. 

Ruby gem candy

You've got yourself a glamorous little snack here! 

Thursday
Mar262015

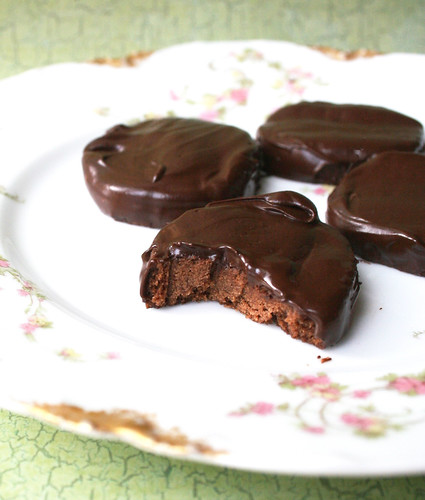
Homemade Thin Mints Recipe

Thin Mints - homemade

OMG. You can make one of the best Girl Scout cookies in your very own kitchen! No weird stabilizers included.

Find the recipe here.

Monday
Mar232015

Cadbury Creme Egg Rolls

Calm down. They're just Cadbury Creme Egg Rolls.

WAIT. CADBURY CREME EGG ROLLS!?! I AM A GENIUS. 

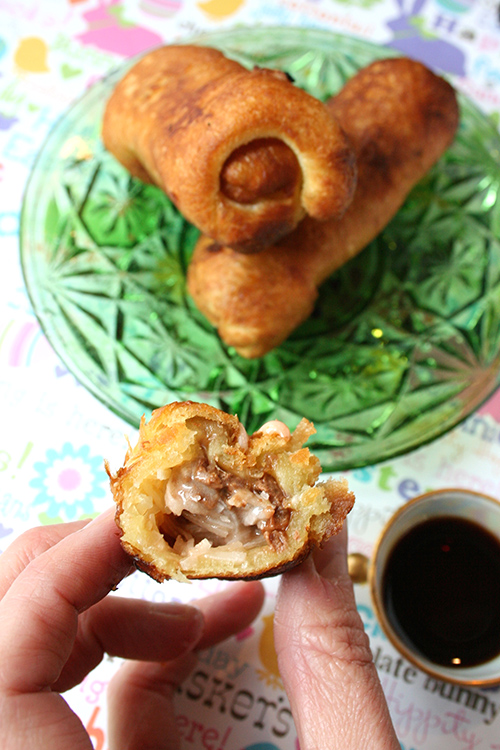
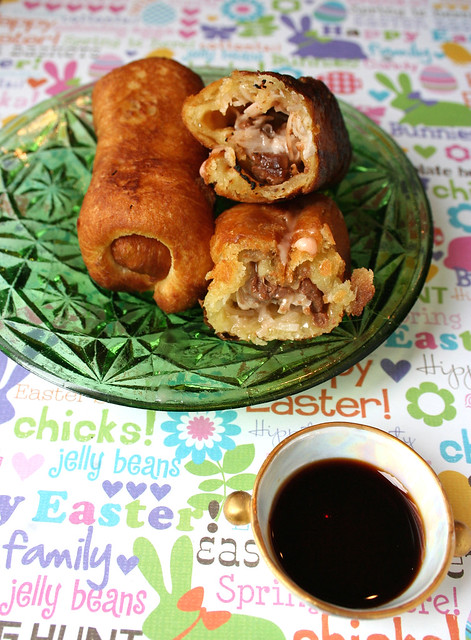
I know, all caps are annoying. But in the case of the last series of words, it was necessary. Because Easter has come early this year with my tastiest Creme Egg creation yet: Cadbury Creme Egg Rolls. 

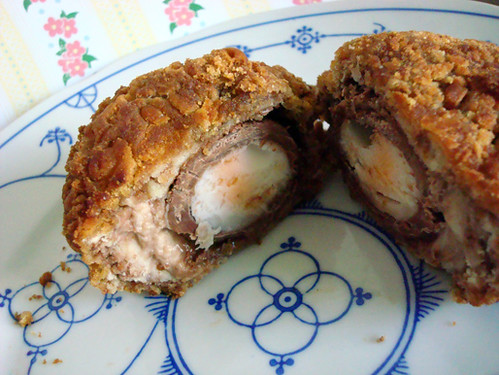
I've delved into Asian-meets-Creme-Egg fusion before, with my Cadbury Creme Egg Foo Young recipe from a few years ago. I've also re-created many specimens of classic cuisine with a sweet twist, including Cadbury Creme Egg Salad, Cadbury Creme Deviled Eggs, Cadbury Creme Eggs Benedict, Cadbury Creme Scotch Eggs, and of course, Cadbury Creme Egg in Hole Toast

But these? These are special. Because they are fried, can be served with sauce, it's true, but mostly because, well, just look at them. 

Cadbury Creme Egg Rolls

The best news is that if you want to make Cadbury Creme Egg Rolls, you don't need a lot of time or ingredients. Really. Let me tell you how.

First, you'll grab four Cadbury Creme eggs, a tube of pop-n-bake crescent rolls, and some flaked coconut. You'll rustle up a large pan and put a bunch of oil in it. 

Then, you'll engage in a montage (80s music encouraged) involving these steps to assemble your egg rolls (don't worry, the full recipe is below).

Once you've done that, you'll heat up the oil and get your egg roll tossin' hands ready*... 

(* = don't actually toss. Gently place them in the oil. Don't ruin your pretty face with hot oil spatter, please.) 

Cadbury Creme Egg Rolls

and fry them to golden perfection. Let them cool slightly then enjoy the gooey rewards contained within. 

Cadbury Creme Egg Rolls


Cadbury Creme Egg Rolls

  • 4 Cadbury Creme Eggs
  • Flaked coconut (half a cup or so)
  • 8 crescent rolls from a package

 Procedure

  1. Put the Creme Eggs in the freezer for about 10 minutes. This will help them become firm when you chop them in a bit.
  2. Unroll the crescent rolls, and divide into 8 perforated portions. Ignore the triangle shape, and mush each one into a ball. 
  3. Using a rolling pin, roll the dough as thin as it will go without seeming like it will break. 
  4. Place some coconut on top of the rolled dough. 
  5. Your Creme eggs are ready about now, I'd say. Take them out of the fridge, and cut each egg in half. You now have 8 portions. 
  6. Cut each portion coarsely, and put it along the coconut on the spread crescent dough. 
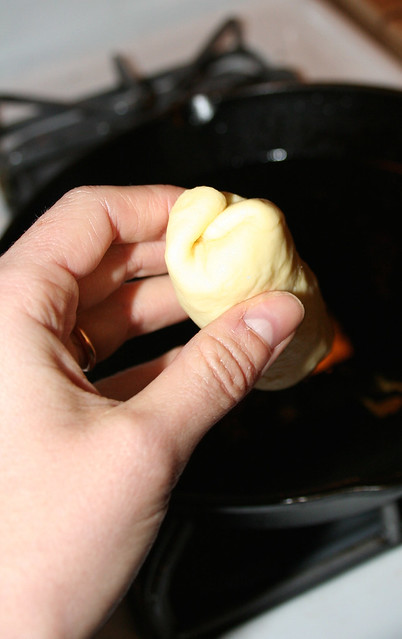
  7. Roll it up, burrito-style. Here's how:
  8. Heat up the oil. Once you think it's hot, test it by tossing a little crumb of crescent dough inside. If it starts bubbling furiously, you're good to go.
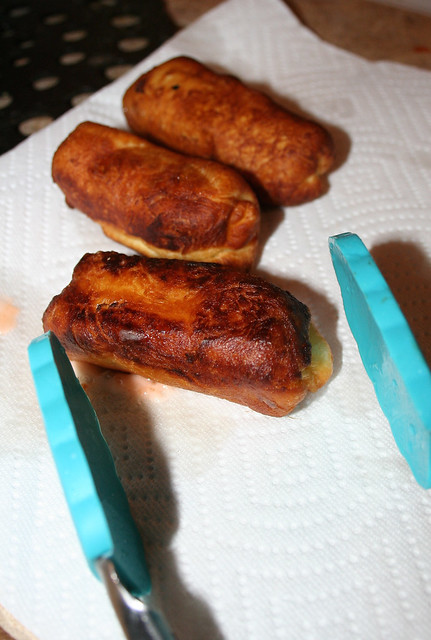
  9. Fry each one (don't do more than 2 at a time, it's just easier to manage that way) until golden on both sides.
  10. Remove from the frying pan and set on paper towels to blot excess oil.
  11. Enjoy warm. Serve with melted chocolate sauce for dipping, if desired (suggested). 

You may also like:

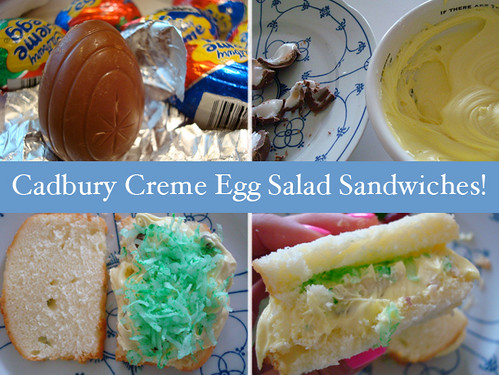
Cadbury Creme Egg Salad

Cadbury Creme Egg Salad

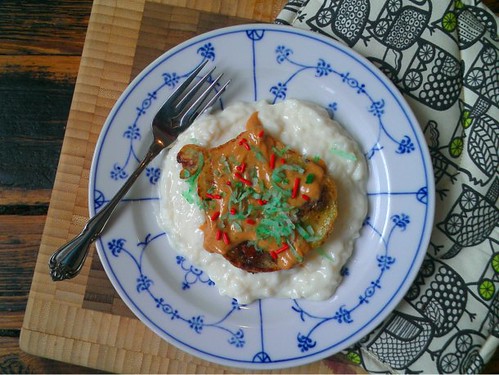
Cadbury Creme Egg Foo Young

Cadbury Creme Egg Foo Young

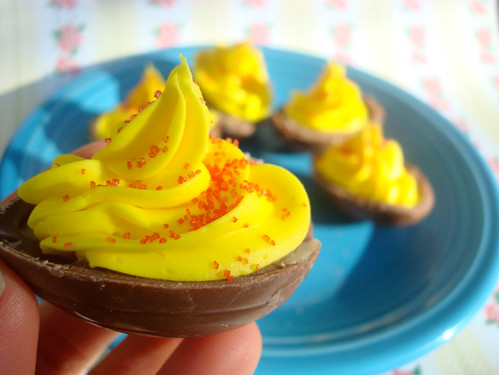
Cadbury Creme Deviled Eggs 

Cadbury Creme Deviled Eggs

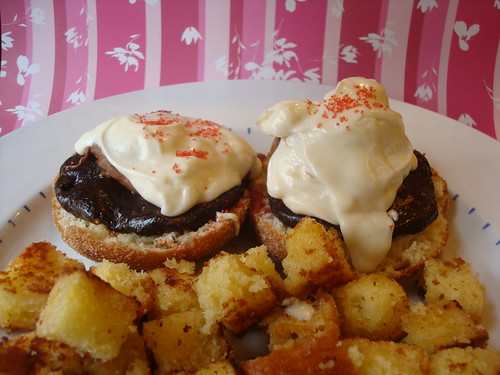
Cadbury Creme Eggs Benedict

Cadbury Creme Eggs Benedict

Cadbury Creme Scotch Eggs

scotch eggs

Cadbury Creme Egg in Hole Toast

Cadbury creme egg in hole toast

 Would you eat a Cadbury Cream Egg roll?

Monday
Mar232015

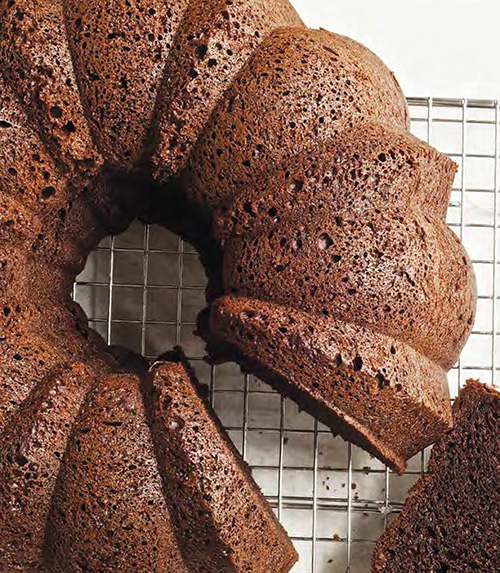
Gluten-Free Chocolate Bundt Cake

There is no good reason to not have cake in your life. 

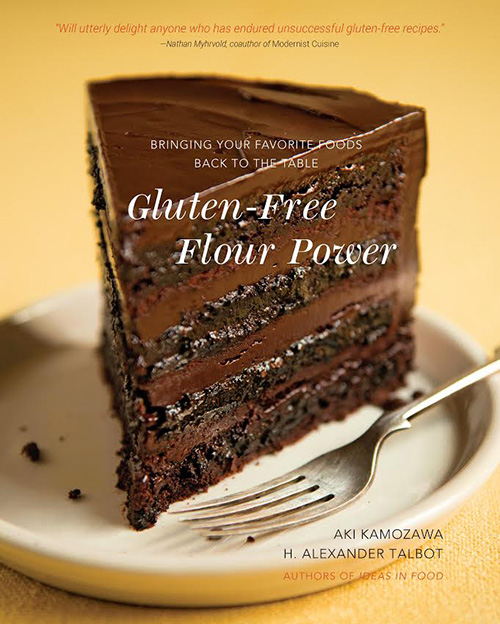
If you're gluten-free and eating cake made with cake flour is not good for your health, you might have to bake a little differently, but ultimately, your favorite treats should not be off limits. The new book Gluten-Free Flour Power: Bringing Your Favorite Foods Back to the Table wants to enable you to bring your favorite desserts back into your life. 

This guest recipe for chocolate bundt cake is a very special one indeed, rich and dense and practically perfect in every way. And plus, it gives you the opportunity to say "I like big bundts and I cannot lie".

Yep. With that, here's the recipe.

Jenny’s chocolate bundt cake

makes 1 small Bundt cake

We created this for Jenny, a family member and good friend. She was diagnosed with celiac disease a few years ago and was worried that she’d never enjoy our cakes and cookies again. This cake is one of the first things we made for her, and it quickly became a favorite. It’s moist and chocolaty, with a tender crumb. Aki likes just a dusting of powdered sugar instead of icing.

  • 2 cups / 260 grams Gluten-Free Flour Blend (recipe below)
  • 1 cup / 85 grams high-quality natural cocoa powder
  • 16 tablespoons (2 sticks) / 8 ounces / 225 grams unsalted butter, at room temperature
  • 2 cups / 400 grams granulated sugar
  • 1 teaspoon / 6 grams fine sea salt
  • 1 teaspoon / 5 grams baking soda
  • ½ teaspoon / 3 grams baking powder
  • 4 large eggs, at room temperature
  • 1 cup / 225 grams buttermilk, at room temperature
  • ¼ cup / 30 grams powdered sugar for dusting

Procedure

  1. Preheat the oven to 350°F. (180°C.). Butter a 7½-inch (6-cup) Bundt pan and dust with flour.
  2. Whisk together the flour and cocoa in a medium bowl. Set aside.
  3. Put the butter, granulated sugar, salt, baking soda, and baking powder in the bowl of a stand mixer fitted with thepaddle attachment (or use hand mixer) and beat on low until light and fluffy. Add the eggs one at a time, mixing until each one is fully incorporated before adding the next.
  4. Add one-third of the flour mixture and mix until just blended.Add half the buttermilk and mix until just blended. Repeat with half of the remaining flour mixture, followed by theremaining buttermilk, and then the last of the flour mixture. Scrape the batter into the prepared cake pan.
  5. Bake for 55 to 65 minutes, until the cake springs back when lightlytouched and a cake tester inserted in the center comes out clean; the internal temperature should be 203° to 208°F.(95° to 98°C.).
  6. Let cool in the pan on a rack for 15 minutes, then turn out onto a rack to cool completely. Just before serving, dust the top of the cake with the powdered sugar. The cake will keep in an airtight container for up to a week.

Gluten-free flour blend: "What Iif" blend

makes 15½ cups / 2020 grams flour blend

What if you had a gluten-free flour that worked in any recipe as a gram-forgram substitute for all-purpose flour? That was the question was asked ourselves when we developed this blend. “IiF” stand for Ideas in Food, our blog, where we published the very first version of this recipe. Alex came up with it for fun after reading the ingredient list on Cup4Cup flour (developed by Lena Kwak and chef Thomas Keller), and it worked beautifully. It’s gone through a few changes since the original, hence the 3.0, but it remains the easiest gluten-free blend to work with. It mimics all-purpose flour in recipes and for that reason, using a gram-for-gram substitution in any traditional recipe will give you comparable results.

  • 700 grams cornstarch
  • 500 grams tapioca starch
  • 300 grams white rice flour
  • 200 grams brown rice flour
  • 200 grams nonfat milk power
  • 100 grams potato flour
  • 20 grams xanthan gum

Whisk together all the ingredients in a bowl. Store in airtight container at room temperature for up to 6 months.

Reprinted from Gluten-Free Flour Power: Bringing Your Favorite Foods Back to the Table by Aki Kamozawa and H. Alexander Talbot. Copyright © 2015 by Aki Kamozawa and H. Alexander Talbot. With permission of the publisher, W. W. Norton & Company, Inc. All rights reserved.
© Cakespy, all rights reserved. Powered by Squarespace.