Home Home Home Home Home Home Home
CakeSpy

Featured: 

My adventure at Ben & Jerry's in Vermont!


Unicorn Love: the Eating Disorder Recovery Blog


 Buy my brilliant books!

Buy my new book!

Buy my first book, too! 

CakeSpy Online Retail!


Archives
Gallery

Fantastic appliance for cake making on DHgate.com

everyrecipe.co.nz

Craftsy Writer

Entries in books (33)

Monday
Apr202015

Grandma's Killer Chocolate Cake from Author James Patterson

Mystery Writers of America cookbook excerpt

Here's a riddle: what kind of cakes do mystery writers like?

Happily, the new book The Mystery Writers of America Cookbook: Wickedly Good Meals and Desserts to Die For is ready and willing to answer this question in the most delicious way. It is a collection of recipes culled from famous mystery writers, and it makes for mighty sweet eating. 

When choosing an excerpt recipe to feature here, my eye was drawn right away to "Grandma’s Killer Chocolate Cake: via mystery writer James Patterson. I hope you'll enjoy!

Grandma's Killer Chocolate Cake

Recipe headnote:

Here’s one “killer” Alex Cross always loves to catch—Grandma’s Killer Cake! A special family recipe dating from the 1940s, this decadent cake seems to get better with age; it is tastier on day two. And you need to be a good detective around the house after it has been made, sitting there in its glass­domed cake stand, staring back at you with deadly temptation, because a piece seems to mysteriously disappear every time I go into the kitchen. Not to be caught red­handed, so looms the “Killer Cake Killer”!

YIELD: 1 SINGLE­ LAYER 9x12 INCH CAKE OR 1 DOUBLE LAYER 9­ INCH CAKE

CAKE

  • 2∕3 cup butter
  • 2 cups granulated sugar
  • 2 eggs
  • 2 cups flour
  • 11∕3 cups buttermilk
  • 11∕3 teaspoons baking soda dissolved in 2 ∕ 5 cup hot water 31∕2 squares bitter chocolate, melted gently
  • 1 teaspoon vanilla extract

FROSTING

  • 1∕2 cup butter
  • 3 squares bitter chocolate
  • 2 cups granulated sugar
  • 2∕3 cup milk 1 teaspoon vanilla extract
  • 1 teaspoon almond extract


1. Preheat oven to 350°F. Cream butter and sugar together. Add eggs.

2. Blend in flour and buttermilk in alternating additions, starting and ending with the flour. Add baking soda mixture, followed by chocolate and vanilla extract.

3. Pour batter into one 9­by­12­inch pan or two round 9­inch springform pans. Bake for 30 minutes, or until a toothpick inserted into the center comes out clean. Remove from oven and let cool.

4. Combine all frosting ingredients in a saucepan, bring to a full boil, and boil for 2 minutes. Let cool. You can put saucepan on ice if necessary to cool quickly.

5. Remove the cake from the pan, frost, and serve.

About the author: James Patterson has sold 300 million books worldwide, including the Alex Cross, Michael Bennett, Women’s Murder Club, Maximum Ride, and Middle School series. He supports getting kids reading through scholarship, Book Bucks programs, book donations, and his website, readkiddoread.com. He lives in Palm Beach with his wife, Sue, and his son, Jack.

Excerpted from The Mystery Writers of America Cookbook: Wickedly Good Meals and Desserts to Die For edited by Kate White. Reprinted with permission from Quirk Books. 

Thursday
Apr092015

Fleur de Sel Shortbread with Vanilla Halvah

Cookie Love by Mindy Segal

You guys. I was super excited to receive a review copy of Mindy Segal's new book, Cookie Love. Why?

Well, a few reasons. 

For one, she's the proprietress of Chicago foodie landmark Hot Chocolate. Even if you've never been there, if you go to their website, the establishment is explained thusly: "Restaurant. Dessert Bar. Pastries." You should already be halfway in love. If you ever go, I promise you'll be the rest of the way in love.

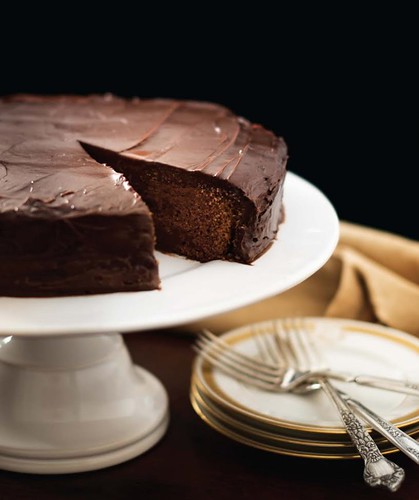
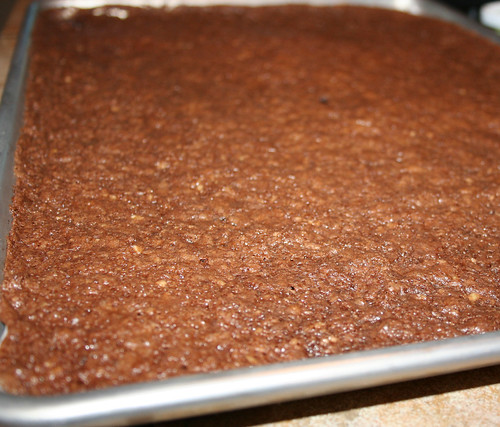
Second, the recipes look AWESOME. You could seriously just buy this book and look at the pictures for the rest of your life, it would be worth the investment just for that.

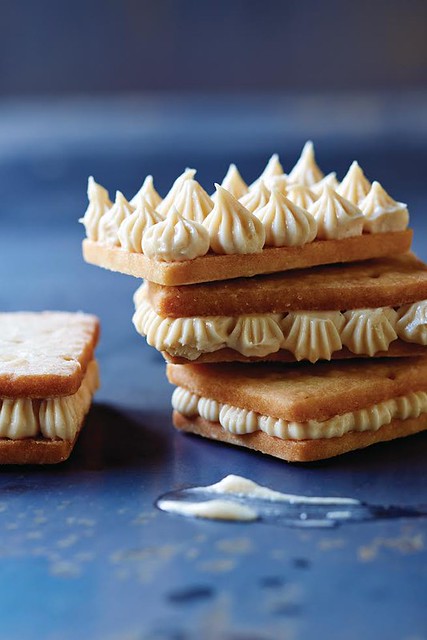
But your life would be even better still if you made these cookies: Fleur de Sel Shortbread with Vanilla Halvah. 

Discover them here with this awesome excerpt recipe. 

A note from Mindy: 

I AM ALWAYS ON a quest to find more ways to use halvah in desserts. Coffee, chocolate, and cocoa nibs are my usual pairings with the Middle Eastern sesame confection, but one day I shifted gears in favor of vanilla and fleur de sel. It worked—halvah anchored the vanilla-flecked frosting, for a sweet, salty, nutty result. To finish the cookies, I dip them partially in dark milk chocolate and then place a shaving of halvah on top. The frosting is seasoned well to balance its sweetness, but because the cookies themselves carry a noticeable salt level, you may prefer to add less. 

Fleur de Sel Shortbread with Vanilla Halvah

makes approximately 28 sandwich cookies

SHORTBREAD
11⁄2 cups plus 2 tablespoons (13 ounces) unsalted butter, at room temperature 11⁄4 cups confectioners’ sugar, sifted
2 extra-large egg yolks, at room temperature
2 teaspoons pure vanilla extract
3 cups unbleached all-purpose flour
2 tablespoons sea salt flakes

FROSTING
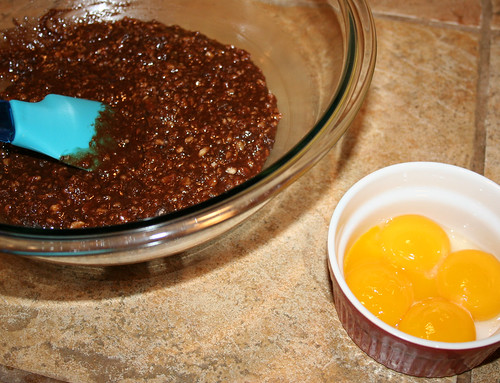
8 ounces plain or vanilla halvah, cubed
2 ounces white chocolate, melted
11⁄4 cups (10 ounces) unsalted butter, at room temperature 1 cup confectioners’ sugar, sifted
1⁄2 teaspoon pure vanilla extract
1⁄2 teaspoon kosher salt
1⁄2 teaspoon sea salt flakes, or to taste

TO FINISH
Piece of plain or vanilla halvah, for garnish 8 ounces milk chocolate, melted

Step #1: Make the Shortbread
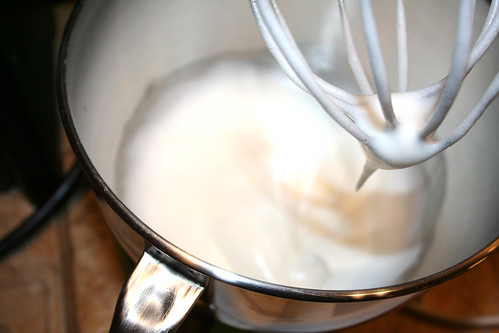
In the bowl of a stand mixer fitted with the paddle attachment, mix the butter on medium speed for 5 to 10 seconds. Add the sugar and mix on low speed to incorporate. Increase the speed to medium and cream the butter mixture until it is aerated and looks like frosting, 3 to 4 minutes. Scrape the sides and bottom of the bowl with a rubber spatula to bring the batter together.

Put the yolks in a small cup or bowl and add the vanilla. In a bowl, whisk together the flour and salt.

On medium speed, add the yolks, one at a time, and mix until the batter resembles cottage cheese, approximately 5 seconds for each yolk. Scrape the sides and bottom of the bowl with a rubber spatula to bring the batter together. Mix on medium speed for 20 to 30 seconds to make nearly homogeneous.

To cut out the cookies, you will need a rectangular cutter approximately 13⁄4 by 21⁄2 inches. To pipe the frosting, you will need the Ateco tip #32. 

Cookie Love by Mindy Segal page1image22832

Add the flour mixture all at once and mix on low speed until the dough just comes together but still looks shaggy, approxi- mately 30 seconds. Do not overmix. Remove the bowl from the stand mixer. With a plastic bench scraper, bring the dough completely together by hand.

Stretch two sheets of plastic wrap on a work surface. Divide the dough in half and place each half on a piece of the plastic wrap. Pat each half into a rectangle, wrap tightly, and refrigerate until chilled throughout, at least 2 hours or preferably overnight.

Let the dough halves sit at room tempera- ture until the dough has warmed up some but is still cool to the touch, 15 to 20 minutes.

Put a sheet of parchment paper the same dimensions as a half sheet (13 by 18-inch) pan on the work surface and dust lightly with flour. Put one dough half on top.

Using a rolling pin, roll the dough half into a rectangle approximately 11 by 13 inches and 1⁄4 inch thick or slightly under. If the edges become uneven, push a bench scraper against the dough to straighten out the sides. To keep the dough from sticking to the parchment paper, dust the top with flour, cover with another piece of parchment paper, and, sandwiching the dough between both sheets of parch- ment paper, flip the dough and paper over. Peel off the top layer of parchment paper and continue to roll. Any time the dough starts to stick, repeat the sand- wiching and flipping step with the parchment paper.

Ease the dough and parchment paper onto a half sheet pan. Repeat with the remaining dough half and stack it on top. Cover with a piece of parchment paper and refrigerate the layers until firm, at least 30 minutes.

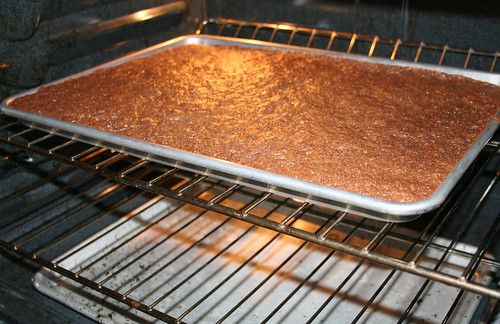
Heat the oven to 350°F. Line a couple of half sheet pans with parchment paper.
Let the dough sit at room temperature for up to 10 minutes. Invert the dough onto a work surface and peel off the top sheet of parchment paper. Roll a dough docker over the dough or pierce it numerous times with a fork. Using a 1 3⁄4 by 2 1⁄2-inch rectangular cutter, punch out the cookies. Reroll the dough trimmings, chill, and cut out more cookies.

Put the shortbread on the prepared sheet pans, evenly spacing up to 16 cookies per pan.

Bake one pan at a time for 10 minutes. Rotate the pan and bake until the cookies feel firm and hold their shape when touched, 3 to 5 minutes more. Let the cookies cool completely on the sheet pans. Repeat with the remaining pan.

Step #2: Frost the Cookies
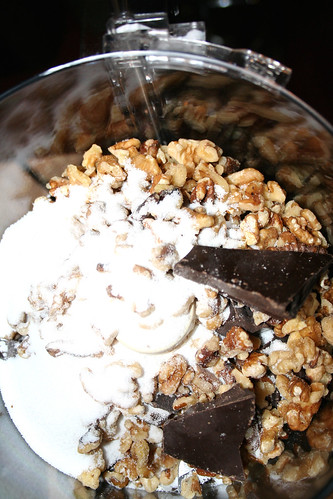
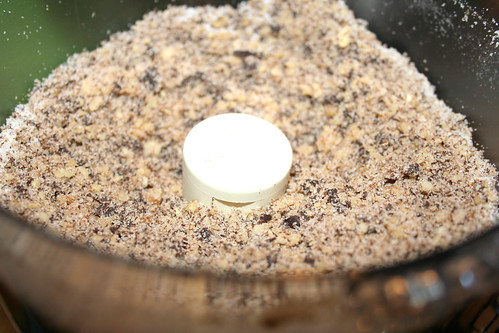
Blend the halvah in a food processor until fairly smooth. Drizzle in the white chocolate and blend until incorporated. The halvah will turn into a thick paste.

In the bowl of a stand mixer fitted with the paddle attachment, mix the butter briefly on medium speed for
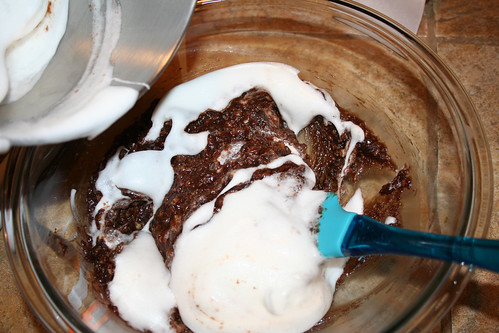
5 to 10 seconds. Add the sugar and beat until the butter mixture is aerated and pale in color, 3 to 4 minutes. Scrape the sides and bottom of the bowl with a rubber spatula to bring the frosting together. Briefly mix in the vanilla and salts until incorporated, approximately 1 minute. Add the halvah paste and mix until smooth, with a little texture left from the halvah.

Fit a pastry bag with the Ateco tip #32 and fill with the frosting.
Make pairs of similar-size cookies. Turn half of the cookies over. Leaving an 1⁄8-inch border, pipe rows of dots 
onto the cookies. The frosting should be approximately as thick as the cookie. Top each frosted cookie with a second cookie and press lightly to adhere.

Step #3: Finish the Cookies
Freeze the piece of halvah until chilled, 30 minutes.

Line two half sheet pans with parchment paper. Dip a quarter of the long side of each sandwich cookie into the milk chocolate, shake off the excess, and place on the prepared pans. Using a vegetable peeler, shave
a piece or two of halvah and place onto the chocolate- dipped part of each cookie. Refrigerate until the chocolate is firm, approximately 1 hour.

The cookies can be refrigerated in an airtight container for up to 1 week. 

Enjoy! 

Buy the book here: Cookie Love

Tuesday
Mar312015

Sweetapolita Dreams

Sweetapolita bakebook

A cupcake, robot, bunny, and unicorn all agree: you should buy The Sweetapolita Bakebook: 75 Fanciful Cakes, Cookies & More to Make & Decorate.

Let me explain.

A few weeks ago, a package arrived in the mail. It was addressed as follows: "to Cuppie the cupcake and his friends robot, bunny, and unicorn, and CakeSpy is under no circumstances allowed to peek".

Ouch, that hurt. Usually the review copies come to me! But I let the cupcake and his friends have the package, and I could see from across the room the book looked like this.

Why would they keep it from me? It looked like my dream book. 

A couple of weeks later, I was contacted by the publishing PR company, asking if I wanted to be part of the author, Rosie Alyea's, blog hop, which includes tons of awesome prizes. 

Hey! What about the strange address on the package?

Turns out, Cuppie had done that so he could have the book all to himself (and, you know, to share with his illustrated buddies).

Happily, at this point, Cuppie and friends shared, indicating that the book had reached the highest possible level of approval in the illustrated world:

So I decided that for my entry in the blog hop, instead of making a recipe, I would ask all of the characters what they liked best from the book. 

What CakeSpy characters like best from the Sweetapolita Bakebook:

Cuppie

Sweetapolita bakebook

Cuppie, who decided to channel Rosie with his apron (let's just not go into the cross dressing aspect of this, OK?), simply loves the rainbow and sprinkle cake, which is composed of multicolored cake layers frosted with blue buttercream and completely smothered in sprinkles.

Cuppie's pick:


Robot

Sweetapolita bakebook

Robot, who you would think would like the robot pop rocks truffles best, did indeed enjoy those--but his first recipe to bake from the book will definitely be the pink cherry party cupcakes.

Robot's picks:

Bunny

Sweetapolita bakebook

Bunny loves the Coney Island Cheesecake. It's sort of like Funfetti plus a rainbow meet cheesecake. How could you not love it?

Bunny's pick:

Unicorn

Sweetapolita bakebook

You really shouldn't be surprised that Sprinkle the unicorn likes the sky cake on page . Especially the topper, which features a rainbow that reminds Sprinkle of the place he was born. 

Sprinkle the unicorn's pick:

This gives you a glimpse of the book, but by no means the full scale. You simply must buy it! 

Buy the book here.

Which recipe are you most excited about?

Monday
Mar022015

Italian in Your Mouth: Torta Caprese

Have you ever heard of Torta Caprese? 

Torta Caprese

My sweetheart was enchanted by this recipe in Brooks Headley's book Brooks Headley's Fancy Desserts: The Recipes of Del Posto’s James Beard Award–Winning Pastry Chef. So...well, he made it. And we ate it. And I want to tell you that it is worth your time. 

According to the book, Torta Caprese is an Italian sweet, named for the island of Capri. This is a traditional version that gets its structure from "walnuts and the superpowers of egg whites". 

It's a very thin brownie, so we decided it was better to serve them in little short stacks, like the one pictured (five brownies at once? How American!). Since they're so thin, it's really like making a DIY layer cake. 

Torta Caprese

Every flavor shines in this recipe, so it's a good time to bring out quality ingredients: basically, your brownies will taste as good as the chocolate you use. 

It's also naturally gluten free, "making it perfect for passover, or for that friend who is not eating gluten, for whatever very real or totally imagined reason."

Torta Caprese

Torta Caprese

Only slightly adapted from Brooks Headley's Fancy Desserts: The Recipes of Del Posto’s James Beard Award–Winning Pastry Chef.

Yield: 1 baking sheet of brownies

  • Bittersweet chocolate, very best quality, chopped, 1 1/2 cups (200 grams)
  • Walnuts, chopped, 1 3/4 cups (200 grams)
  • Sugar, 3/4 cup plus 1/4 cup (150 grams plus 50 grams) 
  • Salt, 1 teaspoon * (4 grams) - note, original recipe calls for 2 teaspoons
  • Unsalted butter, 2/3 cup (or, 1 1/3 sticks) (155 grams), melted
  • Eggs, 4, separated

Procedure

  1. Preheat the oven to 325 degrees F. Line a baking sheet with parchment paper. 
  2. In a food processor, pulse together the chocolate, walnuts, 3/4 cup of the sugar, and the salt, until you have chunks of chocolate and walnut that are not huge but not totally obliterated either. You don't want a paste. Avoid that.
  3. Torta caprese
  4. Transfer the chocolate mixture to a large mixing bowl. Add the butter and mix well with a rubber spatula. Add the egg yolks, and stir to combine. Set the chocolate mixture to the side. 
  5. Torta caprese
  6. In the bowl of a stand mixer, using the whisk attachment, beat the egg whites on medium speed, slowly adding the remaining 1/4 cup sugar and beating continuously until the whites have a meringue-like texture. Do not overbeat.
  7. Torta caprese
  8. Fold the egg whites gently into the chocolate mixture, and pour the batter on to the prepared baking sheet. 
  9. Torta Caprese
  10. Bake until golden, 20 to 25 minutes, or until a toothpick inserted in the center comes out clean. 
  11. Torta Caprese
  12. Let the cake cool in the pan, and cut into chunks. This also freezes beautifully, and will last up to 2 months. Just thaw and serve.
  13. Torta Caprese

How many slices would you stack for dessert?

Thursday
Nov202014

Tastes Like Joy: Creme de Noisettes Recipe

Hazelnut chocolate creme

See that thing? Up there in the jar? That creamy, chocolatey looking stuff? Well, guess what--you now officially have the recipe. 

Not to break you out of the reverie, but I suppose I should tell you what it is, exactly. That little mason jar is filled with a chocolate-hazelnut slurry known as (doesn't it always sound better in French?) crème de noisettes. I never tried this when I was in France, but stateside, I've tried a little something called Nutella which brings it to mind. Ever heard of it?

This lovely recipe is excerpted from French Bistro: Restaurant-Quality Recipes for Appetizers, Entrées, Desserts, and Drinks.

PS: want to read more about my overseas adventures? Here's a roundup of my last trip to Paris.

French Bistro Maria Zihammou

*crème de noisettes*

Hazelnut and chocolate crème

Hazelnut and chocolate is an unbeatable combination that I downright love. My kids do too! Here, I’ve blended the two flavors into a rich and dangerously delicious crème, which my kids love to eat on baguette dipped in hot chocolate. I prefer it on a croissant, dipped in café au lait.

Makes 1 Jar 

  • ½ cup (100 ml) Nutella
  • 7 oz (200 g) dark chocolate, 70% cacao
  • 3½ tbsp (50 g) butter
  • ¼ cup (50 ml) cream
  • 2 tbsp molasses
  • 1 tbsp water
  • 3½ oz (100 g) hazelnuts

Procedure 

  • Place the Nutella in a saucepan. Coarsely chop up the chocolate and place it in the pan. Cut the butter into small pieces and add it too, along with the cream, molasses, and water. Warm over low heat to make a smooth sauce. Move the saucepan off to one side.

  • Roast the nuts in a dry pan for 3–4 minutes. Mix them well and blend them into the sauce. Pour the crème into a jar with a tight lid. If stored in the fridge, it should keep for at least one week.

Enjoy!

Saturday
Oct042014

Coconut Pistachio Gateau with Marzipan Filling

Photo via The Everyday Art of Gluten-FreeI'm not anti-gluten; I'm pro-delicious. This cake happens to be gluten-free, but that doesn't stop me, because just look at the thing. It is a guest post featuring a recipe from The Everyday Art of Gluten-Free: 125 Savory and Sweet Recipes Using 6 Fail-Proof Flour Blends. It is inspired by a recipe from Austin pastry chef Sandy Reinlie, a "genius" when it comes to combining flavors. 

Coconut Pistachio Gateau with Marzipan Filling

For the cake

  • 2 1/2 cups "cake and muffin" blend (link here)
  • 2 cups granulated sugar
  • scant 1 cup finely ground roasted salted pistachios
  • 1/3 cup cornstarch
  • 2 teaspoons baking powder
  • 1 cup milk
  • 1/2 cup pure olive oil
  • 6 large eggs, separated
  • 1/4 cup sour cream
  • 2 teaspoons almond extract
  • 1 1/4 teaspoons coconut extract
  • 1/2 cup sweetened shredded coconut, plus more for garnish
  • 1/8 teaspoon cream of tartar

For the icing

  • 1 cup granulated sugar
  • 4 egg whites 
  • 1/8 teaspoon cream of tartar
  • 1/2 teaspoon vanilla extract

For the marzipan filling

  •  1 pound gluten-free almond paste
  • 1 tablespoon light corn syrup
  • green food coloring (optional)
  • confectioners' sugar, for dusting

Garnish


  • 2 cups salted pistachios, chopped
  • toasted coconut

Procedure

  1. Start by making the cake. Preheat the oven to 350 degrees F. Grease a 10-inch springform pan with butter and line the bottom with parchment.
  2. In the bowl of a stand mixer fitted with the paddle attachment, combine the flour blend, sugar, pistachios, cornstarch, and baking powder. Beat briefly to combine. 
  3. In a separate bowl, whisk together the milk, oil, egg yolks, sour cream, and extracts until very smooth. With the mixer running on medium-low, add the egg yolk mixture to the dry ingredients in a slow, steady stream. Beat the batter on high for one minute, or until thick and smooth. Add the shredded coconut and mix until just combined.
  4. In the clean bowl of a stand mixer fitted with the whisk attachment, beat the egg whites with the cream of tartar until they attain stiff peaks. Using a wooden spoon, fold this mixture into the batter until there are no more white clumps remaining.
  5. Pour the batter into the pan. Bake for 45-55 minutes, until the top cracks slightly and the edges have pulled away from the sides.
  6. Let the cake cool in the pan on a wire rack for at least an hour.
  7. Make the icing now. In a small, heavy saucepan, combine the sugar and 1/2 cup water.  Clip a candy thermometer to the side of the pan and set the pan over medium high heat. Bring the syrup to a boil, whisking to make sure the sugar dissolves, and cook until the temperature registers 239 F (115 C, soft ball stage) on the thermometer. This will take several minutes. 
  8. Meanwhile, in the clean bowl of a stand mixer fitted with a whisk attachment, beat the egg whites until opaque and frothy. Add the cream of tartar and beat on high until the whites are thick and foamy.
  9. With the mixer on high speed, pour the hot sugar syrup into the whipping egg whites in a slow, steady stream being careful to keep the hot syrup between the bowl and whisk to prevent sprays of sugar on your skin or beautiful face. Beat the meringue for 7 minutes, or until the egg whites are very shiny and hold deep folds. The mixer should be cool to the touch on the bottom. Beat in the vanilla just til combined. 
  10. Make the filling. In a food processor fitted with the "s" blade, combine the almond paste with the corn syrup and one to two drops of the food coloring, if using. Mix them until the paste is very smooth. If the almond paste is crumbly, add a bit more corn syrup, a teaspoon at a time, until it folds in on itself. 
  11. Lightly dust your work surface with confectioners' sugar. Turn out the marzipan mixture and roll it into a circle 1/4 inch thick and 11 inches in diameter.
  12. Assemble the thing. Invert the cooled cake onto a wire rack and peel off the parchment paper. Wrap a thread or piece of unflavored dental floss around the circumference of the cake, halfway from top to bottom, and draw the floss tight, using it to cut the cake in two layers (or do it the normal way with a serrated knife).
  13. Set one layer on a serving plate or cake stand. Place the marzipan disk on top. Dollop 2/3 cup of the icing on to the marzipan and spread it twoard the edges. Top with the second cake layer. Ice the cake with the remaining icing. Press the pistachios on the sides of the cake, and sprinkle the top with toasted coconut. Keep the cake under a cake dome for a few days, or in the fridge for up to a week.


Friday
Sep262014

Giveaway: Decorating Cookies Party by Bridget Edwards

UPDATE: WE HAVE A WINNER!!


It's Joanna, whose comment was chosen at random: "My favorite cookie EVER is a bar cookie that's a family recipe called "Revel Bars" ... they're an oatmeal cookie with a thick layer of fudge, and topped with dots of salty oatmeal cookie on top and they're to DIE for. Starbucks used to make a version of it that was not nearly as good."
Sounds like a tasty cookie to me!


Listen up. I want to give you a book!


I don't know if you're familiar with Bridget Edwards of Bake at 350, but if not, you're in for a treat. She is a cookie decorator ROYALE. And she is willing to teach you her secrets in two books: her previous release (which I loved) entitled Decorating Cookies: 60+ Designs for Holidays, Celebrations & Everyday, and now, her brand new book, Decorating Cookies Party: 10 Celebratory Themes. The new book includes 50 designs to be made from a few master cookie recipes (one of them is even gluten-free, people). 

So, you want to win the book?

All you have to do is tell me the following:

What is your favorite cookie in the world and why? 

Yes, that's an open ended question. It could be a store bought cookie, your grandma's recipe, or one you make. Just tell me why it's so special!

I'll choose a winner one week from today (that's Friday, October 3rd). Meantime, you can buy the book here if you need it ASAP! Since the publisher is sending this out directly, I'm honoring their request that the entrants for this giveaway have US or Canadian shipping addresses, please.

Saturday
Oct192013

Buy it Now: Trophy Cupcakes Book

Cupcakes at Trophy Cupcakes

It's not every day that a business I've illustrated in cupcake form releases a book.

But when it does happen (and it has!), I am going to tell you "buy this book now." Please.

The book in question is by beloved Seattle bakery and one of my first supporters, Trophy Cupcakes. The book is entitled Trophy Cupcakes and Parties!: Deliciously Fun Party Ideas and Recipes from Seattle's Prize-Winning Cupcake Bakery.

A mouthful, I know. But nowhere near the mouthful of tastiness you'll experience once you bake one of the cupcake recipes in the book. Seriously--this is good stuff. 

But the book isn't just cupcakes, I learned upon opening my review copy package. This book is designed to party.

Trophy cupcakes

As I unwrapped the tissue, I found not only a book but a built in party... Trophy cupcakes

including... a tiny dancer!

Trophy cupcakes

The party theme corresponds to the book, which is full of party ideas, including recipes, crafty decor and activities, and all of the style you need to pull off a cool event. I love it--it really celebrates not only the cupcake, but the happy culture which should always surround the cute foodstuff.

Trophy cupcakes book

A respectable cache of recipes, of course, is present, with beautiful photos.

Trophy cupcakes book

It's really a lovely book, and I think you should buy it right now. In case you've already forgotten the title,  it's Trophy Cupcakes and Parties!: Deliciously Fun Party Ideas and Recipes from Seattle's Prize-Winning Cupcake Bakery. Do it now!

Saturday
Sep142013

Triple Chip Peanut Butter Cookie Dough Dip from Peanut Butter Comfort

Cookie dough dip

When I think of peanut butter, visions of happiness, butterflies, unicorns prancing, and cotton candy clouds dance in my head. I love the stuff that much.

So when I received the book Peanut Butter Comfort: Recipes for Breakfasts, Brownies, Cakes, Cookies, Candies, and Frozen Treats Featuring America's Favorite Spread, I was pretty psyched. Especially since I happened to have plenty of peanut butter around at the moment.

Naturally, I was drawn in pretty instantly by this recipe because it had pink thingies in the photos. But then, upon futher review, I found that the recipe was for something amazing: Triple Chip Peanut Butter Cookie Dough Dip. Like, OMG. That's a dip I can get into!

Cookie dough dip

Even better, the dough is egg free, so that dough can get right in your mouth.

What would one use cookie dough dip for, you ask? Well, that's kind of a dopey question because I really hope you already have some ideas. It would be a great, indulgent frosting, or a nice dip for graham crackers, or...you know, great by the spoonful. Yum.

Here's the magical recipe.

Peanut Butter Triple Chip Cookie Dough Dip

Adapted from Peanut Butter Comfort: Recipes for Breakfasts, Brownies, Cakes, Cookies, Candies, and Frozen Treats Featuring America's Favorite Spread

Makes 4 1/2 cups dip, or 2-3 servings (kidding)

Ingredients

  • 4 ounces cream cheese, softened to cool room temperature
  • 2/3 cup creamy peanut butter
  • 2 tablespoons butter, softened to cool room temperature
  • 1/2 cup confectioners' sugar
  • 1/2 cup granulated sugar
  • 1/2 cup light brown sugar, packed
  • 1 1/2 teaspoons vanilla extract
  • 1 1/2 cups old-fashioned whole rolled oats (not quick cook or instant)
  • 1/2 teaspoon salt
  • 2 to 4 tablespoons all purpose flour
  • 1/2 cup m&m candies--plain, peanut, or peanut butter
  • 1/2 cup semi-sweet chocolate chips
  • 1/3 cup white chocolate chips
  • 1/3 cup butterscotch chips

Procedure

  1. In a stand mixer fitted with the paddle attachment, cream the cream cheese, peanut butter, and butter, mixing on high speed for 3 to 4 minutes until nice and smooth and creamy. Pause to scrape down the sides of the bowl. 
  2. Add all the sugars and the vanilla, and beat for 2 to 3 minutes on medium high speed. Start slowly, then increase the speed to keep from having a sugar snowstorm. Pause to scrape down the sides of the bowl.
  3. Add the oats and salt and beat until incorporated, 1 minute on medium high speed. Stop and scrape down the sides of the bowl. Add the flour, one tablespoon at a time, mixing after each addition. Only add enough to give it your desired dip consistency.
  4. Fold in the m&m candies and all those chocolate and other chips by hand or with a couple swipes of the mixer on low speed. Serve right away, or keep chilled. Keep this tastiness in the fridge for up to a week.
Sunday
Jul282013

Sweet Book: Cake Decorating with Modeling Chocolate

Modeling chocolate book

A while ago, I received the book Cake Decorating with Modeling Chocolate in the mail as a review copy. I blame myself for taking so long to post about it, but I've been doing a ton of travel for book tour and, you know, for fun--Seattle, San Francisco, Portland, Chicago, Philadelphia, New Jersey, New York, Los Angeles, and probably several places I've neglected to mention. It's all been a lot of fun but sheesh--time for me to get back to spyin' sweet stuff. So, back to the book, which is coming at you from Kristen Coniaris of the website Wicked Goodies.

Have you ever worked with modeling chocolate? If not, it might be about time to expand your cake decorating repertoire. To me, modeling chocolate is sort of like working with modeling wax--if not in taste, at least in texture. It's a malleable substance that is easy to use in a myriad of cake decorating projects. And this book is here to teach you how to make them. I'll go ahead (spoiler!) and tell you about what I consider the most vital skill to be learned in the book:

Important tutorial

Yes! How to make a camo booty out of modeling chocolate! Everyone needs to know that, because you never know when you'll need such a cake. 

Joking aside, though, this cake is action-packed with all sorts of modeling chocolate information, lore, and projects. If you choose not to go for the camo booty (mistake!), there are also wonderful tutorials such as this:

Modeling chocolate

aren't those flowers gorgeous?

There are also plenty of tips for the beginner, including troubleshooting for if things go wrong:

Modeling chocolate

and tips on how to successfully tint your modeling chocolate like all the colors of the rainbow.

IMAG5306

And, of course, many tips that you'll learn when you buy the book.

I found myself very drawn to the more unusual tutorials in the book, such as this pig lounging in mud.

Modeling chocolate

Of course, the rainbow and unicorn-loving side of me loved tutorials such as this, for a rainbow zebra print cake:

Important tutorial

C'est fantastique!

As you can see, this book wonderfully melds education (teaching you what modeling chocolate is, and how to use it) with creativity (refer to camo booty). It's a great volume on modeling chocolate, and if you've been interested in adding this skill to your decorating repertoire, I suggest this book!

Buy it here:  Cake Decorating with Modeling Chocolate.

© Cakespy, all rights reserved. Powered by Squarespace.