Home Home Home Home Home Home Home
CakeSpy

Featured: 

My adventure at Ben & Jerry's in Vermont!


Unicorn Love: the Eating Disorder Recovery Blog


 Buy my brilliant books!

Buy my new book!

Buy my first book, too! 

CakeSpy Online Retail!


Archives
Gallery

Fantastic appliance for cake making on DHgate.com

everyrecipe.co.nz

Craftsy Writer

Entries from October 1, 2012 - October 31, 2012

Wednesday
Oct312012

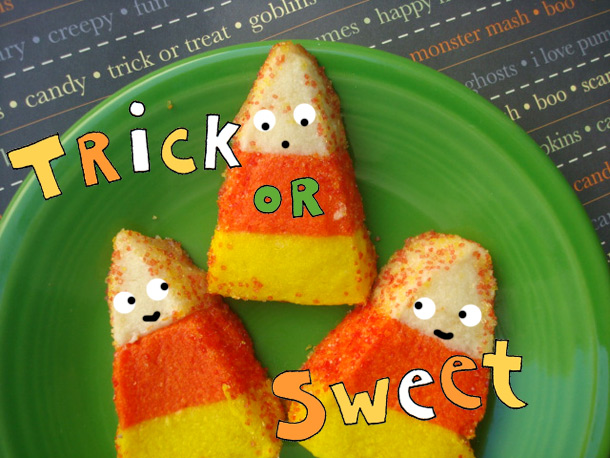
Mega Fun-Size Candy Bar

Every year around this time, I feel the need to rage against Fun-Size candy bars. I mean, come on people! There is nothing fun about a teeny-tiny candy bar.

But then, I had the most incredible idea to make the tiny bars more fun: I'd melt together about 100 of the mini bars to form a monstrous Mega Fun-Size Bar! Now that sounds like fun.

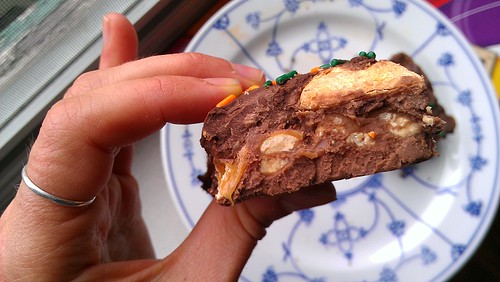
After practically breaking a five-minute mile running to the store to pick up a bushel of bags of the tiny bars, I set to work. I lined a 9x13-inch pan with a patchwork of small Snickers, Nestle Crunch, Butterfinger and Baby Ruth bars, gently heated it in the oven until it melted together, smoothed over the top with melted chocolate chips to make it a cohesive chocolatey mass, and decorated it with some festive sprinkles. I consider it a masterpiece: the different textures and flavors of the candy bars meld together in your mouth to form a treat that is mega-fun to eat. Say hello to the new fun-size.

Mega Fun-Size Bar

Makes 1 bar

Ingredients

  • 4 bags (approximately 12 ounces each) Fun-Size candy bars; about 80-90 bars
  • 2 cups (about 12 ounces) milk chocolate or semisweet morsels

Procedure

  1. Preheat the oven to 300°F. Line a 9- by 13-inch pan with aluminum foil. Unwrap all of your fun-size candy bars. This may take a while.  
  2. Line the bottom of the pan with your unwrapped candy bars. To keep things interesting, alternate the styles so that the different flavors are mixed up, forming a sweet sort of chocolate patchwork.  
  3. Once you have lined the bottom of the pan with candy bars, make a second row, aligning the candy bars perpendicular to the ones below. This will help things melt fairly evenly.  
  4. Place the pan in the oven until things start to get shiny and melty, about 10 minutes.
  5. Remove from the oven and scatter the chocolate morsels evenly on top of the candy bars. Return the pan back to the oven until the morsels have begun to melt, about 5 minutes longer.  
  6. Remove the pan from the oven and place it on a towel or heatproof surface. Very gently, so as not to burn yourself on the sides of the pan, use a butter knife or spatula to evenly smooth and spread the chocolate. You'll want to do this gently but fairly quickly.  
  7. If desired, garnish with sprinkles. Let cool completely before serving (otherwise it will be very messy). Enjoy!

IMAG2752

Tuesday
Oct302012

CakeSpy Undercover: Pinkitzel in Oklahoma City is Magical 

Pinkitzel

Cupcakes are pretty much always magical. But sometimes, they're even more magical than usual.

For instance. While in Oklahoma City, I ended up in a pizza bar at 10:30 pm - because it seemed like it was the only thing open by my hotel. But while chatting with the waitress, I learned that there were some great places to get cupcakes in town. She suggested a place called Cuppies and Joe, and another that "I forget exactly but it starts with the word 'pink'...". I googled it - Pinkitzel was the name!

Well, Cuppies and Joe, while adorable-looking, was closed on Monday and that was my only day in town so sadly that was out. But Pinkitzel was open, so over I headed! 

Pinkitzel

As for the crazy name, as their website helpfully informed,

Pinkitzel is a play on two words, pink and kitzel— which means tickle in Yiddish. So Pinkitzel means tickled pink, which is what we hope you are when you visit and eat our cupcakes, truffles, and candy. Kitzel rhymes with tickle, which makes even our crazy name fun to say!

Pinkitzel

Upon entering this store, I knew I had transcended into a magical land of cupcake-dom. It was sort of like an Alice in Wonderland cupcake world, with decorations, party rooms, cupcake products, and more. Pinkitzel

It was very stylish, though--with several Amy Atlas-would-be-proud type table setups.

And then...there it was: my book ! They had my book there!

Pinkitzel

And it was next to a pink pony. Now that's magical! And I hadn't even gotten to the cupcakes yet! But as you can imagine, I was in a very good mood by the time I got to them.

The cupcakes themselves had cute jackets. 

Pinkitzel

I got the "I Want Candy", a tricked out treat if I've ever seen one--chocolate cake, candy galore. It tasted just as amazing as it sounds. A very nice, tender cake and rich, luxuriant frosting. This was a very good cupcake. And some might balk at how the frosting was piled high, protesting "too much!". But I am not one of those people. I welcomed the challenge.

Pinkitzel

My friend got the pumpkin mousse, which had a pie-like filling and a creamy pumpkin frosting. Nom City!

Pinkitzel

Also purchased and greedily eaten: a macadamia cake truffle. It was everything that makes a truffle good: rich, cakey chocolate, so moist within its chocolate encasement. Enhanced all over by the macadamia nuts. I wish I had another dozen right now.

Pinkitzel

Pinkitzel is a highly magical place, and not just because they have my book. But...you know, it doesn't hurt.

Pinkitzel, Oklahoma City; click here for locations and more information. I visited the downtown location.

Tuesday
Oct302012

Candy Corn Muffins Recipe

I find corn muffins to be an exceedingly lovable food, especially when they contain fat kernels of corn. But since October is prime time for candy, I wondered—what might happen if I swapped real corn for candy corn?

Well, since I have now done it, I can tell you that depending on how you want to look at it, the result is either awful or awesome. Points for awful: the candy corn melts and forms a sticky, sugary well at the bottom of the muffin cup, making it sort of the muffin equivalent of a mullet: business on the top, party on the bottom. Points for awesome: well, actually, now that I think of it, pretty much the same. The candy corn definitely brings these muffins into dessert or sweet snack territory. So for those moments when the slightly gritty texture and light sweetness of a corn muffin strike you as entirely too healthy and simply won't satisfy your sweet tooth, go for the candy gold with these muffins.

Candy Corn Muffins

Makes 12

  • 1 cup (about 4 1/4 ounces) flour
  • 1 cup yellow cornmeal
  • 3 tablespoons sugar
  • 2 teaspoons baking powder
  • 1/2 teaspoon baking soda
  • 1 teaspoon salt
  • 2 eggs
  • 1 1/4 cup (about 10 ounces) milk
  • 1/3 cup (5 tablespoons) butter, melted
  • 1 cup candy corn

Procedure

  1. Adjust oven rack to middle position and preheat the oven to 400°F. Either line a muffin tin with paper liners, or generously grease each cup.  
  2. In a large bowl, combine the flour, cornmeal, sugar, baking powder, baking soda, and salt. Set aside.  
  3. In another large bowl, combine the eggs, milk, and butter. Stir well.  
  4. Using a wooden spoon, stir the wet mixture into the dry, taking care to only mix until the entire mixture is incorporated. Overmixing leads to leaden, hockey puck-like muffins.  
  5. Gently fold in the candy corn, making sure it is evenly distributed. 6 Fill each of the cups about 3/4 of the way full. You should be able to fill 12 cups.  
  6. Place the filled muffin tin on top of a cookie sheet (the candy corn may bubble and drip over the sides; this will keep your oven clean). Bake for 15 to 20 minutes, or until golden on top. Take care when removing the muffins, as the candy corn may have bubbled over and this sweet mixture is quite hot.  
  7. Transfer the pan to a wire rack and let cool completely before serving.


Friday
Oct262012

Baker's Dozen: A Batch of Sweet Links!


How to make a Halloween Cat Cake. Cute! Beyond cute! Pictured above.

Book I need, profiling mom and pop baking operations in New York!

 Oh my yum: Pumpkin Pie Crepes!

I find these cupcake pajamas very cute. 

Dessert ravioli: at least one person hates the trend.

Pumpkin pie flavored soda? Believe it.

America's Best New Cupcakes: what do you think, dear reader?

I like the idea of brownie brittle.

I love cornbread, and this is a highly classy version.

Why do people like Red Velvet so much? An interesting discussion.

In San Francisco, Wu-Tang inspired C.R.E.A.M. has a "secret menu"

Most adorable book, possibly ever: Decorating Cookies: 60+ Designs for Holidays, Celebrations & Everyday.


Wednesday
Oct242012

13 Ways to Mess with Candy Cor

Creamed Candy Corn!First things first. Last week I offered to give away a copy of my masterpiece entitled CakeSpy Presents Sweet Treats for a Sugar-Filled Life. To enter to win, I asked people which they preferred: Candy corn or Mellowcreme Pumpkins.

Well, the winner, Becky S. from Plainfield, IL chose candy corn, and says that crazy as it sounds she eats each piece color by color.

Congratulations Becky!

And this got me thinking how over the years I have messed with candy corn in quite a few ways. Here's a roundup to give you some ideas for how to get downright mischievous with maize--of the sugary sort. Enjoy!

Candy Corn Nanaimo Bars.

Put it all in a pie crust with other Halloween candy and make Leftover Halloween Candy Pie.

Enjoy candy corn in the morning with Candy Corn Muffins.

Make popcorn balls.

Deep-fry it.


Make some tricked-out Krispie Treats!

Celebrate it by making Candy Corn shaped cookies!

Creamed Candy Corn (pictured top)

Make tricolor cookies.


Candy Corn Upside-Down Cake.


Make this delicious Candy Corn Boston Cream Pie recipe.

Of course, you could always also make your OWN candy corn! The recipe is in my book.

Tuesday
Oct232012

Candy Corn Boston Cream Pie

Candy Corn boston cream pie

Happy National Cream Pie Day!

Wait, you did know it was National Boston Cream Pie Day, didn't you? 

Well, it's ok, because even if you didn't, I did. And I also had the foresight to notice that October 23 is pretty darned close to Halloween, and so in an effort of Seasonal Fusion, I'd like to present the famous pie all gussied up for the holiday! That's right. Candy Corn Boston Cream Pie! 

Boston cream pie

This recipe is pretty classic, but with a heaping handful of candy corn in every step for added awesome; also, I top mine with a ganache because I really didn't have the time to do a homemade chocolate fondant (and also, to be quite honest, I like the ganache better. It's a lot creamier. C.R.E.A.M. Yes!

Adding Candy Corn isn't necessary to make this Boston Cream Pie delicious, but it adds a fun lowbrow turn to a fancy-ish dessert. Plus, it's fun and sweet. VERY sweet.

Boston cream pie

Candy Corn Boston Cream Pie

Makes about 8 servings

For the Cake
  • 7 large eggs, separated
  • 1 cup sugar, divided
  • 1 cup all-purpose flour
  • 2 tablespoons butter, melted
  • 1 cup candy corn (divided; use 1/2 cup for the cake, 1/2 cup or to taste for garnish)
  • Pastry cream (recipe follows)
  • Glaze (recipe follows)

Procedure

  1. Preheat the oven to 350 degrees F. Grease and flour the bottom and sides of a 10-inch springform pan.
  2. Carefully separate the eggs, putting the whites and the yolks in a separate large bowls; make sure there are no specks of yolk in the egg whites (the whites won't whip properly if there are bits of yolk mixed in). Add ½ cup of sugar to each bowl.
  3. In the bowl of an electric mixer fitted with the whisk attachment, beat the egg whites on medium-high speed until they form stiff peaks; set aside. Using an electric mixer or by hand, beat the egg yolks until they are thick and pale yellow in color. Stir about one quarter of the whites in to the yolks to lighten the batter, then gently fold the rest of the whites into the yolk mixture.
  4. Whisk the flour into the egg mixture using a large balloon-type whisk, working carefully to minimize the deflation of the batter. Then, still using a whisk, stir in the melted butter. Fold in the candy corn. Pour the batter into the prepared cake pan, filling it about ¾ of the way, and bake for 15 to 20 minutes, or until a toothpick comes out clean when it's inserted into the center of the cake. Let the cake cool in the pan for about one-half hour, then remove it from the pan and transfer to a wire rack to cool completely.
  5. To assemble the cake, using a long serrated knife, slice the cake horizontally into 2 equal layers. Place one of the cake layers, cut side up, on top of a sheet of parchment paper (this will catch any drips, and allow easy cleanup before transferring it to a serving platter). Spoon the pastry cream onto the center of the bottom layer, leaving an inch and a half uncovered on all sides—the weight of the top cake layer will spread it to the edges. 
  6. Place the second layer of cake on top of the pastry cream. Using a ladle, spoon the still slightly warm chocolate glaze on the top of the cake, allowing it to gently drip over the sides of the cake. Gently press the candy corn around the sides or on the top. Serve immediately at room temperature, or refrigerate for up to 2 days, well wrapped, and bring to a cool temperature before serving. Boston cream pie

Pastry cream

Ingredients

  • 1 tablespoon butter
  • 2 cups milk (whole or 2%)
  • 2 cups heavy cream
  • ½ cup sugar
  • 3½ tablespoons cornstarch
  • 6 large eggs
  • 1 cup candy corn

Procedure

  1. In a medium saucepan over medium-high heat, combine the butter, milk, and cream. Bring to a simmer, then remove from heat.
  2. In a medium bowl, whisk the sugar and cornstarch until combined. Add the eggs, beating until the mixture is light yellow and form ribbons when you lift the whisk, about five minutes.
  3. Slowly pour the milk mixture into the egg mixture, whisking until completely combined.
  4. Pour the mixture into a medium-size pot and place over medium heat. Cook, whisking constantly to keep the eggs from scrambling, until the mixture begins bubbling. Continue whisking until the mixture has thickened to the consistency of a pudding; this will happen shortly after it comes to a boil, about 15 minutes. If any bits of egg have cooked, forming lumps, strain the mixture through a mesh sieve.
  5. Transfer to a bowl and fold in the candy corn. They will "bleed", giving the cream a light orange color. Press plastic wrap directly onto the surface of the custard, to keep a skin from forming. Let cool completely in the refrigerator before using.

Chocolate Glaze

  • 1 cup heavy cream
  • 8 ounces semisweet chocolate, finely chopped

In a medium saucepan over medium heat, bring the cream to a boil. Place the chocolate in a medium bowl; pour the hot cream over chocolate, stirring until chocolate is melted and well combined. Set aside to cool slightly, about 10 minutes.

Tuesday
Oct232012

Sweet Art: SpyMom and CakeSpy say Happy Halloween

Art by me and SpyMom

To make you smile, both me and my mom (you know her as SpyMom, but professionally she's Margie Moore, children's book illustrator) made some Halloween art.

Interestingly, although our styles are quite different, we use pretty much the same media: micron pens and watercolor. I use vellum bristol board; she uses watercolor paper. I think that's the biggest difference! It just goes to show how much possibility there can be, even with the same materials. 

That's all. Smile! Enjoy.

Monday
Oct222012

Baker's Dozen: A Batch of Sweet Links!

Halloween Treats!

You look like you could use a candy corn Nanaimo bar.

Pop-tarts commercial, circa 1964.

Yumsies: pumpkin pound cake. Maple Glaze.

I like this: Mason Jar Key Lime Pie Cupcakes.

Interesting: developing a recipe, and sweet potato brulee.

Homemade Nutella Butterfingers. Be still my beating heart!

Helpful etiquette: how to properly eat dessert.

Pumpkin bread. stuffed with cookie dough. Oh yeah.

Looking for a world of dessert? Look no further.

I don't know why, but this made me laugh: how to eat a doughnut.

A brief history of Pumpkin pie.

Caramel fudge swirls.

Pumpkin pie pops: cute and tasty.

Eat like a queen: Diamond Jubilee recipes.

A truly beautiful love letter to doughnuts.

Monday
Oct222012

Lemon Meringue Pie in a Chocolate Cookie Crust

Pie

Here's the thing about Lemon Meringue Pie. It's beautiful. It's like a skyscraper of a pie. A pie-scraper? It's an architectural feat of a dessert, and it even has clouds on top. It looks very pretty in diner cases. 

But when it comes to eating it, I so often find it a disappointment. The lemon part is way too sweet, the meringue part just has a weird texture, and the crust is gluey. It's like eating a slice of homework, that's about how much joy it gives me.

Chocolate Cupcake and Lemon Meringue Pie

But while working on my upcoming book (to be released in spring of 2013, but in the meantime, please buy book #1, CakeSpy Presents Sweet Treats for a Sugar-Filled Life), one of the recipes I worked on and researched was lemon meringue pie. It has a very long and interesting story, involving Quakers, Italians, watchmaker's wives, the Parker House Hotel, and diners. But you'll have to buy the book for that. Right now we're talking about the pie itself.

Lemon meringue pie in a chocolate cookie crust

In baking this pie multiple times, I had a chance to experiment a little bit with it, and had one version that I tried mostly as a lark, because I had no regular pie crust on hand and didn't feel like making it. I thought, I wonder what the pie would taste like made with a cookie crumb crust? And then, even further, I thought, why not try it with a chocolate cookie crumb crust? This thought was likely brought on because I had about a dozen whoopie pie cookie shells which were slowly and gently becoming stale on my counter.

Well, I figured at least it would be interesting. 

So I crumbled up the cookies, mixed them with butter, and baked the crust until crispy. Then I topped with the usual lemon custard and meringue topping and baked it up. I thought that visually, it was quite pretty.

Lemon meringue pie in a chocolate cookie crust

I was genuinely surprised by the end result. The chocolate crust gave the pie a certain depth--a dark contrast to the sweet, tart lemon. It was intriguing, and I enjoyed my slice thoroughly.

Don't get me wrong, if you are not a lemon meringue lover, this will probably not turn you around. But if you do like lemon meringue pie, this is a solid recipe, and the chocolate crust is something to try. 

Note: this picture was taken the morning after I baked it, and some of the condensation made little drips on top. Let it cool and dry completely before refrigerating!

Lemon Meringue Pie in a Chocolate Cookie Crust

For the crust:

  • 2 cups' worth of crumbled chocolate cookies or wafers (I used unfilled, crumbled whoopie pie cookies)
  • 3 tablespoons butter, melted

For the pie filling

  • 4 egg yolks
  • 1½ cups sugar
  • ⅓ cup cornstarch
  • 1½ cups water
  • 3 tablespoons butter
  • 2 teaspoons finely grated lemon zest
  • ½ cup freshly squeezed lemon juice
  • 2-3 drops yellow food coloring (optional)
  • 3 cups Meringue Topping

Meringue Topping

  • 3 egg whites
  • ¼ teaspoon cream of tartar
  • 6 tablespoons sugar
  • ½ teaspoon vanilla extract

Procedure

  1. Preheat the oven temperature to 400 degrees F. 
  2. Prepare the crust. In a large bowl, combine the crumbled cookies with the melted butter. Mix by hand until it's incorporated. Press into a well greased pie plate. 
  3. Bake for 10-15 minutes or until crispy. Let cool completely before filling.
  4. To make the filling, in a small bowl, beat the egg yolks with a fork. In a 2-quart saucepan, mix the sugar and cornstarch; gradually stir in water. Cook over medium heat, stirring constantly, until the mixture comes to a boil. Continue stirring for 1 minute, until the mixture thickens.
  5. Immediately pour about half of the hot mixture into the egg yolks; when well combined, pour this mixture back into the saucepan. Boil and stir for 2 minutes; remove from heat. Add the butter, lemon zest, lemon juice, and food coloring. Stir until the butter is melted and everything is well combined. Pour the hot filling into the pie crust.
  6. In a very clean medium-size bowl, beat the egg whites and cream of tartar with an electric mixer on high speed until foamy. Add the sugar 1 tablespoon at a time and continue beating until stiff and glossy. Beat in the vanilla.
  7. Spoon the meringue onto the filling. Spread it evenly over the filling, carefully sealing the meringue to the edges of the crust to prevent shrinking or weeping. Using a knife, form the top meringue into little peaks (think punk hairdo) or make swirls on the top for a pretty finish.
  8. Bake for 8 to 12 minutes, or until the meringue is light brown. Set the pie on a wire cooling rack and allow to cool in a draft-free place for about 2 hours. Cover and refrigerate the cooled pie until serving. Store any leftover pie in the refrigerator.
Sunday
Oct212012

Raising the Bar: Pumpkin Nutella Bars Recipe

Pumpkin nutella bars

I received this message from CakeSpy reader Jill S., who is currently ranking high on my list of favorite people:

I have come up with a pretty awesome recipe that I wanted to share with you! It's pumpkin baking season, and I love pumpkin, but I adore Nutella -- and I wanted a way to combine the two of them. I've seen pumpkin recipes with Nutella fillings and toppings, and I like to spread it on pumpkin bread, but I never saw anything that actually stirred them together as an ingredient. And then I made it all fancy, too. ;) So, here is my invention: Pumpkin Nutella Bars! I hope you enjoy!

Pumpkin nutella bars

Jill, I do enjoy. And you can, too! Here's the recipe.

Pumpkin Nutella Bars

Pumpkin nutella bars

Crust

  • 1/2 cup toasted, salted pumpkin seeds, crushed in a food processor
  • One 8.8 oz package Biscoff cookies, crushed in a food processor
  • ½ cup butter, melted

Procedure: Press into a 9x13-inch pan. Bake 12-13 minutes at 350 degrees F.

Pumpkin nutella bars

Filling

  • One 15 oz. can pumpkin + 1 Tbsp cinnamon + 1 tsp ginger + 1 tsp allspice + fresh grated nutmeg to taste (all of these to taste, really)
  • 1/4 cup brown sugar
  • 12 oz Nutella

Procedure: Cook pumpkin, sugar, and spices on low heat 30-40 minutes until dark orange and reduced to about 60-70% of original volume. (This is pumpkin butter, and it tastes great on its own as a spread or topping!) When slightly cooled, stir in Nutella Spread cooled filling mixture over cooled crust, refrigerate while you make the ganache.

Ganache

  • 2/3 cup heavy cream
  • 7-8 ounces dark chocolate

Procedure: Heat cream to a simmer, stir in chocolate and let stand. When the chocolate has melted, stir and allow to cool. Spread over the filling and sprinkle with topping.

Pumpkin nutella bars

Topping

  • 1 cup chopped toasted hazelnuts
  • 2 tbsp toasted salted pumpkin seeds

Procedure: Sprinkle topping over ganache; refrigerate for at least an hour before slicing into squares.

Pumpkin nutella bars Now, eat them all!


© Cakespy, all rights reserved. Powered by Squarespace.