Home Home Home Home Home Home Home
CakeSpy

Featured: 

My adventure at Ben & Jerry's in Vermont!


Unicorn Love: the Eating Disorder Recovery Blog


 Buy my brilliant books!

Buy my new book!

Buy my first book, too! 

CakeSpy Online Retail!


Archives
Gallery

Fantastic appliance for cake making on DHgate.com

everyrecipe.co.nz

Craftsy Writer

Entries from October 1, 2012 - October 31, 2012

Saturday
Oct202012

Cuppie the Cupcake Tours Bakerella's New Book

Cake Pops book

Recently, I received a review copy of Bakerella's new book, Cake Pops Holidays. It's a follow up to her everyday classic, Cake Pops: Tips, Tricks, and Recipes for More Than 40 Irresistible Mini Treats. In my opinion, both are amazing books and you should buy at least a baker's dozen of them. 

Now, my opinion is biased because I like to count Miss 'Rella as not only a writer and confection maker who inspires me, but also as a friend. We've had some sweet times together over the years that we've both been in the baking and sweets world. In particular, it was fun to have a back and forth "sweet war" with her wherein I thanked her for this loving video, she thanked me, I thanked her, etc. 

This little Cuppie caused mischief

So I asked my esteemed cupcake, Cuppie, to check out the book and report on his sweet adventures touring the cake pops found in the book. Oh, and btw, if any of the cake pop pictures capture your attention...you can learn how to make them! In the book, that is. But I digress. Let's get adventuring. 

Working on some art

First, he encountered the wreath pops. He found them quite well dressed.

Nice tie

Next, he found Santa! He thought he might play it cool and get on Santa's good side.

Hey Santa

Next, he encountered some tree pops complete with presents. He got a little bratty for a moment.

Present

He cheered himself up by getting dressed in a cute outfit. But unbelievably, he wore the same thing as one of Bakerella's cake pop characters!

Cat Cupcake pops

He also found a little magic. Can you still hear the sleigh bells?

Cupcake reading

Finally, how cute are these little holiday snow globe pops?

Cake it up!

So, I'd say that Cuppie had a fantastic adventure with this book. In case you didn't get the message: 

Buy this book now!

Buy it here: Cake Pops Holidays. For more awesome, also visit the Bakerella website!

Friday
Oct192012

Baker's Dozen: A Batch of Sweet Links!

Cakespy Snackdown

Win a book!

Yum: Halloween cookie box.

Now that's adorable: pretzels decorated to look like pumpkins!

Book I want: Cook's Country Blue Ribbon Desserts.

Kandybar Cakes!

Sweet recipe with a fascinating backstory: 1920s Lemon Pound Cake.

Just received a review copy of this book and can't wait to "dig in": Raising the Bar: The Future of Fine Chocolate

Sweet story: I loved learning more about Philadelphia's Brown Betty Dessert Boutique.

Valuable life skills: how to throw a cookie decorating party for kids!

Also cute for kids (or anyone): Lego Cake!

This pumpkin cake makes me want to eat it all.

Great interview with Tom Douglas about the newly released The Dahlia Bakery Cookbook: Sweetness in Seattle.

OMG! I never even thought about testing my baking powder before.

Thursday
Oct182012

Sweet Potato Pecan Pound Cake With Maple Buttercream

Sweet potato pecan cake

I have a problem.

The problem is that this cake is so delicious that I want to die. And I want the cause of my death to be "eating 200 pounds of this cake". It is seriously that good.

Of course, if you don't like sweet potato or maple (or joy) you should probably not bother with this cake. But if you do like these things, then you're in for a treat. A rich, buttery, spicy pound cake, decadently moist from the sweet potato and lightly crunchy from the addition of toasted pecans would probably be just fine all on its own or with a dusting of confectioners' sugar, but let's be honest: it's even better with buttercream. This simple maple buttercream is a joy to eat, subtle and mellowly sweet. Add a few more toasted pecans on top and you'll be joining me in "want to die a sweet autumn binge eating death" territory.

Here are a few process shots, and then the recipe. Enjoy.

Sweet potato pecan cake

Here is the batter being made. Um, the recipe doesn't require that many eggs. I was doing other stuff too.

Sweet potato pecan cake

Here's the first delicious slather of buttercream meeting cake.

Sweet potato pecan cake

Here's the batter in the pan.

Here's the recipe.

Sweet Potato Pecan Pound Cake with Maple Buttercream

Makes 2 8-inch cakes, 24 cupcakes, or one 2-layer cake

  • 3 cups all-purpose flour
  • 1 teaspoon baking powder
  • 1/2 teaspoon baking soda
  • 1/2 teaspoon salt
  • 3 teaspoons ground cinnamon
  • 1 teaspoon ground nutmeg
  • 1 cup unsalted butter, softened
  • 1 cup granulated sugar
  • 1 cup light brown sugar, packed
  • 4 large eggs
  • 2 cups canned sweet potato pie filling
  • 1/3 cup milk
  • 1 cup toasted pecans, coarsely chopped

Frosting

  • 2 sticks (1 cup) butter, softened
  • 4 cups confectioners’ sugar
  • 2 tablespoons pure maple syrup
  • 1 teaspoon vanilla
  • more toasted pecans, for garnish

Procedure


  1. Heat oven to 350°. Line two 8-inch cake pans with parchment paper, and grease generously. You can also bake these as cupcakes, but you'll reduce the baking time later.
  2. In a medium bowl, combine the flour, baking powder, soda, salt, and spices; set aside.
  3. Cream the butter with sugars until light and fluffy, 3 to 5 minutes. Beat in eggs, one at a time, scraping down the sides of the bowl with a rubber spatula with each addition and mixing well. Beat in the vanilla and sweet potato until blended.
  4. Stir the dry ingredients into the batter in 2-3 increments,  alternating with the milk, until blended. Fold in the nuts.
  5. Spoon the batter into the prepared cake pans.
  6. Bake for 40-50 minutes, or until a cake tester or toothpick inserted in the center comes out clean. 
  7. Cool in the pan for about 15 minutes before turning the cakes out on to wire racks to cool completely before frosting.
  8. Time to make the frosting. In a stand mixer fitted with the paddle attachment, cream the butter and maple syrup for 3 to 5 minutes, until smooth. Stir in the vanilla. Add the confectioners’ sugar, cup by cup, until your desired spreading consistency has been reached. Scrape down the sides of the bowl as needed with a rubber spatula. If the frosting becomes too stiff, stir in a small quantity of milk to thin. 
  9. Frost the cakes generously, and garnish with more toasted pecans and cinnamon and nutmeg.


Wednesday
Oct172012

Sweet Book: Primrose Bakery Book

Primrose Bakery Book Recently, I received a review copy for a cute book called The Primrose Bakery Book. After taking a little look-see, here are some things I am excited about checking out further:

A page of tips on how to properly layer and ice cakes:Primrose Bakery Book

Severe tastiness ahead with chocolate and marshmallow cupcakes:Primrose Bakery Book


SWEET! Lamingtons:

Primrose Bakery Book

Exciting and exotic rose biscuits: Primrose Bakery Book

OMG How cute: "sausage dog" biscuits! Primrose Bakery Book

I learned something new: there is something sweet in existence called Milo Crunch! Primrose Bakery Book

and perhaps even the chance to learn something new! Primrose Bakery Book

Cute! Buy it here: The Primrose Bakery Book

Tuesday
Oct162012

Candy Corn or Mellowcreme Pumpkins? And, win my book!

Cakespy Snackdown

It's a simple question, really. Which do you prefer: Candy corn, or Mellowcreme Pumpkins?

Weigh in by commenting on this post or on my facebook page, and you could win a *signed* copy of my amazing book, CakeSpy Presents Sweet Treats for a Sugar-Filled Life. There's a recipe for homemade candy corn in the book, by the way. 

You don't have to leave a reason, but I would be interested in hearing it if you're so inclined.

This giveaway will be open for one week; I will close it for entries on Tuesday, October 23rd at 5pm EST. Due to high shipping rates overseas, I am only able to offer this giveaway to residents of US and Canada. If you leave a comment on this site, don't panic if it doesn't show up right away: comment moderation is enabled. Good luck!

Tuesday
Oct162012

Trick or Sweet: Candy Corn Upside Down Cake

Recently, I asked my favorite Pineapple Upside-Down Cake recipe a serious question: "What would you like to be for Halloween this year?".

After considering various options, such as Doughnut Upside-Down Cake, Tarte Tatin, and various other options for the inverted dessert, we decided to go with something festive: Candy Corn Upside-Down Cake.

It was simple enough to do: just substitute candy corn for the pineapple requested in the original recipe. But what happened when I baked it up was a surprise: the brown sugar and butter topping fused with the melted candy corn to form some sort of unholy, monstrous Halloween caramel-sugar topping, which dripped back into the cake when inverted. The result? The entire buttery cake tasted like it had been basted in candy corn. And if you're a candy corn lover, that might just be a beautiful thing.

Even Unicorn agrees!

Candy Corn Upside Down Cake

9 servings

  • 1/3 cup (about 5 tablespoons) butter, plus 1/2 cup (1 stick) butter, softened and divided
  • 2/3 cup (about 6 ounces) packed light brown sugar
  • 1 1/2 cups candy corn
  • 1 1/2 cups (7 1/2 ounces) all purpose flour
  • 1 teaspoon baking powder
  • 1/2 teaspoon salt
  • 1 cup (about 7 ounces) granulated sugar
  • 2 large eggs
  • 3/4 cup milk (whole or 2 percent)

Procedure

  1. Preheat the oven to 350°F. Place the butter in a 9-inch square baking pan, and set it in the oven until melted (it is fine to do this as the oven preheats). Remove the pan from the oven and gently tilt so that the butter coats the entire bottom of the pan. Sprinkle brown sugar evenly over the butter. Sprinkle candy corn evenly on top.
  2. In a medium bowl, sift together the flour, baking powder, and salt.  
  3. In the bowl of a stand mixer fitted with the paddle attachment, cream the butter and granulated sugar on medium speed until light and fluffy, 3 to 5 minutes. Add the eggs, mixing until incorporated. Add the flour mixture alternately with the milk, in 2 to 3 additions, pausing to scrape down the sides of the bowl with each addition. Beat on low speed until fully incorporated. Pour the batter into the pan, taking care not to dislodge the carefully planted candy corn.  
  4. Set a cookie tray under the cake in the oven, in case the candy bubbles or drips. Bake until a toothpick inserted in the center comes out mostly clean, 45 to 50 minutes.  
  5. Immediately place a heatproof serving plate upside down over the pan; in one swift, sure motion, flip the plate and pan over so that the cake is now on the plate. Leave the pan in place for several minutes so the gooey mixture can drip down over the cake. After the dripping is done, lift off the pan. Serve still slightly warm. Store, loosely covered, at room temperature.
Monday
Oct152012

Unicorn Doughnuts

Unicorn doughnuts

This morning, I awoke knowing exactly what I needed, above and beyond any other thing on earth.
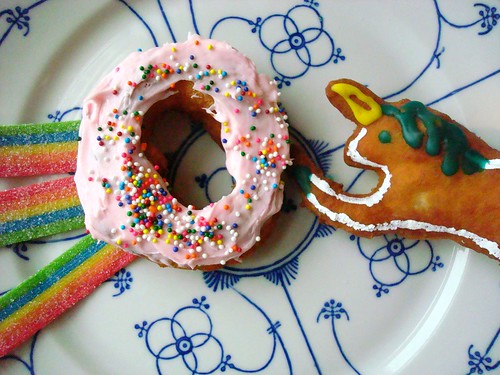
Unicorn Doughnuts.

Good rainbow-colored gravy, how could I make this miracle happen, I wondered?

Well, I guess it could start with making doughnuts. I made up a batch of dough. You can find the recipe below. Technically, it is for "regular" doughnuts. That means you could make round doughnuts. Unicorn doughnuts

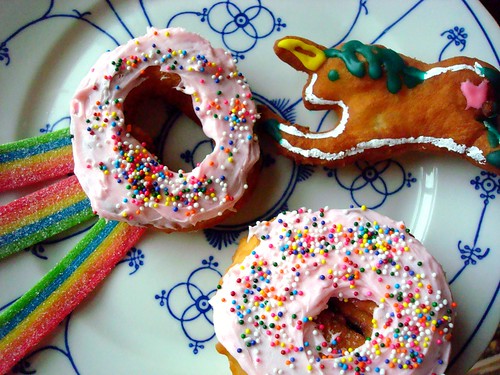
Or you could even free-form and drop dollops of dough into the oil to make a homemade funnel cake! Funnel cake

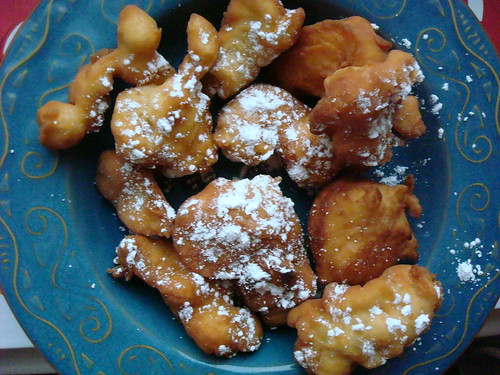
But right now, we are talking about unicorn doughnuts.

Now, I have learned through trial and error that this dough is much easier to work with if you let it chill for a good long while. So I let it chill for about 3 hours total. 

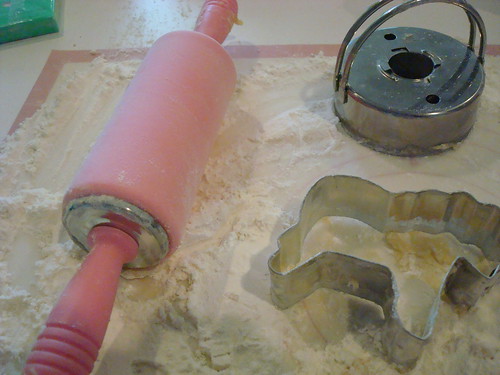
And when it came time to roll out the dough, I brought out my secret weapon: the unicorn cookie cutter. It made fast friends with doughnut cutter.

Unicorn Doughnuts

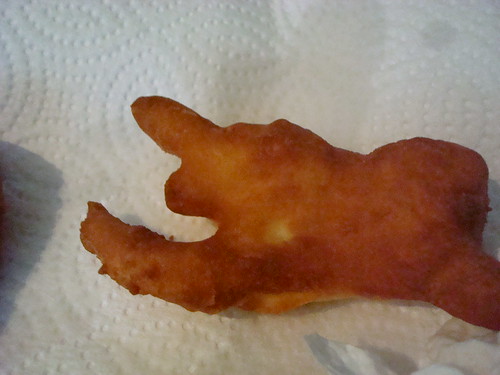
Now, after my first try cutting out a unicorn, I can see why unicorn doughnuts are not in regular rotation. It's very hard to get a clean cut and then transfer it to the frying oil. They come out mangled. Booooo. 

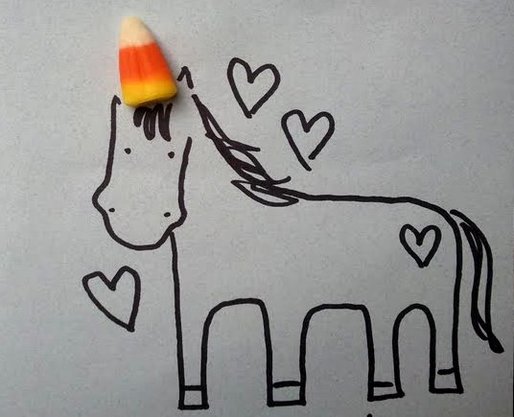
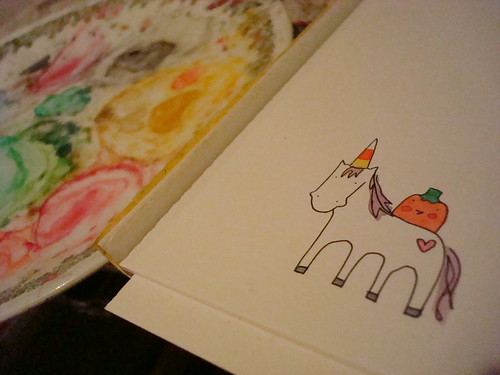
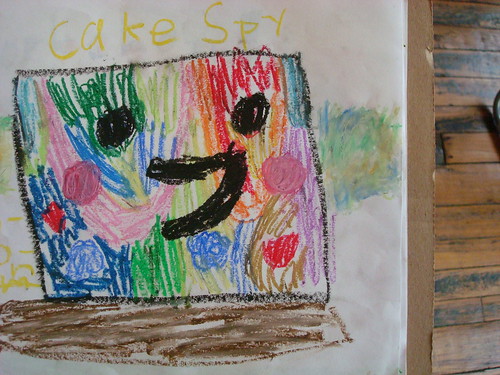
But I didn't get discouraged. For inspiration I looked at this drawing done by a 6-year old friend, which reminded me that my website is capable of magic!

Magical

And so I got back to work. And here's what ultimately worked best. 

I got a small piece of parchment paper, and sprinkled flour on it.

I rolled out a tiny piece of dough to about 1/4 inch thick on top of it. Rolling out tiny dough is cuter with a tiny rolling pin, btw.

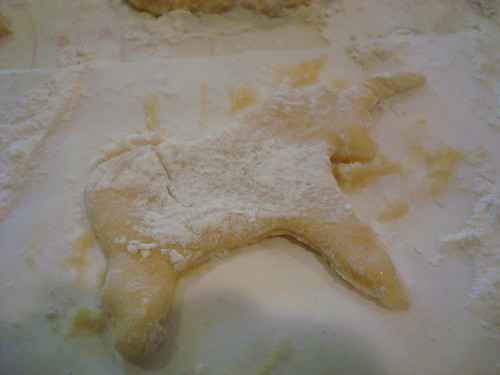
I then floured the cookie cutter and imprinted the dough. I delicately removed the dough on the sides of it before lifting the cutter.

I then put this sheet with the unicorn in the freezer. Not for long, just for maybe 15 minutes. While the oil heated.

Unicorn Doughnut cutout

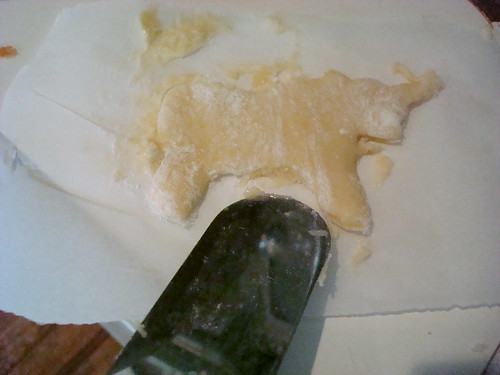
When the oil was ready, I removed the unicorns from the freezer, and delicately extracted them from the parchment using an offset frosting spatula. I dropped them into the oil.
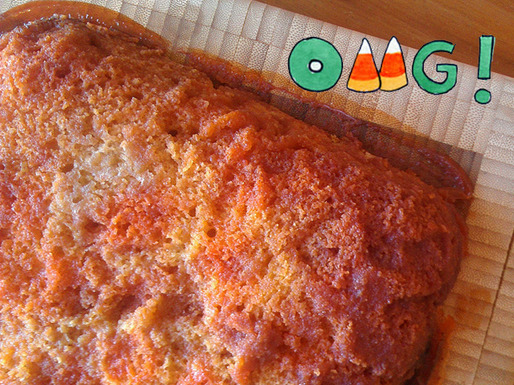
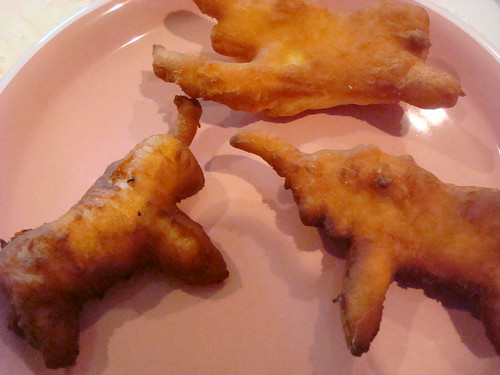
Unicorn Doughnuts

And...it worked!

Fry, unicorn doughnut!

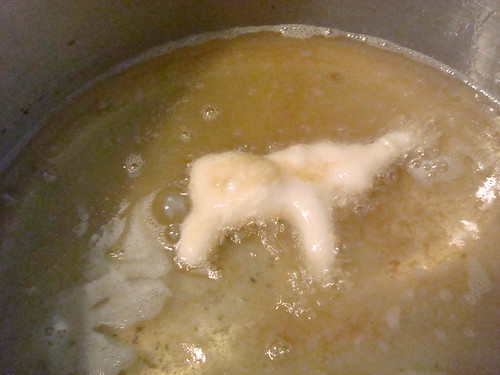
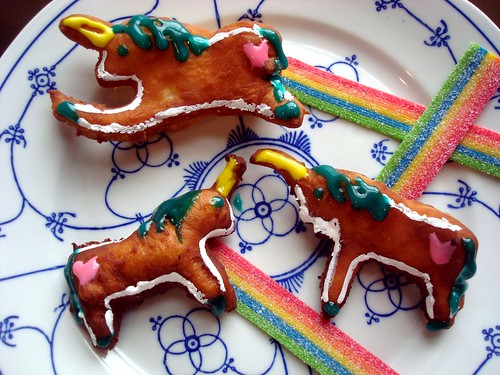
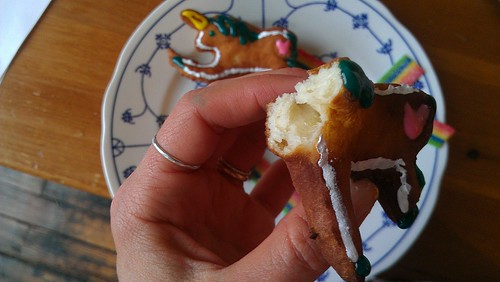
Some of them get a little mangly but it's ok. Because once you decorate them, what looks like a weirdly long leg...becomes a prancy leg! 

Unicorn Doughnuts Unicorn doughnuts

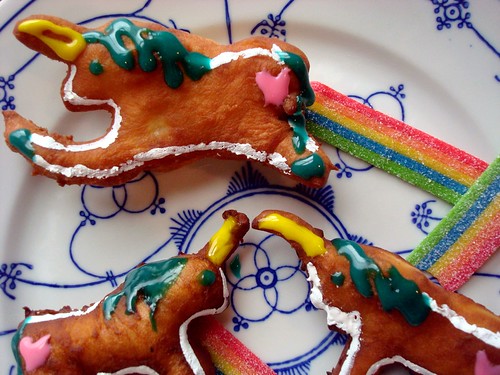
Decorating them like I did is not strictly necessary, but I thought it was fun. I used some writing icing, and applied the white part using a small brush (I won't be using that one to paint again!). 

Homemade Doughnuts

Unicorn doughnuts

Yum.

Unicorn doughnuts

Here's the recipe.

Unicorn Doughnuts

Makes about 20 

Ingredients

  • 3 3/4 cups flour
  • 2 teaspoons baking powder
  • 1/4 teaspoon salt
  • 2/3 cup sour cream
  • 1/3 cup buttermilk
  • 3/4 cup sugar
  • 3 large eggs
  • 1 teaspoon vanilla extract
  • 6 to 8 cups vegetable/canola oil, for deep frying
  • various frosting, writing icing, or just confectioners' sugar, for finishing off
  • Unicorn Cookie Cutter (like this one)

Procedure

  1. In a large bowl, sift together the flour, baking powder, and salt. Set aside.
  2. In another large bowl, whisk the sour cream, buttermilk, and sugar, until smooth and combined.
  3. Beat in the eggs and vanilla until just combined. If needed, scrape the sides of the bowl with a rubber spatula.
  4. In 2-3 increments, add the flour mixture to this wet mixture, stirring with a wooden spoon until just combined. The dough will be quite sticky. Refrigerate it for about 2 hours, or until completely chilled.
  5. Turn the dough on to a very generously floured surface. Knead for 2 minutes, or until the dough is smooth and elastic. Return the dough to the fridge for another hour. This will make certain that the dough does what you want later.
  6. Assemble several sheets of parchment paper (one or two unicorns per sheet for easy handling). Roll out to a 1/2 inch thickness on top of the floured parchment paper. Using a floured cutter, imprint the dough and remove excess dough around it (this helps keep the perfect unicorn shape). Remove the cutter and clean up dough as needed. Put the dough, right on the parchment paper, in the freezer. Repeat with the remaining dough.
  7. In a heavy medium pot or a deep-fat fryer, put enough oil to achieve a depth of about 4 inches; heat it to 375 degrees F. Gently transfer the unicorns from the parchment paper to the oil, removing from the paper using a spatula. Fry the unicorns, 2-3 at a time, until golden brown on each side (less than 3 minutes). Remove with a slotted spoon and place on paper towels to blot excess oil. Repeat with remaining doughnuts.
  8. You're going to have to wait til the doughnuts are cool to decorate them like I did, but if you're greedy, just dust them with confectioners' sugar and eat them while warm. Either way, these magical doughnuts are best consumed the same day they're made.
Sunday
Oct142012

Cocoa Krispies Treats with Candy Corn

Cocoa Krispies Treats with Candy Corn

Guess what I did this weekend?

If you guessed "um, make cereal treats that are tricked-out with the magic of cocoa and candy corn"...well, you are correct.

I made some crispy cereal treats. They are inspired by Rice Krispies Treats (ever heard of 'em?) but a bit more magical. That is for a few reasons.

Cocoa Krispies Treats with Candy Corn

1. They have roughly double the butter.

2. Mine are made with Cocoa Krispies, not regular Rice Krispies. 

3. They get a boost of sweetness from the not-so-secret Halloween ingredient called Candy Corn.

How do these tricked-out treats taste? Like magic, fool! As magic as this illustration I worked on after making the treats.

Sweet! They have all of the good attributes of a classic Krispie treat, but are richer and more interesting than the original. Plus, the candy corn makes them very cute, which is important when dressing up for Halloween. Speaking of Halloween, have you ever noticed that costumes all seem to be either cute, clever, or kind of slutty? Well, these treats fit the former two categories. Cos seriously, I just can't place Rice Krispies Treats in the latter category. I wonder if anyone ever has?


Cocoa Krispies Treats with Candy Corn

But I digress. No more talking about sexy Krispie Treats. We are now talking about how you get these buttery delicious ones out of your dreams and into your mouth. Wait, they just did start sounding sexy...

Cocoa Krispies Treats with Candy Corn

Makes 24

  • 1/2 cup (1 stick) butter
  • 1 bag (10 ounces or so) Marshmallows - I used jumbo but you can use Mini too
  • 7 cups Cocoa Krispies cereal
  • pinch of salt
  • 1 cup Candy corn
  • Generously grease (go ahead, line it with parchment too) a 9x13-inch pan. Set aside.

Procedure

  1. In a large saucepan over low heat, melt the butter. Add the marshmallows and stir frequently until they're melted.
  2. Remove from heat and stir in the cereal. Stir with a wooden spoon until fully coated. Add that pinch of salt.
  3. Cereal
  4. Add the candy corn, stirring until it's evenly distributed. Turn the mixture out into the prepared pan, and smooth it evenly. Using a piece of waxed paper, flatten the treats so that they are pressed nice and tight in the dish. Let sit for about 2 hours or until they're fully set. Use a sharp knife to cut them when you're ready, and clean it between cuts to keep everything from sticking.

You're welcome.

Sunday
Oct142012

Great Gifts: Red Envelope Gift Program

Cakespy Hoodie

So, as part of the October Great Gift Program for Red Envelope, they gave me a complimentary gift card to let me shop the site so I could honestly review something here. You know, kind of the heads up on products so you can read about it here if you decide you want to shop there. If you want to, here's the link.

Here's what I bought. First, I got the Personalized Hoodie. They had an XS, which made me happy because that is my size. Yeah! I got it personalized "CAKESPY". It's pictured above. Why they didn't divide it into "cake" and "spy" on either side of the zipper I don't know, but I still look awfully cute in it. I could see many gifting opportunities for something like this!

I also got the s'mores kit, which is a very fun thing to have on hand. I haven't broken into it yet, but it is really nicely packaged and a nice gift item for the price. 

Also - and I am just saying - they have JUMBO GUMMI BEARS.


Overall, I found it a pleasant shopping experience.

There are many more gift ideas too; click here to shop.  

Friday
Oct122012

Britishly Delicious: Battenberg Cupcakes

Battenberg Cupcakes

CakeSpy Note: This is a guest post from Nicola Cappin of Sunningdale Cakes.

The Americans have their cupcakes, the French their macarons, but the British are just plain bonkers for Battenberg.

Batten-what?! You ask? Battenberg is a tea time treat that like many other British cakes has risen in popularity in recent months.

In the past couple of years the country has gone positively baking mad, thanks in part to a reality tv show called The Great British Bake Off, in which some of the country’s top amateur bakers battle it off baking traditional English goods such as the pink and yellow chequered cake called Battenberg.

Battenberg Cake

The whole concept of anything British has become much more popular over here in the UK in the last two years. Unlike the Americans and French, our national pride has never been particularly strong. But throw in a Royal Wedding, the Queen’s Golden Jubilee and a rather spectacular summer of Olympics and Paralympics and we are suddenly all very proud to be British again!

Ask any Briton over the age of about 70 what tea time is, and they will probably tell you its when they sit down at 4pm to a cup of tea (emphasis on the cup, not a mug) and a slice of cake and a biscuit.

Tea Time

The original custom is generally believed to be credited to Anna, the 7th Duchess of Bedford in the early 19th century, who needed something to stave off the afternoon hunger pangs between lunch and supper.

Queen Victoria favoured a slice of sponge with her afternoon cup of tea. And so, the Victoria Sponge was name. It’s still one of the most popular baked goods here and its a relatively simple two layer sponge, sandwiched with lashings of whipped double cream and raspberry jam and topped with a dusting of icing sugar

If you want to try your hand at it - check out this BBC Good Food recipe.

But, Battenberg is one of my favourites to go with my afternoon cup of tea. The rectangular cake is made up of strips of almond sponge - some tinted with pink food colouring in a chequered pattern, sandwiched together with apricot jam and wrapped in marzipan. Here's an interesting history of it.

Now, don’t get me wrong, we love our cupcakes to here also! The American-style Hummingbird Bakery has sent most of us positively crazy about these little sponge cakes with the beautiful enticing store and their cookbooks.

Here at Sunningdale Cakes, the business I set up, we are constantly in demand for cupcakes. So this week I though I would look outside the box (excuse the pun) and create a Battenberg cupcake.

Happy Baking!

Nicola Cappin is the owner of Sunningdale Cakes, based in Hertfordshire in the UK.


Battenberg Cupcakes

Sunningdale Cakes Battenberg Cupcakes

Note: This is not formatted as an American-style recipe; if you need conversions, this site is handy.

Makes 8 cupcakes

Cake:

  • 175g butter
  • 175g caster sugar
  • 3 eggs
  • 140g self raising flour
  • 50g ground almonds
  • ½ tsp baking powder
  • ½ tsp vanilla
  • ¼ tsp almond extract
  • Pink food colouring

Frosting:

  • 70g butter
  • 350g icing sugar
  • A couple of tablespoons of milk
  • ½ tsp of almond extract or more to taste

Procedures

  1. Preheat the over to 170 degrees C.
  2. Beat together butter, sugar and eggs until mixture appears light and creamy.
  3. Mix in flour, ground almonds and baking powder and the vanilla.
  4. Split the cake mixture between two bowls. In one bowl add a drop of pink food colouring and mix in. In the other bowl, add the almond extract.
  5. Place the pink cake mix in a food piping bag and put to the side. Put the almondy cake mix in a separate food piping bag.
  6. Line a cupcake tray with cupcake cases and pipe a stripe of cream cake mix on one side of the cupcake case and a stripe of pink cake mix on the other side.
  7. Then repeat your piping - alternating. So that you pipe pink on top of the cream, and the other way round.
  8. Bake in the over for 22 minutes or until a skewer inserted into the cake comes out clean.
  9. While the cupcakes cool, prepare the frosting by beating the butter, then adding the icing sugar, almond extract and milk, until you get the right consistency.
  10. Pipe or spread frosting onto cooled cupcakes and decorate with marzipan if desired.
© Cakespy, all rights reserved. Powered by Squarespace.