Home Home Home Home Home Home Home
CakeSpy

Featured: 

My adventure at Ben & Jerry's in Vermont!


Unicorn Love: the Eating Disorder Recovery Blog


 Buy my brilliant books!

Buy my new book!

Buy my first book, too! 

CakeSpy Online Retail!


Archives
Gallery

Fantastic appliance for cake making on DHgate.com

everyrecipe.co.nz

Craftsy Writer

Entries from January 1, 2013 - January 31, 2013

Thursday
Jan312013

Sweet Cookbook: Petite Treats by Christy Beaver and Morgan Greenseth

Petite Treats

I love small things, and I love cute things.

Curiously, though, this doesn't always extend to the world of dessert, where I like quantity, preferably mass. But in the case of the new book Petite Treats: Adorably Delicious Versions of All Your Favorites from Scones, Donuts, and Cupcakes to Brownies, Cakes, and Pies, I'll make an exception, figuring that I'll just eat a baker's dozen of everything.

This volume is the follow up to Mini Pies: Adorable and Delicious Recipes for Your Favorite Treats, and like that title, this book is  just too cute! 

Here's what you have to look forward to in the new book:

Morgan and Christy's new book

Let's dig in, shall we? First off, I was so glad to see these mini scones.

Get Sconed

Why? Because I've actually tried them, in person. They're tiny and delicious.

Scookie: Scone Cookie from Mini Empire Bakery

I also want to eat cranberry orange rolls. Yum.Want to eat it

Pies! Of course there are pies. These girls are pie-making maniacs!

 Pies

But my favorite thing? Definitely this...

Piecaken

Yeah, that's right. 

Piecaken

It makes me think of my friend Megan, and also of the Pumpple I ate. Both good things to think of, at any time.

I think you should buy this book! Here's the link again: Petite Treats: Adorably Delicious Versions of All Your Favorites from Scones, Donuts, and Cupcakes to Brownies, Cakes, and Pies.

Wednesday
Jan302013

Pudding Made With Pudding: Superpudding!

Superpudding

When I looked "pudding" up in the dictionary, it was defined as "a cooked sweet dish served after the main course of a meal: example, rice pudding". Another dictionary defined it as "a dessert with a creamy consistency". I'm going to be so bold, at this point, to say that the dictionary's definitions are highly underwhelming and don't do pudding justice at all.

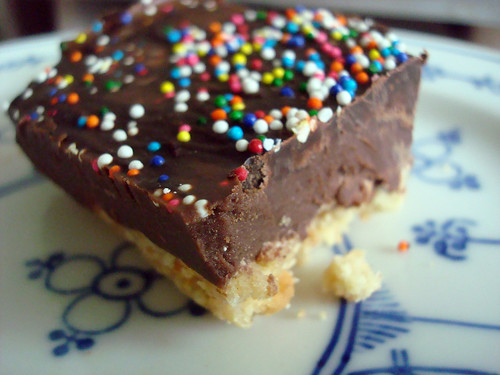
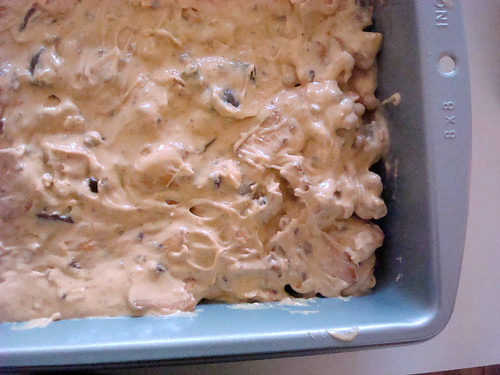
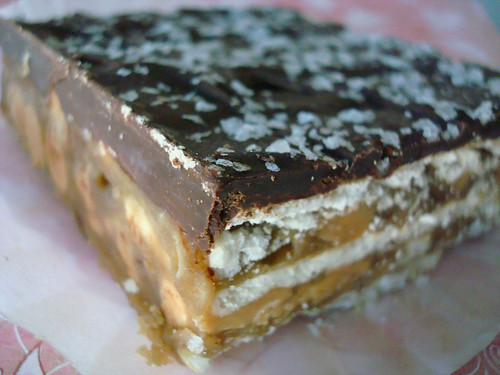
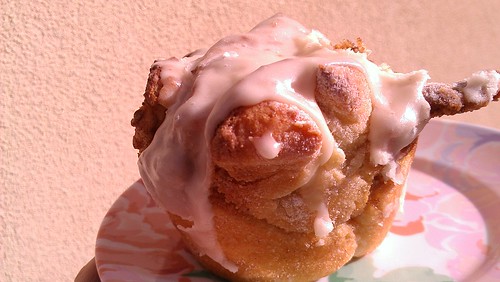
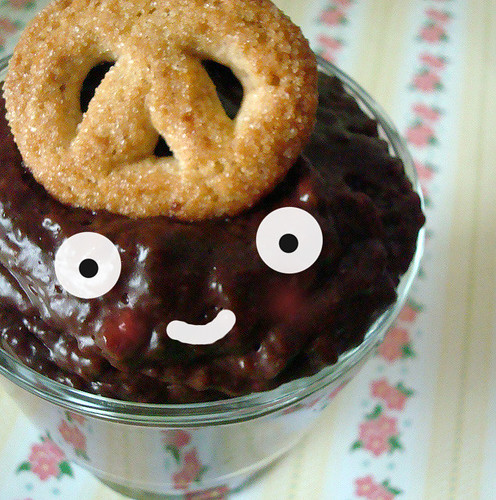
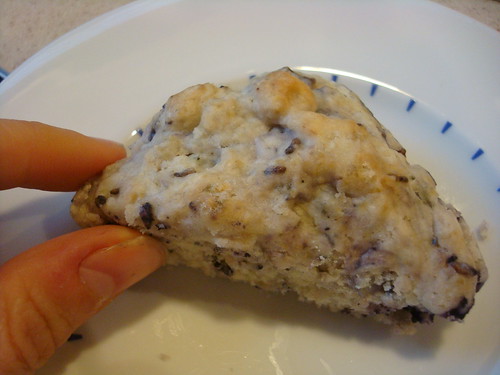
Especially when it's pudding like the specimen pictured above, and which I'd like to talk about with you today, which I am going to try to sum up in a single, humble word by calling it...SUPERPUDDING.

You see, it must be called Super because if all pudding is at least good, this one is great. The secret to its success? It's made, instead of milk, with pudding. I know--your head just exploded at the mere concept.

Superpudding

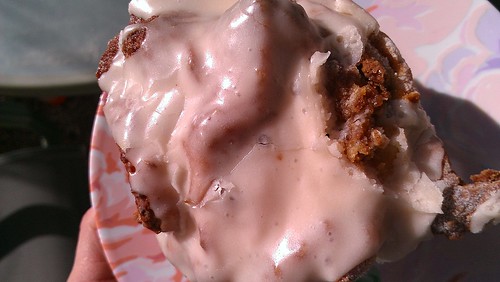
You heard that right. The pudding is mixed with...well, pudding, to create a new variety of the dessert you thought you knew. What separates it from the rest is most notably consistency. If you like a pudding that has the texture of loose yogurt, then don't bother, just go to another website.. But if you like a pudding that is so thick and flavor-packed that it coats the tongue, then this one is for you.

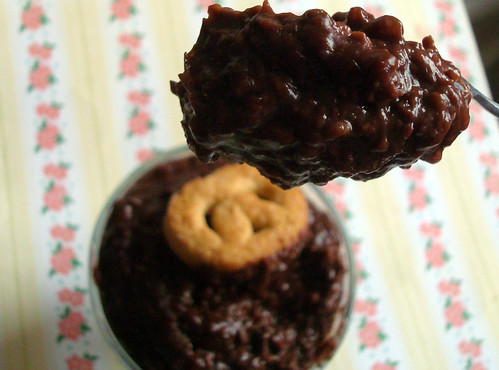
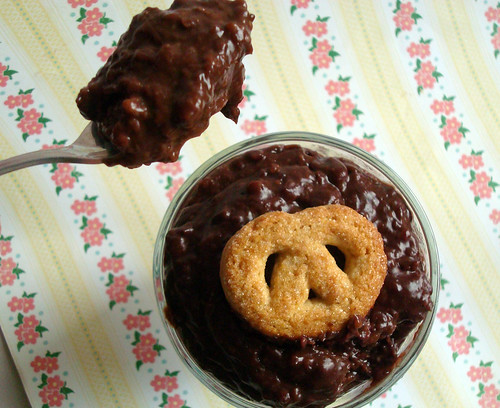
In fact, it is so thick that if you turn a spoonful of it upside down...it will stick to the spoon. I'm totally not kidding.

Superpudding

But how do we mere mortals make this ambrosial dish? It's easy.

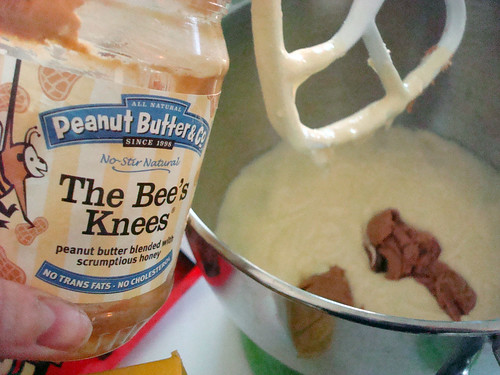
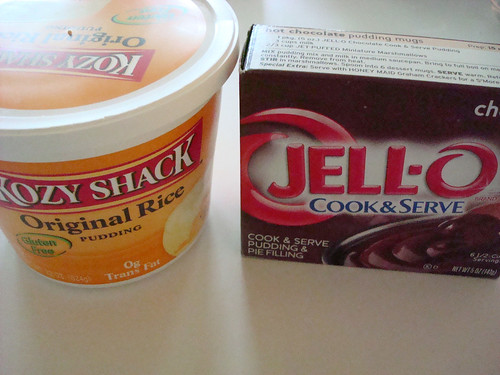
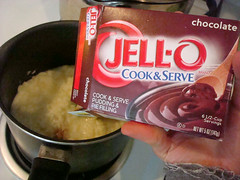
All you do is get a box of cook and serve pudding. And you follow the package instructions. But instead of milk, you use pudding. Pre-made. It can be homemade, but you might lose your sense of urgency by waiting for it to cool. 

Superpudding

The pudding mix requested 3 cups of milk; the pudding was just under 3 cups' worth, so I figured...meh, close enough. So I just replaced "milk" with "rice pudding" in the recipe. Superpudding

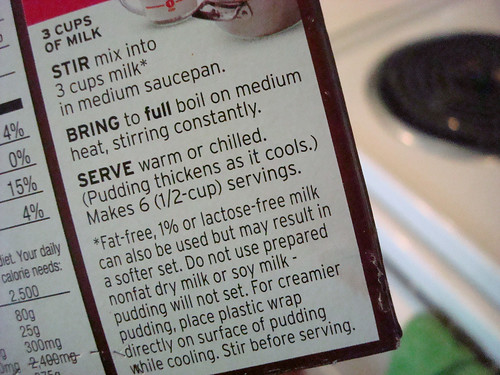
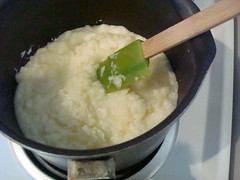
I started by pudding the rice pudding in a saucepan. Then I added the pudding mix.

SuperpuddingSuperpudding


SuperpuddingSuperpudding

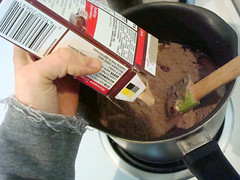
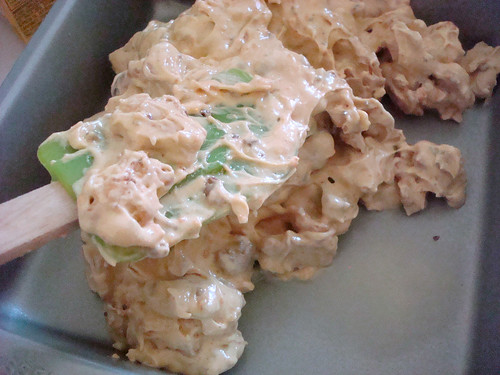
Then, I heated it up. I shoud tell you, though, pudding does not heat like milk. It won't start to simmer, it will start to scorch. So you just keep stirring like your life depended on it so it doesn't scorch, and when it starts to thicken, remove it from the heat.

Give it another stir or two, transfer to a heatproof bowl, and let it chill out in the fridge for a while. Unless you like warm pudding, in which case you can just let it cool until it's warm and not tongue-burningly hot.

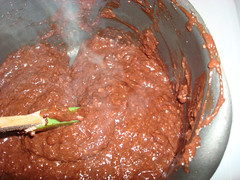
Either way, it's going to thicken...a LOT. 

Superpudding

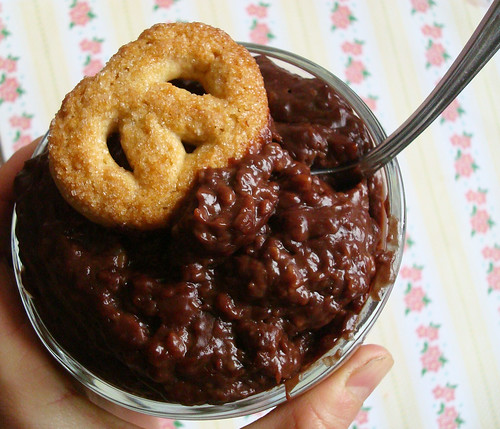
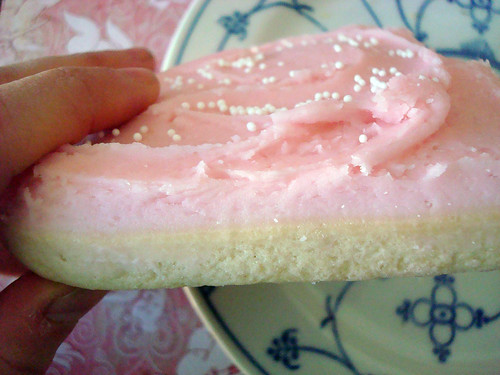
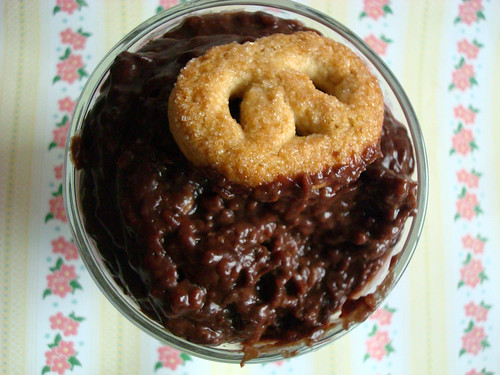
I put mine in pretty parfait cups, and so it didn't look like a chocolate mess, I added a butter cookie for a little color contrast. 

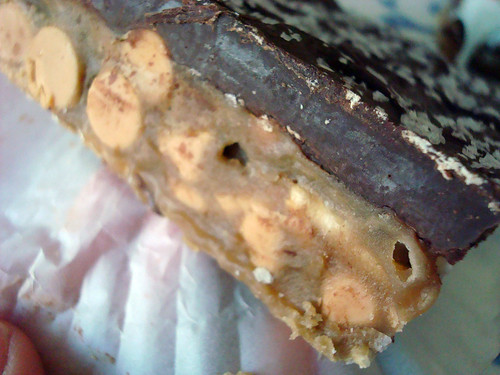
So, let me tell you more about the pudding. Like I have mentioned...it's so thick. To make a comparison, it's almost like the difference between a generic supermarket yogurt and a very thick greek yogurt in terms of how thick it is. 

I loved the combination of rice pudding and chocolate, too. The thickness really seemed to compress everything into an intensely textured and flavored treat. It tasted far more decadent than your everyday chocolate or rice pudding. I was curious to see how it might fare if I let it cool even more, put it into molds or ice cube trays and let it freeze--it seemed like it might be like a frozen truffle or something. Or at least a super-tricked out pudding pop. 

I love you, Superpudding. 

Superpudding 

Superpudding

  • 1 22 ounce tub of pudding (I used Kozy Shack rice pudding)
  • 1 box cook and serve pudding (I used a 6 ounce box of chocolate pudding)

Procedure

  1. Combine pudding and pudding mix in a medium saucepan on low heat. Stir constantly; after a while, the heated mixture will scorch if you are not constantly stirring. At this point, remove from heat. Put in a heatproof bowl and place plastic wrap directly on top, to keep a skin from forming. 
  2. Let cool entirely, if you like your pudding cold. Serve in pretty cups. Keep leftovers refrigerated.


Wednesday
Jan302013

Sweet Art: Two Paintings are Twice as Nice

Custom order

What follows is a fantastic story about sweet art...and one of the biggest artistic compliments I have ever received! 

It all started about five (!) years ago, when I was commissioned to do a custom painting of a cupcake, a banana, and a John Deere tractor. It's pictured above. It was a fun piece to do--the person who asked for it explained that the cupcake was for her, the banana was to represent her young son, and the tractor was for her husband. So it was a family themed piece!

Well, that was that, and then a few years passed. Then I was contacted by the same customer, who wanted a new piece to give to her husband for their upcoming anniversary! This time, could I re-do the piece from before, but with a berry farm backdrop? 

korte

Well, OK. So I did it, and apparently it went over well, because then I received another note, asking--"could you do another?".

Custom painting re doI immediately felt panic--had it been damaged in shipping? Had I done something wrong? But no--apparently, the recipient had loved it SO much that he was scared of even the possibility of losing it, so wanted another, so they could display one, and keep the second as a family keepsake.

Now if that didn't make me feel special, I don't know what would have!

So I did a second painting. With slight differences, because, you know, cupcake paintings are like snowflakes--no two are *quite* the same.

Anyhow--I just thought I would share that sweet story, because it sure made me feel good, and I thought it would make you feel good, too. And, you know, it gives me a chance to show off my artwork. 

Custom art available - email jessieoleson@gmail.com for more info! Other items for sale here.

Tuesday
Jan292013

Sweet Attempt: Mac and Cheese Cookies Recipe

Mac N Cheese Cookie

We all have baking failures. Until yesterday, I considered Mac and Cheese Cookies one of mine. I mean, seriously. Mac and Cheese is delicious. Cookies are delicious. But when I tried to combine them into one unholy cookie foodstuff, it was so clearly a mistake. They're from different worlds! This is an ill-fated love story that really has no happy ending.

Until yesterday, that is, when someone spied the old photo of these cookies on Flickr and sent me an email imploring, "Please, please, please can you give me more info on these? Did you make them? Do you have a recipe? Were they as delicious as they look?"

Well, yes, dear reader, I can send you a recipe. But no, I wouldn't say they were delicious. They were strange, not rocking the sweet and salty thing the way that some cookies can, too savory to be dessert-ish but not sweet enough to be a true cookie experience. I think that maybe without the noodles they would stand a chance, might even be good...but...as much as I wanted it to work, no.

Mac and Cheese Cookies

All the same, it is a fun memory for me. I remember how excited I was about the cookies; I remember how very badly I wanted them to taste good. They might be right up someone's alley--but I don't think they're quite ready for the masses yet. Or maybe they are? Just in case, from the archives, here's the recipe. Choose your own adventure!

Mac and Cheese Cookies (Printable Recipe Here!)


  • 1 cup cooked elbow macaroni
  • 1 cup grated cheddar cheese
  • 1/2 cup unsalted butter, softened
  • 1 cup sugar
  • 1 egg
  • 3/4 cup light cream
  • 2 cups flour
  • 1/2 teaspoon baking soda
  • 1/2 teaspoon salt


For the icing

  • 1 cup grated cheddar cheese
  • 1/4 cup cream
  • 2 cups confectioners' sugar
  • more cream, to thin


  1. Make the cookies. Blend flour, baking soda, and salt together in a large bowl; put off to the side.
  2. Mix butter, sugar and egg until fully incorporated; Stir in cream.
  3. Add flour mixture little by little, stirring well with each addition, until fully incorporated. Stir in the cheese and elbow macaroni.
  4. Allow the dough to chill for about an hour.
  5. Preheat oven to 400°F.  
  6. MacnCheese Cookies
  7. Using a teaspoon or a mini ice cream scoop, drop rounds of dough on your lightly greased cookie sheet, leaving at least 2 inches around each dough ball.
  8. Mac and Cheese Cookies
  9. Bake for 8 to 10 minutes. The cookies will not be brown on top, but will have a slight toasty color on the bottom. Let them cool on the sheet for a few minutes before transferring them to a wire rack to cool completely.
  10. Mac and Cheese Cookies
  11. Make the icing. In a small saucepan over low heat, melt the cream and grated cheese. Once melted and liquid, begin to stir in the sifted confectioners' sugar. If it gets too thick, add a little more cream. Use to glaze over the cooled cookies.


Monday
Jan282013

Staples Sells Sweets and I Made Something Tasty With Them

Buttery cookie bars

Let's say I was a bit surprised when Staples contacted me to ask if I wanted to do a review for them. My response was something like, "dudes, you do know this is a dessert blog, right?"

But I stayed with them, and I was glad I did. Because for one thing, I learned that apparently supplying food (including snacks and sweets) to offices and corporate accounts is a very big part of Staples' business. Who knew?

Additionally, I was glad because they offered to give me a tablet to test out with my bloggity-blogging. I was just fine with this. I like stuff like that.

Whoa

 So Staples went ahead and sent me a parcel including a tablet--the Nexus 7--and a big tin of cookies. The picture to the left shows me taking a picture of the tablet with my phone after opening it. Whoa, technology rabbit hole! I was especially excited about these Dansk cookies, because my grandma always used to buy them for us, and I would zero right in on the pretzel cookies. I mean, they're sweet! Cookies! But they LOOK like pretzels! It confounded my 6-year old mind. I was happy to see the cookies again.

Cookies

So, first, since they were nice enough to send it, my thoughts on the Nexus. I connected it to my at home wifi connection and used it to find some baking ideas which I could use with the butter cookies. I found that it connected very fast, seamlessly, and that the visuals were very nice. I also found that it was VERY handy to use for displaying recipes in the kitchen--so much easier than a laptop. And easier to clean. 

Also nice--the Nexus was easy to hook up my google account with, so it was very easy to plug in all of my info. I found that while it wasn't quite easy to say, create a blog post, on the tablet, it was very easy to log in and make changes to existing blog posts or respond to comments.

But anyway, let's get back to those cookies. Like I said, apparently Staples sells a lot of food. And surprisingly, a lot of it is dessert or sweet stuff. 

Buttery cookie bars

What I did with those cookies is this. First, I opened them up and took a nice long look. Then I asked, "are you ready to meet your destiny?". There was no response.

Then, I mashed them all up and mixed them with half a stick of butter. I then pressed it into a foil-lined 8x8-inch pan.

Buttery cookie bars

Next, I warmed a jar of dark chocolate peanut butter, and poured it right on top. I spread it as gently as possible.

Buttery cookie bars

After that, I melted 4 ounces of semisweet chocolate and spread it on top (again as gently as possible). Then I topped it all with sprinkles.

Buttery cookie bars

I let it chill in the fridge overnight, and in the morning I had a deliciously decadent snack. Shortbready! Chocolatey! Peanut buttery! Swoon. Staples may have given me the means, but I made it even better. YUM.

Buttery cookie bars

Buttery Chocolate Peanut Butter Cookie Treats (Printable recipe here!)

Ingredients

  • 3/4 tin of Dansk Cookies (about 30 cookies)
  • 1/2 stick unsalted butter, melted
  • Dash salt, if you want
  • 1 jar peanut butter (I used Dark Chocolate Dreams by Peanut Butter and Co.)
  • 4 squares semisweet chocolate (1 ounce each)

Procedure

  1. Line an 8x8-inch pan with foil. Set aside.
  2. Crush the cookies until they are fairly fine crumbs. Mix with the butter, stirring well. Add in the salt.
  3. Press into the bottom of the foil lined pan. Press it down well.
  4. Warm the peanut butter until it is pourable. Pour on top of the cookie crust. Spread with a spatula, trying not to upset the cookie crumbs below. Put the pan in the fridge for the moment.
  5. In a double boiler, melt the semisweet chocolate. Once melted and pourable, remove the pan from the fridge; gently pour the chocolate over the peanut butter layer on your bars. Use a spatula to spread. Try to do this quickly as the peanut butter will get soft and start to mix with the top layer.
  6. Top with sprinkles, if desired. Put back in the fridge and let set until firm before serving (2 hours or so). Keep chilled. 

Buttery cookie bars

 Full disclosure, Staples provided me with this Nexus tablet. However, the words and opinions expressed in this review are strictly my own. To see the full line of tablets visit Staples.com.

Monday
Jan282013

Clean Out the Cabinets Cake Recipe

Clear out the Cabinets Cake

It doesn't happen, but every now and again (usually when I know I'm moving soon) I get the urge to clean out all the random ingredients that I have lying around in the kitchen. But I absolutely despise throwing things out--it seems so wasteful. But how to make use of these ingredients in an efficient way? 

Well, when I found myself cleaning out the cabinets recently, I had an inspiration.

Clear out the Cabinets Cake

It started when I found a box of Jiffy Yellow Cake mix. All of a sudden, I looked at everything else with new eyes.

What if I could combine orphan ingredients, all in one cake? It would certainly be something completely awful, or awesome. Maybe both.

Clear out the Cabinets Cake

So I rounded up a few things that I thought could possibly work in this monster of a cake: half a jar of peanut butter, a third of a box of Teddy Grahams, a handful of Fun-Size candy bars, and about 2 handfuls of potato chips (plain, salted). 

I started by mixing the cake according to the box ingredients (1 egg, 1/2 cup of water). Then, I stirred in the peanut butter. It smelled really good, and my spirits began to get high.

Clear out the Cabinets Cake

I then stirred in the rest of it--I broke each candy bar into 3 or 4 pieces, crushed the chips in my hand before adding, but just added the Teddy Grahams as-is. It made for an extremely thick, lumpy batter.

Clear out the Cabinets Cake

I spread it into a well-greased 8x8-inch pan.

Clear out the Cabinets Cake Clear out the Cabinets Cake

I baked it for 22 minutes at 350 degrees, at which point I took out one of the most alluring-smelling cakes my nose has ever known.

When it cooled, I realized that this was a great opportunity to use another ingredient--half a can of cream cheese frosting--so I added that too. Why not? And sprinkles. Rainbow! 

So, you're wondering after this big buildup, how did it taste? 

Clear out the Cabinets Cake

I was so glad I hadn't thrown anything out--this cake was a keeper. The peanut butter mixed throughout the batter worked amazingly with the chocolate chunks studded everywhere from the Fun-size candy bars, making it feel like you were eating birthday cake with alternating bites of a peanut butter cup. But all mixed in your mouth. The only weirdness was the Teddy grahams, which had lightly softened in the baking process, just to the point where they were just crunchy enough to distract from the cake texture, but not different enough to really have a crunchy crunch impact. Clear out the Cabinets Cake Next time I'd crush them before adding. The chips were a pleasant surprise, adding a nice saltiness which made all the competing tastes--peanut butter, cake, frosting, chocolate--come together in a beautiful salty end note. It's like the most beautiful epilogue. 

Clear out the Cabinets Cake

Clean Out the Cabinets Cake (Printable recipe here!)

Serves 9

  • 1 Box Jiffy Cake
  • 1 Egg 
  • 1/2 cup water
  • Whatever stuff you want to add (I added: half a jar of The Bee's Knees peanut butter by Peanut Butter and Company, 2 handfuls of potato chips, about 6 fun-size candy bars, and a third of a box of Teddy Grahams

Procedure

  1. Preheat the oven to 350. Grease a cake pan (round or square).
  2. Prepare the cake mix per the package instructions (1 egg and 1/2 cup water). 
  3. Once the batter is ready, stir in the peanut butter (or any "wet" ingredients).
  4. Stir in the rest of your ingredients.
  5. Bake for 20-25 minutes, per the package instructions. When golden, remove from the oven. Cool the cake, and turn out on to a wire rack. Let cool completely.
  6. If you have frosting, go ahead and frost it. Add sprinkles (why not?). Enjoy!
Monday
Jan282013

January 28: National Blueberry Pancake Day

Source: phoodie.info via Cake on Pinterest


May your National Blueberry Pancake Day be sweet, sticky, and very buttery!

Yes, you heard me right. Today, January 28, is National Blueberry Pancake Day

If you're in Philadelphia, or if you find yourself near Philadelphia, anytime soon, please celebrate by getting a "short stack" at the Dutch Eating Place in the Reading Terminal Market. Maybe it's better if you're not in Philadelphia today, though, they're only open Tuesday through Saturday (pancake day observed, anyone?). They are an Amish business, which is why they don't open every day, although many of the vendors are only there Wednesday through Saturday, so consider yourself lucky for the Tuesday. Plus, they wear the cutest Amish garb while they serve you. But I digress. These are some of the finest blueberry pancakes I have ever tasted--fat yet fluffy, with blueberries that taste sweet and tart and have a pleasingly plump texture (not dehydrated, not weird). Plus, they serve their (huge) pancakes with a "pat" of butter that is about the size of a deck of cards--can you see it on the left hand side of the photo above?

Dutch Eating Place, 1200 Arch Street (in the Reading Terminal Market); more info here.

Sunday
Jan272013

Cake Byte: New Sweets from Flour and Sun Bakery

Flour and Sun Bakery

You know that I don't like to be bossy. But. 

If you find yourself in need of some sweet treats for Valentine's Day, I suggest you hightail it to Flour & Sun Bakery in Pleasantville, NY. Or don't--they ship, too! You can have a parcel of sweetness sent to yourself or your sweetie. Details: they'll send it via USPS with a minimum order of 6 cookies (or 2 cookie necklaces). Shipping charges start at $5.50. For Valentine's day arrival, order by Feb. 8th.

Flour and Sun

I'm highly qualified to tell you all this as not only have I sampled their goods in person, but I recently received a sample parcel of their seasonal offerings.

It was very well wrapped, I must say. While they say that they are clear on the perils of shipping, saying "can't guarantee what happens to the packages once they leave our hands. If a package is greatly damaged, however, please contact us", this was not a worry for me--everything arrived in perfect condition.

So what was inside? 

Love Ewe, Flour and Sun

First up, the I Love Ewe Cookie ($4): Large sheep cookie iced with royal icing, packaged in a cello bag, tied with a festive ribbon and pretty Valentine's Day tag. Very sweet. 

Flour and Sun Flour and Sun

Next, Bee Mine Cookies ($5): Large beehive cookie iced with royal icing with two adorable fondant bees, packaged in a cello bag, tied with a festive ribbon and pretty Valentine's Day tag.

Flour and Sun Flour and Sun

Then, what a cute idea: a Cookie Heart Necklace ($5.50): 12 small heart cookies strung on a ribbon, packaged in a cello bag, tied with a festive ribbon and pretty Valentine's Day tag.

Flour and Sun Bakery

The parcel also included some items that weren't specifically part of the Valentine menu. A soft pink frosted Heart Cookie was probably my favorite thing out of the bunch, because A) it was pink, B) it had the most buttery-luscious frosting ever, and C) it reminded me of a sweet I love from Seattle, but much fancier. 

Saw Mill River Bar, Flour and Sun Saw Mill River Bar, Flour and Sun

It also included--joy!--a Saw Mill River Bar, which is a Flour & Sun original--a huge bar cookie comprised of layers of crackers, caramel & chocolate. Strange, say you? Delicious, say I. You've got to try one of these sweet and salty things. 

I asked owner Denise more about the bar, and she let me know "we started making Saw Mill River Bars about a year and half ago. They are our most popular bar cookie we have. It's club cracker, layer of homemade caramel and peanut butter chips, topped with chocolate and malden sea salt flakes. We also make a version with pretzels and toffee pieces. My baker suggested the name to be honest I can't remember why."

Who really cares though, when it tastes this good?

Pre-order your Valentine's Day cookie by February 8th by calling us at 914.495.3232. You can order just one or several of any of the options for pick up at the bakery. 

Flour & Sun Bakery, 19 Washington Avenue, Pleasantville, NY; online at flourandsunbakery.com

Saturday
Jan262013

Tutorial for Children: The Art of Stealing Easter Candy

How to steal Easter Candy: Tutorial

This tutorial is an act of public service, from CakeSpy to the children of the world. 

Every year, millions of children are deprived of the proper amount of Easter candy that they are due. Parents actually hide or otherwise withhold this Easter candy, justifying this behavior by saying it's for the children's health. 

How do I know this? Because, dear readers, I was one of these children. It's true. As a child, every year when stores started displaying their Easter candy wares, my mother would buy bags and bags of candy, notably Cadbury Mini Eggs. And she would dole them out to we starving children only very sparingly--in torturous servings of one or two at a time. Sometimes she'd even hide them around the house, so that we had to perform a mini egg hunt before enjoying our treat! 

But after a while, I got wise. I realized that she had to have a stash somewhere, and I found it. But how to get access to the sweet treasure without mother's watchful eye noticing? 

As a fairly clever kid (if I do say so myself) I devised a way. And now, children of the world, I'd like to share this method with you. I'm posting it now, at the end of January, so you can hone your art as the Easter Candy season approaches--you might just find it works with Valentine's Day candy, too!

Keep in mind that this method works best with bags of candy that contain many small units--for instance, you wouldn't want to do this with say, a two-pack of Reese's cups. You'd be busted right away because the missing pieces would be evident. But to perform this candy-poaching method with a bag of, say, Cadbury Mini Eggs, it works like a charm.

How to Steal Easter Candy Without Your Mom Noticing

How to steal Easter Candy: Tutorial

Step 1: Assemble your tools. I suggest an X-Acto Knife, and clear tape. You can use a pair of sharp scissors, using one extended scissor leg as a knife, if you don't have access to a knife. The glossy kind of tape is best, but the matte kind is OK. 

How to steal Easter Candy: Tutorial

Step 2: Turn the bag over, so you are looking at the back of it. Flip the flap on the back.

How to steal Easter Candy: Tutorial

Step 3: Using your X-Acto knife, gently cut a 2-inch or so incision along the flap which you've flipped back, trying to keep your line as straight as possible. Don't cut too deeply or you might cut through the entire bag by accident!

How to steal Easter Candy: Tutorial How to steal Easter Candy: Tutorial

Step 4: Remove a few candies. I know your impulse is to take a bunch, but stay cool. Don't take too many, or you WILL be busted. There will be more bags, trust me.

How to steal Easter Candy: Tutorial How to steal Easter Candy: Tutorial

Step 5: Cut a strip of tape to the length of the incision. Cut the tape in half, lengthwise, so it is quite narrow. Adhere it to the incision, pressing it flat and smoothing out air bubbles.

How to steal Easter Candy: Tutorial

Step 6: Fold the flap back.

How to steal Easter Candy: Tutorial

Voila! Now, take the candy and run. Smile to yourself when mom says "Gosh, they put less and less candies in these bags every year!". 

How to steal Easter Candy: Tutorial

Cue the "the more you know" music, and let the rainbows provide a fade-out! No need to thank me, but yes, you're very welcome.

Saturday
Jan262013

CakeSpy Undercover: Revolution Bakery, Santa Fe NM

Gluten Free Cinnamon Roll

I'll be totally honest: sometimes, gluten-free baked goods just taste funny to me.

I know it's not their fault. They're made using a different type of flour--flours, in fact! It's not just a matter of swapping "all purpose" for "gluten-free". It's a little trickier than that. Most gluten-free baking is actually done with a mix of a few types of flour, to guarantee a good combination of flavor and texture.

And likewise, the taste doesn't always translate exactly. Some gluten-free flours will impart a more assertive flavor than white flour. That, I think, is what makes the goods kind of funny sometimes. Like, they taste too healthy or they have too crumbly a texture or something.

gluten free cinnamon roll

So when I taste a gluten-free baked good, do try to be aware of these things, that they will never taste exactly like their floury counterparts. 

But they still can be a thing of beauty in their own, gluten-free right. And an example of a bakery that has a good thing going on is Revolution Bakery in Santa Fe, New Mexico. 

At Revolution bakery, they have a big focus on bread as you walk into the cafe, but they also have a very nice selection of pastries and baked goods--they do cakes, too.

Keeping it simple, I chose a quinoa chocolate chip cookie (which was vegan, too) and a cinnamon roll. 

Gluten free cookie

The chocolate chip cookie was very nice. It was crispy around the edges but slightly softer inside. It crumbled lightly when bitten into, like a coarser sort of shortbread, and the flavor was slightly nutty and almost oat-y, which made it taste like a health cookie, sort of. I say "sort of" because it was assertively cookie-ish enough to not ever be confused with a granola bar. This is the type of healthy sweet I like: one that I can tell myself is virtuous, even if it really isn't.

Gluten free cinnamon roll

The cinnamon roll was likewise lightly nutty in flavor, which worked quite well with the yeastiness of the pastry. But what this treat is really all about is the cinnamon-sugar filling and frosting, which play together to create a symphony of sweet morning music tastes in your mouth. A very nicely done cinnamon roll. Had I tried this one not knowing it was gluten-free, I might believe that a hippie-ish sort had hid flax or something inside of the dough, but I wouldn't instantly proclaim it gluten-free just upon tasting it. It had a very nice texture, too.

Baked goods are a bit spendy at this spot, but a lot goes into making a gluten-free baked good, and I think they're worth seeking out. So if you find yourself in Santa Fe, hit them up! Just remember to go early in the day, because they can tend to sell out of some things later on.

Revolution Bakery, 1291 San Felipe Boulevard; online here.

© Cakespy, all rights reserved. Powered by Squarespace.