Home Home Home Home Home Home Home
CakeSpy

Featured: 

My adventure at Ben & Jerry's in Vermont!


Unicorn Love: the Eating Disorder Recovery Blog


 Buy my brilliant books!

Buy my new book!

Buy my first book, too! 

CakeSpy Online Retail!


Archives
Gallery

Fantastic appliance for cake making on DHgate.com

everyrecipe.co.nz

Craftsy Writer

Entries in tutorial (21)

Saturday
Dec132014

How to Make Ganache with Cocoa Powder

News flash: you can make ganache with cocoa powder.

I'll level with you: sometimes I am lazy. Like, when I want to whip up some ganache right this instant and I already have cream warming and I realize that I don't have any baking chocolate. This is not the moment that I really feel like up and going to the grocery store. This is the moment I wonder: "Can I do this thing with cocoa powder instead of chopped chocolate?". And inside, I am praying. Please, let this work.

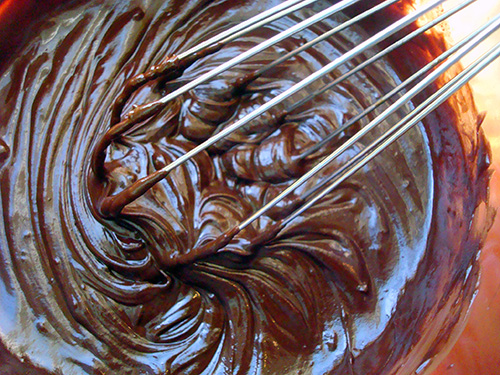
Many times, this type of experimentation only ends in frustration and possibly tears. But this time, it worked. The first time I did it, it came out slightly lumpy; the second time, I sifted the cocoa powder first, and it came out fine. Overall: a success. And even better: it tastes great.

Recipe notes

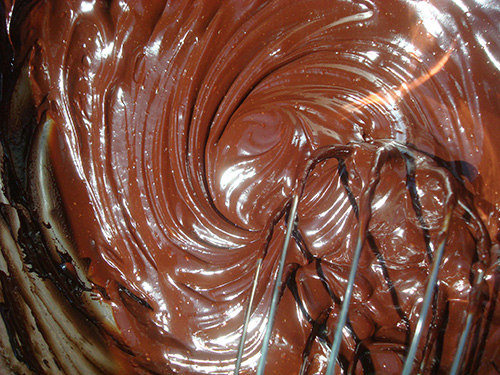
JPHOTO-2012-07-31-8174.jpg

Photo via Flickr member cart_wheels

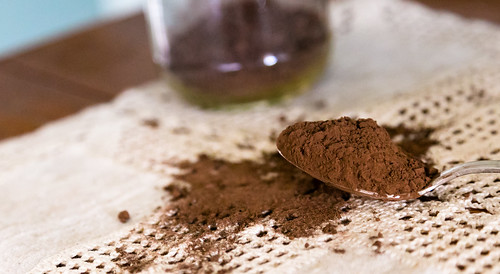
  • It is very important that you sift your cocoa powder before mixing it with the cream. Otherwise you may have lumps in the finished ganache. It will still taste good, though.
  • You can use unsweetened or Dutch processed cocoa for this recipe.
  • I like this ganache better with a little coffee, sugar, salt, and vanilla. You can omit or adjust these if you like. 
  • Let this mixture sit for a good spell if you're using it to top a cake. It will thicken as it cools. 

Ganache made with cocoa powder
Makes enough to fully coat a 9-inch cake, 1 1/2 cups or so

  • 1 cup heavy cream
  • 3/4 cup cocoa powder, sifted
  • 1/4 cup granulated sugar
  • 1/2 teaspoon strong brewed coffee
  • 1/2 teaspoon vanilla 

Procedure

  1. In a saucepan, heat the cream, stirring frequently to discourage scorching, until it begins to simmer and seems like it might start boiling any moment (but don't let it boil). 
  2. Remove from heat and whisk in the remaining ingredients until smooth. Let the mixture cool to your desired thickness. It will never become hard, per se, but it will set to a smooth, spreadable consistency.

What's your favorite quick fix substitution?

Monday
Sep292014

How to Use Reference Images to Create Awesome Art

What do Monet’s water lilies, Andy Warhol’s soup cans, and the below unicorn illustration all have in common? The answer is reference images. Do you know how to use them to create awesome art? If not, you can learn here. I know a lot about this subject, I promise. Read the full article here.

Monday
Jun232014

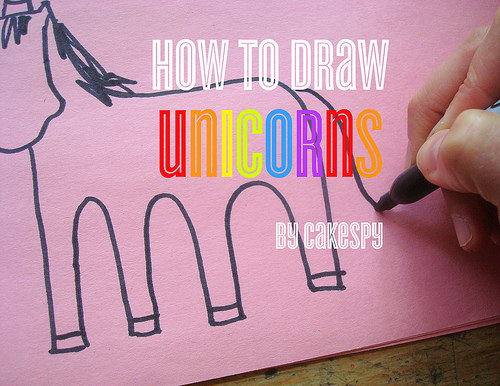
How to Draw Unicorns

So you want to learn how to draw unicorns. Well, you've come to the right place. I have been a professional illustrator of unicorns since 2007, and have been an appreciator and collector of these magnificent beasts since long before that. What I'm saying is this: I'm pretty much the best person to teach you how to draw them.

I'm not going to twinkle-toe around it, because I want to get straight to the good stuff. And by that, I mean creating magic with pen and paper. So here we go:

How to draw unicorns

No superior work of art ever resulted from a lackluster state of mind. So before you get started, you have to get inspired. There are a few sure-fire ways: surround yourself with unicorns you love, read this post about hipster unicorns, watch Planet Unicorn on youtube, or rent The Last Unicorn

 How to draw unicorns

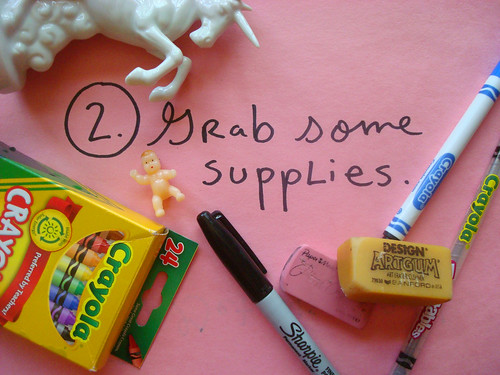
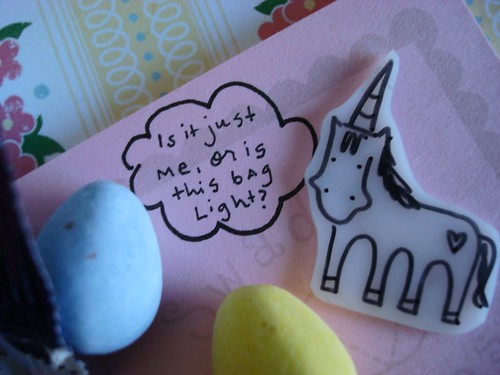
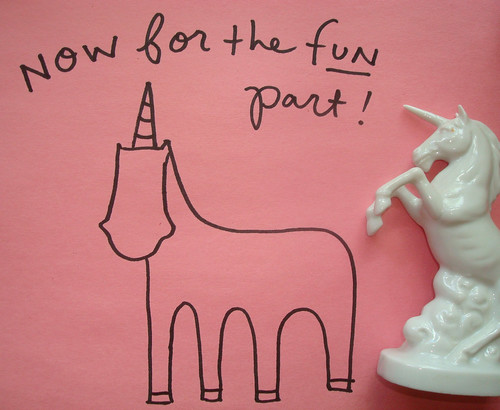
Now that you're fired up, grab some supplies. I am demonstrating simply using a sharpie with pink construction paper, but you can feel free to use whatever medium makes you happy. I have yet to discover how a tiny naked baby can assist in the unicorn-drawing process, but I am a believer, so I am sure that one day I will learn.

How to draw unicorns

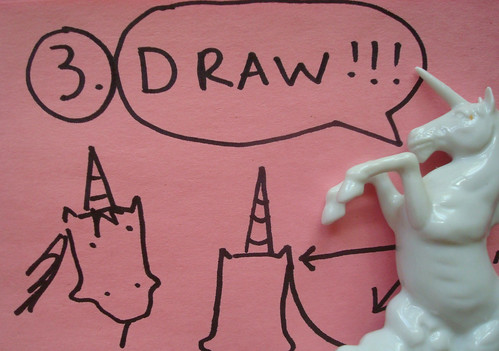
Oooh, ooh, ooh. Now that we're suited up and insprired, it's time to get drawing!

How to draw unicorns

You'll start with the horn. It's easy, really: a thin, tall triangle with stripes for the ridges of the horn.How to draw unicorns

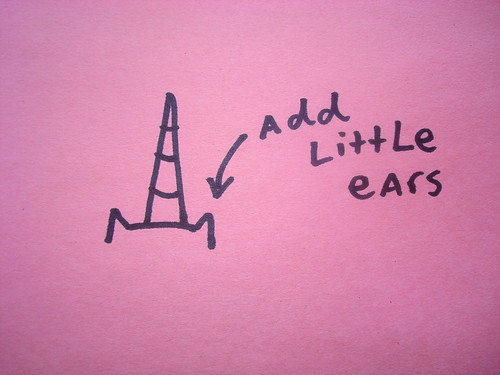
Now, add little ears on the sides of the horn. You want your unicorn to be able to hear the clatter of cupcake tins that means you're getting ready to bake, don't you?

How to draw unicorns

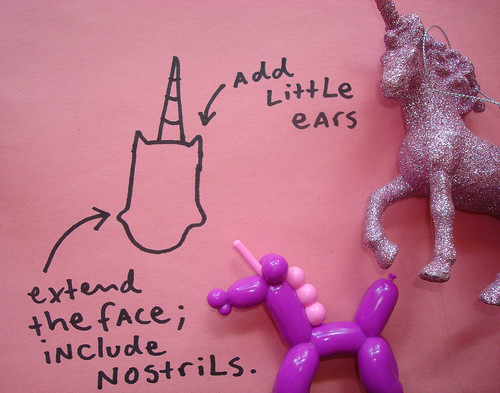
Now, extend the face, adding two little "knobs" on the side for nostrils. You want your unicorn to be able to smell it when you bake cookies, don't you? How to draw unicorns

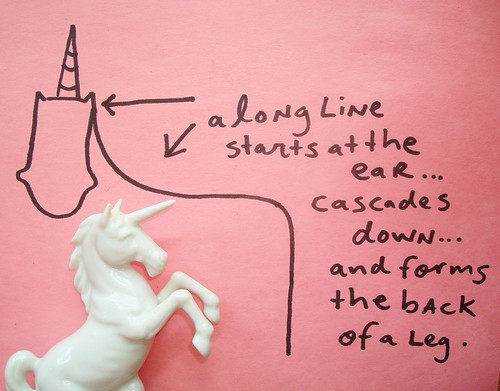
Now for the biggest and possibly scariest step. Draw a long line which starts at the ear and cascades all the way down in a wave, forming the unicorn's back and the back of its hind leg. Whew! How to draw unicorns

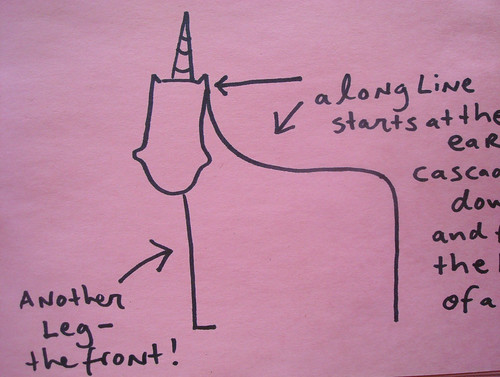
Now, starting at the bottom of the middle of the unicorn's face, draw another line--this is the front leg. How to draw unicorns

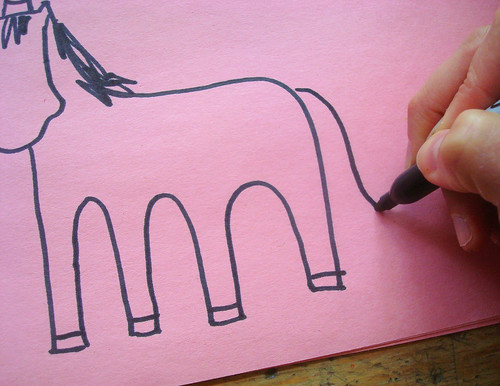
In the space between, draw a total of 4 legs. Be sure to add hooves at the bottom, otherwise your unicorn's feet will be too sensitive to prance about. How to draw unicorns

Oh, goody! We've reached what I personally consider the funnest part of drawing a unicorn. How to draw unicorns

Add a mane, both as a little puff of hair in front of the horn and between the ears, and a nice cascade of hair down the back of the neck.

How to draw unicorns

Add a swingy tail, too!

How to draw unicorns

Add two assertive dots for eyes. Finally, your unicorn can see your pretty smile! Now, add two lighter dots below, for the nostrils.

How to draw unicorns

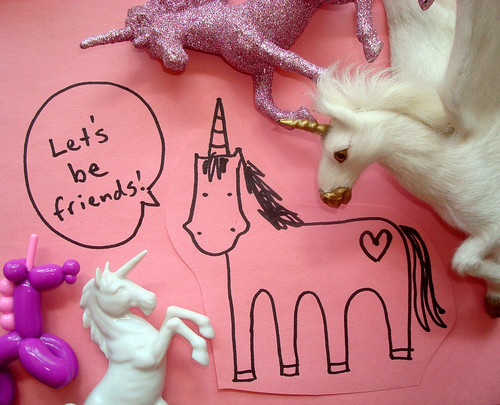
Be sure to add a heart near the unicorn's butt. This is a spot from which it draws power and magical love energy.

How to draw unicorns

Hooray! Now you have a unicorn to be your friend and companion. What will you name it? What kind of adventures will you share?

How to draw unicorns

Enjoy the magic of unicorn art!

Saturday
May242014

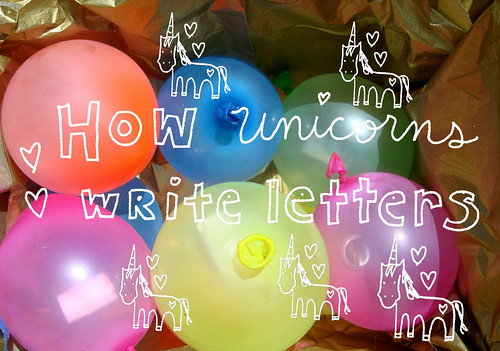
How To Write Letters Like a Unicorn: A Tutorial

Unicorn letter

Have you ever wondered how a unicorn writes a letter?

Well, I was hanging out with my pet unicorn, Sprinkle, who helps me with many things, from headstands...

to everyday advice like how to make rainbow jell-o cups or what time of day I'm most likely to see a shooting star with a rainbow trail.

So, me and Sprinkle were having a nice gossip sesh over frosting shots one day, and after maybe one shot too many, she told me the secret way in which unicorns write letters.

Writing letters like unicorns

Because unicorns do not have hands, they do something really special to send their buddies messages. They whisper messages into rainbow rays, and then they wish them over to their friends, who are not only greeted with a rainbow but good tidings.

Listen, I'm not going to lie: humans do not have the magic ability to do this.

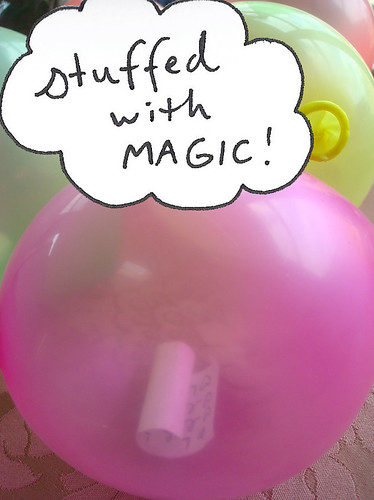
But we can co-opt the idea and send a friend a bouquet of rainbows and sweetness by stuffing balloons with little notes and gifts. It basically guarantees a magical day for the recipient. 

Here's how you, as a human without magical abilities, can make it happen.

How to write a letter like a unicorn

You need:

  • a variety of rainbow colored balloons
  • messages or small gifts to put in the balloons
  • tissue paper and packing material
  • a shipping box
  • love

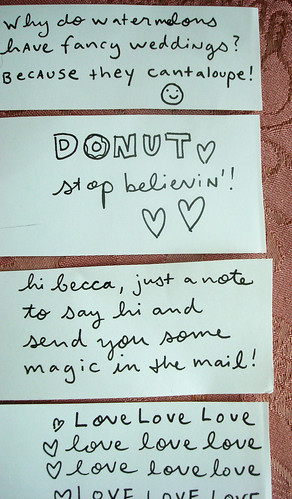
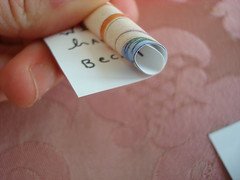
Step 1: Start by preparing a bunch of small notes, like so:

Writing letters like unicorns

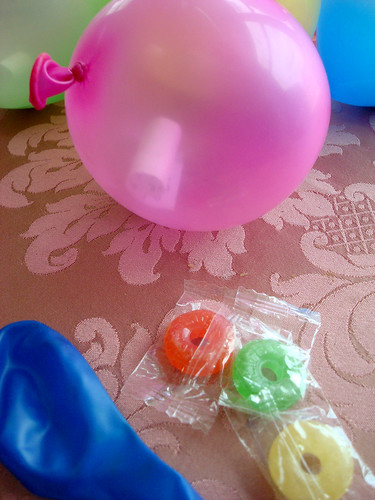
You can also grab some other things, like candy or marbles or small things that will make nice little gifts.

Writing letters like unicorns

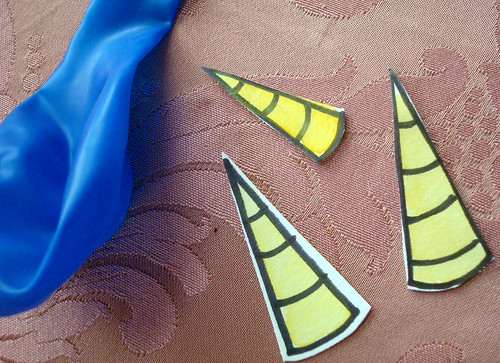
You can also draw some unicorn horns and includes some of those, too: Writing letters like unicorns

because then the recipient can hold them up to ponies and make them instant unicorns, like so:

A pony no longer!

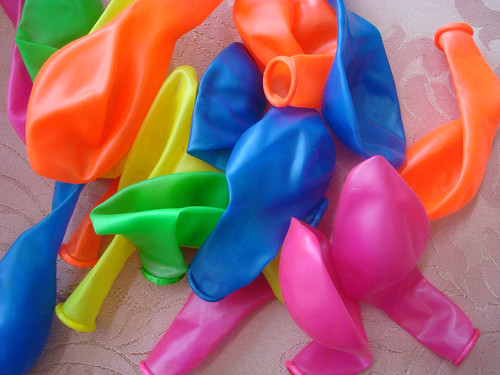
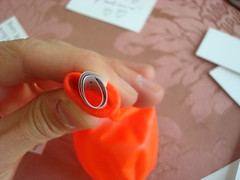
Step 2: Place the notes or gifties in the balloons. One or two things per balloon. Roll up notes to get them inside of the balloons with ease. 

Writing letters like unicornsWriting letters like unicorns

Step 3: Blow up the balloons. Blow them kind of small, about the size of a large apple or so. 

Writing letters like unicorns

Step 4: Once you have a number assembled, place them in a box lined with tissue paper. Line the sides and top with packing material before sealing and addressing the box.

Writing letters like unicorns

Step 5: Send it on its way! Unlike unicorns, you can't wish your package to its recipient, so you'll have to hit up the USPS or UPS or Fedex. For best results, use a fairly rapid shipping method (such as priority mailing). Be happy in knowing that you will have a very delighted recipient when it's received!

Although this is definitely an adapted version of the unicorn method, it's a highly delightful method of making someone's day brighter. And any unicorn would deem that magical. 

So there we go! And now you know...

Writing letters like unicorns

Who in your life deserves a magical letter? 

Tuesday
May062014

Mother's Day Flower Pot Cupcakes Tutorial

Hey, I know you probably already bought your mom the best Mother's Day present ever. But just in case you've slacked...

here's a fantastic and exclusive tutorial just for CakeSpy readers, by Paul Bradford Sugarcraft School!

You may remember how they previously shared a tutorial on making a magical unicorn cupcake. Well, this one is just as sweet! 

For easy reference, here's a review of what you'll need to make these sweet cakes:

Tools

  • 6 silicon flowerpot cases
  • Medium calyx cutter
  • Medium daisy cutter
  • Sieve
  • PME cone tool
  • Small rolling pin
  • Piping bag
  • Sponge former
  • Tweezers
  • Large lily cutter

Ingredients

  • Basic Victoria sponge (or vanilla cake) recipe to fill 6 muffin/ plant pots
  • 400g/ 14oz Ganache
  • 50g/ 1.7oz white flower /gum paste
  • 50g/ 1.7oz green flower/gum paste
  • 12x 20g white wires
  • Green florist tape
  • 6 pose pics
  • PME pearl spray

Enjoy, and happy Mother's Day in advance!

Saturday
Jan262013

Tutorial for Children: The Art of Stealing Easter Candy

How to steal Easter Candy: Tutorial

This tutorial is an act of public service, from CakeSpy to the children of the world. 

Every year, millions of children are deprived of the proper amount of Easter candy that they are due. Parents actually hide or otherwise withhold this Easter candy, justifying this behavior by saying it's for the children's health. 

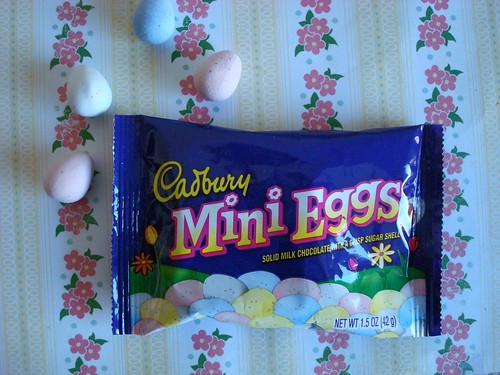
How do I know this? Because, dear readers, I was one of these children. It's true. As a child, every year when stores started displaying their Easter candy wares, my mother would buy bags and bags of candy, notably Cadbury Mini Eggs. And she would dole them out to we starving children only very sparingly--in torturous servings of one or two at a time. Sometimes she'd even hide them around the house, so that we had to perform a mini egg hunt before enjoying our treat! 

But after a while, I got wise. I realized that she had to have a stash somewhere, and I found it. But how to get access to the sweet treasure without mother's watchful eye noticing? 

As a fairly clever kid (if I do say so myself) I devised a way. And now, children of the world, I'd like to share this method with you. I'm posting it now, at the end of January, so you can hone your art as the Easter Candy season approaches--you might just find it works with Valentine's Day candy, too!

Keep in mind that this method works best with bags of candy that contain many small units--for instance, you wouldn't want to do this with say, a two-pack of Reese's cups. You'd be busted right away because the missing pieces would be evident. But to perform this candy-poaching method with a bag of, say, Cadbury Mini Eggs, it works like a charm.

How to Steal Easter Candy Without Your Mom Noticing

How to steal Easter Candy: Tutorial

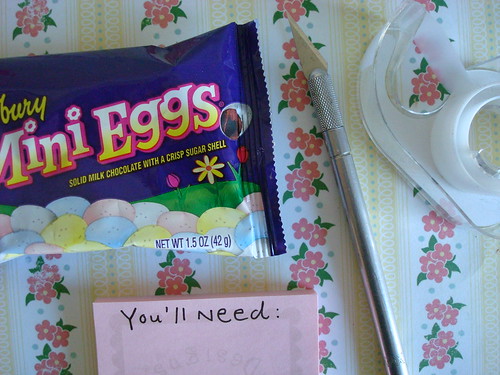
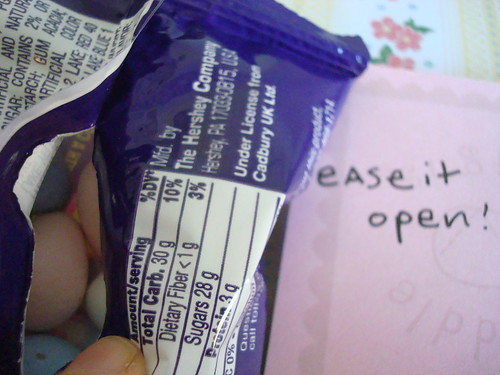
Step 1: Assemble your tools. I suggest an X-Acto Knife, and clear tape. You can use a pair of sharp scissors, using one extended scissor leg as a knife, if you don't have access to a knife. The glossy kind of tape is best, but the matte kind is OK. 

How to steal Easter Candy: Tutorial

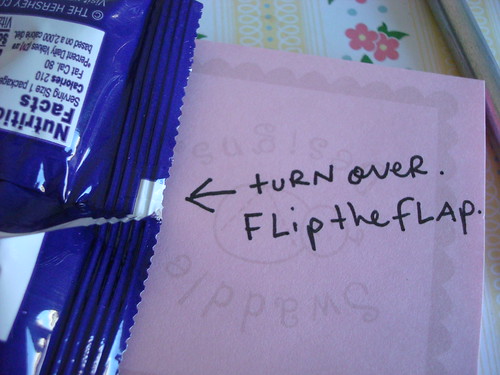
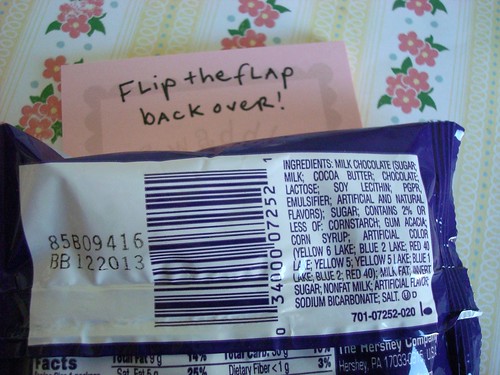
Step 2: Turn the bag over, so you are looking at the back of it. Flip the flap on the back.

How to steal Easter Candy: Tutorial

Step 3: Using your X-Acto knife, gently cut a 2-inch or so incision along the flap which you've flipped back, trying to keep your line as straight as possible. Don't cut too deeply or you might cut through the entire bag by accident!

How to steal Easter Candy: Tutorial How to steal Easter Candy: Tutorial

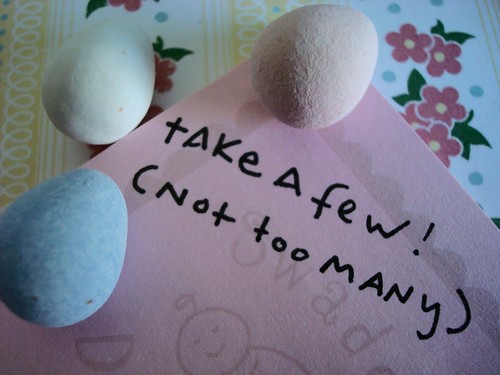
Step 4: Remove a few candies. I know your impulse is to take a bunch, but stay cool. Don't take too many, or you WILL be busted. There will be more bags, trust me.

How to steal Easter Candy: Tutorial How to steal Easter Candy: Tutorial

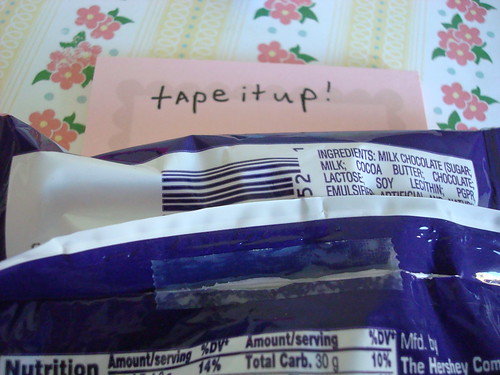
Step 5: Cut a strip of tape to the length of the incision. Cut the tape in half, lengthwise, so it is quite narrow. Adhere it to the incision, pressing it flat and smoothing out air bubbles.

How to steal Easter Candy: Tutorial

Step 6: Fold the flap back.

How to steal Easter Candy: Tutorial

Voila! Now, take the candy and run. Smile to yourself when mom says "Gosh, they put less and less candies in these bags every year!". 

How to steal Easter Candy: Tutorial

Cue the "the more you know" music, and let the rainbows provide a fade-out! No need to thank me, but yes, you're very welcome.

Monday
Aug132012

Cute Food Tutorial: Summery Cupcakes and Cookie Unicorns

Hi all! Norene Cox here from Party Pinching. I'm so excited to be guest blogging for CakeSpy
because I am such a big fan! I’m a lover of cupcakes, photography, writing, beagles & all things
chocolate. I started my website because my kids are growing up (they do that you know) and I
missed being a room mom. I love blogging about all of my fun snacks and party ideas. Today
I’m sharing some fun summer treats that are super easy to make with store-bought candy and
cookies!

Oh, and they’re cute. ‘Cause I’m all about cute food…

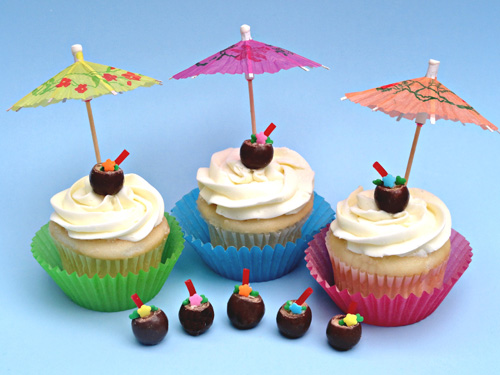
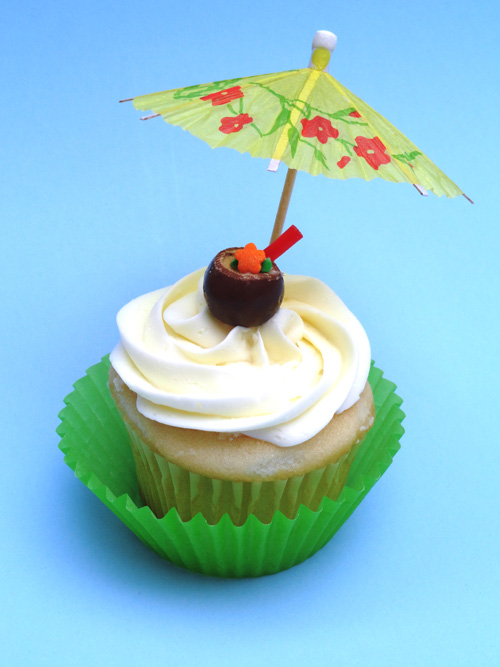
These tropical drink cupcake toppers are made from malted milk balls.

Just slice off the top, and with a little melted white chocolate, attach a little piece of licorice lace and some flower sprinkles. Ta-da! You've got yourself a mini coconut drink. Stick in a paper drink umbrella and you have one festive little cupcake- perfect for a luau party!

Mixing coconut or crushed malted milk balls in the batter is pretty yummy too. Heck, you can even add both.

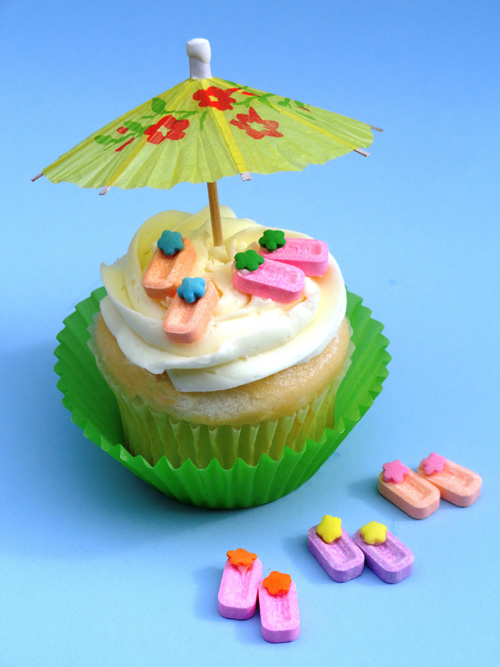
Another super cute summer cupcake topper idea is to take Pez candy and add a little flower sprinkle on one end. Now you have teeny tiny flip flops. Can you imagine anything cuter? Oh, but wait! There’s more cuteness coming…

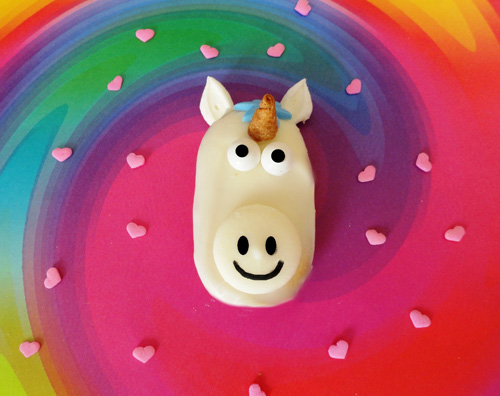
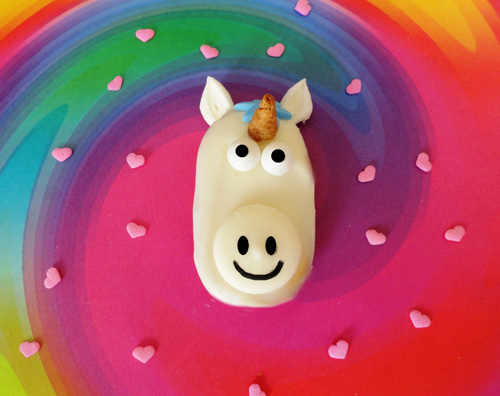
Behold! A unicorn cookie - the epitome of cuteness.

This little magical sweetie is good for any time of year. It’s made out of a Pepperidge Farm Milano cookie dipped in white candy melts. Simply add some candy eyes and a small marshmallow cut diagonally for the ears. Use an edible black marker to draw the nose on a white candy melt. Then cut the mane out of blue fondant using a mini daisy cutter. Carefully cut the tip off of an ice cream cone for the horn.

It’s cute.

And lucky.

And charming.

It’s magically delicious.

Have a sweet summer everyone!

Tuesday
Jul172012

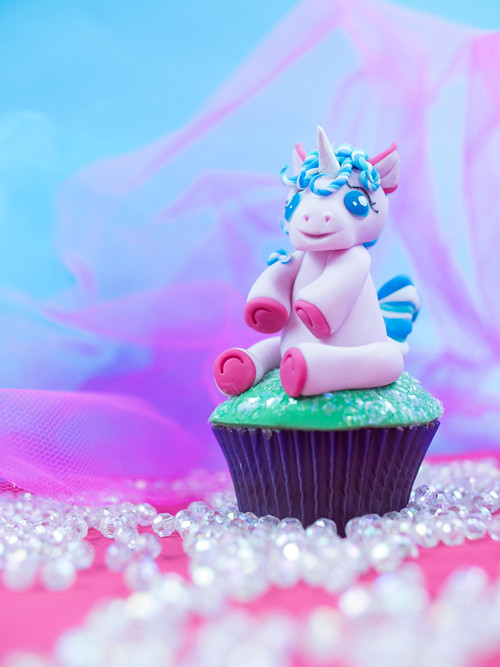
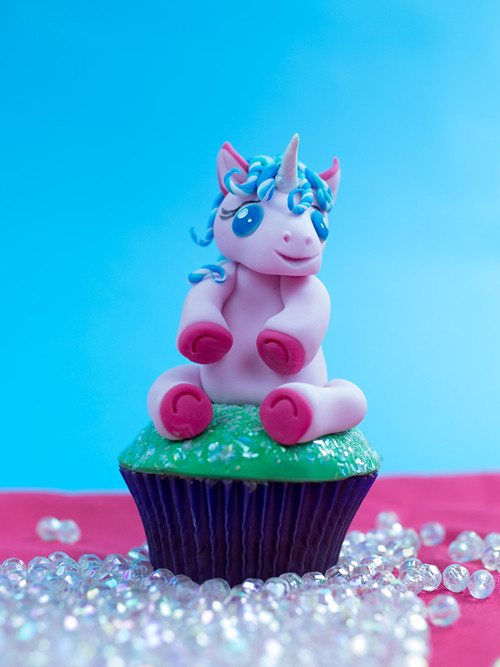
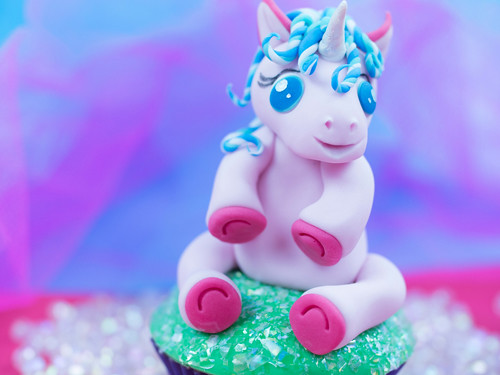
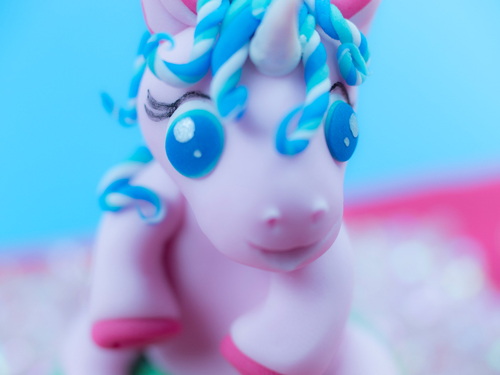
Magical Unicorn Cupcake Tutorial

Paul Bradford Magical Unicorn for CakeSpy

Topping the list of life skills you never knew you needed? How to make a magical unicorn to put on top of your cupcake.

But the days of blithely living your life unaware of how to complete this magical task are over, thanks to my friends at the Paul Bradford Sugarcraft School, who kindly offered up an exclusive tutorial to put on CakeSpy. Not only that, but they were willing do do a tutorial involving a magical unicorn! And don't freak out too much, but in a few days I am going to keep the good times going with a giveaway for some Paul Bradford Sugarcraft School DVDs - so you can get some educaketion at home.

Here, in all its glory, is the video. It's broken up into four parts to keep things manageable for you!


To give you a little bit of a 411 on the Paul Bradford Sugarcraft School (don't you want to go there?), here's their mission statement: 

Paul Bradford Magical Unicorn for CakeSpy


Our aim is to provide you with all the information and skills you need to be a successful cake decorator.
We have hundreds of hours of step-by-step video courses on our website, with new cake designs added weekly. The courses will teach you a wide range of cake decorating skills, with basic designs to suit beginners to more challenging designs for the experienced. Whilst the cake designs featured in our courses may inspire you, the skills and confidence you will gain are invaluable, allowing you to create cake designs as wild as your imagination.
With a wealth of experience including making cakes for royalty in the UK and Prince Albert of Monaco, to running one of the UK's  biggest designer cake businesses, Paul Bradford and his team have a lot of expertise which they are happy to share.
For more information, and to join our lively cake decorating community come to:


- - - - - - - - - - - - - - 

Paul Bradford Magical Unicorn for CakeSpy

Also, if after watching the video you decide that you must make this magical unicorn all by yourself, here's a list of the ingredients and tools needed:

Ingredients
Cupcake (muffin size)
Sugarpastes (fondant):
75g Pink
30g Lincoln green
20g Fuschia pink
15g Jade
15g Blue
15g White

White magic sparkle flakes
Pearl white paint
Black paint

Tools
Small rolling pin
Smiley tool (PME)
Stitchy tool (PME)
Ball tool (PME)
Pasta

No1 Paint brush 


...and, fine, one more unicorn picture for the road: Paul Bradford Magical Unicorn for CakeSpy

Wednesday
May092012

How To Make Edible Rock Candy Jewelry

This necklace is not only delightful, it is delicious.CakeSpy Note: This tutorial is provided courtesy Cake Gumshoe Jasmin, a suspected sweet genius who, among other things, has invented cupcake-stuffed strawberries. Check out her work at 1 Fine Cookie!

It’s fashionable, pretty, tastes good, affordable and easy to make. What’s not to like about 1 Fine Cookie’s rock candy jewelry?

These precious “stones” are made with unique flavors, such as marshmallow, peanut butter and more. The flavor is up to your preference!

Make these for ladies’ night, showers, bachelorette weekends, birthday parties, with the kids, or for Mother’s or Valentine’s day. The possibilities are endless!

The bare-bones basics are listed below; for a more detailed tutorial, visit 1 Fine Cookie.

Ingredients and Tools:

  • clothes pin
  • large glass container
  • ribbon
  • sugar
  • optional but recommended: Torani syrups.
  • optional: food coloring

 Process shot!

How to make it happen

  1. Cook about one part water to three parts sugar. One necklace will be about 1 cup water, as a reference point.

  2. Once the sugar has completely dissolved and simmered, turn off heat and cool. Mix in any food coloring, and a few drizzles of your choice Torani syrup for flavor. 

  3. Soak middle of ribbon (about 2 feet or more) in the sugar water mixture, then coat in sugar overnight until dry.

  4. Place middle of ribbon inside of sugar water, which has been poured into a large glass container. Use clothespins to clip the ribbons and prevent from falling in.

Allow to grow! Move necklaces around a little every day to prevent it from sticking to the sides. While factors will play into how long this will take, including the size of your piece, the humidity, et cetera, you're basically looking at 1-4 weeks.

Cakespy has written permission to feature the recipe, writing and photos of 1 Fine Cookie. Be polite: if you would like to share as well, please visit the website for policies first.


Sunday
Apr292012

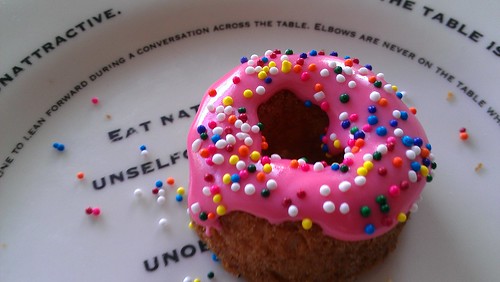
Sweet Dough: Sugar Cookies that Look Like Doughnuts

Doughnut Cookie

So, you're making sugar cookies. Awesome. Good for you.

You've got the batter all mixed. At this point, you pretty much have two choices. You either roll out the dough and cut out some cute shapes, or you're going to drop them on the sheet and bake them. Right? WRONG.

Sour Cream Sugar Cookies

Put away your rolling pin, because I've got an easy way to make your sugar cookies cuter: bake them in a mini doughnut pan .

If you own a mini doughnut pan, like I do (jealous? I got it at the Wilton tent sale when I visited their headquarters), you simply must employ it to make your sugar cookies more adorable.

Honestly, it couldn't be easier to do (provided you have a mini doughnut pan). Here's how I did it.

First, prepare a batch of sugar cookie dough. I am not going to be bossy about what recipe, but I will tell you that I used the one on page 13 of this e-book. Once mixed, set aside for a little bit.

Preheat your oven to the temperature your recipe says it ought to be.

Next, lightly butter your mini doughnut pan. Or spray it with non-stick spray. Whatever you want. 

After it's greased, stuff the dough in the mini doughnut wells. Fill them til they're mostly full. If you think your cookies are going to spread, put less dough in (or put a cookie sheet under the mini doughnut pan while you bake them).

Bake the cookies, but check them about 5 minutes before your recipe would call for, because they're baking in a different vessel.

Donut cookies

Once golden brown, remove from the oven. Let them cool for a while (maybe 20 minutes) in the doughnut pan. Then, gently remove. I found that after loosening one edge with a sharp knife, they basically just popped out. 

Let the cookies cool, and then apply a dab of pink icing (pink is really best) and be sure to put sprinkles on them too.

Enjoy! They're adorable and sweet. But they're not doughnuts, they just look like them.

Doughnut Cookie

© Cakespy, all rights reserved. Powered by Squarespace.