Home Home Home Home Home Home Home
CakeSpy

Featured: 

My adventure at Ben & Jerry's in Vermont!


Unicorn Love: the Eating Disorder Recovery Blog


 Buy my brilliant books!

Buy my new book!

Buy my first book, too! 

CakeSpy Online Retail!


Archives
Gallery

Fantastic appliance for cake making on DHgate.com

everyrecipe.co.nz

Craftsy Writer

Entries in recipes (704)

Tuesday
Jul152008

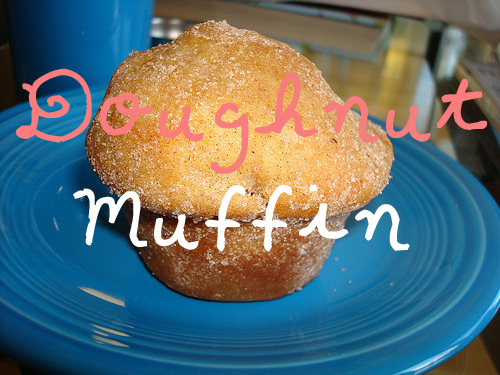
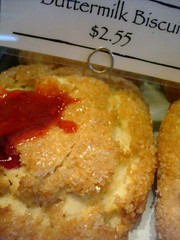
It's Biscuit, It's Biscuit Time!: Macrina Bakery's Buttermilk Biscuits

Macrina's Buttermilk Biscuits

When talking about bakeries in Seattle, the moment will inevitably come when someone asks us "What do you think about Macrina?." After all, Macrina Bakery is probably one of the more famous bakeries in Seattle: it's won awards, it's been featured in numerous cookbooks and on the Food Network. But it's also a very polarizing subject for locals, who either seem to love or loathe the place.


Naysayers will say that they're inconsistent, that the service is slow and sometimes surly, the baked goods dense and exceedingly--perhaps too--rich.

Strangely, those are all the same reasons we love it. Sure, it can be frustrating at times, but it feels deeply human and homey somehow. And our very favorite item there? The buttermilk biscuits with fresh preserves.

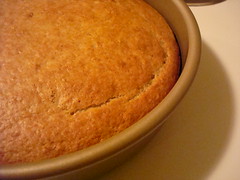
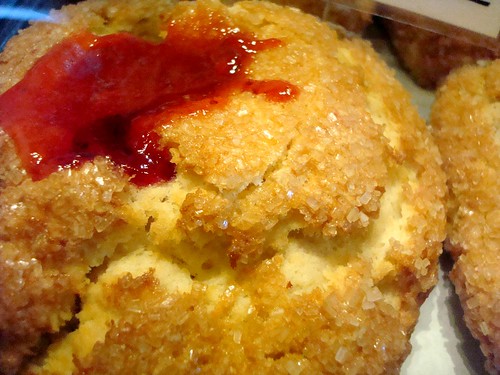
Now, a Southern purist might be appalled by these biscuits--made with buttermilk, shortening, pastry flour and yeast, they seem to be on a different wavelength than the light-as-air, fluffy White Lily flour and lard sort from days of yore. Due to folding the dough three times before baking, they attain a level of flakiness that seems somehow denser than other biscuits, and works wonderfully with a morning coffee. And at approximately 7:15 a.m. in the morning, shortly after the bakery has opened for the day (we never go right at 7 because the biscuits are never out first-thing), we couldn't imagine anything sweeter than the rows and rows of golden-hued biscuits, still warm, each with a glistening jewel-like dollop of fresh preserves.

As for the haters? Go ahead, keep hating--more biscuits for us.


Macrina's Buttermilk BiscuitsMacrina's Buttermilk Biscuits 

In Seattle? Visit Macrina's shop(s--there are three) at 2408 1st Ave. in Belltown 206.448.4032 (and our favorite); at 615 West McGraw Street in Queen Anne, 206.283.5900; and at 19603 Vashon Hwy SW on Vashon Island, 206.567.4133. You can visit them online too at macrinabakery.com.
Not in Seattle? Well, luckily we have the recipe (though if it's more your speed, the recipe for their now famous Sour Cherry Coffee Cake, which was featured on the Food Network's "Road Tasted" show, can be found here). Also, their book is well worth investing in; it can be found here.
Macrina's Buttermilk Biscuits (With a few notes of our own--makes six generous biscuits)
Ingredients:
  • 2 tablespoons warm water
  • 1 teaspoon dried yeast
  • 3 cups pastry flour
  • 2 tablespoons granulated sugar
  • 1.5 teaspoons baking powder
  • 1/2 teaspoon baking soda
  • 3/4 teaspoon salt
  • 3/4 cups vegetable shortening, cut to 1/2 inch pieces
  • 1 cup buttermilk
  • egg wash made from 1 egg and 1 teaspoon water
To Garnish: Coarse sugar (use as desired) and 1/2 cup preserves, your favorite type (we like marionberry). The coarse sugar is not a deal breaker but does add a nice crunch; the preserves are absolutely necessary.
  1. Preheat oven to 350 degrees. Line a baking sheet with parchment paper.
  2. In a small bowl, combine warm water and yeast. Mix with whisk to dissolve yeast, and let sit for five minutes while yeast blooms.
  3. Sift flour, granulated sugar, baking powder, baking soda and salt into a medium bowl. Toss with your hands to combine. Drop pieces of shortening into bowl. Using pastry cutter or fork, cut in until coarse and crumbly.
  4. Add the yeast-water and buttermilk, and mix with a wooden spoon, but only until it all comes together--do not overmix.
  5. Coat hands with flour and pull dough from bowl on to a floured surface. Pat dough into a rectangle, approximately 9 x 5 inches, so the long side is facing you. Dough will be sticky so keep flouring your hands as needed.
  6. To achieve a flaky, layered effect, it's important to give the dough a series of tri-folds: fold into thirds like a letter, folding the left third over the center third first, and then the right third on top. Sprinkle more flour and roll out to a 9 x 5 rectangle again, repeating the tri-fold step twice more (for a total of three tri-folds), ending with a rectangle 3/4 to 1 inch thick.
  7. Cut into six equal rectangles and place on the baking sheet. Brush with your egg wash and sprinkle on raw sugar.
  8. Bake on center rack for 20-25 minutes, or until golden brown on top and bottom (ours only took 18 minutes to get to the point we liked). Let cool for ten minutes or so, then dent the top with a spoon and fill with a generous dollop of your preserves.

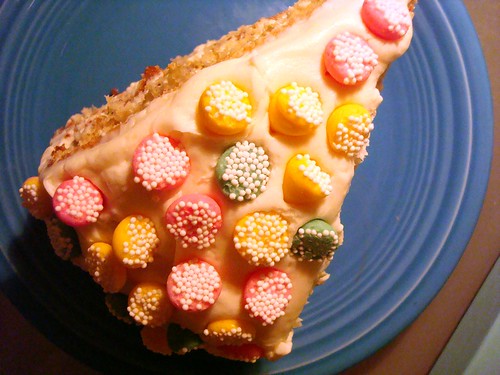
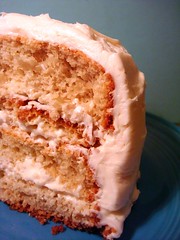
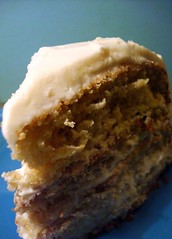
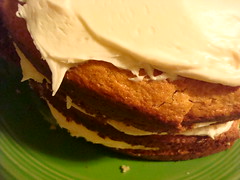
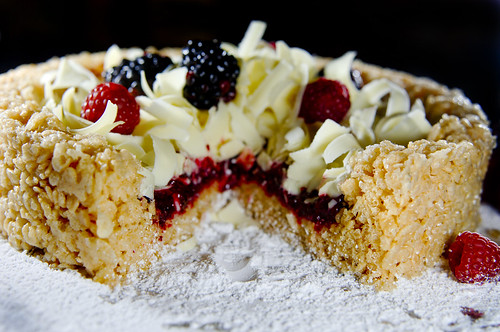
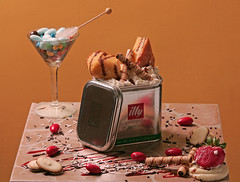
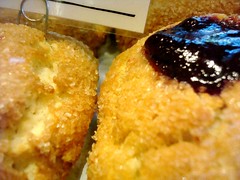
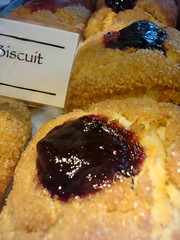
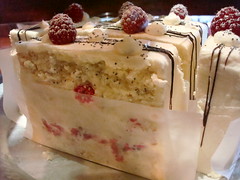
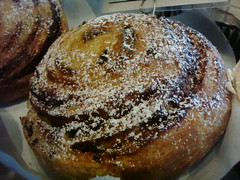
Finally, as a bonus, a couple more photos of other Macrina baked goods:
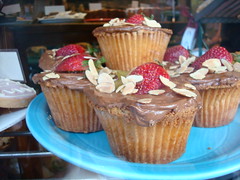
Cupcakes at Macrina, Belltown, SeattleMacrina BakeryKiwi Topped Cupcakes at Macrina, Belltown, SeattleNice Buns at Macrina, Seattle
Macrina Bakery on Urbanspoon


Sunday
Mar302008

Cutting (Cake) Corners: Cakespy Experiments with a Daring Bakers Challenge

Mischief
In case you didn't know it, the Cakespy team is part of a group called the Daring Bakers. Each month, a challenge is posted for members, and each member posts their results on the same day on their websites. This month, we were encountered by a challenge that was tres exciting to us: the Perfect Party Cake by Dorie Greenspan. But--and here's a moment of honesty--when we started looking through the recipe, it seemed awfully...involved. (Of course, at Cakespy, as much as we admire fine baking, we are the first to call ourselves expert tasters, novice bakers). And so, making like Shary Bobbins in the Simpsons, we decided to see how much we could get away with by "cutting every corner". But truly, this was an experiment of curiosity rather than pure brattiness. Though we suspected that our end result would be less than bakery-caliber, we wanted to know--would it be completely inedible? Or would it be, you know, kind of ok? Here's how it went.


Here's the original recipe, and the ways we messed around with it in blue italics:

For the Cake
  • 2 1/4 cups cake flour (we used all-purpose)
  • 1 tablespoon baking powder
  • ½ teaspoon salt
  • 1 ¼ cups whole milk or buttermilk (we used soy milk)
  • 4 large egg whites
  • 1 ½ cups sugar
  • 2 teaspoons grated lemon zest (we left this out)
  • 1 stick (8 tablespoons or 4 ounces) unsalted butter, at room temperature (we got impatient so we nuked it)
  • ½ teaspoon pure lemon extract (we left this out--no lemon handy)

For the Buttercream
  • 1 cup sugar
  • 4 large egg whites
  • 3 sticks (12 ounces) unsalted butter, at room temperature
  • ¼ cup fresh lemon juice from 2 large lemons (we left this out)
  • 1 teaspoon pure vanilla extract

For Finishing (we left this out--just frosted it, plain and simple)
2/3 cup seedless raspberry preserves stirred vigorously or warmed gently until spreadable
About 1 ½ cups sweetened shredded coconut


Getting Ready
Centre a rack in the oven and preheat the oven to 350 degrees F. Butter two 9 x 2 inch round cake pans and line the bottom of each pan with a round of buttered parchment or wax paper. Put the pans on a baking sheet. (We didn't have parchment or waxed paper so we just buttered those babies and hoped for the best.)

To Make the Cake

  1. Sift together the flour, baking powder and salt.
  2. Whisk together the milk and egg whites in a medium bowl.
  3. Put the sugar and lemon zest in a mixer bowl or another large bowl and rub them together with your fingers until the sugar is moist and fragrant. (since we had no lemon zest, we just added it to the butter and proceeded to step #4)
  4. Add the butter and working with the paddle or whisk attachment, or with a hand mixer, beat at medium speed for a full 3 minutes, until the butter and sugar are very light.
  5. Beat in the extract, then add one third of the flour mixture, still beating on medium speed. (we just added the flour mixture).
  6. Beat in half of the milk-egg mixture, then beat in half of the remaining dry ingredients until incorporated.
  7. Add the rest of the milk and eggs beating until the batter is homogeneous, then add the last of the dry ingredients.
  8. Finally, give the batter a good 2- minute beating to ensure that it is thoroughly mixed and well aerated.
  9. Divide the batter between the two pans and smooth the tops with a rubber spatula.
  10. Bake for 30-35 minutes, or until the cakes are well risen and springy to the touch – a thin knife inserted into the centers should come out clean
  11. Transfer the cakes to cooling racks and cool for about 5 minutes, then run a knife around the sides of the cakes, unfold them and peel off the paper liners. (ours came out just fine! yess!!)
  12. Invert and cool to room temperature, right side up (the cooled cake layers can be wrapped airtight and stored at room temperature overnight or frozen for up to two months). (We put it in the fridge to kind of speed up the process, but then got nervous about it cooling unevenly and took it back out again to do it Dorie's way).
CakeCake 
To Make the Buttercream
  1. Put the sugar and egg whites in a mixer bowl or another large heatproof bowl, fit the bowl over a plan of simmering water and whisk constantly, keeping the mixture over the heat, until it feels hot to the touch, about 3 minutes.
  2. The sugar should be dissolved, and the mixture will look like shiny marshmallow cream. (Ours did, sort of).
  3. Remove the bowl from the heat.
  4. Working with the whisk attachment or with a hand mixer, beat the meringue on medium speed until it is cool, about 5 minutes.
  5. Switch to the paddle attachment if you have one, and add the butter a stick at a time, beating until smooth.
  6. Once all the butter is in, beat in the buttercream on medium-high speed until it is thick and very smooth, 6-10 minutes.
  7. During this time the buttercream may curdle or separate – just keep beating and it will come together again. (It did curdle, but we beat on and it did come together again--whew!).
  8. On medium speed, gradually beat in the lemon juice, waiting until each addition is absorbed before adding more, and then the vanilla. (We had no lemon juice to add).
  9. You should have a shiny smooth, velvety, pristine white buttercream. Press a piece of plastic against the surface of the buttercream and set aside briefly.

Sweet Cake MischiefSweet, Sweet Mischief 
To Assemble the Cake
  1. Using a sharp serrated knife and a gentle sawing motion, slice each layer horizontally in half.
  2. Put one layer cut side up on a cardboard cake round or a cake plate protected by strips of wax or parchment paper. (We just put it on a plate).
  3. Spread it with one third of the preserves. (We skipped this, and just applied the buttercream to the sides and top).
  4. Cover the jam evenly with about one quarter of the buttercream.
  5. Top with another layer, spread with preserves and buttercream and then do the same with a third layer (you’ll have used all the jam and have buttercream leftover).
  6. Place the last layer cut side down on top of the cake and use the remaining buttercream to frost the sides and top.
  7. Press the coconut into the frosting, patting it gently all over the sides and top. (We didn't use any coconut, but we topped it with our favorite melty mints, which made it very happy-looking and, you know, covered a multitude of sins).
DSC06586
And so, having broken half of the rules in the recipe, how did it all turn out? Well, if we're completely truthful, our result was more "charming" in that only-a-mother-could-love-it kind of way, as opposed to say, showstoppers like this or this (both entrants who *ahem* followed the recipe...or, more so than us anyway). While the taste was good--certainly, our plates were cleaned without effort or complaint--it wasn't truly great. Ultimately, each step or ingredient that we deemed unnecessary during the baking process showed its importance in the final result--it lacked the certain je ne said quoi that the lemon likely lends to the final product; the presentation, while "rustic", lacked the panache and beauty that the preserves and strawberry would have given.
So, would we do it again? Well, OK, we might not be completely converted to following the recipe exactly--but we'll likely try much harder next time. After all, a lot of thought, testing and tasting goes into these recipes--and by people far better at baking than us--and hey, it's the least we can do to try to honor that expertise if we want a truly delectable baked good.


Tuesday
Jan222008

Dessert Oasis: Fantastical Desserts and Recipes from Michael's Kitchen


Deep Dish Rice Krispie "Pizza"

Photo credit Michael’s Kitchen Newport Beachside Hotel & Resort

Ever felt like dessert menus are becoming a bit...predictable? A chocolate cake of some sort, a fruit-based pastry, cheesecake or tiramisu, a pudding or flan, and an ice cream or sorbet. Yawn.


Fortunately, we recently came across a restauranteur who has not forgotten the childlike joy and simple pleasure that dessert can bring: chef Michael Blum, who recently opened Michael's Kitchen in Miami. He's bringing a bit of pomp and circumstance--as well as a needed dose of fun--back to the institution of dessert, serving up fanciful sweets like desserts like N'awlins style Bananas Foster, Twinkie Tiramisu, Over-the-Top Baked Alaska and the Milky Way Chocolate Malt, and our favorite, the Deep Dish Rice Krispie Dessert Pizza (what can we say, we're in a cereal state of mind lately!).

And while you're probably intrigued by these dessert offerings, perhaps you are wondering: why would Cakespy be so cruel as to spotlight a place so far away? Well, for those of you whose travel plans don't include a Florida getaway anytime soon, we're happy to report that after having written a gushing love note to the management, they were kind enough to donate not one but two recipes for their coveted desserts--Deep Dish Rice Krispie Pizza and Twinkie Tiramisu, which are both listed below. Sweet!
Finally, dessert's fun again; this is a trend we hope will catch on!
If you live in or have plans to visit the Miami Area, Michael's Kitchen is obviously a must-visit; they're located at 16701 Collins Avenue, Miami Beach. 

RECIPE 1: White Chocolate Raspberry or Strawberry Rice Krispie Deep Dish Pizza


Ingredients

  • 3 tablespoons margarine or butter
  • 1 (10 oz.) package regular marshmallows

- Or -

  • 4 cups mini marshmallows
  • 6 cups Rice Krispies®
  • White Chocolate Shavings to taste for garnish
  • Your choice of jam or preserves, to taste (we like a thicker layer, but this recipe calls for a thinner one)


Directions


1. Melt margarine in large saucepan over low heat. Add marshmallows and stir until completely melted. Remove from heat.

2. Add RICE KRISPIES cereal. Stir until well coated.

3. Using buttered spatula or waxed paper, press mixture evenly into 9 x 2-inch deep dish round pan coated with cooking spray.

4. When cool remove from pan by using a hot water bath. Put pan into water for about 30 seconds.

5. To decorate: Spread a thin layer of raspberry or strawberry jam into the center of the circle of the pizza, leaving the “crust” of the pizza bare. Then add white chocolate shavings for the cheese look and sliced strawberries as pepperoni and raspberries as other toppings. NOTE: feel free to use any kind of toppings that your heart desires, there a no limits to this dessert…. Be creative!!!! Best if served the same day.

Serving Size one 9 inch round

RECIPE 2: Twinkie Tiramisu

At Michael’s Kitchen we serve these as individual desserts in 2 inch by 2 inch square glass containers.

Ingredients

  • 1 cup heavy cream (40% milk fat)
  • 5 oz granulated Sugar
  • 3 Tablespoons Espresso (plus a little bit more for dipping the lady fingers)
  • 1.5 pounds of Mascarpone cheese
  • 8 yolks
  • Lady Fingers (at least 36 cookies)
  • 1 box Twinkies

Directions:


1. Use an electric mixer with Wisk attachment and a cold bowl. Place heavy cream and 2 ozs of sugar in bowl and beat until stiff peaks, making whipped cream. This process takes about 3-4 minutes depending on strength of mixer.

2. Remove whipped cream from mixer and place it into the freezer while mixing the other ingredients.

3. Separate the yolks from the whites and place the yolks into a new cold bowl. Beat yolks and the remaining 3 ozs of sugar together. This process takes about 4 minutes. The mixture should look a pale yellow and about 4 times what the mixture started out as.

4. Add the mascarpone cheese until well incorporated and than add 3 Tablespoons of the espresso. Mix for about 20 seconds longer.

5. Remove this mixture from mixer and fold the cream into it. These two mixtures should be combined into one mixture leaving few streaks.

To Assemble:

1. Prepare espresso into a cup of coffee. Taking two ladyfingers break them in half and dip them into the warm espresso.

2. Place ladyfingers into the bottom of the ramekins.

3. Add the tiramisu cream to the top of the ramekin and take a knife across the top of it to clean off the edge.

4. Repeat this process until all cream is gone.

5. Cut the Twinkies in half on a bias and place one half on each tiramisu.

Note: best if refrigerated for a couple of hours but also can be served right after made.
Michael's Kitchen at Newport Beachside Hotel & Resort in Sunny Isles Beach


Wednesday
Dec192007

Beautiful Fusion: Columbia City Bakery's Doughnut Muffin


Recently, we took a journey to the Columbia City Bakery. Though we'd tried their pastries at some of the various coffee shops which they supply in the Seattle area, we wanted to see the source.


Now, anyone who has ever taken the bus from Queen Anne to Columbia City will understand that not just any pastry would be worth the trip. But what made it all worthwhile was our newest obsession: the Doughnut Muffin.

What is a doughnut muffin exactly? In terms of appearance, it looks more like a muffin than a doughnut, but without a cup. But instead of the slightly craggy muffin-top, this one was smooth and more cake-like, and coated with a cinnamon-sugar coating that did kind of resemble that of an old-fashioned doughnut. Its surface had a slight sheen, which made us wonder if it was fried (it's not; it's coated with a layer of butter which gives it that dewy, just-kissed-by-a-fryer look). The texture is not unlike a cake doughnut, but with a denseness that speaks more to the muffin side of things.

But most importantly, what does a doughnut muffin taste like? Well. Upon first bite, Mr. Cakespy's first words were "it tastes like a muffin...and a doughnut...all at once!". To us, this is a beautiful fusion: for one beautiful moment, as the buttery coating, crunchy cinnamon-sugar topping and cakey inside melt together in your mouth, everything else disappears.

Doughnut Muffins can be found at the Columbia City Bakery (call ahead for availability), 4865 Rainier Avenue South, Seattle; (206) 723-6023.

Happily, non-Seattleites need not despair! We located a wonderful variation on the doughnut muffin recipe (inspired in part by the above ones!) on one of our favorite Seattle foodie blogs, Orangette. Click here to see the post and recipe!


Columbia City Bakery in Seattle


Page 1 ... 67 68 69 70 71
© Cakespy, all rights reserved. Powered by Squarespace.