Home Home Home Home Home Home Home
CakeSpy

Featured: 

My adventure at Ben & Jerry's in Vermont!


Unicorn Love: the Eating Disorder Recovery Blog


 Buy my brilliant books!

Buy my new book!

Buy my first book, too! 

CakeSpy Online Retail!


Archives
Gallery

Fantastic appliance for cake making on DHgate.com

everyrecipe.co.nz

Craftsy Writer

Entries in recipes (704)

Sunday
Aug092009

More is More: Decadent Poundcake Cupcakes with Peanut Butter Frosting

Peanut butter cupcakes
There are those people who say that pound cake is a dessert that needs no garnish, rich and decadent as it is on its own. 

I am not one of those people, however, so when I recently prepared the pound cake recipe featured on the absolutely amazing Smitten Kitchen site, while the cakes (which I baked in cupcake-cups) were absolutely delicious, I couldn't help but feel that it was a beginning, not an end: they needed something serious--no delicate fruit toppings here, please--to balance out that lightness.

And what could be more decadent than topping an already-buttery cake with peanut butter buttercream frosting?

Peanut Butter Frosting
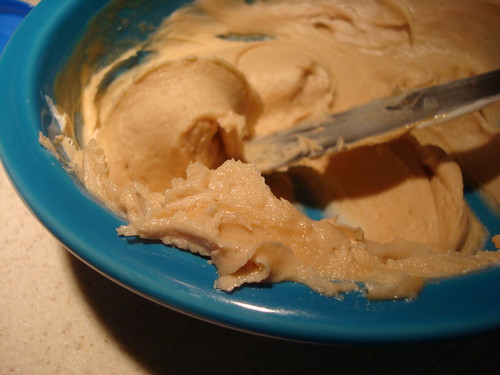
Happily, I had just received a sweet sample pack from Superior Nut which included a decadent peanut butter dessert topping (think peanut butter, but sweeter and with the consistency of a thick hot fudge), which was easily incorporated into a batch of buttercream which was then used to frost the baby-poundcakes; it was all topped off with some sea salt and roasted peanut chunks. The result? Astoundingly sweet, rich, and satisfyingly salty cupcakes which prove that while sometimes less is more, sometimes more is best.  

Want a piece of this awesome? Here's how I did it:

Peanut butter cupcakes
Poundcake Cupcakes With Peanut Butter Frosting


For the Cake: For a light and versatile poundcake, check out this recipe on Smitten Kitchen; I made my batch with two major changes: first, vanilla extract was used in place of cognac; second, they were baked them as cupcakes instead of one large cake (this reduced the baking time by about 5-7 minutes). It made about 15 cupcakes. Some of them were a little bit short, but extra frosting compensated quite nicely.

For the Frosting: I doctored up a batch of Magnolia Bakery's famous buttercream:
  • 1 cup (2 sticks) unsalted butter, softened
  • 4 to 6 cups confectioners’ sugar (less than in the original recipe, since the Peanut butter topping was sweetened)
  • 1/2 cup light cream
  • 2 teaspoons vanilla extract
  • 2 heaping tablespoons of Superior Nut's Peanut Butter topping (or, I'm sure you could make due with a similar amount of lightly melted peanut butter or other nut butter, but you might want to add a little more confectioners' sugar)
  • Optional: Sea salt and Roasted Peanut Chunks for garnish

Place the butter in a large mixing bowl. Add 2 cups of the sugar and then the cream and vanilla. On the medium speed of an electric mixer, beat until smooth and creamy, about 3-5 minutes. Gradually add the remaining sugar, 1 cup at a time, beating well after each addition (about 2 minutes). After incorporated, add the peanut butter topping to the mix and put back on low speed until the icing is thick enough to be of good spreading consistency; you might need to add a little extra sugar but probably not. Do not refrigerate this frosting, or it will become a brick; it can be stored in an airtight container for up to 3 days.

Finally, enjoy. These cakes were brought to CakeSpy buddy Dave's birthday party, and apparently had the birthday crowd in a sugar coma even the next day.


Tuesday
Aug042009

Babka Kebabs: Glorious Kebabka!

Kebabka
There is a deeply rooted belief here at CakeSpy that just about any food tastes better on a stick. I dare you to think of one that doesn't.

But as Rachel of Coconut & Lime recently lamented via twitter, while many desserts-on-a-stick are adorable and delicious, they can all too often be "too small to be satisfying". 

Happily, there is a food on a stick that will stick with you: delicious chunks of chocolate babka speared kebab style on a skewer--or, as I like to call it, kebabka.

Kebabka!
Now, kebabka is not necessarily a cute food. It's not delicate, and it's not dainty. But it is rich, chocolatey, carbohydratey, and delicious--and when enjoyed several chunks at a time eaten directly off of a stick, it will not leave you hungry.

Here's how you do it.


Kebabka (based loosely on this recipe)

  • For the babka
  • 1/2 cup butter, softened
  • 1/2 cup granulated sugar, plus 1/2 teaspoon granulated sugar
  • 4 large egg yolks
  • 1 (.25-ounce) package active dry yeast (2 1/2 teaspoons)
  • 1/4 cup warm water
  • 1 cup milk
  • 1 teaspoon vanilla extract
  • 1 teaspoon salt
  • 2 cups all-purpose flour


For the topping (I kind of cheated here)

  • 1/2 cup butter
  • 1 big bar of chocolate (the jumbo sized ones at the grocery store--I used Hershey's Special dark chocolate)
  • Small amount of whipping cream, just for texture


  1. In a large mixing bowl, cream the butter and 1/2 cup sugar until smooth.
  2. In a separate bowl, beat the egg yolks until creamy (I saved the egg whites for an egg wash later)
  3. Mix the yeast in warm water with the 1/2 teaspoon of sugar. When this mixture thickens, add it to the egg yolks along with the, milk, vanilla and salt.
  4. Add the yeast mixture to the butter/sugar mixture and mix well. Slowly add the flour until a soft dough is formed. 
  5. Turn dough out onto a floured work surface and knead until dough is no longer sticky.
  6. Cover the dough and allow it to rise in a warm place until it doubles.
  7. When it's looking pretty big, you might want to prepare the filling. To do so, you could put your butter and chocolate (broken up) in a double boiler to melt it, or you could do as I did and microwave it at 10 second intervals until it is melted. Add a touch of heavy cream (if you feel like it; I did) and mix until fully incorporated.
  8. At this point, I put the dough on a floured silicone pastry mat and rolled it flat and long. I cut it into about 15 separate little chunks.
  9. Then I rolled out each little chunk of dough and poured some chocolate filling in each one, then made it into a little roll and put each one into a cupcake cup.
    Mini BabkasRising to the occasion
  10. Allow these little loaves to rise again for about 2 hours.
  11. At this point you can either pour some of the leftover topping on top of the risen dough mounds or just, you know, eat it with a spoon (oh so rich!). 
  12. I used some of the leftover egg whites to lightly brush on top of each little loaf to ensure a pleasing golden tone.
    Mini Chocolate Babka
  13. Place in a preheated 350*F (150*C) oven for 30 minutes or until done. Let cool completely.
    Big plate of kebabkas
  14. Once cool, cut into either halves, or fourths; spear as many chunks as you'd like on kebab skewers, and eat yourself some food on a stick. If desired, serve with whipped cream for dipping (it's good!)


Thursday
Jul302009

Making Whoopie: Pies, That Is

Homemade Whoopie Pies
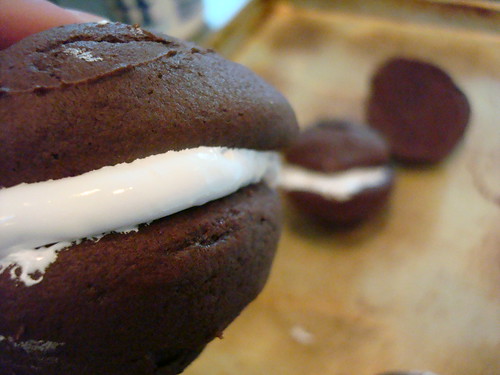
While I stand by my claim that Whoopie Pies are not the next big thing, I am completely willing to admit that they are delicious. While several more exciting recipes have been developed, this one from marshmallowfluff.com is a good starting point--because after all, they say that you should learn the rules before you break them, right? So why not do as CakeSpy buddy Chris and I did and learn the ropes with this fairly traditional recipe, which includes Marshmallow Fluff (a substance which has been connected with the Whoopie Pie since the 1930s, when a cookbook called Yummy Book included a recipe calling for the fluffy stuff), then let your creativity go wild as you discover delicious new variations: pumpkin? Peanut butter chocolate? Strawberry? Or perhaps you could just ogle at all of the flavors available at Wicked Whoopie Pies. It's not just (whoopie) pie in the sky!

Whoopie Pies (recipe adapted from marshmallowfluff.com)

  • 1 egg
  • 1/3 c. vegetable oil
  • 1 c. sugar
  • 2 c. unsifted all-purpose flour
  • 1/3 c. unsweetened cocoa
  • 1 tsp. baking soda
  • 1/4 tsp. salt
  • 3/4 c. milk
  • 1 tsp. vanilla
  • Filling (recipe follows)


Homemade whoopie pies
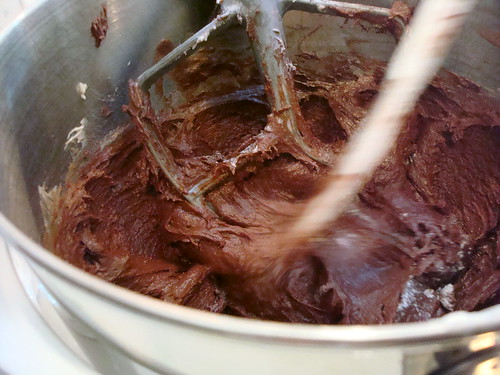
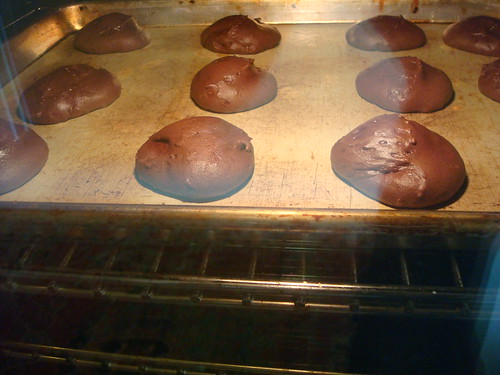
Heat oven to 350 F. Grease two large cookie sheets and set aside. In a large bowl with mixer at medium speed beat egg and vegetable oil. Gradually beat in sugar and continue beating until pale yellow in color. In another bowl, combine flour, cocoa, baking soda and salt. In a measuring cup combine milk and vanilla. Add flour and milk mixtures alternately to eggs and sugar, beginning and ending with dry ingredients.


Homemade whoopie piesHomemade whoopie pies
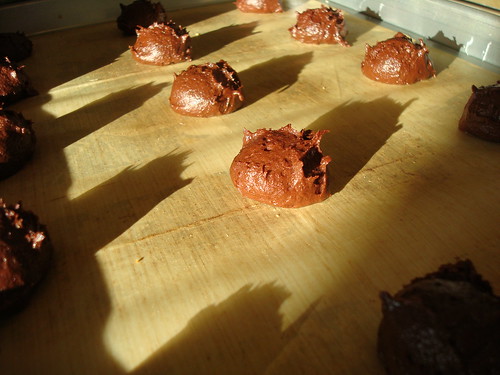
Drop by tablespoons onto cookie sheet. These will spread a lot, so make 6 cakes per sheet at a time. Bake about 5 minutes or until top springs back when lightly touched with finger. Remove to wire racks to cool. When cool, use filling and two cakes to make sandwiches. Makes 15 (or 20-something mini ones).

Filling

  • 1/2 cup butter
  • 1 c. confectioners' sugar
  • 1 cup Marshmallow Fluff
  • 1 tsp. vanilla
In a medium bowl with mixer at medium speed, beat butter and remaining ingredients until light and fluffy. Of course, if you're just lazy, you could just put a big smear of Marshmallow fluff between the cakey layers and enjoy your treat slightly faster. Not that we did this, of course.
Homemade whoopie pies


Thursday
Jul232009

Gimme S'more: Delicious S'more Brownies

S'more brownies by Nicole
Brownies can be a polarizing subject: cakey or fudgy? Frosted or unadorned? Wars haven't been fought over the subject, but I'm pretty sure that punches have probably been thrown.

In a 2007 NY Times article, Julia Moskin wrote that “The ideal modern brownie is simple and unadorned, but rigorously designed (like a Diane Von Furstenberg wrap dress).” While she has a powerful point here, it's clear that she's never tasted the s'more brownies made by multitalented CakeSpy buddy Nicole (who happens to be a baker, pet shop owner and occasional clothing store employee...how many hours are in her day?). These decadent little chocolatey nuggets get a perfect little slightly salted crunch from lightly crushed graham crackers and an absolutely heavenly texture from the marshmallows. She served these at a recent get together at her house, and they disappeared faster than you could say (in your saddest Oliver voice, natch) "S'more, please".

Luckily Nicole has shared the recipe so that we may all attain this well-accessorized brownie nirvana at home.


Nicole's S'more Brownies
  • 2 eggs
  • 1c. sugar
  • 1/2 tsp. salt
  • 1 tsp. vanilla
  • 1/3 c. shortening, melted (CS Note: Not sure how it would affect the recipe to use butter instead here, but I'm not anti-shortening and thought it gave them a nice chewiness).
  • 2 -1 oz squares unsweetened chocolate melted
  • 3/4 c. all purpose flour
  • 1 c. slightly crushed graham crackers
  • 10 large marshmallows, cut in half

Preheat oven to 325 degrees. Beat eggs lightly with a spoon. Stir in sugar, salt and vanilla. add shortening and chocolate. Stir in flour and graham crackers. Do not beat at any time. Spread mixture into 8 inch square pan. Place marshmallow pieces on top of brownies; bake at 325 degrees for about 30 minutes. (Nicole's note: brownies should still be soft; let cool in pan
before cutting.)


By the way, if you're in the Seattle area, your canine friends can enjoy Nicole's baking too--she sells homemade dog biscuits at her pet store Immortal Dog Pet Supply! Just saying.


Wednesday
Jul222009

Cookies by Tea: Delicious Little Picnic-Friendly Morsels

Cookies by Tea
My friend Tea says she's not a baker, but as you can see by these cookies, she's a liar.

She served these little morsels at a recent picnic we had (along with buddies Megan, Scott and Mr. CakeSpy), and they were definitely the star of the show. Though unassuming in size (while the close-up shot may fool you, they are actually about the same size as a jumbo marshmallow), they pack in a lot of flavor: they're chock full of white and milk chocolate chips, nuts and apricots, and very, very buttery. The apricot works especially beautifully, adding a wonderful moisture to the texture as well as a nice flavor complement to the sweet chocolate chips. Honestly, I can't imagine a more perfect picnic cookie. They're compulsively eatable and extremely addictive: just watch out, because it's easy to lose track of how many you've eaten!

Now, I haven't made the cookies myself (yet), but Tea based her recipe on this one, but with minor changes.

Tea's Cookies
  • 1 2/3 cups regular flour
  • 1/2 teaspoon baking soda
  • 1/2 teaspoon salt
  • 3/4 cup melted butter
  • 1 cup packed brown sugar
  • 1 teaspoon vanilla extract
  • 1 egg
  • 2/3 cup white chocolate chips
  • 2/3 cup milk chocolate chips
  • 3/4 cup chopped almonds
  • 3/4 cup dried apricots, chopped

1. Preheat oven to 350 degrees.


2. In a medium bowl, stir together the flour, baking soda, and salt. In a large bowl, stir in the butter and sugar until smooth. Beat in the egg and vanilla. Stir in the dry ingredients until well blended, then add the chips, almonds, and apricots.

3. Drop dough by rounded teaspoonfuls onto an unprepared cookie sheet. Bake for 10 to 12 minutes in the preheated oven. Cookies should be golden brown. Remove from the baking sheet to cool on wire racks.

4. Enjoy, preferably at a picnic.


If you've never visited the Tea & Cookies site, then boy, are you in for a treat: click here! If you have visited before, why not visit again...now?

Wednesday
Jul082009

Corndog Days of Summer: A Sweet and Savory Experiment

Corndog Dessert Experiment
Combining sweet and savory in desserts is not a new thing--unless you've been living under a rock, you've certainly encountered desserts with savory elements--bacon or honey baked ham cupcakes, chili-infused chocolates and caramels; cakes with a cheesy secret; salted licorice ice cream...the list goes on.

Nonetheless I was intrigued when I came across this corndog dessert. It sounded interesting, yes--but delicious? The inventor of the recipe, a pastry chef who also invented a fried chicken dessert assured me it was tasty; I had heard good things about incorporating corndogs into desserts in the past. I set out to see for myself.

Starting out: For the recipe, I started out with Plinio's recipe mentioned above, but substituted the hot dogs with veggie dogs, and instead of making my own ice cream (too hard!) I simply used store-bought French Vanilla. Before anything else, I made the batter and let it sit for about an hour in the fridge. You can scroll down to the bottom of this post for all of the ingredients.
Veggie Dogs
Let the Experimentation Begin: 


That didn't work out.Oh well.

Idea 1: To make the little corndogs as if they were little balls of fried ice cream: surrounding a piece of veggie dog with vanilla ice cream, then coating it all in the cornmeal batter and frying it quickly. 
Verdict: Two problems: First, I don't think I let the ice cream set long enough, and it all imploded. Second: it occurred to me that having the veggie dog surrounded by ice cream would mean that at the center of this treat you'd find a chunk of frozen veggie dog. Sorry, but definitely not a delicious prospect.


Corndog Dessert

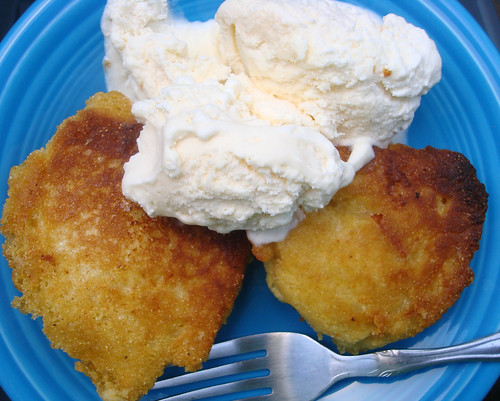
Idea 2: Going for a simpler approach, I coated chunks of cooked veggie dog in the cornmeal batter, and fried them up in a skillet filled with butter and sugar. This gave for a nice, carmel-y crisp edge; they were then served a la mode with plain vanilla ice cream.
Verdict: This method did work better, and the taste was actually pretty good--I think the hardest part was getting over the visual of the little pink coin of veggie dog, but taste-wise it had a nice sweet and salty thing going on.


Corndog Dessert Skewer
Idea 3: Building off of the success of Idea #2, this time I brought back the ice cream ball idea again, but this time put a little dollop of spicy mustard inside of each ball of ice cream and then let them cool for an hour in an extra-cold freezer. Then, I fried up another batch of the corndog-fritters and skewered them on a stick, alternating the fritters and balls of mustard-filled ice cream (note: you might want to let your little corndogs cool for just a little while--if they are still hot, the ice cream will melt a bit too rapidly for you to get them together).

Make Room for MustardBalls of Ice Cream
Verdict: Once again, once you can separate yourself from the weird factor of mixing hot dogs and ice cream, it's actually pretty good. I was most suprised by how nicely the spicy mustard worked with the rich vanilla ice cream though: it was a surprisingly addictive combination. 
Resolution: This was a very fun experiment, and once past the weird factor, the dessert is actually pretty palatable. Nonetheless, I don't think it is going to make it into my regular dessert rotation--as fun as it is to challenge yourself sometimes, I still think guests might make faces if you tried to serve this to them at a barbecue.

Corndog Dessert
Miscellaneous things you'll need:
  • 3 veggie dogs (or two would be fine if you like smaller pieces--you'll end up with about 20 golfball-sized corndog balls)
  • Vanilla Ice cream (if you got a half-gallon, it would be too much, but I'm sure you'll put it to good use).
  • Spicy mustard, if desired (I used Gulden's)
  • For frying: a stick of butter and as much sugar as you want to sprinkle in with it

Batter:
1 cup cornmeal
1 cup flour
1/4 cup sugar
1 tsp salt
1 tsp baking soda
1 ea egg
1 cup milk


Directions:

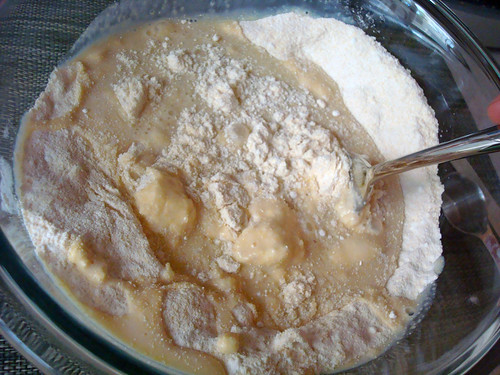
Combine dry ingredients; in separate bowl, combine egg and milk. Combine wet and dry ingredients and mix well. Refrigerate for at least 1 hour before use.
Batter
At this point, choose your adventure! You can coat each piece of veggie dog (I cooked mine first) and fry it up in a butter-and-sugar mixture and serve a la mode; you could make them up and skewer them with ice cream balls, or you could invent your own variation. Have fun!


Thursday
Jun252009

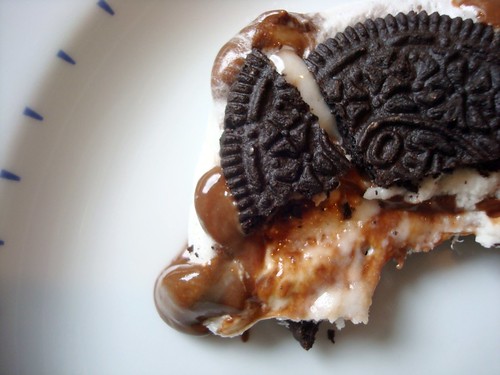
Campfire Meets Cookie: Let's Make S'moreos!

S'moreos!
Have you ever found yourself, mid-s'more, feeling like maybe, just maybe...something is missing?

You're not alone, buddy. But the matter has been given much thought, and a conclusion has been reached: that missing thing is cream filling, and the solution can be found with a certain famous sandwich cookie.

It's time to make S'moreos!
S'moreos!

When s'mores meet Oreos, magic--in the form of an oozy, creamy, unapologetically sweet treat--ensues. Basically, you won't be able to believe you've lived this long without them.

CakeSpy Note: I made mine in the microwave, as I am not an outdoorsy type; however, if there is a campfire handy, feel free to make yours using toasted marshmallows.

S'moreos
Hershey's Chocolate BarOreos
You'll need:

  • Either one, or two (depending on how decadent you feel) Oreos--Double Stuf optional
  • half a jumbo marshmallow per s'moreo (a whole one was just too big)
  • 2 rectangles from a regular sized Hershey bar

With One Oreo: If you've elected to use just one Oreo, twist it apart so that the top and bottom are separate. Face the filled side up, and put the chocolate squares on top, then layer the marshmallow half, then top it off with the remaining Oreo half. Put in the microwave at high for approximately 15-20 seconds. The marshmallow may rise and cause the top half of the Oreo to fall off; this is ok. Simply place it back on top upon removing from the microwave, and enjoy immediately.


With Two Oreos: If you're going for the double Oreo version (good decision), repeat the same steps as above, simply using a whole Oreo for the top and bottom. It may take a few more seconds in the microwave, but it's oh so worth it.
S'moreos!


Tuesday
Jun162009

Ace in the Hole: A Sweet Breakfast Trompe-l'œil

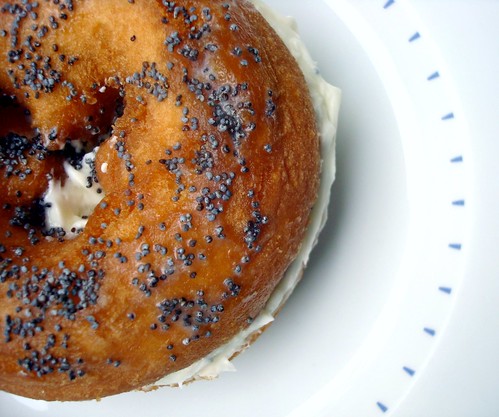
Bagel with cream cheese...or is it?
The bad news: this is not a deliciously chock-full of carbohydrates bagel with cream cheese.

The good news: it's even better. It's a delicious doughnut filled with cream cheese frosting and topped with poppyseeds so as to resemble a deliciously chock-full of carbohydrates bagel with cream cheese.

Now, a variety of reasons for making these could be presented to you, but really, why bother? When breakfast treats collide this sweetly, the awesome speaks for itself.

Want to make some for your own breakfast table? Oh, it's easy, and they're so much fun to serve. Here's what you need to do.
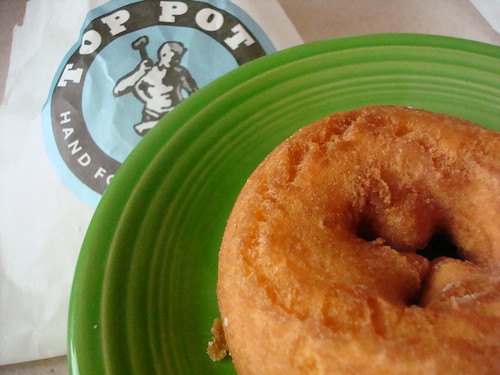
Top Pot Doughnut
Breakfast "Bagels" Made From Doughnuts and Cream Cheese Frosting


Ingredients:
  • Plain cake doughnuts (as many as you'd like); we picked up ours at Top Pot Doughnuts.
  • Vanilla or cream cheese frosting (about the same amount you'd use to top a cupcake for each doughnut; if you need a recipe, try this one or this one)
  • Poppyseeds (or sesame seeds would work too)
  • Butter (about a teaspoon-ful per doughnut)

Directions:
  1. Slice doughnut in half (for some reason it seems to work easiest if you apply the poppyseeds after slicing)
  2. In a small microwave-safe dish, melt about 1 teaspoon-ful of butter per doughnut you'll be making by putting it in the microwave for about 10 seconds. 
  3. Lightly brush the top side with about a teaspoon of melted butter (oh, get over it--they're already fried, anyway)
  4. Immediately sprinkle poppyseeds on top of the buttered side (this will ensure that they stick) and put this half to the side for a moment.
    Frosting!
  5. Apply a generous dollop of room-temperature frosting to the bottom (sans seed) half of the doughnut. It is important that the frosting be room temperature because if it is chilled, when you try to spread it you may break the doughnut apart. Gently spread.
  6. Put the poppyseed-laden piece on top.
  7. Enjoy (coffee works nicely at this point, too).
Bagel and Cream Cheese


Wednesday
May272009

Triple Threat: The Cookie Cake Pie

Cookie Cake Pie
Cookies, Cakes and Pies are basically the holy trinity of baked goods.

Separately, each is wonderful in its own way. Cookies and milk after school. Birthday cake. Pie at Thanksgiving.

But what if--just what if--all of this awesome could be combined into one singular sensation?

It's time to break out a seriously sweet triple play: the Cookie Cake Pie.
Cookie Cake Pie
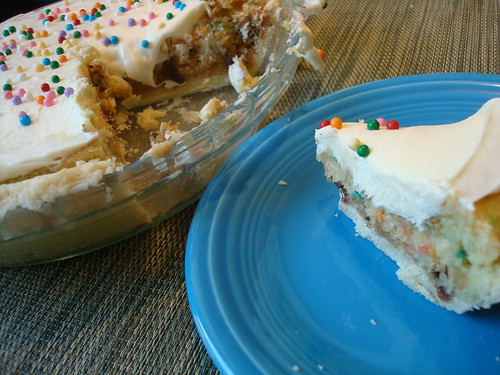
I wish I had a more clever moniker for you, but really, the name does say it all: it's a cookie and a cake within a pie. This treat embraces the idea that if some is good, more is wonderful; it weighs more than any I've ever held in my arms, and it packs much more of a sugary punch. Excessive? Perhaps. But everyone who tried it all but licked the plate clean.

Want one of your very own? Here's what you need to do.

Cookie Cake Pie

You'll need:


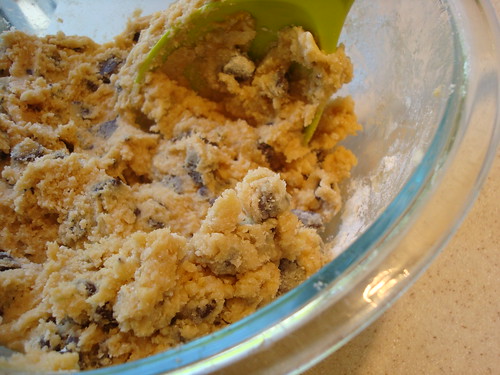
Cookie Dough
First, prepare one batch of chocolate chip cookie dough. You can leave this in the fridge or to the side while you prepare the rest.

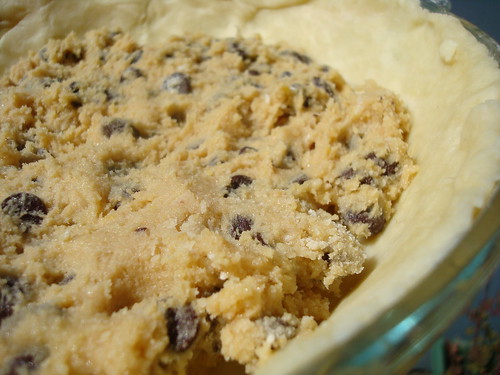
Next, prepare a single pie crust and line it into a pie plate. I considered blind-baking it, but ultimately did not, and I thought it turned out fine.
Cookie dough in pie crust
Place the cookie dough inside of the pie crust and using your fingers or a spoon, spread it so that it evenly coats the bottom of the crust. Mine was about an inch thick; I had enough cookie dough leftover to make about three big cookies, or one massive cookie dough snack.

At this point, you might want to pre-heat the oven. I considered each of the three recipes (pie, cookie and cake) and chose an average of 350 degrees.

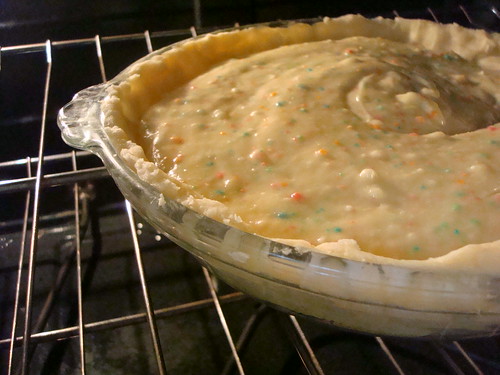
Let the cookie-filled pie crust rest for a bit while you mix up some birthday cake. If I'm to be completely honest here, I used Rainbow Chip cake. Yes, from a mix. It just felt right, and it added such a nice color contrast. Don't judge me.
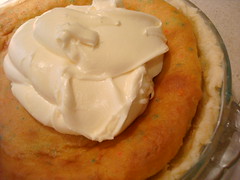
Pouring Cake Batter on Cookie dough in Pie Crust
Pour cake batter directly on top of the cookie dough til the pie crust is about 2/3 filled. The cake will rise, so you want to leave room for it. You will probably have leftover cake batter; why not make some cupcakes?
Let it Bake
Put this monster in the oven and check after about 25 minutes. I kept on checking every 5 minutes and think it ended up baking for about 30-40 minutes total. I took it out when the cake was golden around the edges. As an update, I have tried it again with other mixes and sometimes it takes up to 55 minutes.
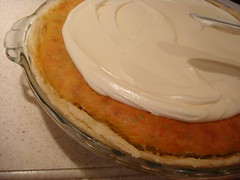
Frost, GenerouslyFrost it!
Let cool, and frost generously with buttercream frosting (mine was approximately an inch thick--this is not the time for moderation). Garnish as desired; I thought sprinkles were festive and pretty.

Yum
Finally--and most importantly--enjoy.


Monday
May112009

Mommie Dearest: A Sweet Post-Mother's Day Treat

Mother's Cookies Truffles
Mother's Day is over--and now, with a big sigh of relief, we can go back to blaming her for everything for another year.

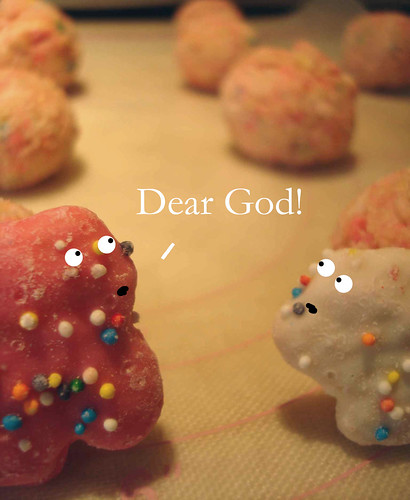
But there's no need to invest in a Starlee Kine-esque stint at the Hoffman Institute to work out all those mommy issues--here's a far better (and more delicious) way to take out some of that aggression: by seriously crushing some Mother's Circus Animal Cookies (which we scored through our friends at FoodBuzz!) and making delicious truffles out of them.

This is a variation of the Oreo Truffle recipe made famous by Bakerella; in this version, simply substitute a bag of the (newly re-released!) Carnival Animals by Mother's Cookies.


Mother's Cookies
Crush Your Mother's Cookies Truffles


  • 1 package Mother's Cookies
  • 1 8oz. package cream cheese (softened)
  • confectioner's dark chocolate, melted


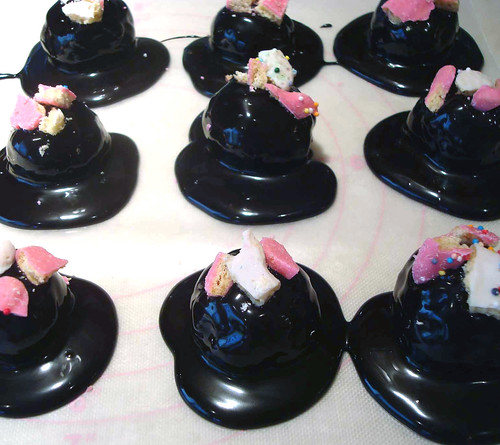
1. Coarsely cut about six or seven cookies into small chunks. They'll be jagged and messy but that's ok, they're for garnish. Reserve for later.
Making Truffles
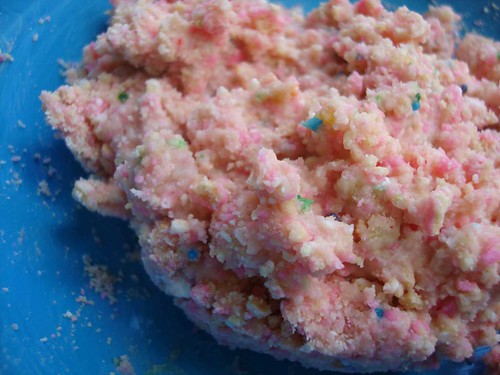
2. Crush remaining cookies and stir in softened cream cheese. Use the back of a large spoon to help mash the two together.
Mother?
3. Roll the mixture into 1" balls and place on waxed paper covered cookie sheet.
Truffles
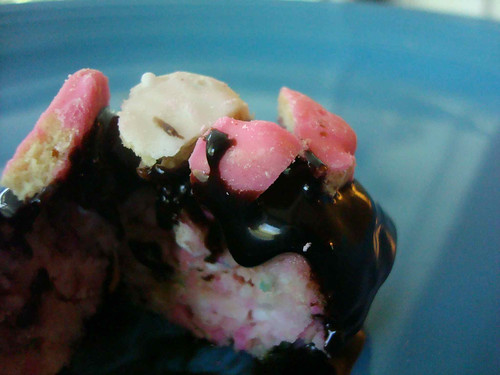
4. You're supposed to melt chocolate as directed on the package and then dip balls into chocolate--but I'm lazy so I just poured it on top of each (which ended up giving them an extra chocolate "foot"--yum). Set aside on wax paper covered cookie sheet to dry. 

You can sprinkle the tops with the coarsely chopped cookies for decoration.
Insides
5. Once dry (if you can wait that long), refrigerate. Share with mom, if you dare.


Makes about 36 truffles.


© Cakespy, all rights reserved. Powered by Squarespace.