Home Home Home Home Home Home Home
CakeSpy

Featured: 

My adventure at Ben & Jerry's in Vermont!


Unicorn Love: the Eating Disorder Recovery Blog


 Buy my brilliant books!

Buy my new book!

Buy my first book, too! 

CakeSpy Online Retail!


Archives
Gallery

Fantastic appliance for cake making on DHgate.com

everyrecipe.co.nz

Craftsy Writer

Entries in recipes (704)

Sunday
Nov012009

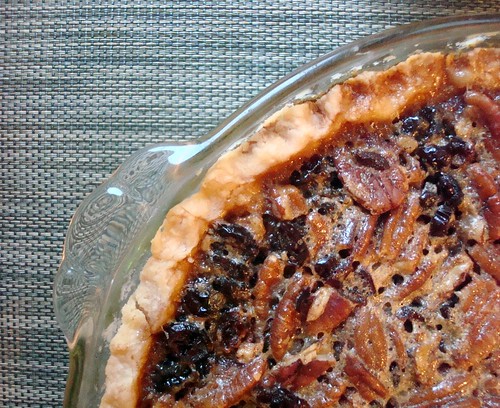
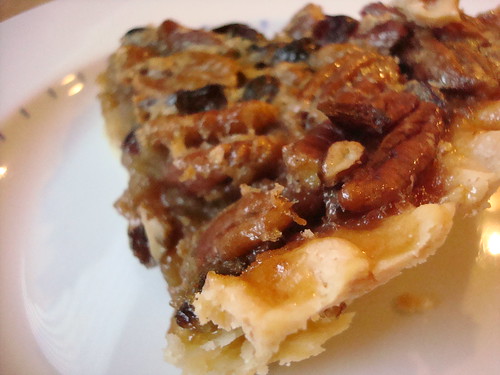
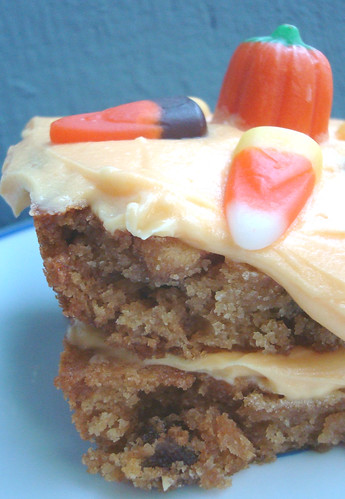
Pie Time: The Most Amazing Pumpkin Banana Cream Pie with Brandy Whipped Cream

Pumpkin Banana Mousse Tart with homemade brandy whipped cream
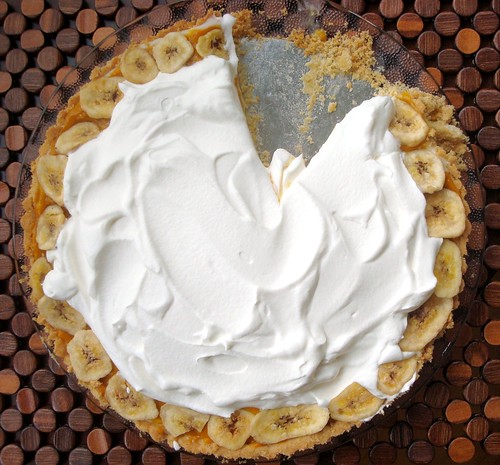
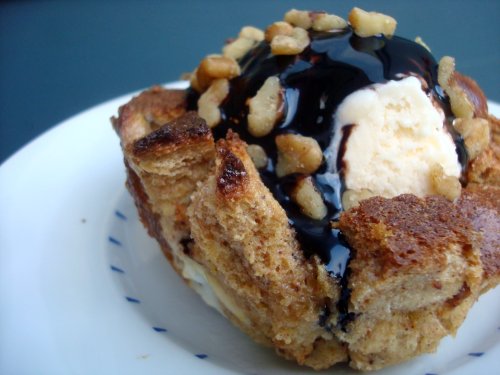
There are pies--and then there are truly great pies. And it's my great pleasure to introduce you to one of the truly great ones: Pumpkin Banana Cream Pie with Brandy Whipped Cream. This triple-decker treat is a triple-threat of awesome, combining recipes by Ina Garten and Tom Douglas, with some added variations (like Brandy whipped cream) dreamed up by my friend Nurit, ace baker and writer of 1 family. friendly. food., with whom I baked this hunk of delicious the other day. But really, words are wasted when we could be talking about how to get on the express train to having this pie in your mouth:

Pumpkin Banana Mousse Tart with homemade brandy whipped cream
Pumpkin Banana Cream Pie with Brandy Whipped Cream

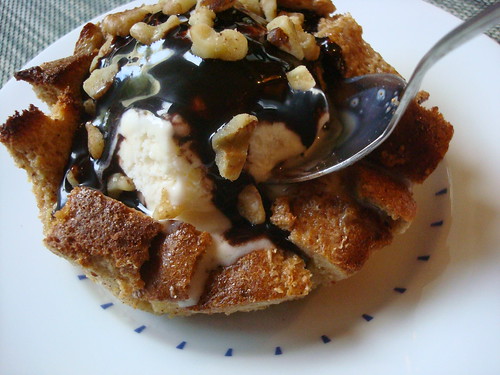
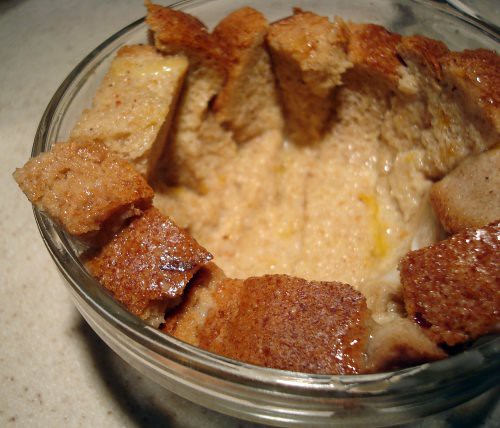
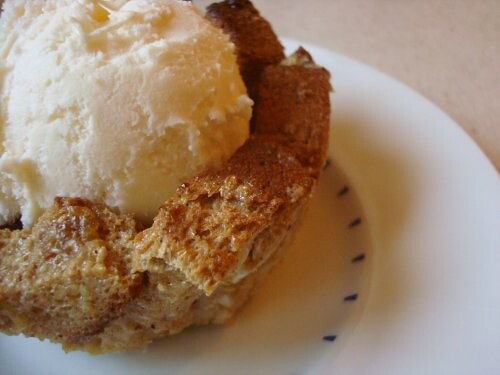
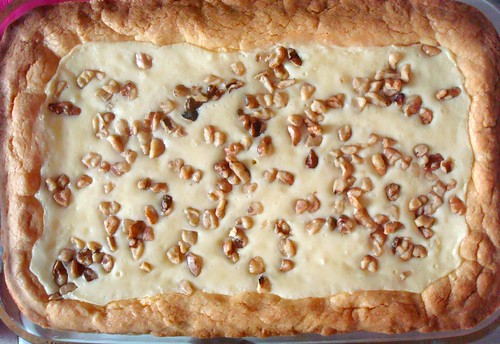
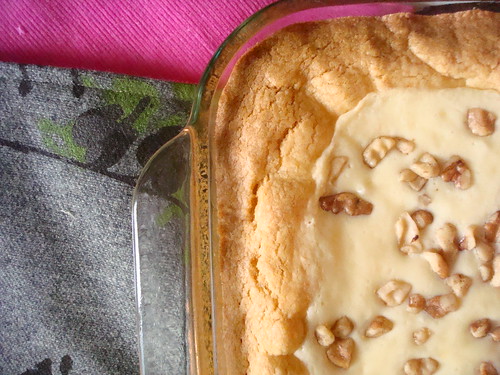
Nurit's Note: We used an 11-inch tart pan but you can use a regular pie pan. In any case, you probably will have some extra custard which you can layer and serve in pretty little bowls. (Check her site for her own posting about the pie, and check back soon for a separate post about this dessert!)

More notes:The pumpkin custard is based on Ina Garten’s Pumpkin Banana Mousse Tart and the vanilla custard is based on Tom Douglas’s Coconut cream pie (but substituting banana for coconut). The dough was from a recipe of Nurit's, and the brandy whipped cream (ethereal!) was her brainchild as well.

For the dough:
2 sticks unsalted butter
2 tablespoons sugar
2 cups self-rising flour
2 egg yolks
3/4 cup banana chips, crushed in food processor

For the pastry cream:
2 cups milk
1 teaspoon vanilla extract plus 1 teaspoon vanilla paste (the original recipe called for 1 vanilla bean, split in half lengthwise)
2 large eggs
1/2 cup plus 2 tablespoons sugar
3 tablespoons all-purpose flour
1/4 cup (1/2 stick) unsalted butter, softened

1-2 bananas thinly sliced

For the pumpkin custard layer:
1/2 cup half-and-half
1 (15-ounce) can pumpkin puree
1 cup light brown sugar, lightly packed
3/4 teaspoon salt
1/4 teaspoon ground ginger
A pinch ground nutmeg
3 extra-large egg yolks
1 package (2 teaspoons) unflavored gelatin
1 ripe banana, finely mashed
1/2 teaspoon grated orange zest
1/4 cup orange juice

For whipped cream:
1 1/2 cups heavy cream, chilled
1/4 cup sugar
1 1/2 tablespoons brandy

Make the dough. 

  1. Pulse butter, sugar, and flour in a food processor, or do it with hands, until you get big crumbs. Add the yolks, pulse until the crumbs are moist. Press into a generously greased 11-inch tart pan. Press banana chips into dough. Refrigerate covered for 30 minutes or so. 
  2. Bake at 375 F for 20-25 minutes.

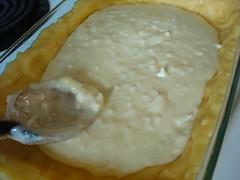
Make the pastry cream. 
  1. Warm the milk in a medium saucepan until it almost comes to a boil. Add the vanilla. (If using a vanilla bean, scrape the seeds from the bean and add both the seeds and pod to the milk mixture. Place the saucepan over medium-high heat and stir occasionally.)
  2. In a bowl, whisk together the eggs, sugar, and flour until well combined. Temper the eggs (to keep them from scrambling) by pouring about 1/3 cup of the scalded milk into the egg mixture while whisking. Then add the warmed egg mixture to the saucepan of milk. Whisk over medium-high heat until the pastry cream thickens and begins to bubble. Keep whisking until the mixture is very thick, 4 to 5 minutes more.
  3. Remove the saucepan from the heat. Add the butter and whisk until it melts. (Remove and discard the vanilla pod.) Transfer the pastry cream to a bowl and place it over a bowl of ice water. Stir occasionally until it is cool. Place a piece of plastic wrap directly on the surface of the pastry cream to prevent a crust from forming and refrigerate until completely cold. The pastry cream will thicken as it cools.

Make the pumpkin custard layer.
  1. Heat the half and half, pumpkin, brown sugar, salt, ginger, and nutmeg in a heat-proof bowl set over a pan of simmering water until hot, about 5 minutes. Whisk the egg yolks in another bowl, stir some of the hot pumpkin into the egg yolks to heat them, then pour the egg-pumpkin mixture back into the double boiler and stir well. Heat the mixture over the simmering water for another 4 to 5 minutes, until it begins to thicken, stirring constantly (so the eggs to scramble) until it reaches 160 F degrees. Remove from the heat.
  2. Dissolve the gelatin in 1/4 cup orange juice (or water). Add the dissolved gelatin, banana, and orange zest to the pumpkin mixture and mix well. Set aside to chill in the fridge or use the same ice bath as the vanilla cream.
Make the whipped cream.
  1. In an electric mixer with the whisk, whip the heavy cream with the sugar and brandy on medium-high speed until firm peaks form.
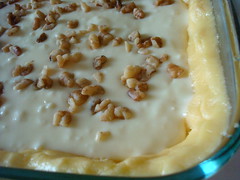
Pumpkin Banana Mousse Tart with homemade brandy whipped creamGoodbye, pie
Assemble it all.
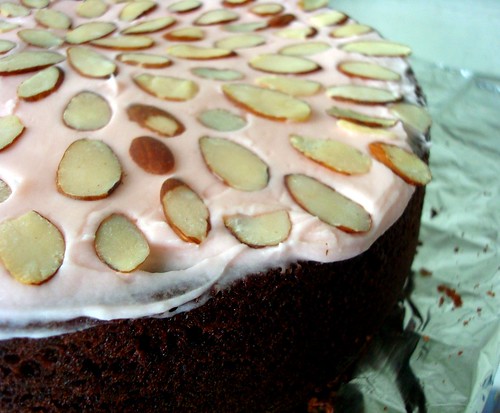
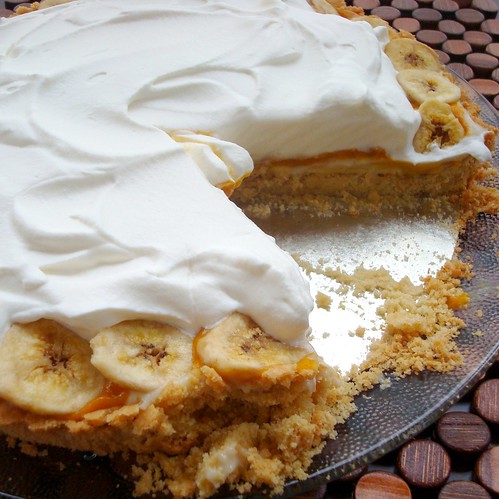
When the custards and dough are cooled, assemble the pie by layering the fresh bananas on top of the dough. Then spoon with vanilla cream on top, smoothing the surface. Next, add the pumpkin custard, and last spoon the whipped cream. Decorate with banana chips or fresh banana slices (add fresh banana only shortly before serving so they don’t brown). Let pie set in the refrigerator for at least 2 hours before serving.

Keep up with my friend Nurit by visiting her site and by following her on twitter!

Wednesday
Oct282009

Sweet Tart: Cranberry Bourbon Pecan Pie

Cranberry Bourbon Pecan Pie
Emily Post is probably frowning at me (tastefully, unobtrusively) from the great beyond for mentioning a holiday pie before Halloween is even over, but trust me: this one is worth the breach in etiquette.

The backstory? Not long ago, I sampled an absolutely delicious walnut-caramel-cranberry bar cookie in Chicago, and instantly I knew I had found a hit: the sweetness of the sugary nut mixture was perfectly paired by the tart cranberries. I had a feeling that it would translate beautifully to Pecan Pie.

So when I encountered the Bourbon Pecan Pie in the brand new (and so worth buying!) Grand Central Baking Book by local legend Grand Central Bakery (remember my adventure with early morning baking there?), I knew I had found the ideal recipe for my cranberry hypothesis.

Well, this spy is happy to report that it worked beautifully. Adding a generous handful of tart cranberries (I know! Fruit!) to the Bourbon Pecan Pie worked on two levels: first, it tempered the extreme sweetness of the pecan-sugar-corn syrup mixture; second, it added a refreshing tang to the fiery, warming bourbon.

Want some for yourself? Here's the recipe.
Cranberry Bourbon Pecan Pie
Bourbon Pecan Pie with Cranberries
-adapted from The Grand Central Baking Book-


  • 1 single pie crust, blind baked (ingredients below) 
  • 1 cup light corn syrup
  • 3/4 cup packed brown sugar
  • 2 tablespoons unsalted butter
  • 1/4 cup bourbon
  • 1 teaspoon vanilla extract
  • 3 eggs, at room temperature
  • 1 1/2 cups pecans, lightly toasted
  • 3/4 cup dried cranberries (I used apple juice-sweetened; if possible, use the least sweet version you can!)


Rather Thick Single Pie Crust (adapted from Martha Stewart)

  • 2 1/2 cups all-purpose flour
  • 1 teaspoon salt
  • 1 teaspoon sugar
  • 1 cup unsalted butter, cut into 1 tbsp. pcs., very cold
  • 1/4-1/2 cup cold water


Directions:

  1. Prepare the pie crust. Put the flour, salt and sugar into a food processor and pulse once or twice. Add the butter and process until the mixture looks grainy. Then slowly, while pulsing, add the water until you can form the dough by pressing it between your fingers. Note: this can be done by hand as well. Decant the loose dough onto a piece of plastic wrap. Using the wrap, fold the loose dough towards the middle and press with the back of your hands to form dough. Wrap and chill for at least 4 hours before using. Dough can be made ahead for up to one week. Before you're ready to bake this pie, blind-bake the pie crust for about 10-15 minutes at 325 degrees F.
  2. Ready to make the pie? Preheat your oven to 325 degrees F., baby!
  3. When you're ready to Prepare the filling. Put the corn syrup and brown sugar in a heavy saucepan over medium heat and cook, stirring occasionally, until the sugar dissolves. Remove from heat and add the butter, bourbon and vanilla. Let the mixture cool, and then add the eggs and whisk until smooth (don't add the eggs while the mixture is still very hot, otherwise you'll have scrambled eggs!).
  4. Fill and bake the pie. Arrange the pecans and cranberries on the bottom of the crust. Carefully pour the filling over them (some will rise to the top, like magic!). Bake for 45-50 minutes, until the filling is set; rotate the pan halfway through baking time. This pie allegedly serves about 8--however, what the recipe does not mention is that the 8 servings may be the same 2 people four times in one day.


Friday
Oct232009

Trick or Sweet: Ghoulish Cupcakes Recipe from Bredenbeck's Bakery of Philadelphia

Disaster!
Dear Bredenbeck’s Bakery:

I've never met you, but I love you. Why? Because recently you sent me the adorable following recipe / Halloween craft idea: Ghoulish Cupcakes! I'm happy to report that it is as easy in practice as it is in theory, and all parties to which they are served are completely delighted--and satisfied by the taste, as well. It's no trick: these are a real treat!

Sweet regards,

CakeSpy

P.S. To all others--do you want to recreate this magic at home? It's easy. Just do this:

Ghostly Halloween Cupcakes

-recipe kindly donated by Bredenbeck’s Bakery in Philadelphia -

You'll need:

  • A dozen of your favorite cupcakes (I used this recipe)
  • 16 oz. vanilla icing (I used this recipe)
  • 22 oz. (two packages) white chocolate chips or candy coating, plus a generous tablespoon of vegetable shortening (the shortening is my addition)
  • Gel icing

Directions:

  1. Start with your favorite cupcake recipe and bake according to instructions.
  2. Flip your cooled cupcakes upside down, and spoon a dollop of icing on top (of the upturned bottom) to add height
  3. Place the iced cupcakes in the freezer until icing is firm
  4. Melt white chocolate and shortening in a double boiler
  5. Place frozen iced cupcakes on a wire rack
  6. Spoon melted white chocolate or candy coating over top of iced cupcakes, allowing excess to drizzle through wire rack
  7. Create beady eyes and scary faces with black shoestring licorice or gel icing
  8. Enjoy!


Ghostly Cupcakes


If you happen to be in Philadelphia, you can also try the original Bredenbeck’s version of these tasty treats. I hear a rumor that for the month of October, customers who say “Boo!” will receive a ghost cupcake for a discounted price.

Care to hear more about the bakery? OK! Here's the 411: A Philadelphia tradition since 1889, Bredenbeck’s Bakery bakes its delicious cookies, cakes, pies and pastries with the finest all-natural ingredients. Located in the heart of Chestnut Hill, Bredenbeck’s is famous for its delicious butter cookies, fancy miniatures and gourmet wedding cakes, all baked on premises. The historic shop is located at 8126 Germantown Avenue, Philadelphia, PA, 215-247-7374 or online at bredenbecks.com.

Saturday
Oct172009

Last Seduction: Chocolate Seduction Cake Recipe from Essential Baking Company

Flourless Chocolate Cake
Several years ago when I was first considering making a move from New York City to Seattle, a friend offered some wise advice to help me make the decision: "before you make any rash decisions, make sure you find a good bakery there." Sage advice indeed.

I didn't exactly follow the advice though. I didn't find one bakery: I found three.

The first three bakeries I visited in Seattle--in order--were Cinnamon Works, Macrina Bakery and Essential Baking. This was basically a triple play of delicious: two weeks later, I lived in Seattle. And all three bakeries have a sweet spot in my heart.

So when one of those first bakeries I ever visited--Essential Baking--offered to share one of their recipes, I knew it was going to be good.

Called "Chocolate Seduction Cake", this flourless cake is pure decadence--redolent with rich chocolate flavor--while still maintaining a delicate crumb which isn't quite brownie or fudge, but definitely cake. It's great all by itself, but it's even better with whipped cream, ice cream, or (best of all) prettily decorated with pink buttercream frosting and decorative sliced almonds (an idea I picked up when I judged a pie contest!).
Flourless Chocolate Cake
Chocolate Seduction Cake

-adapted from Essential Baking Co. in Seattle -

Serves 8-10 generously

  • 10 ounces Belcolade chocolate (that's the brand Parisian Star uses; a high
  • quality dark chocolate could be subbed)
  • 5 ounces unsalted butter, room temperature
  • 1 ounce cognac
  • 6 egg yolks
  • 6 egg whites
  • 3/4 cup sugar, divided
  • 1/2 teaspoon salt


Directions:

  1. Preheat oven to 350 degrees F
  2. Line 9x9" cake pan with parchment paper and grease
  3. Gently melt the chocolate and butter in a double boiler; set aside.
  4. Whip egg yolks with 1/2 cup sugar until light and fluffy.
  5. Add cognac to chocolate and butter mixture and fold very gently into whipped egg yolks and sugar.
  6. Whip egg whites with 1/4 cup sugar and salt until soft peaks form, then fold into the chocolate and egg yolk mixture.
  7. Fill the cake pan 3/4 full.
  8. Bake for about 35 minutes or until knife inserted in center of cake comes out clean.
  9. If desired, let cool completely and then frost with pink (really, pink is best) vanilla buttercream (I used the one in the latter half of this recipe).


Friday
Oct092009

Paradise Found: The Pain Perdu Parfait

Pain Perdu Parfait
Hypothetically speaking, wouldn't it be glorious if French Toast, bread pudding and an ice cream sundae had a baby? Le sigh: one can dream.

Dream no more: I have non-hypothetical proof! Say hello to the Pain Perdu (a fancy way of saying French Toast) Parfait, a little something I dreamed up thanks to Foodbuzz's challenge to think of new and creative ways to use Nature's Pride bread products. Constructed of Honey Wheat bread soaked in a rich, sweet French Toast-y batter and then baked in cupcake cups until they have molded to the shape with a crispy, brown sugary crust, each little dish is filled with a healthy scoop of ice cream while still warm; the result is a creamy, dreamy treat which lies in a wonderful nether region between decadent brunch and rich dessert.

It may be Pain Perdu, but it tastes like Paradise Found.

Pain Perdu Parfaits

AKA French Toast Ice Cream Cups

-serves 4 -
  • 4 slices slightly stale bread, sliced lengthwise (I used honey wheat)
  • 2 eggs
  • 1/2 cup light cream or half and half
  • 1/2 teaspoon vanilla
  • cinnamon and nutmeg to taste
  • about 1 teaspoon brown sugar per cup
  • 1 scoop of ice cream per cup


    Directions


  • Ice cream toppings of your choice
  1. If you're going to bake these in the oven, preheat the oven to 350 degrees. Or, you can use the toaster oven, in which case no action is needed till later.
  2. In a bowl, beat eggs, cream, vanilla, and spices together.
  3. Dip each slice of bread into the egg mixture, allowing bread to soak up some of the mixture.
  4. After dipping each piece, arrange in a cupcake cup or in an oven-safe greased dish or ramekin (depending on what size you'd like), until the strips have lined up to approximate the bowl-like shape. If needed, press down in the center so that they mimic the bowl shape.
    French Toast Bowl
  5. Drizzle about a teaspoon of brown sugar over each little "bowl" making sure to hit the sides of your little bread bowl. This will caramelize and taste delectable later.
  6. Place in the oven for about 10 minutes, or until browned and crispy on the sides and firm in the center--or put in toaster oven for about 15 minutes on medium-high.
    Pain Perdu Parfait
  7. Remove from heat and let set for at least 20 minutes. Once firm, place a scoop of ice cream in the center of each "bowl" and garnish with hot fudge sauce, nuts, butterscotch, or any topping of your choice. Serve immediately.Pain Perdu Parfait


Sunday
Oct042009

Nothing Bundt Cake: Chocolate Banana Bundt Cake for a Rainy Day

Rainy day cake
What is it about baking cake that always brightens up the darkest day or mood? Surely it's not just the taste, although that certainly doesn't hurt. It's the the full sensory experience: reading a recipe. Gathering and mixing together the ingredients; seeing them come together. Putting the batter in a pan...and that amazing cake-baking aroma while it bakes. By the time the cake is done, eating it is almost secondary (note: almost), as you've already gotten so much satisfaction out of making the finished product.

In Seattle, I couldn't imagine a cozier bakery for a rainy day than Macrina Bakery, so I was thrilled when they sent out their coffee cake recipe in a recent newsletter. Any fruit of your choosing makes a nice complement to the dense butteriness of the cake, which is perfect for breakfast; I used bananas and topped the cake off with a generous dose of chocolate and nuts, which is guaranteed to make the darkest days brighter.

Rainy Day Bundt Cake

- adapted from Macrina Bakery's Fresh Fruit Coffeecake -

Makes 1 Bundt cake

  • 3 cups unbleached all-purpose flour (I used whole wheat--worked nicely with the banana)
  • 1-1/2 teaspoons baking soda
  • 3/4 teaspoon salt
  • 2 cups ripe fruit (I used bananas)
  • 12 tablespoons unsalted butter at room temperature
  • 1 cup granulated sugar
  • 1/2 cup light brown sugar
  • 2 eggs
  • 1-1/2 teaspoons pure vanilla extract
  • 1-1/2 cups buttermilk

Chocolate topping:

  • 1 teaspoon shortening
  • 3 ounces semisweet or dark chocolate

Directions:
  1. Preheat oven to 350º F. Oil a 12-cup Bundt pan.
  2. Sift flour, baking soda and salt into a large bowl and toss with your hands to combine. Remove 1/4 cup of the flour mixture and set bowl aside.
  3. In a separate medium bowl, combine fruit and the reserved 1/4 cup of flour mixture. Toss until fruit is evenly coated and set aside. Tossing the fruit in flour helps keep it from sinking to the bottom of the coffeecake _ a true disaster!
  4. Combine butter, granulated sugar and brown sugar in the bowl of your stand mixer. Mix with the paddle attachment for 5 to 8 minutes on medium speed. The mixture will become smooth and pale in color. Add eggs, one at a time, making sure the first egg is fully mixed into the batter before adding the other. After the second egg is incorporated, add vanilla extract and mix for 1 minute. Scrape down the sides of the bowl with a rubber spatula and mix for another 30 seconds to make sure all of the ingredients are fully incorporated. Remove the bowl from the mixer.
  5. Alternately add small amounts of flour mixture and buttermilk to the batter mixing with a wooden spoon just until all dry ingredients are incorporated. Gently fold in the flour coated fruit making sure the fruit is evenly distributed through the batter. Spoon batter into the prepared Bundt pan filling two-thirds of the pan.
  6. Bake on the center rack of the oven for 1 hour and 30 minutes, or until top is golden brown. Check the center of the coffeecake with a skewer. It will come out clean when the cake is done. Let cool in a pan for 45 minutes.
  7. Loosen the sides of the cake with a sharp knife. Place a serving plate upside-down on top of the cooled Bundt pan and invert the pan to remove the cake.
  8. For chocolate topping: melt chocolate and shortening in a double boiler. Pour gently directly on to the cake. Toss some walnuts, powdered sugar, or both, on top if it suits you.
  9. Enjoy!


Wednesday
Sep302009

Disappearing Act: Houdini Bars

Houdini Bars
Leafing through The Cake Mix Doctor Returns (have you entered the giveaway, by the way?), the first recipe to catch my eye was for Houdini Bars. What's a Houdini bar? Named for the magician because because they're "so rich and delicious that they disappear quickly," these dense bars are comprised of a cakey crust filled with a buttery, cheesecake-y filling with nuts and coconut. Heaven on a plate? Yes indeed: they taste like birthday cake, cheesecake, and coconut cream pie--simultaneously--in every beautiful bite. If you love decadent desserts, these ones will disappear fast.
Houdini Bars
(P.S. If you love the pot holders shown above, they're from Rustbelt Fiberwerks!)
Houdini Bars
adapted from The Cake Mix Doctor Returns
Recipe says that it makes 30, but we only got 12 (gluttons)

  • 1 package (18.25 oz) plain yellow cake mix
  • 1 stick butter, melted
  • 3 large eggs
  • 1 package (8 oz) cream cheese, at room temperature (recipe calls for reduced-fat; I used full-fat)
  • 1 teaspoon pure vanilla extract
  • 2 cups confectioners' sugar, sifted
  • 1/2 cup sweetened flaked coconut
  • 1/2 cup walnuts (original recipe called for pecans; either way, the nuts are optional)

Spooning in the coconut-cheesecake mixtureReady to bake

  1. Place a rack in the center of the oven and preheat the oven to 350F. Set aside a generously greased 9x13-inch pan.
  2. Place the cake mix, butter, and one egg in a large mixing bowl and beat on low speed with an electric mixer until the ingredients are incorporated, about 1 minute. Press the batter into the bottom and partially up the sides of the baking pan (I used my hands) and set the pan aside.
  3. Place the cream cheese in the same mixing bowl and beat with an electric mixer on low speed until fluffy, 30 seconds. Add the remaining 2 eggs and the vanilla and the confectioners' sugar and beat on low speed until smooth and combined, about 1 minute. Fold in the coconut; pour mixture over the crust and smooth the top with a spatula. Scatter the nuts, if you've chosen to use them.
  4. Bake the bars until the edges are well browned and the center is firm to the touch, about 40 to 50 minutes. Transfer the baking pan to a wire rack and let cool for 30 minutes before cutting and serving (do not score the bars while still hot!)

These bars keep in the fridge for up to five days. If they last that long.


Tuesday
Sep222009

Puff Daddy: Reese's Puffs Bars with Buttercream Frosting

Reese's Puffs bars
So, I recently received a very large parcel of boxes of cereal from General Mills with which to try out some recipes for consideration for the Betty Crocker Halloween recipes section of their site. Naturally, I immediately set out to find as many delicious recipes as I could for baked goods which include cereal. One recipe for "Chewy Cereal Bars", which called for Grape-Nuts, intrigued me, but I suspected the recipe could be improved upon: first and foremost, by using Reese's Puffs instead. After making some other alterations to make the recipe uniquely my own, I can say that it's a pretty delicious end result, like chewy blondies with little crispy explosions of peanut butter and chocolate. Top 'em off with some buttercream frosting (and maybe even double deck 'em and decorate them for Halloween or the occasion of your choosing) and you've got yourself a cereal winner.
Layered Reese's puffs bars with frosting

Reese's Puffs Bars

Ingredients (bars):

  • 1/3 cup butter
  • 1 cup Reese's Puffs Cereal
  • 3/4 firmly packed brown sugar
  • 1 egg
  • 1 1/2 tablespoons pure vanilla extract
  • 3/4 cup all-purpose flour
  • 3/4 teaspoon baking soda
  • Optional Halloween garnish: candy corn and mellowcreme pumpkins


Directions:

  1. Preheat oven to 350 F. Grease an 8-inch square baking pan. In a medium saucepan, melt butter; once melted, add cereal and incorporate for about 2 minutes, stirring constantly.
  2. Remove from heat; stir in brown sugar until incorporated. Add egg and vanilla, and stir until completely blended.
  3. Add flour and baking powder; stir until completely blended.
  4. Spread into greased pan, and bake about 20 minutes or until golden around the edges. Let cool completely, and then frost. If desired, cut the batch in half and create double decker treats and slice them into thin fingers; if desired, garnish with candy corn and/or mellowcreme pumpkins.


Ingredients (frosting)

  • 1 cup unsalted butter, softened
  • 6 cups confectioners' sugar
  • 1/2 cup half and half
  • 2 teaspoons pure vanilla extract

Directions:
Cream the butter and about 4 cups of the confectioners' sugar until smooth and creamy; add the vanilla and the rest of the sugar bit by bit until the frosting reaches your desired consistency (you may not need all of it). For orange frosting, add about 1 drop of red and 4 drops of yellow food coloring and mix until the color is even; frost the cooled bars. Do not freeze or chill this frosting.


Wednesday
Sep162009

Getting Baked: Delicious Chocolate Chip Cookies from the Baked Cookbook

Chocolate Chip walnut cookies
How many times have I said that you simply must buy Baked: New Frontiers in Baking?

Well, if you don't own it, clearly I haven't said it enough. Here's how the book has renewed its place in my heart yet again this week: the absolutely perfect Baked chocolate chip cookie.

Now, I have made a fair share of chocolate chip cookies in my life, and am more than willing to admit that while they've been good, they've never been perfect. And while I don't want to go all dramatic on you and say these are the best chocolate chip cookies ever, I can say with absolutely no hesitation that these are the best cookies that have ever come out of my kitchen: chewy in the middle, ever-so-slightly crispy on the outside, slightly puffy and not too flat.

The secret? Well, at their retail location I suspect that they probably put crack in the cookies, but the recipe owes its awesomeness to stressing the importance of fresh ingredients: I promise, if you use fancy butter, fresh eggs, and real vanilla, it really makes all the difference.

I only messed with their recipe slightly, omitting 2/3 cup of the chocolate chips and substituting walnuts. If you like your chocolate chip cookies a little fancy, it's a delicious variation.

Chocolate Chip Cookies, Ever so slightly adapted from the recipe in Baked: New Frontiers in Baking

Ingredients:

  • 2 cups flour
  • 1 teaspoon salt
  • 1 teaspoon baking soda
  • 1 cup (2 sticks) unsalted butter, softened
  • 1 cup packed dark brown sugar
  • 1/2 cup granulated sugar
  • 2 large eggs
  • 2 teaspoons pure vanilla extract
  • 2 cups semisweet chocolate chips
  • 2/3 cup walnuts


Directions:

  1. In a large bowl, whisk the flour, salt, and baking soda together; set aside.
  2. In the bowl of an electric mixer fitted with the paddle attachment, beat the butter and sugars together until smooth and creamy. Scrape down bowl and add eggs, one at a time, beating until incorporated. Mixture will look light and fluffy. Add vanilla and beat for 5 seconds.
  3. Add the flour mixture, bit by bit, mixing after each addition.
  4. Using a spatula or wooden spoon, fold in the chocolate chips.
  5. Cover the bowl tightly and put in the fridge for several hours (Baked suggests 6; I did 2 and they were still delicious).
  6. Preheat the oven to 375 F degrees.
  7. If you want big cookies, use an ice cream scoop to scoop out 2-tablespoon sized balls. If you want smaller ones, use two teaspoons (one to scoop the dough and one to release it). Use your hands to shape into perfect balls and erase any imperfections. Place on prepared baking sheets, leaving at least 1 inch between cookies. Bake for 10-12 minutes for smaller cookies, 12-14 minutes for larger cookies. Make sure to rotate pans at the halfway mark to ensure even baking. They're done when the edges are golden and the tops are just starting to lose their shine.
  8. Remove pan from oven and cool on wire rack. They are great warm, but you could also let them cool, if you're so inclined.
  9. These babies can be stored in an airtight container for up to 3 days. Doubt they'll last that long though.


Wednesday
Sep092009

Some Like it Hot: Hot Cocoa Cupcakes With Cream Cheese Frosting

Chocolate cupcakes with cream cheese frosting
Summer is totally awesome and all, but it seems to me as if there are way too many light, fruit-based and altogether too-virtuous desserts that prevail during those hot and sunny months. But as the days gradually start to get shorter and cooler, there's a sure-fire antidote, which can be summed up in three beautiful words: Hot Cocoa Cake. This is not a cake for wimps: it's unimaginably rich and decadent. Often, recipes for it call for a fudge-like frosting to be applied directly to the still-hot cake; however, as I've always preferred chocolate desserts that have a flavor contrast, I tried them with cream cheese frosting on a whim. The flavor combination works like a dream; when served at a party, they disappeared rather quickly.

Hot Cocoa Cupcakes With Cream Cheese Frosting

For the cakes (makes about 18; adapted from this recipe):

Ingredients
  • 2 cups flour
  • 2 cups sugar
  • 1 teaspoon salt
  • 4 tablespoons cocoa
  • 2 sticks (4 oz. ea) butter
  • 1/2 cup buttermilk
  • 1 cup water
  • 1 tsp cinnamon
  • 1 tsp vanilla
  • 1 tsp baking soda
  • 2 eggs, beaten

Directions:
  1. Preheat oven to 400 F.
  2. Mix together flour, sugar, and salt. 
  3. In a saucepan, bring the butter, cocoa, and water to boil and pour over flour mixture. 
  4. Add the rest of the ingredients to the mixture and stir well. 
  5. Fill cupcake cups 3/4 full.
  6. Bake for about 20 minutes. Because you won't see the cakes browning at the edges, use a toothpick inserted in the center of a cupcake to test doneness.
  7. Once cool, frost generously with cream cheese frosting; if desired, garnish with walnuts.
Cream Cheese FrostingWalnuts
For the frosting:


Ingredients
  • 1 (8)-ounce package of cream cheese, softened (do not substitute low-fat; it just doesn't work the same way)
  • 1/2 cup unsalted butter, softened
  • 2 teaspoons vanilla extract
  • 1/4 teaspoon salt
  • 4 to 6 cups confectioners' sugar (depending on your desired consistency)
Directions
In a large mixing bowl, beat the cream cheese, butter, vanilla and salt until the butter is completely incorporated into the cream cheese and it has a smooth consistency. Add the confectioners' sugar cup by cup, stirring after each addition, until it has reached the desired consistency.


© Cakespy, all rights reserved. Powered by Squarespace.