Home Home Home Home Home Home Home
CakeSpy

Featured: 

My adventure at Ben & Jerry's in Vermont!


Unicorn Love: the Eating Disorder Recovery Blog


 Buy my brilliant books!

Buy my new book!

Buy my first book, too! 

CakeSpy Online Retail!


Archives
Gallery

Fantastic appliance for cake making on DHgate.com

everyrecipe.co.nz

Craftsy Writer

Entries in pie (36)

Friday
Oct312014

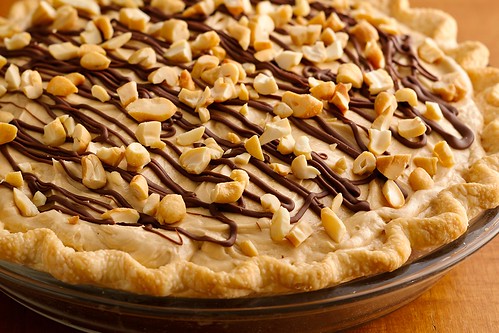
Pillsbury Bake-Off Countdown: Creamy Cashew Turtle Pie

Creamy Cashew Turtle Pie

Things that I love definitely include pie crust, chocolate, cashew butter, cashews, salt, cream cheese, and caramel. Guess what? This pie has them ALL. Thank you to Tina Repak-Mirilovich of Johnstown, Pennsylvania for coming up with such a gem of a recipe. Good luck at the Bake-Off!

Creamy Cashew Turtle Pie

  • Prep Time: 25 Min
  • Total Time: 1 Hr 50 Min
  • Makes: 8 servings

Ingredients

  • 1 Pillsbury Refrigerated Pie Crust, softened as directed on box
  • 3/4 cup milk chocolate chips
  • 1 1/3 cups cashew butter
  • 1 cup chopped salted cashews
  • 1 package (8 oz) cream cheese, softened
  • 2/3 cup caramel topping
  • 1 container (8 oz) frozen whipped topping, thawed

Procedure

  1. Heat oven to 450°F. Make pie crust as directed on box for One-Crust Baked Shell, using 9-inch glass pie plate. Cool completely on cooling rack, about 20 minutes.
  2. In small microwavable bowl, microwave 1/2 cup of the chocolate chips uncovered on High 30 to 60 seconds, stirring once, until chips can be stirred smooth. Add 1/3 cup of the cashew butter; mix well. Spread chocolate mixture over bottom of cooled pie crust. Sprinkle 3/4 cup of the cashews over chocolate mixture. In large bowl, beat cream cheese, remaining 1 cup cashew butter and the caramel topping with electric mixer on medium speed 1 to 2 minutes or until blended. Gently stir in whipped topping until well blended. Spoon and spread cream cheese mixture over cashews. Refrigerate 1 hour.
  3. In small microwavable bowl, microwave remaining 1/4 cup chocolate chips uncovered on High 30 to 60 seconds, stirring once, until chips can be stirred smooth. Place chocolate in small resealable food-storage plastic bag. Cut off small corner of bag; squeeze bag to drizzle chocolate over pie. Sprinkle with remaining 1/4 cup cashews. Refrigerate at least 30 minutes before serving. Store loosely covered in refrigerator.

Note: the Pillsbury Bake-Off is coming in November! Check out my coverage of the 45th and 46th Bake-Off, and follow the recipes posted so far by clicking the bakeoff tag below.

Wednesday
Oct152014

Union Pie: The State of the Union is Delicious

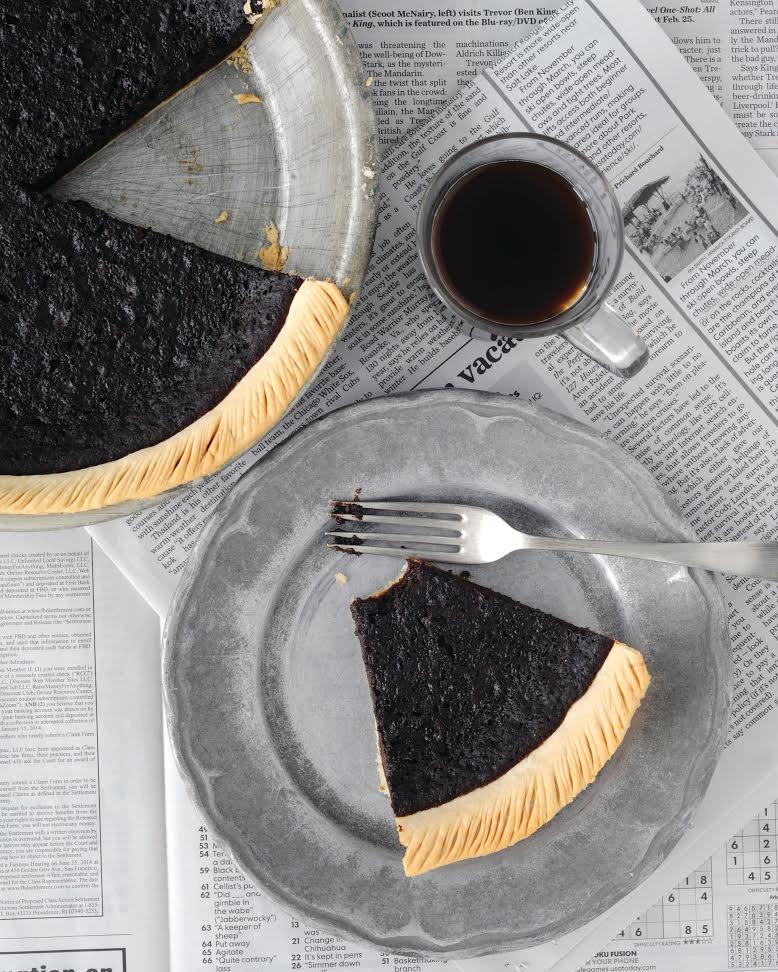
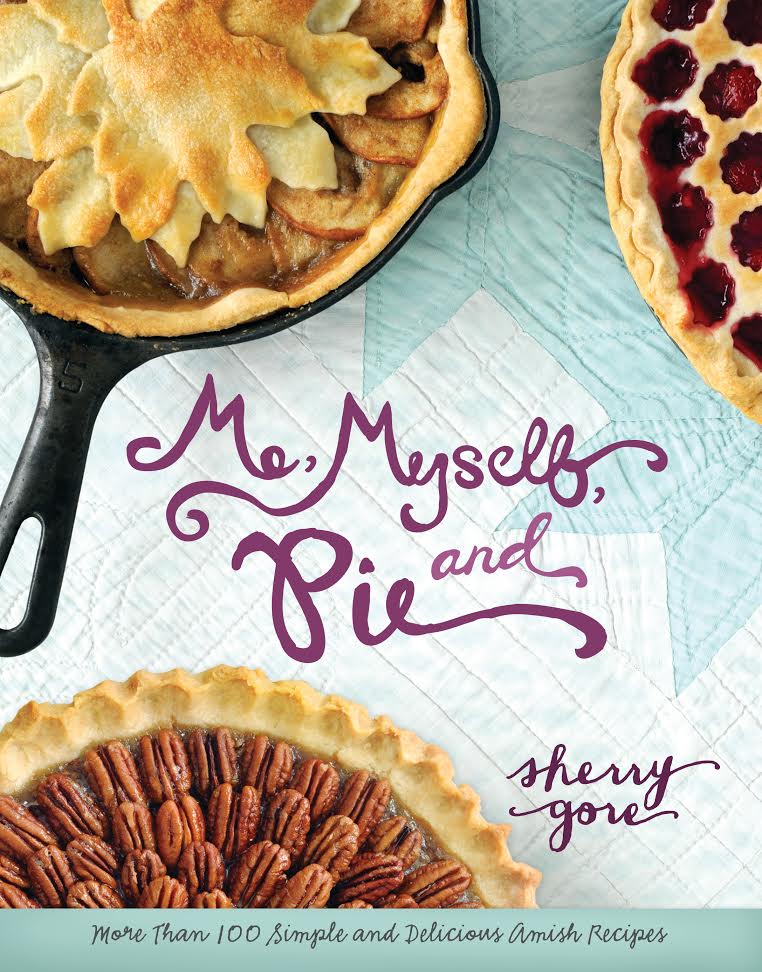
Image: Me, Myself and Pie by Sherry GoreIf there's one thing that I gained during my year living in Philadelphia, it was a deep love of Amish cuisine. Living next to the Reading Terminal Market, it was all at my fingertips--well, from Wednesday through Saturday, that is. 

This is all to say that I am immediately intrigued when I see a new book featuring Amish recipes. So suffice it to say that I was super excited to receive the new, pie-centric Me, Myself, and Pie by Sherry Gore. And guess what? It's as awesome as you might think an Amish pie recipe book would be. Full of recipes from the expected (Shoofly Pie) to the downright unusual (Union Pie, which is featured here) and with many lovely sweet and savory recipes in-between, I think that this book is a fine addition to any baker's repertoire, especially if you liked my second book, The Secret Lives of Baked Goods: Sweet Stories & Recipes for America's Favorite Desserts, and have an interest in the stories behind sweets. (Like how I just plugged my book there? Yup, just did it. BUY IT.)

I am excerpting the recipe for "Union Pie" from the book. This recipe immediately intrigued me because A) I'd not seen it before, and B) in the picture, it looked almost like a pie filled with tar, so dark was the filling. Turns out it's a slurry made primarily of molasses, buttermilk, sour cream, and spices. Well. I'll let Sherry Gore take it from here with the headnote and recipe--enjoy!

Thanks to Harper Collins for letting me reprint the recipe, which is from Me, Myself, and Pie by Sherry Gore.

Union Pie

I love this pie! Made with sour cream, buttermilk, and dark molasses, this custard confidently charges in like a brisk cup of licorice coffee to preserve the harmony between your fork and your sweet tooth. United we stand, indeed.

FOR THE CRUST

  • One 9-inch unbaked pastry pie crust

INGREDIENTS

  • 1/2 cup sour cream
  • 1/2 cup buttermilk (or sour milk)
  • 1/2 cup molasses
  • 1 large egg, beaten
  • 1/2 cup sugar
  • 1 tablespoon plus 1 teaspoon flour
  • 1/4 teaspoon baking soda
  • 1/2 teaspoon ground cinnamon
  • 1/2 teaspoon ground nutmeg

TO PREPARE

  1. Preheat oven to 400°F.
  2. In a bowl, combine sour cream, buttermilk, molasses, and egg.
  3. In a separate bowl, combine flour, baking soda, cinnamon, and nutmeg. Pour the flour mixture into the sour cream mixture and combine thoroughly.
  4. Pour the mixture into the unbaked pie crust.
  5. Bake at 400°F for 10 minutes. Reduce heat to 350°F and continue baking for 20–25 minutes, until a knife inserted into the center comes out clean.

Have you ever heard of Union Pie?

Wednesday
May142014

The Secret to Perfect Pie Crust? It's in Your Hands (Plus a Giveaway)

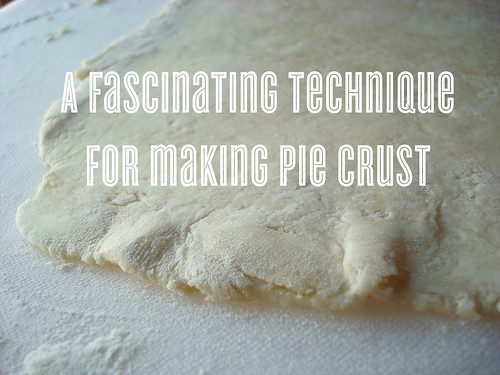
Pie crust technique

Note: this post includes a giveaway at the bottom! Lucky you.

You're always taught the same basic rules with pie crust. Cut small pieces of cold butter into a mixture of flour and salt; blend until the pieces are like peas. Add cold water, a little at a time, until the dough will come together in a clump. Gather, flatten into a disc, chill, and proceed. 

But recently, I learned a method that basically rocked my everloving, pie-eating world. Because it involves using your fingers to attain the perfect consistency.

This was very exciting to me because I actually kind of despise most kitchen tools. Especially the pastry cutter, because it is such a pain to wash. In general, the more functions I can get out of one tool, the more I like it. Wooden spoons and wire whisks? Awesome. Garlic press? Not so much. 

But enough about me--back to the pie. You're probably wondering some things. Let me try to answer:

Where the method came from

I learned this method at the Bake For Good event in Los Angeles, part of the Bake For Good Tour, where baker Robyn told us it was a method she'd learned from famed foodie Marion Cunningham.

By the way, if you want to know more about the event, check out this video.

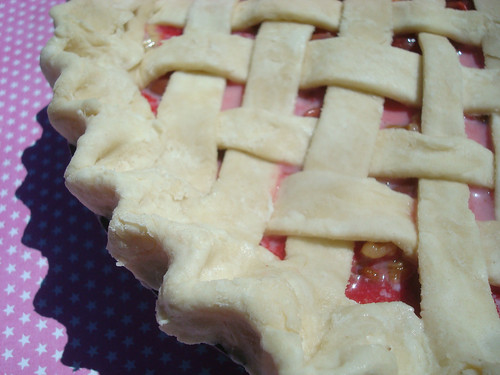
Cherry cream walnut pie

How it works

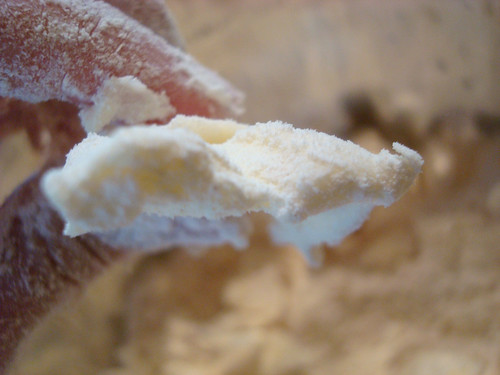
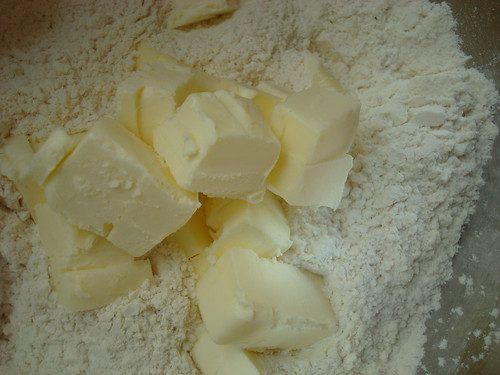
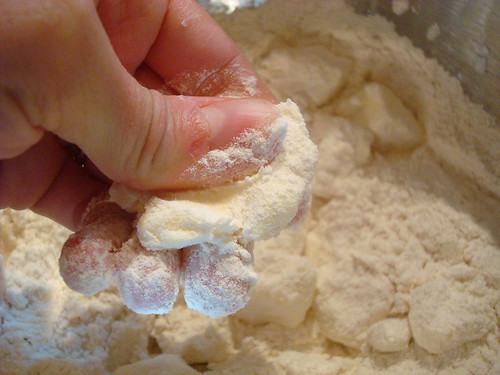
Basically, the method includes working in larger than usual hunks of butter, and instead of mashing them with a pastry cutter, you squeeze the butter pieces with your fingers to flatten them.

    Cherry cream walnut pie

Why you should immediately adopt this practice

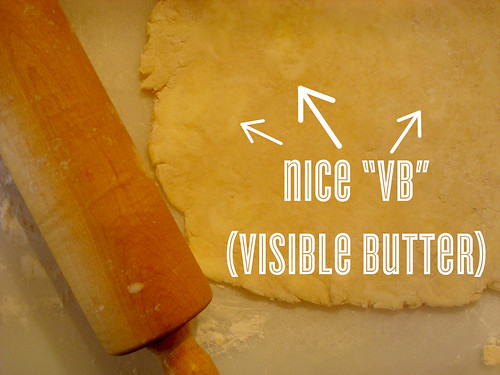
Those pieces of flat butter will make for the coveted "VB" (visible butter) in your rolled crust, and the taste is flaky and fantastic on your resulting pie.

Pie crust technique

I have co-opted and adapted it for my own use at home with a sort of mashup between traditional and by hand methods. Best of both worlds, and still, minimal stuff to clean.

And here, I will share it with you. Aren't you lucky?

Making Pie Crust with Your Hands

adapted from King Arthur Flour, who adapted it from Marion Cunningham

enough for a double crust pie

  • 2 1/2 cups flour
  • 1 1/4 teaspoons salt
  • 1 cup (2 sticks) cold unsalted butter
  • 1/4 to 1/2 cup very cold water

Procedure

  1. Sift together the flour and salt in a large bowl. Set to the side.
  2. Size your butter. One stick cut into small pieces, the other cut into fairly large pieces (double the size you'd usually cut for a pie crust.
  3. Cherry cream walnut pie
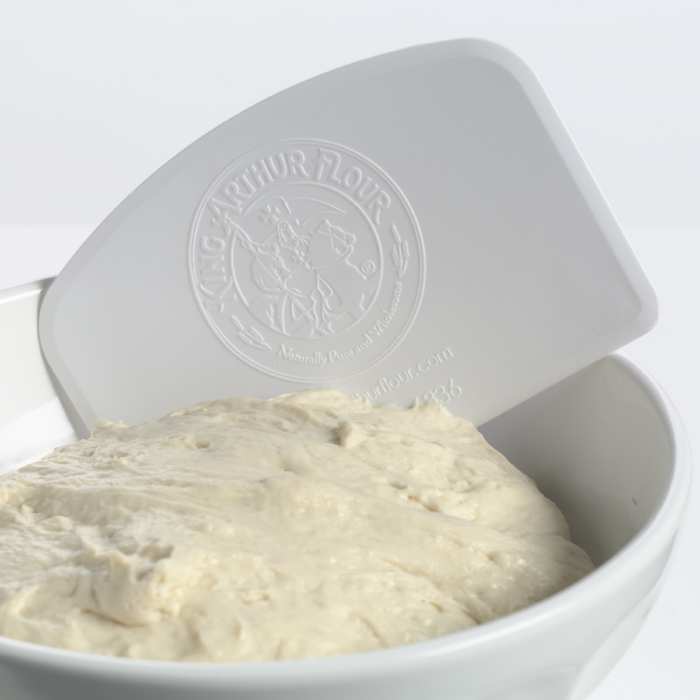
  4. Work in the stick of smaller butter with a plastic dough scraper (my new favorite tool and very easy to clean). It's not going to have the same impact that double the butter would in terms of working in, but go for the regular pea sized consistency.
  5. Now, add the bigger hunks of butter. Gently coat them with flour in the mixture, so they won't stick to you when you squeeze them. 
  6. Cherry cream walnut pie
  7. Now, one by one, squeeze all of those pieces of butter until they're flat like pancakes. Cherry cream walnut pie You don't have to be too precious about it. Grab, squeeze, then move on to the next one.
  8. Got 'em all? OK. Give the mixture another stir with your pastry scraper. Now, start adding the water. Switch back to your dough scraper.
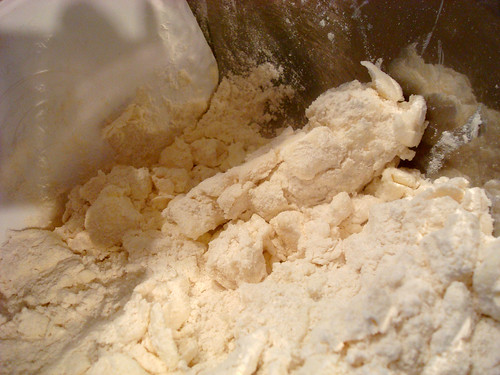
  9. Keep on adding it bit by bit until the dough forms a shaggy consistency, still floury but you can clump it together.
  10. Pie crust method
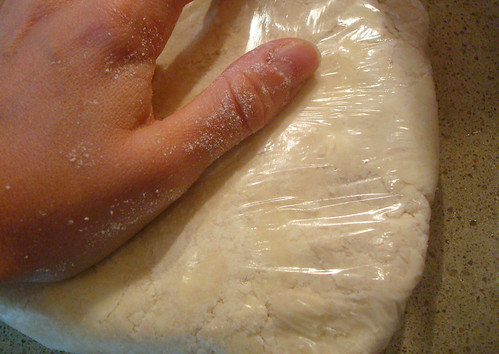
  11. Gather, form into a ball, and place on top of a sheet of plastic wrap. Wrap the plastic on top of it, not too snugly, and then flatten it into a disc with your hand. Doing it this way, I learned, helps the dough spread out into the plastic and is just less messy.
  12. Pie crust method

Proceed with your recipe as usual. 

GIVEAWAY!

Hooray! King Arthur Flour has offered to reward one lucky reader with one of their mega cool dough scrapers, a cookbook, AND some of their highly patented and extremely delicious boiled apple cider (perfect for flavoring apple pie and using as a slightly fancy pancake syrup). Want to win? All you have to do is leave a comment (don't panic if it doesn't pop up right away; comment moderation is enabled) answering the following question:

What's your favorite type of pie to eat, and how do you like it served?

Apple pie with cheese for breakfast? French silk pie à la mode for dessert? It's all game here. I'll choose a winner by EOD Pacific time one week from today!

Tuesday
Mar192013

Pastry Pilgrimage: Pie Town, New Mexico

Pie Town, New Mexico

A Pie-lgrimage: Road trip to Pie Town, New Mexico.

In the game of life, we all have journeys to take, and pilgrimages to make. And as a seeker of sweetness, I prefer to make mine dessert related. So it should be no surprise to you that it's been a longtime dream of mine to visit Pie Town, New Mexico. Yes, friends, this is a place that actually exists. And this spot in the desert's name was in fact inspired by the classic American dessert.

As the lore goes

There are several versions of the story of the founding of the town and how we came to be called Pie Town. There may be some discrepancy in dates but these are the basic facts of our story.

In 1922 a veteran of WW-I by the name of Clyde Norman filed a 40-acre mining claim for gold and silver along the route of US-60 and a trail set aside to drive cattle to a railhead 60 miles to the east. Although US-60 bills itself as the Nation's first coast-to-coast highway, when Clyde Norman settled here the cattle driveway was the more important route. Norman’s mining claim was not very successful so he opened a small store to supplement his income. He sold gasoline, kerosene and pies made from dried fruit. Some stories say he made the pies, some say that his teenaged niece did. At any rate the pies were a hit with the cowboys on the cattle drives who went out of their way to stop at "Pie Town."

In 1924 Harmon L. Craig bought a half-interest in Pie Town from Norman for "one dollar of good and lawful money and other good and valuable consideration." A few years later Craig bought out Norman and became Pie Town's leading citizen. He owned the mercantile store, a Chevron service station and garage, a café and a pinto bean warehouse. Most of the families that settled in Pie Town came from Texas and Oklahoma during the Dust Bowl and established homesteads. The bean warehouse provided local homesteaders a way to market their crops. Mr. Craig helped these families struggling though the Depression by selling land below market value, and by making loans with no collateral and no interest.

When it came time to establish a Post Office for the town the Postmaster General thought Pie Town was not an appropriate name, but the local citizens insisted that it was the only acceptable name.

In 1940 Farm Security Administration photographer Russell Lee took an extensive set of photographs of Pie Town, including some using the new Kodachrome color film. Those photographs are in the National Archives.

Today's residents still have the sense of community and self-sufficiency that sustained the earlier settlers. We enjoy a unique tranquility in one of the few places in the United States where you can still see the Milky Way.

Of course, as the owner of the Good Pie Cafe put it more directly, “we call it Pie Town because it's about 3.14 miles from nowhere.” 
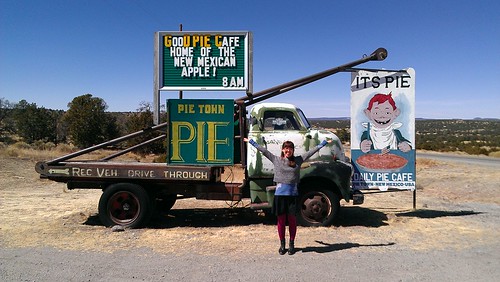
Here I am!

And well, that's true. It's about a 3.5 hour drive from Santa Fe, or a 2.5 hour drive from Albuquerque. Either way, it's a long trip for a town that boasts a main street area of about 2 blocks, and only a small handful of businesses, two of which are pie-centric. 

Good Pie Cafe, Pie Town, NMGood Pie Cafe, Pie Town, NM

One friend asked me “did you really drive all that way for just a slice of pie?”.

My response was, “No. I drove that distance for three slices of pie.” 

But to one on a pastry pilgrimage, that's quite enough. And it's also true that this town has played muse to more than me: there's a book called Pie Town which was so popular that a sequel was written, too. Even without that, though, I was delighted to head down there—on Pie Day, no less, 3/14. 
Good Pie Cafe, Pie Town, NM Good Pie Cafe, Pie Town, NM

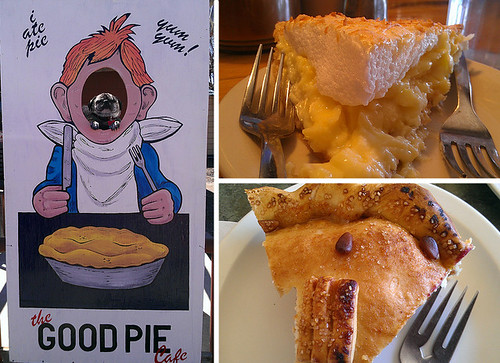
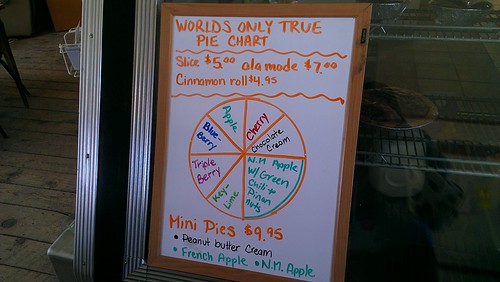
After driving a long-long way, our first stop was the Good Pie Cafe. At this cafe they serve a simple diner menu, but Pie is the real focus. They'll offer several types each day, and most likely their famous New Mexican Apple Pie will be on the menu. 

The atmosphere is eclectic and funky, kind of like visiting your uncle who's living off the grid or something. But with pie. It's cozy and quirky.
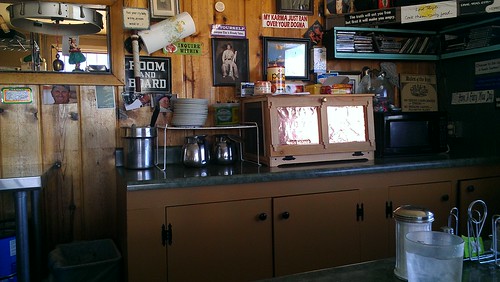
Good Pie Cafe, Pie Town, NM

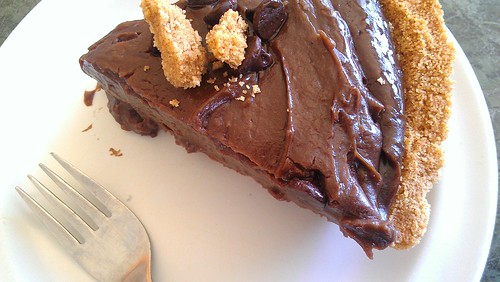
We ordered the New Mexican apple pie and the chocolate pie. Good Pie Cafe, Pie Town, NM
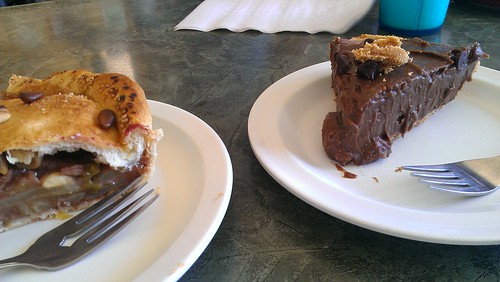
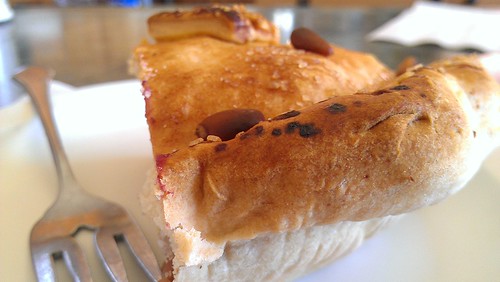
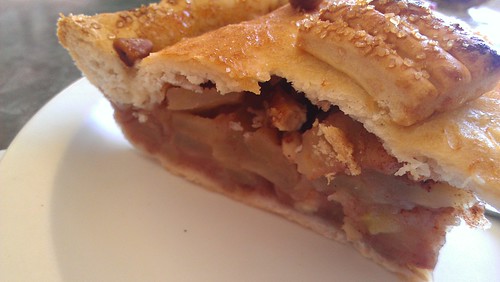
It was evident from the get-go that these are not necessarily fancy pies. But the love with which they are crafted is clear, and for me, that made the experience. The apple pie was an interesting flavor—the light sweetness of the apples was nicely paired with toasty pinon, and then—surprise!--a little kick from the green chile.
Good Pie Cafe, Pie Town, NM Good Pie Cafe, Pie Town, NM

It made for a fascinating flavor, and I could definitely see this as a breakfast treat, not so much a sweet at all. Especially with that nice, sturdy and very carb-y crust. That's my type of crust, by the way. I don't like it when pie crust shatters on you. The chocolate pie had a nice flavor, but I wished it had a big fat dollop of whipped cream on top.
Good Pie Cafe, Pie Town, NM

Still, the experience of eating pie in this weird little spot in Pie Town made it all worthwhile.
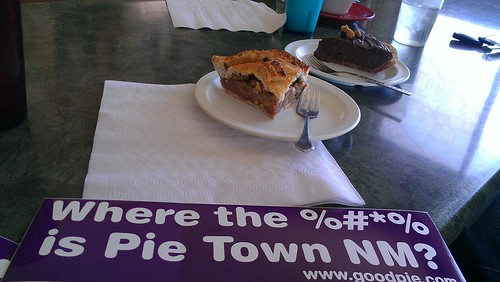
Good Pie Cafe Good Pie Cafe, Pie Town, NM

While we were there, we were given stickers as a token of the owner's appreciation of our patronage on Pie Day. We were also told to come back on 6/28, which locals call “Double Pie Day” on which you are welcomed to eat double the pie. What a great day!
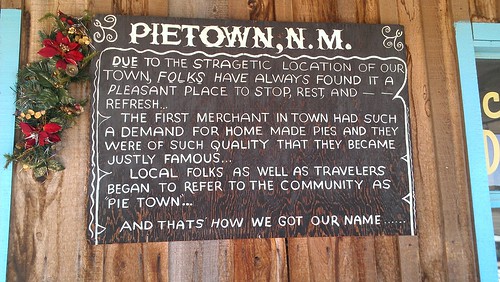
Pie-o-neer Cafe, Pie Town, NM

Down the road, you'll find the Pie-O-Neer Cafe. Don't go there on Thursday, or Monday, or Tuesday, or Wednesday, as they are closed—but luckily, it was Pie Day on the Thursday we went, so they were open as an exception.
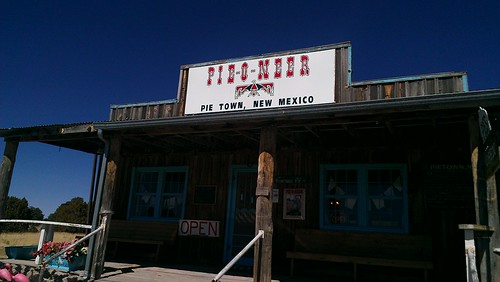
Pie-o-neer Cafe, Pie Town, NM

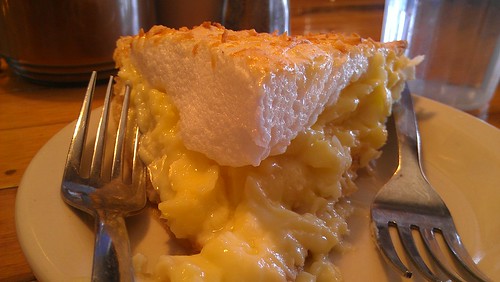
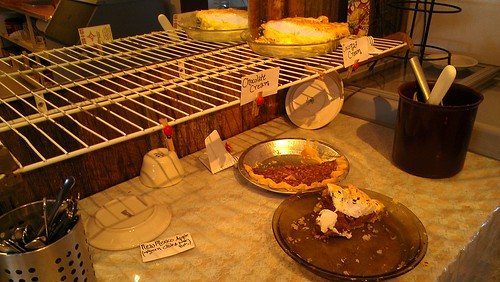
It being pie day and all, the selection was somewhat picked-over by the time we got there—apparently, there had been a big run from students from a nearby college. But there was enough for us to enjoy a slice of coconut cream pie with a nice meringue topping. 
Pie-o-neer Cafe, Pie Town, NM

Interestingly, I don't think I have ever tasted coconut cream pie with a meringue top like this before. I found it highly satisfactory. The coconut custard was very dreamy, and the pie crust a flakier variety than down the street. It worked very well together.

Pies Open

 Moreover, I felt that the pies were perhaps more sophisticated at Pie-O-Neer and the atmosphere still quirky but a little bit more grandma's house style.

Pie-o-neer Cafe, Pie Town, NM

Pie-o-neer Cafe, Pie Town, NM

So yes, I drove 7 hours (3.5 hours each way) for some pie. Was it the best pie I've ever had? No. But I call to mind a passage in the classic Donuts: An American Passion in which John T. Edge refers to the act of eating beignets at the famous Cafe Du Monde as being a "rite of passage". While they're not the only friteur in town, he says, there's something to having the experience of eating them there and taking part in that ritual. 

So, that having been said, for the experience of enjoying pie in pie town, what I ate couldn't have been better. 

Pie Town, 3.14 Miles from Nowhere. Places to go while you're there: Good Pie Cafe, Pie-O-Neer Cafe, and don't miss the Windmill Museum
Tuesday
May152012

Leftover Pie Parfait for Serious Eats

Leftover pie. It's not a common occurrence—who leaves pie uneaten, after all? But it has happened, maybe even in your own fridge: that one final slice, left to linger, and maybe getting a little dry around the edges.

But what to do? Do you just choke down the past-its-prime slice? Do you douse it in whipped cream, hoping to make it taste better?

No. What you do is salvage that slice by making it a pretty Pie Parfait. By choosing an assortment of ice cream and toppings which complement your pie, you can bring new life to a dying dessert. In fact, slightly stale pie will work best as its texture will hold up better against the ice cream, and it will better absorb the flavors of the additions.

The composition of your parfait is your own adventure. The basic rule is that you want to choose an ice cream, a topping, and a sauce which act either in harmony or in unison with your pie flavor. For instance, you could compose a harmonious concoction by pairing a slightly tart apple pie with cinnamon ice cream, graham cracker crumbles, and caramel sauce; or, you could go matchy-matchy and pair a slice of grasshopper pie with mint chocolate chip ice cream, thin mints, and chocolate sauce.

Plus, it's fun. Who wouldn't like to trick out their pie and eat it in a pretty cup? It's the perfect way to eat your leftover dessert.

For the full scoop, visit Serious Eats!

Wednesday
Nov302011

Teeny's Tour of Pie: High 5 Pie, Seattle

CakeSpy Note: This is the first in Teeny Lamothe's Tour de Pie series on CakeSpy! Teeny is touring the country, learning how to make pies at some of the nation's sweetest bakeries. She'll be reporting here on each stop! First stop: Seattle!

Where: Seattle, Washington

When: The first stop was September... beginning to end.

Why: I found a friend in pie and a fellow lady baker: Dani Cone. She is a truly savvy business lady as well as an inspired pie baker. Dani was the first person to say yes to the tour of pie! 

How: The first stop on the tour was phenomenal. I couldn't have asked for a better way to begin. Not only were Dani and lead baker Anna happy to host, they seemed enthralled with the idea of a pie tour. They provided some really solid advice as well as major baking time. I was able to go in four or five times a week and learn the process of making a High Five pie. 

Observations: I was able to do all sorts of things during the month I was at High Five. I learned how to make fillings by the pound rather than by each individual pie. I helped bake the wholesale pies, packaged them and got them ready for delivery. There was always crust to be rolled out. Anna was very conscious of not wasting excess dough, and I've actually incorporated a lot of her crust ideals into my own pie making. While I was there I fell in love with their marionberry pie and their savory reuben pie. I made my very first cream pie ... banana cream, thank you very much! and was able to share my own recipe for french silk pie, which I think they might still make on occasion. (and if they do, I am endlessly proud) Every day at the kitchen felt like a collaboration. If we weren't making the actual fillings we were talking about them, bouncing ideas off of each other and essentially letting the excitement of baking pie permeate our lives. The whole month felt very surreal, I had a hard time grasping what my life had become. Every day I got to play with butter and flour and that at the end of each day our labors resulted in delicious pies. It was truly an inspiring first stop. 

Tour of Pie Recipe: I did a lot of biking while I was in Seattle, and after getting very lost one day I stumbled on a huge cache of wild blackberry bushes. I later found out that they grow like weeds along the bike trails... but that day I thought I had discovered an amazing hidden treasure. I was tired and frustrated and entirely lost lost lost, but I dove into those bushes without a second thought and picked blackberries until my arms were sufficiently scratched, my fingertips were sufficiently stained and my appetite was sufficiently sated. So, clearly, the Seattle 'tour of pie' recipe is for...

Washington Blackberry Pie

Whole Wheat Crust Ingredients

  • 2 1/2 c whole wheat flour
  • 1 tsp salt
  • 2 tbs sugar
  • 1/2 c shortening 
  • 1 1/2 sticks of butter (12 tbs)
  • 1/4 c vodka
  • 1/4 c water

Procedure

  1. mix all the dry ingredients. cut in the butter and shortening until the pieces are about the size of peas and coated in flour. add the vodka, smush together with a spatula. add the water, smush together with a spatula. it's gonna be a little sticky/wet. divide into two balls, put in baggies, refrigerate for at least half an hour.... ya know, while you mix the filling. 

Blackberry Filling Ingredients

  • 2 cups fresh or frozen (but definitely handpicked if possible!) blackberries
  • 1/4 c sugar
  • 4 tbs cornstarch

Procedure

  1. mix everything together and preheat the oven to 350 degrees. 
  2. assemble the pie! Roll out the first of the chilled crust balls. Transfer to 9-inch-diameter pie dish, trim any excess dough but be sure to leave a 3/4 inch overhang, spoon filling into the crust. I would use a lattice for the top crust, because it's just the prettiest with the dark blackberries. Arrange 7 or so dough strips on top of the filling, spacing evenly. Form lattice by placing remaining dough strips in opposite direction on top of the filling. Trim ends of dough strips even with overhang of bottom crust. Fold strip ends and overhang under, pressing to seal. Crimp edges decoratively.
  3. bake for 45 - 55 minutes or until the crust is a golden brown and your blackberries are bubbling. 
Tuesday
Nov292011

Pie Time: Meet CakeSpy Contributor Teeny Lamothe, Pie-Maker

CakeSpy Note: Do I ever have exciting news for you. CakeSpy's got a new contributor, who focuses on pie! Just don't call her PieSpy: her name is Teeny Lamothe, and she's touring the country as a pie apprentice at various bakeries. She's going to chime in with her sweet discoveries and observations on the way! But I've spoken enough--let me allow her to introduce herself.

Hello CakeSpies! My name is Teeny Lamothe and I'm a lady pie baker on a very important quest for pie knowledge. While your number one Spy has begun touring around toting treats and books (hooray!) I've just embarked on a 'tour of pie.'

You're probably wondering what a 'Tour of Pie' entails... It's essentially my way of paying homage to the old world notion that apprenticing is the most vital and thorough way to learn a trade. I'm going all over the United States to apprentice at a slew of different pie shops in order to learn as much as I can before embarking on my own lady bakership. I've invented an individually educational trip in which I get to bake with pie mentors every day, dousing myself in flour and fillings and helping little bits of fruit and sugar fulfill their pie destinies. Check out my pie musings at teenypies.tumblr.com and support pie here.

Look out for Teeny's entries starting later on this week!

Wednesday
Oct052011

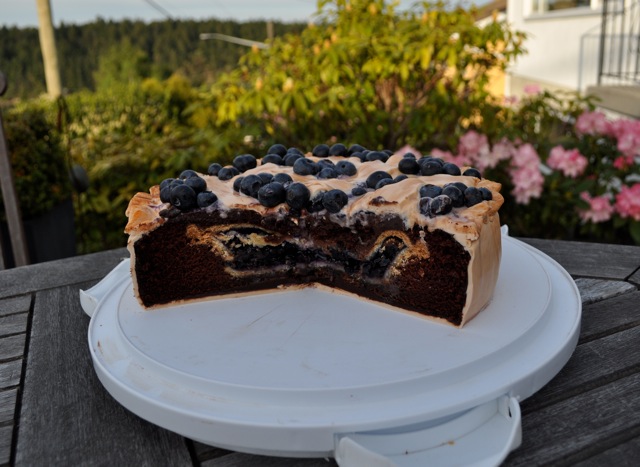
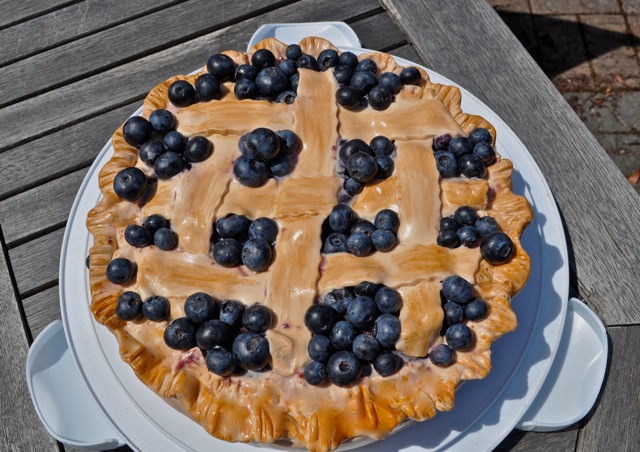
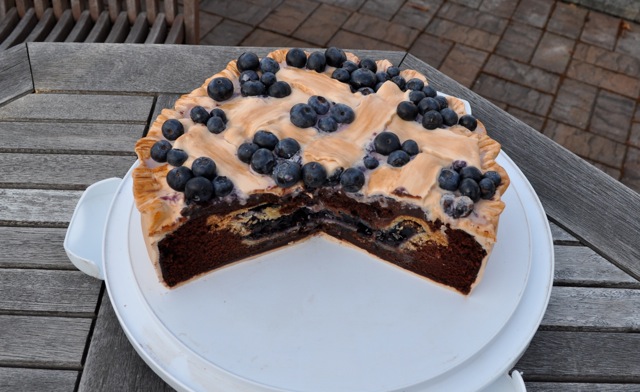
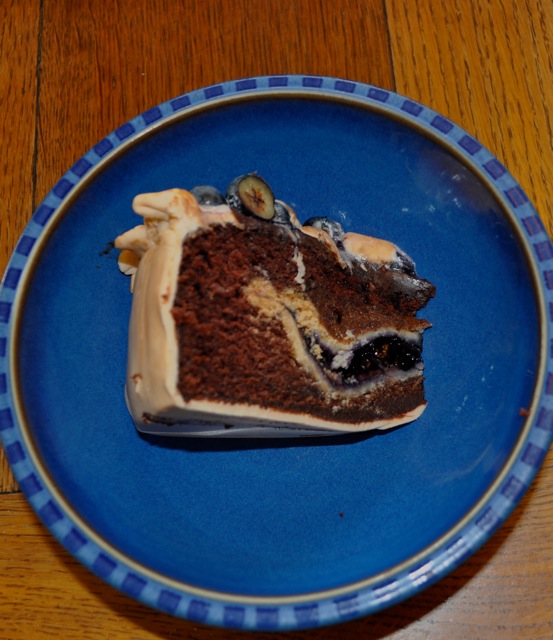
Cake That Looks Like Pie: Blueberry Chocolate PiCake Tutorial

Photos: Cake Gumshoe SetiaCakeSpy Note: This is a guest post from Cake Gumshoe Setia, who just started blogging at cakesbysetia.blogspot.com.

I love cake. I bake cakes for many people and many occassions, and am constantly brainstorming my next cake project and an occassion to make it for. So, imagine my surprise when I happily tell my husband that I have a wonderful cake idea in store for his birthday, and he responds "I was actually thinking I might want pie". (Insert gasp of horror here). Pie? Seriously? You are asking a lover of cakes - a cake-artist-in-the-making, if I may be so bold, to make you a PIE?

Don't get me wrong, I have nothing against pie. In fact, on occassion, I quiet fancy a slice; heated, served with a side of vanilla ice cream. I can even make a decent pie when I put my mind to it. Yet that is not the point, is it? The point, if not already apparent, was that I was desperately excited to come up with some wonderful cake creation for my husband's birthday. Sure, I knew he was probably teasing about the whole pie thing...right? However, I was now bound and determined to make something a bit tongue-in-cheek that would teach him a lesson, and yet give him what he wanted at the same time.

A cake that looks like a pie seemed like a pretty obvious solution! Why not? I'd never made one - it sounded like good fun! He'd get a good laugh! Perfect. Hmmm...yet it didn't seem quite perfect enough. More brainstorming required... Then I remember hearing of a place in Philidelphia that serves a dessert called "Pumpple Cake". It looks like a regular cake from the outside, but has an entire pie - two in fact - (apple inside vanilla cake, pumpkin inside chocolate cake, double stacked) on the inside. Now this got me thinking...What if I took that a step further? A cake disguised as a pie is great fun. But a PIE, disguised as a CAKE, further disguised as a PIE...well that is just genius!! (At least in my muddled little mind!)

My husband loves blueberries; fresh blueberries, blueberry pancakes, blueberries on cereal, and yes, of course, blueberry pie. And what goes swimmingly with blueberries - or any kind of berry for that matter, I asked myself? Why, chocolate of course! And so, I went forth and baked...And the results, in my opinion, were both pleasing to the eye and to the palate! Voila! A deep-dish blueberry-looking pie!

Here's how you make it happen.

Blueberry Chocolate PiCake Instructions


  1. Make favorite never-fail chocolate cake recipe.
  2. Pour enough batter into the cake pan to just cover the bottom.
  3. Insert pie onto batter.
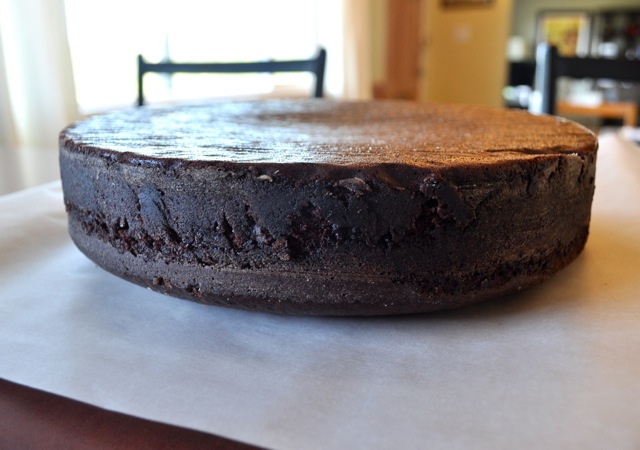
  4. Pour remaining batter on top and around sides of pie.
  5. Bake the cake/pie as directed- takes considerably longer than regular cake-baking time. It seems like the top will never cook, but be patient, it will! Just keep watching it!
  6. Turn pie over onto work surface so it is upside down.
  7. Smother with a delicious chocolate ganache. Smooth ganache with hot knife to ready it for the fondant.
  8. Decorate to look like a deep-dish pie, using fondant. (I decided to do a lattice "crust" on the top).
  9. Use a little brown food colouring and vodka mixed together to 'paint' more colour onto the fondant, giving it a more "baked" look.
  10. Add fresh blueberries as desired.


Thursday
Jun022011

Totally Sweet: Cherry Pie in a Chocolate Pie Crust Recipe from Domestic Fits

Photos: Domesticfits.comCakeSpy Note: This is a guest post from Cake Gumshoe Jackie, a Los Angeles resident (but we won't hold that against her) who cooks and bakes from a small kitchen surrounded by a husband, bulldog, 1 year old daughter and lots of sunshine. She is committed to cooking and baking with the abundance of local produce that her area offers, strawberries and avocados better watch out!

CHOCOLATE PIE CRUST! It’s pretty clear by my excessive use of capitalization what my favorite part of this pie is. I woke up in the middle of the night (I know, overly dramatic for a food blog post) with the idea of a chocolate pie dough crust. After a quick google search I wasn’t able to find a recipe for inspiration, leading my to wonder if my midnight dessert vision wasn’t even possible. By only modifying my go-to pie dough crust, It turns out that it is VERY possible, and super tasty.

Here are a few process shots and the recipe, which can also be found on Jackie's blog, Domestic Fits.

Cherry Pie in a Chocolate Pie Crust

 Ingredients

  • 1/3 cup unsweetened cocoa
  • 2 2/3 cup of all purpose flour
  • 1/2 tsp salt
  • 3 tbs sugar
  • 12 tbs butter, cut into cubes
  • 1/2 cup shortning
  • 1/4 cup vodka
  • 1/4 cup cold water

Pie Filling ingredients:

  • 1 1/4 cup sugar
  • 3 tbs cornstarch
  • 5 cups of fresh bing cherries
  • 3 tbs lemon juice from a real life lemon, none of that squeeze bottle crap (about 1 large lemon’s worth)
  • 1/2 tsp vanilla extract
  • 1 cup chocolate, broken up into chunks (I used 56%)
  • 3 tbs butter
  • 1 tbs light corn syrup
  • 2 tbs butter (for crust assembly)
  • plus 2 tbs white sugar to sprinkle on top before cooking 

 Procedure

  1. I did some pretty extensive research on pie dough over the past few years and I’ve learned a few things that I’ll pass on to you all. First, food processors are great at getting the job done as quickly as possible, and we all know that the more you mess with dough the tougher it becomes. So break out that food processor and add the cocoa, 2 cups of the flour, salt and sugar and give it a quick pulse until it’s combined.
  2. Add the cubes of butter and the shortening and pulse until combined, about 1 1/2 minutes. A mix of shortening and butter gives a good flavor and texture.
  3. Now, if you have a larger food processor that mine, then add the remaining flour and pulse until it gathers around the blade. MINE is tiny and I need a new one. So if you are in the same boat as I am, just transfer it to a bowl and add the remaining flour by hand. (if you have a nice big guy food processor, transfer to a bowl after you add the remaining flour)
  4. Then add the water and the vodka and squish it into the dough until its all combined. Vodka is another tip I picked up during my dough research. It cooks off completely (unlike water) creating a super flakey crust. Your dough will be very moist, but you can add a bit of flour if it is too moist to hold together. Then split into two evenly sized disks and wrap in plastic wrap, and chill for AT LEAST AN HOUR, super important, don’t skip this step.
  5. You can chill it for a few days if you need to, in that case, put the wrapped circles in a zip lock bag.
  6. Before you get to the cherries, combine the sugar, cornstarch, salt, lemon juice and vanilla in a large bowl and set aside.
  7. Now, get out those beautiful cherries. You’ll have to pit them, so I hope you have a pitter. You can buy them for about $8 and its totally worth it.
  8. To pit 5 cups, it should only take about 10 minutes. Unless, your daughter needs a nap and she won’t sleep and you can hear her jumping in her crib throwing bedtime bunny, sleepy time bug, and her sippy cup across the room and you have to go in and lay her down and tell her that she is a tired lady and she needs to go nigh night….in that case, it may take longer.
  9. Add the pitted cherries to the sugar mixture bowl and stir until the cherries are well coated. Allow to rest for about 30 minutes.
  10. Get your cold dough out of the fridge and place it on a well floured surface. I’m not gonna lie to you, this is not the easiest dough to work with. It’ll need a lot of flour on both sides, flour the top to make sure it doesn’t stick to your rolling pin. roll out into a circle large enough to fit into your pie pan with only a little over hang. If it breaks apart, just smoosh it back together with your fingers. Transfer to your pie pan, if it breaks, again, just push the cracks back together.
  11. in a microwave safe bowl, add your chocolate chunks, butter and corn syrup.
  12. Microwave for 20 seconds, stir and repeat until all melty. Pour the chocolate into the crust and smooth out to make an even layer. Then add your beautiful cherries. 
  13. OK, so by this point I was a little fed up with my crust, so the double crust plan was altered a bit. If you want to roll out circle #2 and make it a double crust, be my guest. I decided to roll out #2 and cut him up with two mini cookie cutters. You can also cut strips to do a lattice top.
  14. I then layered them on the top to create parallel lines, brushing each cutout with melted butter to help them adhere to each other. I then filed in a bit of the blank spaces with randomly placed cutouts and sprinkled the top with sugar.
  15. By this point you may be thinking, “Why didn’t she ask me to preheat the oven? Did she forget? should I just set it to my go-to 350?” Nope. This is one of those pearls of pie dough wisdom that I am passing on. Ice cold dough cooks better than room temp dough. SInce we have worked this pie dough over pretty good, it needs to rest and chill before going into the oven. SO now, turn the oven on and set it to 475 and place your pie in the fridge to chill. Wait about 20 minutes and then bake your pie at 475 for about 15 minutes. Then, turn your oven down to 375 and finish baking for about 45 minutes or until the filling is thick and bubbly. If your crust looks like it is browning too much, cover it in foil.


Thursday
May052011

Saltwater Sweetness: Saltwater Taffy Cream Pie Recipe

Now, you may not know this, but I hail from a magical land called New Jersey. And in that magical land, there is a magical snack that gives residents along the shore their secret, magical New Jersey powers. That snack is called Saltwater Taffy (and at this point, no, you are not invited to ask any follow up questions).

Now, the name may be misleading. This taffy doesn't actually contain saltwater, but instead is called such because it was popularized by the shore in Atlantic city in the late 1800s-early 1900s, and has been associated to a close proximity to the sea ever since. Dig?

But what is true is that it is a singular sensation of a confection: mellower and creamier than hard candies, with a texture that begs you to slowly savor rather than suck and bite. 

I don't know about you, but that's all I needed to decide it would make a great addition to a cream pie.

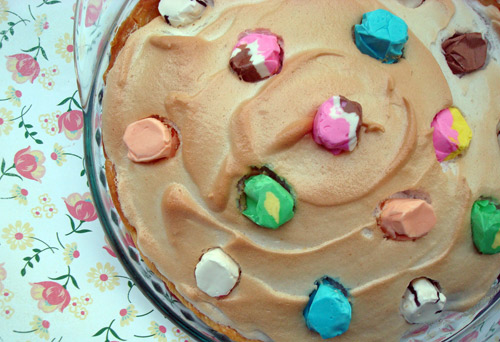
So here it is for you, friends: a modern marvel that I'm calling Saltwater Taffy Cream Pie. YES!

Saltwater Taffy Cream Pie

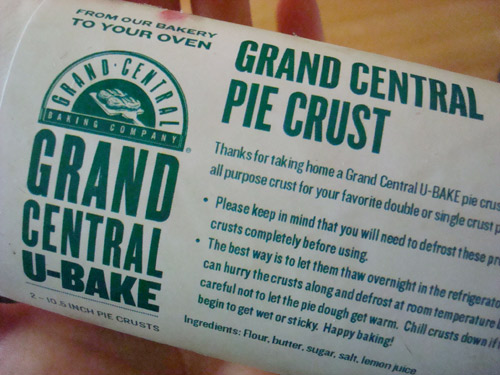
  • 1 9-inch pie crust (unbaked) - I tried out the Grand Central U-bake Crust, which I recently received a sample of, and it worked great!
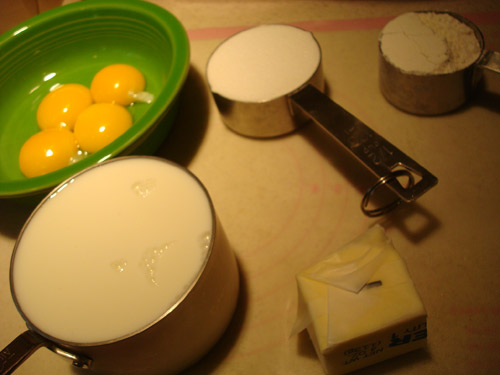
  • 1/2 cup plus 4 tablespoons sugar, divided
  • 1/3 cup all purpose flour
  • 1 1/2 cups milk
  • 4 large eggs, separated
  • 1/4 cup (1/2 stick) butter
  • 2 teaspoons vanilla, divided
  • 30 or so taffy candies (about 15 for the filling and as many as you'd like to garnish)
  • 1/4 teaspoon cream of tartar
  • 1/8 teaspoon salt

Procedure

  1. Preheat the oven to 400. Bake the pie crust 8-12 minutes (using pie weights), or until lightly brown. Set to the side to cool.
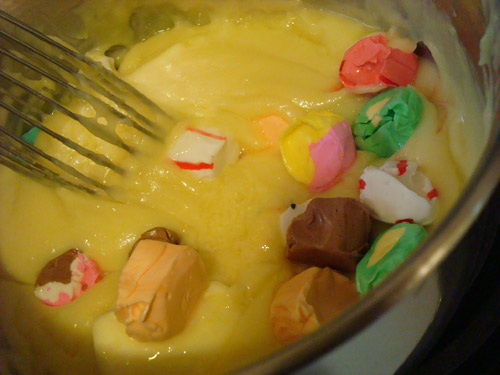
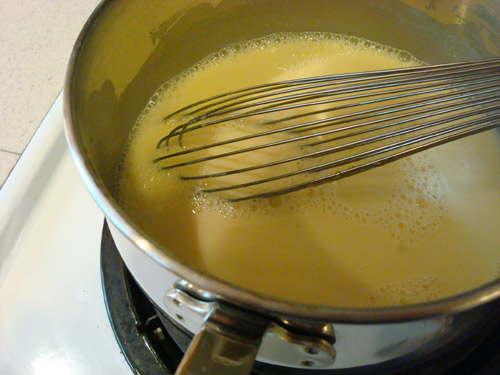
  2. In a medium saucepan, mix 1/2 cup sugar and the flour. Add the milk and stir until dissolved. Add the egg yolks and mix very well. Cook over low heat, stirring constantly, until thickened--this was about 15 minutes in total for me. Remove from heat and stir in the butter, 1 teaspoon of vanilla, and 15 or so of your taffy candies (um, unwrapped please). They may make bright swirls in the filling, which is...not necessarily pretty or appetizing. Power through it. Cool the mixture, and pour into the prepared pie crust.
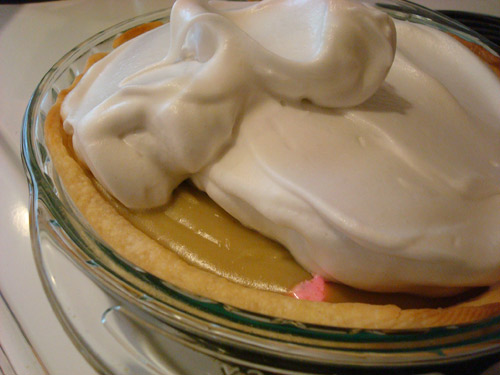
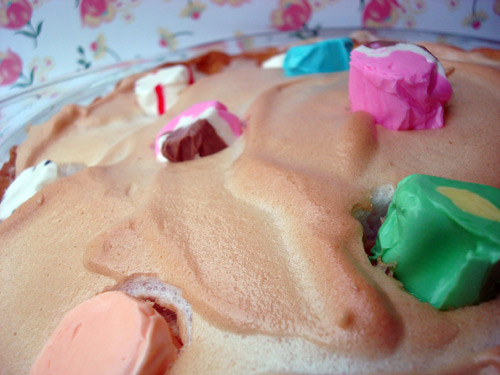
  3. In a large bowl, beat the egg whites on high speed with an electric mixer, til stiff but not yet glossy. Sprinkle the cream of tartar and salt on top, and beat lightly. Slowly add the remaining sugar and 1 teaspoon vanilla, beating constantly until the meringue forms soft peaks and a nice glossy sheen, kind of like the consistency of shaving cream. Spread over the pie. Reduce oven heat to 325. Bake 8-12 minutes, or until lightly browned. I found that to brown evenly, it helped to shift the plate halfway through baking. Remove from the oven and let cool on a wire rack. Once cool, dot the top with extra taffy, if desired. Refrigerate leftovers.

© Cakespy, all rights reserved. Powered by Squarespace.