Home Home Home Home Home Home Home
CakeSpy

Featured: 

My adventure at Ben & Jerry's in Vermont!


Unicorn Love: the Eating Disorder Recovery Blog


 Buy my brilliant books!

Buy my new book!

Buy my first book, too! 

CakeSpy Online Retail!


Archives
Gallery

Fantastic appliance for cake making on DHgate.com

everyrecipe.co.nz

Craftsy Writer

Entries in recipes (704)

Wednesday
Apr222009

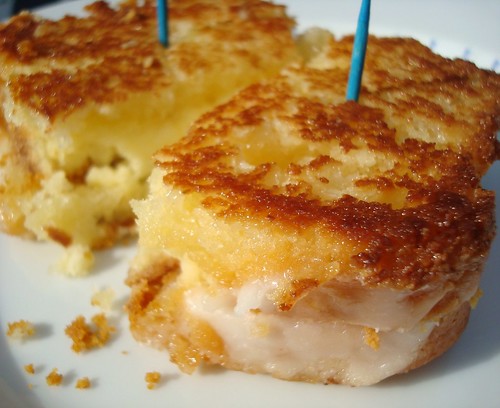
Grilled Cheesecake: A Sweet Take on a Classic Sandwich

Grilled Cheesecake Sandwich
With all this talk about the Grilled Cheese Invitational and all of the recipes featured on Good Food lately, I've had grilled cheese on the brain.

Grilled cheese is pretty much the best thing since sliced bread. After all, it is sliced bread--with the added awesomeness of cheese and butter. Can it really get any better?
After being hit with what can only be described as a stroke of pure genius, I can definitively say yes. It can get better.
Say hello to the grilled cheesecake sandwich.

Grilled Cheesecake Sandwich
"Is this serious?" you may be asking yourself. 
Oh yes. Made out of slivered cheesecake layered between slices of buttered pound cake, this sandwich is serious all right--as serious as a heart attack. 
Here's how it's done.
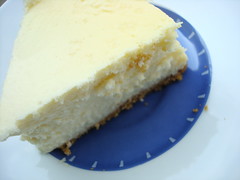
Grilled Cheesecake

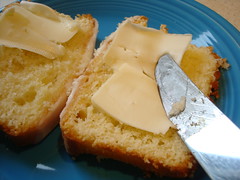
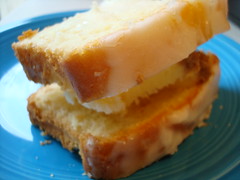
Buttering the Pound CakeCheesecake
  • 2 slices pound cake (any flavor you like), buttered on the outside
  • 1 small slice cheesecake, slivered

Assembling the Sandwich
1. Assemble the sandwich as follows: one slice pound cake (butter side down), as many slivers as you'd like of cheesecake (we included bits from the crust for added crunch), and the other slice of pound cake, buttered side up. 
Hitting the pan
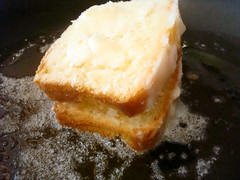
2. Put in a saucepan over medium-low heat.
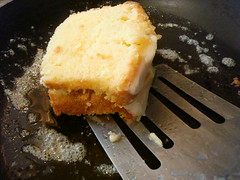
Flipping it!
3. After about a minute and a half, gently lift with a spatula to see if it is lightly browned on the bottom. If it is browned to your liking, go ahead and flip; if not, let it brown just a little longer.
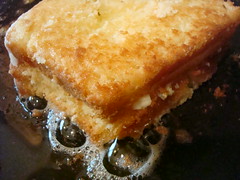
Bubbly and buttery
4. Once browned to your liking, carefully flip the sandwich. Press down on the top with the spatula to make everything kind of meld. The second side will brown faster than the first one did, so keep a close eye on it.
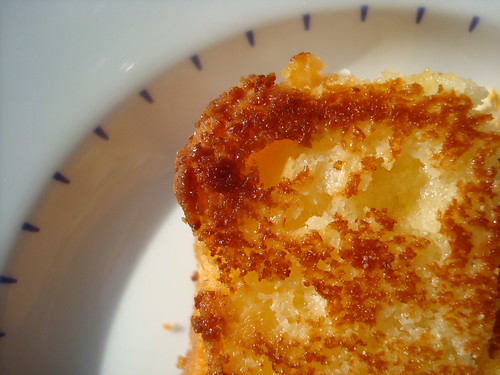
5. Remove from heat, turn off the heat, slice in half (if you're into that), and enjoy.
Serving note: For those of you who simply can't eat a grilled cheese without soup, I think a bowl of slightly melty strawberry ice cream would complement it quite nicely.


Monday
Apr202009

Ice-ing on the Cake: A Different Kind of Ice Cream Cupcake

Filled Cupcake
Recently, I was posed with an interesting reader inquiry: "Have you ever made cupcakes using ice cream instead of milk in the recipe?"

Well, no. The thought had never actually occurred. But you can bet that shortly after being asked, I found myself in the freezer aisle of the local grocery.

So what happens when you make cupcakes with ice cream?


First, I chose a cupcake recipe by Amy Sedaris. It's copied below as it appeared in her wonderful book, but "milk" is replaced with "ice cream" in the appropriate spots.


Amy Sedaris's Vanilla Cupcakes Made with Ice Cream
  • 1 1/2 sticks unsalted butter
  • 1 1/2 cups sugar
  • 2 eggs
  • 2 teaspoons pure vanilla extract
  • 2 1/2 teaspoons baking powder
  • 1/4 teaspoon salt
  • 2 1/2 cups flour
  • 1 1/4 cups slightly melted (still cold) ice cream (this was milk in the original recipe)
Turn oven on to 375 degrees F.


Put butter in mixer and beat at medium speed until somewhat smooth. Pour in sugar and beat well. Add 2 eggs. I like to crack the eggs on the side of the bowl while it is moving, which can be really stupid. I like to take chances. Yes, I have had to throw away my batter because I lost eggshells in the mix. Yes, it was a waste of food and yes, I know how expensive butter is, but what can I say? I'm a daredevil. Mix well. Add: vanilla, baking powder, salt, flour, and ice cream. Beat until it looks like it is supposed to and pour into individual baking cups, until they are about 2/3 full. Bake for 20 minutes or until golden brown. Should produce 24 cupcakes; I get 18 because I'm doing something wrong, although my cupcakes were voted second best in the city by New York Magazine.

--------------------------------

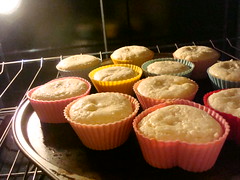
Ice cream cupcakes baking

When the cupcakes were baking, they looked just fine--they were rising nicely, and if anything the only thing that clued us in that they were different was a slight glossiness to the texture of the top of the cake.

Looking good...
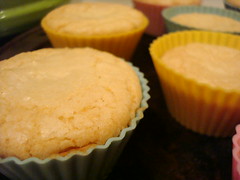
When they came out of the oven, they still looked good...

Fallen cupcakes
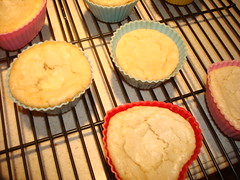
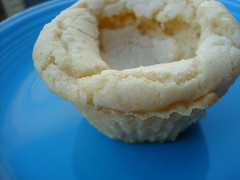
But then something started to happen--they began to slowly collapse, like fallen souffles. Oh no!

When cooled, we took them out of the silicone baking liners, and found that not only were they fallen, but these cakes were seriously dense. They seemed to weigh more than a cupcake should, and had a texture that was more like a scone or cakey cookie than a light and fluffy cupcake.
Fallen cupcake

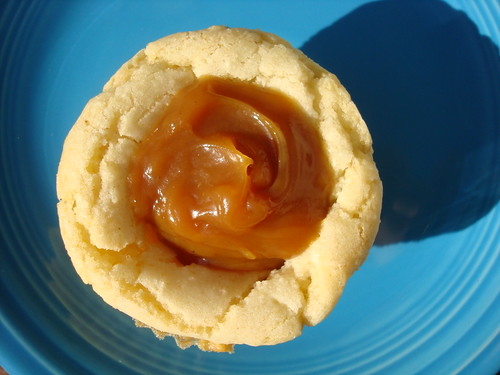
Luckily, our friend Dan the Baker had just given us a jar of delicious bourbon caramel sauce (what's in it we have no idea, but it is good), and so instead of frosting the cupcakes, we filled each indentation with a generous spoonful. This seemed appropriate in more ways than one--not only did it cleverly disguise the fallen cupcakes, but it tasted a little like an ice cream topping. A nice, thick hot fudge sauce or butterscotch sauce would probably work just as well.

Filled Cupcake
The ice cream cupcakes were pretty good as a baked good, but it was hard to actually think of them as cupcakes, since they had such a different texture and density--it's almost as if they needed their own category, resting somewhere between cookie and cake. Replacing the milk with ice cream definitely does change the character of the finished product (don't ask me why in terms of chemistry, please--I went to art school)--so proceed with caution!


Thursday
Apr022009

Sweet Nostalgia: Cotton Candy Cupcakes

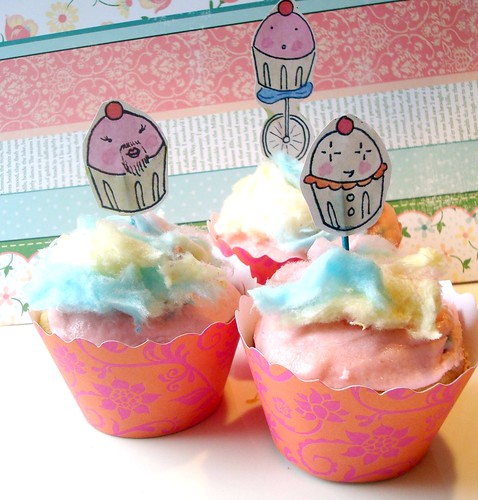
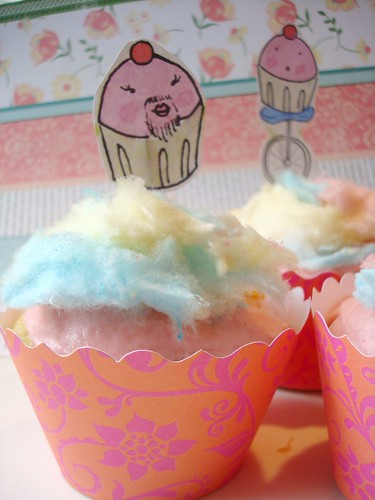
Carnie Cotton Candy Cupcakes
When a CakeSpy reader recently wrote asking if we had a cotton candy cupcake recipe, the response was immediate: no, but did we ever want to have one. 

Cotton candy is one of those foods that is loaded with nostalgia: the billowy clouds of spun sugar conjure visions of idyllic childhood summers, county fairs and carnivals. Now, we don't want to confuse the experience with the product, (after all, there are more realistic pitfalls to cotton candy, like its saccharine sweetness and the sticky, pastel-colored hands it leaves you with) there's no denying that cotton candy is just a happy sort of food.
So when a recipe wasn't immediately available, we decided to improvise; here's what we came up with--a buttery vanilla cupcake topped with cotton candy-infused pink buttercream frosting, topped with even more cotton candy. Not as if they need to be any sweeter, but the Bella Cupcake Couture wrappers and Carnie Cuppie toppers sure did make them cute. 
The overall result? Tastes like childhood to us.

Cotton Candy Cupcakes
Makes 24 cupcakes
Yellow Cupcakes (cake recipe only via foodnetwork.com):
  • 1 cup unsalted butter
  • 2 cups sugar
  • 1 1/4 teaspoons vanilla extract
  • 4 eggs
  • 3 cups sifted cake flour
  • 1 tablespoon baking powder
  • 1/2 teaspoon salt
  • 1 cup milk
  • cupcake liners


Preheat the oven to 350 degrees F.


In a mixer with a whip attachment, cream the butter until light and fluffy. Add the sugar and continue to cream. Gradually add the vanilla and eggs and mix in well. Sift together the dry ingredients; then mix into the butter mixture alternating with the milk. Pour batter into cupcake paper-lined muffin tins filling them 3/4 full. Bake until puffed and firm in the center and light golden brown on top, about 20 to 25 minutes. Let cool. (Freeze at this point, if necessary.)

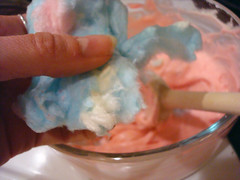
Cotton Candy!Cotton Candy Frosting
Cotton Candy Buttercream Frosting (adapted from this recipe)

Makes enough frosting for 24 cupcakes
  • 1 cup (2 sticks) unsalted butter, softened
  • 6 to 8 cups Confectioners' sugar
  • 1/2 cup Milk
  • 2 teaspoons Vanilla extract
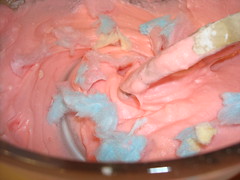
  • 1 handful cotton candy (we used this prepackaged kind), broken into small pieces, plus another handful for garnish
  1. Place the butter in a large mixing bowl.
  2. Add 4 cups of the sugar and then the milk and vanilla.
  3. On the medium speed of an electric mixer, beat until smooth and creamy, about 3 to 5 minutes.
  4. Gradually add the remaining sugar, 1 cup at a time, beating well after each addition (about 2 minutes), until the icing is thick enough to be of good spreading consistency. You may not need to add all of the sugar.
  5. Add a few drops of red food coloring and mix thoroughly til it's a desired shade of pink.
  6. Stir in the small pieces of cotton candy, stirring until incorporated. It may melt a little bit into the frosting; this is ok.
  7. Use and store the icing at room temperature because icing will set if chilled. 
  8. Optional topping: tear off chunks of cotton candy and use as garnish; do this last step  immediately before serving, because it will wilt if left out.


Thursday
Mar192009

ShamRock Shake, Rattle and Roll

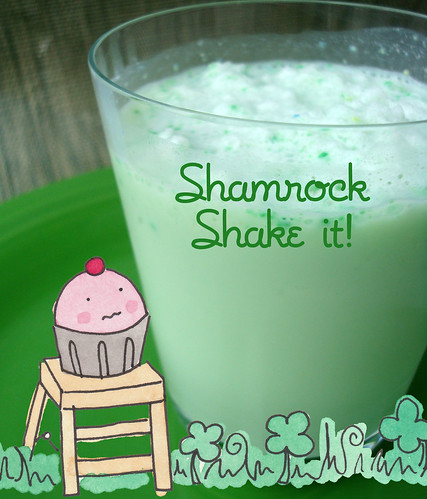
Shamrock Shake, Rattle and Roll
St. Patrick's day may be over, but the ultimate symbol of green excess is still available through the end of the month. No, we're not talking about green beer--we're talking about that green monster of a cold confection, the Shamrock Shake.

There's something delightfully trashy about this shake, which has clearly resonated with the public--there's even a movement to make it available year round. But somehow, as attracted as we are to this never-found-in-nature-green drink, we can't seem to make ourselves cross the threshold of those golden arches--must have seen Super Size Me one too many times.
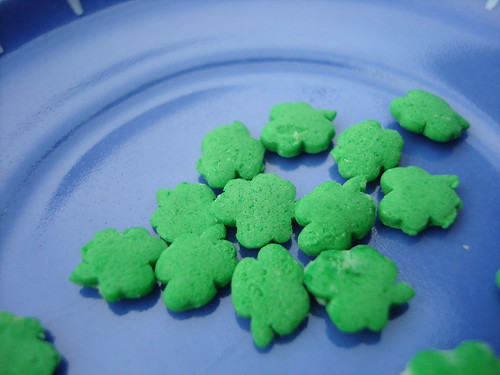
Shamrocks
Luckily, we've come up with a solution to make something just as satisfyingly unhealthy at home--and this recipe actually has shamrocks. So bad it's good, in a rot-your-teeth-out sort of way; plus, with St. Patrick's day baking supplies on sale, it's also an extremely cost-efficient treat.

Shamrock shakeShamrock shake
Shamrock Shake
Ingredients:
  • A massive handful of green shamrock sprinkles (no, you may not substitute non-shamrock shaped green sprinkles)
  • 4 ounces or so milk (we used soymilk--yes, we see the incongruity in this)
  • A healthy scoop of ice cream 
  • Small handful of ice cubes
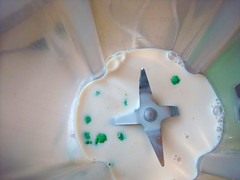
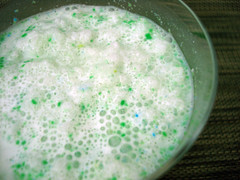
Directions: Pour in blender; blend until smooth. Pour in your favorite glass that will allow the green to show through. Bask in the sugary green glory. Serves one.
* Optional note: Feel free to add Bailey's Irish Cream, Creme de Menthe or straight whiskey to taste. 


Monday
Mar092009

Sugar Crash: An Unusual Introduction to the Cowboy Cookie

Cookie Sandwich
Sometimes a new baked good just comes crashing into your life--full throttle, no apologies, no turning back.

The Cowboy Cookie was such a treat for us--literally.

You see, not so long ago, a car crashed into the house neighboring the CakeSpy Headquarters. No, really. See?
Car Crash!
It crashed right into the kitchen, where said neighbor happened to be at the time of the crash--in the middle of mixing up some cookie batter.
Dough ballsDough
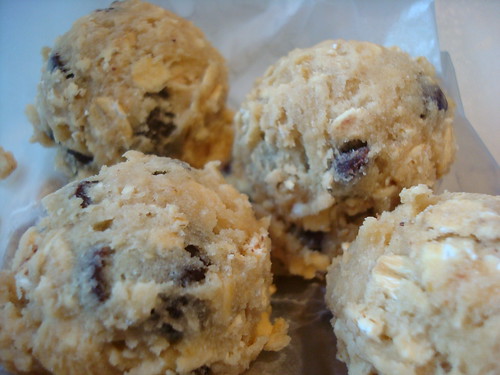
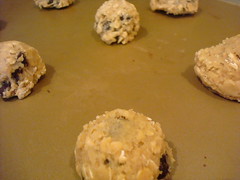
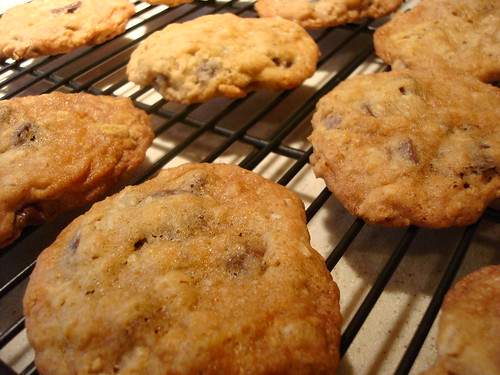
Well, needless to say their oven was not OK, so we found ourselves in the unique position of having inherited a batch of cookie dough, all ready to bake. And so preheat the oven we did, and about half an hour later, we had a fresh batch of cookies. What resulted was a mysterious, yet delicious, cookie. They had oats, but couldn't quite be called an oatmeal cookie; they had chocolate chips, and yet we wouldn't quite call them a chocolate chip cookie. And did we detect a pecan or two?
Cookies
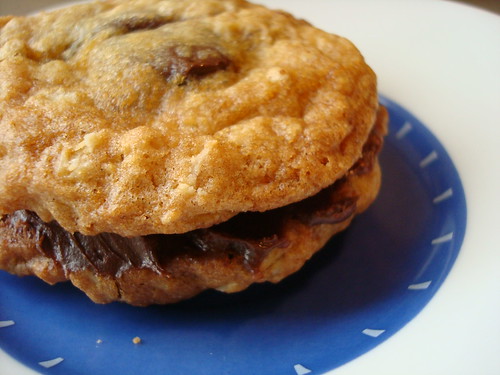
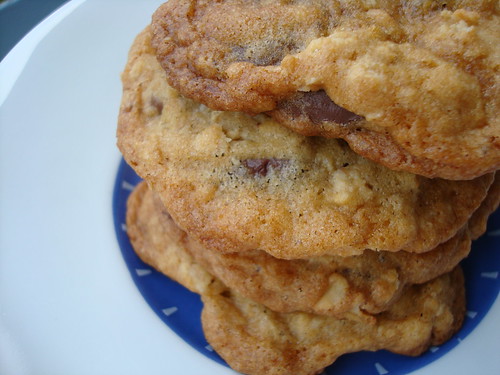
Turns out, they're called Cowboy Cookies--and with their dramatic entrance, they've certainly lassoed our hearts--and with an extra dab of chocolate frosting in between, they're bound to corral the affections of just about any cookie lover.

Stack of cookies
There are a number of varieties of the Cowboy Cookie to be found online, and they're certainly an easy one to personalize to taste; but in case you're curious, this recipe that we found on Martha Stewart seemed very close to the ones that we had:

Cowboy Cookies

  • Vegetable oil cooking spray
  • 2 cups all-purpose flour
  • 1 teaspoon baking soda
  • 1 teaspoon salt
  • 1/2 teaspoon baking powder
  • 8 ounces (2 sticks) unsalted butter, softened
  • 3/4 cup granulated sugar
  • 3/4 cup light-brown sugar
  • 2 large eggs
  • 1 teaspoon pure vanilla extract
  • 1 1/2 cups old-fashioned oats
  • 6 ounces semisweet chocolate, cut into 1/4-inch chunks (1 cup)
  • 3 ounces (3/4 cup) pecan halves
  • 1/2 cup shredded unsweetened coconut
Directions


Preheat oven to 350 degrees. Coat baking sheets with cooking spray, line with parchment, and spray parchment. Sift flour, baking soda, salt, and baking powder into a medium bowl.
Beat butter and sugars with a mixer on medium-high until pale and creamy, about 3 minutes. Reduce speed to medium. Add eggs, 1 at a time, beating well after each addition. Beat in vanilla.
Reduce speed to low, and slowly add flour mixture, beating until just incorporated. Beat in oats, chocolate, pecans, and coconut until combined. (Dough can be refrigerated for up to 3 days.)
Using a 1 1/2-inch ice cream scoop or a small spoon, drop dough onto baking sheets, spacing 3 inches apart.
Bake until edges of cookies begin to brown, 11 to 13 minutes. Transfer baking sheets to wire rack, and let cool for 5 minutes. Transfer cookies to racks. Let cool. (Cookies can be stored up to 3 days.)


Friday
Mar062009

POM-mier Wonderful: Pomegranate Palmiers

POM-mier
Pomegranates are kind of like the rock star of the antioxidant world. In fact, based on what we read on the POM Wonderful website, there isn't a whole lot they can't do: they improve cardiovascular health, help clear arteries, and might even help you feel more frisky. And happily, pomegranate seeds and juice are pretty delicious, even on their own, so getting all of those benefits need not taste like bitter suffering.

However, when the sweet people at POM (thanks buddies!) offered to send us some of their juice to test out with baking, we wonderered, could there be a way to increase the awesome quotient of this superfood? The answer is yes: by smothering its supreme antioxidancy in butter and sugar.
Palmiers ready to bakePOM juice
So was born the POM-mier, a pomegranate infused and topped palmier. Joking aside, the resulting pastry is a lovely, not too-sweet combination of flavors: the buttery, flaky pastry gets a sweet, tart taste contrast from an infusion of pomegranate between its layers and a topping of pomegranate syrup. Here's how we made them:

Pomegranate palmiersPomegranate Syrup
Pomegranate Palmiers (adapted from a recipe on Epicurious):

Ingredients:

  • 1 to 2 tablespoons POM Wonderful juice per pastry sheet
  • 2 sheets puff pastry (or more, or less, to your preference)
  • 1 tablespoon sugar per pastry sheet (approx.)


Preheat oven to 400°F.


Sprinkle some sugar on a work surface and cover it with a puff pastry square sheet. Then sprinkle more sugar evenly over pastry sheet and roll it out into a 10-inch square with a rolling pin. With a pastry brush, gently brush the pomegranate juice across the surface of the puff pastry (this will give the finished pastry the lightest essence of pomegrante).

Fold in two opposite sides of the pastry sheet square so that they the sides meet in the center. Fold in same sides of the pastry again.

Fold one half of the pastry over the other. Cut pastry crosswise into 1/2-inch-thick slices. Dip cut sides of each piece in sugar and arrange, cut side down, on an ungreased baking sheet. Repeat with three remaining pastry sheets.

Bake palmiers in batches in middle of oven until golden on bottom, about 12 minutes. Turn over and bake until golden on bottom, 5 to 7 minutes more, then transfer to a rack to cool completely. While cooling, top with pomegranate syrup (below).

Pomegranate Syrup (Adapted from the POM Wonderful website):


  • 1 cup POM Wonderful Juice
  • 1/2 cup sugar

Combine juice and 1 cup of sugar in a small saucepan; bring to a boil.
Reduce heat and simmer about 20 minutes until reduced to about 3/4 cup, stirring frequently.
Remove from heat and cool. (You can store in a tightly closed jar or container in the refrigerator for up to 2 months).
With a spoon, gently pour a small amount on top of each finished pastry.


Thursday
Feb262009

Short But Sweet: A Salute to Shortbread

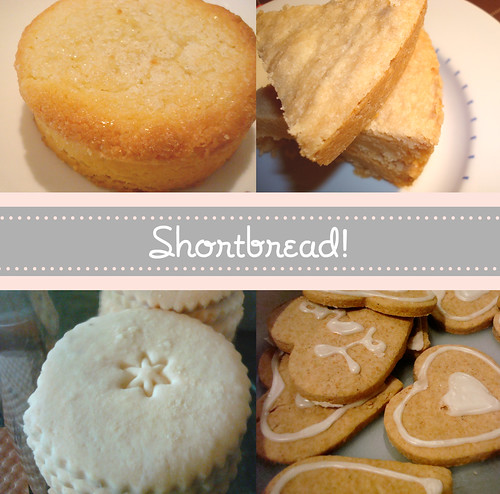
SHORTBREAD!
Shortbread is certainly one of life's small pleasures: crispy, tantalizingly buttery, and when done right, the perfect combination of sweet and slightly salty.

With only three main ingredients (flour, sugar and butter--with a dash of salt for good measure)--traditional shortbread isn't a complex thing, but we would be hard-pressed to call it simple food. Because certainly there is an art to mixing those ingredients, to yielding the elusively perfect, buttery crumb.
But what else lies beneath this humble cookie? We took some time to think about various aspects of the cookie--here's what we discovered.
First off, where does the cookie come from?

As Historic-UK.com informs us, the story of shortbread begins with the medieval biscuit ("twice-baked"), wherein leftover bread dough was baked a second time to form a type of rusk--this is to say, if you picture a family tree of cookies, this would mean that shortbread, rusks and biscotti all share some relatives.
While by some accounts they existed as far back as the 12th century in Britain, it seems to us that it is truly Scotland where shortbread as we know it was developed: it is here that gradually the yeast began to be replaced with butter, and oat flour, which were some of their agricultural staples. These "short" bread cookies were a fancy dessert, reserved for the wealthy and for special occasions. And certainly their popularity was bolstered by the fact that in the 16th Century, they are said to have been a favorite of Mary, Queen of Scots (she liked a variation which included caraway seeds, in case you were interested).

Dipped Shortbread at Au Bon Pain, Penn Station
Why are they called "short"?
It's all about the butter, baby! According to Everything You Pretend to Know about Food and Are Afraid Someone Will Ask, which is like, our favorite book ever,
short pastry is a nonyeast pastry that has a high ratio of butter to flour. Short pastries bake up crumbly rather than chewy and tend to keep well, owing to their high fat content.
What is the proper shape for a traditional shortbread cookie?
We've seen them round, rectangular, diamond-shaped, and cut into wedges from a larger round--so what gives? Is there a proper shape for a traditional shortbread cookie? Once again according to Historic-UK.com,
Shortbread is traditionally formed into one of three shapes: one large circle divided into segments ("Petticoat Tails"); individual round biscuits ("Shortbread Rounds"); or a thick rectangular slab cut into "fingers."

Of course, having taste-tested each of these traditional variations, we can report that while they may differ in look, each shape is delicious.
Dog Portrait Cookies
What is the best shortbread cookie recipe?
These days, shortbread recipes are available in a dizzying array of flavors and variations: and from chocolate peanut butter to gorgeously decorated chocolate shortbread (above, photo c/o Whipped Bakeshop) to Earl Grey to cherry almond to even lavender vegan variations, we have enjoyed many of them. But moreover, we love this simple, classic recipe, which is a wonderful springboard for variations (note: though it can be made into round cookies rather than a big round, it is a fragile dough so may be harder to handle in that way).


Scottish shortbread in a pie tinShortbread
Classic Shortbread
  • 1 cup all purpose flour
  • 1/4 cup sugar
  • 1/4 teaspoon salt
  • 1/2 cup (1 stick) chilled unsalted butter, cut into 1/2-inch cubes

Preheat oven to 300°F. Lightly butter 9-inch-diameter springform pan (we couldn't find ours so used a pie plate--it worked just fine!). Whisk flour, sugar, and salt in medium bowl to blend. Add 1/2 cup butter and rub in with fingertips until mixture resembles coarse meal. Gather dough together and form into ball; flatten into disk. Roll out dough on lightly floured surface to 1/2-inch-thick round. Transfer round to prepared pan. Using fingers, press dough evenly over bottom to edges of pan. Using tip of small sharp knife, score dough into 8 equal triangles, then pierce all over with fork. Bake until shortbread is cooked through and pale golden, about 45 minutes.


Using tip of sharp knife, cut warm shortbread into triangles along scored lines. Run knife around shortbread to loosen. Cool in pan at least 30 minutes. Using spatula, carefully remove shortbread from pan.

Can be made 1 day ahead. Store shortbread airtight in single layer at room temperature.


Saturday
Jan172009

She's a Brick House: The NYC Brownstone Front Cake

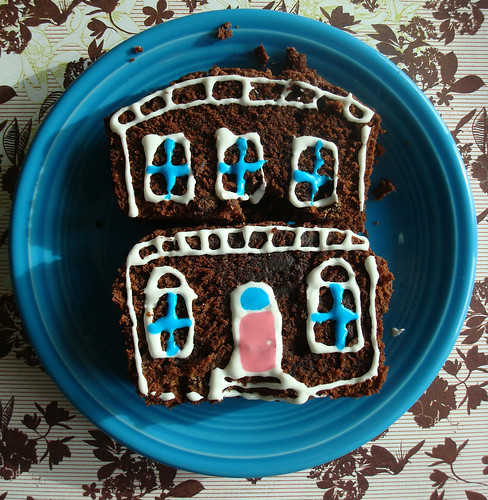
Brownstone front cake
What's in a name? They say that a rose by any other name would smell as sweet--but would it be as compelling? 

Take for instance the New York City Brownstone Front Cake. Certainly that's a much more appealing and interesting name than say, "Chocolate Loaf Cake"--and certainly the name is what lured us to learn more about, and bake, this cake. 

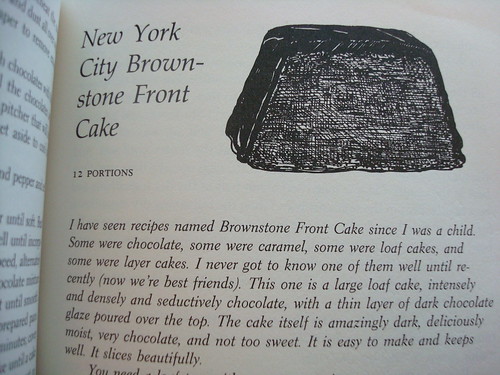
New York City Brownstone Front Cake

As Maida Heatter notes above, the Brownstone Cake is not something easily defined: the name has been used to describe cakes of caramel and chocolate, served as loaves or as layer cakes (if you're interested in learning more about its history, click here). But what holds true in each version is that this is a serious, dare we say brick house, of a cake: moist, rich, and very dense. 
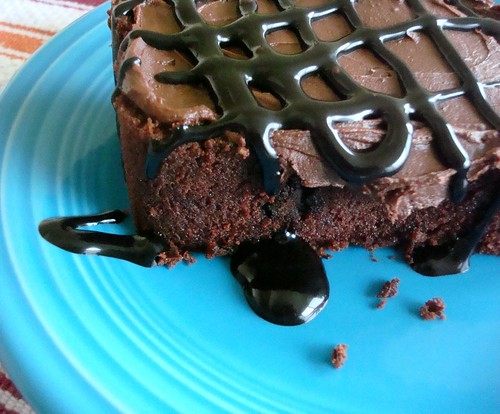
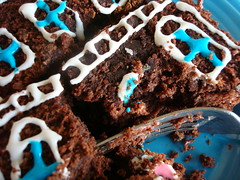
Using Maida's recipe as a starting point, we made our own version of the Brownstone cake, in a loaf pan. The result was an almost brownie-like cake. Because it was a large one, we let it stand as a loaf and let each eater choose their own adventure with their slice. It's an easy one to enjoy plain, iced (top picture), a la mode, or completely over the top-chocolatey (below). 

Ridiculously over the top chocolate brownie cake

New York City Brownstone Front Cake (adapted from Maida Heatter)
  • 2 ounces unsweetened chocolate
  • 1 cup boiling water
  • 1 tsp. dry instant coffee
  • 1 3/4 cups unsifted unbleached flour
  • 1/4 cup unsweetened cocoa powder (we used Hershey's Special Dark)
  • 1 tsp. baking soda
  • 1/8 tsp. salt
  • 4 ounces (1 stick) unsalted butter 
  • 1 3/4 firmly packed cups light brown sugar
  • 2 large eggs
  • 1 tsp. vanilla extract
  • 1/2 cup sour cream
  • *Optional Cakespy additions for added decadence and deliciousness:
  • 2 heaping tablespoons dark chocolate peanut butter--this gave it a richer, deeper dark chocolate color than some other examples of the cake we've seen.
  • 1 generous handful chocolate chips
Directions:
  • Adjust a rack one-third up from the bottom of the oven and preheat the oven to 325 degrees. You need a loaf pan with a 9-cup capacity (we didn't so we made two loaves using a smaller loaf pans). Butter the pan. (The original recipe calls for a breadcrumb mixture to line the pan but we didn't do that).
  • Chop the chocolate into coarse pieces and place it in a small saucepan off the heat. Add the boiling water and instant coffee. Stir until the chocolate is melted. (Maida's note: the mixture is in a saucepan so that if necessary it can be placed over heat until the chocolate is melted). Stir to mix and set aside.
  • Sift together the flour, cocoa, baking soda, and salt and set aside.
  • In the large bowl of an electric mixer beat the butter until soft. Add the sugar and beat until well mixed. Beat in the eggs one at a time, and then beat in the vanilla. On low speed add about half of the dry ingredients and beat to mix. Beat in the sour cream and then the remaining dry ingredients. Still on low speed, gradually add the melted chocolate mixture, scraping the bowl as necessary with a rubber spatula and beating until thoroughly mixed.
  • *At this point, figuring it would be delicious, we also stirred in a generous handful of chocolate chips, and about 2 heaping tablespoons' worth of dark chocolate peanut butter (we used Peanut Butter and Co.'s), in little chunks here and there in the batter.
  • Pour the batter into the prepared pan(s). 
  • Bake for about 1 1/2 hours or until a cake tester gently inserted in the middle comes out dry.
  • Cool the cake in the pan for about fifteen minutes. Then cover with a rack, turn the pan and rack upside down, and remove the pan, leaving the cake upside down to cool on the rack.

Empty pan, baby!Brownstone Front cake deliciousness

Now, this is the point at which we split paths with Maida. Rather than making her suggested Brownstone Icing,  as mentioned above, we left the cake as-is and let each eater choose their own adventure; the most delicious variation was undoubtedly the over-the-top chocolatey slice, on which we slathered on a bit of leftover chocolate buttercream frosting from a recent bout of baking and topped it with Hershey's chocolate syrup; to those who might consider this a bit excessive, it really is quite good lightly iced or even plain as well.


*As an added note, those who find this cake of interest may also get some extreme enjoyment out of David Lebovitz's Devil's Food Cake recipe.

Wednesday
Jan072009

Going Dutch: Say Hallo to the Jan Hagel

Jan Hagel cookies
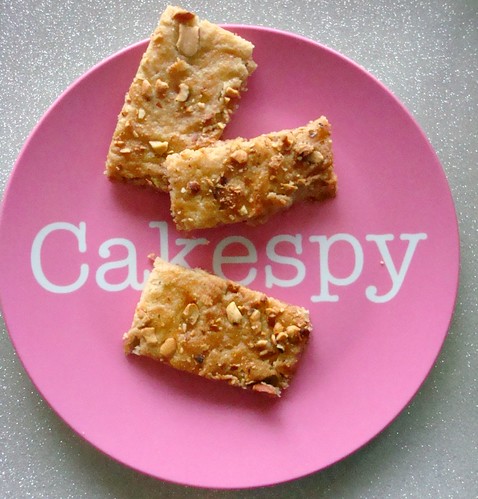
What can we say about our love affair with Jan Hagel? It just sort of...happened. OK, truth be told, we'd just poured 2 cups of flour into a bowl to make banana bread and realized we had no bananas. After scouring our recipe books for another recipe that might start out with the same amount of flour, we decided to try the Jan Hagel from our beloved Betty Crocker's Cooky Book.

As Betty informs us, the Jan Hagel is a cooky of Dutch origin; as the internet informs us, they are also sometimes known as Hollanders, Janhagels, Dutch Almond Cookies, Dutch Hail or Sugar Hail Cookies.
But what may have started out as a fluke has blossomed into an obsession: these cookies, which are thin, crunchy, and very buttery, are also really, really good. But what gives with the name?
As we found out through one site, A Cookie for Every Country, Jan Hagel (yan HAH-ghle) "is Dutch for ‘an unruly mob’ or ‘rabble,’ with hagel in the sense of ‘multitude’ or ‘swarm.’ In the cookie, the rock sugar resembles hail." Another site backs up the hail theory, citing that Jan Hagel is merely translated "John Hail". The recipe we used didn't call for rock sugar, but maybe those little bits of nut could stand in for the "hail"? Also, though we can't find a reason behind it, there is another legend which was interesting, which is that "Jan Hagels are fed to homesick little children in heaven upon their arrival at St. Peter's Gate".
Who could blame the little lost souls--we wouldn't want to leave these cookies behind, either.

Jan Hagel Cookies
Here's the recipe:
  • 1 cup butter or margarine
  • 1 cup sugar
  • 1 egg, separated
  • 2 cups all-purpose flour
  • 1/2 tsp. cinnamon
  • 1 tbsp water
  • 1/2 cup very finely chopped walnuts (we used a mix of walnuts, almonds and cashews--it was delicious)
Heat oven to 350 degrees. Lightly grease a jelly roll pan, 15 x 10 x 1 or so. Mix butter, sugar and egg yolk. Measure flour by dipping method or by sifting. Blend flour and cinnamon; stir into butter mixture. Pat into pan. Beat water and egg white until frothy; brush over dough; sprinkle with nuts. Bake 20 to 25 minutes, or until very lightly browned. Cut immediately into finger-like strips. Makes 50 3 x 1 inch strips.


Sunday
Jan042009

Well-Dressed: The Salad Dressing Cake

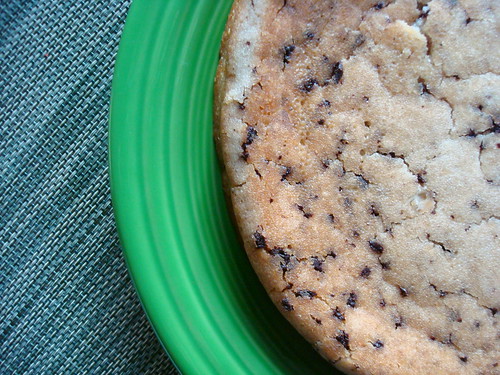
Salad Dressing Cake
The New Year is upon us, and with it comes that most dreaded, terrible custom: The New Year's Resolution. Proclamations of healthy eating and new gym memberships are as plentiful as the popping of champagne corks less than a week before. However, as we all know, few stick to those resolutions--so when you've given up, when you're ready to come back to the dark side, we present the Salad Dressing Cake.

Now, the name "Salad Dressing Cake" can be misleading--this is not some sort of exotic balsamic-glazed confection. No sir, the dressing we're talking about here is the one that dresses salads of the potato and macaroni varieties: mayonnaise. Now, for all those naysayers, a few points. If you're disgusted by this cake but you're one of the many who indulged in bacon-flavored baked goods in the past year, you take a long look at yourself in the mirror before you judge the mayo cake. Because what makes up mayonnaise--egg yolks, oil, vinegar--is all stuff that would go into a cake anyway. And as a note to vegan readers, the recipe works just fine with Vegenaise as well.

Cake
We were surprised by this cake. It's probably the most dense, moist, rich cake we've ever made--it has a slightly tangy flavor, not unlike a sour cream cake. In our version, instead of using 4 tbsp of cocoa powder as in the original recipe, we substituted the same amount of ground Callebaut chocolate--this not only gave the cake a nice added texture and color, but added a nice bittersweet flavor contrast. Topped with a simple buttercream frosting, it's actually quite a pleasant cake. 
Moreover, the biggest problem with this cake is not the flavor but the gross-out factor--no matter how you put it, no matter how many justifications you have, Salad Dressing Cake does not sound delicious or appetizing. Still, once you get past that hurdle, you might be pleasantly surprised. Our advice? Serve now, and tell the tasters what they ate later
Salad Dressing Cake


Salad Dressing Cake (Via reliableanswers.com)

  • 2 cups Flour
  • 2 teaspoons Baking Soda
  • 1 cup Sugar
  • 4 tablespoons cocoa (we used ground chocolate--see above)
  • 1 cup warm water
  • 1 cup Miracle Whip or mayonnaise salad dressing (or vegenaise for a vegan option)
  • 1 teaspoon Vanilla
  1. Mix all ingredients together, beat until smooth. Grease a 13"x9" cake pan (we used a circular pan) and dust with flour. Bake at 350° for 30-minutes or until a toothpick inserted in the center comes out clean.
  2. Frost when cool; we used this simple buttercream frosting:
  • 2 cups (4 sticks) unsalted butter, room temperature
  • 1 pound confectioners' sugar, sifted
  • 1 teaspoon vanilla extract
  • 1/8 teaspoon salt
  1. In a mixer bowl fitted with a paddle attachment, combine butter, sugar, vanilla, and salt. Beat on high speed 2 to 3 minutes, scraping down the sides of the bowl occasionally.
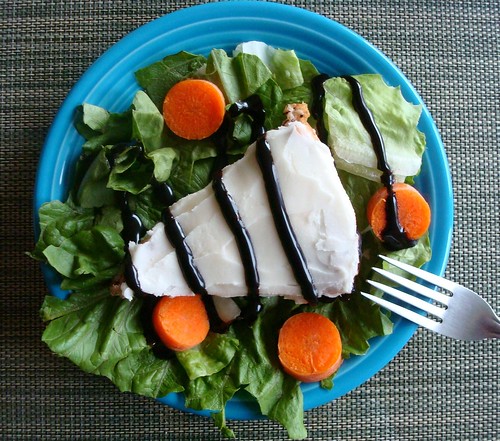
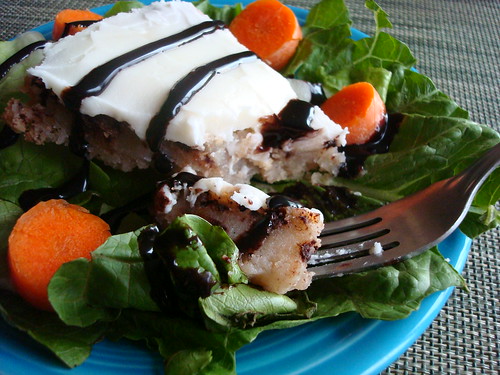
If desired, serve on top of a real salad for a delightfully mischievous presentation.


© Cakespy, all rights reserved. Powered by Squarespace.