Home Home Home Home Home Home Home
CakeSpy

Featured: 

My adventure at Ben & Jerry's in Vermont!


Unicorn Love: the Eating Disorder Recovery Blog


 Buy my brilliant books!

Buy my new book!

Buy my first book, too! 

CakeSpy Online Retail!


Archives
Gallery

Fantastic appliance for cake making on DHgate.com

everyrecipe.co.nz

Craftsy Writer

Entries in recipes (704)

Friday
Dec262008

Bananarama: Chocolate Frosted Banana Shortbread Cookies

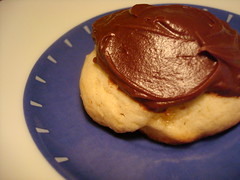
Chocolate topped banana shortbread
'Twas the day after Christmas, 

And when we did rise,
Inside the kitchen
Was an awful surprise:
Not a cookie remained; 
The plates were all bare
So we pushed up our sleeves
And made cookies to share.
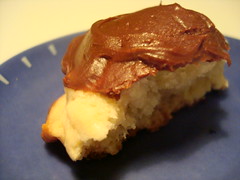
It's true; when we woke up this morning, we had the horrific realization that all of our Christmas cookies had been eaten. No, seriously. and the only sources of sweetness in the house were an overripe banana and some leftover chocolate frosting. Getting a bit crafty, we altered a classic old fashioned sugar cookie recipe by upping the butter and adding aforementioned banana to the batter; once out of the oven, we topped the cookies with a dollop of chocolate frosting for a delectable bit of added richness. The finished product was a moist, cakey, shortbready cookie which tasted even better as they cooled and the banana flavor developed. We decorated a couple like anthropomorphic Hostess cupcakes, for no particular reason, but aren't they kinda cute? What a sweet and unexpected post-Christmas miracle.

Chocolate-topped Banana shortbread cookiesChocolate-topped Banana shortbread cookies
Here's how to make 'em:
  • 1 stick unsalted butter, room temperature and cut into chunks
  • 1 super-ripe banana (same ripeness you'd use for banana bread), cut into chunks
  • 1 cup sugar
  • 1 large egg
  • 1 teaspoon vanilla
  • 2 cups all-purpose flour
  • 2 teaspoons baking soda
  • 3/4 teaspoon salt

In a large bowl stir together the butter, 1 cup of the sugar, the egg, banana and the vanilla. Into the bowl sift together the flour, the baking soda, and the salt and stir the mixture until it forms a dough. Chill the dough, covered, for at least 2 hours or overnight (Note: we only let ours cool for about 30 minutes; your finished cookies would probably be smoother and better-looking if you allowed the dough to cool longer, but try telling that to the cookie-hungry masses.)


Preheat the oven to 375°F. Roll rounded tablespoons of the dough into balls, and arrange them 3 inches apart on lightly greased baking sheets. Either leave as balls for fat cookies, or use cookie cutters or flatten slightly for cookies with a more uniform thickness. Bake the cookies in batches in the middle of the oven for 8 to 12 minutes, or until they are pale golden. Transfer the cookies to racks and let them cool. The cookies keep in an airtight container for 1 week.


Sunday
Nov302008

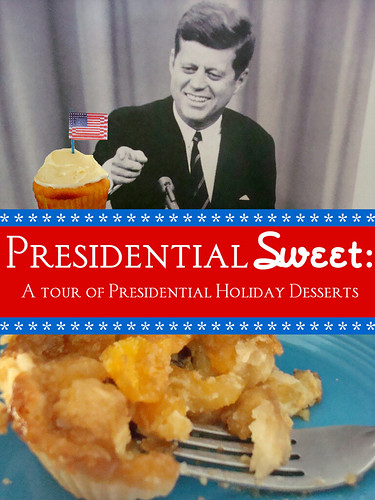
Foodbuzz 24, 24, 24: Presidential Sweet: A Tour of Presidential Holiday Desserts

Presidential Sweet
The holidays are a wonderful time, aren't they? You get to sit around and eat. Hopefully at someone else's house, where they cook and you don't have to clean up afterward.

But what about the big house? That is to say, the White House? We began to wonder what sweets and traditions might have played into Presidential culture, in both the current age and years past. And luckily, we were chosen by Foodbuzz for the 24, 24, 24 project so we suddenly had the time and the means to learn and explore a bit more--all amounting to quite a sweet surprise for our family and friends the entire week of Thanksgiving! Let's just say it wasn't just one day of feasting chez Cakespy.

Mount Cupmore


The below is a combination of the actual dishes served based on actual Presidential menus we've located, known favorite recipes of the presidents and their wives, and, you know, a little mischievous daydreaming of our own. We made several of the recipes and served them to family and friends--and so, without further ado, here's a summation of several of our favorite Presidential-inspired dishes, going in chronological order:

A note about Thanksgiving: You'll notice that most Thanksgiving recipes kick in later on in the list--this is because although the first one was celebrated in 1671, it wasn't actually a holiday (or even celebrated regularly) until 1863, when Abraham Lincoln finally made it a national holiday. But there was plenty of other holiday goodness going around before--and since!
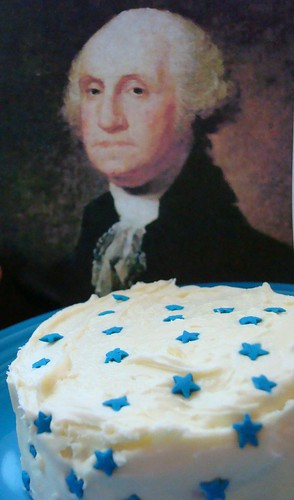
George thinks the cake is great
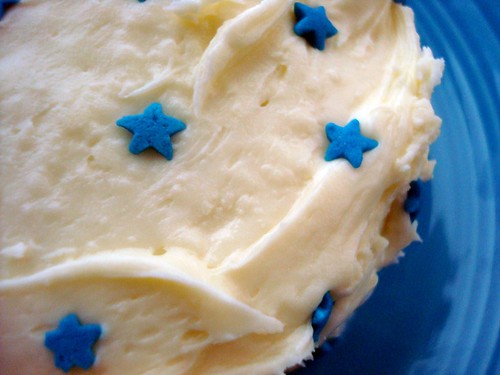
Washington's Great Cake: Our journey of delicious started with the big man, that Cherry-tree killa George Washington (OK, so maybe he did it, maybe not). Though George Washginton did have a Thanksgiving dinner, what we found much more entrhralling was Martha's famous "Great Cake" (read more here!), one of her favorites which was traditionally served at Christmastime. This cake truly was great--especially in size, as it called for 40 eggs, 4 pounds of butter, and a variety of fruits including 2 pounds of apples, and plenty of cream sherry. While tempted, the materials just seemed like a bit of a wast, so ultimately we did the recipe in 1/8 scale and it actually worked out ok; we ended up swapping egg-white icing (an acquired taste in our opinion) for a rich cream cheese frosting with some festive stars. George would approve, we think. If you want to try the actual recipe for THE great cake though, check out this site.
Cake frosting
--------------------------------------------------------------
Corn Pudding
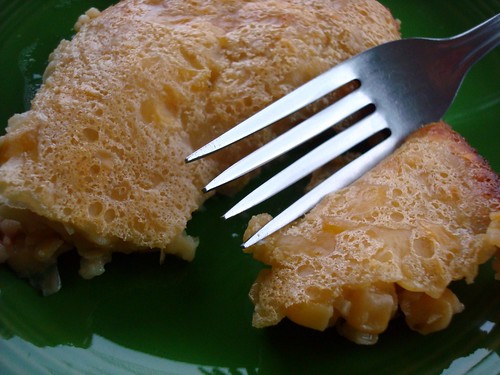
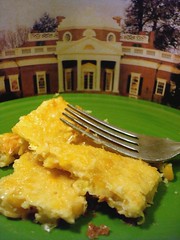
Thomas Jefferson's Corn Pudding: TJ was certainly a renaissance man, and in addition to a great deal of hobbies and interests, he was quite the gourmand--he's even credited with introducing the greater US culture to the île flottante (which he served at a New Year's fete). Though Thanksgiving wasn't technically a holiday yet, we like to think that he'd serve something like this sweet corn pudding at his table--a popular recipe during his Presidential years. At our table, we found it to be a pleasant-tasting dish--like some types of cornbread, gently skirting the line between side dish and dessert.
Thomas Jefferson's Corn Pudding
Sweet Corn Pudding Recipe
  • 2 c. whole kernel corn (1 16 oz. can) drained
  • 1 tbsp. flour
  • 3 tbsp. sugar
  • 2 eggs
  • 3/4 tsp. salt
  • 3/4 c. milk
  • 1/2 stick butter
Place all ingredients in a blender and mix at high speed 10 seconds. Pour into well greased baking dish and bake 45 minutes at 375 degrees. To make enough for company I triple the corn and double everything else and bake it for an hour or more until a knife comes out clean.
-----------------------------------------------------------------------------------
Gingerbread
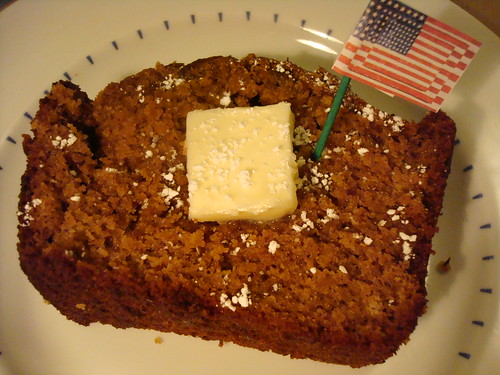
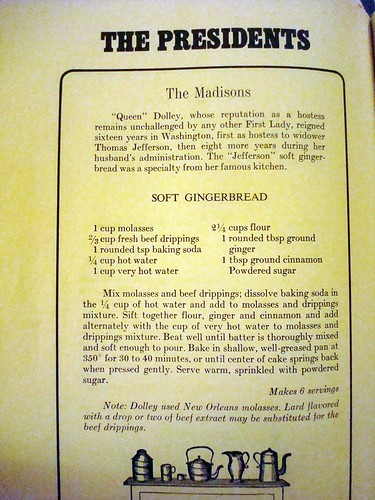
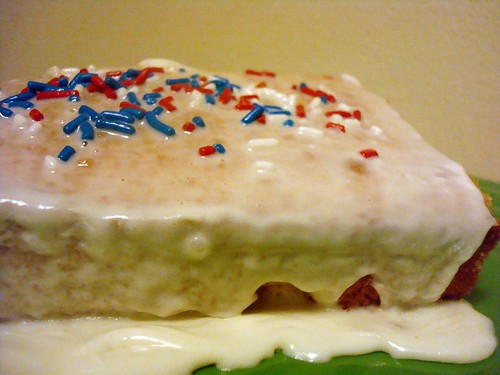
Madison's Gingerbread: While to many, the Madisons (namely, Dolley) are linked to ice cream, Dolley also had a much warmer, but equally delicious, favorite for the holidays--Soft Gingerbread. Apparently hers got its unique and delicious flavor from beef drippings, but call us chicken, we decided to use butter instead and while we have no point of comparison, this one was very moist and delicious, so the butter seemed to have worked just fine. If you'd like, though, be the judge yourself!

DeliciousDelicious
Dolley Madison's Soft Gingerbread
  • 1 cup molasses
  • 2/3 cup fresh beef drippings
  • 1 rounded tsp baking soda
  • 1/4 cup hot water
  • 1 cup very hot water
  • 2 and 1/4 cups flour
  • 1 rounded tbsp ground ginger
  • 1 tbsp ground cinnamon
  • Powdered sugar (to top)
Mix molasses and beef drippings; dissolve baking soda in the 1/4 cup of hot water and add to molasses and drippings mixture. Sift together flour, ginger and cinnamon and add alternately with the cup of very hot water to molasses and dripping mixture. Beat well until batter is thoroughly mixed and soft enough to pour. Bake in shallow, well-greased pan at 350 degrees for 30 to 40 minutes, or until center of cake springs back when pressed gently. Serve warm, sprinkledwith powdered sugar. Makes 6 servings.
President stuff
--------------------------------------------------------------
Martin Van Buren's Doughnuts: Well, we didn't actually make them, but we were fascinated to learn two facts about MVB: first, he and his wife spoke Dutch at home (he was American-born but of Dutch heritage); the second, that his favorite food was doughnuts. Here's a recipe for an 1800's era Dutch doughnut (oliebollen) that we bet he would have loved on Christmas morning.
--------------------------------------------------------------
*Mischievous note* William Henry Harrison Might have Liked it: well, he wasn't president for long. but, he did prompt us to learn more about Funeral Pie.
--------------------------------------------------------------
*Mischievous note* James K. Polk might not have had much of an interest in food, but we'd officially like to dedicated the Bûche de Noël and the millefueille to him--after all, he was Napoleon of the Stump.
--------------------------------------------------------------
Mary Todd Lincoln's Cake
Abraham Lincoln / Mary Todd Lincoln's Vanilla-Almond Cake: It's said that this is the one Mary made when courting Lincoln in the early days. Since they both met and later married during the holiday season--not to mention that Honest Abe declared it to be the best cake he'd ever tasted-- we figure it's a good holiday offering to represent Lincoln's era.
While the cake itself is good--dense, slightly nutty, and plenty buttery--we're not so sure about its aphrodisiac powers. We made our cake in just one layer, not two; all the more frosting to glaze on over it all.


Mary Todd Lincoln's Vanilla-Almond Cake (via Recipe Goldmine)
  • 1 1/2 cups granulated sugar
  • 1 cup butter
  • 1 teaspoon vanilla extract
  • 2 3/4 cups sifted cake flour
  • 1 teaspoon baking powder
  • 1 1/3 cups milk
  • 1 cup almonds, finely chopped
  • 6 egg whites, stiffly beaten
  • White Frosting
  1. Cream together sugar, butter, and vanilla extract.
  2. Stir together the cake flour and baking powder; add to creamed mixture alternately with milk. Stir in almonds.
  3. Gently fold in the egg whites.
  4. Pour into two greased and lightly floured 9 x 1 1/2-inch round baking pans.
  5. Bake at 375 degrees F for 28 to 30 minutes. Cool 10 minutes; remove from pans. Fill and frost with White Frosting.
White Frosting: In a saucepan, combine 1 cup sugar, 1/3 cup water, 1/4 teaspoon cream of tartar and dash salt. Bring mixture to boiling, stirring until the sugar dissolves.


In mixing bowl place 2 egg whites; very slowly pour the hot sugar syrup over, beating constantly with electric mixer until stiff peaks form, about 7 minutes. Beat in 1 teaspoon vanilla extract.
--------------------------------------------------------------

Cakespy Note: Though it's not strictly dessert, we couldn't help but notice that Andrew Jackson, FDR, Calvin Coolidge, and LBJ all had an admitted penchant for pancakes. We'll bet these carb-lovin' presidents would have enjoyed this Christmas tree composed of crepes like this one.
--------------------------------------------------------------


William Howart Taft: It takes only a mere glance at the man to tell that he was as serious about sweets as he was about politics (it's true--he weighed well over 300 pounds). Apparently above all he had a soft spot for pumpkin pie; while we found the recipe below online for a "William Taft Pumpkin Pie", it seems a little bit suspect (we're not sure if they had canned milk then...does that sound ignorant?) we've gotta believe that in a different era, he'd have enjoyed the one at the bottom of this post even better.
  • 9 Inch pie crust
  • 1/4 c Granulated sugar
  • 1/2 c Brown sugar
  • 3/4 c Canned milk
  • 3/4 c Fresh milk
  • 1 1/2 c Pumpkin
  • 2 Eggs; separated
  • 1/4 ts Allspice
  • 1 ts Cinnamon
  • 1/2 ts Ginger (if you wish)
  • 1/2 ts Salt

Line a 9-inch pie pan with pastry. Mix sugars, salt and spices. Add
pumpkin. Add egg yolks and milk. Add more spices, if desired. Last, fold in
beaten egg whites, not too stiff. Pour filling into unbaked pie shell. Bake
at 450 degrees for 10 minutes, then turn down to 350 degrees until done,
about 30 to 40 minutes (depending on your oven). Pie ready when knife comes
out of filling clean.
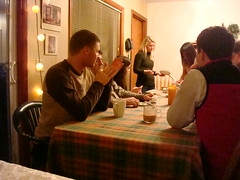
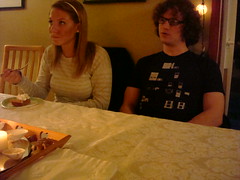
 

Pietime!Tasting pie is serious business
--------------------------------------------------------------
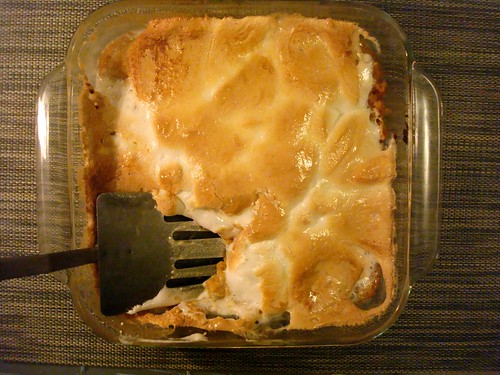
Sweet Potato Casserole
Herbert Hoover, Franklin D. Roosevelt, Richard Nixon (his menu below) and Lyndon B. Johnson were apparently huge fans of the sweet potato casserole; happily, there's an official White House recipe. We doubled the marshmallow for added awesomeness. The founding fathers would approve, we think. We sure dug into this one with relish--er, sweetness.
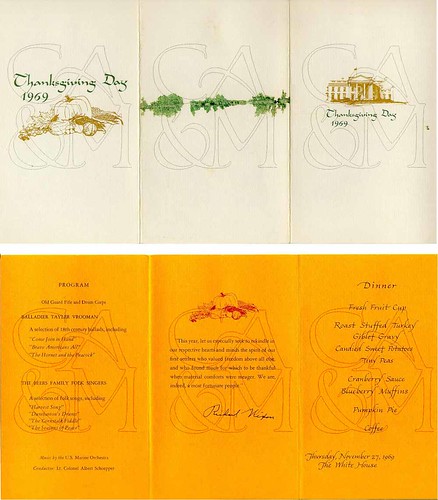

November 27, 1969


  • 8 medium sized sweet potatoes,
  • roasted, peeled and passed through
  • a fine mesh sieve
  • 3 whole eggs, lightly beaten
  • 1 cup half and half
  • 1 tablespoon vanilla
  • 1 tablespoon turbinado sugar
  • 1 teaspoon salt
  • ½ bag miniature marshmallows
  • cooking spray

Preheat oven to 350 degrees. In a large bowl, lightly mix all the ingredients except the marshmallows. Spray a 9 inch casserole dish with cooking spray. Pour the custard and top with a half bag of mini marshmallows. Bake for about a half hour. Keep warm for service.
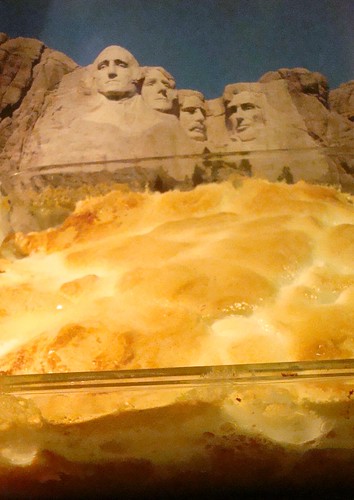
Sweet Potato Casserole
--------------------------------------------------------------
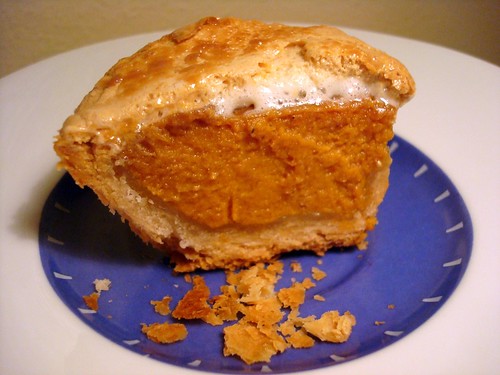
Truman mini pie
Harry S. Truman's Light Pie: Via The Old Foodie, we discovered this excerpt from a 1946 edition of the New York Times:

WHITE HOUSE MENU GUARDS WAISTLINE.
The White House announced today an ample menu for the Thanksgiving dinner which President Truman will sandwich in between two diplomatic dinners, but he’s still dieting.


The continued waistline-reduction regime is on the authority of Mrs. Mary E. Sharpe, White House housekeeper, who counts the Presidential calories. She declined to elaborate other than to say: “When I make up menus I keep it in mind.”

Mrs. Sharpe gave the Thanksgiving menu as follows: clear bouillon, curled celery and olives, roast stuffed turkey, cranberry sauce, giblet gravy, candied sweet potatoes, buttered peas, cauliflower au gratin, orange and cress salad, pumpkin pie with whipped cream and cheese, candied fruit, nuts, coffee.

And so, we figured that it would be in keeping to make a pint-sized (diet friendly) pie for Harry--so, with an extra bit of filling from the Mesnier recipe (bottom) we made a single-serve piece in a cupcake cup, with a low-fat marshmallow topping. Still yummy, and mos' def cute!

--------------------------------------------------------------
Jackie Kennedy's Hot Fruit DessertJackie Kennedy's Hot Fruit Dessert
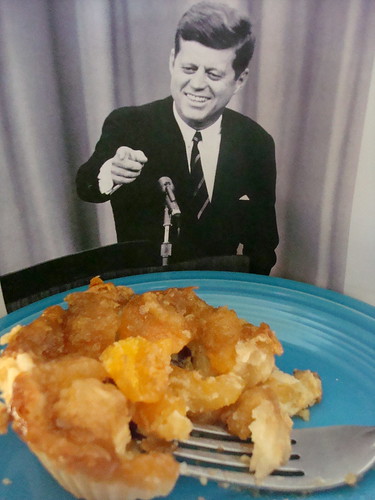
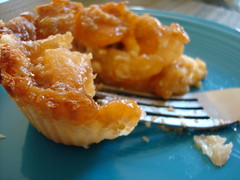
Kennedy's Hot Fruit Dessert Pies: It's known that assorted pies and ice cream always played a role in the Kennedy Thanksgiving dinner. However, we took it a step further by combining the pie idea with Jackie Kennedy's famous Hot Fruit Dessert (click here for the recipe)--her signature dish. We made the dessert but then baked it in as a pie filling; we used extra pie crust from the recipe at the bottom of this post and used it to line cupcake cups, filling them with the fruit slurry and topping it all off with a brown sugar glaze on top. Though we're not usually fruit pie fans, this one had enough of a rich kick from the buttery glaze and sour cream that even we were impressed. As seen below, we think JFK approves as well. Of course if you don't care for fruit pies, you could always try to replicate these cookies.
JFK approves
--------------------------------------------------------------
Ladybird Johnson's Lemon Cake
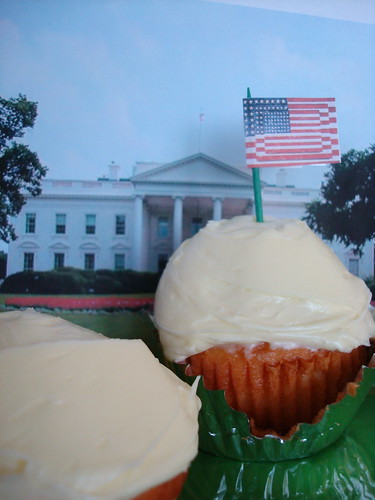
Johnson's Lemon Cake: Behind every great President is a great First Lady, and behind at least one first lady--Ladybird Johnson--was a great arsenal of awesome cake recipes. We went for one of her (and the President's) favorites--taking a modern twist and making them into cupcakes. The result? A cupcake that is light, fluffy, and simply delicious--so refreshing, it provides a nice foil to all of those other holiday foods!


Ladybird Johnson's Lemon Cake
  • 3/4 cup butter or margarine (at room temperature)
  • 1 1/4 cup granulated sugar
  • 8 egg yolks
  • 2 1/2 cups cake flour
  • 3 teaspoons baking powder
  • 1/4 teaspoon salt
  • 3/4 cup milk
  • 1 teaspoon vanilla extract
  • 1 teaspoon grated lemon rind
  • 1 teaspoon lemon juice
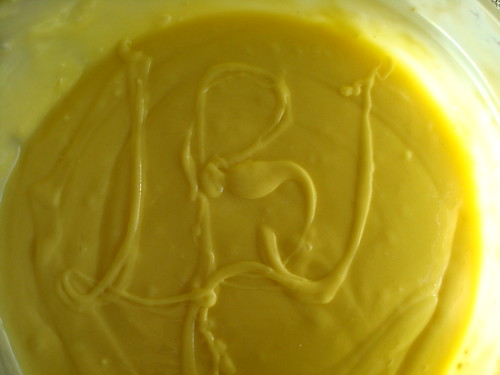
What's in the batter?
Icing Ingredients
  • 2 cups confectioners' sugar
  • 1/4 cup butter or margarine (at room temperature)
  • 1 lemon, Grated rind only
  • 1 lemon, juiced
  • 2 teaspoons cream (or more, until spreading consistency)
  • Yellow food coloring, if desired

Directions:
Cream butter and sugar until fluffy. In a separate bowl, beat egg yolks until light and lemon-colored; blend into creamed mixture. Sift together flour, baking powder and salt; resift 3 times. Add sifted ingredients to creamed mixture in thirds, alternating with milk. Beat the batter thoroughly after each addition.


Add vanilla extract, lemon rind and lemon juice; beat 2 minutes. Bake in greased 10-inch Bundt pan in preheated oven at 325 degrees F for 1 hour or until cake tester inserted in center comes out clean. You can also can use three 9-inch round cake pans and bake at 350 degrees F for 25 minutes. Double the frosting recipe for a layer cake.

Lemon Icing
Combine ingredients and beat, adding cream until desired consistency.

Ladybird Johnson's Lemon Cake (as cupcakes)
--------------------------------------------------------------
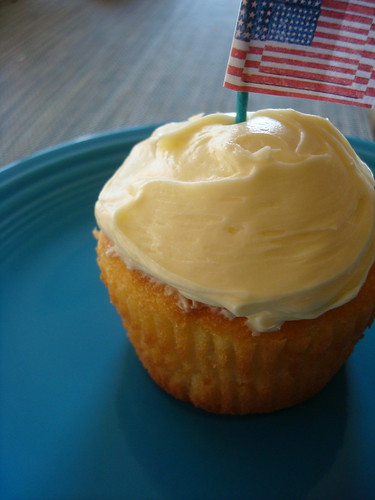
Tassies
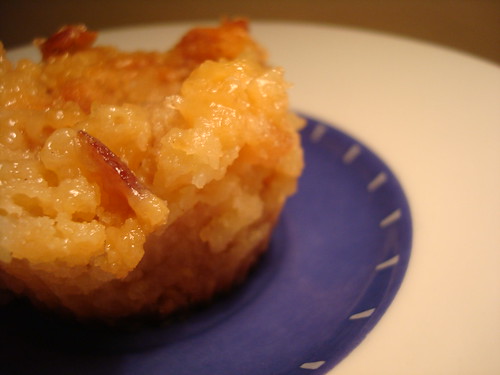
Jimmy Carter's Pecan Toffee Tassies: Now, Jimmy Carter did have holiday meals at the White House, duh, but even more importantly, he was the first Presidential figure to ever bake with Paula Deen--so we'd say that these cookies are a step above. We'd serve these at any Christmas party. Ours were stickier and less pretty than Paula's, but man, were they rich and delicious. Needless to say, they disappeared really fast.

Pecan Toffee Tassies (Via Paula Deen)


  • 1 (15-ounce) package refrigerated pie crusts
  • 1/4 cup (1/2 stick) butter, melted
  • 1 cup firmly packed brown sugar
  • 2 tablespoons all-purpose flour
  • 2 large eggs, lightly beaten
  • 1 teaspoon vanilla extract
  • 1 cup finely chopped pecans
  • 1 (10-ounce) package almond brickle chips
  • Directions
  • Preheat the oven to 350 degrees F.

Unroll the piecrusts onto a lightly floured surface. Roll into 2 (15-inch) circles. Cut out 48 circles using a 1 3/4-inch fluted or round cookie cutter, re-rolling dough as needed. Place in 1 3/4-inch muffin pans, pressing on the bottoms and up the sides of each of the mini-muffin cups. Combine the melted butter, brown sugar, flour, and eggs in a large bowl, mixing well. Add the vanilla. Stir in the pecans and brickle chips. Spoon the pecan filling evenly into the pie shells. Bake for 25 minutes, or until filling is set and crust is lightly browned. Cool in pans on wire racks.

--------------------------------------------------------------
Presidential Eggnog
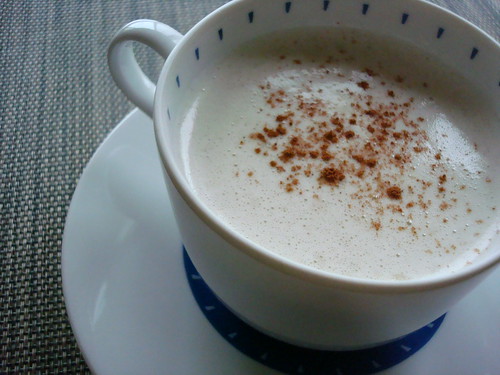
And now, to the modern day. What better to get into the spirit of the holidays than with some holiday spirits? For 11 years spanning the Clinton and George W. Bush presidencies, this eggnog recipe has ruled. In White House Chef, author Walter Scheiber describes how
every year, the holiday season was kicked off with the "running of the 'nog", our playful way of referring to the tour of the House we made with the eggnog (and a riff on the "running of the bulls" from Pamplona, Spain).
What can we say? This is the real deal--it certainly packs a punch, and even if it was just thanksgiving, it certainly put our crew in a celebratory mood. (Though for full disclosure, we didn't have Cognac so just doubled up on the rum. *hic*)
White House Eggnog
  • 5 ounces egg yolks (6-7 yolks)
  • 1 cup sugar
  • 3/4 cup bourbon
  • 3/4 cup Cognac
  • 3/4 cup dark rum
  • 7 ounces egg whites (6-7)
  • 1 teaspoon salt
  • 2 cups heavy cream
  • 1 tablespoon pure vanilla extract
  • 1 quart milk, plus more if needed
  • Nutmeg, for serving
  1. Put the yolks and sugar in the bowl of a standing mixer fitted with whisk attachmen; whip until pale yellow ribbons form, 5-7 minutes.
  2. Add the cognac, bourbon, and rum, whip well, scrape down the sides, and mix again. Transfer the mixture to a 6-qt bowl.
  3. In separate, clean mixer bowl, whip the egg whites and salt until very stiff peaks form. Fold into eggnog mixture.
  4. Wipe out the mixer bowl, pour in the cream and vanilla, and whip until very stiff peaks form. Fold this into the eggnog mixture. Add the milk and whisk until smooth, 3-5 minutes.
  5. Chill, garnish with nutmeg (and cinnamon, in our case!) and enjoy!
----------------------------------------------------------------------------------
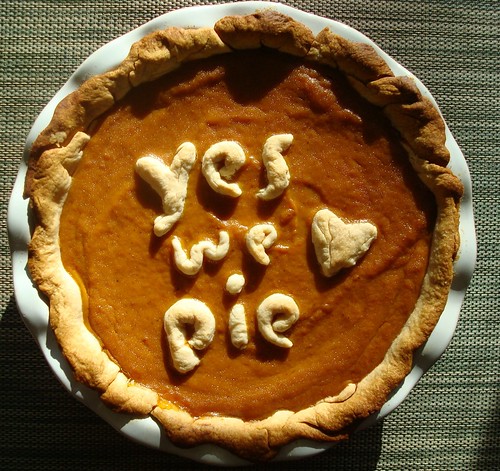
Yes We Pie
And for the past 25 years or so, apparently one pie has risen above all others in the White House: Raymond Mesnier's Ginger Pumpkin Pie. So we made it--here's one thing we wouldn't mind passing on to the next administration, we must say.


Presidential Pumpkin Pie With Ginger
Ingredients for the Pie Crust
Makes enough for 2 12-inch pie shells.

  • 3 1/2 cups cake flour
  • 1/2 cup water
  • 4 Tbsp. sugar
  • 1/2 tsp. salt
  • 1 1/2 cups shortening, plus some for greasing parchment
Recipe for pieProduct Placement?
Ingredients for the Pumpkin Filling
  • 2 egg yolks
  • 1 cup sugar
  • 1/2 Tsp. salt
  • 1 1/2 tsp. ground cinnamon
  • 3/4 tsp. ground ginger
  • 1/4 tsp. ground cloves
  • 18 ounces milk
  • 2 2/3 cups plain canned pumpkin puree
  • 1 baked 12-inch pie shell (recipe below)
  • 1/2 pint heavy cream
  • Candied ginger, finely cut

Directions for the Pie Crust


1. Heat oven to 375 degrees. Place ingredients in mixing bowl. Then using paddle attachment of an electric mixer, mix until well blended, about 3 minutes.
2. Divide dough in two; shape each into a ball. (Dough balls can be wrapped and frozen.)
3. Roll out on floured surface into a round to fit a 12-inch glass pie plate. Trim crust at edge of plate. (It will be covered with whipped cream.)
4. Prick crust with fork on bottom and sides. Crumple a piece of parchment paper; open up and grease one side of the paper. Place greased side down in crust; fill bottom and a little up the sides with dried beans.
5. Bake 15 minutes; remove from oven, and carefully remove paper and beans. If crust tears, patch it by pressing together with your fingers. Bake another 10 minutes, until crust is brown, and remove. It is not necessary to wait for crust to cool before filling.

Directions for the Pumpkin Pie

1. Heat oven to 375 degrees.
2. Beat whole eggs and yolks lightly.
3. Cream sugar and eggs, and beat in salt, cinnamon, ginger, cloves and milk until thoroughly blended. Stir in the pumpkin. Pour into pre-baked pie shell.
4. Bake about 1 hour, until a toothpick inserted in center comes out clean. Do not jiggle. Cool pie on wire rack, then chill.
5. To serve, whip cream and pipe around edge of pie; decorate with candied ginger.

(Eggnog and pumpkin pie Recipes courtesy of Roland Mesnier, Chief White House Pastry Chef, copyright 2001.)
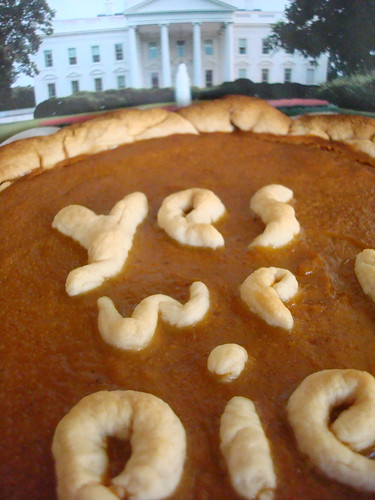
Yes We Pie


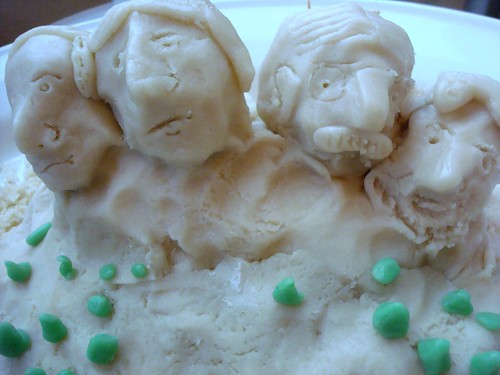
As for a grand finale? How about a sculpture of Mt. Rushmore rendered in sugar cookie dough and cake? OK, it sounded great in theory--but alas, our chef d'oeuvre turned out to be a major chef don't. And yet...while eating hunks sugar cookie dough molded into a vague visage of a President, one can't help but be slightly dazzled by all that sweetness--regardless of whether the outcome looked more like an unholy mashed potatoes and peas combination. Hey, you win some, you lose some.
Mt Rushmore from sugar cookie dough
In closing? Have a sweet Holiday Season, and thank you again to Foodbuzz for letting us have fun with the 24, 24, 24 project--and do check out the other entries here!

For suggested further reading, check out the sources we used for this post:

Dessert University: More Than 300 Spectacular Recipes and Essential Lessons from White House Pastry Chef Roland Mesnier
The White House Cook Book : A Comprehensive Cyclopedia of Information for the Home Containing cooking, Toilet and Household Recipes, Menus, Dinner Giving Table, Etiquette, Care of the sick, Health Suggestions, Facts Worth Knowing Etc.
Presidential Tidbits & Trivia by Sid Frank and Arden Davis Melick
The President's Table: Two Hundred Years of Dining and Diplomacy
Zimbio.com
Hugging the Coast


Friday
Nov282008
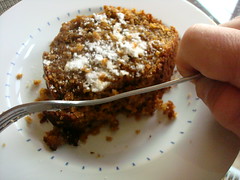
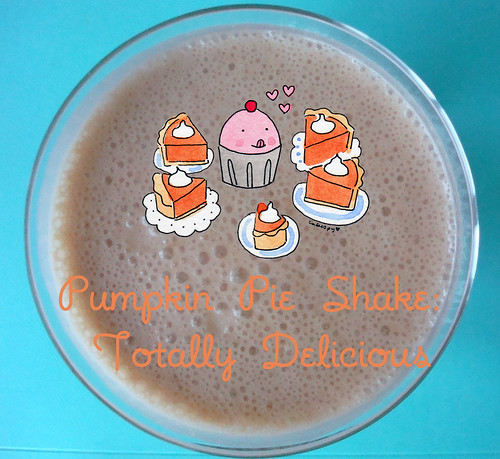
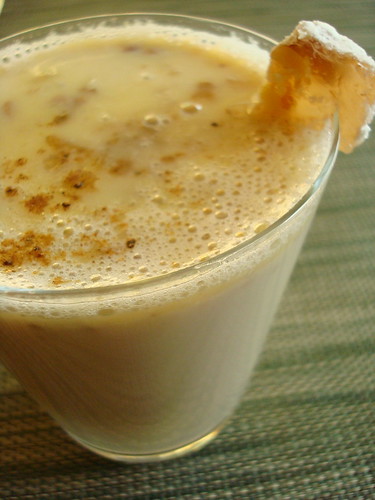
Shake it Up: The Lovely and Amazing Pumpkin Pie Milkshake

Pumpkin Pie Shake
There's a lot of attention given to Thanksgiving Leftovers. From smashed potato cakes to stuffing fritters to creative recipes that go far beyond the standby turkey sandwich, the leftovers are sometimes even more coveted than the feast itself.

However, never until this year had we ever had to worry about leftover Pumpkin Pie. In general, it gets--wait for it--gobbled up straightaway.
However, this year, having made not one but four different pies (more about that in a few days), we suddenly did find ourselves with leftovers. While steaming milk for coffee this morning, suddenly we had a memory of recently having read about a gorgeous-sounding apple pie shake in John T. Edge's Apple Pie book; why not try it with some pumpkin pie?
Now, we're certain that there are a zillion different variations that you could use, but here's what we did--and man, was it delicious.
  • 6 ounces unsweetened soy milk (we're sure dairy milk would be fine too, this just happened to be what we had)
  • Dash of soy creamer
  • small handful mini marshmallows
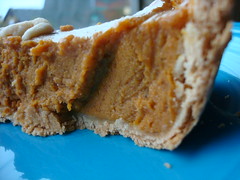
  • 1 small slice pumpkin pie (we used one on which the crust measured about 2 inches)
  • 4-5 ice cubes
  • Cinnamon, nutmeg and ginger to taste
  • Leftover PiePumpkin Pie Shake
  1. In a small saucepan, warm soy milk and creamer; once warm, add marshmallows and continue to warm (but not boil) until marshmallows are fully melted. Add in cinnamon, nutmeg, ginger or spices to taste.
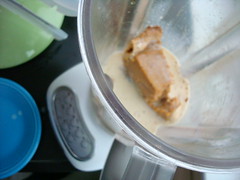
  2. Place pie slice in blender.
  3. Pour liquid mixture over pie slice, and add ice cubes
  4. Blend until smooth

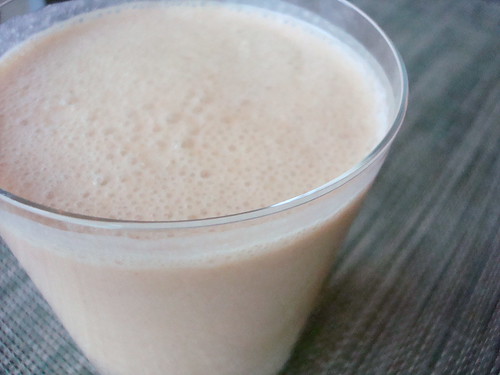
Pumpkin Pie Shake
Try to drink slowly; inevitably, it will be so delicious that you'll get brain freeze. Wait it out, then repeat. It's sure to give you energy for all that shopping you've got to do.


Wednesday
Nov192008
Sky Rockets in Flight: Afternoon Turkish Delight

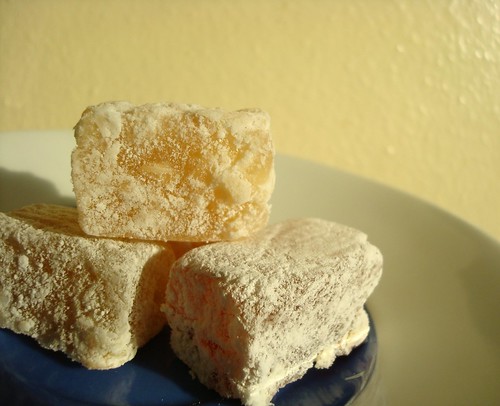
Turkish Delight
Early on in the novel The Lion, the Witch and the Wardrobe, one of the characters, Edmund, is enchanted and hypnotized by an unusual food: Turkish Delight

Now we know that everyone is entitled to their opinions and tastes, but we think Edmund could have done better. Truly, we've just never understood the appeal of the sticky confection known as Turkish Delight. Sure, it's got an interesting history--but in we've always found its texture kind of weird, and it's always seemed to have had a bit of an identity crisis (somewhere between candy, jelly, nougat and fruit roll-ups). However, when we recently came across a recipe for "Turkish Delight Frothy", a kind of nonalcoholic hot toddy featuring the confection, we have to admit we were intrigued, and so we gave it a try.

Turkish Delight Frothy
The recipe had a distinct Middle Eastern feel, what with rosewater, honey, pistachios, and cardamom. This got us all excited--we love Middle Eastern pastries which largely rely on said ingredients.  But would it be enough to make Turkish Delight haters into lovers?
The Turkish Delight Frothy definitely has its strong points. It's warm, spicy, sweet and comforting--like a chai tea latte. However, it's worth noting that rather than masking the flavor of the confectionery, the added ingredients actually managed to heighten it--which we imagine, if you're a fan of the stuff, would be--well, delightful. However, as we sipped we realized that maybe, secretly, brattily, we were hoping that the extra stuff might make frothy might taste like something other than its main ingredient. Le sigh. So while we'll likely stick with hot chocolate and chai as our hot beverages of choice, if you are a fan of Turkish Delight, this one might be worth a try.


Here's the recipe:

Turkish Delight Frothy

Serves: 2

  • 2 cups milk
  • 2 ounces Turkish delight, cut into small cubes, plus extra for garnish
  • 1/2 cup heavy cream
  • 2 teaspoons rose water
  • 1/2 teaspoon honey
  • Pinch ground cardamom
  • 1 tablespoon unsalted pistachio nuts, finely chopped
  1. In a small saucepan over medium heat, combine the milk and Turkish delight. Heat, stirring constantly, until the mixture just reaches the boiling point. Remove from heat and set aside.
  2. In a medium bowl, use an electric mixer or whisk to beat the cream, rose water, honey and cardamom until just stiff.
  3. Divide the milk mixture between 2 serving cups, then top with the whipped cream. Garnish with additional cubes of Turkish delight and the chopped pistachio nuts.
  4. Serve it with a spoon for eating unmelted (and delicious) lumps of candy at the bottom.

-- Recipe from Louise Pickford's "Hot Drinks" (Ryland, Peters & Small), we found it via the Seattle PI.


Monday
Nov172008

Peanutty Buddies: Chocolate Peanut Butter Shortbread Cookies from Peanut Butter and Co.

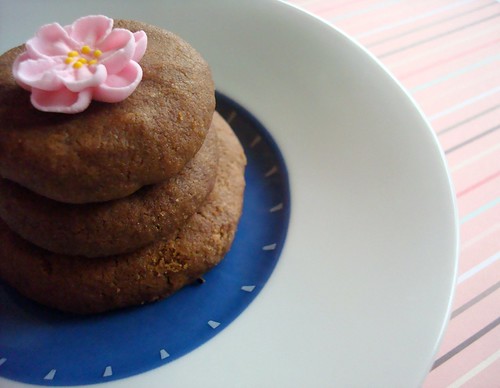
Chocolate peanut butter shortbread cookie stack
When Peanut Butter and Co., a cute little Greenwich Village cafe known for its incredible number of variations on the humble peanut butter sandwich, began distributing their peanut butters nationwide, we were thrilled. We love peanut butter. 


When it came to their book The Peanut Butter & Co. Cookbook: Recipes from the World's Nuttiest Sandwich Shop though, we were a bit skeptical. Honestly, why bother with a cookbook when their stuff tastes so good just eaten directly from the jar? Yes, it's true--we're not above eating a spoonful of "Mighty Maple" (delightfully crunchy) or White Chocolate Wonderful (kind of like a white-chocolate Reese's cup, only all smooth and silky) right from their respective peanut butter jars.

But somewhere between spoonfuls, a glorious thought occurred: What if it tasted even better baked into something? 

And so we consulted the book, and settled on something simple to start: the peanut butter shortbread. While theirs calls for regular peanut butter, we upped the ante by using their Dark Chocolate Dreams variety. These cookies bake for a long time, which allows ample time for the aroma of peanut butter, chocolate, and cookie to permeate the entire house. This is not a bad smell to have permeate your house, by the way. The taste seemed to have three defined layers: upon first bite, one encountered the sandy, slightly salted, buttery bite of the shortbread; then, a moment later, there was the peanut butter; chasing it very closely, a finish of rich, dark chocolatiness. Oh, were they delicious. Here's our adaptation of the recipe:

  • 2 cups flour 
  • 2/4 teaspoon salt
  • 1 cup (2 sticks) unsalted butter, softened
  • 3/4 cup peanut butter (We used their "Dark Chocolate dreams" variety)
  • 1 cup sugar
  • 1 teaspoon vanilla

Their recipe says it yields 12 wedges of shortbread, but we did a combination of thinly rolled cookies and simple, small round cookies and got more like 24.

  1. Prehead the oven to 275. Either grease a 9-inch cake pan (if you want wedges) or just grease a regular cookie pan if you're a rule-breaker, like us.
  2. In a large bowl, sift together the flour and salt and set aside.
  3. In a separate large bowl, use an electric mixer to combine the butter, peanut butter, sugar, and vanilla til fluffy. Continue mixing, adding the dry ingredients 1/2 cup at a time, until fully incorporated.
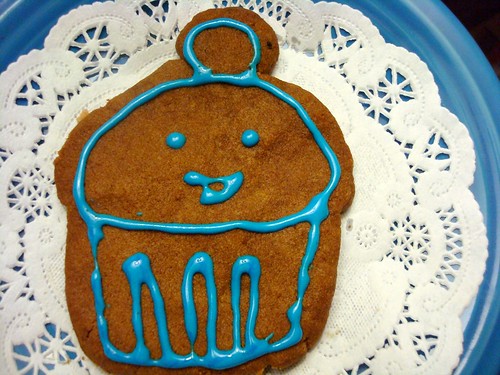
  4. (a.) If you want classic wedges, at this point press the dough into the prepared cake pan, using a knife to score the surface of the dough into 12 wedge-shaped pieces. Repeatedly press the tips of te tines of a fork around the outer edge of the shortbread, creating four concentric circles of dots. (b.) If you want to go your own way, roll them into little balls and then flatten them slightly (like at the top). We also rolled out a few and tried to use a cookie cutter, but the buttery nature of this dough didn't take to that so well. All the same, we did get a few cute Cuppie-cookies.
  5. Bake for 75 minutes (since we'd broken a rule, we checked it at 60 minutes and ultimately took them out at 65 minutes or so), or until shortbread is a pale golden color (since ours was brownish from the chocolate, we looked for a slight crispness around the edges). If in wedges, allow to cool for 1 hour before cutting. Store in airtight container for up to 2 weeks.
Cakespy Note: we should add that while the peanut butters are available online at ilovepeanutbutter.com, the shipping can get pricey; you might want to try your local supermarket. We found that they had them at our local gourmet supermarket in Seattle, so we can only assume they're around the rest of the US too!

Chocolate peanut butter Shortbread cookie


Friday
Nov142008

Lost and Found: The Chocolate Topped Princess Cake

Princess Cake
What makes a dessert go extinct? Times changing? Palates and preferences shifting? Dessert chefs retiring? All of the above? 

Whatever the reason, and wherever they may go, there are nonetheless certain desserts that stay alive in people's memories. And during our recent bout of research (read: obsession) with the Princess Cake, we came across one such dessert. The Princess Cake at famed Los Angeles eatery Scandia was not green, and in fact, it even varied a bit from the classic recipe, getting an added crunch from two layers of macaroons in addition to the layers of cake, jam and cream--and an added layer of richness with a layer of chocolate frosting atop the classic marzipan. However, one thing is for certain--this cake was certainly loved. 
While Scandia is no longer around, luckily Cake Gumshoe (and go-to pastry Chef of the Cakespy crew) Chris Jarchow sleuthed out the recipe for Scandia's Princess cake in the gorgeous book Lost Desserts: Delicious Indulgences of the Past Recipes from Legendary and Famous Chefs by Gail Monahan. Together, we took on the massive (and very time-consuming) cake-making project. Here's how we did it:


Princess Cake

Princess Cake (It says it serves 8-10, but we found that a little went a long way and it was more like 15 servings...no, really)
For the Yellow Cakes: 
  • 3 large egg yolks
  • 1/2 cup milk
  • 1 1/4 teaspoons vanilla extract
  • 1 1/2 cups sifted cake flour
  • 3/4 cup sugar
  • 2 teaspoons baking powder
  • 3/8 teaspoon salt
  • 6 tablespoons unsalted butter, at room temperature
For the Vanilla Buttercream: 
  • 3 large egg yolks
  • 6 tablespoons sugar
  • 1/4 cup light corn syrup
  • 1 cup (2 sticks) unsalted butter, softened
  • 4 teaspoons vanilla extract
For the Marzipan Icing:
  • 1 cup almond paste
  • 1 cup confectioners' sugar, sifted
  • 1 large egg plus one egg yolk (or more if needed to make a spreading consistency)
  • 1/2 teaspoon vanilla extract
For the chocolate icing:
  • 2 ounces unsweetened chocolate, cut into small pieces
  • 1/2 cup confectioners sugar, sifted
  • 1 tablespoon hot water
  • 1 large egg, at room temperature and lightly beanten
  • 3 tablespoons unsalted butter, at room temperature

Macaroons
To assemble the cake: 
  • 24 almond macaroons--somewhat hard and chewy, not hard and crisp (recipe suggests store-bought but Chris made ours)
  • about 5 tablespoons dark rum (or more, if you're feeling frisky)
  • About 2 cups best-quality raspberry jam
To make the yellow cakes:
  1. Preheat oven to 350 degrees. Butter two 6 or 8 inch round or square cake pans at least 1 1/2 inches deep. Line the bottoms with parchment paper; butter the paper and dust the paper and pans with flour.
  2. In a mixing bowl, combine the egg yolks, 2 tablespoons of the milk and the vanilla.
  3. Place the flour, sugar, baking powder, and salt in the bowl of an electric mixer and mix for 30 seconds until combined. Add the butter and remaining 6 tablespoons milk. Mix on low speed until uniformly moist. Switch to high speed and mix for 1.5 minutes. Add the egg mixture in three batches, beating 15 seconds after each addition and scraping down the sides of the bowl with a rubber spatula.
  4. Divide the batter evenly between the prepared pans and smooth the surfaces with a spatula. Bake until a cake tester inserted near the center comes out clean and the cake springs back when pressed lightly in the center, 20 to 25 minutes. The cakes should start to shrink from the sides of the pan only after they are removed from the oven.
  5. Cool on wire racks for 10 minutes, then loosen the cakes from the sides of the pan with a small knife and invert the cakes onto the racks. Re-invert and cool completely. Split each cake horizontally into two layers.
To make the vanilla buttercream:
  1. Using an electric mixer, beat the egg yolks until light and fluffy, about 5 minutes.
  2. Meanwhile combine the sugar and corn syrup in a small saucepan and cook, stirring constantly, until the syrup comes to a rolling boil and the sugar dissolves, and the entire surface is covered with large bubbles. Immediately pour the syrup into another cool saucepan or metal bowl to stop the cooking. 
  3. Beating constantly, add the syrup to the egg yolks in a slow, steady stream. Use a rubber spatula to scrape the last of the syrup into the yolks and to scrape down the bowl occasionally. Continue to beat until the mixture is completely cool.
  4. Gradually beat in the butter and then the vanilla. Store the buttercream in an airtight container in the refrigerator. Bring to room temperature and beat again before using.
To Make the Marzipan Icing:
  1. Cut the almond paste into small pieces and place in the bowl of an electric mixer with the sugar, the whole egg, and the egg yolk. Beat on medium speed until combined, adding more egg if necessary to make the icing a spreading consistency. Add the vanilla and beat until combined.
Frosting
To Make the Chocolate Icing:


  1. Melt the chocolate in the top of a double boiler or a metal bowl set over a saucepan of simmering water. When melted, remove from heat and add the confectioners' sugar and hot water. Stir thoroughly; add egg and beat well. Add the butter one tablespoon at a time and beat until thoroughly combined, smooth, and glossy (this took several minutes).

Layering the Princess Cake
To Assemble the cake:
  1.  Lay the macaroons out on a piece of wax paper, flatten them a bit with your hand, and spinkle with 2 tablespoons of the rum. Set aside.
  2. Layer a cake layer on a cake plate and dampen the top with 1 tablespoon of rum. Spread generously with jam and then cover evenly with 12 or so macaroons. 
  3. Spread the underside of a second cake layer with buttercream, about 3/8 inch thick. Place this second layer, buttercream side down, on top of the first layer. Dampen the top with 1 tablespoon of rum. 
  4. Spread the top of this second layer generously with jam (be sure to hold the side of the cake so it doesn't slide around).
  5. Spread the underside of a third cake layer with buttercream, again about 3/8 inch thick, and lay it, buttercream side down, on top of the second layer.
  6. Dampen the top of the third layer with the last tablespoon of the rum, spread generously with jam, and evenly cover the jam with the remaining 12 macaroons.
  7. Spread 3/8 inch of buttercream on the underside of the fourth cake layer and lay it, buttercream side down, on top of the third layer.
  8. Use leftover buttercream sparingly to tidy up the cake: fill gaps on the sides between layers, and just generally smooth things over. Put the cake in the fridge or freezer for at least 15 minutes to harden the buttercream. Note: Ours started to pull a "Leaning tower of Pisa" in the fridge, so it might be a good idea to support it on the side somehow. We eventually put a wooden skewer through the cake to keep it solid).
    Making the Princess Cake
  9. When the buttercream is hard, ice the cake with a layer of marzipan icing. Refrigerate or freeze for about fifteen minutes, again to harden the icing, and then ice a final time with the chocolate icing (we didn't think it was attractive during this time, but it's quite pretty once sliced into--see top!).
    Scandia's Princess Cake
  10. The cake should be kept in the refrigerator until one hour before serving. It can be assembled up to 24 hours in advance and kept well covered and refrigerated. It can also be frozen.
Note: The vanilla buttercream, marzipan, and chocolate icing will keep well in the fridge for several days. To store longer, freeze.


Sunday
Sep282008

American Pie: Recipe for a Quick Fix

Not apple pie
Apple pie is an enduring symbol of America. Why? Well, there are more reasons than we can go into right now--but if you're curious, we highly recommend Apple Pie: An American Story by John T. Edge.

But what happens when apples are scarce or prohibitively expensive, as during the rations of World War II?

You do another all-American thing: find a quick fix! During those war years, that fix was making a mock "apple" pie filled with a slurry of (inexpensive) Ritz crackers, sugar syrup and lemon rind. Ready to throw up in your mouth a little? Well, hold it in, because while not as good as "real" apple pie, it's strangely passable if you close your eyes and think really hard about apples while chewing.
And when we made this pie recently, we decided to go a little further on the mock concept. In celebration of what seems to be a New England-centered (or does it perhaps root from the Midwest?) preference for eating pie with a wedge of sharp cheddar, we made our mock pie using cheese-sandwich Ritz crackers. Here's a shot of it in progress (before adding the sugar syrup and top crust):


Pie filling
So how did this concoction taste?
Well. It smelled amazing while baking and once out of the oven.  The crust was tantalizing. Taste-wise, however, this regional specialty didn't really translate to the chemical counterpart. The cheese remained somewhat gravelly in texture and didn't really ooze throughout the way we'd hoped; instead, it remained in grainy, salty, cheesy deposits which acted more like landmines than sweet surprises on the palate.

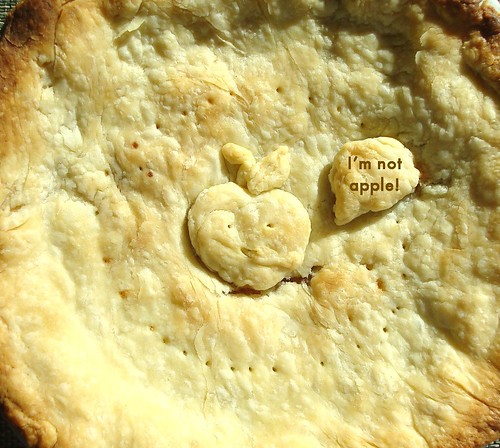
I'm not apple!
Of course, perhaps the most insulting part of this story is that living in Washington state, we're currently experiencing a bounty of delicious (real) apples--and next time we'll try to remember the saying of another great american icon Marvin Gaye, "Ain't nothing like the real thing, baby". Because friends don't let friends eat fake pie.
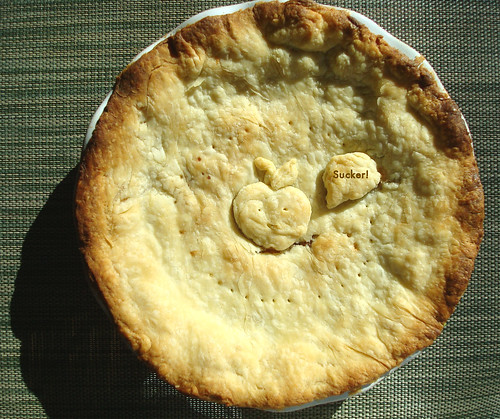
Sucker!


Ritz Mock Apple Pie (from backofthebox.com)

The classic pie, featuring Ritz crackers baked in a golden crust,
is perfect for the holidays.

Pastry for two-crust 9-inch pie
36 RITZ Crackers, coarsely broken (about 1 3/4 cups crumbs) --we used the mini cheese-filled sandwich crackers
1 3/4 cups water
2 cups sugar
2 teaspoons cream of tartar
2 tablespoons lemon juice
Grated peel of one lemon
2 tablespoons margarine or butter
1/2 teaspoon ground cinnamon

1. Roll out half the pastry and line a 9-inch pie plate. Place
cracker crumbs in prepared crust; set aside.

2. Heat water, sugar and cream of tartar to a boil in saucepan
over high heat; simmer for 15 minutes. Add lemon juice and peel;
cool.

3. Pour syrup over cracker crumbs. Dot with margarine or butter;
sprinkle with cinnamon. Roll out remaining pastry; place over pie.
Trim, seal and flute edges. Slit top crust to allow steam to escape.

4. Bake at 425 F for 30 to 35 minutes or until crust is crisp
and golden. Cool completely.

Makes 10 servings

Preparation Time: 45 mins.
Cook Time: 30 mins.
Cooling Time: 3 hrs.
Total Time: 4 hrs. 15 mins.


Friday
Sep052008

Cake Byte: Sweet News from Cakespy!

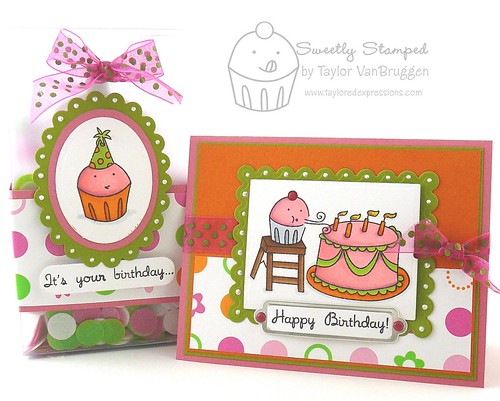
birthdaygiftset
Oh, we're just brimming with sweetness this week! Here are some of the exciting things happening at Cakespy.com:

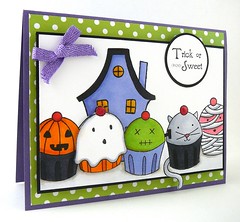
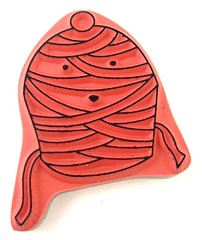
Mummy Cupcake Rubber StampTrick or Sweet Rubber Stamps

Sweet Stamps! Our own Head Spy Jessie recently collaborated with Taylored Expressions, a California-based rubber stamp company, to create several sets of rubber stamps! The first three sets, with Halloween and Birthday themes, are making their debut today: Frightful Night, Trick or Sweet, and Sweet Celebration. It was a fantastic experience, and the stamps came out so cute! Now you, too, can create your own cupcake cards and craft projects using these adorable stamps! Each set of unmounted, deeply etched, pink rubber stamps retails for $21.95. To see some of the projects others have made with the stamps, check out tayloredexpressions.blogspot.com; to purchase the stamp sets, visit tayloredexpressions.com!

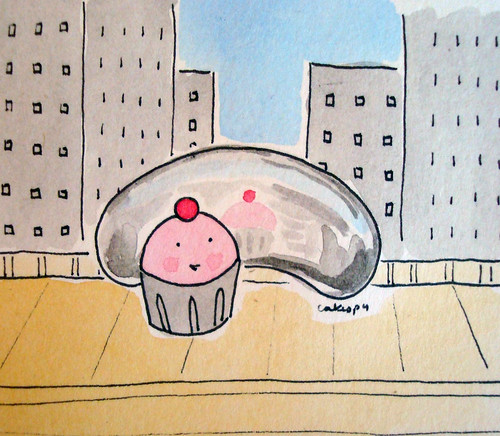
Cuppie at the Chicago "Bean"
Going to Chicago and Milwaukee! Next week Cakespy will be headed to Chicago and Milwaukee...deliciousness is bound to follow! Stay tuned for upcoming roundups of all the sweet stuff we discover--and feel free to pass on suggestions!

Totally Sweet! Finally, longtime Cakespy reader and supporter Sue Scara of Piscataway, NJ, is living the sweet life indeed: her recipe for Bubbe's Apple Cake is a finalist for an upcoming "Spreading Smucker's Traditions" contest! Starting September 8, vote for her recipe (below) at smuckers.com!

The recipe:

Bubbe’s Apple Cake (our grandmother’s version of the traditional European-Jewish Apple Cake)

  • 1 ¼ cups flour
  • 1 teaspoon baking powder
  • ½ teaspoon salt
  • 4 medium apples, peeled and cut into thin slices
  • ½ cup Smucker’s Red Plum jam
  • juice of ½ lemon
  • 3 large eggs (brought to room temperature)
  • 1 cup sugar
  • ½ cup vegetable oil
  • ½ teaspoon each of vanilla extract and almond extract
  • A “shake or two” of cinnamon

Begin by preheating oven to 350 degrees. Grease an 8” square baking pan.

Combine the flour, baking powder and salt together in a mixing bowl. Give dry ingredients a stir and set the bowl aside. In another bowl, combine apple slices, Smucker’s Red Plum jam and lemon juice. Mix up so that apples are coated in jam and lemon juice. Set aside.

Beat the eggs well, either with electric beater on medium, or vigorously by hand. Gradually add sugar and beat (about 2 min.), or mix by hand, till mixture is almost fluffy. Add oil and vanilla and almond extracts, and continue to beat and scrape side of bowl till all is combined. Next, mix in the flour mixture (if using electric beater, reduce speed to low). Mix short time more till batter is blended to uniform color and consistency.

Take just half of the batter and spread evenly in the baking pan. Next, cover the layer of batter with the apple and jam mixture. Then spread the remaining half of the batter over the apples. Give a light shake or two of cinnamon over the surface of the cake. Bake on the center rack till golden (approximately one hour).

After removing from oven, let the cake cool. Cut into squares and serve.


Tuesday
Aug262008

C'est Bon: The Famous Bonbon Cookies of 1955-1960

Bonbon cookies
1955-1960 was certainly an eventful series of years. Sputnik I was launched; Alaska and Hawaii were proclaimed the 49th and 50th states; Truman Capote published the novella Breakfast at Tiffany's, which would later be made into a film by the same name.

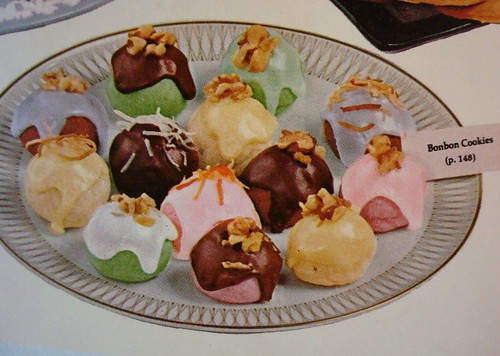
And during these years, there was one cookie that spoke to the times more than any other: the Bonbon Cookie. At least that's what Betty Crocker says. And other than the fact that she's not actually...well, real, she's never led us astray. According to her Cooky Book (1963), the treats are described as being real trailblazers on the cookie frontier:


Bonbon Cookies from Betty Crocker


"candy-like cookies in vogue--women were fascinated by these beautiful and delicious cookies which were baked as cookies, served and eaten as candies. Excitement over Bonbons brought more candy-cookies, Toffee squares and Cream Filberts, for example"


And if that doesn't pique your interest, the photos in the book will (above)--in pastel tones worthy of Marie Antoinette's court, these are without a doubt cookies for ladies, a pinkies-out affair. We had to make them. Turns out, they're amazingly easy--and rather delicious.
 
Chocolate innardsBonbon Cookies being made
A few notes:
  • They are rather on the sweet side--so for those who like a less-sweet cookie, you might want to leave off the frosting, or opt for a more savory filling for the cookies, such as chopped nuts or unsweetened coconut; we used chocolate chips, but then again we're not scared of sweet cookies.
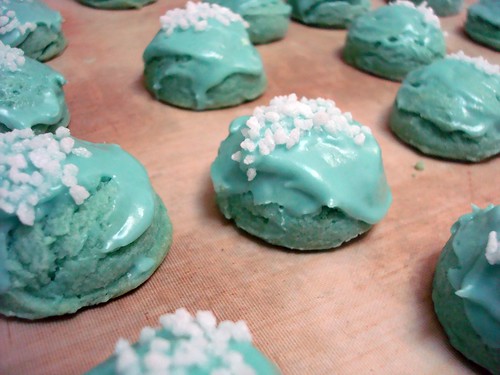
  • In keeping with the spirit of this dainty cookie and the era from which it harkens, we elected to make ours Tiffany Blue, garnishing them with white sugar pellets in white to offer the same color palette as that iconic box with its white bow. We found that adding a drop or so of green with two or three drops of blue food coloring reached the signature tone nicely.
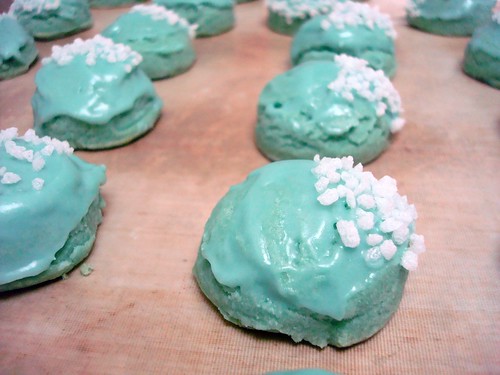
  • To attain the desired round Bonbon shape, we used a small ice cream scoop to spoon out our dough; while in the scoop we inserted 2-3 chocolate chips, pressed them down, and then reformed the dough over it to secure the filling.
Here's the recipe:

Bonbon Cookies in Tiffany Blue
Bonbon Cookies
Created by Mrs. Joseph J. Wallace, Whitehall, Montana

For the Cookies:
  • 1/2 c. soft butter 
  • 3/4 c. sifted confectioners sugar 
  • 1 Tbsp. vanilla
  • food coloring if desired 
  • 1 1/2 cups all purpose flour 
  • 1/8 tsp. salt
Possible fillings: chocolate chips, chopped nuts, coconut, cherries...choose your own adventure!
For the Icing:
  • Mix 1 cup sifted confectioners' sugar, 2 tbsp cream, 1 tsp vanilla, and food coloring (if desired).
Heat oven to 350. Mix butter, sugar, vanilla and food coloring (if using), thoroughly. Measure flour by dip-level-pour method or by sifting. Blend in flour and salt. If dough is dry, add 1 to 2 Tbsp. cream. Wrap a level Tablespoon of dough around filling.. Place 1" apart on un-greased cookie sheet. Bake 12 to 15 min. Cool; dip tops of cookies in frosting; decorate with another topping if desired. Makes 20-25 cookies.
Tuesday
Jul222008

Batter Chatter: Interview with Melissa Cohen of Metal Sugar

Metalsugar
Do cupcakes go to heaven after they're eaten? Are they up somewhere, hanging out on cotton candy clouds, looking down at us? 

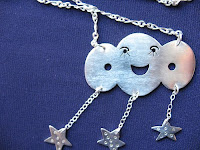
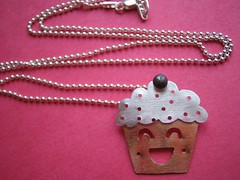
Well, if they are, they'd be happy to see themselves memorialized on the fantastically sweet jewelry made by Metal Sugar Designs. Owner Melissa Cohen's love of all things sweet and cute certainly shows in her jewelry line, which cupcakes and little anthropomorphic characters play a prominent role. We recently got to talk shop with Melissa; here's what we learned about seeking one's calling, the best cupcakes in New York--and we even got a prized recipe (see bottom):

Cakespy: Can you tell us a little bit about how Metal Sugar came to be?
Melissa Cohen: About two years ago, I found myself in panic mode. I was utterly lost and working in Corporate America, feeling somewhat hopeless about the future and what I wanted to do with my life. I felt like I should KNOW where I was going and what I was doing, but I didn't. I have always thought of myself as a creative person, but I didn't necessarily have an artistic talent, and I really wanted one. I thought about taking some art classes for years and never did, but once I was in freak out mode, it was time to get creative. So, I signed myself up for a jewelry course in the summer of '06, hoping that this would get me in the right direction. I was determined to change the course of my life and discover something I could be passionate about. Shortly after the class started, I made my very first ring (the Puff-Puff). I fell in love with metalsmithing right then and there! I became obsessed and finally got to feel what it was like to be totally passionate about something. I found what I was good at and what could hopefully end up being my full-time hobby/career. Two years later, I'm still obsessed, still passionate about making jewelry, and even more excited about [the] future!


SprinklesBaby Cupcakes at Cupcake Royale 

CS: Your designs are very eclectic, but cupcakes in particular seem to make a few appearances in your line. What is it about cupcakes?
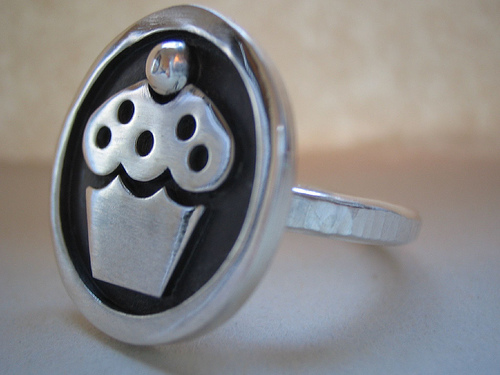
MC: Ever since I was little, my mom and I would bake cupcakes in a variety of colors and flavors, topped with delicious cream cheese icing and plenty of rainbow sprinkles. Nothing was better than a warm cupcake out of the oven! As I grew older, this love just got stronger and I found myself making cupcakes anytime I entertained guests. As an homage to my favorite dessert, I decided to make the Cupcake Signet Ring (pictured top). After that, Cuppington was born.


Metal Sugar PendantCS: Can you tell us a bit more about the Cuppington pendant? We know there's got to be a story behind that smiling little face (left).
MC: I never quite broke out of that phase of loving Japanese toys and candies from childhood; "Kawaii", as they say. I love anthropomorphic things - inanimate objects with happy faces. I don't know what it is, but I just can't handle it! Cuppington was made after I got a tattoo of a smiling cupcake with my best friends. I knew then that he needed to be part of my jewelry collection.

CS: What are some of your most popular designs?
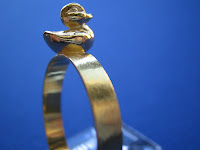
MC: The Cupcake Signet Ring, Cuppington, the Amoeba-ish Necklace, my Serious Business Ties, and my Bar rings - those are hot right now. I just started making tiny tiny duckie jewelry, too.

CS: You currently live in Brooklyn but hail from Georgia. What baked goods or desserts do you miss from the South?
MC: Being a southern gal, I grew up eating pralines: a Savannah specialty made from brown sugar, cream, and pecans. 

CS: What have been some of your favorite NYC baked good / dessert finds?
MC: I was on the cupcake hunt for almost a year, trying every cupcake in every bakery around NYC. Surprisingly, I never found one that was better than my ole Betty Crocker cake mix with sprinkles. That is, until I met the ladies of Lux Sugar! This wonderful group of bakers make the yummiest, moistest cakes and cupcakes you'll find! Once I had their strawberry cupcake, the hunt was over! Check them out, seriously! Other than that, the Crème Brûlée' at Dumont in Williamsburg is amazing!

CS: What type of sweets hold a special place in your heart?
MC: Cupcakes are definitely my favorite, but a close second is my Mom's Chocolate Delight! (Recipe below).

CS: If interested, how and where can people buy your work?
MC: You can find me on metalsugar.com or on Etsy, as well as various other sites. Because I do custom pieces, I love being contacted through my site. I also LOVE having people check out my jewelry in person, so I try to sell at craft fairs or flea markets in the area often. I'm working on getting into blogging about my work, but I'm not quite there yet-stay tuned!

CS: Any advice for budding jewelry designers or small business owners? Things you wish you knew when you were just starting out?
MC: I'm still fairly new at all of this, but my advice is to take classes. Try something you've been curious about. Explore something new! It changed my life in every possible way. I went from worrying about what I was going to do with my life to being excited about where my creativity could take me. I wish I had known that I had talent sooner, but it's never too late!

CS: What's next for Metal Sugar?
MC: To be honest, I don't really know...You never know with Metal Sugar! One day it's a poop ring and the next it's a classic design that your mother would wear :-) Keep checking my site for the many surprises to come!

Melissa's Mom's Chocolate Delight


Crust: 
  • 1 C all purpose flour
  • 1 stick butter, melted
  • 3/4 C chopped pecans


    Mix together, pat into 13x9x2 glass pan; Bake at 300* -30 min; let cool.


Middle Layer: 
  • 1 C Cool whip
  • 8 oz cream cheese
  • 1 C conf. sugar(powdered sugar)


    Mix together, pour over crust.

Top layer:
  • 1 small inst. van. pudding 
  • 1 small inst. choc. pudding
  • 3c. milk
Mix with spoon or whisk to thicken.
Pour over cream cheese mixture.


Top with cool whip.


NOTES: 
  • Good idea to purchase the 12 oz size cool whip (Any brand)
  • I prefer the choc fudge flavor pudding and any strength milk will work, from whole milk to 1%. I haven't used skim, but it probably will work, just use a little less.


© Cakespy, all rights reserved. Powered by Squarespace.