Home Home Home Home Home Home Home
CakeSpy

Featured: 

My adventure at Ben & Jerry's in Vermont!


Unicorn Love: the Eating Disorder Recovery Blog


 Buy my brilliant books!

Buy my new book!

Buy my first book, too! 

CakeSpy Online Retail!


Archives
Gallery

Fantastic appliance for cake making on DHgate.com

everyrecipe.co.nz

Craftsy Writer

Entries in recipes (704)

Wednesday
Sep082010

Curiosity Killed the Cookie: Another Experiment in How Not To Make Chocolate Chip Cookies

Not sure about whether or not curiosity killed the cat, but it sure did compromise these cookies. 

That's right: I've been messing with chocolate chip cookies again. It all started about a week ago, after a lifetime of conscientiously creaming the butter and sugar at the beginning of making chocolate chip cookies. I had received a big ol' parcel of freebies from Nestle Toll House (giveaway coming in a few days!) and had cookies on the mind.
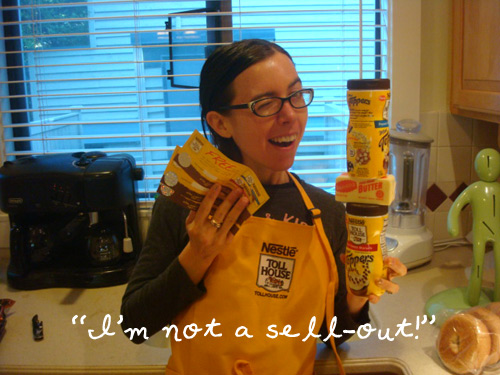
A question occurred: "what would happen if I swapped the order in which the flour and sugar are added?".

Well, needless to say I was gonna find out.

And so, instead of creaming the butter and sugar, I "creamed" the butter and flour, and then added the sugar in, bit by bit, later on in the recipe, at the time when I would normally be adding the flour. I didn't mess with the actual measurements of the ingredients, though.

So what happened?

Well, the fact that these were going to come together differently was evident right away. The flour clumped up with the butter like...well, pie crust. (this makes sense, right?)
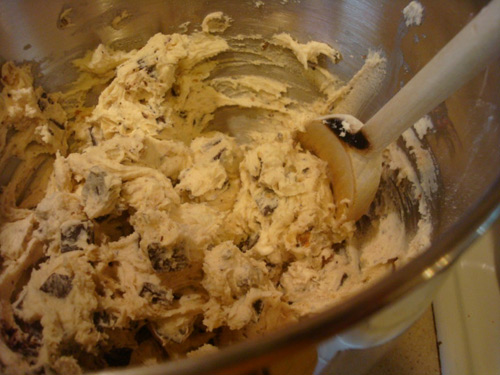
And then, adding in the eggs and other ingredients, things seemed to start looking like normal cookie batter.

Adding in the sugar, bit by bit, the dough looked, smelled, and felt pretty normal. I added in the vanilla and chocolate chips.

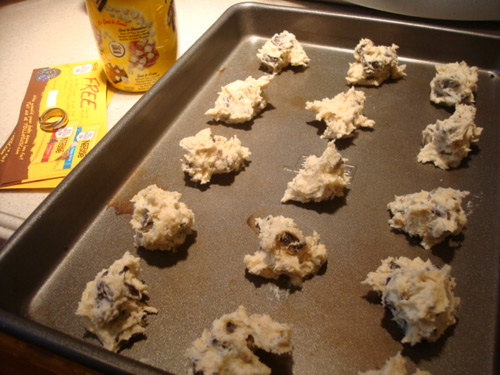
I let it chill for a while. Normal-looking. I spooned it on to the baking sheet, finishing off some of the cookies with these cute Nestle chocolate and white chocolate chip mini morsel toppers.

When the cookies came out of the oven, they looked completely perfect: lightly browned on the edges and bottom, soft in the middle.
But then something strange happened. As the cookies cooled...they turned into cookie crackers!

They looked right. They smelled right. They even tasted pretty right. But the texture was...well, disappointing. Crackery. Weird.
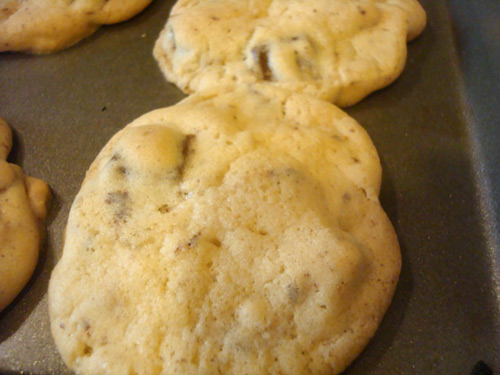
As I found out on Baking911.com, I had basically skipped an important step by making this switcheroo: "Creaming incorporates the maximum amount of air bubbles so a recipe will rise in the oven and be light in texture." So while I can't get technical about the chemistry of why this crackery texture was the result, I can say that while I was happy to have seen for myself what happens when you skip this step, I'm not likely to do it again.
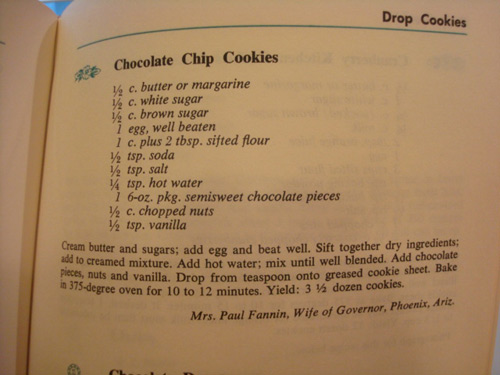
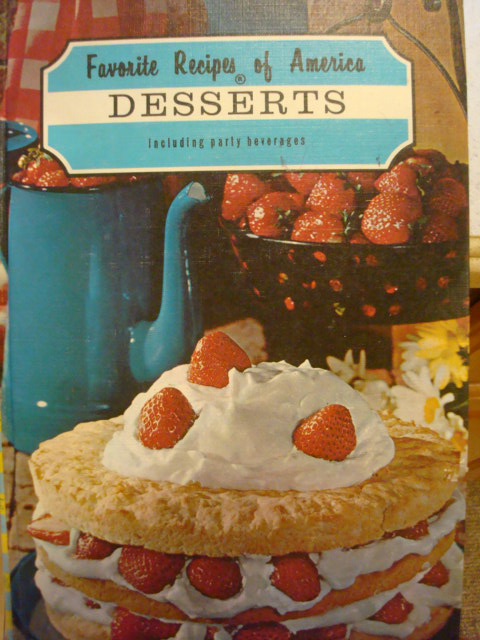
Here's the recipe I used--feel free to try my experiment for yourself, or honor the good Mrs. Paul Franklin, Wife of Governor, from Phoenix, AZ, and follow the directions correctly (listed correctly below). By the way, this is the book the recipe is from--isn't the cover just too much?
Chocolate Chip Cookies

From Favorite recipes of America desserts Including Party Beverages, Vol 1  

Ingredients

  • 1/2 cup butter
  • 1/2 cup white sugar
  • 1/2 cup brown sugar, packed
  • 1 egg, well beaten
  • 1 cup, plus 2 tablespoons, sifted flour
  • 1/2 teaspoon baking soda
  • 1/2 teaspoon salt
  • 1/4 teaspoon hot water
  • 1 6-ounce package semisweet chocolate morsels or pieces
  • 1/2 cup chopped nuts (optional)
  • 1/2 teaspoon vanilla

Procedure

Cream butter and sugars; add egg and beat well. Sift together dry ingredients (except for chocolate); add to creamed mixture. Add hot water; mix until well blended. Add chocolate pieces, nuts, and vanilla, and blend just until incorporated. Drop from teaspoon onto greased cookie sheet. Bake in a 375-degree oven for 10-12 minutes. Makes 3 1/2 dozen small cookies.

Thursday
Sep022010

Totally Stuffed: Cupcake-Filled Croissants Recipe

The list of foods that are made more awesome by being stuffed in croissants is pretty immense and far-reaching, from the sweet (chocolate, almonds, cream cheese) to the savory (ham, cheese, hot dogs).

So I was pretty sure that a buttery blanket of croissant dough would have the same awesomeness-enhancing effect on leftover birthday cake (or, in this case, a leftover birthday season cupcake, from the delectable Jubilee Cupcakes).

And guess what? It turned out pretty good. While the frosting can melt out a bit and get messy, it does lends an extra-buttery richness (and a nice color contrast, as mine had pink frosting), and the cake crumbs give it an extra-carbohydratey boost, perfect for carbo-loading if you're about to run a marathon (or, you know, just a tasty snack if you're not).

Want to give it a try? Here's how I did it.

Birthday Cake-Filled Croissants

Ingredients

  • 1 leftover cupcake (or, 1 leftover slice birthday cake)
  • 1 package ready-to-bake croissants (you know, the kind in a roll)
  • Extra butter, to brush on top (if you're into that)

Directions

  1. Preheat oven to the temperature directed on the croissant package.
  2. Unroll the croissants. In the center of each, place a chunk of birthday cake, crumbled up (with frosting!). Roll them up, or (as I did with some of them) form the dough into little dumplings around the cake.
  3. Place on a sheet. If desired, brush tops with melted butter (why not?).
  4. Bake for the time specified on your croissant package. When you open the oven, you may discover that the frosting has oozed a bit out of the sides, but don't worry--plenty was probably able to melt into the croissant dough. Plus, once it cools just a bit, you can kind of scrape off the oozed bits and eat them (if, like me, you have no manners, that is).


Monday
Aug302010

Joyeux Anniversaire: Birthday Cake French Toast Recipe for Serious Eats

Say hello to your new best friend, Birthday Cake French Toast. This recipe breathes new life into birthday cake that is past its prime, making use of the dry texture to absorb a rich, eggy mixture, which is then pan-fried (frosting and all) to yield a new breed of French toast that's beyond decadent. In the tradition of over-the-top morning foods such as Cadbury Creme Eggs Benedict, this makes for a sugar bomb of a plate, tasting far better than it has any right to, in a so-bad-it's-good sort of way.

Click to read more ...

Monday
Aug232010

Being Green: Zucchini Cake with Chocolate Cream Cheese Frosting Recipe for Serious Eats

It's not easy being green.

It is, however, exceedingly easy to eat green, especially when we're talking about zucchini cake. Now, you probably already knew that the abundant late summer fruit (yes, it's a fruit) yields a moist, dense, and delicious quick bread. But please, don't let the story end there—because when you take it into cake territory by adding a thick slathering of chocolate cream cheese frosting, you'll have a far sweeter finish.

The frosting prettily contrasts the color of the cake, and the triple-threat of complementary flavors—tangy cream cheese, rich chocolate, earthy zucchini—makes for a final product that leaves zucchini bread absolutely green with envy.


For the full entry and recipe, check out Serious Eats!


Saturday
Aug212010

Sweet Excess: Chocolatey Kitchen Sink Cinnamon Rolls Recipe

Question: what happens when you raid your pantry while making cinnamon rolls late at night and top them with every sweet thing you can get your hands on?

Answer: Nothing good. Nothing good at all. It's awful. It's terrible. Here's how you do it at home.

Note: This is best done late at night, when things like this seem like good ideas.

Step 1: Get yourself some cinnamon rolls--you know, the kind from the can that pops when you open it.

Step 2: Set them all in a pie plate or in a baking pan.

Step 3: Raid fridge and pantry for any various sweet leftovers you might have. For me, these happened to be about 1 cup of chocolate fudge frosting, 3 almost-stale brownies, and half a can of chocolate fudge sauce.

Step 4: Put all foraged items on top of the cinnamon rolls (I broke the brownies into little crumbs). Bake as directed on container.

Step 5: Remove from oven. Admire handiwork. Remember the icing that comes with cinnamon rolls. Wonder to self: is it too much? Decide that no, it's not, and pour icing on top of the bubbling mass of a sugar-bomb.

Step 6: Top it all with the rainbow sprinkles that you found in the cupboard while the rolls were baking. Because...well, why not?

Step 7: Enjoy, preferably immediately and in front of bad TV for the ultimate terrible late-night indulgence.

Wednesday
Aug182010

Sweet Pop: Pat Benatart for Serious Eats

As any 1980s music lover knows, running with the shadows of the night burns a ton of calories. You're going to need a slice or six of Pat Benatart to maintain your energy.

Inspired by pop-rock princess Pat Benatar, this tart starts with a cookie crust (erring more toward crumbly than "real tough cookie with a long history"), a lemon-lime cream cheese filling (sweet and rich with a pleasing tartness, these flavors say that "We Belong" together), and is topped with whipped cream for a sweet finish. The crowning glory? A totally cheesy free-form portrait of Pat, accented with Pixie Stix powder, one of the star's favorite treats.

It's an ideal mix of awful and awesome—basically, before you put another notch in your lipstick case, you'd better make sure you give it a taste.

For the full entry and recipe, check out Serious Eats!

Friday
Aug132010

Everyone's Irish, Even in August: Whisky Maple Cupcakes Recipe

Thing I'm saddest about at this minute: I do not have a Whisky Maple cupcake from Cupcake Royale in my mouth. This is a fact that became all the more evident when I read the Seattle Weekly writeup on the delicious seasonal morsel, which is sadly available only during March. 

Happily, I uncovered the recipe in an issue of Edible Seattle, and you know what that means: you can be Irish any time you want now. And oh, how sweet to be Irish with a rich sour cream vanilla cupcakes with whisky maple buttercream. They're just as good made at home (although your frosting swirls might not be as perfect as the one shown above, which was made by Cupcake Royale!).

Here's the recipe.

Sour Cream Vanilla Cupcakes with Whisky Maple Buttercream

Adapted from Cupcake Royale

Cupcake ingredients 

  • 3/4 cup whole milk (I used half and half! heavy, but tasty)
  • 1/2 cup full fat sour cream
  • 2 teaspoons vanilla
  • 2 3/4 cups flour
  • 1 teaspoon baking powder
  • 1/2 teaspoon salt
  • 1 cup (2 sticks) unsalted butter, room temperature
  • 2 cups granulated sugar
  • 3 large eggs, room temperature 

Frosting ingredients

  • 1 cup unsalted butter, at room temperature
  • 1/4 cup whisky (CCR uses Jameson, I used some cheap brand, I'll be honest about it)
  • 5 tablespoons maple syrup
  • 1/2 teaspoon salt
  • 4 cups confectioners' sugar

Procedure

  1. Preheat oven to 350 F.
  2. Line a standard muffin tin with cupcake liners (this recipe yields 18-24 cupcakes, depending on size). 
  3. In a small mixing bowl, mix together the milk, sour cream, and vanilla. In a separate small bowl, whisk together the flour, baking powder, and salt. 
  4. In the bowl of an electric mixer, combine the butter and sugar. Beat together on medium spead until the mixture is light and fluffy, about one minute. Add the eggs one at a time, beating at medium speed for a full 30 seconds after each addition. Scrape down the sides of the bowl with a rubber spatula. Add half the dry mixture, and beat until incorporated. Repeat the process again, mixing until the liquid and dry ingredients are combined, the batter thick and smooth.
  5. For traditional cupcakes, fill each lined cup 2/3 of the way full with batter. For fat crowns on your cakes, fill each cupcake liner close to the top (this will make fewer cupcakes, but bigger and awesomer ones).
  6. Bake for 22-27 minutes, or until a cake tester comes out clean.
  7. Make the frosting. Using an electric mixer, beat butter, whiskey, syrup, salt, and one cup of the confectioners' sugar together until smooth. Add the rest of the sugar bit by bit until it has reached your desired consistency (you might not use all of it). Spread generously on cooled cupcakes.


Thursday
Aug122010

Bar Hopping: Peanut Butter and Chocolate Chip Topped Bar Cookies Recipe

If I were, on this very day, pressed to answer the question "what treat would you most enjoy eating until you descend into morbid obesity?" I would have a ready answer: Peanut butter and Chocolate Chip-Topped Bar Cookies.

It all happened recently while baking the "Dream Bars" from Betty Crocker's Cooky Book and realizing that--duh--I basically had none of the ingredients for the top layer, which was meant to be made up of an almond-coconut topping. So there I was, with a somewhat sad expanse of beige batter for a bar cookie base.

Turning to my pantry (OK, my cabinet), I found half a jar of old-fashioned chunky peanut butter and half a bag of milk chocolate chips. Yes! In the mix they both went, scattered irregularly on top of the batter.

The result? Something lovely and amazing. Moist blondie-esque cookie bars with pockets of gooey-crunchy peanut butter and smooth, delicious chocolate. Something you won't...be...able...to...stop...eating. And if you don't like them? No problem, I'll finish the tray for you.

Peanut Butter and Chocolate Chip-Topped Bar Cookies

adapted from Betty Crocker's Cooky Book

Ingredients

  • 1/2 cup butter
  • 1/2 cup brown sugar, packed
  • 1 cup flour
  • 1/2 jar (about a cup) peanut butter (I used chunky)
  • 1/2 bag (about a cup) milk chocolate chips

Procedure

  1. Heat oven to 350 F.
  2. Mix the butter and sugar thoroughly. Stir in flour. Press and flatten with hand to cover the bottom of a parchment-lined oblong pan, 13x9-ish. 
  3. Bake 10 minutes, then spread with the topping (irregularly spooned globs of peanut butter and a sprinkling of chocolate chips).
  4. Return to the oven and bake for 25 minutes more, or until golden brown. Cool slightly, then cut into bars. Makes about 20.
Wednesday
Aug112010

Brownie Heaven: The Baked Brownie

Now, I don't like to talk in absolutes, but...

...without a doubt, there's definitely something wrong with you if you don't think that the Baked Brownie is the finest brownie of all.

I recently used it as the base for Mimosa Brownies, which were most excellent--but really, this is a brownie that doesn't need anything added--and for that reason, I'd like to take a few moments to celebrate the beauty that is the Baked brownie in its purest form.

This is a brownie which is fudgy and chewy but not too extreme in either direction. Each bite is redolent of chocolate, and every bite is indulgently delicious. They're perfect (but it's ok if you don't like the espresso--while I don't necessarily understand what your problem is, they still taste great without).

Here's the recipe. As you can see from the top photo, it's not only CakeSpy-beloved, but gnome-approved.

The Baked Brownie

As seen in Baked: New Frontiers in Baking  

Ingredients

  • 1 1/4 cups flour
  • 1 teaspoon salt
  • 2 Tablespoons dark cocoa powder
  • 11 ounces quality dark chocolate (60-72%), chopped coarsely
  • 8 ounces butter (2 sticks), cut into 1 inch cubes
  • 1 tsp instant espresso powder
  • 1 ½ cups sugar
  • ½ cup light brown sugar
  • 5 large eggs, room temperature
  • 2 teaspoons vanilla extract

Procedure

  1. Preheat oven to 350 degrees.
  2. Butter the sides and bottom of a glass or light colored metal pan 9x13x2 pan (I like to lay down a bit of parchment too, for easy removal from the pan).
  3. In a medium bowl, whisk together the flour, the salt, and cocoa powder.
  4. Configure a large sized double boiler. Place the chocolate, the butter, and the instant espresso powder in the bowl of the double boiler and stir occasionally until the chocolate and butter are completely melted and combined. Turn off the heat, but keep the bowl over the water of the double boiler and add both sugars. Whisk the sugars until completely combined and remove the bowl from the pan. Mixture should be room temperature.
  5. Add three eggs to the chocolate/butter mixture and whisk until just combined. Add the remaining eggs and whisk until just combined. Add the vanilla and stir until combined. Do not over beat the batter at this stage or your brownies will be cakey.
  6. Sprinkle the flour/cocoa/salt mix over the chocolate. Using a spatula (DO NOT USE A WHISK) fold the dry into the wet until there is just a trace amount of the flour/cocoa mix visible.
  7. Pour the mixture into the pan and smooth the top with your spatula. Bake the brownies for 30 minutes (rotate the pan half-way through baking) and check to make sure the brownies are completely done by sticking a toothpick into the center of the pan. The brownies are done when the toothpick comes out with a few moist crumbs.
  8. Cool the brownies completely before cutting and serving.


Monday
Aug092010

Reading Is Totally Sweet: Honey-Yogurt Panna Cotta with Berries Recipe from Author Jenny Nelson

Eating is awesome, but what to do during those in-between meal times when you're not hungry? Work up an appetite by reading food-themed literature, that's what. Or at least that's what I do (when I'm not painting anthropomorphic pastries, of course).

So I was delighted to receive a review copy of Georgia's Kitchen, a novel wherein the namesake character is a New York chef who goes to Italy to find herself, both in a culinary and existential sense. The book is full of sensual descriptions of delicious food (hooray!). While there isn't a heavy dessert presence, happily I was able to catch up with author Jenny Nelson, who was able to answer the question: what type of dessert keeps authors inspired? Here's what she had to say about one of her favorite recipes, for Honey-Yogurt Panna Cotta:

Panna cotta, a deceptively simple Italian dessert that means, literally, cooked cream, is one of my favorite desserts to make, serve and – most important – eat! I serve it all the time -- at dinner parties, holidays and even as a weekday treat for my kids. It’s elegant, delicious and so, so easy to prepare. While tasty panna cotta recipes abound, this is one of my all-time favorites. You can make it even richer using all cream, but I opt for a more healthful 1 cup half and half, 1 cup whole milk. Either way, it’s delicious.

Honey-Yogurt Panna Cotta with Berries

Serves 8

  • 2 cups heavy cream (or 1 cup half and half, 1 cup whole milk; or 2 cups whole milk)
  • 1/4 cup sugar
  • 1/2 teaspoon vanilla extract
  • 1 envelope (1/4 ounce) unflavored gelatin
  • 1 cup plain low-fat yogurt
  • 1/2 cup honey, plus more for serving
  • 1/8 teaspoon salt
  • 2 cups mixed berries (blueberries, blackberries and raspberries are my favorites)

Procedure

  1. Place cream and sugar in a medium saucepan. Bring cream to a boil, stirring to dissolve sugar. Cover pan, remove from heat, and set aside steep, at least 10 minutes.
  2. Place 1/2 cup cold water in a small bowl, and sprinkle gelatin over water; set aside to soften, at least 5 minutes.
  3. In a large bowl, whisk yogurt, honey, vanilla and salt until combined; set aside.
  4. Return cream to a boil. Remove from heat, and immediately stir in softened gelatin until dissolved.
  5. Pour mixture through a fine-mesh sieve into yogurt-honey mixture; mix until combined.
  6. Divide mixture among eight 4- to 6-ounce ramekins. Chill until firm, at least 4 hours and up to 2 days.
  7. Wash berries and, if necessary, cut into bite-size pieces. Mix together and set aside 
© Cakespy, all rights reserved. Powered by Squarespace.