Home Home Home Home Home Home Home
CakeSpy

Featured: 

My adventure at Ben & Jerry's in Vermont!


Unicorn Love: the Eating Disorder Recovery Blog


 Buy my brilliant books!

Buy my new book!

Buy my first book, too! 

CakeSpy Online Retail!


Archives
Gallery

Fantastic appliance for cake making on DHgate.com

everyrecipe.co.nz

Craftsy Writer

Entries in chocolate chip cookies (3)

Sunday
Jun152014

How to Make Any Chocolate Chip Cookie Better

Choco-belly chocolate chip cookies

When is the last time you thought about the bottom of your chocolate chip cookie?

People have debated for years, decades, close to a century about how to make already-good chocolate chip cookies even better. Toast the nuts. Don't toast the nuts. Forgo the nuts entirely. Rest the dough. Add more brown sugar.

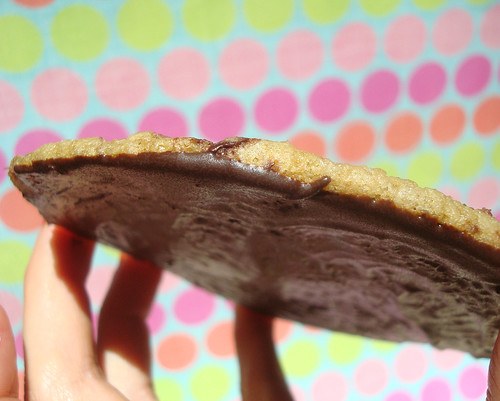
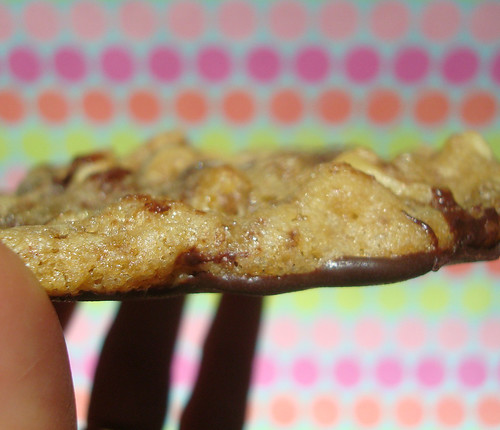
While well-intentioned, I humbly have to submit that this is the easiest, least controversial, and most taste-pleasing to make your cookies better: coat the bottoms of the cookies with chocolate.

Choco-belly chocolate chip cookies

Say what?

I know. But it is truly the gateway to chocolate delight. 

Choco-belly chocolate chip cookies

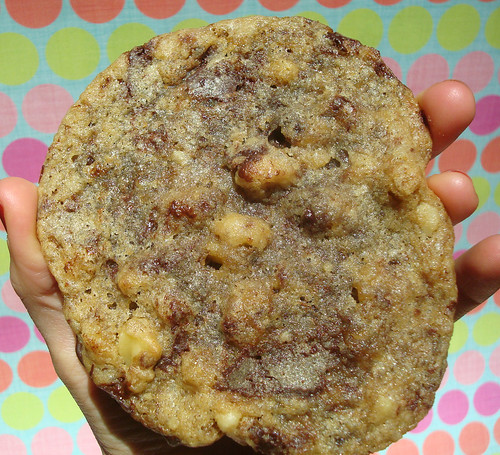
You see, the brilliance behind this method is that from the top, it looks like just an everyday chocolate chip cookie, but then when you bite into it, you're greeted with a delightful taste surprise. If you ask me, it tastes even better because there is the aspect of joy of discovery: you bite into a cookie expecting, you know, awesome chocolate chip cookie, and then--OMIGOD! It is so chocolatey that your head may be tempted to spin. 

Choco-belly chocolate chip cookies

It's an easy method to employ in your baking, and between you and me, it could be used for cookies other than chocolate chip. Some cookies such as chocolate dipped macaroons or sugar cookies are thinking along similar lines, but they lack the ninja-like stealth of the choco-bottom in terms of delightful taste surprise. 

I've elected to call these cookies "Choco-belly chocolate chip cookies" because indeed, this method of preparing cookies does take the oft-overlooked underbelly of the cookie and raise it to a thing of celebrated beauty.

So how do you do it?

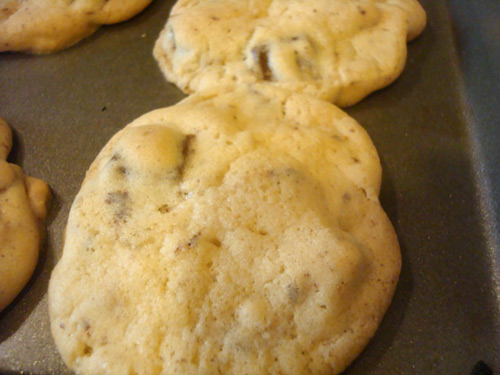
I could be totally snarky and tell you "simply melt chocolate and brush or spread it on the bottom of your cookies", but I won't do that, because I want to share the cookie recipe, which is quite good, too. It makes a nice cookie: crispy on the edges, chewy on the inside. I liked 'em. DO listen to the chilling part of the recipe, because if you don't your cookies will spread considerably.

So here goes. Prepare your taste buds for a deliciously wild ride. 

Choco-belly chocolate chip cookies

Choco-belly chocolate chip cookies

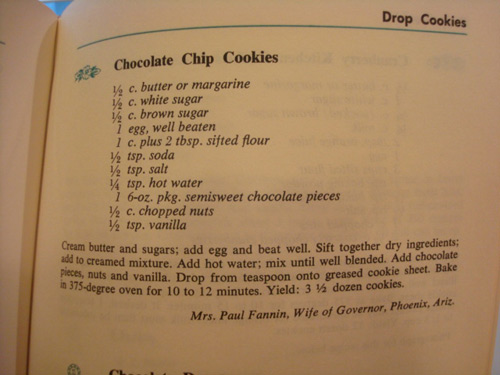
adapted from a chocolate chip cookies recipe on Craftsy

  • 1 cup (2 sticks) unsalted butter, softened
  • 1 cup brown sugar
  • 1/4 cup white sugar
  • 1 egg
  • 1 egg yolk
  • 2 teaspoons vanilla extract
  • 2 cups all-purpose flour
  • 2 teaspoons cornstarch
  • 1 teaspoon kosher salt
  • 1 teaspoon baking soda
  • 1/2 cup walnuts or pecans, some coarsely and some quite finely chopped
  • 2 cups chocolate morsels, divided

Step 1:

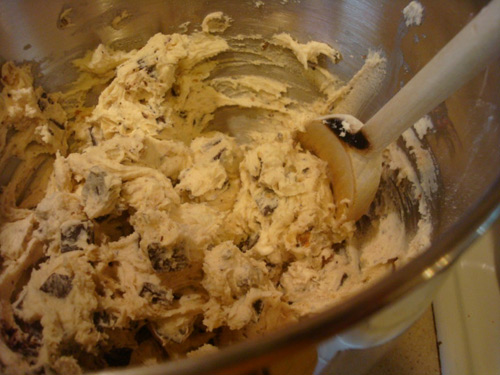
Cream the butter in the bowl of a stand mixer. Add in both the brown and white sugar and mix to combine. Stir in the egg and egg yolk, one at a time, until fully incorporated. Stir in the vanilla.

Step 3:

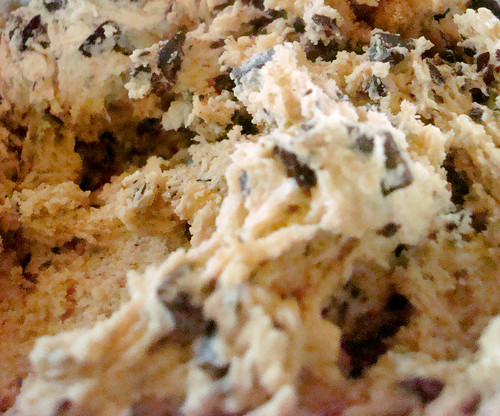
In a medium bowl, whisk together the flour, cornstarch, salt, baking soda and pecans. Slowly add the dry ingredients to the wet until just combined. Fold in 1 cup of the chocolate chips.

Choco-belly chocolate chip cookies

Step 5:

Refrigerate dough for 30 minutes.
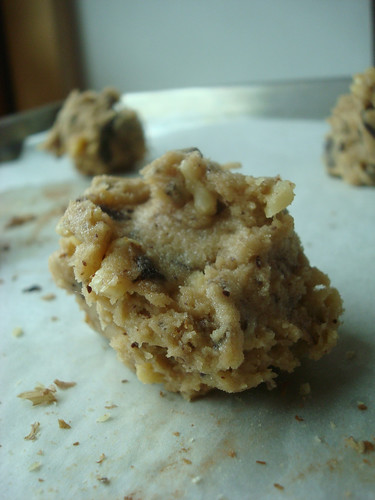
Step 6:

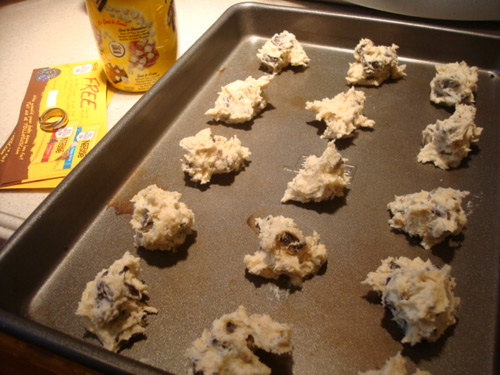
Preheat oven to 325 degrees. Remove dough from the fridge and scoop onto a parchment-lined baking sheet, about 2 inches apart. Bake for 12 minutes and remove from the oven. Cookies will look slightly underdone, but will continue baking on the hot cookie sheet. Once cooled, transfer to a wire rack to cool completely.

Choco-belly chocolate chip cookies

Step 7:

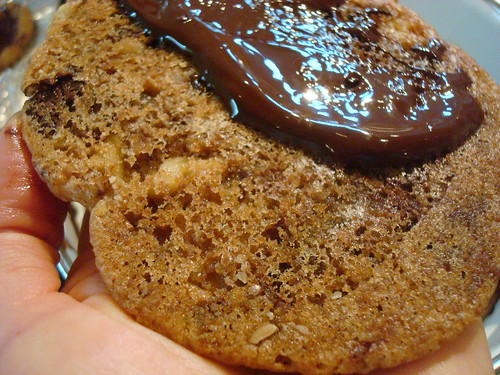
Once cooled, melt the remaining chocolate in the top of a double boiler.

Step 8:

Brush or spread a layer of chocolate (fairly thin, but enough to be opaque) on the bottoms of the cookies. Place them back on the wire rack, bottoms up. Let them cool until the chocolate has set. 

Choco-belly chocolate chip cookies

Enjoy. Like you needed to be told.

Tuesday
Dec072010

Tate's-Off: A Tasteoff Featuring Homemade Vs. Purchased Tate's Chocolate Chip Cookies

For your consideration: Tate's Bake Shop, in Southhampton, NY. As their website invites, 

If you're in the Hamptons and walk around the charming little Atlantic coast town of Southampton, you'll see a celadon green Victorian structure with white shutters, framed in flowers, that seems to attract people like bees to a hive. It's Tate's Bake Shop, the fairytale culmination of a dream that got started when 11-year-old Kathleen King began baking cookies to sell at her family's farm stand not far out of town.

Sounds pretty idyllic, huh? But wait, there's more: in addition to having a full-fledged retail store, retail mail order business and wholesale division, they also have a cookbook, released a couple of years ago: Tate's Bake Shop Cookbook: The Best Recipes from Southampton's Favorite Bakery for Homestyle Cookies, Cakes, Pies, Muffins, and Breads

And even more recently, they sent me a parcel of samples, containing aforementioned cookbook, as well as a variety of mail-order cookies (in three flavors: macadamia, oatmeal raisin, and their bestselling item, chocolate chip cookies). Now, of course I am thankful for these goodies--I mean, who doesn't love free stuff? But at the same time, every time I receive something like this, the mischievous side of me can't help but cry out to be heard.

And so I decided to put these cookies to the test by doing a taste-off: Tate's Versus Tate's. I made a batch of their bestselling item--the chocolate chip cookies--and then my friend Danny and I did a taste-test of the mail-order version versus the homemade version. Which would win?

Now, I realize that I probably had the home-team advantage here: my cookies would be slightly fresher, warmer, and we both would have known that someone superbly cute had made them. So to level the playing field, I did make sure to fully cool the cookies before serving, and then to lightly warm both specimens on the still-warm oven before serving. The results?

Appearance:

Tate's Mail Order: More perfectly formed than the homemade version, and the chocolate chips must have been different, because they were slightly flatter in this version.

Tate's Homemade: Slightly irregular, but not displeasing in appearance. Also the centers were slightly lighter, probably because if anything I err toward slight underbaking.

Texture:

Tate's Mail Order: Very crunchy--crackery, even.

Tate's Homemade: Crunchy on the outside and mostly through, but lightly chewy in the center even when cooled.

Taste:

Tate's Mail Order: Dry, but not stale--still very buttery, and redolent of brown sugar and deep chocolate flavor.

Tate's Homemade: More moist, even when cooled and crunchy. Pleasingly salty, and although they used less chocolate than the original recipe, they still tasted like they had more chocolate chips. Perhaps uneven distribution? Or perhaps the fact that although they had cooled, they still retained that chocolatey glow of taste from the oven permeations?

All said and done: While it was clear that these were variations of the same cookie, the homemade version definitely won. Obviously, even though I tried to level the playing field, one thing holds true: just-baked cookies always win. There's a certain something that comes from home baking that can't be beat. Nonetheless, I feel as if it might have been a slightly different outcome had we just scored the Tate's mail-order ones on the same day they had been baked.

Final word: Unless you're in the tri-state area and can go to the source, buy the book and make 'em yourself.

Tate's Chocolate Chip Cookies

  • 2 cups all purpose flour
  • 1 teaspoon baking soda
  • 1 teaspoon salt
  • 1 cup salted butter
  • 3/4 cup sugar
  • 3/4 cup dark brown sugar, firmly packed
  • 1 teaspoon water
  • 1 teaspoon vanilla (I used Rodelle--they recently sent me some as a sample and I am very impressed!)
  • 2 large eggs
  • 2 cups semisweet chocolate chips

Procedure

  1. Preheat oven to 350. Grease or line two baking sheets with parchment or Silpat.
  2. In a large bowl, stir together the flour, baking soda, and salt.
  3. In another large bowl, cream the butter and sugars. Add the water and vanilla. Mix the ingredients just until combined.
  4. Add the eggs and mix them lightly. Stir in the flour mixture. Fold in the chocolate chips. Don't overmix the dough.
  5. Drop the cookies 2 inches apart onto the prepared cookie sheets using two tablespoons or an ice cream scoop.
  6. Bake for 12 minutes or until the edges and centers are brown. Remove the cookies to a wire rack to cool.
Wednesday
Sep082010

Curiosity Killed the Cookie: Another Experiment in How Not To Make Chocolate Chip Cookies

Not sure about whether or not curiosity killed the cat, but it sure did compromise these cookies. 

That's right: I've been messing with chocolate chip cookies again. It all started about a week ago, after a lifetime of conscientiously creaming the butter and sugar at the beginning of making chocolate chip cookies. I had received a big ol' parcel of freebies from Nestle Toll House (giveaway coming in a few days!) and had cookies on the mind.

A question occurred: "what would happen if I swapped the order in which the flour and sugar are added?".

Well, needless to say I was gonna find out.

And so, instead of creaming the butter and sugar, I "creamed" the butter and flour, and then added the sugar in, bit by bit, later on in the recipe, at the time when I would normally be adding the flour. I didn't mess with the actual measurements of the ingredients, though.

So what happened?

Well, the fact that these were going to come together differently was evident right away. The flour clumped up with the butter like...well, pie crust. (this makes sense, right?)

And then, adding in the eggs and other ingredients, things seemed to start looking like normal cookie batter.

Adding in the sugar, bit by bit, the dough looked, smelled, and felt pretty normal. I added in the vanilla and chocolate chips.

I let it chill for a while. Normal-looking. I spooned it on to the baking sheet, finishing off some of the cookies with these cute Nestle chocolate and white chocolate chip mini morsel toppers.

When the cookies came out of the oven, they looked completely perfect: lightly browned on the edges and bottom, soft in the middle.

But then something strange happened. As the cookies cooled...they turned into cookie crackers!

They looked right. They smelled right. They even tasted pretty right. But the texture was...well, disappointing. Crackery. Weird.

As I found out on Baking911.com, I had basically skipped an important step by making this switcheroo: "Creaming incorporates the maximum amount of air bubbles so a recipe will rise in the oven and be light in texture." So while I can't get technical about the chemistry of why this crackery texture was the result, I can say that while I was happy to have seen for myself what happens when you skip this step, I'm not likely to do it again.

Here's the recipe I used--feel free to try my experiment for yourself, or honor the good Mrs. Paul Franklin, Wife of Governor, from Phoenix, AZ, and follow the directions correctly (listed correctly below). By the way, this is the book the recipe is from--isn't the cover just too much?

Chocolate Chip Cookies

From Favorite recipes of America desserts Including Party Beverages, Vol 1  

Ingredients

  • 1/2 cup butter
  • 1/2 cup white sugar
  • 1/2 cup brown sugar, packed
  • 1 egg, well beaten
  • 1 cup, plus 2 tablespoons, sifted flour
  • 1/2 teaspoon baking soda
  • 1/2 teaspoon salt
  • 1/4 teaspoon hot water
  • 1 6-ounce package semisweet chocolate morsels or pieces
  • 1/2 cup chopped nuts (optional)
  • 1/2 teaspoon vanilla

Procedure

Cream butter and sugars; add egg and beat well. Sift together dry ingredients (except for chocolate); add to creamed mixture. Add hot water; mix until well blended. Add chocolate pieces, nuts, and vanilla, and blend just until incorporated. Drop from teaspoon onto greased cookie sheet. Bake in a 375-degree oven for 10-12 minutes. Makes 3 1/2 dozen small cookies.

© Cakespy, all rights reserved. Powered by Squarespace.