Home Home Home Home Home Home Home
CakeSpy

Featured: 

My adventure at Ben & Jerry's in Vermont!


Unicorn Love: the Eating Disorder Recovery Blog


 Buy my brilliant books!

Buy my new book!

Buy my first book, too! 

CakeSpy Online Retail!


Archives
Gallery

Fantastic appliance for cake making on DHgate.com

everyrecipe.co.nz

Craftsy Writer

Entries in recipes (704)

Monday
Jul122010

Taste the Rainbow: Kaleidoscope Cookies Recipe

Sure, you could get a sweet thrill from checking out the pretty patterns in a kaleidoscope.

But it's much more delicious to taste the rainbow--delivered via crumbly, buttery, colorful Kaleidoscope Cookies.

These cookies were a hit at Crafty Wonderland when Sara Bir served them to go along with Joe Ryckebosch's colorful tape art, and so I knew they'd be the perfect choice to serve at this past weekend's Urban Craft Uprising.

Plus, they were from my BFF cookbook, Betty Crocker's Cooky Book. Yes!

They were a nice echo to the colorful melange of t-shirts with my artwork, and the crowds--no pun intended--ate them up. I made a big batch--perfect for a big crowd. Here's the recipe.

Kaleidoscope Cookies

Adapted from Betty Crocker's Cooky Book  

Makes many (like 60)

 Ingredients

  • 1 pound (4 sticks) unsalted butter, softened
  • 2 cups confectioners' sugar, sifted
  • 1/2 teaspoon salt
  • 2 teaspoons vanilla extract
  • 1 pound 6 ounces (about 4-½ cups) all-purpose flour
  • Various colors of food coloring paste or gel
  • 1 cup or so sprinkles or colored decorating sugar


 Procedure

  1. In an electric stand mixer, beat the butter with a paddle attachment until it is creamy. Add the confectioners' sugar and salt and beat for several minutes, until all of the ingredients are well incorporated and no lumps of powdered sugar remain. Beat in the vanilla extract, then add the flour and beat until a soft dough forms.
  2. Divide the dough into 3 parts. Incorporate the food coloring or gel of your choosing into each color--be sure to make the colors quite vibrant, as they will slightly fade in the oven (not much, but a little), and knead until the color is evenly distributed. I left one part white, used a little red food coloring for a pink section, then more red for a red section for mine.
  3. Roll each tinted segment into a log about a foot long. Then squish the three logs into one long log and roll until they form one roll (I got a nice wavy design when I did this).
  4. Gently roll and squish the finished log until it’s about a foot long. Then cut it in half to form two logs and roll each one of those until you have a number of logs that are 1-1/2 to 2 inches in diameter--it will be quite a few. If desired, place the sprinkles or decorating sugar on a large, shallow plate and roll each log to coat. Wrap the logs in wax or parchment paper and chill overnight or freeze up to a month.
  5. Remove the dough from chilling--if it was in the freezer, let it warm up just until you can handle it, but not until it is soft Preheat oven to 375 F.
  6. Unwrap the logs and, with a sharp knife, slice them into coins about 1/3-inch thick. Place on ungreased cookie sheets (the cookies will not spread much as they bake).
  7. Bake two sheets at a time for about 7-9 minutes, rotating halfway through baking, until the cookies have firmed up but are not browned. Remove the cookies to a wire rack to cool completely. Store in an airtight container.


Thursday
Jul082010

So Bad, But So Good: Chocolate Chip Cookie Dough Filled Funfetti Cupcakes

Nobody's going to challenge the idea that cupcakes are delicious. It's like, fact.

But you know what? They're even better when stuffed with cookie dough.

I learned this, of course, when I found myself with a boatload of extra Funfetti cake mix and cookie dough from making a Cookie Cake Pie, and decided to make a batch of cupcakes with a dollop of dough dropped in each cup of batter before baking.

Now, if you've never done it yourself, here's what you can expect.

First: A heads up: the cookie dough will sink--the cake will bake around and over the dough. But this is OK, because each one has an unexpected, gooey little sugar bomb inside.

Note: It will be gooey, by the way, so if you are worried about things like, oh, salmonella, use an egg-free cookie dough.

Second, and perhaps more importantly: It will delight you and your friends to eat them.

Now, I'm going to confess: my favorite delivery method is with either Funfetti or Rainbow Chip cake (a mix. Yup, I said it). But please, please, please: Make your own frosting. It's so easy, and it adds an extra dimension of delicious to this ever-so-slightly trashy (but delightfully so) treat.

Here's the recipe I used.

Chocolate Chip Cookie Dough-filled Cupcakes

 Components

  • 1 box Funfetti or Rainbow chip cupcake mix
  • 1/2 batch of chocolate chip cookie dough (um, bake the rest as cookies)
  • 1 batch fudge buttercream (recipe below, as found on AllRecipes)

Procedure

  1. Prepare cupcake batter per box instructions--but before baking, fill the cups about 2/3 full, then give each one an added dose of awesome by adding a generous spoonful of cookie dough.
  2. Bake as directed on box instructions.
  3. Remove from oven and let cool. 
  4. Meanwhile, make the frosting (recipe below). When the cupcakes are room temperature, frost liberally, and enjoy.

Chocolate Fudge Buttercream

  • 1/2 cup butter
  • 1/4 cup shortening
  • 1/3 cup unsweetened cocoa powder
  • 2 cups confectioners' sugar
  • 2 tablespoons milk
  • 1 cup hot fudge topping
  • 1 teaspoon vanilla extract

Procedure

  1. Cream together the butter or margarine with the shortening.
  2. Sift the cocoa with the confectioners' sugar and add to the creamed mixture. Mix together adding 1 tablespoon at a time of milk to keep mixture smooth. Don't add more than 1/4 cup of milk.
  3. Add the hot fudge topping and the vanilla extract. Blend until smooth and creamy.

P.S. In case you were wondering how the Cookie Cake Pie came out? Delicious.

Wednesday
Jun302010

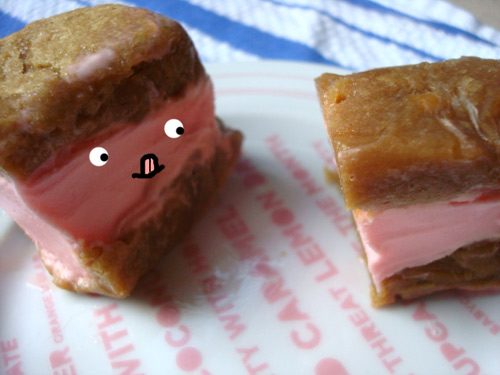
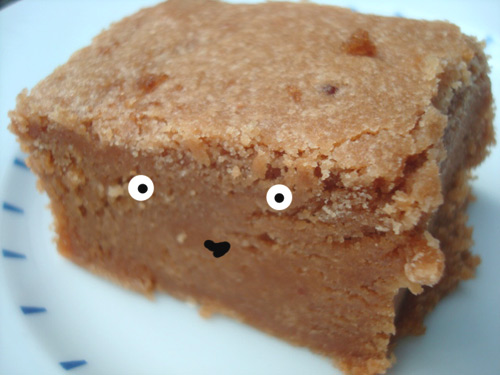
Strawberry Blondies: Decadently Delicious Ice Cream Sandwiches

What's better than a blondie?

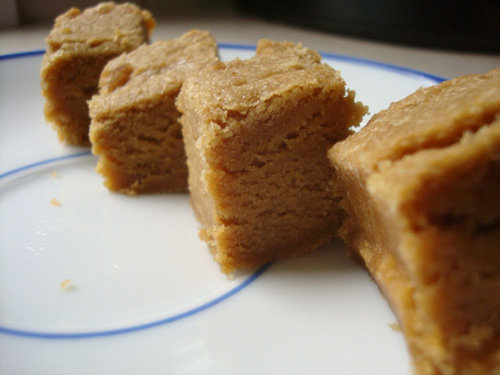
How about a peanut butter blondie?

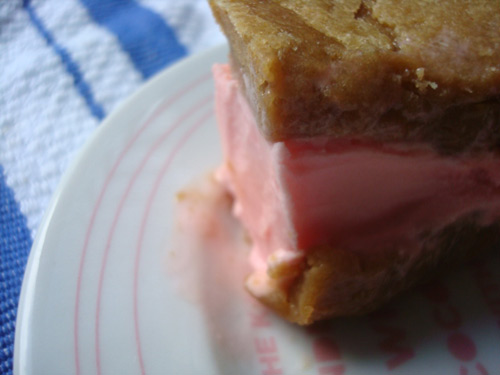
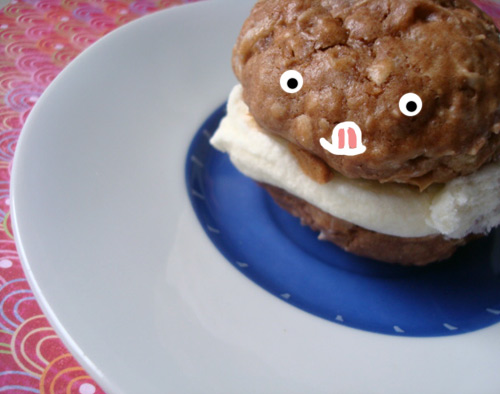
And even better than that...how about two layers of peanut butter blondie sandwiched around sweet, rich, strawberry ice cream?

Forget blonde. Forget brunette. One bite of this confection and you'll only see strawberry blond(ie).

Starting out with my favorite blondie recipe (from the absolutely wonderful book All American Desserts by Judith M. Fertig) made awesomer with a decadent dose of creamy peanut butter, the addition of ice cream is hardly necessary, but it sure is welcome: the strawberry flavor with the peanut butter give an echo to the classic peanut butter and jelly pairing, but this end result is far sweeter--the perfect summery indulgence.

Here's how you make the magic happen in your own kitchen.

Strawberry Blondie Ice Cream Sandwiches

- Makes 12-24, depending on how big you want 'em -

Ingredients

  • 2 cups flour
  • 1 teaspoon baking powder
  • 1 teaspoon salt
  • 1/2 to 3/4 cup peanut butter (I used Mighty Maple)
  • 2/3 cup unsalted butter, melted
  • 2 cups packed dark brown sugar
  • 2 large eggs, lightly beaten
  • 2 teaspoons vanilla extract
  • To fill: 1-2 pints (depends how hungry you are) strawberry ice cream--do yourself and buy a good kind.

Procedure

  1. Preheat your oven to 350 F. Lightly grease and parchment-line a 9x13 or 8x8-inch pan (I used 8x8 for fat, thick blondies).
  2. It's time to make the blondie batter. Sift together the flour, baking powder, and salt into a medium-sized mixing bowl. Stir in the pecans or walnuts (or no nuts, if you don't want 'em) and set aside.
  3. With an electric mixer, beat the melted butter and brown sugar together in a large mixing bowl. Beat in the eggs and vanilla. Beat in the flour mixture, bit by bit, mixing well after each addition. I added in the peanut butter last, mixing until incorporated. The batter was super thick; spread it into your pan.
  4. Bake for 25-30 minutes, or until a toothpick comes out mostly clean when inserted in the center. If anything, it's better (taste-wise) to err on slightly under-baked.
  5. Let cool completely. Cut into squares.
  6. Cut each square in half lengthwise and place a dollop of strawberry ice cream on top of the bottom half. Put the top half on top of the ice cream to form a sandwich. Wrap in waxed paper or plastic wrap and lightly flatten with hands to make the ice cream flush with the blondie layer. Chill in the freezer for several hours before serving. Eat immediately after removing from the freezer.


Tuesday
Jun292010

Mac Attack: Chocolate Peanut Butter Macaroons Recipe

Macaroons don't really get much attention these days--these slightly frumpy, lumpy coconut cookies receive far less attention than their glamorous cousin, the macaron.

But there's a variation which ought to make you take notice: the Chocolate Peanut Butter Macaroon. The result of some kitchen experimenting when I was testing out a recipe for Angel Food Cake Macaroons from The Cake Mix Doctor Returns , this was a decidedly happy outcome, resulting in a cookie which is chewy, moist, and incredibly rich. So rich that adding frosting is excessive, though? Not a chance. Sandwiched with some leftover frosting from my Hartford Election Day cupcakes, these macaroons even approach being cute--but more importantly, they're an absolute dream to eat.

Note: While I used a cake mix recipe for the macaroons, I have a feeling that adding the peanut butter and cocoa to just about any plain coconut macaroon recipe would probably work out fine.

Chocolate Peanut Butter Macaroons Recipe

Adapted from Angel Food Macaroons from The Cake Mix Doctor Returns

- Makes about 48 small cookies -

Ingredients

  • 1 package (16 ounces) Angel Food Cake Mix
  • 1/2 cup water
  • 1 1/2 teaspoons vanilla extract
  • 3 cups sweetened flaked coconut
  • 1/2 cup peanut butter (smooth, or lightly grainy textures, work best--don't use chunky. Or low fat)
  • 2 tablespoons cocoa powder
  • You'll need: Parchment paper, for lining baking sheets

Procedure

  1. Preheat oven to 350 F. Line two baking sheets with parchment paper; set aside.
  2. Place the cake mix, water, and vanilla in a large mixing bowl; mix in your electric mixer on low speed until smooth, about 30 seconds. Stop and scrape down sides of the bowl. Increase speed to medium and beat for one more minute. 
  3. Add your peanut butter and cocoa powder and mix on low speed just until incorporated.
  4. Fold in the coconut.
  5. Drop the dough by rounded teaspoonfuls about 2 inches apart on your prepared baking sheet. Place the baking sheet in the oven and bake the macaroons until they are set and just browned lightly on the edges--about 10-12 minutes.
  6. Remove from the oven and slide the parchment paper with macaroons on top onto a wire rack to cool for five minutes. Using a small metal spatula, remove the macaroons from the paper. You can re-use the parchment paper if you still have any dough left over as the macaroons will come off quite cleanly.
  7. If desired, once cooled, turn over frost the bottom (flat side) of half of the macaroons and sandwich together with a second one. I used the leftover frosting from this recipe, and man, was it good.
Monday
Jun282010

Look to the Cookie Sandwich: Black and White Ice Cream Sandwich Cookies

Paul Simon once sang that "everything looks worse in black and white". Clearly, the guy had never sampled a black and white ice cream sandwich cookie. 

Now, technically the black and white cookie isn't a cookie at all, but a cake--a drop cake, to be exact. So you know what that means? This is basically a trinity of awesome: cakey cookies, sweet frosting, and creamy, rich ice cream. 

And due to its technical cake status, it's what I've decided to enter as my entry in the TLC Cake Crew's first challenge! Curious to hear more?

And once baked, cooled, and stacked, these babies make you remember what summer desserts are all about: pure, unadulterated joy.

In fact, there's only one thing about this black and white treat that might give you pause: if you choose to alternate the alignment of the frosting and ice cream flavors, which side do you eat first?

For the full entry and recipe (including cookies adapted from David Lebovitz's newest book, Ready for Dessert), visit Serious Eats! But for the reader's digest version, here are the instructions for assembly--have one scoop of vanilla, and one of chocolate ice cream, ready for each sandwich.

Assembly of Black and White Ice Cream Sandwich Cookies

(makes about 12 sandwiches using the recipe linked above)

Get out your ice cream, and let it sit outside of the freezer for 10 minutes or so to soften a bit before assembling. I used a carton of Neapolitan ice cream so that I could grab spoonfuls right along the chocolate-vanilla line to sandwich between my cookies. Turn one of the unfrosted cookies so that the flat side is up; place a nice-sized scoop of vanilla-chocolate ice cream directly on top. Using a spoon, lightly flatten the top of the scoop to make room for the rounded bottom of the cookie that you'll be placing on top. Place the frosted cookie on top, and gently press down so that the sandwich comes together. Using a butter knife, gently smooth the sides of the ice cream so that it is flush with the edges of the cookie.

Wrap in plastic wrap or waxed paper, and store in the freezer for at least one hour to allow the ice cream to set. Enjoy immediately upon removing from the freezer.

Saturday
Jun262010

Big Fun: An Enormous, and Delicious, Cinnamon Roll

Have you ever wondered "what would happen if you baked a package of pop-n-bake cinnamon rolls as one long, continuously huge cinnamon roll?".

If so, you're not alone. And happily, I have the answer: it's basically the easiest way ever to make a big pile of awesome. And, ah, you know, work your way toward morbid obesity.

The finished product vaguely resembles a cross-section of a very old tree--but in this case, each ring in its spiral is a layer of delicous.

Now, I'm not quite sure if these pictures really convey scale. If you need a realistic idea of the scale of this thing, consider the size of a football player's head, in a helmet, and you'll be getting the idea.

A Very Large Cinnamon Roll

Serves 1-8, depending on how hungry you are

Ingredients

Procedure

  1. Preheat oven to 350 F.
  2. Place one of the rolls in the center of a large, lightly buttered baking pan (either 9x9 or 9x13-inch). Unroll the next one and continue it in a spiral around the first one; repeat with the succeeding rolls until you have one long, continuous snail of a cinnamon roll.
  3. Bake 25-29 minutes or until browned.
  4. Spread with the provided icing.
  5. Enjoy. 
Wednesday
Jun232010

America the Sweet: United Cakes of America, and Hartford Election Cupcakes

Let's talk for a minute about the new book United Cakes of America: Recipes Celebrating Every State by Warren Brown, owner of the CakeLove empire in the DC area.

I love the idea of this book: a sweet show of patriotism, dedicated to celebrating the cakes unique to each region of the USA, including recipes and stories.

And for the most part, I love the result: it's beautifully designed, well written, and so far, the recipes are tasting most excellent. 

My only reservation about the book isn't so much a complaint about the content as a wish that even more had been done to delve into the history--including the hows and whys--of each region's cake. Several of the entries--Hartford Election Day Cake, Hummingbird Cake, and Red Velvet Cake, for instance--come with insightful histories and thoughts on why the cakes might have come into their own in a certain region, and I found these to be the most fascinating parts of the book. However, other entries are more loosely tied to a region, simply inspired by other flavors popular in the area rather than truly zeroing in on the region's cake specialty. For instance, the Washington entries are for Apple Cake and Coffee Buttercream, respectively. While both apples and coffee definitely have a strong presence in Washington, and I have no doubt that the recipes are delicious, I wouldn't consider these cakes that really represent the area.

But you know what? If the only reservation about this book is that I wanted more, that's really not such a bad thing. 

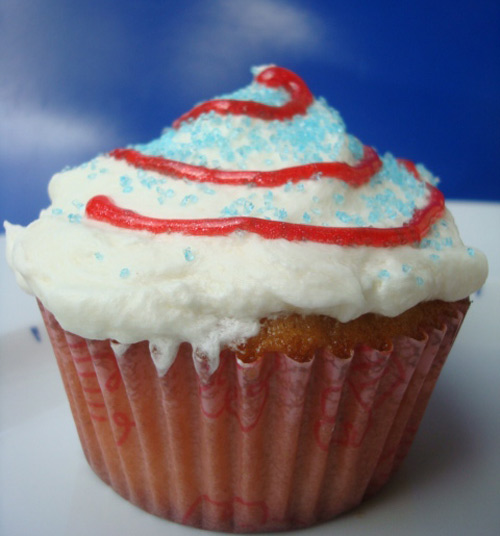
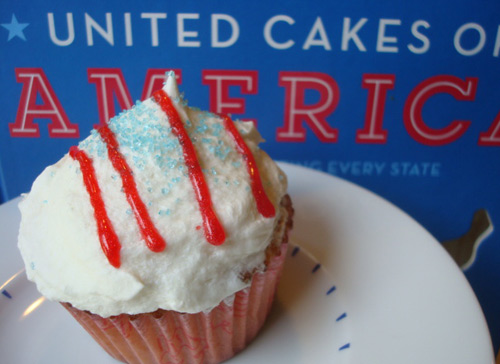
Here's one of my favorite entries so far, the Connecticut cake: an updated version of Hartford Election Day Cake, which was probably an American adaptation of English fruitcakes, which has since evolved into the below delicious spice cake. Spicy and flavorful, these cupcakes are quite light, but don't worry--a healthy dollop of the old-fashioned milk buttercream (which, by the way, smells and tastes so good that you might just want to lick the bowl) anchors them down quite deliciously. And it's a perfect recipe to dress up in red, white, and blue for the 4th of July!

Hartford Election Day Cupcakes

Makes about 11 cupcakes

Dry ingredients:

  • 8 ounces (1 cup) superfine granulated sugar
  • 5 ounces (1 cup) all-purpose flour
  • 1 tablespoon potato starch
  • 1⁄8 teaspoon kosher salt
  • ½ teaspoon  nutmeg, freshly grated
  • Pinch of allspice
  • Pinch of salt
  • 1⁄8 teaspoon baking soda

 Wet ingredients:

  • 3 ounces (6 tablespoons) butter, melted
  • ¼ cup half-and-half
  • 1 tablespoon rum
  • ½ teaspoon vanilla extract
  • 2 whole eggs
  • 1 egg yolk

Procedure 

  1.  Preheat the oven to 325°F and place the rack in the middle position. Lightly coat a cupcake tray with nonstick oil-and-starch spray and line 10 of the cups with paper liners.
  2. Measure and combine all the dry ingredients in a deep bowl. Whisk lightly for about 15 seconds to blend.
  3. Combine all the wet ingredients in a container with a tight-fitting lid and shake well for 15 seconds.
  4. Lightly whisk the wet ingredients into the dry ingredients. This should take about 15 seconds.
  5. Scoop or pour 2 ounces of batter into the paper-lined cups. (Using a food scooper or ladle works best.)
  6. Bake for 20 to 25 minutes, or until the tops of the cupcakes are golden brown and a wooden skewer inserted in the center of one comes out clean or with just a few crumbs.
  7. Cool the cupcakes for five minutes before removing them from the tray. When they are room temperature, frost or decorate them with Old-Fashioned Milk Buttercream (recipe below).

 Old-Fashioned Milk Buttercream

Yield: Enough for one 9-inch layer cake or 24 cupcakes (note: it is more than you'll need for the cupcakes, but it tastes good enough to eat by the spoonful)

  • 1 cup milk
  • 2 ounces (¼ cup) all-purpose flour
  • 8 ounces (2 sticks) unsalted butter
  • 8 ounces (1 cup) superfine granulated sugar
  • Pinch of salt
  • 2 teaspoons vanilla extract

 Optional garnish: sprinkles, decorating gel, etc.

 Procedure

  1. Quickly whisk together 4 tablespoons of the milk with the flour. This slurry will be somewhat thick, so whisk thoroughly to make it smooth. Press out any lumps with a flexible spatula, if necessary.
  2. Whisk in the rest of the milk and transfer the mixture to a 2-quart heavy-bottom saucepan. Bring to a simmer for about 30 seconds over medium heat, whisking the whole time.
  3. Remove the pan from the stove and place plastic wrap directly against the milk’s surface. (This is the best method to prevent a skin from forming.) Cool to room temperature.
  4. Combine the butter, sugar, salt, and vanilla in the bowl of a standing mixer fitted with the paddle attachment and mix at medium to high speed for 5 minutes.
  5. Pour the cooled milk-and-flour mixture into the bowl and beat for another 5 minutes, or longer, as needed to achieve a spreadable consistency.
Sunday
Jun202010

Essie's Cookies: A Sweet Treat From Betty Crocker's Cooky Book

Well, it was natural that I would feel an affinity with a recipe called "Essie's Cookies"--after all, Essie sounds like Jessie, and that's me!

But rhyming namesake aside, what do these cookies have to offer for eaters? Well, according to the intro in what you have to know is my favorite cookie cookbook, Betty Crocker's Cooky Book, they are a "crisp, crunchy, good-eating cooky". Quel mysterieuse! Curious, I whipped up a batch.

Turns out, these are an amazingly easy rolled sugar cookie, and true to BC's word, very "good-eating". Visiting parents favored the ones from the back of the pan which were crispy on the edges; Mr. Spy and I ate up the softy ones from the front (because no, I didn't rotate the pan--even though I know you're supposed to. Whatevs).

Oh, and in the spirit of abbreviation (and ingredient availability chez moi) I omitted the split almonds on top. Don't tell Essie, but I think they were fine without.

Here's the recipe:

Essie's Cookies 

Makes about 36 cookies

Ingredients

  • 1/2 cup butter
  • 1 cup sugar
  • 1 egg
  • 1/2 teaspoon almond extract
  • 1 3/4 cups flour
  • 2 teaspoons baking powder

Optional: 1 egg white (for an egg wash), 1 teaspoon cinnamon, 1/4 cup sugar, and toasted split almonds to top the cookies (I just sprinkled with sugar)

Procedure

  1. In a stand mixer, mix butter, 1 cup sugar, egg, and flavoring thoroughly.
  2. In a separate bowl, stir together flour and baking powder.
  3. Blend the flour mixture into the wet mixture. Chill dough for at least an hour.
  4. Heat oven to 375 F. Roll dough 1/16" thick on a lightly floured, cloth covered board. Cut with cookie cutters; place on an ungreased baking sheet.
  5. If you're doing the egg wash business, beat the egg white with a fork and brush over cookies; sprinkle the cinnamon and sugar on top, and garnish with toasted split almonds. Or, if you're lazy like me, just sprinkle with sugar and pop 'em in the oven.
  6. Bake 8-10 minutes, or until lightly brown at the edges.
Friday
Jun182010

White Light: White Chocolate and Apricot Cookies Recipe

I'll confess: one of my favorite things about the publication Seattle Woman Magazine is that they often feature recipes from Macrina Bakery, a famous bakery around these parts. And in a recent issue, they featured a recipe for chocolate and apricot cookies. Delicious combination? I think so.

In my version, they get an even sweeter makeover by using white chocolate chips and a handful of candied walnuts, making for a tempting treat for customers at my store!

Of course, if you can't stop by to try them, make the magic happen in your own household: here's my adaptation of the recipe.

White Chocolate and Apricot Cookies

Adapted from Macrina Bakery

Makes 15 jumbo cookies, or up to 36 small cookies

Ingredients

  • 2 1/4 cups unbleached all-purpose flour
  • 1 teaspoon baking soda
  • 1/4 teaspoon salt
  • 1/2 teaspoon finely ground espresso or coffee
  • 10 ounces white chocolate chips
  • 3/4 cup apricots, diced
  • a generous handful of candied walnuts (optional)
  • 8 ounces butter, at room temperature
  • 1 1/2 cups sugar (original recipe called for half white and half brown, but I only had white--still tasty)
  • 2 eggs
  • 2 teaspoons pure vanilla extract

Procedure 

  1. Combine flour, baking soda, salt, and espresso in a medium bowl. Mix with a whisk until evenly distributed. Add chocolate chips and apricot bits and mix well. Set aside.
  2. Combine the butter and sugar in a stand mixer. Using the paddle attachment, mix on medium speed for about 5 minutes, until the mixture is smooth and pale in color. Add 1 egg at a time, mixing until incorporated. Scrape down the sides of the bowl, and then add the vanilla. Continue mixing until butter, sugar, eggs, and vanilla are all incorporated (about 1 minute). Scrape down the sides of the bowl.
  3. Add the dry ingredients in 3 additions. Mix on low speed for no more than 1 minute. Remove bowl from mixture and do a final mix with a rubber spatula.
  4. Remove from bowl and chill for at least one hour.
  5. Preheat oven to 350. Line two baking sheets with parchment.
  6. Scoop dough with a medium-sized ice cream scoop to form 1-inch balls. Leave at least an inch and a half around each cookie to allow for some spreading.
  7. Bake cookies for 15-18 minutes, turning about halfway to ensure even baking. Cookies should be golden at the edges but soft in the middle.
  8. These cookies will keep for up to 3 days in an airtight container.


Wednesday
Jun162010

Wild Oats: Oatsies Recipe From Betty Crocker's Cooky Book

Pop Quiz: when faced with the prospect of imminent Oatsies, the proper reaction is:

A. Panic--you must run from this menace!

B. Dread--you're definitely going to need to visit the doctor.

C. A world-weary sigh--you don't need this today.

D. Delight--you're faced with the prospect of a delicious treat!

Of course, anyone who knows Oatsies knows that the answer is D: you are faced with the prospect of a delicious treat. But for those who may not be in the know, let me share with you what exactly what an oatsie is, from my BFF cookbook, Betty Crocker's Cooky Book:

A delicious caramel-like oat confection topped with chocolate. Shared with us by Charlotte Johnson of our staff, who makes them often for her college-student son and daughter.
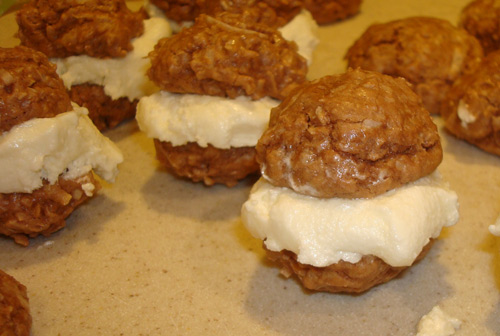
And a most sincere thanks to Ms. Johnson, wherever she may be, for these are indeed a treat to be treasured: sweet, lightly salty, nutty, oaty, caramelly, and extremely addictive.

Oatsies

Ingredients

  • 2 cups rolled oats
  • 1/2 cup brown sugar (packed)
  • 1/2 cup butter
  • 1/4 cup corn syrup (recipe calls for dark; I used light because it is what I had)
  • 1/2 teaspoon salt
  • 1 teaspoon vanilla
  • 1 package (6 ounces) semisweet chocolate pieces (I used these nice fat chips)
  • 1/4 cup chopped nuts (I used pecans)

Procedure

  1. Heat oven to 400 F.
  2. Mix oats and sugar in a large, heatproof bowl (you'll need to pour a hot mixture over it soon).
  3. Melt butter; add syrup, salt, and vanilla. Pour over the oats and sugar; mix well.
  4. Pat mixture into a greased square pan (I used 8x8-inches).
  5. Bake 8-10 minutes--do not overbake! (How do you know it's done? It will be lightly bubbling on the sides)
  6. Melt chocolate and spread on top--or, if you're like me and don't read directions thoroughly, just sprinkle on the chocolate pieces and let them melt on the still-hot mixture.
  7. Sprinkle nuts on top of this, and let cool (or, again, like me, don't follow the directions and eat immediately. Messy, but tasty). You'll need a pretty sharp knife to cut these, as they're pretty sticky. Happily, I have a sharp and fancy knife called the "Jessica" (like me!) with which I can do these things.
© Cakespy, all rights reserved. Powered by Squarespace.