Home Home Home Home Home Home Home
CakeSpy

Featured: 

My adventure at Ben & Jerry's in Vermont!


Unicorn Love: the Eating Disorder Recovery Blog


 Buy my brilliant books!

Buy my new book!

Buy my first book, too! 

CakeSpy Online Retail!


Archives
Gallery

Fantastic appliance for cake making on DHgate.com

everyrecipe.co.nz

Craftsy Writer

Entries in recipes (704)

Monday
May162011

Sweet Honey: Honey-Almond Cantuccini from Ancient Grains

I always love meeting a new cookie. So I was delighted to make the acquaintance of Cantuccini in the newly-released book Ancient Grains for Modern Meals: Mediterranean Whole Grain Recipes for Barley, Farro, Kamut, Polenta, Wheat Berries & More by Maria Speck, in which they are introduced thusly:

"Small almond biscotti are called cantuccini, or "little nooks" in the Tuscany region of Italy. These are honey-sweetened and delicately flavored with almonds in two forms--a finely ground meal and whole toasted nuts. Watch these twice-baked cookies closely, as you don't want them to brown too much and lose their fine fragrance. You will need extra almond meal for the work surface."

Honey-Almond Cantuccini

 Ingredients

  • 1 3/4 cups whole wheat pastry flour
  • 1 cup lightly packed almond meal (3.5 ounces)
  • 1/2 teaspoon sea salt
  • 1/2 cup coarsely chopped toasted skin-on whole almonds
  • 1/2 cup extra-virgin olive oil
  • 1/2 cup honey
  • 2 1/2 teaspoons vanilla extract
  • 2 teaspoons finely grated lemon zest

 Procedure

  1. Whisk together the pastry flour, almond meal, and salt in a large bowl, and then stir in the almonds. Make a well in the center. In a medium bowl, using a large whisk, thoroughly blend the olive oil, honey, vanilla, and lemon zest until thick and syrupy, about one minute. Add to the center of the dry ingredients and combine, using a rubber spatula or wooden spoon, just until a soft dough forms. Do not overmix. Cover the bowl with a plate and let sit at room temperature for 30 minutes.
  2. Meanwhile, position a rack in the center of your oven and preheat to 300 degrees F.
  3. Line a large rimless sheet with parchment paper.
  4. Lightly sprinkle your work surface with almond meal. Cut the dough inside the bowl into four equal pieces. It will be soft and sticky. Briefly knead each piece a few times to smooth and form into a log, about 7 inches long and 1.5 inches wide. If almond pieces protrude, gently press them in while working the dough. Add more almond meal to your work surface if needed. Repeat with the remaining dough. Place logs on the prepared baking sheet, leaving about 2 inches in between.
  5. Bake the logs until the tops show small cracks, firm up, and just start to brown--32 to 35 minutes. Remove from oven, and carefully slide the parchment paper with the logs onto a wire rack to cool for about 15 minutes. Leave the oven on.
  6. Transfer logs to a cutting board. Using a large, sharp serrated knife, cut each log diagonally into 1/2 inch thick slice. Return the parchment paper to the baking sheet; place the slices upright (not cut-side up) on the baking sheet.
  7. Bake until the cantuccini feel dry to the touch at the cut sides (not on the top) and just start to brown at the edges, 15-17 minutes. Transfer the cookies to a wire rack to cool completely before storing. They freeze well for up to 1 month.


Monday
May162011

Total Brownie Overload: Brownie Upside-Down Brownie Recipe for Serious Eats

Om nom nomWhat on earth is a Brownie Upside-Down Brownie?

First, think to yourself: "Pineapple Upside-Down Cake". Now, replace "pineapple" with "brownie" and "cake" with "brownie." Now you are getting the idea. This brilliant notion came to me by way of Vickie, the designer behind A Mano Jewelry and, apparently, a whiz in the kitchen.

Starting with a buttery, brown sugar base, a layer of bite-sized brownies is then coated with decadent brownie batter, baked and then flipped for the most decadently, buttery, chocolatey treat you could possibly imagine. Advice: eat now, and diet another day.

Note: Use either pre-packaged brownie bites, such as these, or homemade (almost erring on under-baked) brownies for the topping part; they will simply melt into the brownie batter in the most deliciously chocolaty fashion.

For the full entry and recipe, visit Serious Eats!

Sunday
May152011

Chocolate Love: Mom's Chocolate Cake Recipe from Macrina Bakery

Photo: Macrina BakeryIt's the most wonderful time of the month, a week in, when the rent has already been paid and we all receive Macrina Bakery's recipe of the month in our inbox. Le nom!

This month, they've featured "Mom's Chocolate Cake", which is introduced thusly: "This dessert is named in honor of those homemade chocolate cakes that moms are famous for. I like to apply the frosting in big swirls."

Here's how to make it happen at home.

Mom's Chocolate Cake

INGREDIENTS:

Makes 1 (9-inch) layer cake
For the cake: 

2 eggs
3/4 cup whole milk
1/3 cup canola oil
2 teaspoons pure vanilla extract 
1-3/4 cups granulated sugar
1-1/2 cups unbleached all-purpose flour
1/4 cup dark cocoa powder, sifted
1 teaspoon baking powder
1 teaspoon baking soda
3/4 teaspoon salt
3/4 cup boiling water

For the vanilla syrup: 
1/4 cup pure vanilla extract
1/4 cup granulated sugar
1/4 cup water

For the chocolate frosting: 
12 ounces unsweetened chocolate, coarsely chopped
1 pound (4 sticks) unsalted butter, at room temperature 
3-1/2 cups powdered sugar, sifted
2 tablespoons pure vanilla extract

PREPARING THE CAKE LAYERS:
Preheat the oven to 325°F. Prepare a 9 x 3-inch cake pan by brushing the inside with oil, then lining the bottom with a 9-inch circle of parchment paper. Set aside.

Combine eggs, milk, canola oil, and vanilla extract in a medium bowl and mix well with a whisk. Set aside.

Sift sugar, flour, cocoa powder, baking powder, baking soda, and salt into the bowl of a stand mixer. Toss with your hands to combine. Attach the bowl to the stand mixer. Add the wet ingredients to the bowl of dry ingredients. Using the whisk attachment, mix on medium speed until combined, about 2 minutes. Keep mixing as you add the boiling water in a slow stream, mixing just until the water is incorporated, about 30 seconds.

Pour the batter into the prepared cake pan. Place pan on center rack of oven and bake for 55 to 60 minutes or until cake is set in the center. Test center with a skewer to make sure the cake is done. Remove from the oven and let cool in the pan on a wire rack for at least 30 minutes.

PREPARING THE VANILLA SYRUP: 
Combine ingredients in a small saucepan and bring to boil over medium-high heat. Stirring frequently, cook until sugar is dissolved and the liquid is syrupy, 2 to 3 minutes. Remove from heat and let cool.

PREPARING THE CHOCOLATE FROSTING: 
Place chocolate in a medium stainless steel bowl. Place bowl on top of a saucepan filled with 2 inches of simmering water, making sure that the bottom of the bowl does not come in contact with the water. It’s important that the water be just simmering; if it’s too hot it will scorch the chocolate. Stir chocolate with a rubber spatula until all of the pieces have melted and reached a smooth consistency. Remove the bowl from the heat and let cool to room temperature.

Combine butter and powdered sugar in the bowl of your stand mixer. Using the paddle attachment, mix for 5 to 8 minutes to cream the butter. Start on low speed and gradually increase to medium. Starting out on a higher speed will likely result in a snow storm of powdered sugar, a real mess. When the butter mixture is light and fluffy, add the melted chocolate and mix until incorporated. Add the vanilla extract and continue mixing a few more minutes until the frosting is thick enough to spread. If the frosting gets too soft, simply chill it in the refrigerator to firm it up. If it stays in the refrigerator for too long, let it sit out for a few minutes and then re-whip it.

ASSEMBLING THE CAKE 
Invert the cooled cake to remove it from the pan. If it sticks, run a  sharp knife around the sides of the cake to release it from the pan. Peel the parchment paper off the bottom of the cake. Using a sharp bread knife, carefully cut the cake horizontally into 3 equal layers. Place the bottom layer on a serving plate or cardboard cake circle and brush it with a little vanilla syrup. Spread a generous amount of chocolate frosting (about 1/4 inch) over the cake. Top it with another layer of cake and repeat the process. Add the final cake layer. Place a dollop of frosting on top of the cake and spread it 1/8 inch thick, spreading any excess frosting down onto the sides. Spread a little more frosting on the sides until the entire cake has what bakers call a crumb coat: a thin underlayer of frosting that keeps crumbs out of the final layer of frosting. Crumbs will be clearly visible through the frosting. Chill the cake in the refrigerator for 20-30 minutes. The remaining frosting can stay at room temperature while the cake chills.

Remove the cake from the refrigerator and add the final layer of frosting. I like to create a swirl pattern in the frosting, just like the cakes I remember from childhood. Store in the refrigerator for up to 2 days. This cake is best served at room temperature, so remove it from the refrigerator 1 hour before serving. 

Thursday
May122011

Sweet Honey: Homemade Honeycomb Recipe from Cake Gumshoe Victoria

CakeSpy Note: This is a totally sweet guest post from Singapore-based Cake Gumshoe Victoria, who blogs here.

Honeycomb; noun: A wax structure made by bees featuring hexagonal cells where they store eggs and honey.
Sounds a little... gross.

Honeycomb; delicious: An amalgamation of honey, sugar and glucose lifted to bubbly heights with the addition of baking soda. Promises to melt into almost nothing when you crunch into it. Much better and made even better when coated in dark chocolate. It’s like a whole fleet of honeycomb pieces entering a diving competition.
 
My first encounter with the confection was when my sister introduced me to Violent Crumble; similar to Crunchie. It was strange, like cotton candy, it looked so large yet dwindled into sugar sweet nothing in your mouth with only an aftertaste of honey lingering. I’m not even sure it was real honey now that I think of it. Their ‘pores’ were uniform, definitely not hexagonal and much smaller than the ones found in homemade honeycomb. I wonder how they did it.
 
So today I decided I’d try my hand at making my own. It’s simple enough, starring only a few main characters; sugar, honey, glucose and baking soda. It starts with a big pot, a minor effort of stirring and a huge uproar of sugar-ness rising once the baking soda comes into contact with the hot caramel-like liquid. It’s pretty fun to watch, like a school volcano project, only this time, completely edible.
 
They’re great covered in dark chocolate, or if you’re feeling quite hardworking, bake a batch of cupcakes and use these babies as their crowning glory.

Honeycomb
(from Home Cooking by Rachel Allen)
  • 1 tsp sunflower oil
  • 325g caster sugar
  • 50g honey
  • 125g glucose
  • 1 tbsp baking soda
  1. Line a large baking tray with parchment paper and grease lightly with the oil.
  2. Place the sugar, honey and glucose in a large pot. Add 4 tablespoons of water and bring to a boil over high heat. Stir until the sugar dissolves and stay away once it does; just let it boil in peace. Simmer, without stirring, for 5-10 minutes or until it reaches 149°C (300°F).
  3. Immediately remove from heat and quickly whisk in the baking soda. The mixture will grow very quickly. Pour into the prepared baking tray, swirling to spread the mixture evenly. Leave to cool completely before breaking into chunks and shards. Store in an airtight container.
For chocolate coated honeycomb chunks, melt 150g of chocolate in the microwave and then after it’s cooled down, spread it evenly with a spatula over the honeycomb pieces or just let them plunge into chocolate heaven. Leave to set completely on baking paper.
 
For more great recipes, visit Victoria's blog!
Monday
May092011

Sweet Innovation: Cupcake-Stuffed Strawberries by 1 Fine Cookie

Photo: 1finecookieSo. It's been proven that cupcakes are better when stuffed with things. Truffles, mini pies, even cupcakes!

But what about when you stuff cupcakes in other stuff? 

Photo: 1finecookieTime to meet the greatest cake innovation that has ever met health food: cupcake-stuffed strawberries, dreamed up by my new favorite website, 1 Fine Cookie. A clever riff on cake truffles, these babies start with strawberries which are cut at the bottom to let the delicious cupcake-and-frosting slurry in, and then coated in chocolate or candy wafer coating; the result is extreme deliciousness and decadently addictive, not to mention clever as all get-out.

For the full tutorial and recipe, visit 1finecookie.com.

Monday
May092011

Magic in the Middle: Truffle-Stuffed Cupcakes Recipe for Serious Eats

Chocolate cupcakes are pretty great. But there's a way to make them even better: stuff 'em with truffles. We originally got the idea from Reddit.

It's an easy and quick addition: simply drop a chocolate truffle in each treat before baking. The rewards are many. The gooey little chocolate center not only adds a decadent richness to the cake, but also keeps it deliciously moist.

Note: What kind of truffles? I used Godiva Gems; while I haven't tried this recipe with other truffles, I feel as if it would work well with most truffles containing a more solid filling such as ganache, coconut, or caramel (avoid liqueurs and soft or oozing fillings).

Note: With half of the batch, I took care to ensure each truffle was fully covered with batter; with the other half, I simply dropped the truffles in the center of the cup before baking. The outcome was the same with all of the cakes: the truffles would sink to the lower center of the cupcake either way.

For the full entry and recipe, visit Serious Eats!

Thursday
May052011

Saltwater Sweetness: Saltwater Taffy Cream Pie Recipe

Now, you may not know this, but I hail from a magical land called New Jersey. And in that magical land, there is a magical snack that gives residents along the shore their secret, magical New Jersey powers. That snack is called Saltwater Taffy (and at this point, no, you are not invited to ask any follow up questions).

Now, the name may be misleading. This taffy doesn't actually contain saltwater, but instead is called such because it was popularized by the shore in Atlantic city in the late 1800s-early 1900s, and has been associated to a close proximity to the sea ever since. Dig?

But what is true is that it is a singular sensation of a confection: mellower and creamier than hard candies, with a texture that begs you to slowly savor rather than suck and bite. 

I don't know about you, but that's all I needed to decide it would make a great addition to a cream pie.

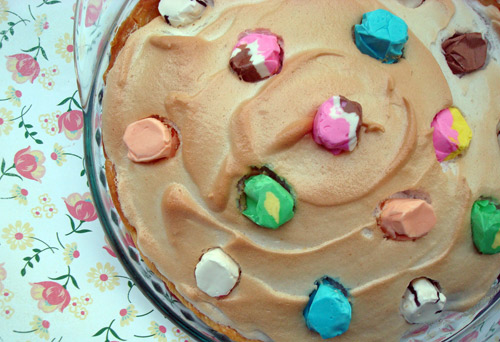
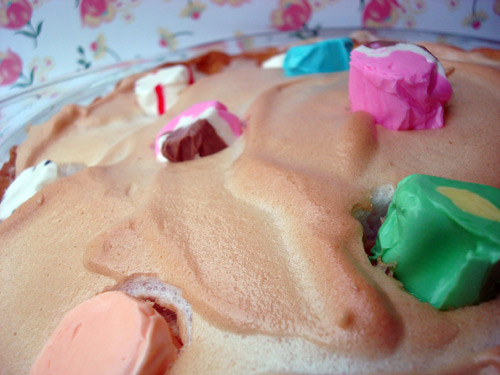
So here it is for you, friends: a modern marvel that I'm calling Saltwater Taffy Cream Pie. YES!

Saltwater Taffy Cream Pie

  • 1 9-inch pie crust (unbaked) - I tried out the Grand Central U-bake Crust, which I recently received a sample of, and it worked great!
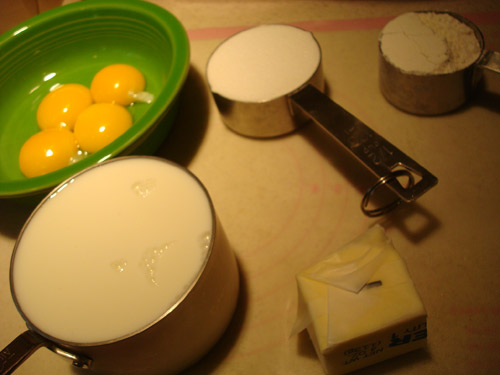
  • 1/2 cup plus 4 tablespoons sugar, divided
  • 1/3 cup all purpose flour
  • 1 1/2 cups milk
  • 4 large eggs, separated
  • 1/4 cup (1/2 stick) butter
  • 2 teaspoons vanilla, divided
  • 30 or so taffy candies (about 15 for the filling and as many as you'd like to garnish)
  • 1/4 teaspoon cream of tartar
  • 1/8 teaspoon salt

Procedure

  1. Preheat the oven to 400. Bake the pie crust 8-12 minutes (using pie weights), or until lightly brown. Set to the side to cool.
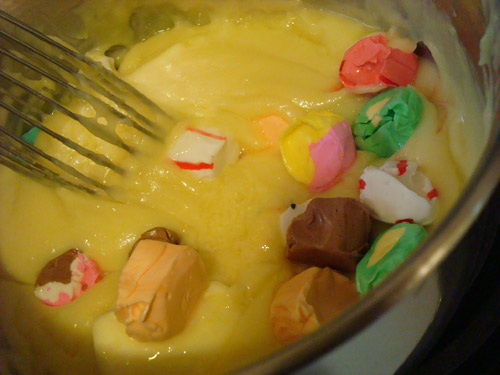
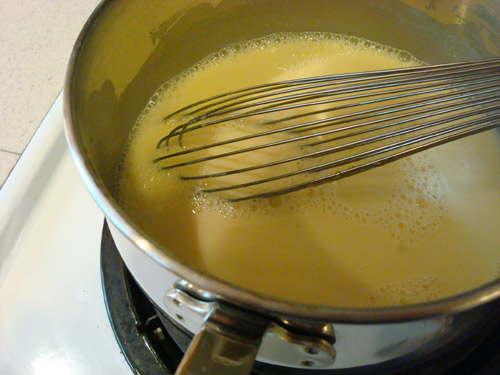
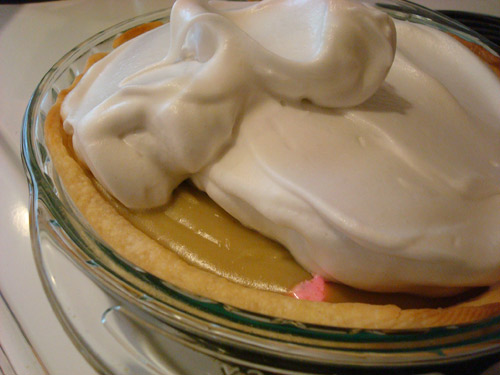
  2. In a medium saucepan, mix 1/2 cup sugar and the flour. Add the milk and stir until dissolved. Add the egg yolks and mix very well. Cook over low heat, stirring constantly, until thickened--this was about 15 minutes in total for me. Remove from heat and stir in the butter, 1 teaspoon of vanilla, and 15 or so of your taffy candies (um, unwrapped please). They may make bright swirls in the filling, which is...not necessarily pretty or appetizing. Power through it. Cool the mixture, and pour into the prepared pie crust.
  3. In a large bowl, beat the egg whites on high speed with an electric mixer, til stiff but not yet glossy. Sprinkle the cream of tartar and salt on top, and beat lightly. Slowly add the remaining sugar and 1 teaspoon vanilla, beating constantly until the meringue forms soft peaks and a nice glossy sheen, kind of like the consistency of shaving cream. Spread over the pie. Reduce oven heat to 325. Bake 8-12 minutes, or until lightly browned. I found that to brown evenly, it helped to shift the plate halfway through baking. Remove from the oven and let cool on a wire rack. Once cool, dot the top with extra taffy, if desired. Refrigerate leftovers.

Wednesday
May042011

Getting Loopy: Froot Loop Whoopie Pies Recipe from Munchin With Munchkin

Photo: Muchin With MunchkinCakeSpy Note: This is a guest post from Cake Gumshoe Christine, who blogs at Munchin With Munchkin. Let the NOM begin:

The first time I had a whoopie pie was 15 years ago and completely by accident. I had found a sandwich cookie recipe in one of my mother’s cook books and begged her to make it with me. I remember the chocolate cookies being moist like cake and the icing tasted like no other. We only made them once as the cookbook was lent to a friend and never seen again.

I would dream about those cookies and subconsciously was on the hunt for another fresh batch. Every recipe I tried after that became a horrid mess of typical vanilla icing and cookies that in no way resembled cake. Years later the whoopie pie trend emerged and I finally re-discovered that magical cookie of my childhood.
One evening, after being horribly nostalgic, I picked up a box of fruit loops as a late night snack. The first bite yielded memories of elementary school and early morning chaos. By the second bite I had a revelation! The mysterious taste of fruit loops was no longer a mystery!

I ran to my spice cabinet and searched through the endless glass bottles until I found one in particular; cardamon. The spice that only  saw the light of day during a curry cook-off was the secret ingredient in my childhood cereal!

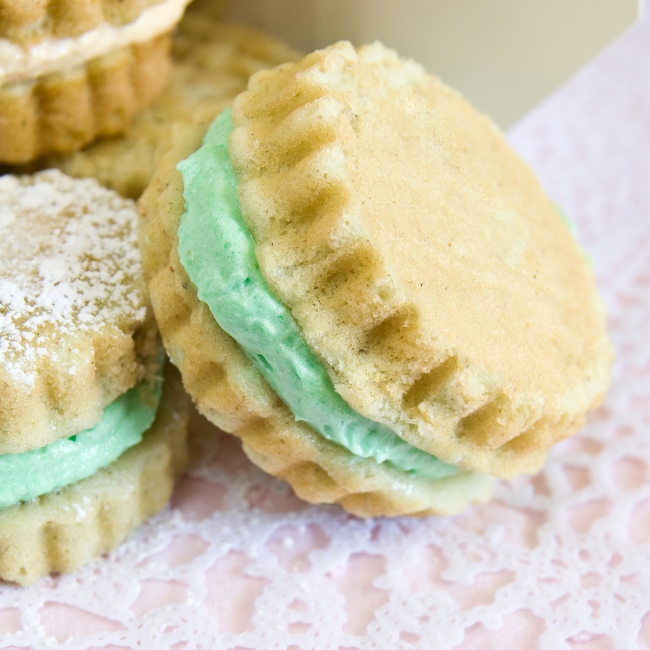
Upon this discovery I began to imagine all the new baking possibilities. Cardamon rice pudding, cardamon lime pie, cardamon cake, and that’s when it hit me; Fruit Loop inspired whoopie pies. Combining cardamon cookies with a light and fluffy fruit flavoured icing would make everything wrong in the world right. So today I say farewell to my diet (at least for now) and hello to orange and green coloured carbs.

Froot Loop Whoopie Pies

Cookies

  • 1 cup granulated sugar
  • ½ cup vegetable shortening
  • 2 eggs
  • 2 cups all purpose flour
  • 1 ½ Tsp. baking soda
  • ½ Tsp. salt
  • 1 cup buttermilk
  • 1 Tsp. vanilla extract
  • 1 Tbsp. ground cardamom

Lime Filling

  • ½ cup vegetable shortening
  • ¾ cup powdered sugar
  • ½ cup marshmallow cream
  • ½ Tsp Vanilla
  • 1 Tsp. Lime zest
  • 1 Tbsp. fresh lime juice

Mandarin Filling

  • ½ cup vegetable shortening
  • ¾ cup powdered sugar
  • ½ cup marshmallow cream
  • ½ Tsp Vanilla
  • 1 Tsp. Mandarin zest
  • 1 Tbsp. fresh mandarin juice

Procedure 

  1. Preheat Oven to 350.
  2. Line a baking sheet with parchment paper and spray with cooking oil; set aside. (Or alternately use a whoopie pie pan)
  3. In a large bowl cream together the sugar with ½ cup shortening using an electric mixer. Add eggs and continue to mix until well combined.
  4. Add flour, baking soda, salt, buttermilk, vanilla and cardamon and blend on low speed for one minute. Increase speed to medium and continue to mix for an additional two minutes ensuring to scrape down the sides.
  5. Scoop one tablespoon of batter onto the prepared pan about an inch apart. Bake in the oven for 8-10 minutes until no indentation appears when the top is lightly touched.
  6. Let cool on cookie sheet or in whoopie pie pan for two minutes and then transfer to a cooling rack until cooled.
  7. While cookies are cooling prepare the filling. Combine all ingredients in a medium bowl. Using an electric mixer beat on low for one minute.
  8. Add desired amount of food colouring, increase speed to high and continue to beat for an additional two minutes. Refrigerate until ready to use.
  9. To assemble cookies place a dollop of icing on the centre of the flat side of one cookie. Top with another cookie and press gently together to evenly spread the icing. Repeat for all cookies.


Makes about 20 sandwich cookies

Monday
May022011

Cinco de Sweet Mayo: Cinnamon Sugar Dessert Chips With Fruit Salsa Recipe

Everyone knows that chips and salsa are an ideal accompaniment to margaritas and a delicious precursor to a Cinco de Mayo meal.

But what about giving them a sweet makeover to continue the party post-dinner?

Say hello to Cinnamon Sugar Dessert Chips with Fruit Salsa, a dish wherein plain flour tortillas are brushed with a decadent cinnamon-flecked brown sugar and butter mixture and baked until crispy, then served with fruit preserves. Like its cousin Pie Fries, this dish is a snap to prepare and makes for some sweetly addictive eating.

For the full entry and recipe, visit Serious Eats!

Sunday
May012011

Pie Slam Profiles: Pake Recipe and Story by Alexander

CakeSpy Note: This is part of a series of Pie Slam Profiles, featuring the recipes and stories of each of the 9 entrants in last week's Pi(e) Day Pie Slam! This entry came from Alexander, who made the ultimate dessert: a Pake (a pie baked into a cake!). Here's his story:

 Though we all know of Thomas Cake, know the holiday and have seen the statues of him, most do not know his humble beginnings.

As a young cupcake Thomas attended a mostly pie school. The tartlets would all surround him, throw pits at him, mock his egg content, pull at his ruffled cupcake clothes and call him nothing without frosting.

Thomas hoped to find a friend in the also maligned Concord grape tartlet but Concord’s cruelty ran deepest of them all. He’d shove Thomas into the wet dirt, calling him a mud pie.

The adult pies would look the other way, saying things like “Tartlets will be tartlets,” and “that little cupcake just needs a thicker crust.”

As Thomas grew older, almost a full sized cake, he began stuffing himself with cherries to try and fit in with the pies. But his cake brethren despised those of their kind who filled themselves with fruit, for nothing was more reviled than a fruit cake. Once, his father caught him hiding cherries and shouted, “You are not my son! I didn’t raise a black forest cake! I raised a good, simple chocolate cake!”

 But the political winds were changing: At a national level, the cakes formed an alliance with the also oppressed crumbles, a sizable minority that usually sided with the pies, but were sick of playing second fiddle to them. In a violent coup, cakes and crumbles overthrew the ruling pie majority and secured power through brute force. The now ruling Cake Party banned pies from appearing at Thanksgiving and the pumpkin pies wept.

At first, Thomas reveled in the power of his new social status. He need only threaten to report his pie classmates to the ruling party and he would get whatever he wanted.

But one day, Thomas saw Concord pie by a big mud puddle. As Thomas lifted Concord by the scruff of his tin, intending to make Concord eat humble pie, the Apple pies guffawed in anticipation, their cruel laughter reminding Thomas of his position only weeks before. Instead he gently lowered Concord to dry land and asked, “Can’t we all just get along?”

From then on, Thomas became an advocate for downtrodden desserts. Pie, cake, brownies, cookies clafouti and even donuts soon marched to his rallying cry of dessert equality. Even the soufflés rose to the occasion.

 The King Cake feared Thomas’ 350 degree rhetoric. One day, Thomas simply disappeared, never to be seen again. Rumor had it, the King Cake had personally stabbed Thomas in the back with a cake server, but most believe he was simply dumped in a compost pile and left to rot.

But, Thomas’s ideas live on! The next time you think of ordering a cake for a birthday or consider entering a pie into a fair, remember Thomas’s teachings! Consider instead, a panna cotta or maybe even a Pavlova. Don’t be slave to your sweet preconceptions! Remember, our enemies are not the pies or the cakes but the soups, the salads, the main course, the Atkin’s Diet! Sweet solidarity!

Chocolate and Cherry Pake

Crust:
  • Make a "sturdy" pie crust. I usually follow Ken Haedrich's food processor recipe from his book "Pie."
  • 2 3/4 cups all purpose, 1 tablespoon sugar, 1 teaspoon salt, 2 sticks cold butter, 1/2 cup cold water. Follow standard crust directions, but mix two egg yolks into the cold water to make the crust sturdier.
Pie Filling:
  • 1-1/2 lb. Bing cherries, pitted (4-1/2 cups)
  • 1 cup  sugar
  • 1/4 cup MINUTE Tapioca
  • 1 Tbsp.  lemon juice
  • 1/4 tsp. almond extract
  1. Mix fillings and let sit for 15 minutes, Fill crusts and bake at 400 for 45-50 minutes.

Cake Batter:


  1. Make a basic chocolate cake batter. I usually use something similar to this (a decently sturdy cake, not the total fall apart cake on the back of Hershey's Cocoa Powder box (a surprisingly good recipe):
  2. Prepare two cake pans. Pour just enough batter to cover the bottom of one pan, then place the cherry pie into it. Drop the pan on the counter to remove air bubbles and to settle the pie in the batter. Just barely cover the exposed top of the pie with batter. Pour the remaining batter into the other pan.
  3. Bake. The cake pan with the pie will take much longer as the pie is absorbing most of the heat (especially if the pie has already cooled.) Remove the normal pan when it's done, remove the pie/cake pan when it's slightly underdone. Let both cool, then cut the normal cake layer into two or three layers (depending on the thickness.)


Frosting:


  • Make a buttercream  (1/2 cup butter, 3 1/2 confectioner's, 1 pinch salt, 1 teaspoon coffee or espresso.)


To assemble:


  1. Place the cake enclosed pie as the bottom layer. Frost with butter cream. Place a normal cake layer on top of it. Frost and sprinkle with cherries and cherry kirschwasser. Do the same for the remaining layers, but do not frost and cherry the final layer.
  2. Cover the entire pake with stabilized whipped cream and decorate with chocolate shavings. Refrigerate so the whipped cream doesn't go bad.


© Cakespy, all rights reserved. Powered by Squarespace.