Home Home Home Home Home Home Home
CakeSpy

Featured: 

My adventure at Ben & Jerry's in Vermont!


Unicorn Love: the Eating Disorder Recovery Blog


 Buy my brilliant books!

Buy my new book!

Buy my first book, too! 

CakeSpy Online Retail!


Archives
Gallery

Fantastic appliance for cake making on DHgate.com

everyrecipe.co.nz

Craftsy Writer

Entries in recipes (704)

Monday
Jul112011

Hop to It: Grasshopper Pie in a Brownie Crust Recipe for Serious Eats

Comprised of a boozy, creamy mint filling in a chocolate cookie pie crust, Grasshopper Pie is a deliciously refreshing summertime dessert.

But when you swap out the chocolate cookie crust for a crumbled brownie crust, you've got something even more amazing. When you pour the hot filling onto the rich brownie crust, they meld together beautifully when chilled. If you serve it with a big scoop of ice cream on top (not excessive at all) it verges into brownie sundae territory, in the best way possible.

For the full writeup and recipe, visit Serious Eats!

Sunday
Jul032011

Sweet Summer: Apple and Bing Cherry Galette Recipe from Macrina Bakery

Image: Macrina BakeryHappy July, indeed: it's time for Macrina's recipe of the month! This time, it's for something that sounds delectable even to those (like me) who are wary of fruit-based desserts: Apple and Bing Cherry Galette. Sweet with a bit of sour? Sounds pretty summery, and perfect to be paired with ice cream. Here's the recipe introduction:

I have fond memories of the first time we made this dessert. My friend Kay Simon, wine maker and co-owner of Washington's Chinook Winery, had stopped by the café with some bottles of Merlot that we'd ordered. She also brought along a surprise gift - five pounds of sweet, sun-ripened cherries from her neighbor's farm in Prosser, Washington. We popped a few into our mouths and started daydreaming of all the wonderful pastries we could make with the fruit. The end result was one of my favorite desserts.

Apple and Bing Cherry Galette Recipe

Serves 8 to 10

  • 6 Granny Smith apples 
  • 1/2 tablespoon freshly squeezed lemon juice
  • 3/4 cup granulated sugar
  • 3 tablespoons unbleached all-purpose flour 
  • 1/2 tablespoon cinnamon
  • 2 tablespoons unsalted butter, cut into small pieces
  • 2 cups fresh Bing cherries, stemmed and pitted
  • 1 tablespoon pure vanilla extract 
  • 1/2 recipe Flaky Pie Dough, chilled (recipe follows)
  • Egg wash made with 1 egg and
  • 1 teaspoon water
  • 2 tablespoons coarse raw sugar
  • Vanilla ice cream, for serving


Preheat the oven to 375°F. Peel and core apples and cut into 1/2-inch slices (approximately 12 slices per apple).

Place apple slices and lemon juice in a large bowl. Add sugar, flour and cinnamon and toss until slices are evenly coated. Spread apples into a single layer on a rimmed baking sheet and dot with pieces of butter. Roast on center rack of oven for 15 minutes to release some of the juices and intensify the flavors. Set aside to cool.

Increase oven temperature to 385°F. In a large bowl, combine cooled apples, cherries and vanilla extract. Mix gently with a wooden spoon and set aside.

Coat your hands with flour and shape the chilled piece of dough into a ball. Working on a floured surface, flatten the ball slightly and roll it into a 14-inch circle, about 1/8 inch thick. Gently transfer rolled dough onto a parchment-lined, rimmed baking sheet.

Pile fruit onto center of the dough, leaving excess liquid in the bowl, and spread to cover about 8 inches, leaving a 3-inch border of dough around the filling. Lift border on top of the filling, tucking and folding the dough to create a gathered or pleated finish. Lift each of the folds up and brush underneath with egg wash to seal the crust. Brush all exposed dough with egg wash and sprinkle with coarse raw sugar.

Chill in the freezer for at least 30 minutes.

Place tart on center rack of oven and bake for 15 minutes. Reduce heat to 375°F and bake for 40 minutes more or until crust is golden brown. If the apples start to burn before the crust is ready, cover them with a small piece of aluminum foil. Let cool on the baking sheet for 20 to 30 minutes. Serve warm with vanilla ice cream.

Flakey Pie Dough
Makes enough dough for 2 double-crusted (9-inch) pies, or 2 (10-inch) rustic galettes or tarts.


  • 5 1/4 cups unbleached all-purpose flour
  • 1 tablespoon kosher salt
  • 12 tablespoons (1 1/2 sticks) unsalted butter, chilled and cut into 1/4 - inch pieces
  • 1 3/4 cups solid vegetable shortening, chilled
  • 1 cup ice water


Combine flour and salt in a large bowl and toss together.  Add butter and cut it into the flour until the texture is coarse and crumbly.  You can use a pastry cutter or your fingers, but I like to use 2 forks.  Break up the shortening and add it in small pieces.  Cut in the shortening until the dough is crumbly again.  Add ice water and mix just until the water is incorporated and the dough sticks together when pinched.  This dough will be quite sticky, so dust your hands with flour before handling it.  Pull dough from bowl onto a lightly floured work surface (chilled marble is ideal) and pat it into a block.  Wrap the dough tightly in plastic wrap and chill in the refrigerator for at least 1 hour before using.  Since this recipe makes enough dough for 2 pies or tarts, I recommend cutting it in half before chilling.

Flakey Pie Dough will last for up to 4 days in the refrigerator and for up to 1 month in the freezer.  If you freeze half or all of the dough, it’s a good idea to double wrap it.  Frozen dough needs to be fully defrosted before it’s used, and my preferred method is to transfer the dough to the refrigerator 1 day before I plan on baking with it.  The dough can also be defrosted at room temperature, but it needs to be re-chilled in the refrigerator for 1 hour prior to using.

Tuesday
Jun282011

Sweet Chill: Cannoli Ice Cream Recipe for Serious Eats
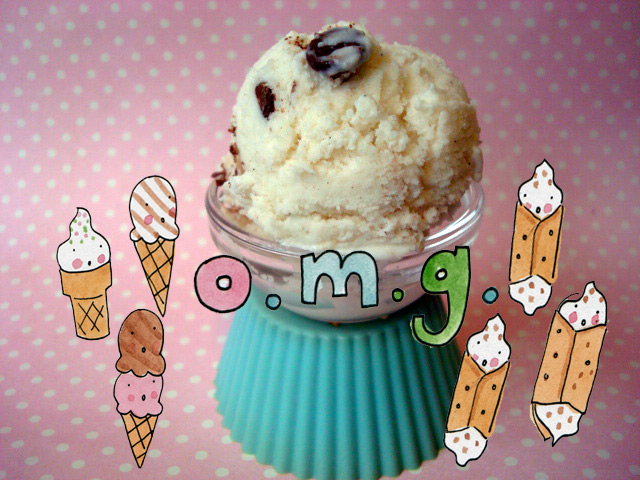
Everybody knows that the best part of the cannoli is the cream. But what happens when you take that delicious filling and combine it with ice cream?

What you've got on your hands is an ice dream, that's what. This is an adaptation of a recipe from the brilliant book All American Desserts by Judith Fertig, wherein high-quality vanilla ice cream is doctored up with the makings of cannoli cream. The result is a memorable frozen treat: rich with ricotta, spices, and flecked with bits of candied fruit and chocolate chips. It's the best of two creamy worlds.

For the full entry and recipe, visit Serious Eats!

Tuesday
Jun282011

Sweet and Salty: Peanut Butter Potato Chip Cookies Recipe for Peanut Butter and Co.

Looking for cookies to serve during your July 4 festivities? Bake this cookie that creates an explosion of flavors in your mouth, of the sweet-savory kind.  The sweet drop cookies are nicely contrasted by the saltiness of the chips, but get a fascinating flavor dimension from the nutty Smooth Operator peanut butter. One bite and even doubters will be singing a new story.

Note: I found that you can also get extra flavor-points by using The Bee’s Knees peanut butter, which adds pleasing mellow end-note from the honey mingling with the brown sugar.

For the full entry and recipe, visit Peanut Butter & Co's website!

Saturday
Jun252011

Double Trouble: Cheesecake-Stuffed Carrot Cake Recipe from Rice Kernel

CakeSpy Note: This is a guest post from The Rice Kernel. Named for a little boy who came along and transformed one family's kitchen experiences, Rice Kernel features wholesome, homemade recipes to help you achieve a "rainbow a day" of colorful and nutritious foods.  For the sweets lover, Rice Kernel's "rainbow" includes plenty of indulgences, often made over with healthful ingredients.  This triple strawberry cheesecake is the perfect collaboration of creamy, decadent cheese and fresh, tart summer berries. The recipe originally appeared as part of this post.

This two-in-one cake has a sweet secret: what appears to be a traditional carrot cake is actually stuffed with cheesecake! As Rice Kernel puts it,

While my humble looking cake doesn’t hold a candle to the professional ones, the combination of smooth cheese and flavorful carrot cake is undeniable.  Beneath the unpretentious appearance lies a creamy cheesecake sandwiched by layers of moist, mildly spiced cake flecked with carrots and pineapple.  As if the layers aren’t enough, the cakes are enveloped by a generous coating of marshmallow cream cheese frosting.  (Marshmallow optional, but this is an all-out recipe with granulated sugar and a generous amount of oil.  It is butter-free, if that counts.)  You could certainly interchange the carrot cake layers for flavors of your choosing; a red velvet cake would be a beautiful contrast.

Luscious Carrot Cake, from Whipped

3 cups all-purpose flour
3 cups granulated sugar
1 teaspoon salt
1 tbsp baking soda
1 tbsp ground cinnamon
1 1/2 cups canola oil
4 large eggs, lightly beaten
1 tbsp vanilla extract
1 1/2 cups shelled walnuts, chopped
1 cup shredded coconut
1 1/2 cups pureed cooked carrots
1 small 8 oz. can of crushed pineapple, drained
1/2 cup walnuts for the top (optional)

For the Cheesecake Layer

2 oz. white chocolate, chopped
16 oz. cream cheese, room temperature (2 packages)
1/2 cup + 2 tbsn. sugar
1 tablespoon flour
2 eggs, room temperature
1 teaspoon vanilla
1 tablespoon heavy cream

For the Frosting

8-oz cream cheese, room temperature
1 1/4 cups marshmallow creme (7-oz)
1 tsp vanilla extract

Procedure 

  1. Prepare the carrot cake layer. Preheat oven to 350 degrees F. Grease two 9 inch cake pans. Line the bottoms with parchment paper. Peel and cook carrots until a fork easily can be poked in to them. One small bag of full sized carrots should yield about the right amount of pureed, cooked carrots. Drain the carrots and purree while still warm in a blender or food processor until they are smooth. Measure out 1 1/2 cups of the carrot puree and set aside.
  2. Sift dry ingredients into a bowl. Stir dry ingredients together with a whisk to combine well. Add oil, eggs and vanilla. Beat well for about 2 minutes. Fold in walnuts, coconut, carrots and pineapple. Pour equal amounts of batter into each pan. Set in the middle of the oven and bake for about 50 minutes or until edges have pulled away from sides and toothpick inserted in middle comes out clean.
  3. Remove from oven and let sit in pans 10 minutes. Turn out onto a rack and cool completely.
  4. Prepare the cheesecake layer. Preheat the oven to 350 degrees F. 
  5. Melt the white chocolate, set aside to cool slightly.
  6. In a large bowl using an electronic mixer, mix the cream cheese on low speed until creamy. Add the sugar and mix slowly until smooth. On low speed, mix in the flour. Turn off the mixer and scrape down the bowl and beater with a rubber spatula. Add one egg at a time, mixing well after each addition, scraping the sides of the bowl. Mix in the vanilla and cream until the mixture is smooth. Using a large spoon, stir in the melted white chocolate until incorporated.
  7. Pour the batter into a parchment paper lined 9-inch spring form pan. Bake for about 30 minutes or until the center is set when you slightly shake the pan. Allow to cool before removing from the spring form pan. Allow to cool completely before assembling the cake.
  8. While you're waiting for the cakes to cool, go ahead and make the cream cheese frosting. Combine all ingredients in a medium bowl and beat with an electric mixer at medium-high speed until smooth and fluffy. Set to the side for once the cake is assembled.
  9. ASSEMBLE IT ALL. Place your bottom layer of cake on the dish/ plate you will be serving it on with the leveled side facing up.
  10. Spread a thin layer of cream cheese frosting on top – it doesn’t matter how messy it looks since it will be covered.
  11. Transfer the cheesecake to the top of the cake, then spread another thin layer of cream cheese frosting on top of the cheesecake.
  12. Top with the remaining layer of cake – leveled side down so that you have a clean surface. Use the rest of the cream cheese frosting to frost the entire cake.
  13. Top with optional nuts or shredded coconut.
Thursday
Jun232011

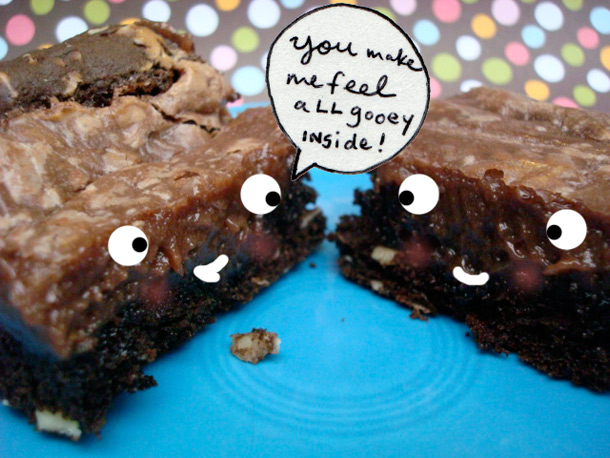
Ooey Gooey: Chocolate Gooey Butter Cake Recipe for Serious Eats

Gooey Butter Cake: there is no part of these three beautiful words that is wrong. This cake, which is actually more like a two-part bar cookie, is the pride of St. Louis, MO, a cake steeped in legend and even a little controversy.

It is also unique in that recipes almost always call for a cake mix, and many will argue that this is the "traditional" method of preparation—and yields the best end result.

This version twists the tradition slightly, using a chocolate cake mix instead of the usual yellow, and employs cocoa in the filling. The result is an addictively sweet variation on this rich regional treasure.

For the recipe, visit Serious Eats!

Tuesday
Jun142011

Matcha Point: Matcha Tiramisu With Adzuki Red Bean and Mascarpone Recipe

CakeSpy Note: This is a guest post from The Rice Kernel. Named for a little boy who came along and transformed one family's kitchen experiences, Rice Kernel features wholesome, homemade recipes to help you achieve a "rainbow a day" of colorful and nutritious foods.  For the sweets lover, Rice Kernel's "rainbow" includes plenty of indulgences, often made over with healthful ingredients.  This triple strawberry cheesecake is the perfect collaboration of creamy, decadent cheese and fresh, tart summer berries. The recipe originally appeared as part of this post.

Growing up in the 1980s, tiramisu was ubiquitous at dinner parties and on restaurant menus.  And I consumed my share of them.  (With a Shirley Temple in my other hand, of course.  I wanted a “drink” like the adults.)  But in the intervening decades, my parents rarely ordered or prepared the Italian dessert – they were turned on to (and, hence, turned off by) the raw eggs and copious of heavy cream and mascarpone.  These days, I don’t come upon tiramisu often but when I do, I can’t deny a few bites of the Italian-American favorite.   

I can’t recall with certainty how or when I dreamt up this recipe.  I was thinking about tiramisu - and thinking that my husband doesn’t share my affinity for coffee and liquer-infused desserts.  Feeling (momentarily) indifferent about typical American dessert flavors, this idea was conceived.  Here, the ladyfingers are soaked in sweetened green tea and sandwiched between rich mascarpone cheese and nutty, sweet red bean paste.  Matcha powder is sifted between layers and atop the dessert as both a bitter counterpoint to the sweetened layers and as a garnish. 

How was it, you ask?  The texture of the dessert is much like a traditional tiramisu – creamy with a softened, moist cake layer.  There is a richness and creaminess from the mascarpone, a nutty sweetness from the adzuki bean paste, and a slightly bitter (but refreshing) contrast from the green tea.  Frankly, if you enjoy the flavors of green tea and red bean you’ll find this delightful – and addictive.  If the flavors aren’t your cup of tea, may I suggest lemonstrawberryvanilla, or chocolate for your sweet tooth? 

Matcha Tiramisu with Adzuki Red Bean and Mascarpone

Ingredients

1 cup boiling water + 1 tbsp macha powder + sugar (to taste).
16 Savoiardi biscuits (ladyfingers)
Matcha powder for dusting
1 cup (1/2 pound) mascarpone cheese (or cream cheese, or vegan cream cheese)
1/4 cup heavy cream
2 tbsp powdered sugar 
2 tbsp matcha powder for dusting
1/2 cup adzuki bean paste (thinned with a few tablespoons of water)

Procedure

  1. Beat cream and powdered sugar in a large bowl with an electric mixer until soft peaks form.  Fold in mascarpone.
  2. Pour 1 tbsp matcha and water mixture in a shallow bowl.  
  3. Dip both sides of half of the ladyfingers in the espresso and use them to line the bottom of a glass or ceramic baking dish.  Dust the ladyfingers with matcha powder.
  4. Spoon a third of the adzuki bean pasta atop the ladyfingers and spread in a smooth, even layer.  Follow with the mascarpone mixture.  Repeat with ladyfingers, adzuki, and mascarpone.  (End with the mascarpone.)
  5. Cover and refrigerate the tiramisu for at least 4 hours or overnight.
  6. Just before serving, sift the matcha powder over the top of the tiramisu.

Note:  Tiramisu can be refrigerated up to 2 days.

Monday
Jun132011

Fromage et Chocolat: Chocolate-Covered Cheetos Recipe for Serious Eats

Believe it or not, this was not my idea.

This nugget of sugar-coated tastiness came from Becky Selengut, author of Good Fish (and arguably Bad Seed, or at least enabler of Bad Ideas), who made a compelling suggestion to the world via Twitter: "Chocolate covered fritos. Go. Make. Sell. Widely."

Well, naturally I knew this confection was my destiny, but I took it one step further, testing out the idea on several chips, including two types of Doritos, Fritos, Lay's Potato Chips, and Cheetos.

To be honest, the original chips were probably the biggest crowd-pleaser, but theCheetos were certainly the most compelling—vaguely shrimplike in shape, these nubbly, crunchy, chocolate-and-cheese snacks were oddly addictive in a sweet-and-salty, lowbrow sort of way; if you enjoyed Velveeta Fudge, you might want to give this one a try.

For the full entry and recipe, visit Serious Eats!

Wednesday
Jun082011

Street Eats: Chocolate Pudding and Cookies Recipe from Food Trucks by Heather Shouse

Image credit: sugarcave.com

Street food is one of the most exciting emerging sectors of the foodie landscape, creating impromptu dining experiences made possible by following trucks on Twitter or Facebook to find out where they are, and then lining up on the street to get some of the (often unique) food being served up.

It was only a matter of time before a book came out dedicated to the subject, and Food Trucks: Dispatches and Recipes from the Best Kitchens on Wheels is a fun and timely ode to The New Street Food. It is full of stories and recipes, mostly savory, but a small handful of sweet ones.

The one that I zeroed in on, though? Yellow Submarine in Miami, Florida--because they had the most compelling dessert recipe, for Chocolate Pudding and Cookies. It's sort of like my favorite Banana Nilla Wafer pudding, but with chocolate pudding and no bananas.

Angela's Chocolate Pudding and Cookies

8-12 servings

  • 2 boxes (3.5 oz) chocolate pudding (cook and serve)
  • 4 cups cold milk
  • 1 can Nestle table cream
  • 1 can condensed milk
  • 2 (3.15 oz) packages Goya Maria cookies (mexican butter cookies) 
  1. Make the pudding according the package instructions. Let the pudding rest for 2-3 minutes, then add the table cream and condensed milk, mixing very well.
  2. Into a large, round glass bowl, pour enough of the chocolate mixture to cover the bottom of the container. Add a layer of the Maria cookies, then top with a layer of the pudding; repeat until the cookies and chocolate mixture are used up. Let the treat rest in the fridge for 2 hours, then spoon out on to plates and serve.


Tuesday
Jun072011

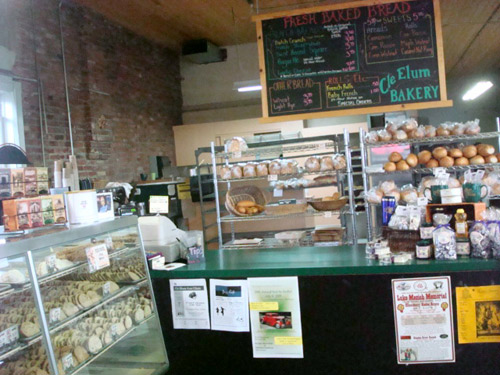
Pass the Torchetti: Torchetti Cookies from Cle Elum Bakery, WA

The other day, I found myself in a magical land called Cle Elum.

Now, don't ask me how to pronounce the name of the town--but do ask me what I ate there, because I did find a magical place called Cle Elum Bakery.

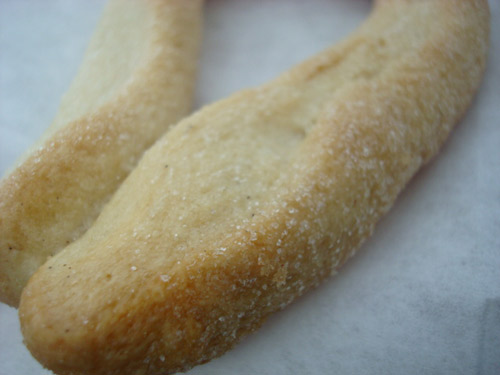
I ate something called Torchetti, that's what. This is a traditional Italian cookie which I learned more frequently goes by Torcetti, which means "little twist"--which, you know, describes them pretty well. Physically they resemble Berlinerkranser or Calabrian Love Knots, but texture and taste-wise they are different; where aforementioned cookies are crumbly and buttery, these biscuits are more hearty and sturdier in texture with the addition of yeast, more like lightly sweet biscuits than butter cookies.

As I learned from this segment,

The recipe itself is very old, indicated by the use of yeast, not baking powder, for leavening.  These cookies are from the Piedmont region of northern Italy.  Turin, Piedmont's capital, was also Italy's first capital.  The city preserves remarkable architectural and cultural treasures.

They're a very nice snacking cookie, no matter what you want to call them or how you want to spell it.

Of course, if you can't make it up (or over?) to Cle Elum, you can try this recipe (adapted from Taste of Home):

Torchetti (or Torcetti)

  • 5 cups all-purpose flour
  • 1 cup cold butter, cubed
  • 1 cup shortening
  • 1 package (1/4 ounce) active dry yeast
  • 1/2 cup warm milk (110° to 115°)
  • 2 eggs
  • 1 tablespoon sugar
  • 1-1/2 teaspoons vanilla extract
  • 2 cups confectioners' sugar
  • Additional confectioners' sugar

Procedure

  1. Place flour in a large bowl; cut in butter and shortening until mixture resembles coarse crumbs. Set aside. In a large bowl, dissolve yeast in warm milk. Add the eggs, sugar, vanilla and 2 cups of the crumb mixture; beat until well blended. Gradually beat in remaining crumb mixture.
  2. Turn onto a floured surface; knead for 3-4 minutes. Place in a greased bowl, turning once to grease top. Cover and let rise in a warm place until doubled, about 1 hour.
  3. Punch dough down; divide into six portions. Shape each portion into twelve 6-in. ropes, about 1/4-in. thick; roll in confectioners' sugar. Shape each rope into a loop. Holding both ends of loop, twist together three times.
  4. Place 2 in. apart on greased baking sheets. Bake at 375° for 12-14 minutes or until golden brown. Roll warm cookies in additional confectioners' sugar. Cool on wire racks. 


© Cakespy, all rights reserved. Powered by Squarespace.