Home Home Home Home Home Home Home
CakeSpy

Featured: 

My adventure at Ben & Jerry's in Vermont!


Unicorn Love: the Eating Disorder Recovery Blog


 Buy my brilliant books!

Buy my new book!

Buy my first book, too! 

CakeSpy Online Retail!


Archives
Gallery

Fantastic appliance for cake making on DHgate.com

everyrecipe.co.nz

Craftsy Writer

Entries in confections (21)

Sunday
Jan112015

Besitos de Coco: Coconut Kisses from Puerto Rico

I'm pretty sure that a cookie in Puerto Rico known as "Besitos de coco" translates as "awesomely ginormous coconut macaroons baked in cupcake tins". I should, of course, note that this is without the aid of a dictionary or translation, it is just what comes from my heart.

Fine. If you want to get all technical, it means "coconut kisses". But these are not a peck on the cheek. They're a big fat kiss, from someone you love, and not your aunt or Grandma. A kiss with a little squeeze. 

Technically, you can make these any size, from fairly small to very large. That's why I left off a count on the recipe, because if you want modest portions you'll get many; if you want jumbo confections, you'll get 12 or so.

Besitos de coco

Adapted from Sandra's Kitchen

  • 5 1/2 cup sweetened shredded coconut
  • 2/3 cup all-purpose flour
  • 1 teaspoon salt
  • 1 teaspoon vanilla
  • 1 can (14 ounces) sweetened condensed milk 

Procedure

  1. Preheat the oven to 325. Line a cupcake tin with liners.
  2. In a large bowl, combine the coconut, flour, and salt. Mix to incorporate.
  3. Now, stir in the condensed milk and vanilla. Stir until totally combined (the mixture like a slightly more liquid consistency than rice krispie treats). 
  4. Place a heaping tablespoon of the coconut into each cup, or get fancy and load it into a piping bag with a jumbo star tip like they do in Rincon. 
  5. Bake for 40 minutes, or until browned and toasty on top. Let cool in the pans completely before removing. These freeze beautifully, or will keep at room temperature in a sealed container for several days. 

Do you like coconut in your sweets?

Monday
Sep292014

Homemade Coffee Marshmallow, Anyone? 

I don't consider myself a marshmallow-seeker. I don't avoid them, but I don't actively seek them out. 

However, marshmallows are one of those foods that when homemade, can be truly exquisite. I've tried making regular and funfetti ones, and let me tell you, my hot chocolate didn't complain once.

When Lavazza sent me a potential guest post recipe pitch (un-sponsored other than the fact that they donated the recipe and I think they make good coffee) that involved coffee marshmallows, I said "sign me up!". Bold yet sweetly sophisticated, these marshmallows practically beg you to come up with a fancy coffee liqueur cocktail recipe to pair them with. Or, if alcohol isn't your speed, combine them with hot cocoa for a little extra zip. Use a strong, good quality coffee if you don't have the brand mentioned.

Oh, and make them today for best results: September 29th is National Coffee Day!

Ingredients:

  • 1 cup brewed Lavazza Perfetto, room temperature, divided
  • 3 packets gelatin
  • 3/4 cup corn syrup
  • 1 1/4 cups sugar
  • 1 vanilla bean
  • pinch of salt
  • 1 cup confectioners sugar
  • 2 tablespoons cocoa powder

Procedure

  1. Combine 1/2 cup of the brewed coffee with the gelatin in the bowl of a stand mixer.  Whisk to combine.   Attach the bowl to the base of the mixer and install the whisk attachment.  Allow the gelatin to set.
  2. In a medium sized saucepan, combine the remaining 1/2 cup of brewed coffee with the sugar and corn syrup; stir to incorporate all ingredients.  Without stirring, bring the sugar mixture to a boil over medium-high heat, add a candy thermometer to the pot and cook until the sugar mixture reaches 238 degrees.
  3. Meanwhile, spray a 9”x13” baking pan with non-stick cooking spray.  Combine the confectioners sugar and cocoa powder in a bowl, mix well.  Sprinkle the greased pan with the cocoa/confectioners mix and tilt the pan in all directions, ensuring the entire surface of the pan is coated.
  4. When the sugar syrup has reached temperature, carefully drizzle it into the bowl of the stand mixer as it whips on medium-high.  When all the syrup has been added, increase the speed to high.  Add a pinch of salt and the seeds of a vanilla bean.  Continue to whip on high until the mixture begins to lighten in color and cool. 
  5. Spray a spatula with non-stick spray and dump the marshmallow mixture into the prepared baking pan.  Working quickly, spread the marshmallow as evenly as possible.  Sprinkle with some cocoa/confectioners blend and, gently, with your hands, pat the marshmallow to help flatten it.  Cover with plastic wrap and allow to set at least eight hours, preferably overnight.
  6. Carefully remove the set marshmallow from the pan onto a cutting surface.  With a sharp chef’s knife, cut the marshmallow into strips one inch in width.  Cut the strip into one inch pieces to achieve a one inch square.   Toss each marshmallow square in the remaining cocoa/confectioners mix and shake off the excess.  Store in a cool, dry area in an airtight container.

Have you ever made homemade marshmallows?

Wednesday
Jul162014

Unicorn Pom-Pom Puffs

Here's an important question to which I would like an honest response. It is this:

Would you rather eat a macaroon-esque "white chocolate coconut cluster"...

or a unicorn pom-pom puff?

Hey, remember how I said I wanted an honest answer? I lied: I don't even need or want it. Because I've made the executive decision: the unicorn ones are better.

Basically, I dreamed up this confection thusly: upon pondering a simple use for the white chocolate cache I had at the time, I discovered an easy way of combining melted white chocolate with shredded coconut to form a super-sweet (and simple) confection. I like multipurpose treats, though, so I thought "well, how could I make these a lure for unicorns in addition to satisfying my sweet tooth?". 

The answer was simple: add a little rainbow magic. By divvying up the mix and tinting portions in different colors before forming clusters, I ended up with fuzzy-cute treats that tasted like the Spirit Of Sugar had descended and was knocking right on my taste buds (that is to say--very sweet). I settled on the name "Unicorn Pom Pom Puffs" because, well, look at them.

Unicorn pom pom puffs

If you don't love white chocolate or coconut, make them anyway. You might just catch a unicorn!

Unicorn Pom-Pom Puffs

Unicorn pom pom puffs

  • 2 cups lightly toasted coconut (very light color is important)
  • 7 ounces white chocolate
  • food coloring

Procedure

  1. Melt the white chocolate. Remove from heat.
  2. Divide the chocolate into four separate bowls large enough to do some stirrin'.
  3. Tint each portion with the color desired (I used red, yellow, blue, and green) until it reaches the tone of your liking.
  4. Unicorn pom pom puffs
  5. Add 1/4 of the coconut to each bowl. Stir til combined.
  6. Unicorn pom pom puffs
  7. Gather a small lump of each color together, and clump them lightly so that they adhere. Place on a baking sheet as you finish them. Continue until you've used all of the mixtures.
  8. Unicorn pom pom puffs
  9. Let them set for an hour or more before eating for the best texture. Store leftovers at room temperature in an airtight container.

Taste the rainbow!

Wednesday
Nov062013

Grenades: A Confection, Not an Explosion

Grenades

I don't know if she remembers it, but I met the owner of Butter, a bakery in Vancouver, in a very sweet way. I was the "artist of the month" at Seattle knitting shop Hilltop Yarn--that makes sense if you consider the fact that I do artwork like this:

Knitting Cakes

So, said owner happens to be in Seattle that day and happens to walk in. We get to talking, given our mutual interest in sweets, and forever and ever on since then I've taken a deep interest in the goings-on at Butter. So I was so delighted when they came out with their great book, Butter Baked Goods: Nostalgic Recipes From a Little Neighborhood Bakery. I've already shared with you their marshmallow recipe, and now it's time to make it count, because you're about to get a new recipe that uses those marshmallows. But this is even better, because they are paired with cereal, chocolate, and sugar sugar sugar. Here's the 411 on Grenades:

This is a treat my young friend Kate introduced me to. The original version used Kraft marshmallows and melted Mackintosh’s Toffee, and it really was delicious. Our Butter version has a few more steps involved, but I think the end result is worth the effort. We had great fun coming up with different riffs on the classic combination. To date my favorite is a banana marshmallow rolled in peanut butter and Rice Krispies, then dipped in milk chocolate—proving once again that you are only ever limited by your imagination.

Grenades

MAKES: About 24 to 30 grenades

YOU WILL NEED: candy thermometer, cookie sheet lined with parchment paper

BEFORE YOU BEGIN: Prepare a batch of Butter’s Famous Marshmallows. You only need half the batch so will have lots left over.

From Butter Baked Goods: Nostalgic Recipes From a Little Neighborhood Bakery

Ingredients

  • 1⁄2 batch Butter’s Famous Marshmallows
  • 4 cups Rice Krispies
  • 2 cups heavy cream
  • 1⁄2 cup whole milk
  • 1 1⁄2 cups granulated sugar
  • 1 1⁄2 cups dark brown sugar
  • 1 teaspoon salt
  • 3 tablespoons butter
  • 1⁄2 cup light corn syrup
  • 1⁄4 cup water
  • 2 pounds dark chocolate (about 4 cups chocolate chips)

Procedure

  1. Place the Rice Krispies in a small bowl and set aside.
  2. In a large saucepan over medium heat, combine the cream, milk, both sugars, salt, butter, corn syrup and water. Clip the candy thermometer to the side of the saucepan to monitor the temperature. Use a whisk to stir the caramel mixture constantly until it reaches 220°F. Remove from the heat and allow to cool for 1 minute (don’t wait too long or the caramel will start to firm up.)
  3. Use a fork to dip each marshmallow into the caramel mixture and gently move it around to coat the whole surface. Lightly tap the fork on the side of the bowl to remove any excess .
  4. Immediately drop the marshmallows into the Rice Krispies and roll them around until completely coated. Place on the prepared cookie sheet.
  5. Temper the dark chocolate (need a primer? Check on this post I did for Craftsy).
  6. Use a fork to dip each marshmallow in the tempered chocolate. Lightly tap the fork on the edge of the bowl to help remove any excess. Place back on the cookie sheet, lined with fresh parchment paper.
  7. Allow the chocolate to set for at least 1 hour before you enjoy (or place in the refrigerator to speed things up).
Wednesday
Nov062013

The World-Famous Marshmallow Recipe from Butter

I'm a big believer in the fact that if a food is made well, even if it's not a foodstuff you typically like, it can make you a believer.

Marshmallows from butter

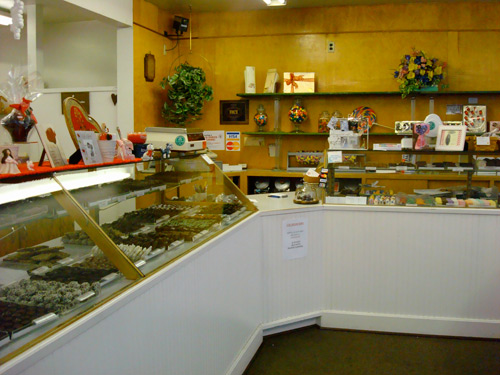
Such is the case with the homemade marshmallows at Butter, a bakery in Vancouver. They were kind enough to share their recipe, from the newly released book, Butter Baked Goods: Nostalgic Recipes From a Little Neighborhood Bakery. Here's the recipe, starting with the headnote:

If there is one item that really put Butter on the map, I would have to say it’s our marshmallows. Back in 2007, when Butter first opened, the gourmet marshmallow was still a bit of a mystery. Most people didn’t know there was a tasty alternative to store-bought marshmallows available. But word soon got out, people started talking, and my brain got ticking. Butter now makes 18 flavors of marshmallows, and I’m always coming up with new varieties—but Butter’s Vanilla Marshmallows are the classic we opened our doors with.

Butter’s Famous Marshmallows

MAKES: About 64 (1- × 1-inch) marshmallows YOU WILL NEED: (9- × 9-inch) baking pan, buttered

From Butter Baked Goods: Nostalgic Recipes From a Little Neighborhood Bakery

  • 1 cup water
  • 3 envelopes unflavored gelatin
  • 2 cups granulated sugar
  • 1⁄2 cup light corn syrup
  • 1⁄2 teaspoon salt
  • 2 tablespoons pure vanilla
  • Generous amount of icing sugar to coat the marshmallows, about 2 cups

Procedure

1. In a stand mixer fitted with a whisk attachment, pour in 1⁄2 cup of the water and sprinkle with the gelatin. Set aside to allow the gelatin to soak in.

2. In a medium saucepan over high heat, add the sugar, corn syrup, salt and remaining 1⁄2 cup of water. Bring to a rolling boil and continue to boil for 1 minute. Remove from the heat.

3. Turn the mixer to low and mix the gelatin once or twice to combine it with the water. Slowly add the hot sugar mixture, pouring it gently down the side of the bowl, and continue to mix on low. Be really careful at this point because the sugar mixture is smoking hot! It’s not a job for little ones.

4. Turn the mixer to high and continue to whip for 10 to 12 minutes until the marshmallow batter almost triples in size and becomes very thick. Scrape down the sides of the bowl frequently to avoid the batter overflowing as it grows. Stop the mixer, add the vanilla, and then whip briefly to combine.

5. Transfer the mixture to the prepared baking pan and use a spatula or bench scraper to spread it evenly in the pan. Work quickly, as the marshmallow becomes more difficult to manipulate as it sets.

6. Grease a sheet of plastic wrap with butter and lay it across the top of the marshmallow. Press down firmly on the plastic wrap, to seal it smoothly and tightly against the mixture.

7. Leave the marshmallow to set at room temperature for at least 3 hours or, even better, overnight. The marshmallow will be too sticky and soft to cut if you try too soon.

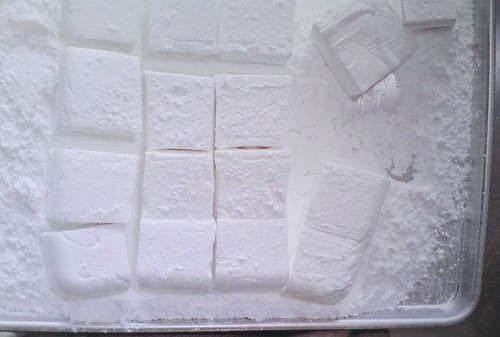
8. Sprinkle a work surface or cutting board with the icing sugar. Run a knife along the top edge of the pan to loosen the marshmallow slab. Invert the pan and flip the marshmallow out onto the counter or board. Scoop up handfuls of the icing sugar and rub all over the marshmallow slab.

9. Use a large knife to cut the slab into 1- × 1-inch squares. Roll each of the freshly cut marshmallow squares in the remaining icing sugar to coat them completely. If you—and most of your kitchen—are speckled with marshmallow by the time you finish this recipe, fear not! It’s mostly sugar, so a little hot water and elbow grease will have things as good as new in no time.

Marshmallow Variations


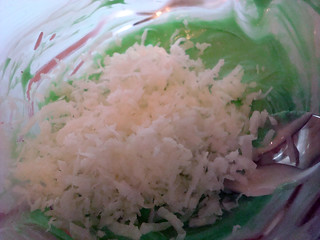
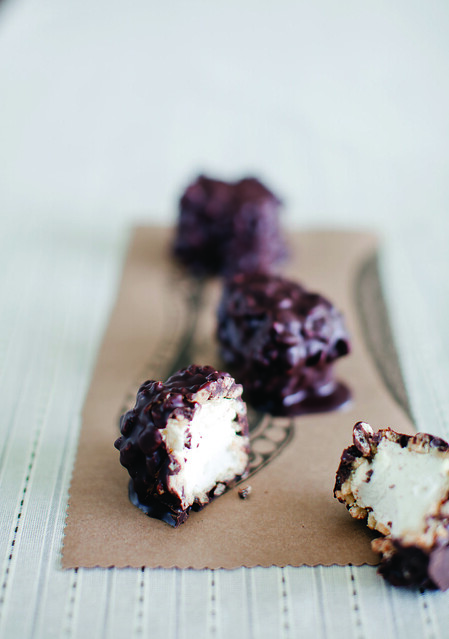
  • TOASTED COCONUT MARSHMALLOWS My personal favorite! Just substitute the 3 cups icing sugar with 3 cups unsweetened shredded coconut. To prepare the coconut: Preheat the oven to 325°F. Sprinkle the coconut onto a cookie sheet in one even layer and bake in the preheated oven for 15 minutes, until the coconut is a lovely golden brown, stirring every 5 minutes to make sure it toasts evenly. Remove from the oven and allow to cool. Follow Steps 8 and 9 to coat the marshmallows completely in toasted coconut.
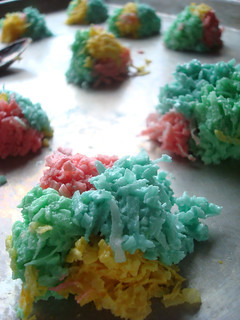
  • RASPBERRY MARSHMALLOWS In a small saucepan over medium heat, warm 1⁄4 cup raspberry jam (any variety will do) until it becomes runny, about 3 minutes. Remove from the heat. Place a fine sieve over a small bowl and pour the warm jam through the sieve to catch any seeds and create a puree. Add the puree and one drop of red food coloring at Step 4 of the recipe.
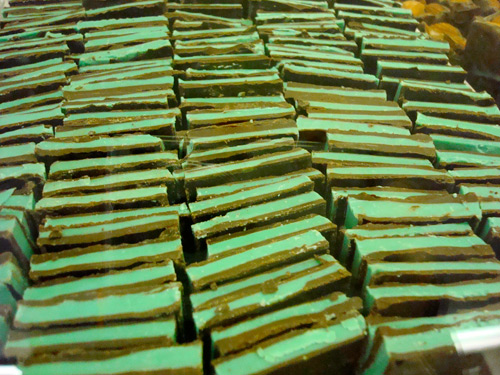
  • MINT MARSHMALLOWS These are fantastic in hot chocolate! Add 1 teaspoon of mint extract and 1 drop of green food coloring at Step 4 of the recipe. Make sure you do this at the end of the whisking process—if you add it too early it prevents the marshmallow from achieving its proper volume.
  • COFFEE MARSHMALLOWS Add 1⁄2 cup of strongly brewed coffee or espresso instead of the water in Step 1, and add another 1⁄2 cup instead of the water in Step 2.
  • CINNAMON MARSHMALLOWS Another yummy option for your hot chocolate or, even better, melted on top of your sweet potatoes at Thanksgiving. Add 2 teaspoons of ground cinnamon at Step 4.


Monday
Nov212011

SweetsGiving: Chocolate Cranberry Pistachio Bark Recipe

Photo: Munchin with MunchkinCakeSpy Note: This is a guest post from Cake Gumshoe Christine, who blogs at Munchin with Munchkin! Let the NOM begin:

It can be difficult to decide on what to bring to Thanksgiving. Typically all the bases are covered, leaving gifts of alcohol or pie as your only options. If you want to share a unique treat with your loved ones try making this cranberry pistachio bark!

This is one of the easiest recipes I have ever posted and it only takes about 10 minutes total. The results are both delicious and pretty! Don’t expect to bring any leftovers home, this stuff disappears fast!

Chocolate Cranberry Pistachio Bark

  • 1 cup white chocolate candy melts
  • 1 cup dark chocolate candy melts
  • ½ cup pistachios
  • ½ cup dried cranberries

Also needed: wax paper

Procedure

  1. Line a cookie sheet with wax paper. Set aside.
  2. Place dark chocolate melts in a medium microwavable bowl. Microwave on medium power for 30 seconds. Stir mixture and continue to microwave for 30 second intervals until chocolate is completely melted.
  3. Reserving about two tablespoons, pour dark chocolate onto prepared cookie sheet and spread over surface with a spatula. Place cookie sheet in the refrigerator to harden.
  4. In the meantime melt white chocolate melts using the same 30 second interval method. Once completely melted stir in pistachios and cranberries.
  5. Pour the white chocolate mixture over the hardened dark chocolate on the cookie sheet. Dip a spatula into the reserved dark chocolate and drizzle over the top of the bark to decorate.
  6. Return cookie sheet to the refrigerator until the bark has hardened.
  7. Once completely cooled and hardened remove from the fridge and break apart into pieces. Store in a sealed container in a cool dark place so it does not melt.
Wednesday
Sep072011

Sweet Sleuth: Who Invented S'mores?

Is this how the S'moreo was born?Today, while eating a delicious s'more, I found myself thinking that if I could go back in time, at that moment my destination would be to visit the person who invented the s'more so I could thank them. With emotion and enthusiasm.

It was with deep sadness that I realized I would not know who that person was, so I hit the books to find out more about this sweet treat.

This s'more was made using a portion of Snickers Bar.The name seems self-explanitory enough: a slurring of "Gimme some more" would naturally become S'more. Why did it settle on this particular sweet treat? No idea, but I have the thought that it is like a nickname: this one just stuck.

As for who invented it? As What's Cooking America advises,

No one is really sure who invented S'mores, because the recipe has basically been passed around by word of mouth since then. The first known recipe appeared in the 1927 Girl Scout hand book called Tramping and Trailing with the Girl Scouts.

The recipe is credited to Loretta Scott Crew, so happily I would at least have a person to go back in time and thank, because while she probably didn't invent the confection, hers is the first known published recipe for the delicious triple-threat of graham cracker, marshmallow, and chocolate.

So how did this trinity of awesome come together?

What seems pretty reasonable (to me, anyway) is that what really kept this treat going was the producers of the products. Concurrently, marshmallows were becoming commercially available for the first time; Graham crackers had gained much popularity after their invention by Sylvester Graham (described as "a New England health advocate with a passion for temperance and fiber"), and the recipe had been picked up and gained popularity (as well as evolving into a sweeter, more cookielike cracker) after being mass-produced by Nabisco. I must make a side note to wonder "What would Sylvester Graham think of S'mores?". Somehow I don't think it's what he envisioned his legacy to be.Sta-Puft could make so many S'mores.

But I digress. My theory about products coming together in the right place at the right time is supported by an article on Slashfood, which also brings up an interesting point on other popular confections which debuted in the same era:

The true origin of the snack is unknown, as camping recipes tended to be passed from person to person and family to family - often over the campfire itself. The first recipe for s'mores was published in 1927 in the Girl Scout Handbook and the event marked the official introduction of the s'more into popular culture.

The publication of the s'more recipe was not the first pairing of chocolate, marshmallow and cookies. In 1913, the Mallomar cookie was introduced to market, followed in 1917 by the Moon Pie. Both products have a graham cracker-like base - a sandwich, in the case of the Moon Pie - and are topped with marshmallow and a layer of chocolate.

 so, maybe it was a Girl Scout reaction to popular treats around the time, which themselves were the result of these new products?

As for their enduring popularity? As Liesl Schillinger (a documented s'more hater) says,

they're easy-to-make, guaranteed nostalgia-inducers, well within the reach of any parent's budget. Others may disagree, but I suspect that most us don't eat them for the taste. We eat them to relive our first s'mores experience, back when our taste buds were so rosy new that any sugar was ecstasy; back when our parents were the age we are now … and younger. S'mores take us back in time. You don't have to like them to love them.

Well put.

Want s'more? You may enjoy:


Monday
Aug152011

Seeking Sweetness: Behind the Scenes with This Charming Candy

So, if you've ever seen my store (CakeSpy Shop, conveniently located at 415 East Pine Street in Seattle's Capitol Hill neighborhood), you're probably already familiar with the wares of This Charming Candy, a Seattle-based purveyor of creative and delicious lollipops.

When you come to the shop, you'll see something like this:

But in case you've ever wondered what goes on behind the scenes, I'll give you a sneak peek.

Recently, I went to their culinary studio in North Seattle, and they allowed me to take a few shots of the sweet process. Well. I was too late to see the candy mixture being mixed, but I did get there in time to see it gently cooling and hardening in molds:

...but you should know that as with any art, there are always the leftover bits--like an artist's palette littered with little bits of this and that color, here's a small rainbow of cast-off sugar:

...and once the lollipops are at the right consistency, they're ready to be packaged with sleeves and ties, on deck:

...and then we'll have packaged lollipops!

...and now, if you head on over to CakeSpy Shop at 415 E. Pine Street in Seattle, you can buy a fistful for yourself. Or call us at 206.605.3589 - we do mail order too!

For more about This Charming Candy, visit their website. 

Sunday
Jul102011

Sweet Find: Johnson Candy Company, Tacoma WA

Not long ago when I took a little road trip to Tacoma to try and find the site of one of the original Mars factories (nerdy but true), my friend Reina (also one of the owners of Hello, Cupcake) introduced me to a gem of a candy shop: Johnson Candy Company.

Now, I was absolutely thrilled with this old-fashioned candy shop. It was old-school, but not in a put-on, contrived nostalgia sort of way: more like because they've been doing this candy thing the same way for, like, ever.

Of course, being so-old school, they don't even have a website. But I was able to learn a bit of their backstory from South Sound Magazine:

This long-time Tacoma favorite has been creating candy for local sugar seekers since 1925. The business was started by Russell Johnson, who ran a soda fountain lunch spot in the Hilltop neighborhood and bought some candy items. Well, the candy was popular so he decided he’d learn how to make it. Eventually he ditched the lunch gig and started making candy full time when he opened Johnson Candy Company, according to his son, Ron. During WWII, the elder Johnson hired another candy maker who brought with him more recipes. Ron purchased the business in the 1970s and now his son, Bill, is the third-generation lead candy maker turning out favorites such as caramel pecan turtles and homemade caramel dipped in chocolate and sprinkled with salt. “People keep coming back for more of those,” Ron said. Sweet, salty and addicting. Don’t miss out on their boxes of Valentine’s Day chocolates. 

...and if you're seeking classic confections such as cordials, homemade candies, or even bubblegum balls decorated like zoo animals (pictured top), they're a great spot, but honestly it's worth a visit alone just to walk in and absorb what feels like a very sweet history of candy-making.

Johnson Candy Company, 924 Martin Luther King Jr. Way, Tacoma, 253.272.8504

Thursday
Jul072011

Sweet Find: Chilmark Chocolates, Martha's Vineyard

So, I have relatives who live on Martha's Vineyard. They live their year-round, so I guess that makes them "townies", or "Islanders".

And in spite of me asking them "have you hung out with Carly Simon and/or James Taylor lately?" every time we talk, they still love me enough to have introduced me to a sweet island treasure: Chilmark Chocolates.

It's true. While recently visiting SpyFamily in New Jersey, the Vineyard division of the family brought with them a box of assorted truffles by Chilmark. At first sight, it appeared to be a fairly regular box of chocolates.

But like some guy once said about a box of chocolates "you never know what you're gonna get". And in this case, it was a sweet surprise: old-fashioned, but exquisitely executed chocolate truffles and confections, including milk chocolates, dark chocolates, enrobed truffles, and flat bark-type chocolates. The chocolate was not especially fancy, but more like an exquisite version of an everyday brand, and in that way it became a sort of sublime experience. There is just something about these chocolates.

They have a sweet story, too; as I learned from this 1987 New York Times article,

CHILMARK CHOCOLATES began four years ago (CS Note: that would be 1983), the product of a young woman's passion for making fine chocolates. It has evolved into a social experiment in which about 30 workers with disabilities make and sell chocolates, using equipment adapted to their needs.

''Both the chocolates and working with the disabled were sort of trial-and-error,'' said Jan Campbell, the 25-year-old founder of this cottage industry in Chilmark, Mass., on Martha's Vineyard. ''We learned both as we went along.''

The chocolates, which are hand-dipped or handmade, are Ms. Campbell's invention. She learned the basics five years ago from her father, Malcolm, the vice president of the Van Leer Chocolate Corporation in Jersey City. Soon, she had turned her hobby into a business, making chocolates in her parents' kitchen and selling them in the farmers' market on Martha's Vineyard.

All I can say is, next time I visit the Vineyard Division of SpyFam, I'm going to forgo spying on Carly Simon's house and head straight for the sweet stuff at Chilmark Chocolates.

Chilmark Chocolates, 19 State Rd. Chilmark, MA 02535

© Cakespy, all rights reserved. Powered by Squarespace.