Home Home Home Home Home Home Home
CakeSpy

Featured: 

My adventure at Ben & Jerry's in Vermont!


Unicorn Love: the Eating Disorder Recovery Blog


 Buy my brilliant books!

Buy my new book!

Buy my first book, too! 

CakeSpy Online Retail!


Archives
Gallery

Fantastic appliance for cake making on DHgate.com

everyrecipe.co.nz

Craftsy Writer

Entries in recipes (704)

Monday
Dec192011

Sweet Stripes: Candy Cane Striped Cookies Recipe for Serious Eats

It's true: Italian Flag Cookies, or Rainbow Cookies, as they're sometimes called, are already sort of Christmas-hued.

But if you, like me, prefer something more substantial than preserves between layers, you might adore this equally festive frosting-filled Candy Cane Striped Cookie variation. These cakey cookies are a pretty addition to any holiday cookie tray, and easy to tailor to your tastes. Not content to merely mimic the candy cane stripes? Make them minty: flavor the filling with a touch of peppermint extract for a sweet flavor complement to the almond flavor and chocolate topping.

For the full entry and recipe, visit Serious Eats!

Saturday
Dec172011

Cookie Time: Chocolate Crinkles Cookies Recipe by Stephanie Anderson Witmer

CakeSpy Note: This is a guest post from Cake Gumshoe Stephanie! Here's her Bio: Stephanie Anderson Witmer is the author of the cookbooks Killer Pies  and Killer Chili  (as Stephanie Anderson, her maiden name), both published by Chronicle Books in 2007. She has also written about food for Better Homes & Gardens, Punchfork.comSpirit magazine, and more. Visit her website at stephanieandersonwitmer.com. 

One reason I love Christmas so much is that in my family, it’s almost exactly the same year after year after year. In the morning, we eat cinnamon rolls, followed by poached eggs over pieces of bread in coffee cups (eponymously called “Charlie eggs” after my paternal grandfather). In the afternoon, my grandmother prepares an informal afternoon buffet that includes beef brisket, steamed shrimp, baked beans and the ubiquitous red-and-green Jell-O mold.

But it’s what comes after all of this that’s the main Christmas food event, in my opinion: my grandma’s chocolate-crinkle cookies. We wait in anticipation for her to carry out the Christmas tree–shaped cookie tray, ready to pounce on the crinkles, stockings, presents and good manners be damned. All of us — kids, adults, aunts, uncles, cousins, parents, grandparents — attack the pile of crinkles with such ferocity, we’re practically elbowing each other out of the way. (The best tactic is to quickly grab a handful and retreat. Don’t be polite. You will eat them all.)

On a normal day, the chocolate-chip cookies or the peanut-butter cookies with the Hershey’s Kisses in the middle or the sugar cookies bedazzled with vibrant sanding sugar would be popular picks. But it’s not a normal day. It’s Christmas—the one and only day of the year that the chocolate crinkles make their appearance. Sure, we could make the cookies more often, but it just doesn’t feel right. Their rarity is part of why they taste so good (but just part).

And now I share my grandma’s recipe with you. Some crinkle words of wisdom before you begin: First, crinkles should be small, ever-so-slightly crispy on the outside and chewy on the inside. It’s important not to over-bake them. They should look not-quite done when you pull them out of the oven. Next, the dough needs to be refrigerated overnight, so be sure to plan accordingly. Just before baking, the cookies are shaped into balls and rolled in what will seem like an ungodly amount of confectioners’ sugar. Err on the side of more, not less. As they bake, the cookies will spread, with the sugar forming the crinkles, and they’ll come out of the oven looking as if they’ve been dusted with newly fallen snow.

Grandma’s Chocolate-Crinkle Cookies

Yield: 6-7 dozen

Ingredients

  • ½ cup vegetable oil
  • 8 ounces unsweetened chocolate, melted
  • 2 cups sugar
  • 2 teaspoons pure vanilla extract
  • 4 large eggs
  • ½ teaspoon salt
  • 2 cups all-purpose flour, sifted
  • 2 teaspoons baking powder
  • Confectioners’ (10x) sugar, for coating 

Procedure

  1. Mix oil, melted chocolate, sugar and vanilla in a large mixing bowl. Blend in one egg at a time. Mix together salt, flour and baking powder in a separate bowl, and then add to wet ingredients, blending until combined. Cover with plastic, and refrigerate dough overnight.
  2. Preheat oven to 350°F. Roll a teaspoon of cold dough into a ball, and then generously roll each ball in confectioners’ sugar. Place 12 balls on a greased cookie sheet, and bake 8–10 minutes. (Check after 8 minutes). Do not overbake. Cookies should be slightly soft when done.
Thursday
Dec152011

Sweet Idea: Chocolate Covered Candy Canes Recipe for Serious Eats

Candy canes are great and all. But they're even better when they're coated in chocolate.

Coating your candy canes in a rich robe of chocolate raises the bar for the classic holiday sweet, imparting both a delicious flavor contrast and adding a festive visual appeal. They're a sweet party favor, an easy way to make your hot chocolate more awesome, and--bonus--they're really easy and quick to prepare.

Note: This recipe works best with candy canes that are about 6 inches long, or peppermint sticks; if using mini candy canes, use extreme care so you don't burn yourself with the hot melted chocolate!

For the full entry and recipe, visit Serious Eats!

Saturday
Dec102011

Sweet December: Macringle Recipe from Macrina Bakery

Image: Macrina BakeryJoy to the world! Macrina Bakery has shared a recipe for their delicious version of Kringle--the "Macringle". Here's what they say in their newsletter:

This is Macrina's version of Kringle, the traditional Scandinavian breakfast pastry. The classic version is made with Danish dough and filled with almond paste, but I like to use our flaky Croissant Dough and a light almond cream. It makes a beautiful presentation for brunch or a holiday table.

Serves 10-12

  • 1 recipe Croissant Dough (recipe follows) 
  • 1 cup whole almonds
  • 8 tablespoons (1 stick) unsalted butter, at room temperature
  • 1/2  cup granulated sugar
  • 1 egg
  • 3 tablespoons pure vanilla extract
  • 1 1/2 tablespoons all-purpose unbleached flour
  • Egg wash made with 1 egg and 1 teaspoon water
  • Coarse raw sugar
  • Powdered Sugar

Procedure

  1. Complete the Croissant Dough recipe as instructed and chill in the refrigerator for 30 minutes.
  2. Preheat oven to 350°F. Place almonds on a rimmed baking sheet and toast for about 20 minutes, or until golden brown. Let cool.
  3. Place cooled almonds in the bowl of a food processor and blend until medium fine. Add butter, granulated sugar, egg, vanilla extract and flour and blend for about 3 minutes, or until smooth. Scrape almond cream into a small bowl and set aside.
  4. Take Croissant Dough from refrigerator and remove plastic. Cut dough in half and place one piece on a lightly floured work surface. Set second piece aside. Gently roll dough into a 12 by 20-inch rectangle, taking care not to tear the dough. If the dough resists being rolled, let it sit for a few minutes to relax, then try again. Lift rolled dough onto a rimmed baking sheet lined with parchment paper. Repeat process with second piece of dough.
  5. Scoop half of the almond cream onto the center of each rectangle and spread it out to approximately 4 by 16 inches. Fold the long sides of each rectangle on top of the almond cream leaving a 1-inch opening down the center. Fold 1 inch of dough underneath each of the ends and pinch to seal. This creates a double thick crust that will keep the almond cream from oozing out during baking. Brush the top of the dough with egg wash and sprinkle with coarse raw sugar. (Avoid brushing the almond cream with egg wash.)
  6. Note: At this point, the pastries can be baked or wrapped well with plastic wrap and frozen for up to 2 weeks. Make sure that the frozen pastries are completely defrosted before baking.
  7. Preheat oven to 385°F.
  8. Let the pastries sit at room temperature for 30 minutes. Dough will rise slightly and become soft to the touch. Bake for about 30 minutes, or until a deep golden brown on top and bottom. Let cool on baking sheet for about 10 minutes, then cut into slices. Dust with powdered sugar before serving.

Croissant Dough
This recipe was inspired by an article I read in Cuisine magazine back in 1983. In the article the talented chef Nick Malgieri shared his secrets for making great croissants. My staff and I started experimenting on our own, and after adding a-little-of-this and taking out a-little-of-that, we came up with what I think is a great recipe. At the bakery, we use this dough as the base for a wide range of sweet and savory breakfast pastries. The key to this recipe is keeping the butter and dough cool while you work with them.

Makes approximately 2 1/2 pounds of dough

  • 1 1/2 cups whole milk
  • 1 1/2 tablespoons dried yeast
  • 3 tablespoons granulated sugar
  • 2 tablespoons pure vanilla extract
  • 1 1/2 teaspoons kosher salt
  • 3 cups and 3 tablespoons all-purpose unbleached flour
  • 12 ounces (3 sticks) unsalted butter, chilled

Procedure

  1. Pour milk into a saucepan and warm over medium heat. Remove from stove when milk is warm to the touch, taking care not to over-heat. Transfer to a large bowl and sprinkle yeast over the top. Add sugar and vanilla extract and mix with a whisk until dry ingredients are dissolved. Let sit for 5 minutes while yeast blooms.
  2. In a separate medium bowl, combine salt and 3 cups of flour. Mix with a wooden spoon. Add flour mixture to the bowl of milk and stir until all ingredients are incorporated. It's important not to over-mix the dough. Cover bowl with plastic wrap and place in refrigerator for at least 8 hours or overnight. While in the refrigerator, the dough will almost double in size.
  3. The next day, remove bowl of dough from the refrigerator and set on counter.
  4. Cut cold butter into twelve equal pieces. Place butter and remaining 3 tablespoons flour in the bowl of a standing mixer. Using the paddle attachment, mix on low speed for about 2 minutes until butter is completely smooth.
  5. Using a plastic scraper, scoop the butter mixture onto a floured work surface and pat into a 6-inch square. (At the bakery we refer to this as a butter-block.) Lightly flour the top and bottom of the butter-block to make it easier to handle, then lift it onto a piece of plastic wrap and set aside.
  6. Note: Before going on to the next step, it's important to make sure that the butter-block and the bowl of dough are the same cool temperature. If the butter gets too warm and soft, place it in the refrigerator until it is thoroughly chilled. If necessary, do the same with the dough.
  7. The next step is incorporating the butter into the dough. Remove the plastic wrap from the bowl of dough and lightly sprinkle flour over the top. The spongy dough will be sticking to the bowl, so coat your fingers with a little flour and gently release the dough from the sides. Pull dough onto a lightly floured work surface and gently pat into a square. Stretch each of the corners outwards about 4 inches, creating an x shape and leaving a 7-inch square of dough in the center. Place the cold butter-block in the center of the dough and fold the stretched corners on top, overlapping them slightly. Pinch all the seams of dough together, completely sealing the butter in dough. Sprinkle a little more flour on your work surface, and moving quickly to keep butter from softening, gently roll dough into a 12 by 20-inch rectangle about 1/2 inch thick. If the dough cracks open and butter starts to peek through, pinch the dough to reseal it.
  8. Once the dough has been rolled out, it's time to start the book-folds. This process distributes the butter and dough into alternating layers, resulting in the wonderful flaky dough we all love. Note: If the butter gets too soft it will start to seep through the dough. If this happens, place dough on a rimmed baking sheet lined with parchment paper. Wrap well with plastic and place in the refrigerator to chill for 30 minutes. Position the rectangle so that a long side is facing you and fold the left and right sides on top, meeting in the center. Crease the seam gently with your fingers to make the next fold easier. Next, fold the dough in half, bringing the left side over the right so that it resembles a book. Lift the folded dough onto a lined, rimmed baking sheet and cover with plastic wrap. Chill dough in the refrigerator for 30 minutes.
  9. After 30 minutes, remove dough from the refrigerator and let sit for 15 minutes. Remove plastic wrap and lift dough onto a floured surface, positioning dough so that the open side of the fold is in front of you. Roll dough, from left to right, into another 12 by 20-inch rectangle. Moving quickly, follow the above book-fold instructions a second time. Lift folded dough back onto the lined, rimmed baking sheet. Cover with plastic wrap, and chill in the refrigerator for another 30 minutes.
  10. The dough still needs one more fold. Remove dough from the refrigerator and let sit for 15 minutes. Then follow the above book-fold instructions a third time. Cover the folded dough and let chill in the refrigerator for 30 minutes.
  11. Unlike pie dough, Croissant Dough really doesn't keep well. I recommend forming the dough into pastries right away. Once the pastries have been formed, they should be baked within 24 hours or wrapped with plastic wrap and frozen.
Tuesday
Dec062011

Teeny's Tour of Pie: Emmy's Organics, Ithaca NY

CakeSpy Note: This is the second in Teeny Lamothe's Tour de Pie series on CakeSpy! Teeny is touring the country, learning how to make pies at some of the nation's sweetest bakeries. She'll be reporting here on each stop! This stop: Emmy's Organics, Ithaca, NY

Where: Ithaca, NY to work at Emmy's Organics 

When: Ithaca was the second stop on the tour and was from the beginning of October to the end.

Why: I actually went to college and was friends with one of the co-founders of Emmy's, Samantha Abrams. Being at Emmy's had less to do with baking (seeing as they are a raw company) and so much more to do with learning everything small business. I was really interested in spending some significant time with both Samantha and Ian in order to really get a feel for what it was like to build a business from the ground up. 

How: October was lovely. I think I really learned a lot about myself and what it's going to take in order to begin a successful business. I definitely had moments of doubt and insecurity, but luckily both Sam and Ian were there to offer endless support. This month everything settled into something much more real and therefore achievable, as long as I'm willing to put the work in. 

Observations: It was wonderful to experience firsthand the growth spurts of a young company. Both Sam and Ian are incredibly knowledgeable about the value of food, and what a huge part it plays in people’s health and well being… not to mention an affinity for all things small business. I loved going to their kitchen because they both understand that for me learning means doing. Being able to mix the recipes, spread the granola and hand press the cheesecake crusts, all the while being told why certain grains and seeds benefit from sprouting, and what substitutes for what, means that I’ve been able to accumulate a vast amount of knowledge in a short amount of time. I also did a lot of baking and selling on the side. Being in Ithaca, using local ingredients and selling pies to strangers helped to instill a huge sense of pride in myself and my product. It’s was a blast price shopping different flours and trying different variations on my favorite fall recipes. I got to sell my pies at Felicia’s Atomic Lounge during their happy hour, and it was a huge success… I mean, who doesn’t want a tiny pie while sipping on a fall cocktail?? Ithaca was a huge lesson in everything small business, as well as a real sense of coming into my own as a potential business lady. It was everything I could have hoped for and more.

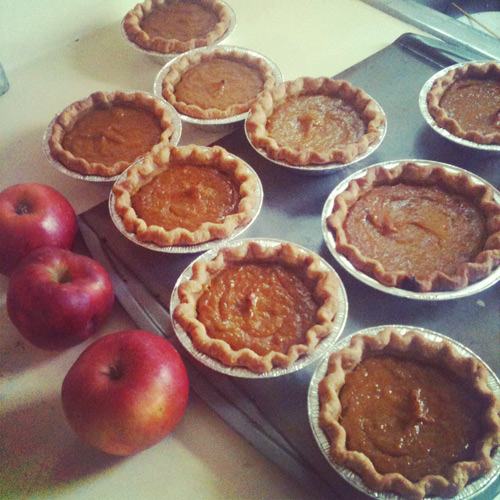
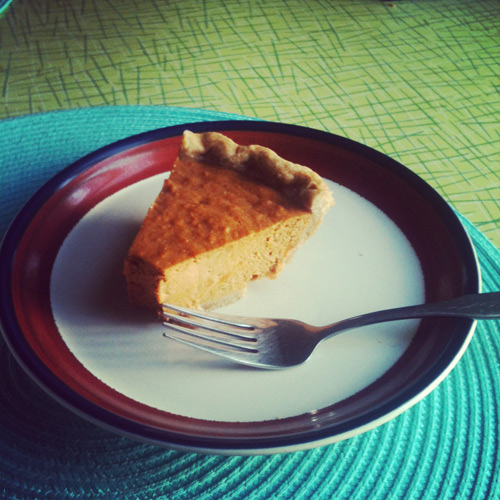
Tour of Pie Recipe: Sweet Potato Pie (because it was in Ithaca that I bought my first box of bulk sweet potatoes)

Ingredients

  • 1 large or 2 small sweet potatos
  • 1 cup honey
  • 1/2 cup heavy cream
  • 3 eggs
  • 1 tbs cinnamon
  • 1 tsp salt
  • 1 tsp ginger
  • 1/2 tbs allspice

Procedure

cut potatoes in half, lightly oil the cut surface and place cut side down onto a baking sheet. bake @ 325 until tender. coooooool. remove peel and puree. In a large bowl mix 2 cups worth of the puree with the ginger, cinnamon, allspice and salt. Add the eggs and beat them in. Add in the honey and the heavy whipping cream all while mixing. Pour filling into crust and bake at 400 for 50-55 minutes or until a knife inserted 1in from the edge comes out clean. cool on a rack before enjoying!

Monday
Dec052011

Mac Attack: Christmas Tree Coconut Macaroons Recipe for Serious Eats

In general, coconut macaroons are not what would be considered a "cute" cookie.

But that's about to change: introducing the Christmas Tree Coconut Macaroon!

These sweet little somethings are rendered adorable simply by tinting the coconut with green food coloring and then decorating with sprinkles and writing icing post-baking. They're fun and easy to make, sweet to eat, and it's a very child-friendly baking project to boot!

For the full entry and recipe, visit Serious Eats!

Tuesday
Nov292011

Natty Boh Cupcakes Recipe from Cake Gumshoe Jen

CakeSpy Note: This is a guest post from Cake Gumshoe Jen, who lives in Annapolis, Md., just down the road from Baltimore, the home of National Bohemian beer -- or Natty Boh. She was inspired by the adorable man with the mustache to bake these Natty Boh cupcakes for her blog, Eat. Swim. Shop. 

If you’re not from the mid-Atlantic, you may not be familiar with National Bohemian beer — or Natty Boh.

Natty Boh has a long history in Baltimore, and while it’s not brewed in the Charm City anymore, many people consider it Baltimore’s beer. And the super cute one-eyed mascot, Mr. Boh, still winks at everyone from the top of Brewers Hill. So when I decided to bake some beer cupcakes in honor of Baltimore Beer Week, I had to use Natty Boh.

I am not a beer person, but Natty Boh tastes a little like Corona to me. So I thought lime zest would work well with the beer in the batter.

I didn’t whip the egg yolks long enough because I’m impatient. But the cupcakes will be even spongier if you do. So you should.
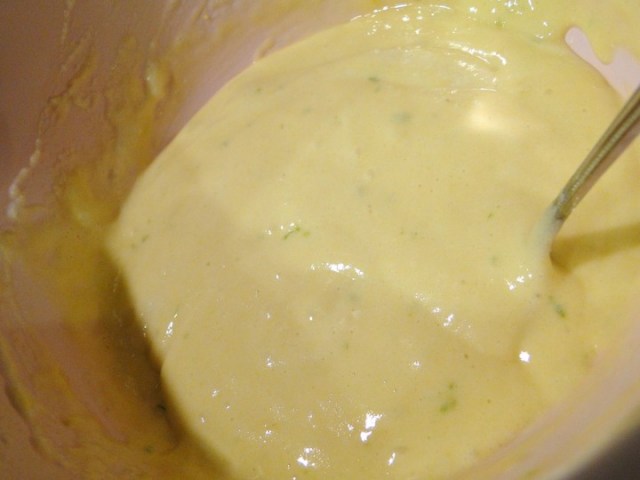
Don’t be scared by the beer in the batter. The cupcakes just have a slight hint of Natty Boh flavor (and scent), but it’s really nice. I put a little bit of beer in the frosting, too, but you don’t have to.

FYI, it’s probably a good idea to make sure you have enough powdered sugar to make frosting before you start making the frosting… especially if it’s 11 p.m. and your neighbors are asleep.
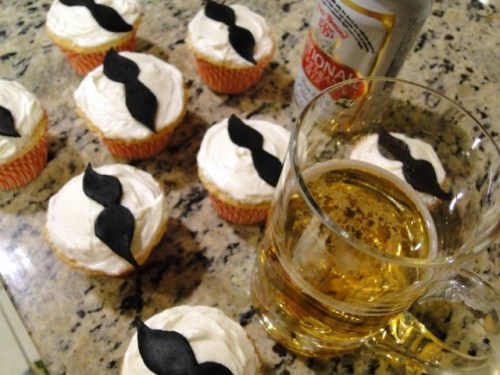
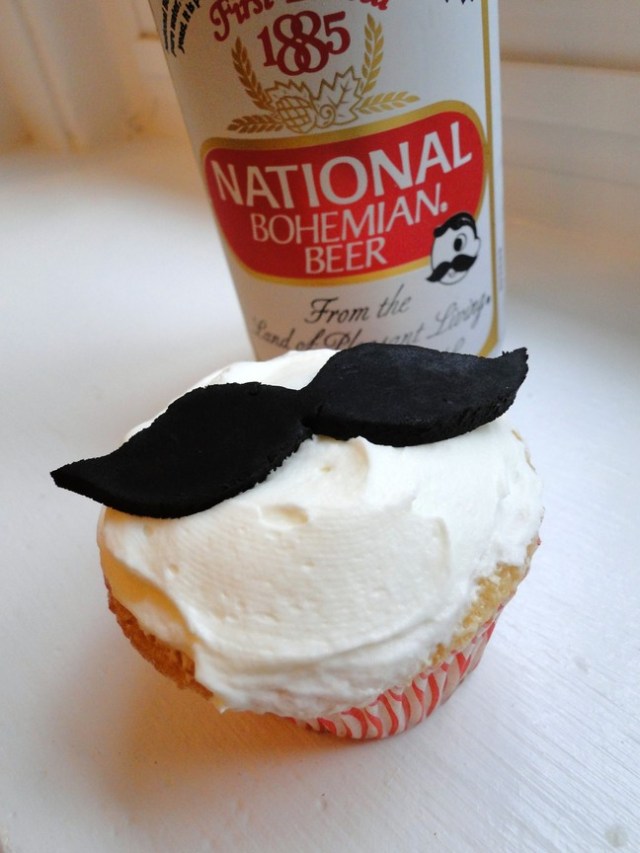
Since these are Baltimore cupcakes, I used Duff/Charm City Cakes black fondant to make little Mr. Boh-esque mustaches. I just used a small sharp knife to cut the mustaches out, but you could make a stencil from parchment paper if you’d like. I also tried to do an eye, but it looked weird. Alas.

Of course, don't let the extra beer go to waste...
Here's the recipe.

Beer-lime cupcakes (Recipe adapted from a really old edition of the Joy of Cooking. Makes about 15 cupcakes)

  • 1 teaspoon lime zest
  • 1 cup granulated sugar (sift if there are a bunch of chunks in it)
  • 3 large eggs, separated and at room temperature
  • 1/3 cup beer
  • 1 cup cake flour
  • 1 1/2 teaspoons baking powder
  • 1/4 teaspoon salt

Procedure

  1. Preheat oven to 350 F. Stir the sugar and lime zest together in a small bowl or measuring cup.
  2. Beat the egg yolks in a medium bowl until thick and lemon-colored — this may take a few minutes. Gradually add the sugar and beat until well combined. Stir in the beer. (And wash the beaters)
  3. In a small bowl or measuring cup (you can use the one you used for the sugar), stir together the cake flour, baking powder and salt. Gradually add to the yolk mixture and stir until combined.
  4. Using clean, dry beaters (and a clean, dry small bowl), beat the egg whites until they hold peaks, but are still glossy. Fold the beaten egg whites into the cake batter.
  5. Pour or spoon the batter into lined cake pans, filling each cup about 3/4 full. Bake for 15 minutes, or until cupcakes start to brown and a toothpick inserted in the center of one comes out clean. Allow to cool before frosting.

Beer-lime buttercream (makes just enough to frost 15-16 cupcakes, double recipe if you want to use a lot of frosting on each cupcake)

  • 1 stick (1/4 cup) butter, at room temperature
  • 1 1/2-2 cups powdered/confectioners’ sugar
  • 1/2 to 1 tablespoon beer
  • 1/2 tablespoon lime juice
  • 1 teaspoon lime zest (optional)

Procedure

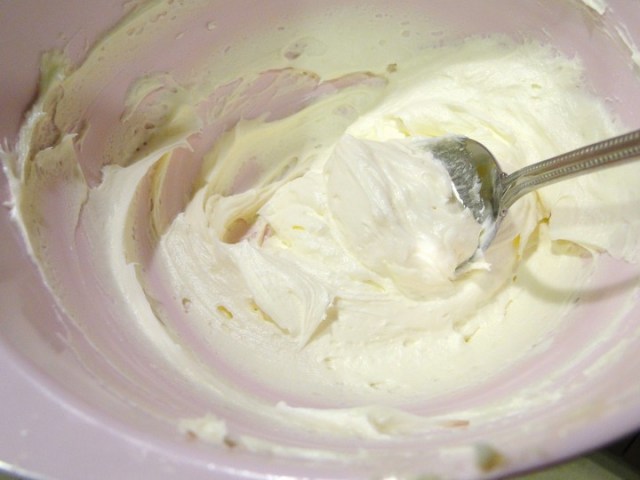
Beat butter and 1 cup powdered sugar together until fluffy. Add beer, lime juice and lime zest and beat to combine. Add additional powdered sugar until frosting reaches desired consistency (or until you run out, like me).

Monday
Nov282011

Friendsgiving: Chocolate Baileys Ice Cream Pudding Pie Recipe

Pudding pie is far more delicious when you make it with melted ice cream. But it's even TASTIER when you add Baileys to the mix, as I did for their Friendsgiving campaign.

Pairing decadent, creamy Baileys with chocolate ice cream and pudding will yield possibly the most luxuriant chocolate cream pie filling you've ever tasted. The thick, velvety chocolate mixture falls somewhere between pudding pop and mousse in texture, which is so deeply, darkly, completely chocolaty in flavor that you won't want the slice to stop.

Note: As for the pie crust, the style used is up to you. I used a chocolate wafer cookie crust, but you could easily swap it out for a graham cracker or cookie crust if desired. 

Baileys Ice Cream Pudding Pie

  • Pre-baked 9-inch pie crust 
  • 1 large package (5.9 oz) instant chocolate pudding 
  • 1 1/2 cups melted chocolate ice cream (yield after melting), with a nice pour of Baileys mixed in
  • 1/2 cup Baileyswhipped cream for topping (suggested)

Procedure

1. In a large bowl, beat pudding mix and Baileys and melted ice cream with a whisk until fully combined (about 2 minutes). 

2. Spoon mixture into your prepared pie crust (it will be rather thick). Using an offset spatula, smooth the filling so that it is evenly distributed. 

3. Refrigerate for 2-3 hours to let set before eating. If desired, top with a dollop of whipped cream before serving. 

Monday
Nov212011

You Say Nanaimo: Chocolate Cranberry Nanaimo Bars Recipe for Serious Eats

It's a fact: Nanaimo Bars are delicious. They're a decadent no-bake treat named for the Canadian city in which they were invented, comprised of a chocolate-graham-coconut crust, a custard-buttercream middle, and a chocolate topping.

But they also dress up nicely for Thanksgiving, as proven in this chocolate-cranberry variation.

The Canadian classic takes a tart-but-sweet Thanksgiving turn by adding dried cranberries to each of the three layers. The resulting seasonal variation is bound to delight family and friends at Thanksgiving festivities and start the holiday cookie season off sweetly.

For the full entry and recipe, visit Serious Eats!

Sunday
Nov202011

Gooey Peanut Butter Cake Recipe for Peanut Butter and Company

Gooey Butter Cake is the pride of St. Louis, MO and proof that sometimes a mistake in baking can lead to a beautiful new invention.

Now, for a long time I held the belief that “Gooey Butter Cake” was the most beautiful cake-name in the world, but now I know that it’s not true–the best one is Gooey Peanut Butter Cake.

This recipe is basically proof that a classic can sometimes get even better: adding White Chocolate Wonderful peanut butter to both the crust and the filling adds a beautifully nutty note to this sweet, rich, and utterly indulgent treat.

Find the recipe I developed for Peanut Butter and Company on their website!

© Cakespy, all rights reserved. Powered by Squarespace.