Home Home Home Home Home Home Home
CakeSpy

Featured: 

My adventure at Ben & Jerry's in Vermont!


Unicorn Love: the Eating Disorder Recovery Blog


 Buy my brilliant books!

Buy my new book!

Buy my first book, too! 

CakeSpy Online Retail!


Archives
Gallery

Fantastic appliance for cake making on DHgate.com

everyrecipe.co.nz

Craftsy Writer

Entries in guest blog (62)

Tuesday
Oct192010

Guest Post: How To Make Gelatin Bows by Nellie Cakes

CakeSpy Note: This is a guest post from Nellie Cakes, a blog written by Nell, a mom who taught herself how to bake so her daughter could have way cooler cupcakes on her birthday than anyone else in school. 

First thing: look at the cake on the top left of the above picture. Now, disregard the cake for a minute, and check out that bow on top! How pretty is that? And guess what! It’s completely edible.  Here’s a closer look at it:

It doesn’t actually taste like much of anything, but it won’t detract from the taste of the cake either, if you decide to slice right on through it. (Which would probably be pretty tough to do.)

Bows aren’t the only thing you can make with this method either! (Flowers and butterflies would look gorgeous too, no?)

There’s another cool thing about it too! You can use the scraps from your project to make your own home-made edible glitter for all your other pretty desserts! To do that, just take the clippings that you’d normally throw away after you finished the project and cut them into tiny pieces. When I held my clippings next to the glitter I bought, I couldn’t tell the difference at all!

You’ll have to plan a little ahead of time if you want it to be ready for that cake you made because it takes about twelve hours for it to completely dry, plus the assembly time.

Ok, here’s what you need:

  • Unflavored gelatin (like Knox)
  • Water
  • Food coloring
  • A clean paint brush
  • A non-stick surface, like a pattern board for fondant. (I used Duff Goldman’s Texture Tiles, which were at Michaels for $5)
  • Scissors

Take one packet of the gelatin (about one tablespoon) and put it in a small bowl with 2 ½ tablespoons of water. Give it enough time to soak up the water completely, about five minutes.

After that’s done, put it in the microwave for about five seconds. Gelatin melts at really low temperatures, so that’s all you’ll need to liquefy it. When you pull it out, it should look like this:

Let it cool for 5 to 10 minutes. When it cools to the right point, a layer of… well, scum, will form on the top. Take a stick of some kind and lift that layer off. If it won’t stay on the stick, let it cool for a few more minutes and try again. It should come off mostly in one piece. Discard that part. Once that’s done, it should look like this:

Nice and clear.

By this time, it will probably be too thick to do anything with, so throw it back in the microwave for another five seconds. When it comes out, add the food coloring and mix it around. To make the pink/red in the bow, I only put one drop of regular liquid food coloring in there. If you want it to be more intense, you could always add more. You can also paint the dried gelatin afterward, with a mixture of high proof vodka and food coloring, so if it dries a lighter color than you anticipated, it’s not a total loss. If you do paint it, the gelatin will warp when it gets wet. Make sure you have two non stick surfaces you can sandwich it between, and put a book or something on top until it dries again.

Once you have it the right color, dip your paint brush in the gelatin and paint it onto the non-stick surface, like this:

I made mine pretty thin, stretching the gelatin to cover two and a half boards, which worked out perfectly for the bow, which measured about five inches across. If you want the bow to be bigger or smaller, you can alter the amount. 

My original surface had a simple pattern on it, so it came off pretty easily. Be careful with patterns that are deeper. They’ll cause the gelatin to pool in certain spots, which will make it pretty difficult to peel off the board without cracking it.

Now you wait. It will begin to harden up pretty quickly, but it takes about 12 hours to fully dry. You’ll know it’s dry because you’ll hear it popping off the board. The first time this happened, I walked all over the house trying to figure out what that crackling noise was. I figured it out about a half an hour into the search. I felt like a moron.

The second time I made this, I made sure to paint it on at night so it would be dry the next morning.

Now that it’s all dry (and weirdly plastic like), slowly pull it off the board. It’s amazingly strong, so you don’t have to worry too much about ripping or cracking it.

Take out a pair of clean scissors (you could even use fancy craft scissors) and clean up the edges so it’s a nice rectangle. Then, cut the rectangles into strips. Mine were about half an inch thick. Like so:

This is where it gets a little trickier. Take the strip and bend it in half, trying not to crease it anywhere. You kind of have to fidget with it to get it right. Once it looks good, warm up some more of the gelatin (if you have some left over. If you don’t, make a tiny bit more) and dip the opposite end of your paint brush in it, and put a dot of the gelatin where you want the edges of the bow to attach. Just pretend it’s Elmer’s glue. You might have to hold it there for a little while until it stays stuck, of you could use paper clips like I did:

 While those are drying, trim a little bit off the ends of the strips you have left, and make smaller loops. And then do it again with even smaller loops. While you wait for those to dry, you can begin assembling the larger ones, if you feel they’re stable enough. Use some of the gelatin to glue the edges together, forming a star with the loops, kind of like this:

Make sure you glue everything together on top of your non-stick surface, or you’ll end up chiseling gelatin off your table. (Not that I’d know first hand or anything…)

Once that’s stable, add in the smaller ones on top of the first row, but still in between them so it looks well spaced. Repeat. You kind of have to mess around with it to see what looks best. Keep adding the loops until you feel like it’s nice and full. Also, make sure to give yourself time between each major addition, so it doesn’t all fall apart on you.

Let it dry over night.When it’s totally dry, you’d be surprised how durable it is! Now you can put it on top of a cake! I used a couple dabs of corn syrup to make it stick.

Here’s a picture of the finished bow before it went on the cake:

...and here's the cake again.

Hope you enjoyed this tutorial! For more awesome, visit Nellie Cakes!

Thursday
Oct142010

Guest Post: How To Make Homemade Sugar Decorations by Nellie Cakes

CakeSpy Note: This is a guest post from Nellie Cakes, a blog written by Nell, a mom who taught herself how to bake so her daughter could have way cooler cupcakes on her birthday than anyone else in school. 

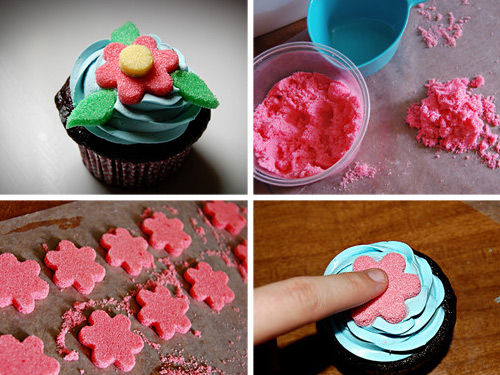
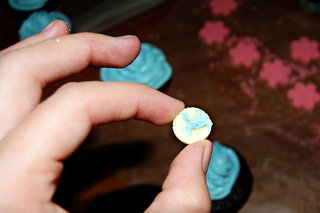
I was originally going to write about how to make your own sanding sugar, which is cool in and of itself, but while I was coloring the sugar for the photos I was going to post I got inspired and decided to make some home made sugar decorations too (finished product pictured top left).

The cupcake is plain old chocolate, the icing is Swiss Meringue buttercream and the flower is completely made out of sugar. It’s a cute little thing, isn’t it? I’ve also decorated a cake with sugar stars and an owl.

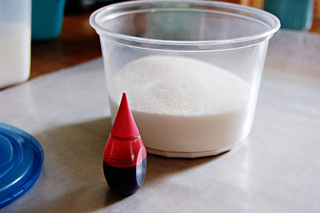
To make your own colored sugar, you’ll need a cup of regular granulated sugar, some liquid food coloring and a very tight sealing container. I’m not messing around on this point. If it’s not super air tight you’re going to end up with sugar all over your kitchen and ants may or may not invade your home and eat your kitchen down to the floor beams. If this does happen, I will not be held responsible!

All of your stuff should resemble this:

If your stuff doesn’t resemble this stuff, you have already screwed up too badly to go on. Disregard the rest of the post if you can’t put some sugar in a container.

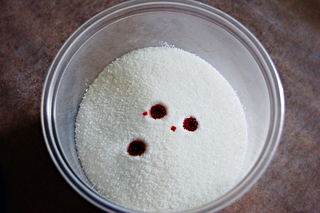
Next, put a few drops of whatever color you’d like into the bowl. I decided on pink for the flowers, but you can make them any color you’d like. Or you don’t have to make flowers at all. I guess it just depends on what cookie cutters you have. Or what food coloring. Anyway, it should look like this now:

Start out with only a few drops because it’s harder to lighten the sugar than it is to darken it. If you try to lighten it you’ll have a more speckeld effect.

I have to warn you, your colored sugar isn’t going to look like the store bought kind. That stuff has something in it to make it shiney. This stuff will be a little less sparkly, but still very pretty. It works out though, because when you make the sugar decorations, using the store bought stuff makes it harder to get a clean edge on your design. The crystals on the store bought stuff are bigger, which is a pain when you try to put the cookie cutter through it.

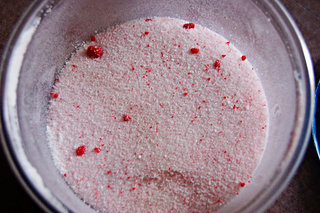
Once you have a few drops in, close up the lid nice and tight. You might even want to put the container in a zip lock bag just to be safe. After you’ve made sure it’s on lock down, shake theshit out of it. Really go crazy! The harder you shake it the faster the color will disperse. You have to change the dirrection of your shaking every so often too. The goal of the shaking is to break the ball of wet sugar into a bunch of tiny pieces so the color can be mixed around. Is your arm tired yet? Does it look like this?

If it looks like this, you’re not done. You can either close it back up and shake the shit out of it some more, or you can take a fork and break up the little balls of food coloring, then close it up and shake it some more. When it’s finally finished, it will look like this:

But less wet. The wet comes later.

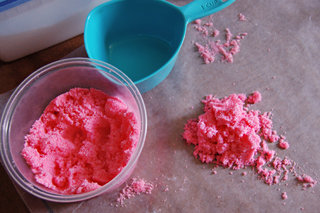
Isn’t that pretty? I used about 8 drops of the neon grocery store food coloring for this pink.

Now that you have your pretty sugar, it’s time to make the decorations. Get out your trusty 1/2 teaspoon measuring spoon, some wax paper, something nice and flat (I’m using the bottom of my 1 cup measuring spoon), and tiny cookie cutters of your choice (or random house hold objects like a bottle cap for a circle).

Measure out 1/2 a teaspoon of water for each cup of sugar you colored and pour it into the container. Close it up and shake the shit out of it again. All of the same rules apply. You still want to break that ball of sugar up so the moisture spreads itself around. Once you’re done, it should feel like wet sand. Squish some of it between your fingers. If it holds a shape, you’re good. If it doesn’t, try adding a tiny bit more water, drop by drop and then reshake it until it does.

Once you have some wet sugar, lay out a big piece of wax paper and dump some of the sugar on top of it. Take the flat thing you have and push it down so you have a layer that’s about 1/4 inch. If it’s thicker, that’s ok too. You just want it to feel like it’s packed down.

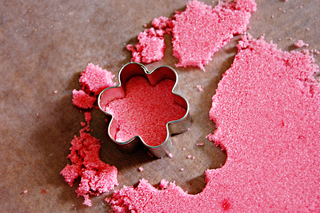
Take your cookie cutter and press it into the sugar like you’re cutting out cookies but don’t lift it back out! Instead, keep the cookie cutter flat on the surface and drag it to the side, like so:

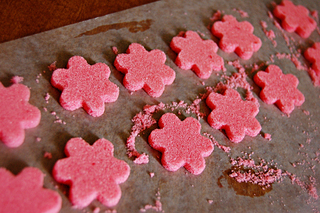
Keep it on the waxed paper, and start a line of sugar cut outs as far away from your mound of sugar as possible to allow yourself more room. Once you get however many you will need, make a few more. You will end up breaking some, I promise. I know you guys know what a line of these will look like, but here’s a picture of them anyway.

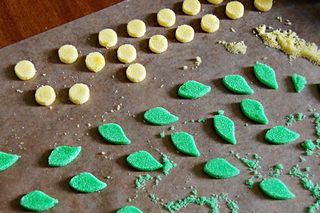
Aren’t they pretty? I made some leaves and yellow dots for the centers, but the flowers look cute without all that too. Here are my leaves and dots:

Once you have a billion of these things cut out, let them sit there for a few hours. The longer the sit there, untouched, the sturdier they’ll be. I left mine over night. If you don’t end up breaking a few of these like I did, they’d make super cute sugar cubes for a little girl’s tea party or a baby shower.

If you made them a really dark color, they will make your coffee look funny. One time, I made WAY too much blue sugar so my husband was forced to put it in his coffee. It looked really gross when it dissolved. Coffee should never look that way.

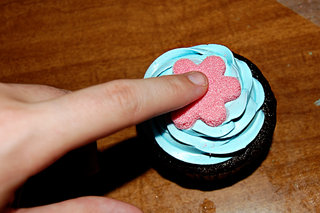
Anyway, after they’re all set and hard, just push them into the icing on your cake or cupcake, like this:

For the yellow dots, I used a little bit of the icing (not too much! You don’t want it to squish out the sides!) and glued them onto the flowers:

I stuck a couple of the leaves in there, and ta da! Pretty, completely edible decorations! I like how they look home made and perfect at the same time.

Good luck! I’d love to see pictures if you end up making some! You can email them here (and I’ll probably end up posting them)! Happy decorating, and I wish you the best with the herd of ants.

Tuesday
Sep282010

Sweet Mini-Series: Hummingbird Bakery Chronicles, by Cake Gumshoe Alexandra

CakeSpy Note: This is the introduction to a series of several entries about (and recipes from!) London's Hummingbird Bakery by Cake Gumshoe Alexandra Levert, who is an assistant director for a French television network in Toronto, Ontario, Canada. She loves cooking and baking because she finds it comforting and yet challenging at the same time. She tries to combine her love of food and her love of travel as much as life will let her.

Alexandra's Spy Report

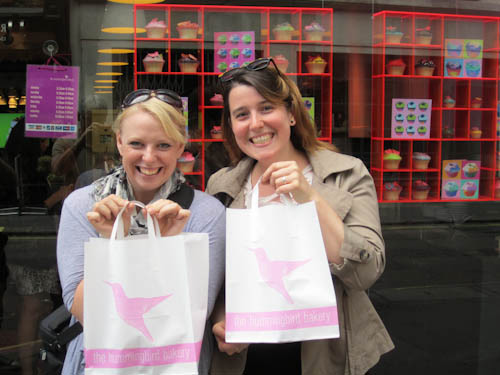
I recently went to visit my Australian friend and her boyfriend in London, England. Upon my arrival, as I reached into my bag to give them a little souvenir from my trip to Prague, she handed me a book… Something called Hummingbird Bakery Cookbook. I was immediately intrigued by it, seeing as the cover adorned lovely cupcakes and a few other desserts. You see, I’ve been obsessed with cupcakes for quite a while now, and seeing this picture of the beautiful and perfect sweets didn’t help my obsession. When I finally opened the book, I remember being completely enamored with the variety of desserts being described and also with the beauty of their presentation. To my great surprise, my friend told me the bakery was actually in London itself, and that we could go to one of the three locations during my stay. How marvelous!

My experience at The Hummingbird Bakery

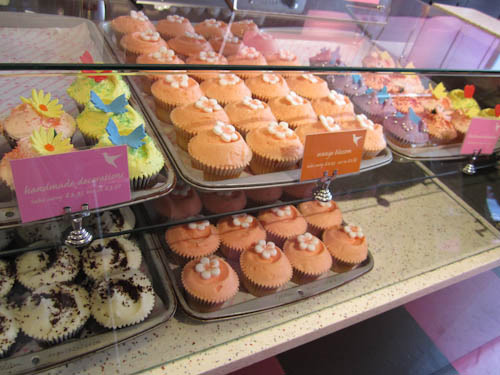
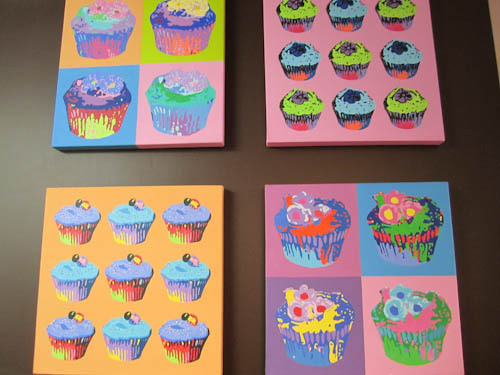
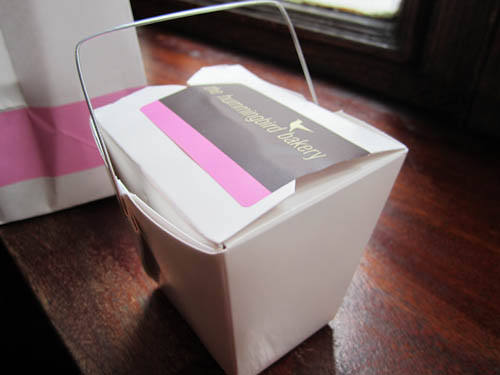
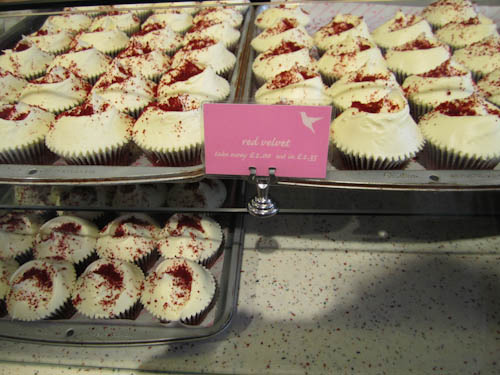
The location I went to is situated on Wardour Street, a small side street in SoHo. I could see the white and pink hummingbird sign by the entrance from far away. When I went in, I found it as adorable as I thought I would: Cupcake pop-art on the walls, cookbooks on shelves, dessert trays and, most importantly, endless rows of cupcakes. I went there on a Saturday, so the bakery was packed and extremely busy. I queued for my chance to finally get one their sweets, but when one of the girls working there asked me what I wanted, I couldn’t even choose! Vanilla with vanilla frosting? Too easy.  Vanilla with chocolate frosting? Too common. Orange blossom? Maybe some other time. Red Velvet with cream cheese frosting? Perfect! I bought my cupcake along with two notebooks as souvenirs for my friends back in Toronto. Then my friend and I walked to Trafalgar Square and devoured our desserts in seconds! The cake was moist and flavorful, the frosting was simply delicious, and the two put together made it one of the best cupcakes I have ever had. My friend had also bought the raspberry cheesecake and after having only a spoonful of it, I can honestly say it was incredible.

The final word?

So, if you are ever in London and are looking for a little (or big) something to satisfy your sweet tooth, I definitely recommend The Hummingbird Bakery. Now, I am back home and eager to try some of the dessert recipes. Stay tuned to hear about my attempt to make some cupcakes of my own.

In the meantime, check out Hummingbird Bakery online!

Sunday
Jul182010

Totally Sweet Guest Post: Decorated Party Cookies by Bird Crafts

CakeSpy Note: This is a guest post from Bird, who would like to introduce herself thusly: Hi everyone, I'm Bird from Bird Crafts and I love to blog, chat, craft and design printable party goodies (which you can get at my shop on Etsy). You can also find the full tutorial on her site.
Yep, these are my first decorated cookies. I don't say that to brag, but rather as a huuuuuge disclaimer and perhaps as an incentive for you to have a go too. 'Cause if a total cookie virgin can ("can" being a very loose term here...), then anyone can!
I got my cookie dough recipe and cookie cutters from a baking supplies on-line shop as they make tons of cookies for demonstration purposes, and so I figured their recipe would stand the test. And it did!

It held the intricate frog and butterfly shapes beautifully and tasted great! The only ingredient missing was 2 tea-spoons of bicarbonate of soda or some other raising ingredient, I think.

Anyhow, if you're using this recipe, be sure to persevere until you eventually get a smooth dough like the photo above and refrigerate the dough covered in cling film for at least 2 hours. It is a very short (crumbly) dough and it needs to be chilled before you attack it!
TIP: before rolling your dough, make sure to cover you working surface and rolling pin with flour. It does not say that on the recipe sheet, but I found it helped a lot.

Whilst you let your cookies cool down on the wire rack (Yep, I even attempted lollipop cookies, but that's another post..), prepare your icing.

Now, this was a total guess work but later I discovered the ratio of icing sugar to water is just so the mixture has a syrup consistency and covers the back of a spoon without being too thin (very scientific...NOT). But you'll be able to experiment and get the right consistency after a few attempts. 

TIP: If it's too sloppy, add more sugar. If it's too thick add more water (a few drops at a time).

Add a few drops of liquid food colouring and set aside covered with film so it does not get a crust. 

I must say that if it hadn't been for Wilton's Icing tubes, I would not be writing this post. 

TIP: If you're a novice to icing you should purchase these tubes to practice with, otherwise you may totally lose the will to live...

The tubes are sooo easy to handle even if you don't have very steady hands. Plus, you can simply screw the lid back on and store the rest for another occasion. Please note: Wilton are NOT paying me to say that!

Where were we...Now, draw a thin line all around you cookie. Doesn't have to be neat, you'll be able to re-do it later. You just need a line to act as a barrier holding the thinner icing inside. Fill the gap with the thinner icing you reserved. 

TIP: Don't be tempted to place too much on, otherwise it may run over the lines.

TIP: Use a tooth pick to help you "guide" the icing into the little corners and small spaces. 

TIP: Note that I am decorating the underside of the cookie? This is because the right side is slightly raised in the cooking process and you really need a flat surface to work with - So turn those babies upside down to decorate.

Let your cookies dry over night. I sat mine on a baking tray on my worktop.  

Next day, add the finishing touches to your design, like going over the edges of the cookie one more time with the Wilton's icing tube and adding detailing.
Let the cookies dry another day, but make sure there are no curious hands or teeth about. Place them in cute party bags and make someone's day!

Oh, and I used the cupcake toppers from my Garden Party Collection as favor tags, and my assorted  matching Fabrics as the the background (fabrics coming soon to my shop)! Tags vailable at my Etsy shop.

TIP: Although this whole process takes 3 days you can make the cookies in advance:

1. You can chill the dough and roll it out the next day.

2. You can freeze the baked cookies without the icing

3. You can also freeze the cookies already decorated in a covered plastic container, separated by grease-proof paper. Defrost them covered at room temperature for about 2 hours. They taste basically the same as fresh. Honestly, I tried!

I don't really know how long you can keep them in the freezer for, but I am testing that for you. I guess because the recipe contains butter it wouldn't be advisable to freeze them for longer than 3 months...(CakeSpy Note: but really, will they last that long?)

Friday
Apr232010

Chip off the Old Block: A Cookie Monster Guest Recipe from Vero NYC

Cookie by Carol's CookiesStart working up an appetite: Chocolate Chip Cookie Day is coming up on May 15th. And from what I hear, there's a rather unexpected place to score a delicious dessert called The Cookie Monster in NYC: Vero, a wine bar with two locations in the city. As they tell it,

 Despite not being on the menu, the Cookie Monster is one of Vero’s most popular items and devoured by regulars and discovered each night at their two locations in Manhattan.  While this simple dessert may seem each to prepare, each day the cookies are flown fresh from Carol’s Cookies in Chicago, who was voted most popular chocolate chip cookie by People Magazine.

Cookie Monster dessert, photo c/o Vero NYCAnd I tend to believe them--any dessert that calls for ice cream and whipped cream respectively in 4 scoop quantities--in addition to the cookie--is probably going to be pretty good, in my opinion.

However, if you can’t make it in to Vero to try this bite of chocolate chip cookie heaven, Vero was kind enough to share a recipe to recreate the magic at home--of course, the Carol’s Cookie and Vero’s ambience are not included.

Vero's Cookie Monster

Ingredients

  • 1 plate-sized chocolate chip cookie (preferably from Carol’s Cookies in Chicago)
  • 4 scoops of vanilla ice cream
  • 4 scoops of fresh whipped cream 
  • Drizzle of rasberry coulis
  • Drizzle of chocolate coulis
  • ½ cup of blackberries, raspberries and blueberries

Procedure

Place warm cookie on plate, top with ice cream and whipped cream; drizzle with raspberry and chocolate coulis and garnish with fresh fruit.

The Cookie Monster is $12, and available for dinner every night at both location, ask for it by name at both Vero locations in Midtown and Uptown; for directions and more info, visit veronyc.com.

Thursday
Mar182010

Grande Dane: Danish Delights in Solvang, CA from Cake Gumshoe Gayle

CakeSpy Note: This is a guest post from Gayle Wheatley, a pastry aficionado, writer, and artist based in Los Angeles, who grew up near Solvang, California. You can find her writing at www.culturevixen.com, and her art at www.gaylewheatley.com

You’re not in Denmark anymore…although you’d never know it.

For sweet aficionados this side of the pond, European confectionery delight can be sampled just a hop, skip, and a jaunt from Los Angeles. Without having to fly to Denmark to embark on this culinary journey, one can get their pastry fix in Solvang, California, a Danish village located in Santa Barbara county. Downtown Solvang is no ordinary California city. It’s home to Scandinavian shops, wine bars, and eateries that all architecturally appear to have been plucked out of a picturesque village outside Copenhagen. Yes, Danish flags flap in the wind. Yes, store clerks strutt traditional costumes. And yes, Smorgasbord feasts and aebleskivers (Danish pancakes) beckon from restaurant windows. Solvang even boasts not one—but three—historic windmills!

But the best part of a trip to Solvang are the bakeries. Traditional to the core, Solvang boasts four savory bakeries that serve a delicious array of Danish desserts made with quality ingredients, prepared fresh daily. Perhaps my unsatiated pastry cravings are the result of early years spent working in a Solvang bakery, when once upon a time I had access to unlimited quantities of delicious delicacies, and the full-bodied perfume of Danish sweets used to follow me around. Nowadays I’m on the other side of the pastry counter, but the sweets are just as tempting as ever.

Demystifying the Pastry Counter

When you enter a Solvang bakery, the first rule of thumb is to find your way up to the glowing front counter to have a look at all the fancy sweets you can choose from. What you’ll see can be broken down into the following tasty categories:

Danishes & Puff Pastry: These are the very pastries that coined the term “Danish,” and they are a completely different animal than the zombie variety you’ll find at the local coffee shop. These are filled with a burst of fruit such as blueberry, apricot, cream cheese, raspberry, or apple. You’ll also find bear claws and boats, which are fruit-filled Danishes dusted with powdered sugar. Then there my personal favorites: cinnamon crisps, Danish waffles, and florentines. I can never resist a large swirly cinnamon crisp or a Danish Waffle filled with whipped cream and a squirt of raspberry. Chocolate-dipped florentines are another favorite: a crunchy treat made from crushed almonds sandwiching a mocha buttercream center.

Petit-fours & Mini Sweets Petit-fours: Or miniature dessert cakes, are typically filled with buttercream and a squeeze of fruit puree, then topped with fondant and fancy embellishments sculpted from icing. You’ll also find all kinds of tiny treats from almond-topped pistachio bars to macaroons, to rum balls and chocolate-topped Napoleon hats. But the big stars of the show are the rich and tempting chocolate-crowned eclairs, generously stuffed cream puffs, and delicate multi-layered Napoleons.

Danish Specialties: These are pastries meant to be shared, as you’ll notice by their size, which can easily feed a dozen. These show stoppers include:


  • Kringles: pretzel-shaped coffee cake filled with marzipan, custard, and raisins, and sprinkled with sugar and sliced almonds.
  • Butter Rings: Round cakes made with butter, marzipan and custard, topped with frosting in the shape of rings.
  • Strudels: A well-known family classic filled with apricot, raspberry, custard, or perhaps cream cheese, sprinkled with sugar and almonds.
  • Butter cookies: You’ll find buckets upon buckets of these assorted cookies that include favorites such as chocolate chip, lemon, coconut, cinnamon, almond, chocolate marble, and sugar-frosted.


Bread: The staple of any bakery, bread completes the pastry counter, offering the only item that won’t satisfy a sweet tooth. But the bread in Solvang’s Danish bakeries is traditional and hearty. The most common loaves you’ll find in Solvang are pumpernickel, onion-cheese, cardamom, and cinnamon-raisin.

Once you’ve selected your Scandinavian specialties of choice, you can either dine in and enjoy your sweets with coffee or tea, or head out for an impromptu picnic in one of Solvang’s parks or courtyards. Either way, you’re sure to treat your taste buds to an old world experience you won’t soon forget.

Places to Sample Danish Delights in Solvang, CA:

Danish Mill Bakery, 1682 Copenhagen, Solvang, CA 93464 (805) 688-5805; online at danishmillbakery.com

Mortensens Danish Bakery, 1588 Mission Drive, Solvang, CA 93463 (805) 688-8373; online at mortensensbakery.com

Olsens Danish Village Bakery, 1529 Mission Drive, Solvang, CA 93463 (805) 688-6314 olsensdanishvillagebakery.com

The Solvang Bakery, 460 Alisal Road, Solvang California 93463 (805) 688-4939; online at solvangbakery.com

Monday
Mar152010

Sweets for the Sweet: Samoa Cupcakes by Rainy Day Gal

CakeSpy Note: This is a guest post from Rainy Day Gal (a.k.a. Jenny Miller), a fellow Seattle blogger with a major sweet tooth.

Right now Samoas are here. As are Thin Mints. And Tagalongs. And some weird new flavors that nobody wants. But I'll forgive them their dried-cranberries-in-a-cookie misstep just this once. I just can't resist those cute little gals in uniform in front of the grocery store. I'm their best customer, and especially so this year because I decided to take on a baking project involving my all time fave---the aforementioned Samoas. Crunchy cookie covered in chocolate, caramel and toasted coconut? What could be better? Making it into a cupcake, of course. You could do this with any of your favorite cookies, Girl Scout or non---see my suggestions at the end of this post. To match the flavors of the Samoa, I chose a basic vanilla cupcake and a frosting lightly flavored with coconut. I now accept that I am ready to begin. So I will.

First we need to get some coconut milk reducing to make it more concentrated. Pour a can into a saucepan, bring to a boil, and simmer over medium heat for about a half hour. Give it a stir once in a while. It will froth and get really big, but the liquid is really reducing in there. Meanwhile, grab the basics: flour, cake flour, sugar, baking powder, salt.

4 eggs. Hippie eggs. I wrote a song about them earlier but I felt it would be inappropriate to share with you. Unsalted butter. 2 sticks. Cubed.

One cup of whole milk. And I'm definitely not going to share my song about hippie milk with y'all.

Pure vanilla extract. Don't ever buy imitation vanilla flavoring, pretty please. I will come over and throw it out your window. And, most importantly? The cookies.

I used two boxes for 24 cupcakes. I accept that there are far too many calories in Samoas alone, let alone in a Samoa cupcake. Somewhere Jillian Michaels is doing push-ups in her magical trainer castle and plotting what she'll have in store for me tomorrow. Stick 'em in your food processor and pulse away. Not even close. Getting closer.... ...perfect.

Toss 'em in a shallow bowl and let's get ready to make our cupcake batter. Toss your dry ingredients in the bowl of a stand mixer fitted with the paddle attachment. Give it a quick spin on low to combine the powdery stuff. Throw in your butter... ...and mix just until those little buttery chunks are coated with flour. Crack your 4 hippie eggs into the milk and add one tablespoon of vanilla. Mix well. Add the milk/egg/vanilla mixture to the dry ingredients a third at a time, stopping before each addition to scrape down the sides of the bowl. One... two.... ...three. It's alright if it's a little lumpy. Those little chunks of butter will serve to keep the cupcakes moist.

Now here's my trick for filling cupcake liners. Grab a big freezer bag and anchor 3 inches of one of the bottom corners under something heavy. Your stand mixer works perfectly for this. Pour in the batter (I usually hook one edge of the bag onto the little metal thingie that the mixer attachments hook onto. Yes, that is it's proper name.). Seal the bag, hold at the corner and cut off the tip. This is for those of us ghetto-fabulous chefs who don't own pastry bags. Fill your liners about 1/3 full...

...and then sprinkle on a light layer of the crumbled cookies. Then squeeze more batter over the top so that the entire thing is about 3/4 full. Throw into a preheated 325F oven for 17-20 minutes.

By now your coconut milk should be about a quarter of what it once was. It's also creamy and thick---perfect! Refrigerate for at least 30 minutes. Ready to make frosting? Combine cream cheese, butter, vanilla, powdered sugar and reduced coconut milk in your mixer fitted with the whisk attachment.

Mix until light and creamy.

Once the cakes are done, set them on a rack to cool completely before frosting. I'm fairly certain my cupcake army is plotting to take over my home. Once they're cool enough, frost with about 1 tablespoon of frosting each. We're really using frosting in this case to serve as "glue" for the cookie crumbs---we don't want to overdo it. After frosting, give 'em a light dunk in the cookie crumbles. Perfect! I found one stray cookie in the box, so he gets the seat of honor (pictured top). Uh oh. Maybe he's commander of the army.

I think I've just done myself in. And, just because I feel like being sued for copyright infringement*, I stuck a purdy little Girl Scout logo on one of these beauties. *Rainy Day Gal has no affiliation with the Girl Scouts. She admires and respects the organization and hopes that they will not sue her, but instead send her boxes and boxes of cookies. 

Alright, let's get down to it: how did they taste? Pretty darn good. The cake was moist and a tad on the dense side, with a crunchy little layer of cookie halfway down. The frosting added to the flavor of the cake, but didn't overpower the taste of the cookies on top. I simply loved the texture: crunch is always good. These cakes are not for the faint of heart, however---they are incredibly rich. I would make two Girl Scouts share one. A chaser of milk is definitely in order. I now accept that this post has come to an end. But before you go here are some ideas I have for making cupcakes using other flavors of GS Cooks (that's my new nickname for them. Go with it.):

I hope you're enjoying Girl Scout cookie season as much as I am! Well, who am I kidding---I don't think anyone enjoys Girl Scout cookie season as much as I do. Have a totes fab wed, y'all. -RDG Samoa Cupcakes

  • One batch Vanilla Vanilla Cupcake batter
  • 2 boxes Samoas cookies, pulsed in a food processor until crumbly
  • One batch Slightly Coconut Frosting (see below)

Preheat oven to 325F. Fill cupcake liners 1/3 full of batter. Sprinkle a light layer of cookie crumbs on top of batter. Pour the remaining batter on top until liners are about 3/4 full. Bake for 17-20 minutes. Transfer to a wire rack and let cool completely. Once cool, spread one tablespoon of frosting on top and then lightly press frosted side of cupcake into cookie crumbs. Makes 24 cupcakes. Slightly Coconut Frosting

  • 1 can coconut milk
  • 4 oz cream cheese, softened
  • 4 tbsp butter, softened
  • 1/2 tsp vanilla extract
  • 1 1/2 cup powdered sugar

Pour coconut milk into a saucepan, bring to a boil, and simmer over medium heat, stirring occasionally, until reduced by 75%. Let cool. Combine 4 tablespoons of the reduced coconut milk and remaining ingredients and beat until light and creamy. Refrigerate any unused frosting.

Sunday
Mar142010

Poires from Paris: Bagatelle de Poires Pochees Recipe

Totally sweet: a recipe from an actual French person! Here's a guest post from the wonderful and talented Helene, whose work you can find over here.

Well, today you will be able to amazed every one by cooking: "une bagatelle de poires pochées" for 8. How to make it? Nothing easier... I'll show you right now.

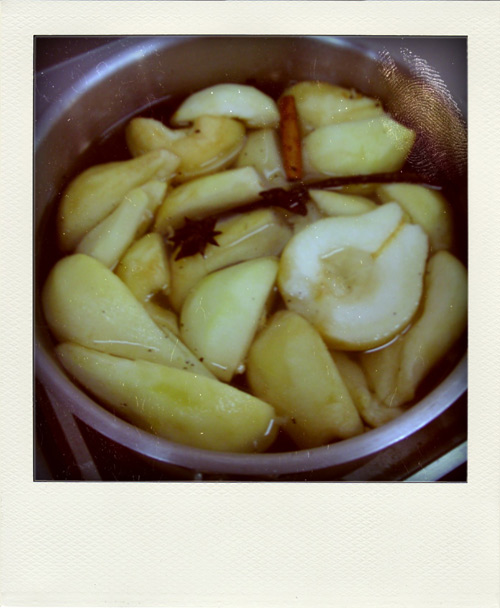
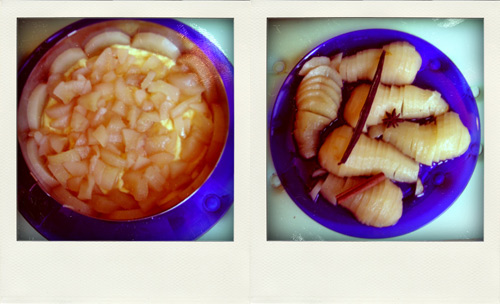
First, you have to prepare your pears by dousing them in a delicious sugar and spice coating.

For 4 pears, mix into a big pan:

  • 1 liter of water
  • 500 g of sugar
  • 3 or 4 cinnamon stick
  • Some star anise
  • 4 g. of vanilla

Let the mixture heated and dip your peeled pears, drained and cut in 2 pieces.

Let it cook slowly...

Second, prepare the biscuit

This is a cheap and easy recipe for a biscuit very Frenchy and so good.... This is the basis of our fruits or chocolate charlotte cake. For our recipe we need to prepare it in 2 plain circles. But first of all... the recipe :

Ingredients

  • 4 eggs
  • 100 g of sugar
  • 100 g of flour

 Procedure

  1. Separate the white from the egg yolk. Mix the yolk and 80 g of sugar in a bowl: whisk strong enough to lather and bleach everything.  
  2. Beat the egg whites until stiff and mixed with the remaining 20g sugar. Whisk again to smooth everything.
  3. Mix it gently with the yolk. Stir very slowly so as not to « break » our preparation.
  4. Add in once the flour and mixed it still gently.
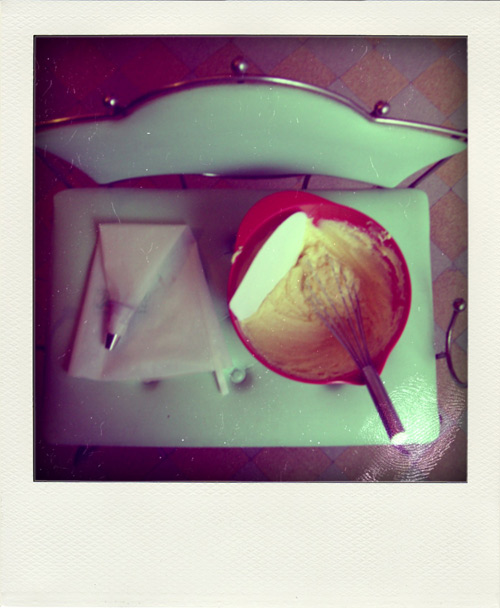
  5. The batter is ready ! take your pastry tip and bag...
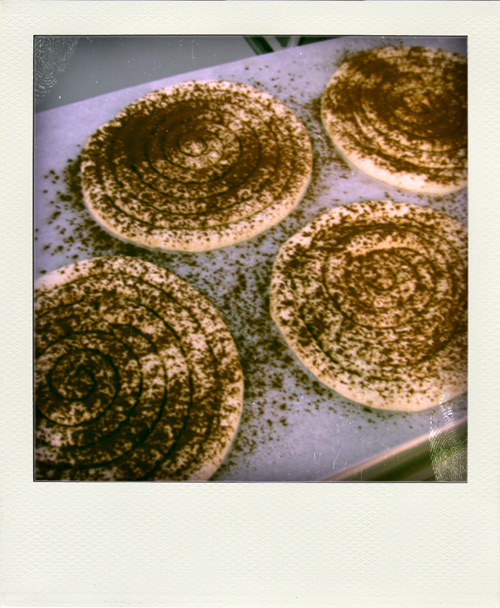
  6. Make 2 regular spiral, the size of your dessert circles.
  7. Sprinkle with icing sugar or cocoa powder twice.
  8. And presto! : bake them, 15 min. à 180°C

And third, the mousseline cream!

We have to start with our pear mixture.

Once it cooled, we will have to mix it with butter cream.

Ingredients

  • 300 g of whole milk 
  • 1 egg
  • 40 g of sugar
  • 30 g of fecule de pomme de terre (I don't know the word for this)
  • 1/2 vanilla pod

Faire un pâtissière :

  1. Heat the milk with the vanilla until it bowled.
  2. In the mean time, whisk together egg, sugar, powdered cream with a little hot milk (to relax the mixture).
  3. Once the milk is boiling, mixed everything in the pan and thicken everything, whisking bluntly!
  4. Be careful not to burn the preparation
  5. Once ready, take the mixture away from the fire and put it down a plate to the freezer for 20 minutes to cool it completely.
  6. Meanwhile, get your 170g soft butter!    I mean  a soft butter (not melted)  and whip  it into cream . 
  7. When your mixture is cooled, mix butter whipped with it.

Your mousseline  is ready!

Fourth, assembly ...

  1. Your pears are drained and  cutted 
  2. Place your first biscuit in the bottom and wet it with syrup poached pears. 
  3. Put your cream into a first layer and place a pear slice on the side of your circle.
  4. Fill with half a pear cutted in small pieces! be generous and cover with cream mousseline.
  5. Cover it with your second wet biscuit !
  6. The circle is completed ...chill for at least 2 hours.
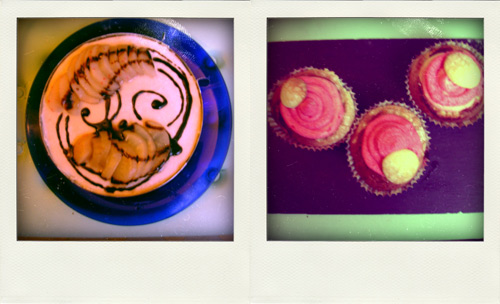
  7. Once cooled, here is a great cake nearly done!
  8. It is better to eat the next day, so the flavors will be stronger and better "soaked" !  

C'est formidable...

Finally,  some decorating suggestions!

In France, it is common to add a thin layer of almond paste and write the name of the cake  on it.  

But I prefer that you use your imagination. If you're afraid of spoiling, prefer simplicity! For example, use your last poached pears into slices and place it on your decor, or the spices from the syrup...or maybe you'd like to make them into little "cupcakes" ...the sky's the limit!

Thank you very much! I hope you love this "bagatelle" French pear cake !  

Saturday
Mar062010

Sweet Find: Profile on Baltimore Cake and Wedding Cottage in Maryland

Image courtesy Bmoresweet

CakeSpy Note: This is a post from Cake Gumshoe Megan, who's always on the lookout for her next sweet experience!

Tucked away in a nondescript strip mall off busy Belair Road, the Baltimore Cake and Wedding Cottage is a gem of a cake decorating supply store.

Family owned since 1977, the store is divided in half, splitting square footage between accessories a bride needs for her big day and tools and accessories her baker needs as well. The store’s website devotes itself to the wedding side of the business, but a visit to the bricks and mortar retail store reveals a different story.

The store entrance is situated at the split between the merchandise, and you’ll want to veer to the left, toward the cake supplies, though the store does seem to have fine invitations, bridal veils and really cute wedding cake toppers. 

Cake pans of all shapes and sizes line one side of a 30 foot-long free-standing shelf, and cupcake toppers and picks and other character cake toppers and decorations fill the other. On my last visit there, spring and Easter cookie cutters, cupcake liners, and enough colorful sprinkles to drag you out of your winter doldrums made up the featured items section at the front of the store.

Displays of cookie cutters for all seasons and occasions as well as more sprinkles, quins and colored sanding sugars give way to a sizeable selection of candy molds for new babies, weddings, graduations and many other holidays and occasions – these molds make individual shaped candies, candy lollipops and candies on pretzels.

The store also stocks flavorings for candy fillings and a rainbow of candy coating colors. Looking for lavender? Check. Going for mint green? Sure. Searching for sky blue? Absolutely.

You will, of course, need to box and/or display all of the yumminess you’re going to make once you leave the store with all your new goodies. The Cake Cottage offers a wide variety of plain and decorated candy boxes and bags as well as basic and covered cake boards for your sugared masterpieces.

Once you get to the checkout, you’ll how you’ve missed that the counter display ringing the register is chock full of sugar and gum paste flowers, babies, dogs, ducks, chicks, rattles, bibs, cats, and almost any other edible garnish you can think of.

If you are at a loss as to what to do with all your new supplies, check out the calendar of classes offered at the Cake Cottage. All levels of cake decorating are offered as well as individual workshops on piping borders and flowers. Adults and children alike can learn the art of candy-making, and all class participants get 10 percent off in the store for the duration of the class.

But perhaps my favorite part of the store is the women who work there. They know the inventory inside and out, have wonderful tips for using their products and they have great memories for faces too. I don’t get there very much due to living 800 miles away, but the staff remembers me every time.

Baltimore Cake and Wedding Cottage, 8716 Belair Rd., Nottingham, MD 21236; P (410) 529-0200
Open seven days a week: Mondays through Fridays from 10 a.m. to 9 p.m., Saturdays from 10 a.m. to 7 p.m., and Sundays from 11 a.m. to 5 a.m. Online at 
cakeandweddingcottage.com


Wednesday
Feb242010

Go Nuts: Peanut Butter Blondies with Peanut Butter Frosting Recipe

CakeSpy Note: This is a guest post and recipe from Cake Gumshoe Julia, a 26 old wife, exercise fiend, and baking enthusiast. Her writing can be find at her site, Fat Girl Trapped in a Skinny Body.

 Do you love peanut butter?

Did you know I love peanut butter?

I mean LOVE peanut butter. Not in a romantic way, but in a mouth watering, makes my taste buds sing kinda way. As I am getting older, not old, just older, I'm growing out of the idea that a dessert has to be based around chocolate. I now understand that a freaking amazing, mouth watering, makes you jump in the air with excitement, dessert can be based on something other than chocolate: peanut butter.

Saturday morning I woke up super early with lots of excitement and anticipation about what I would bake that day--and I realized it must be Blondies. And I could add peanut butter and make them extra delicious. I felt content with my decision. And after you make these, you will understand why I was so content. I can't say I am in love with these, because I am in love with my husband (ahh, how romantic of me). But I can say, with confidence, that these are one of my all time favorite desserts.

Peanut Butter Blondies

Recipe adapted from My Kitchen Addiction

 Ingredients

  • 1/2 cup (1 stick) unsalted butter
  • 2 cups dark brown sugar
  • 1/2 cup peanut butter
  • 2 eggs 
  • 1 teaspoon vanilla extract
  • 2 1/2 cups all purpose flour
  • 1 teaspoon baking powder
  • 1/4 teaspoon baking soda
  • 1/2 teaspoon salt
  • 1 cup milk chocolate chips

Peanut Butter Frosting

Recipe adapted from Ina Garten

 Ingredients

  • 1 cup peanut butter
  • 1 cup powdered sugar
  • 1/3 cup half and half
  • 1 tsp vanilla extract
  • 2 tbsp butter, softened
  • 1/8 tsp kosher salt

 Procedure

  1. Preheat the oven to 350°F. Grease a 9-inch by 13-inch pan and set aside.
  2. In a saucepan over medium heat, melt the butter and brown sugar, stirring constantly until smooth.
  3. Remove from the heat, and stir in the peanut butter.
  4. Allow to cool while combining the dry ingredients – flour, baking powder, baking soda, and salt – in a large mixing bowl.
  5. Add the eggs, one at a time, to the brown sugar and peanut butter mixture, mixing well after each addition.
  6. Add the vanilla extract and stir to combine.
  7. Pour the mixture into the prepared dry ingredients, and stir to create a thick, smooth batter.
  8. Transfer the batter to the prepared pan, spreading the batter evenly to the edges of the pan.
  9. Sprinkle with the milk chocolate chips, lightly pressing them into the batter.
  10. Bake for 25 minutes. Allow to cool in the pan.
  11. Mix all the frosting ingredients in a bowl with a hand mixer. Beat for about 2-3 minutes; until all the ingredients are incorporated. Spread onto the cooled blondies.
  12. Sprinkle with mini chocolate chips. Cut into 15 large squares, serve and enjoy with a glass of ice cold milk!

These are rich, dense, and simply delicious!

Page 1 ... 2 3 4 5 6 ... 7 Next 10 Entries »
© Cakespy, all rights reserved. Powered by Squarespace.