CakeSpy Note: This is a guest post from Rainy Day Gal (a.k.a. Jenny Miller), a fellow Seattle blogger with a major sweet tooth. Her current endeavor is "The 12 Days of Bakemas"--12 days, 12 recipes, and 12 million dirty dishes."
Bab-what? Bab-who?
The word is Babka, my friends, and you should really get to know each other.
What is babka, you ask? It's an eastern European bread twisted and rolled up with chocolate and cinnamony goodness, topped off with a sprinkling of streusel.
Why is it called babka? Because it's darn fun to say. Or, as my other good friend Wikipedia informed me, it stems from the Polish noun "baba," meaning grandmother--so-named because of its resemblance to a grandmother.
Huh. I don't know about your grandmother, but mine is definitely twisted, stuffed with chocolate and perpetually covered in streusel. Quite a fitting name, I'd say.
Before we get going, I must say: of what I have made so far in this 12 days of Bakemas adventure, chocolate babka has been by far my favorite. And here are the reasons why:
1) The dough is soft and chewy like the inside of a cinnamon roll.
2) Said dough is covered in melted chocolate.
3) The streusel on top gives it a buttery, sugary crunch.
4) It's pretty and swirly and twisty.
5) It's fun to say. Babka. Baaaabka. You try.
Alright. Enough talkie talkie. Ready to do this thing?
Let's go.
(Click here for the full recipe and directions!)
You need flour. Bread flour and all-purpose, please.
Also snag some cocoa powder, salt, powdered sugar, granulated sugar, and cinnamon from your pantry.
You'll also need vanilla extract, 1 packet of dry active yeast, cooking spray, butter, one egg (yolk only), and 3/4 cup of 1% milk.
And finally, the star of the show: Chocolate. Semi-sweet, and 4 ounces of it.
Now, put on that apron (or as I like to call it, an "old college sweatshirt") and let's begin.

Warm up the milk and pour it into the bowl of a stand mixer.
Add 1 teaspoon granulated sugar (make sure your camera is not in focus during this step: very important)...

...and that packet-o-yeast. Turn on the mixer and blend until the yeast has dissolved. Let stand 5 minutes.

Meanwhile, measure out 6 tablespoons of granulated sugar. Turns out it's about 1/3 cup. Throw in 1/4 teaspoon salt while you're at it.

Add the sugar/salt mixture...

...1 teaspoon vanilla extract...

...and egg yolk. Give it a stir.

Measure out 1/3 cup all-purpose flour and add 1 1/4 cups bread flour.

Switch attachments to your dough hook, but not before pretending to be Captain Hook for 4 minutes.

Slowly add the flours while the mixer is running. Mix until a purdy dough begins to form.

Now, soften 5 tablespoons of butter...

...and add it to the dough. Mix until all of the buttah is incorporated.

Turn the whole mess out onto a floured surface. Warning: it's a gonna be sticky. And greasy.
Keep 1/3 cup all-purpose flour right next to ya...

...and knead for about 10 minutes, adding the flour a tablespoon at a time until it no longer sticks to your hands. The dough should be smooove and elastic.

Spray a bowl (non-metal, please) with cooking spray, plop in that mound-o-dough, give it a flip to coat the whole durn thing with cooking spray, cover, and let rest in a warm place for about 1 1/2 hours (or until it's doubled in size).

Meanwhile, grab that bee-youtiful chocolate.

Give it a good chop...

...and throw it in a bowl.

Add 1/2 cup granulated sugar, 1/4 teaspoon salt, 1/2 teaspoon cinnamon, and 3 tablespoons unsweetened cocoa powder.

Give it a good stir.
Alrighty. We've done the dough and the filling. Now let's prep the streusel.

In a bowl, combine 1 tablespoon butter, one tablespoon flour, and one tablespoon powdered sugar.

Mash it all up with a fork, and then stick it in the fridge until we're ready to use it.

Finally, let's get our bread pan ready. Line the bottom with parchment paper, and then spray the whole dang thing with cooking spray.
Now would also be a good time to preheat your oven to 350°.

Is your dough ready? If you're not sure, press two fingers into it. If the indentations stay put, it's good to go. If not, let it rise longer.
If it's ready, punch it down, re-cover, and let rest five minutes.

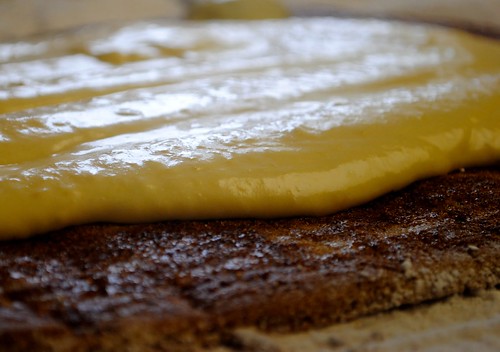
Now then. Flip it out onto a floured surface and roll into a 15"x15" square.

Spread out the filling on top of the dough, leaving a little room at the edges.

Roll it up nice and tight, pinching the edges closed....

...and give it a few good twists. That is what's going to make it all swirly and purdy.

Squeeze it into your bread pan. If it looks like a snake, that's cool. It won't taste like one. I promise.

Crumble the streusel on top, and stick this bad boy in the oven for 40 minutes, or until it sounds hollow when you tap the top.

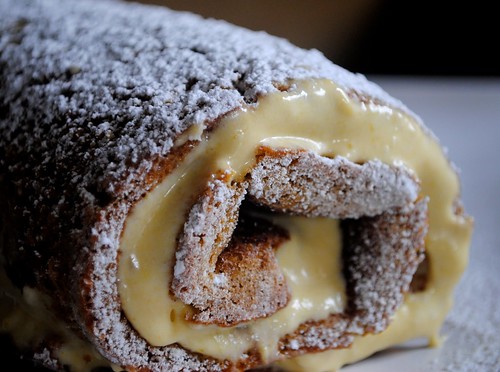
Or until it looks like this.

Oh my.

This is going to be gooood.

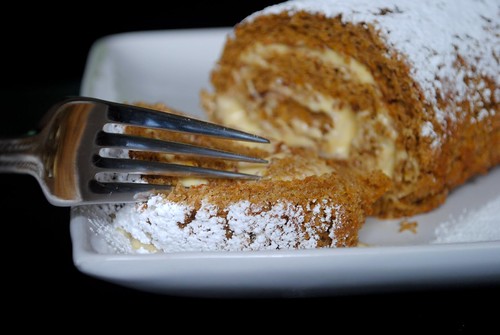
Let it cool in the pan for a few minutes, then flip it out onto a wire rack to let cool completely. And by "completely," I mean as long as you can prevent yourself from ripping that sucker in half and inhaling the whole dang thing.
I think I lasted all of 7.5 minutes. I then cut out the middle piece (above) and scarfed it.

Then I let the rest of the loaf cool like a good little gal.

I must say, this stuff was delicious warm and cold. When it was warm, the chocolate was melty and gooey. But when it was cold, the chocolate had hardened and gave it delicious little rungs of texture.

I'd love this bread warm on Christmas morning. Coffee, a warm, gooey slice of this chocolatey delight, and hanging out with my favorite peeps.

Heavenly.
Happy 12 Days of Bakemas!
-RDG
Chocolate Babka Recipe
from Cooking Light
1 teaspoon granulated sugar
1 package dry yeast (about 2 1/4 teaspoons)
3/4 cup warm 1% low-fat milk (105° to 110°)
6 tablespoons granulated sugar
1/2 teaspoon vanilla extract
1/4 teaspoon salt
1 large egg yolk, lightly beaten
7.5 ounces all-purpose flour (about 1 2/3 cups), divided
5.85 ounces bread flour (about 1 1/4 cups)
5 tablespoons butter, cut into pieces and softened
Cooking spray
- Ingredients for Filling
- 1/2 cup granulated sugar
- 3 tablespoons unsweetened cocoa
- 1/2 teaspoon ground cinnamon
- 1/4 teaspoon salt
- 4 ounces semisweet chocolate, finely chopped
- Ingredients for streusel
- 2 tablespoons powdered sugar
- 1 tablespoon all-purpose flour
- 1 tablespoon butter, softened
- Procedure
- Dissolve 1 teaspoon granulated sugar and yeast in warm milk in the bowl of a stand mixer; let stand 5 minutes. Stir in 6 tablespoons granulated sugar, vanilla extract, 1/4 teaspoon salt, and egg yolk. Weigh or lightly spoon flours into dry measuring cups; level with a knife. Add 6 ounces (about 1 1/3 cups) all-purpose flour and bread flour to milk mixture; beat with dough hook attachment at medium speed until well blended (about 2 minutes). Add 5 tablespoons butter, beating until well blended. Scrape dough out onto a floured surface (dough will be very sticky). Knead until smooth and elastic (about 10 minutes); add 1.5 ounces (about 1/3 cup) all-purpose flour, 1 tablespoon at a time, to prevent dough from sticking to hands (dough will be very soft).
- Place dough in a large bowl coated with cooking spray, turning to coat top. Cover and let rise in a warm place (85°), free from drafts, 1 1/2 hours or until doubled in size. (Gently press two fingers into dough. If indentation remains, dough has risen enough.) Punch dough down; cover and let dough rest 5 minutes.
- Line the bottom of a 9 x 5?inch loaf pan with parchment paper; coat sides of pan with cooking spray.
- To prepare filling, combine 1/2 cup granulated sugar, cocoa, cinnamon, salt, and chocolate in a medium bowl; set aside.
- Place dough on a generously floured surface; roll dough out into a 16-inch square. Sprinkle filling over dough, leaving a 1/4-inch border around edges. Roll up dough tightly, jelly-roll fashion; pinch seam and ends to seal. Holding dough by ends, twist dough 4 times as if wringing out a towel. Fit dough into prepared pan. Cover and let rise 45 minutes or until doubled in size.
- Preheat oven to 350°.
- To prepare streusel, combine powdered sugar, 1 tablespoon all-purpose flour, and 1 tablespoon softened butter, stirring with a fork until mixture is crumbly; sprinkle streusel evenly over dough. Bake at 350° for 40 minutes or until loaf is browned on bottom and sounds hollow when tapped. Cool bread in pan 10 minutes on a wire rack; remove from pan. Cool bread completely on wire rack before slicing.


 Now would be an appropriate time for me to act very high and mighty on the subject of Hello Naomi in a "I discovered her way before the fact" sort of way. After all, she was first featured on CakeSpy over 2 years ago, while she was still a student and baked only as a Flickr-posting hobbyist. But I'm not gonna be like that--I can share.
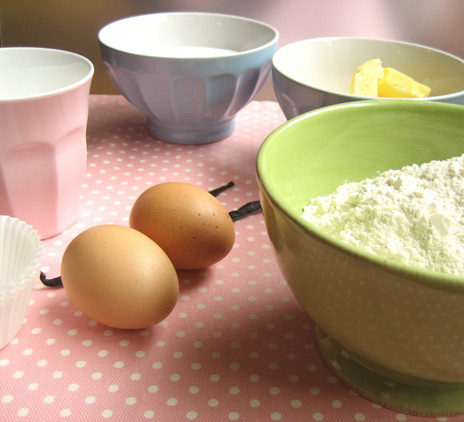

 4 Comments