Home Home Home Home Home Home Home
CakeSpy

Featured: 

My adventure at Ben & Jerry's in Vermont!


Unicorn Love: the Eating Disorder Recovery Blog


 Buy my brilliant books!

Buy my new book!

Buy my first book, too! 

CakeSpy Online Retail!


Archives
Gallery

Fantastic appliance for cake making on DHgate.com

everyrecipe.co.nz

Craftsy Writer

Entries in recipes (704)

Monday
Feb142011

Triple Chocolate Nanaimo Bars: A Delicious Valentine's Day Recipe for Serious Eats

Why are forks more popular in February? Because they have Valen-tines!

And happily, there's still time to make up something tasty for those tines: Triple Chocolate Nanaimo Bars. Now, in case you're not familiar with Nanaimo bars, they're a fairly perfect food to begin with: a decadent three-part confection made up of a chocolate graham cracker crust, a (vanilla) custardy middle section, and chocolate topping.

Of course, like so many things, they're even better with more chocolate—and this version, with a rich dark chocolate center and a high quality bittersweet chocolate topping, might just make you fall in love, à la black widow spider, with the whole tray. Hey, nobody says you have to share.

For the full entry and recipe, visit Serious Eats!

Sunday
Feb132011

Coconut Dream: Coconut Cream Bread Pudding with Chocolate Velvet Sauce

There are some coconut haters out there.

But that's just fine, because that means there's more of this exceedingly decadent coconut cream bread pudding for the lovers to share. 

This delicious dessert comes by way of Paula Deen's The Deen Family Cookbook. As the grande dame of get-fat-quick desserts herself says, "the rich coconut pudding with a nice pool of chocolate sauce all around brings me back to the days when me and Bubba would count out all our change to buy mounds bars on the way home from school". Like a Mounds bar all grown up and decked out in its after-dinner best, this dessert is bound to make you both very fat and very happy.

Coconut Cream Bread Pudding with Chocolate Velvet Sauce

Serves 6

  • One large loaf (16-20 inches) French Bread, cut into one inch cubes
  • 4 egg yolks
  • 2 whole eggs
  • Two 13.5 ounce cans unsweetened coconut milk
  • One 15-ounce can of cream of coconut
  • 1/4 teaspoon salt
  • 1/4 teaspoon nutmeg
  • 2 cups sweetened flaked coconut
  • Chocolate sauce
  • 1 cup semisweet chocolate chips
  • 1/2 cup heavy cream

 Procedure

  1. Lightly grease the bottom of a 9-inch square flameproof baking dish. Arrange the bread cubes evenly. In a large bowl, whisk together the yolks and eggs, coconut milk, cream of coconut, salt, and nutmeg. Stir in 1 1/2 cups of the coconut flakes. Pour the custard over the bread cubes. Press the cubes gently to soak up the custard. Let the mixture stand for about an hour in the fridge (covered).
  2. Preheat the oven to 325 F. Sprinkle the top of the pudding with the remaining 1/2 cup coconut flakes. Cover the dish with foil, poking a few holes so that steam can vent. Place a roasting pan on the oven rack and put the baking dish in it. Pour hot water into the roasting pan to come halfway up the sides of the baking dish. Bake until the pudding is firm to the touch, about 1 hour and 15 minutes. Remove the foil and bake for 15 minutes more. Remove the baking dish from the water bath (carefully!) and run it under the broiler, at least 4 inches from the heat, until golden (1-2 minutes). Let the pudding cool completely.
  3. Make the chocolate sauce directly before serving. Place the chocolate chips in a medium saucepan, and melt on low heat. Pour the cream over the slightly melted chips and continue stirring on low heat until you have a smooth, creamy mixture. Add more cream if desired until it has reached your desired consistency. Drizzle over each serving. 


Friday
Feb112011

Better Together: Peanut Butter Cup Pocket Pies

True or False: 

  1. Everything's cuter in miniature form.
  2. Pie is so hot right now.
  3. Peanut butter cups are delicious.

Well, I think we all know the answer to all three, and it's certainly not "false". But when these three truths come together in one adorable pocket pie form, they go beyond TRUE to TRUE LOVE.

That's right: Peanut Butter Cup Pocket Pies!

These sweet morsels are the perfect two-bite treat, and tasty as can be with the can't-lose combo of peanut butter and chocolate, all blanketed between two discs of rich, buttery pie crust. 

They'd be cute as pops too, but I think I actually prefer the stick-less version, because they're easier to "pop" in your mouth. 

Here's how you make them.

Peanut Butter Cup Pocket Pies

Makes 12 2-inch pocket pies


  • 1 9-inch pie crust, unbaked
  • 12 teaspoons (approx.) creamy peanut butter
  • about 36-40 chocolate chips (milk, semisweet or dark chocolate, your choice)
  • 1 egg, beaten (for egg wash)

You also need: a 2-inch (or so) round cookie cutter, small pastry brush

  1. Prepare a baking sheet by lining it with parchment; set to the side. Preheat oven to 400 degrees F.
  2. Roll out your pie crust on a flat, floured surface.
  3. Using a 2-inch (or so) round cookie cutter, cut out as many rounds as you can. It's fine to use other shaped cookie cutters too, but keep it fairly simple (hearts, squares, flower shapes, etc) so that you'll be able to easily seal the pies later. Clump the remaining dough, re-roll, and try to get some more cutouts. If they're kind of ugly, it's ok--use these for the bottom layer of your pocket pies.
  4. Lay out half of the pies on your prepared baking sheet. Place a teaspoon of peanut butter in the center of each, leaving room on the perimeter so you can seal the second half of pie crust on top. Add 3-4 chocolate chips to each, pressing into the peanut butter. 
  5. Using a small pastry brush, brush a small amount of egg wash along the perimeter of each of the peanut butter-filled pie bottoms.
  6. Place the top cutouts on top of each of the peanut buttered and egg washed bottom pieces. Press gently down, and use the tines of a fork to "seal" the pies. I did not vent these on the top. If you want, egg wash the top of the pies too (I didn't, because I forgot. I will be honest.)
  7. Place in the preheated oven; bake for 8-12 minutes, or until golden. 
Monday
Jan312011

Whole Hog: Groundhog Day Cake for Serious Eats

My family has an unusual tradition: we celebrate Groundhog Day. In a completely non-ironic way. And to herald the occasion, there is always a cake-homage to the skittish little critter.

Why? Well, my dad is a surfer, and he carefully follows Punxsutawney Phil's yearly emergence. If he does not see his shadow, it means spring is coming, and thus surf season will come sooner. And also because, well, cake is very delicious.

Of course, no matter whether you're in a rush for spring to come, it's a pretty sure thing that this Groundhog-themed cake will brighten your day—and the remaining crumbs will cast minimal shadows.

For the full entry and recipe, visit Serious Eats!

Monday
Jan242011

Have Some Funfetti: Funfetti Pancakes for Serious Eats

Fact: half of the word "pancake" is comprised of the word "cake". Actually, if you want to get really technical, it's slightly more than half.

And in celebration of bringing more cake to the pan, I'd like to present my newest invention: Funfetti Pancakes.

By lightly modifying a typical cake mix, you can make your own DIY pancake mix; the resulting pancakes are light and fluffy, but sweeter (and in this case, more colorful) than the typical griddle fare. Top them with jam, syrup, or even cake frosting for a morning treat that tastes like sweet fun.

For the full entry (and recipe!) visit Serious Eats!

Sunday
Jan232011

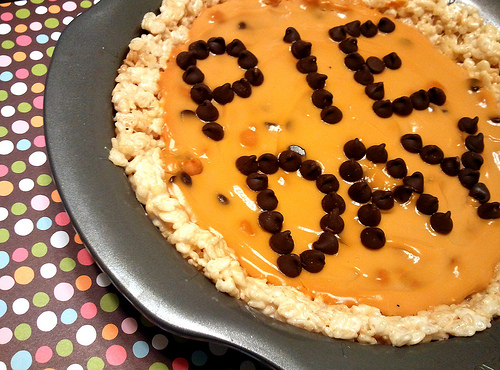
Crispy, Creamy, Gooey: Caramel Pudding Pie in a Rice Krispie Treat Crust

Guess what? Today is National Pie Day. Why today? I don't have a good answer for that, but when I have given you a perfectly good reason to eat pie, your follow-up question shouldn't be "why", but "why not?" and the only thing you should really be concerned with is how you'll celebrate.

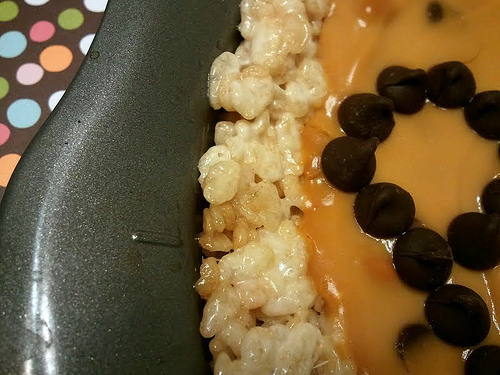
Happily, in Seattle, there's an annual Pie Day Party in the Ballard neighborhood; however, even if you're nowhere near Seattle, you can still enjoy this extremely easy and incredibly delicious recipe for Pudding Pie in a Rice Krispie Treat Crust (which, incidentally, is what I will be bringing to the party). Though I used caramel pudding, you could use any flavor you like (vanilla, chocolate, butterscotch, or even pistachio sound good to me) -- either way, the resulting treat, which has a satisfying mix of crunchy, gooey, and creamy textures and flavors, is good to the last bite.

Pudding Pie in a Rice Krispie Treat Crust

Serves about 8

 Ingredients

  • 1 batch Rice Krispie Treat Batter
  • 1 batch instant pudding (3.3 ounce size box)
  • optional: mix-ins for your pudding (chocolate chips, caramel sauce, coconut flakes, etc)

 Procedure

  1. Prepare your pie plate by buttering it generously (the slices can be hard to remove if you don't).
  2. Make Rice Krispie treats as you usually would, in the microwave or on the stovetop; however, instead of pressing the mixture into a square pan as usual, press it into your pie plate, pressing the mixture down on the bottom and up the sides, holding a piece of waxed paper to press so the mixture doesn't stick to your hands. You might not use all of the treat batter; if not, press the remaining mixture into small ramekins or form into Krispie balls to enjoy later.
  3. Let the crust cool completely.
  4. Prepare your instant pudding (typically by whisking the pudding and 2 cups cold milk together until it starts to thicken); if desired, add a handful of chocolate chips, a swirl of caramel, or whatever mix-ins you'd like. Spoon the pudding into your pie crust and keep refrigerated until you're ready to serve it. Ideally, let the pie set for about an hour before serving so the pudding can completely thicken.
  5. Use a very sharp knife to slice, to ensure that you cut through the krispie treat crust; serve using a cake server.


Friday
Jan212011

Feather in Your Cappuccino: Cappuccino Tapioca Pudding with Cardamom Brulee Recipe

FACT: Pudding is delicious. So why is it that so many home bakers, undaunted by baking cakes, cookies, or even pie crust, are scared to make it?

Could it be they're scared of the dreaded scrambled eggs effect of adding eggs to the hot liquid? Or is it just that it's so much easier to add cold milk, mix, chill, and serve? (Bless you, instant pudding!)

Well, in the new book Serve Yourself: Nightly Adventures in Cooking for One by Joe Yonan, one of the goals is to stress that pudding is something you can (and should) do at home. Don't believe me? Here's a recipe that the publisher was kind enough to share! Sounds good to me!

Cappuccino Tapioca Pudding with Cardamom Brulee
Makes 6 (1/2-cup) servings
  • 3 cups milk, preferably low-fat
  • 1/3 cup small pearl tapioca
  • 1 tablespoon instant espresso powder
  • 2 egg yolks, whisked to combine
  • 1/4 teaspoon fine sea salt
  • 1/3 cup plus 2 tablespoons sugar
  • 1/2 teaspoon ground cardamom
  1. Pour 1 cup of the milk into a heavy saucepan. Add the tapioca and let soak for at least 30 minutes.
  2. Pour the remaining 2 cups of milk into a mixing bowl or glass measuring cup, sprinkle the espresso powder over, let it sit for a minute or two, and then stir to dissolve.
  3. Whisk the espresso-milk mixture into the tapioca mixture, along with the egg yolks, salt, and 1/3 cup of the sugar. Over medium heat, slowly bring the mixture just barely to a boil, stirring constantly; it will take 10 to 15 minutes. Reduce the heat until the mixture is barely simmering, and continue cooking the tapioca, stirring occasionally, until the beads swell up and become almost translucent and the custard thickens, another 15 to 20 minutes.
  4. Remove from the heat and let it cool. Spoon the pudding into 6 individual 1/2- cup ramekins and wrap each in plastic wrap, pressing the plastic directly onto the surface of the pudding to prevent a skin from forming. Refrigerate until chilled. It will keep it the refrigerator for several days or in the freezer for up to 2 months.
  5. When you are ready to eat, unwrap one of the ramekins of pudding (thaw it first if frozen), and sprinkle the top with 1 teaspoon of the remaining sugar and a pinch of cardamom. Use a small culinary blowtorch to caramelize the sugar on top, keeping the torch moving so you deeply brown but don’t blacken the sugar, then eat.

Reprinted with permission from Serve Yourself: Nightly Adventures in Cooking for One by Joe Yonan copyright © 2011. Published by Ten Speed Press, a division of Random House, Inc.

Photo credit: Ed Anderson © 2011

Tuesday
Jan182011

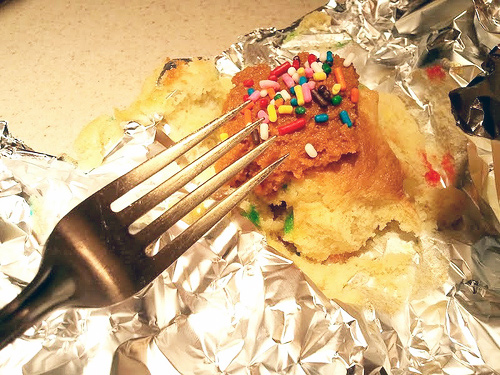
Mix it Up: Funfetti Cakelets in the Toaster Oven

Picture this: you've just filled up a cake tin's worth of cupcakes, and you have a dollop of batter left. What to do?

Now, you may think that the possibilities stop at A) Swipe it with your finger (or a spatula) and eat it...or B) Put it in a cupcake liner and bake it all by its lonesome.

Now, these are respectable options, for sure. But I'd like to present another option: bake it in the toaster oven.

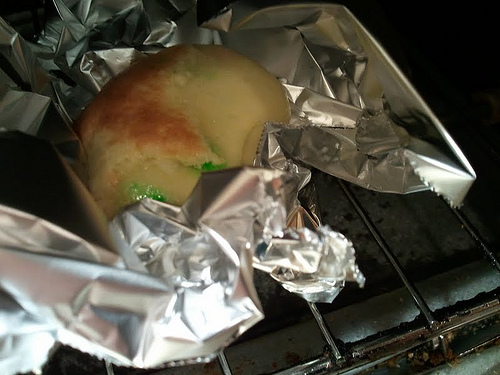
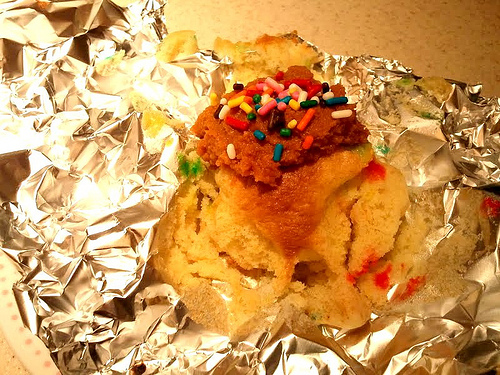
I did this recently, and while I wouldn't call it an amazing success, it was thoroughly eatable, and a great sweet fix in a pinch (or late at night, when these things seem like a great idea). And it sure was fun to do.

Here's how I did it.

Toaster Oven Cakelets

 Ingredients

  • 1 dollop leftover Funfetti batter, prepared per box instructions
  • a piece of aluminum foil to bundle it in

Procedure

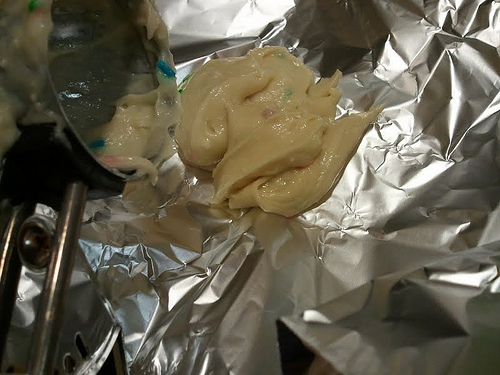
  1. Place your dollop of cake batter on the center of the aluminum foil. Bunch the sides up around it, to form walls so that the batter won't seep through.
  2. Place the wad in the toaster oven and toast (you heard me, toast) it on medium heat (350 if you have such settings) until it is browned on top, about 15 minutes. Lightly peel away the foil from the side to see if it is baked through. If so, remove from toaster oven, cool, and top with frosting, a dab of ice cream, etc, and enjoy.


Thursday
Jan132011

Footloose and Butter and Dairy Free: Vegan Peanut Butter Cookies Recipe

Are you scared of vegans? Well, really, you shouldn't be. Because really, they're a lot like the rest of us. They just don't eat things with butter or milk or eggs. Or, you know, burgers or bacon.

But you know what? Vegans do like cookies. And when Melisser Elliott passed through Seattle to sign and promote her splendid book The Vegan Girl's Guide to Life: Cruelty-Free Crafts, Recipes, Beauty Secrets and More , I made some vegan peanut butter cookies to sweeten the afternoon.

And you know what? Turns out that the vegan cookies were very delicious, and the vegans were very friendly. No need to be scared. Try it at home and see for yourself:

Vegan Peanut Butter Cookies

Makes like 24

  • 1/2 cup granulated sugar
  • 1/2 cup packed brown sugar
  • 1/2 cup peanut butter (smooth, no-stir type)
  • 1/2 cup Earth Balance (it's in most grocery stores)
  • 1 egg replacer of your choice (options here)
  • 1 1/4 cups flour
  • 3/4 teaspoon baking soda
  • 1/2 teaspoon baking powder
  • 1/4 teaspoon salt

Procedure 

  1. Mix sugars, peanut butter, Earth Blance and egg replacement in large bowl.
  2. Stir in remaining ingredients.
  3. Cover and refrigerate about 2 hours or until firm.
  4. Heat oven to 375ºF.
  5. Shape dough into 1 1/4-inch balls.
  6. Place about 3 inches apart on ungreased cookie sheet.
  7. Flatten in crisscross pattern with fork dipped into sugar.
  8. Bake 9 to 10 minutes or until light golden brown. Cool 5 minutes; remove from cookie sheet. Cool on wire rack.
Monday
Jan102011

Seriously Sweet: Crumb Cake Shake for Serious Eats
It's a new year, and some of you might be trying to think of ways to eat healthier.

And on a completely unrelated note, I would like to introduce you to the Crumb Cake Shake.

The inspiration for this shake comes from a coffee cake shake known as the "Mother Futcher" fromTradewinds Cafe of Portland, Maine, famously consumed by Adam Richman on Man Vs. Food. As soon as I saw this frozen treat, I knew I had to make my own version.

Combining two of the world's most perfect foods—crumb cake and ice cream, mixed with a dash of cream for good measure—this shake is an absolute dream, especially when served with a crumb cake wedge as garnish.

For the full "scoop" visit Serious Eats!

© Cakespy, all rights reserved. Powered by Squarespace.