Home Home Home Home Home Home Home
CakeSpy

Featured: 

My adventure at Ben & Jerry's in Vermont!


Unicorn Love: the Eating Disorder Recovery Blog


 Buy my brilliant books!

Buy my new book!

Buy my first book, too! 

CakeSpy Online Retail!


Archives
Gallery

Fantastic appliance for cake making on DHgate.com

everyrecipe.co.nz

Craftsy Writer

Entries in recipes (704)

Monday
Mar142011

Pi Oh My: Make a Pi-Shaped Pie, for Pi Day

There is some disagreement over when to celebrate Pie Day. Some (including the American Pie Council) cite January 23 as the day, the reason allegedly being that the digits of 1/23 are "easy as pie." Others (generally math nerds) say it must be March 14, or "Pi" Day.

Of course, this is a very silly argument, because really, it's an opportunity to enjoy pie on two separate occasions, whether baked at home or at a roadside stand, cafe, or bakery. But as a shout-out to the math nerds, here's a Pi-shaped Pie for March 14.

Use the template with your favorite pie crust and use whatever filling you'd like (I used peanut butter and chocolate chips), but know that it's best enjoyed at 1:59 PM...and 26 seconds.

For the full entry and recipe, visit Serious Eats! For more fun pie times, come to CakeSpy Shop tonight for Seattle's first PIE SLAM!

Saturday
Mar122011

Well Bread: Strawberry and Cinnamon Bread Using A Breadmaker from Ben of Breadmaker Reviews

Are you still using your breadmaker to make regular old bread, like a jerk?

Well quit it, and use your breadmaker to bake up something sweet, starting with this Strawberry and Cinnamon Bread.

This is a guest post and recipe from Cake Gumshoe Ben, a passionate foodie with a penchant for cooking outdoors (especially in the Australian summertime) who has a unique day job: he reviews and puts together buying guides for kitchen appliances. Here's what is known in the biz as a "plug" for his website: 

At Breadmaker Reviews we aim to provide you with not only great, in-depth reviews on breadmakers, but valuable information that will help you know exactly what to look for and where to get it.

but most importantly, here's the recipe. You're welcome.

Strawberry & Cinnamon Bread using a Breadmaker

  • 1 packet frozen, sweetened strawberries (About 300g), thawed
  • 1 1/2 cups flour
  • 1 cup white sugar
  • 2 eggs
  • 1/2 cup vegetable oil
  • 1 teaspoon baking soda
  • 1/2 teaspoon baking powder
  • 2 teaspoon ground cinnamon
Procedure
  1. Drain the juice from the strawberries, setting aside about 1/2 of it.
  2. In a large mixing bowl mix together the flour, sugar, eggs, oil, baking soda, baking powder and cinnamon. (You can use the kneading function on your breadmaker to do this part but ensure you do the next step by hand.)
  3. Very lightly fold in the strawberries and the juice set aside earlier. Don't overdo this part as you want the strawberry flavour to streak through, rather than be dissolved in the bread.
  4. Add the ingredients into your bread pan, place it into the breadmaker and select the quick bake cycle (medium crust texture if available).
  5. Remove pan from breadmaker immediately after baking and allow to cool before removing bread.

Wednesday
Mar092011

Berry Delicious: Cranzac Cookies Recipe a la David Lebovitz

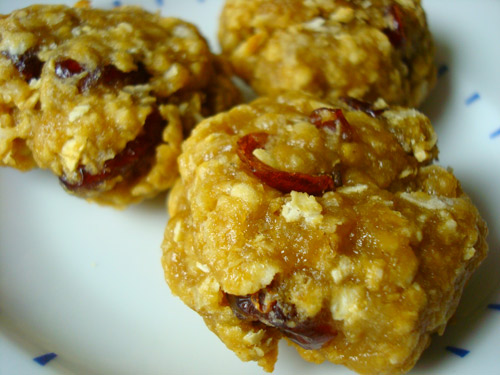
Cookies are just so cute when they pretend to be health food. Case in point: the ANZAC biscuit (ANZAC stands for Australian and New Zealand Army Corps, and both places share ownership of the cookie). On the surface, its oaty, nubbly appearance looks rather virtuous--but one bite will tell you the butter, sugar, and golden syrup-filled truth.

David Lebovitz makes them even better in his brilliant (and beautiful) book Ready for Dessert: My Best Recipes by adding cranberries to the mix, which add a pleasing little zing of flavor; I made them better still with the addition of a dollop of buttercream on top. Don't worry, they still have oats, so they're still totally healthy. You're welcome.

CakeSpy Note: I made these for a David Lebovitz-themed meeting of my cookbook club--to check out what other people made, check out Kairu's flickr stream!

Cranzac Cookies

Ingredients

  • 1 cup rolled oats
  • 1 cup packed light brown sugar
  • 1 1/4 cups flour
  • 1 cup sweetened shredded coconut
  • 1/2 cup dried cranberries
  • 1/2 teaspoon baking soda
  • 1/4 teaspoon salt
  • 3 tablespoons water
  • 4 tablespoons unsalted butter, melted
  • 1/4 cup golden syrup (or honey)

To top: About 1 cup vanilla buttercream frosting or cream cheese frosting of your choosing

Procedure 

  1. Preheat oven to 350. Line two baking sheets with parchment paper.
  2. In a large bowl, toss together oats, brown sugar, flour, coconut, cranberries, baking soda, and salt. Stir in the water, melted butter, and syrup or honey until the dough is cohesive and moist.
  3. Using your hands, shape the dough into 1 1/4 inch balls. Place the balls on the prepared baking sheets and lightly flatten them with your hand. They should have about 1 inch of space on all sides to allow for light spreading.
  4. Bake, rotating the tray halfway through baking, until the cookies are golden brown, about 12 minutes.
  5. Let the cookies cool on the baking sheets til firm, then use a spatula to transfer them to a wire rack.
  6. Once cool, top each with a dollop of frosting, and if you'd like, a cranberry piece on top for added cuteness.
Monday
Mar072011

Just Dough It: Homemade Do-Si-Do Girl Scout Cookies for Serious Eats

Girl Scouts can teach you everything you will ever need to know about teamwork. How, exactly? Just look to the cookie. I'm talking, of course, about Do-Si-Dos (sometimes called Peanut Butter Sandwiches), where peanut butter and oatmeal cookie work together to make one beautiful baked good. And—even better—they're served in sandwich form, which means that you get to eat two at once, with frosting. Could there possibly be a more warm and fuzzy hand-holding experience of a cookie?

This homemade version, adapted from Frugal Antics of a Harried Homemaker, comes out a bit fatter and more moist than the original (not such a bad thing, right?), but the flavor is fairly spot-on: sweet, nutty, lightly salty, and very buttery. That is to say, dangerously addictive.

Not keen on the peanut butter and oatmeal pairing? Try your hand at homemade Thin Mints, Tagalongs, or Samoas instead!

For the full entry and recipe, visit Serious Eats!

Tuesday
Mar012011

Awesome Overload: Homemade Samoas With Peanut Butter

I know, I know. You probably went into the sweetest sort of sugar shock when I posted those Homemade Samoas Girl Scout Cookies.

But I want to know that there's a way to make them even awesomer.

It's true. And it involves peanut butter.

While appointing my Samoas with chocolate on top, out of the corner of my eye a jar of peanut butter caught my eye, and a little lightbulb went off in my head.

And I'm happy to report that yes, adding a dollop of peanut butter to the coconut-topped Samoas, and then finishing it off with a Hershey's kiss or big dollop of chocolate topping is extremely delicious.

Want to try it yourself? Simply follow the recipe I posted on Serious Eats, but after topping the cookies with your coconut mixture, add a teaspoon of peanut butter and then top with either hershey's kisses or a dollop of the chocolate topping called for in the recipe. Easy as pie! I mean, cookie?

Monday
Feb282011

Scouting Sweetness: Homemade Samoas Girl Scout Cookies for Serious Eats

Fact: Samosas and Samoas, while both delicious, are not the same. In a nutshell, the former is a savory snack, often eaten before an Indian meal; the latter is a sweet cookie, sold by Girl Scouts, enjoyed basically any time.

Of course, there's no need to power through this homonym haze in some areas of the country, where these chocolate-coconut-shortbread-caramel confections are known as "Caramel deLites."

But regardless of geography and nomenclature, one thing is for sure: these cookies are tasty little morsels. And when you've reached the end of the box you purchased from your local Scouts, there's a surefire solution for sweet gratification: make your own batch (my recipe is adapted from recipes onBaking Bites and Batter Licker), and call them whatever you want.

Check out the full entry and recipe on Serious Eats!

Saturday
Feb262011

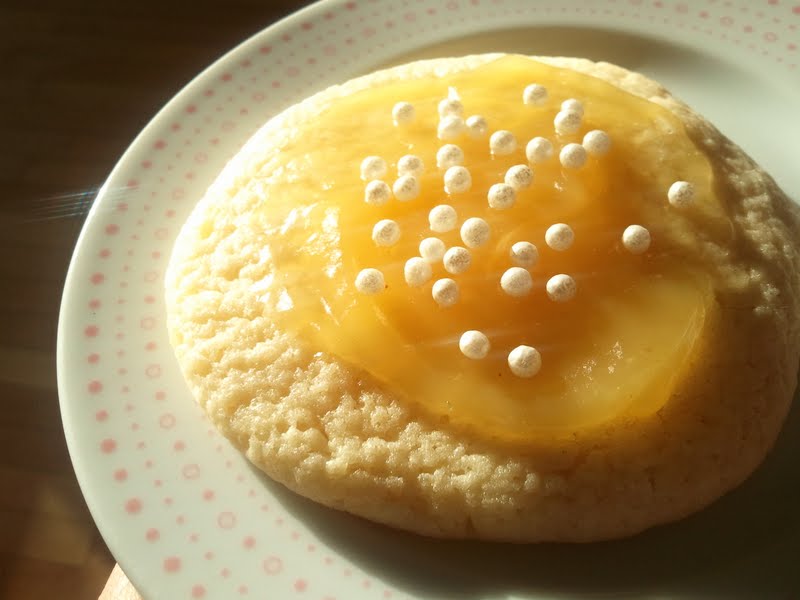
When Life Gives You Lemons: Very Lemon Drop Cookies Recipe

Some sweet recipes dumb down lemon flavor, overcompensating with sugar to make up for the tartness of the lemon. Not these cookies. Sure, they're plenty sweet, but by using lemon juice, rind, liqueur, candies, and even lemon curd to top them, they've got so much lemon that non-lemon lovers need not apply. But if you do love lemon, then pucker up and get ready to chow down on these sweet-tart treats. Get bonus sweet-sour points by garnishing with pixie stix powder, but it's not necessary; pearl sugar is pretty too.

Lemon Drop Cookies

20 to 24 cookies, depending on size

  • 2 cups flour, sifted
  • 3 teaspoons baking powder
  • 3/4 teaspoons salt
  • 1 tablespoon grated lemon rind
  • 1/2 cup (1 stick) butter, softened
  • 1 cup sugar
  • 1 egg
  • 1/4 cup lemon juice
  • 2 tablespoons lemon liqueur
  • 2 tablespoons water
  • 3/4 cup tart lemon candies
  • Optional: lemon curd, pixie stix, or pearl sugar for topping

Procedure

  1. Preheat oven to 375. Line two baking sheets with parchment paper.
  2. In a medium bowl, sift together the flour, baking powder, and salt.
  3. In the bowl of a stand mixer fitted with the paddle attachment, mix the lemon rind, butter, and sugar, beating until light and fluffy.
  4. Add the egg and mix until incorporated.
  5. Add the lemon juice, lemon liqueur, and water; beat well.
  6. Add the dry ingredients, and beat until incorporated, using a rubber spatula to scrape down the sides of the bowl. Gently fold in the lemon candies.
  7. Using a tablespoon or ice cream scoop, drop mounds of dough onto parchment-lined cookie sheets. Be sure to leave 2 inches around each cookie, for spreading.
  8. Bake for 10-15 minutes, or until just golden on the edges. Let cool, and if desired, top each cookie with about 1 teaspoon of lemon curd. 


Tuesday
Feb222011

Baked, Not Stirred: Fresa Breeze Margarita Cupcakes Recipe from Robicelli's

Who knew? February 22 is National Margarita Day. But how to celebrate? Well, naturally, you should indulge in a margarita or seven. But you'll need something to soak up all of that blissful booze, so may I suggest a Margarita Cupcake? Here's a recipe sent on care of Partida Tequila, developed specially for them by Robicelli's (who you know I have a cake crush on!).

Margarita Cupcakes

Cake
3/4 stick butter, melted & cooled
3 eggs
1/4 heavy cream
1/4 cup Partida Blanco tequila
1 cup flour
3/4 cup sugar
1 teaspoon baking powder
1/2 tsp salt
Zests of 2 limes

Cream cheese frosting
1 tsp Partida Blanco Tequila
1/2 stick butter, softened
1 package cream cheese, softened
3 cups powdered sugar

Strawberry salsa
1 large container strawberries, stems removed and chopped 
1/4 cup seedless cucumber, peeled, seeded and diced
1/3 cup sugar
2 Tbsp Partida Tequila
One Lime, juiced
1/2 teaspoon Sea Salt

Strawberry Salsa:
1.  Combine all ingredients in a bowl and cover with plastic wrap.  Refrigerate for at least 30 minutes.

For Cake:
1. Preheat oven to 350.
2. Beat eggs until well mixed, then add butter, cream, tequila & salt.  Mix until combined.
3. Sift together flour, sugar and baking powder.  Add to wet mixture and stir until smooth.
4. Divide amongst 12 cupcake tins and bake for 16-18 minutes, or until the tops just spring back when touched.

Cream Cheese Frosting:
1.  Beat together tequila, softened butter and cream cheese on high speed until light and fluffy.
2.  Add powdered sugar 1/2 a cup at a time, beating well after each addition.
3.  Once all sugar is added, beat for an additional 3 minutes to incorporate air.

To assemble:
1.  Strain salsa, reserving liquid.  Using a pastry brush, brush the top of each cupcake with the liquid.
2.  Frost cupcakes with the cream cheese & tequila icing.  Using a teaspoon, scoop out an indentation in the middle of each cupcake.
3. Place a heaping spoonful of the strawberry salsa in each indentation.
4.  Garnish with a sliver or lime.

Monday
Feb212011

Scouting Sweetness: Homemade Tagalong Girl Scout Cookies for Serious Eats

Once upon a time, Girl Scout Cookies were made by hand, by actual Girl Scouts. They were then sold door to door to teach the girls lessons about marketing and goal-setting.

These days, while the aim is still true—the proceeds go to a good cause—the Tagalongs*, Thin Mints, and Samoas are made commercially, making for confections that arguably fall into "don't confuse the experience with the product" territory.

The solution? Do buy cookies from those earnest young Scouts. But also make a batch of your own for a delicious home-baked treat. Start with these Tagalongs: slightly fatter and more substantial than the Scout version, you'll enjoy each chocolatey, peanut buttery, shortbready bite.

Not into Tagalongs? More of a Thin Mints fan? Make Thin Mints instead »

* In some regions, Tagalongs are packaged under the name "Peanut Butter Patty." Different licensed bakeries that supply the Girl Scouts call the same cookies different names. Wiki up on it here.

For more lore, and the recipe, visit Serious Eats!

Saturday
Feb192011

Dark But Sweet: Bittersweet Chocolate Gateau Recipe from Macrina Bakery, Seattle

Image: Macrina BakeryTopping the list of things that make you go NOM? Howsabout a big slice of Bittersweet Chocolate Gateau? It's the recipe of the month from Seattle's famous Macrina Bakery, and I don't know about you, but I think it would be a perfect cake to enjoy for breakfast, lunch, dinner, or all of the above.

Bittersweet Chocolate Gateau

  • 10 ounces bittersweet chocolate
  • 9 eggs
  • 12 tablespoons (1-1/2 sticks)
  • unsalted butter, at room temperature
  • 3/4 cup granulated sugar
  • 1/4 cup dark cocoa powder, sifted
  • 2 cups (1 pint) fresh raspberries
  • Lightly Sweetened Whipped Cream (recipe follows)
  • Powdered sugar


Procedure

  1. Preheat oven to 350°F. Oil a 9 x 13-inch springform pan. Set aside.
  2. Chop chocolate into small pieces and place in a small stainless steel bowl. Place bowl on top of a saucepan filled with 2 inches of simmering water, making sure that the bottom of the bowl does not come in contact with the water. It’s important that the water be just simmering; if it’s too hot it will scorch the chocolate. Stir chocolate with a rubber spatula until all of the pieces have melted and reached a smooth consistency. Remove the bowl from the heat and set it on the stovetop to keep it slightly warm.
  3. Separate eggs, placing yolks in a small bowl and whites in a medium bowl. Set bowls aside.
  4. Combine butter and sugar in the bowl of a stand mixer and using the paddle attachment, mix on low speed for 1 to 2 minutes. Increase speed to medium and mix for about 5 minutes more to cream the butter. The mixture will become smooth and pale in color. Start adding the egg yolks, 2 at a time, taking care to mix each addition fully before adding more yolks. Scrape down the sides of the bowl with a rubber spatula as needed. After all of the yolks are incorporated, add the sifted cocoa powder and continue mixing until combined.
  5. Remove the bowl from the stand mixer and fold in the melted chocolate with a rubber spatula. The batter will thicken. Using a whisk or hand-held mixer, whip egg whites until medium-stiff peaks form. Gently fold the whipped egg whites into the batter, one third at a time. Continue folding the batter until there are no visible white streaks; it is important that the whites be fully incorporated into the batter. The final mixture should have a sponge-like texture. Pour the batter into the prepared springform pan and scatter half of the raspberries over the top. Poke the berries down with your fingers until they are just below the surface.
  6. Place pan on center rack of oven and bake for 45 to 50 minutes, or until the center is set. Let cool on a wire rack for 30 minutes. Release the sides of the pan and lift, leaving the cake on the pan bottom. Dust the top of the cake with powdered sugar and garnish with the remaining raspberries. Serve with Lightly Sweetened Whipped Cream. It’s best to enjoy this cake the day it’s baked, but it can be stored at room temperature for up to one day. It will become very dense and fudge-like if kept in the refrigerator.
  7. It's also most excellent with freshly whipped cream!
© Cakespy, all rights reserved. Powered by Squarespace.