Home Home Home Home Home Home Home
CakeSpy

Featured: 

My adventure at Ben & Jerry's in Vermont!


Unicorn Love: the Eating Disorder Recovery Blog


 Buy my brilliant books!

Buy my new book!

Buy my first book, too! 

CakeSpy Online Retail!


Archives
Gallery

Fantastic appliance for cake making on DHgate.com

everyrecipe.co.nz

Craftsy Writer

Entries in recipes (704)

Thursday
Apr262012

Magically Awesome: Rainbow Unicorn Pinata Cookies

CakeSpy Note: if you follow me on facebook or Twitter, you probably know I'm partial to documenting my sweet discoveries and daily goings-on. Here's where I post a daily feel-good photo, for no particular reason other than to showcase these sweet little nothings, in hopes that they'll make you smile.

Behold, the most magical cookies, possibly ever: Rainbow Unicorn Pinata Cookies. 

As Sheknows.com contributor (and possible soul twin) Sandra Denneler says,

These multi-striped, burro piñata sugar cookies come complete with hollow centers that you can fill with a secret stash of your favorite candies. Break open or bite into these festive treats and be greeted with a sugary surprise. Olé!

Now. I know that they are meant to be rainbow burros - but really, they look like unicorns to me, so I would like to announce that I have made my decision: unicorns they are.

In the day or two since this recipe was published online, an astonishing number of family, friends, and readers have sent this recipe to me, which is beyond flattering: when you think of sweet, magical, rainbow, unicorn things, YOU THINK OF ME! That's about how it should be, I think.

Find the full recipe and tutorial on sheknows.com.

Wednesday
Apr252012

Sweet Schooling: Wellesley Fudge Cake Recipe

Wellesley Fudge Cake

Wellesley Fudge cake--a deeply decadent chocolate cake topped with a slab of fudge frosting--seems an unlikely sweet to associate with the prim-and-proper ladies of Wellesley (the college featured in the classic feat of cinema Mona Lisa Smile). 

Clearly by the popularity of this recipe, it seems that those young ladies had as voracious an appetite for the sweet stuff as they did for knowledge. But to really look at the origins of this cake, we’ve got to rewind a little bit, to the invention of fudge itself.
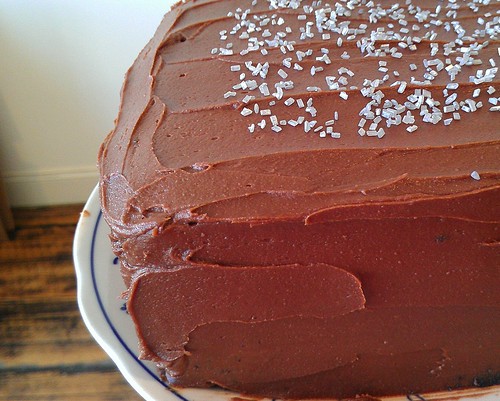
Wellesley Fudge Cake


Fudge, that semi-soft candy made from butter, sugar, and various flavorings (very commonly chocolate) is an american-ized version of french bonbons and creams, and it became popular in the US in the early 1900s. The Oxford English Dictionary suggests that the name is perhaps derived from the word “fadge”, which is an old-timey term for “to fit pieces together”. Of course, not to confuse you, but an Irish dish called “Fadge” does exist, but it is actually an apple potato cake, traditionally served at Halloween.

As an interesting side note, the word “fudge” referring to a cheat or hoax dates to the 1830s, before the candy was popular--but this may explain how the name was assigned to the candy, too.

You see, those young college ladies would use the sweet stuff as their excuse to stay up late: candy-making was an acceptable activity, and they would use it as an excuse to stay up late, ostensibly to talk about boys and other forbidden subjects. “Nearly every night at college,” said the Vassar girl, “some girl may be found somewhere who is making ‘fudges’ or giving a fudge party.” The timing seems to work out: the word “fudge” for a confection showed up as early as the 1890s, and by 1908 the term was commonly used in association with women’s colleges.
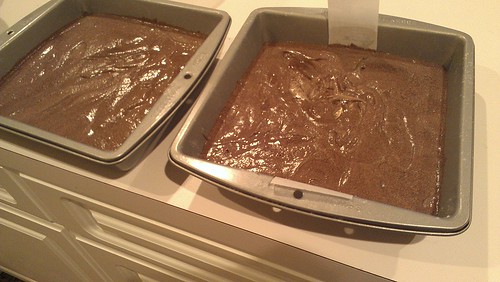
 

IMAG0570

A 1909 cookbook produced by Walter Baker & Co. (producer of Baker’s chocolates) includes three different recipes for fudge, each just slightly different and named, respectively, after Vassar, Smith, and Wellesley colleges.

In fact, there is a letter in the Vassar archives which says,

“Fudge, as I first knew it, was first made in Baltimore by a cousin of a schoolmate of mine. It was sold in 1886 in a grocery store...I secured a recipe and in my first year at Vassar, I made it there--and in 1888 I made 30 pounds for the Senior auction, its real introduction to the college, I think.”

So why would it proliferate, and be adapted to an even richer and more over the top treat, the decadent Wellesley Fudge Cake, at this particular school? Perhaps because it was such a forbidden pleasure there. An 1876 circular to parents states that the college refuses to accept students who are broken down in health, maintaining that a proper diet is key for proper learning, and that “we have therefore decided not to receive any one who will not come with the resolution to obey cheerfully all our rules in this respect, and pledged in honor neither to buy nor receive in any manner whatsoever any confectionery or eatables of any kind not provided for them by the College.” Further, the founder of Wellesley College held that, “pies, lies, and doughnuts should never have a place in Wellesley College”. Well, naturally it would take off here: it tasted positively sacre-licious!

By 1913, fudge and fudge cakes were was common on the tea-room menus surrounding the college.I will help
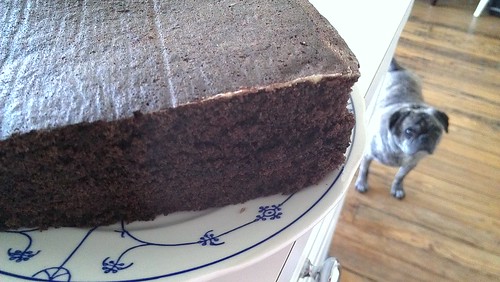
Every few decades the cake enjoys a renaissance; a little fussy to make in that it requires a bit of candy-making prowess, it is astoundingly easy to eat. The confection was bound for success too: soon, it was even featured prominently as

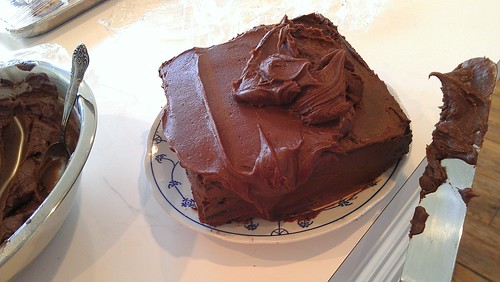
Some versions call for an unfrosted cake; others, which I favor, feature a double dose of chocolate, the base of which is brownie-like, coated with a more fudge-like frosting.IMAG0574
Note: Traditional recipes called for “thick sour milk”; I'm not quite sure what that even is, so this recipe employs buttermilk. After testing another traditional recipe with some help by Java Cupcake, I find this a superior cake. 

The recipe that finally ended up tasting best? This one, lightly adapted from the geniuses at Cook's Country Magazine. Their original version appears in the book Cook's Country Blue Ribbon Desserts.

Wellesley Fudge Cake
Adapted from Cook's Country Blue Ribbon Desserts

Cake

  • 2 1/2 cups all-purpose flour
  • 2 t. baking soda
  • 1 t. baking powder
  • 1/2 t. salt
  • 3/4 c. hot water
  • 1/2 c/ Dutch-processed cocoa powder (I used Hershey's Special Dark which also works fine)
  • 16 T. (2 sticks) unsalted butter, cut into 16 pieces and softened
  • 2 c. granulated sugar
  • 2 large eggs
  • 1 c. buttermilk, room temperature
  • 2 t. vanilla extract

Frosting

  • 1 1/2 c. packed light brown sugar
  • 1 c. evaporated milk
  • 8 T. (1 stick) unsalted butter, cut into 8 pieces and softened
  • 1/2 t. salt
  • 8 oz. bittersweet chocolate, chopped
  • 1 t. vanilla extract
  • 3 c. confectioners’ sugar, sifted

To make the cake:

  1. Adjust an oven rack to the middle position and heat the oven to 350 degrees. Grease and flour two 8-inch square baking pans, then line the bottoms with parchment paper. Combine the flour, baking soda, baking powder and salt in a bowl. Set aside.
  2. In a small bowl, whisk the hot water and cocoa together until smooth and set aside. In a large bowl, beat the butter and granulated sugar together with an electric mixer on medium-high speed until light and fluffy, 3-6 minutes. Beat in the eggs, one at a time, until incorporated. Mix in one-third of the flour mixture, followed by 1/2 cup of the buttermilk. Repeat with half of the remaining flour mixture and the remaining 1/2 cup buttermilk. Add the remaining flour mixture and mix until combined. Reduce the mixer speed to low and slowly add the cocoa mixture until incorporated.
  3. Give the batter a final stir with a rubber spatula to make sure it is thoroughly combined. Scrape the batter into the prepared pans, smooth the tops, and gently tap the pans on the work surface to settle the batter. Bake the cakes until a toothpick inserted in the center comes out with a few crumbs attached, 25-30 minutes, rotating the pans halfway through baking. Let the cakes cool in the pans for 15 minutes. Run a small knife around the edges of the cakes, then flip them out onto a wire rack. Peel off the parchment paper, flip the cakes right side up, and let cool completely before frosting, about 2 hours. (The cakes can be wrapped tightly in plastic wrap and stored at room temperature for up to 2 days.)
  4. To make the frosting: Stir together the brown sugar, 1/2 cup of the evaporated milk, 4 tablespoons of the butter, and salt in a large saucepan and cook over medium heat until small bubbles appear around the edge of the pan, 4-8 minutes. Reduce the heat to low and simmer, stirring occasionally, until large bubbles form and the mixture has thickened and turned deep golden brown, about 6 minutes. Transfer to a large bowl. Stir in the remaining 1/2 cup evaporated milk and remaining 4 tablespoons butter until the mixture has cooled slightly. Add the chocolate and vanilla and stir until smooth. Whisk in the confectioners’ sugar until incorporated. Let the frosting cool to room temperature, stirring occasionally, about 1 hour.
  5. Line the edges of a cake platter with strips of parchment paper to keep the platter clean while you assemble the cake. Place one of the cake layers on the platter. Spread 1 cup of the frosting over the cake, right to the edges. Place the second cake layer on top, press lightly to adhere, and spread the remaining frosting evenly over the top and sides of the cake. Refrigerate the cake until the frosting is set, about 1 hour. Remove the parchment strips from the platter before serving.


Tuesday
Apr242012

Cinco de Mayo Sweet: Tortilla Torte Recipe for Serious Eats

Have you ever found yourself wondering why, in the field of desserts inspired by Mexican food, the choco taco must always reign supreme? I mean, there is so much possibility in the genre. I know that personally, I'd be mega-thrilled about a chocolate-peanut butter quesadilla or some Cadbury Creme huevos rancheros.

But for a sweet south of the border-inspired treat that really takes the cake, why not try out a Tortilla Torte? This recipe is lightly adapted from a family cookbook recipe shared with me by Kerry Haygood of cake pop bakery Lollicakes.

Composed of tortillas stacked over chocolate cream filling and topped with a billow of fluffy white frosting, this torte visually resembles fancy stacked sponge cakes, but ultimately makes for a very different dessert experience. The tortillas take a bit of getting used to—they will remain lightly chewy even when the chocolate has had a chance to set— but the taste sensation is unlike any other dessert I've ever tried. The floury taste of the tortillas mixes quite pleasantly with the rich chocolate-sour cream filling (which is also great by the spoonful) and the complementary tangy sweetness of the sour cream frosting.

That's to say: it's nacho typical dessert.

For the full entry and recipe, visit Serious Eats!

Monday
Apr232012

Sweet Chips: Choco Nachos Recipe

Choco Nachos

Desserts inspired by Mexican food: there's just so much untapped potential. I mean, who wouldn't love a delicious choco-burrito (why must it just be choco tacos?) or a blueberry-cornmeal sope with sweetened sour cream on the side? Or tamales with a sweet, instead of savory, filling? Really, the possibilities are staggering (and very delicious-sounding).

Choco nachos

But for now, I'll keep it simple with a brilliant new invention of mine: Choco Nachos.

This dish could not be easier to make, and the rewards are many to your taste buds. They're sweet! They're crunchy! They're carbohydratey! They're buttery! They have chocolate! You can dip them in ice cream, rice pudding, or more chocolate! 

Choco nachos

Seriously, I don't know why you're even still reading this (are you?). You should get yourself to the grocery store for the ingredients. Or maybe you don't even need to: they are prepared using fairly common pantry ingredients. All you have to do is cut tortillas into chip shapes, brush with butter-sugar-cocoa mixture, and bake until they've reached your desired level of crispiness. Here's how you make it happen.

Choco nachos

Choco Nachos

Ingredients

  •  Tortillas (I used 4 10-inch tortillas)
  • 2 teaspoons cocoa (I used Hershey's special dark)
  • 1 tablespoon sugar
  • dash of cinnamon
  • 1 stick of butter
  • Ice cream, rice pudding, or whatever sweet and creamy accompaniment you'd like to serve on the side

Procedure

  1. Preheat your oven to 375 degrees F. Butter the bottom of a large jelly roll pan (don't use a cookie sheet becase it will drip!). If no jelly roll pan, a large pyrex pan will work - you will just do it in a few batches.
  2. Trim the tortillas into chip shapes. As small or as big as you want them.
  3. Stir the cocoa, sugar, and cinnamon together in a small bowl.
  4. Melt the butter in a saucepan or in the microwave. Stir in the sugar mixture until it's well distributed.
  5. Place chips on the buttered pan. Brush the tops with the sugar-butter mixture. Place in the oven for 6-10 minutes or until crispy. Flip halfway through the process. If you have more chips than fit on the sheet, do this in several batches.
  6. Serve while still slightly warm, with whatever dipping sauce you'd like.
Wednesday
Apr182012

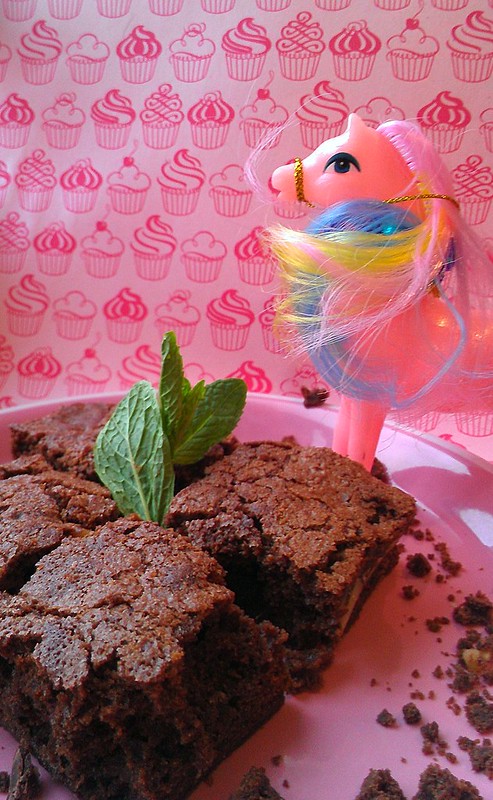
Sweet Story: Katharine Hepburn Brownies

Katharine Hepburn Brownies

Here is a fantastic and true story about Katharine Hepburn. In the early 1980s, a Bryn Mawr student was considering dropping out to go to Scotland and write screenplays. While home for the holidays in her native NYC, her frantic father wrote a letter to Katharine Hepburn, who had also attended Bryn Mawr, imploring “She's a great admirer of yours, and perhaps she'll listen to you”.

Wait, what? Well, it turns out, this wasn't such a crazy thing to do. Turns out, this distraught father was a neighbor of Miss Hepburn's, and would occasionally exchange pleasantries: not good friends, for sure, but a friendly acquaintance.

Upon receiving this cry for help, the imperious Hepburn didn’t waste any time. She phoned at 7:30 the next morning, demanding to speak with the would-be dropout (who was sleeping at the time of the call but certainly awoke rapidly) admonishing “what a damn stupid thing to do!” , and proceeding to deliver a stern lecture, after which she demanded father and daughter at tea at her home.

On the date of the tea, upon arriving at Hepburn’s Turtle Bay townhome, Hepburn greeted them with “casual hauteur, she provided us with tea and some of her famous brownies”.

While there’s no transcript of the tea party, let’s just say the student remained at Bryn Mawr.

Katharine Hepburn Brownies

 Were the brownies responsible? Perhaps. Because as a woman of principle, Hepburn’s were:


1. Never Quit

2. Be Yourself

3. Don’t put too much flour in your brownies.

As Liz Smith says in “Dishing,” “I suppose you realize already those rules to live by were handed down by Katharine Hepburn.” They first appeared in Ladies home journal in 1975 accompanying an interview with Kate, who called them “the best brownies ever!”. Where Kate got the recipe has always been vague, but the popularity of them has not been vague at all. The recipe was released to the public in that article. Since then, it has taken on a life of its own, proliferating in books, magazines, and with the advent of the internet, it became a much-storied recipe on blogs and food websites.
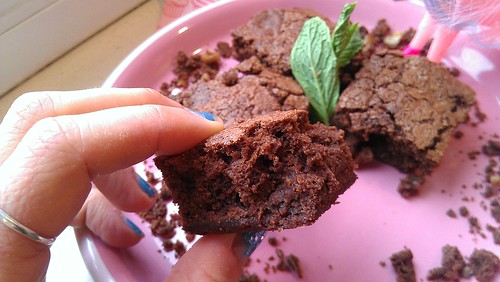
And there’s a reason why the legend endures. If there are three schools of brownie (cakey, chewy, and fudge-like) these are firmly chewy affairs: thick and slightly gooey while still warm, in that sort of "stick-to-your-front-teeth" sort of way (that is a compliment). They're incredibly easy: a dude friend who made this recipe said it should be rated as "guy-friendly" and "totally easy". So there you go. 

Brownies

Katharine Hepburn Brownies

Makes one tray, you decide how many brownies to slice it into.

Ingredients

  • 2 (one-ounce) squares unsweetened baker's chocolate

  • 1 stick unsalted butter

  • 1 cup sugar

  • 2 eggs

  • 1/2 tsp. vanilla

  • 1/4 cup flour

  • 1/4 tsp. salt

  • 1 cup chopped walnuts


Directions
Melt chocolate and butter in a heavy saucepan over low heat. Remove from heat and stir in sugar. Add eggs and vanilla and beat well. Stir in flour, salt and walnuts. Mix well. Pour into a buttered 8-inch-square baking pan. Bake at 325° for 40 minutes. Cool and cut into squares. 

Monday
Apr162012

Butter Me Up: Philadelphia Butter Cake Recipe for Serious Eats

Philadelphia Butter Cake. If you've never heard of it, are you ever in for a treat.

Philadelphia Butter Cake is a rich, buttery cake with a gooey center that's served in bar form. Judging by the picture and the name, you might be tempted to think that Philadelphia Butter Cake is similar to Gooey Butter Cake, a St. Louis specialty. But you're not quite right: while they have some similar characteristics, I'd call them more "cousins" than "twins". The Philadelphia version has two distinct differences from Gooey Butter Cake: first, the topping does not include cream cheese, and second, the base contains yeast.

If light-as-air-cakes are what you crave, then don't bother with this one. Though the flavor and appearance are in some ways quite simple, it's still definitely an indulgence. Philadelphia Butter Cake is almost indescribably rich: if you can imagine Gooey Butter cake without the cream cheese, and with a base that is somewhat like a crushed, compressed danish, then you're getting the right idea. It's like an opportunity to savor the very soul of butter in a compact, sweet square of pleasure.

For the full entry and recipe, visit Serious Eats!

Monday
Apr092012

Sweet Tarts: Leftover Jelly Bean Pop Tarts for Serious Eats

Leftover Jelly Bean Pop-Tarts: the perfect way to add some magic to your morning by making colorful use of your leftover Easter candy.

Preparing a homemade version of the popular store-bought pastries is extremely easy, and placing rows of jelly beans in the middle is a vibrant way to make use of any straggler candy. The jelly beans become soft and slightly gooey while the tarts are still warm; they form into flattened but soft little sugar lumps when cooled. Unlike fruit fillings which are somewhat able to masquerade as healthy, the sweetness of the candy takes these treats into firm dessert territory (or at least extreme morning indulgence). They're a fun treat to make with kids, and are bound to delight eaters as they discover the rainbow of color contained within.

For the full entry and recipe, visit Serious Eats!

Thursday
Apr052012

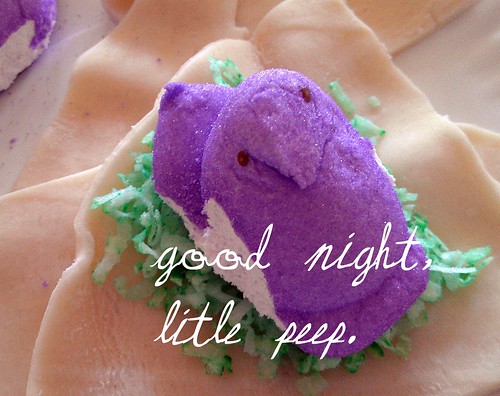
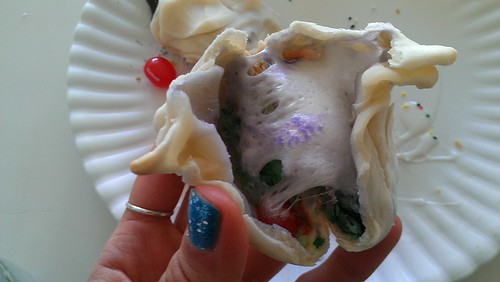
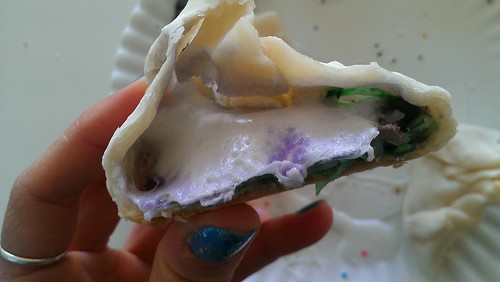
Sweet Treats: Peeps Dumplings

IMAG0297

Today, I found myself with a few little ingredient odds and ends at hand.

Included: Peeps, pie crust, tinted coconut.

And so I thought...why not engage in a little Peeps Torture? After all, this a documented fun activity. Who hasn't enjoyed a little Easter-time Peeps torture? 

And so, I cut out scraps of pie crust in a size about 5 inches by 5 inches.

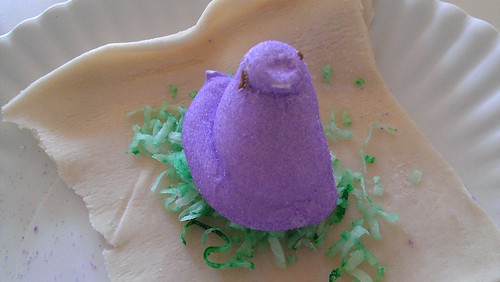
On top of it, I laid a little bed of tinted coconut.

IMAG0302

And then I put a Peep on top of that...like putting it on a little nest. 

IMAG0299

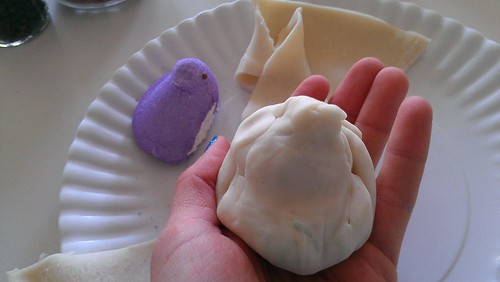
And then I gathered the crust and sort of "tented" it around the peep. Like a little bed!

IMAG0301

Is it just me, or does Peep #2 look a little concerned?

Well, he had good reason for concern. He was next to be put into a bed. A forever bed.

and then...I put these little dumplings in the oven. And then...

IMAG0319

Aaaaaah!

Here's how to make this magic happen at home.

IMAG0320

Peeps Dumplings

Ingredients

  • Pie crust scraps (enough to roll back out to about 5x5 inches)
  • As many Peeps as you have pie scrap pieces
  • shredded coconut 
  • Chocolate chips or chocolate pieces (I didn't to this but think it would taste good so I am suggesting it here)

Procedure

  1. Place one Peep and whichever fillings you'd like on the center of each piece of pie crust.
  2. Form a little "tent" around the peep, making sure to seal the top off to prevent oozing.
  3. Bake at 400 degrees for 7-10 minutes, or until it starts to brown.
  4. Let cool, but serve still slightly warm.
Wednesday
Mar282012

Cadbury Creme Egg Foo Young for Serious Eats

Cadbury Creme Egg Foo Young: believe it or not, it's actually quite good.

Taking visual inspiration from the Chinese takeout staple, this trompe l'oeil sweet starts by frying pancakes studded with Cadbury Creme Egg pieces, which are then topped with melted peanut butter "gravy" and served atop a bed of rice pudding.

The pancakes, which do not require sugar for the batter, are plenty sweet owing to the Creme Eggs. The crispy edges and warm, soft, gooey interior of the pancakes are wonderful when paired with the creamy rice pudding, and the peanut butter "gravy" adds just enough savoriness to cut through the sweetness. It's a delicious dessert prospect—perhaps the only thing that is missing is a Cadbury Creme Egg Roll!

For the full entry and recipe, visit Serious Eats!

Monday
Mar262012

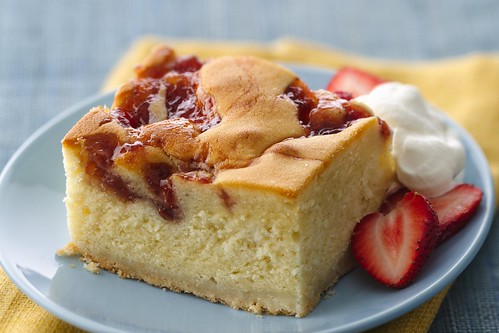
Pillsbury Bake-Off Countdown: Strawberries and Cream Butter Cake

Strawberries and cream cake

CakeSpy Note: I am beyond ecstatic to announce that I have been invited as a media guest to the 45th Annual Pillsbury Bake-Off in Orlando, Florida! The event will take place in late March; til then, I am going to feature several of the sweets finalists here in anticipation of the big day!

Strawberries and cream, re-imagined gooey butter cake style!

That's the story behind this delicious Bake-Off entry, which starts with store-bought sugar cookie dough. "Sugar cookie dough is the start of an easy-to-make, yummy cream cake with strawberries. Really!" says Laurie Benda of Madison, WI.

Strawberries and Cream Butter Cake

16 servings
  • 1roll Pillsbury® refrigerated sugar cookie dough
  • 1 1/4 cups unsalted or Salted Butter, softened
  • 3/4cup granulated sugar
  • 3 ggs
  • 3 1/2 teaspoons McCormick® Pure Vanilla Extract
  • 2 1/4 cups Pillsbury BEST® All Purpose Unbleached Flour
  • 1 can (14 oz) Eagle Brand® Sweetened Condensed Milk
  • 1/3 cup Smucker’s® Strawberry Preserves
  • 2 cups heavy whipping cream
  • 2 tablespoons powdered sugar
  • 1lb fresh strawberries, sliced (2 1/2 cups)

Procedure

  1. Heat oven to 350°F. Let cookie dough stand at room temperature 10 minutes to soften. Spray 13x9-inch pan with Crisco® Original No-Stick Cooking Spray. Break up cookie dough in pan; press to cover bottom of pan.
  2. In large bowl, beat butter and granulated sugar with electric mixer on medium speed until light and fluffy. Beat in eggs and 2 teaspoons of the vanilla until well blended. On low speed, alternately beat in about 1/3 of the flour and 1/2 of the condensed milk, ending with flour addition, until blended. Pour batter over dough in pan, spreading gently to cover.
  3. Drop teaspoonfuls preserves onto batter; with knife, swirl preserves into batter.
  4. Bake 45 to 55 minutes or until edges are golden brown and toothpick inserted in center comes out clean. Cool until slightly warm, about 1 hour.
  5. In small bowl, beat whipping cream, powdered sugar and remaining 1 1/2 teaspoons vanilla with electric mixer on high speed until soft peaks form.
  6. Serve warm cake with whipped cream and strawberries. Store covered.
© Cakespy, all rights reserved. Powered by Squarespace.