Home Home Home Home Home Home Home
CakeSpy

Featured: 

My adventure at Ben & Jerry's in Vermont!


Unicorn Love: the Eating Disorder Recovery Blog


 Buy my brilliant books!

Buy my new book!

Buy my first book, too! 

CakeSpy Online Retail!


Archives
Gallery

Fantastic appliance for cake making on DHgate.com

everyrecipe.co.nz

Craftsy Writer

Entries in recipes (704)

Monday
Jun112012

Omg Alert: Ice Cream and Frosting Pie

Pie

Sometimes, a dessert comes along that just makes you want to eat your weight in it. Sometimes, it's something classy, like an exquisitely made opera cake. 

But more often, it's something really trashy, like Vanilla Kreme Donuts or cinnamon rolls stuffed with chocolate chip cookie dough.

Or--wait for it--ice cream and frosting pie. Seriously...I don't know what to say, other than to humbly admit that it's excessive and maybe even bordering on a little bit awful...but dear lord, it's also genius, and could I ever do some damage to this thing.

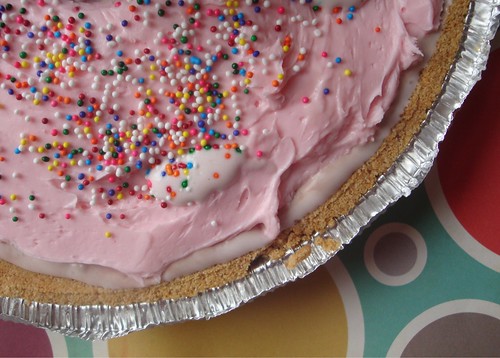
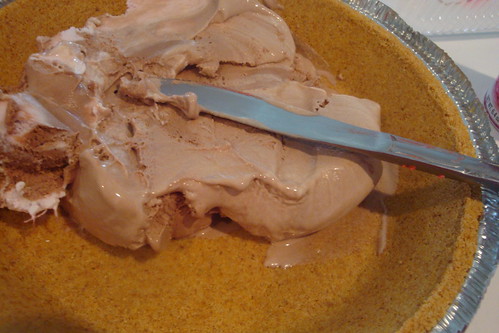
Best of all, it's beyond simple to make. You really just put ice cream in the pie crust, and let it freeze. Nothing, too crazy, right? But then...oh, then. Once set, you create something truly amazing with one additional step: you smear buttercream all over it (sprinkles too, if you'd like. I like). Don't thank me, because you'll be cursing me after you finish the entire thing in one sitting.

Ice Cream and Frosting Pie

  • 1 9-inch baked pie crust (I used a graham cracker crust)
  • The better part of a half gallon of vanilla ice cream (or, do half vanilla, half chocolate)
  • 1 1/2 cups vanilla buttercream (use the recipe featured here)
  1. Let the ice cream soften, or force nature's hand by putting it in the microwave for about 15 seconds.
  2. Ice cream pie
  3. Fill the pie crust with ice cream until it's about 90 percent full. Pack it in so that it's nice and dense. Spread it so that it's fairly even on top. 
  4. Let this freeze in the freezer for a few hours. Go watch a few episodes of Mad Men or something. 
  5. Once the ice cream is pretty firm, mix up your buttercream. Spread it all over the top. Don't fuss with it too much because the ice cream will start to spread around the longer you take. 
  6. 20120409-200375-sprinkles
  7. Finish it off with sprinkles. Serve immediately, or return to the freezer before serving. 
 

Monday
Jun112012

Cupcake Cream Pie Recipe for Serious Eats

When it comes to cream pies, you probably think along the lines of banana, coconut, or chocolate. But why limit yourself? Why not let your imagination fly high and fill your pie with delicious cupcakes?

I recently gave this pie in the sky idea a try by lining the bottom of a baked pie crust with alternating slices of cut-up vanilla and chocolate frosted cupcakes, over which I poured a rich, homemade custard filling. So what happens? As the custard sets, it absorbs some of the rich butteriness of the frosting, infusing the entire pie. As a result, the taste is kind of like cream pie meets birthday cake, in a decidedly delicious way. While some might argue that it's gilding the lily, it might interest you to know that this pie also tastes fantastic when paired with ice cream.

For the full entry and recipe, visit Serious Eats!

Monday
Jun042012

Blueberry Pie Recipe from SpyMom

SpyMom Made a Pie

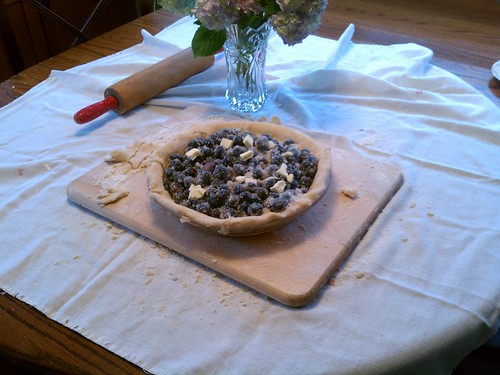
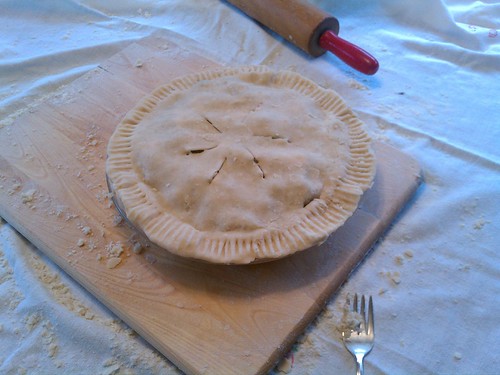
Guess what? SpyMom (that would be MY mom) made a pie. A glorious pie. One so simple and sweet, delightful to eat. SpyMom dubbed it "perfectly imperfect" in its final look, but judging by the little heart-shaped dollop of blueberry juice on top (do you see it?), I'd simply call it "perfectly lovable".

SpyMom made a pie

Happily, she was willing to share the recipe, which she has adapted from a version (I'm not sure which) of the Boston Cooking-School Cookbook.

Oh, and as an aside about the final result: it's the type of pie that is perfect with ice cream, but it also makes for fantastic breakfast-eating, too.

Of course, as SpyMom cautions, this pie was made with fresh New Jersey blueberries, and that's really what makes the pie. Since it's so simple, use the best blueberries you can--you won't regret it! 

Blueberry Pie by SpyMom

Blueberry Pie

  • 1 double-crust pie dough, unbaked. 
  • 4 cups fresh blueberries, washed
  • 3 tablespoons flour
  • 1 cup sugar
  • 1/8 teaspoon salt
  • 1 tablespoon lemon juice
  • 1 tablespoon butter 

Preheat oven to 425 degrees f. 

Line the pie pan with half of the dough (for a bottom crust).

Mix the flour, sugar, and salt in a large bowl. Add the blueberries and lemon juice and toss well.

Pile the mixture into your prepared bottom crust, and dot the top with cut-up pieces of butter.

Roll out the top crust and drape it over the pie. Crimp or flute the edges to form a seal. Make several vents on top to let the steam out while baking.

Bake for 10 minutes at 425 degrees, and then reduce the heat to 350 degrees F. Bake for 30-40 more minutes, or until the top is browned.

Tuesday
May082012

Pike Place Market Inspired Honey Cream Biscuits Recipe

On the list of Things I Love To Eat, biscuits rank very high. So when I received a review copy of Pike Place Market Recipes: 130 Delicious Ways to Bring Home Seattle's Famous Market by Jess Thomson (who also co-wrote the Top Pot Doughnuts cookbook) and saw that it included a biscuit recipe, I knew I had to try it. The headnote drew me in:

"If you can get past the allure of Moon Valley Organics's honey-scented skincare products at its Pike Place Market Day Stall, you'll also find delicious honey, harvested in Washington's Cascade Mountains. Use it to make these biscuits, which are perfect for breakfast, served straight from the oven. Spread them with butter and--what else?--a little more honey.

Decadent cream biscuits, redolent of honey and topped with more honey? Done and done. Here's the recipe!

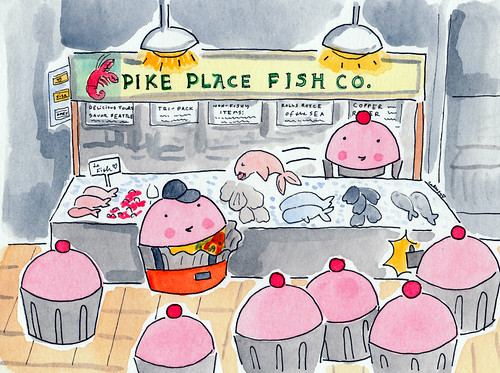
The book is well worth a look even if you're not from Seattle, btw--it's full of fantastic recipes, and wonderful stories about the famed and storied market. Oh, and the fishmonger on the right side of the cover, above? I have totally illustrated him in cupcake form. I'm totally not kidding. Someone asked me to do a custom piece once and asked me to use that guy as a picture reference because she had a crush on him. He's the tattooed cupcake, below.

Fish Thrower Cuppies!

Honey Cream Biscuits

Makes 8

  • 3 cups all-purpose flour, plus more for rolling
  • 1 teaspoon kosher salt
  • 1 1/2 tablespoons baking powder
  • 3/4 cup (1.5 sticks) cold unsalted butter
  • 1 cup plus 1 to 2 tablespoons heavy cream
  • 1/4 cup high quality honey
  • 1 tablespoon melted butter

also suggested: more honey and butter, for serving; or, do as I did, and add a big spoonful of brown sugar melted in butter.

Procedure

  1. Preheat your oven to 425 degrees F. Line a baking sheet with parchment paper and set aside.
  2. Whisk the flour, salt, and baking powder together in a mixing bowl. Cut the cold butter into 1/2-inch chunks, and using a large fork or pastry cutter, mix the butter into the flour mix until the butter resembles small peas. Add 1 cup of the cream and the honey, drizzling the honey evenly over the entire mixture, and mix well with a fork until no dry spots remain.
  3. Knead the dough a few times in the bowl to help it hold together (add the extra cream if needed). Turn it out onto a lightly floured surface. Roll it to an 8-inch circle, about 1/2 inch thick. Using a 3-inch biscuit cutter or drinking glass or similarly sized cookie cutter, cut out biscuits, re-rolling so you can use the scraps for more biscuits. 
  4. Invert the biscuits onto the prepared sheet so that the smooth side is up (that way, they'll rise up, not out), brush with the melted butter, and bake for 12-15 minutes, until puffed and golden. Let cool for 5 minutes on the sheet, then serve warm, with butter and honey.
Monday
May072012

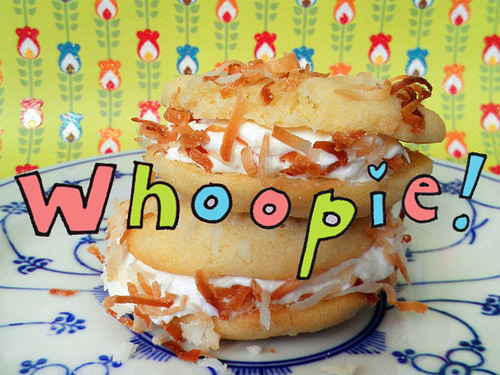
Cream of the Crop: Coconut Cream Whoopie Pies Recipe for Serious Eats

Guess what? Tomorrow (May 8) is National Coconut Cream Pie Day.

Clearly, this is an appropriate occasion to eat your weight in coconut cream pie. But why stop there? Why can't whoopie pies come to the party, too?

True: traditional whoopie pies are not pie at all—rather, they are cake-like cookies with frosting sandwiched in between. But in the case of the Coconut Cream Whoopie Pie, you can have your cake and eat your pie, too. The rich filling is sort of like a mix between coconut frosting and cream pie filling.

Moreover, these sweet sandwiches are like eating the delicious intersection between sugar cookies, coconut cake, and coconut cream pie in one delectable form—that is to say, an absolutely appropriate food to celebrate this red-letter calendar day.

For the full entry and recipe, visit Serious Eats!

Wednesday
May022012

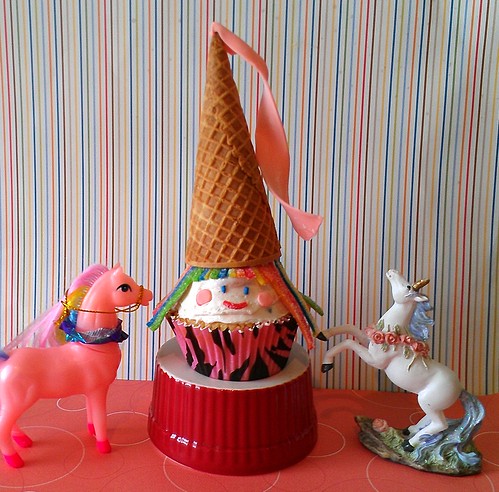
Sweet Fancy: Magical Princess Cupcakes inspired by Amy Atlas

Please just buy Amy Atlas's new book already. Entitled Sweet Designs: Bake It, Craft It, Style It, this sweet book is chock-full of amazing party ideas and as packed as a cup of brown sugar is for a cookie recipe, with delicious recipes and adorable tutorials.

Princess cakes

But don't just take my word for it: check out this cute tutorial.

In the book, there's a recipe and tutorial for "Wicked Pumpkin Cupcakes" which employ overturned ice cream cones for witch hats and candy corn for noses. How cute!

Of course, since it's months from Halloween, I figured it would be pretty adorable to adapt this into a "Pretty Princess Cupcake". Yup, still adorable. And proof that you can use this book as a template to come up with your own party ideas too! Choose your own adventure, yo.

Pretty Princess Cupcakes

adapted from Wicked Pumpkin Cupcakes from Sweet Designs: Bake It, Craft It, Style It.

Makes 12

Assemble your cupcakes. Frost each, spreading until smooth on the cupcakes.

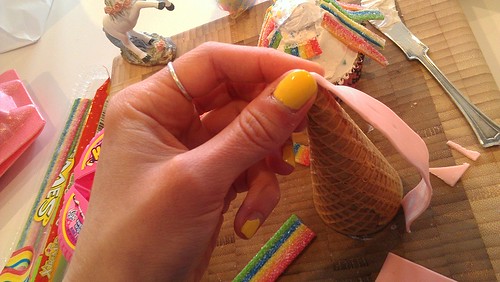
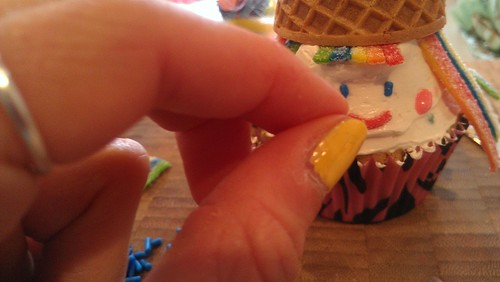
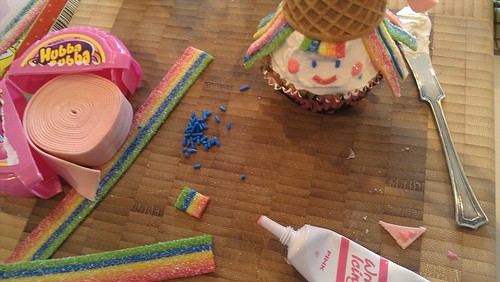
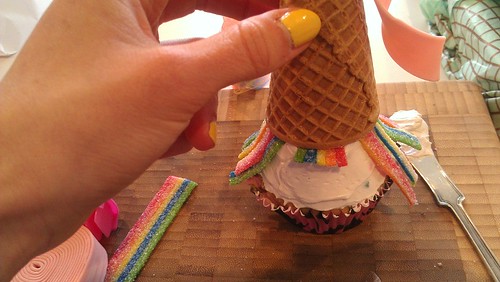
Adhere an approximately 4-inch piece of bubble tape to the top of your ice cream cone, to form a little veil at the top of the hat. You know, how princesses like to do. I adhered it by putting a tiny dab of frosting but then really just gently pressing the gum around the top of the cone; they stayed in place long enough to serve and be devoured. Repeat with remaining cones. If desired, add a little "twist" to the veil.

Making the hat

Place an ice cream cone "hat" onto each cupcake, making sure to leave enough frosting showing for the face. Place the longer licorice strands around the sides, for hair; use the shorter stands in front, for "bangs". I even cut along the color divisions for a nice little fringe on the bangs. 

Put on the hat

Fringe

Note: you can also do the hair first and then stick the "hat" on, but sometimes it doesn't stick as well (the cone won't stick as well to the frosting when the candy is already on it!).

How I did this thing

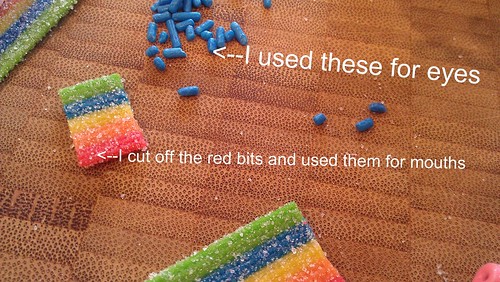
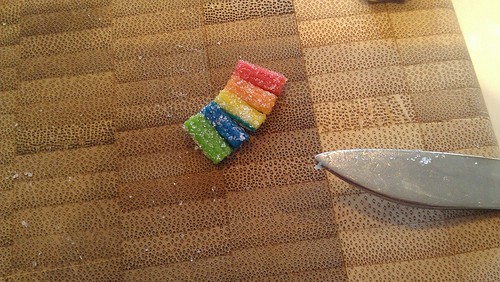
Create faces using your candy--you can use m&m's for the eyes, but I actually found that using small bits of sprinkles was decidedly adorable too. Using small bits of the leftover Taffy candy, I cut out 1/2 inch segments of the red section and used it as smiling faces, and formed tiny pieces of bubblegum from the bubble tape into tiny pink cheeks.

Sweet  

How I did it

Tuesday
May012012

Tunnel of Penuche Cake Recipe for Serious Eats

Perhaps you've heard of Tunnel of Fudge Cake. In spite of its titter-worthy name, this rich, nutty fudge cake with a gooey center and chocolate glaze is a modern classic. It was entered into the 1966 Pillsbury Bake-Off, and it's largely accepted as the recipe that made bundt pans a must-have item, and a predecessor of the chocolate lava cake trend.

But for those of you who aren't into the chocolate overload of the famous Tunnel of Fudge Cake, I have configured a sweet counterpart: the Tunnel of Penuche Cake.

If fudge is the inspiration for the original, penuche (a "blonde" fudge made with brown sugar, butter, milk, and vanilla) is the muse for this honey-hued variation. The dense cake is somewhat blondie-like, redolent of brown sugar and butter and studded with bits of pecan. Although the gooey center effect is far more subtle in this version than the original— it's more like a slightly softer and richer cake in the center, giving way to a lightly crispy edge— it's still extremely pleasant to eat. Ungarnished, this would make a fantastic breakfast cake; when topped with a generous coating of butterscotch sauce or dulce de leche, it is suitable for eating any time of day.

For the full entry and recipe, visit Serious Eats!

Sunday
Apr292012

Sweet Dough: Sugar Cookies that Look Like Doughnuts

Doughnut Cookie

So, you're making sugar cookies. Awesome. Good for you.

You've got the batter all mixed. At this point, you pretty much have two choices. You either roll out the dough and cut out some cute shapes, or you're going to drop them on the sheet and bake them. Right? WRONG.

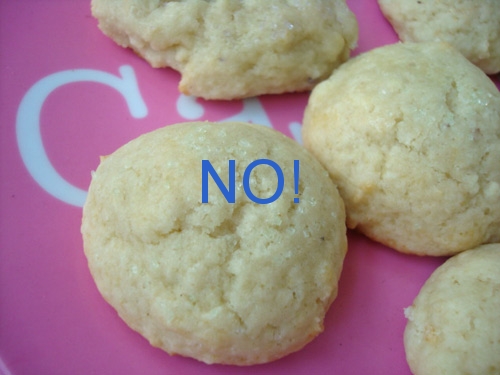
Sour Cream Sugar Cookies

Put away your rolling pin, because I've got an easy way to make your sugar cookies cuter: bake them in a mini doughnut pan .

If you own a mini doughnut pan, like I do (jealous? I got it at the Wilton tent sale when I visited their headquarters), you simply must employ it to make your sugar cookies more adorable.

Honestly, it couldn't be easier to do (provided you have a mini doughnut pan). Here's how I did it.

First, prepare a batch of sugar cookie dough. I am not going to be bossy about what recipe, but I will tell you that I used the one on page 13 of this e-book. Once mixed, set aside for a little bit.

Preheat your oven to the temperature your recipe says it ought to be.

Next, lightly butter your mini doughnut pan. Or spray it with non-stick spray. Whatever you want. 

After it's greased, stuff the dough in the mini doughnut wells. Fill them til they're mostly full. If you think your cookies are going to spread, put less dough in (or put a cookie sheet under the mini doughnut pan while you bake them).

Bake the cookies, but check them about 5 minutes before your recipe would call for, because they're baking in a different vessel.

Donut cookies

Once golden brown, remove from the oven. Let them cool for a while (maybe 20 minutes) in the doughnut pan. Then, gently remove. I found that after loosening one edge with a sharp knife, they basically just popped out. 

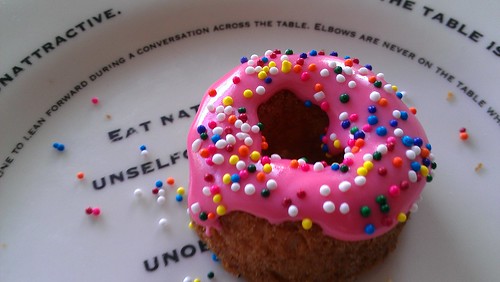
Let the cookies cool, and then apply a dab of pink icing (pink is really best) and be sure to put sprinkles on them too.

Enjoy! They're adorable and sweet. But they're not doughnuts, they just look like them.

Doughnut Cookie

Friday
Apr272012

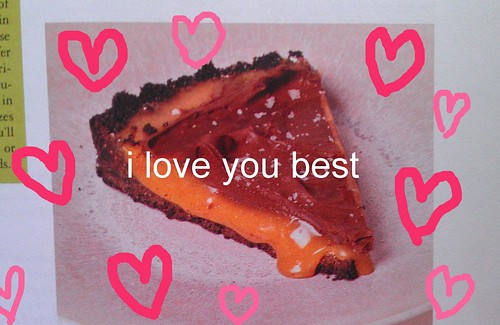
Salted Caramel Tart Recipe from the Edible Seattle Cookbook

Salted caramel tart

I don't know if we have actively discussed how awesome Jill Lightner is. So awesome that I'm not even going to pause and correct the fact that I ended a sentence with "is". Make that two sentences. Hey, it's my website, I do what I wanna!

But back to Jill. She's the editor of the incredible publication Edible Seattle, and she has an encyclopedic knowledge of all things foodie in the greater Seattle area. And even better, her sweet tooth just about matches mine. She was one of the first in line to get a copy of CakeSpy Presents Sweet Treats for a Sugar-Filled Life signed at my book launch party. Yes, I like Jill very much.

Buy this thing

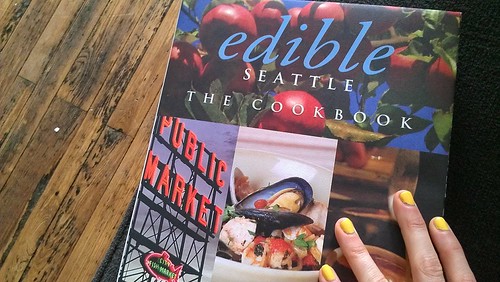
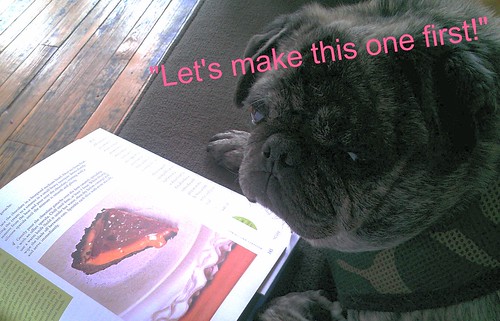
And now she has her own book out: Edible Seattle: The Cookbook . This gorgeous volume includes recipes for Pacific northwest specialties by Seattle area cooks and pastry chefs, as well as profiles on the local providers, ingredients, and inventors of these lovely recipes. It's a vital volume for anyone living in the greater Seattle area, but a great buy for non-Seattleites too. And the dessert chapter is very, very nice, including sables, pies, homemade ice creams, and--my favorite--a salted caramel tart.
Salted caramel tart

The recipe comes from the Volunteer Park Cafe, and yields a crack-like addictive result. The caramel recipe will yield double what you need for two tarts, but it keeps well in the fridge, so save it for a second tart, or just eat it by the spoonful til it's gone.

Here's the recipe for that tart to get your motor running--for more, buy the book.

Salted Caramel Tart

For the crust

  • 1 box (9 ounces) Nabisco famous chocolate wafers
  • 1 stick unsalted butter, melted

For the caramel

  • 2 cups sugar
  • 1 cup filtered water
  • 1 cup heavy cream
  • 1 stick (8oz) chilled unsalted butter, cut into small pieces
  • 1 teaspoon pink Hawaiian Alaea sea salt, smoked gray salt, or fleur de sel

For the chocolate ganache

  • 8 ounces fine quality bittersweet chocolate, chopped (chocolate chips ok)
  • 1 cup heavy cream

Procedure

  1. Preheat the oven to 325 F. Grind the cookies in a food processor or crush by hand until they are fine crumbs. Drizzle the melted butter over the ground cookies, and either pulse in processor or mix by hand until combined. Press into a 9-inch fluted tart pan. Bake 10-15 minutes, until it is fragrant (light browning will be hard to detect on the dark chocolate wafers). Cool to room temperature.
  2. In a heavy medium saucepan, bring the sugar and water to a boil over medium-high heat. Do not stir. Brush down the sides of the pan every 5 minutes with a pastry brush dipped in water to keep crystals from forming. Continue cooking until the caramel is a deep golden brown, keeping a watchful eye on the pot so it doesn't burn. Remove the pan from heat and slowly pour in the heavy cream, whisking constantly. The hot caramel will bubble, so be careful--if it hits your hand, it WILL hurt. Whisk in the chilled butter pieces. Add the sea salt, whisking to comine. Pour half of the caramel into the cooled chocolate crust. Chill until firm in the refrigerator, at least one hour.
  3. Near the end of your cooling period, prepare the ganache. Place the chocolate in a heatproof medium bowl. Over medium heat, bring the cream to a simmer in a small heavy saucepan. Immediately remove from heat and pour over the chocolate, stirring with a rubber spatula until the mixture is smooth and glossy.
  4. Gently pour the ganache over the firm caramel, spreading with an offset spatula. Chill until firm, at least one hour. When slicing, use a warm knife (hold under hot water and dry before using)and wipe off the blade between cuts. Sprinkle each slice with more salt, and serve immediately.

Buy the book: Edible Seattle: The Cookbook.

Friday
Apr272012

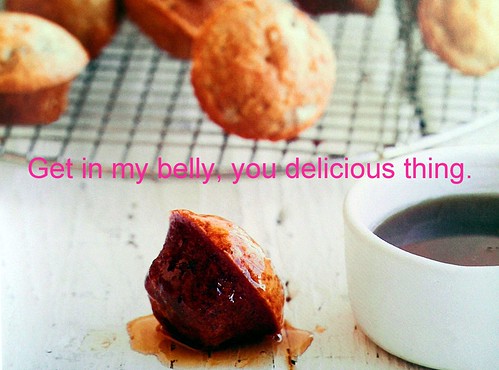
Morning Sweets: Mini Banana-Maple Pancake Muffins Recipe

Mini Banana-Maple Pancake Muffins Recipe

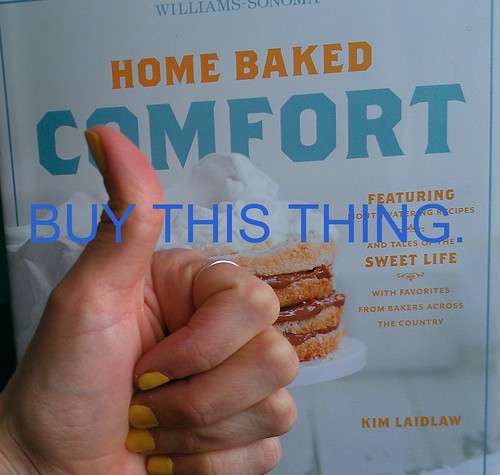
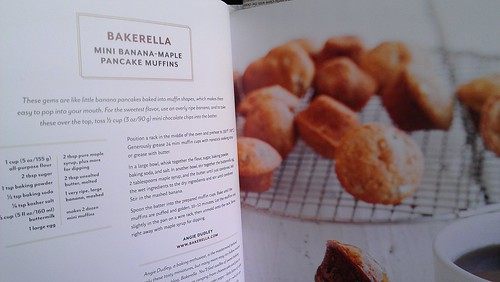
Um. Did I tell you that my bloggy BFF Bakerella (I love alliteration, what can I say?) contributed a recipe to the fantastic new book Home Baked Comfort, released by Williams-Sonoma and including fantastic recipes from bakers across the country?

Thumbs up

Well. Miss Bakerella's contribution is rather delicious: Mini Banana-Maple Pancake Muffins. Really, just uttering the title of the recipe ought to have you running to Williams-Sonoma to purchase the book...but in case it doesn't, here's the actual recipe.

Like little pancakes in muffin form, these are a snap to make and unbelievably easy to eat. How did you just eat ten? Huh?
Yes!

The book is full of plenty of other awesome stuff. Go buy it.
Mini Banana-Maple Pancake Muffins

Makes 2 dozen

  • 1 cup all-purpose flour
  • 2 tablespoons sugar
  • 1 teaspoon baking powder
  • 1/2 teaspoon baking soda
  • 1/4 teaspoon salt
  • 2/3 cup buttermilk
  • 1 large egg
  • 2 tablespoons pure maple syrup, plus more for dipping
  • 2 tablespoons unsalted butter, melted
  • 1 very ripe large banana, mashed

Procedure

  1. Position a rack in the middle of your oven. Preheat to 350 degrees F. Generously grease 24 mini muffin cups with nonstick cooking spray or butter it up.
  2. In a large bowl, whisk together the flour, sugar, baking soda and powder, and salt. In another bowl, stir together the buttermilk, egg, 2 tablespoons of maple syrup, and butter until just combined. Add the wet to the dry ingredients and stir until combined. Stir in the mashed banana until evenly distributed.
  3. Spoon the batter into the prepared muffin cups. Bake until puffed and golden, 10-12 minutes. Let hte muffins cool slightly in the pan on a wire rack, then unmold onto the rack. Serve while still warm with extra syrup for dipping.
© Cakespy, all rights reserved. Powered by Squarespace.