Home Home Home Home Home Home Home
CakeSpy

Featured: 

My adventure at Ben & Jerry's in Vermont!


Unicorn Love: the Eating Disorder Recovery Blog


 Buy my brilliant books!

Buy my new book!

Buy my first book, too! 

CakeSpy Online Retail!


Archives
Gallery

Fantastic appliance for cake making on DHgate.com

everyrecipe.co.nz

Craftsy Writer

Entries in recipes (704)

Monday
Jul232012

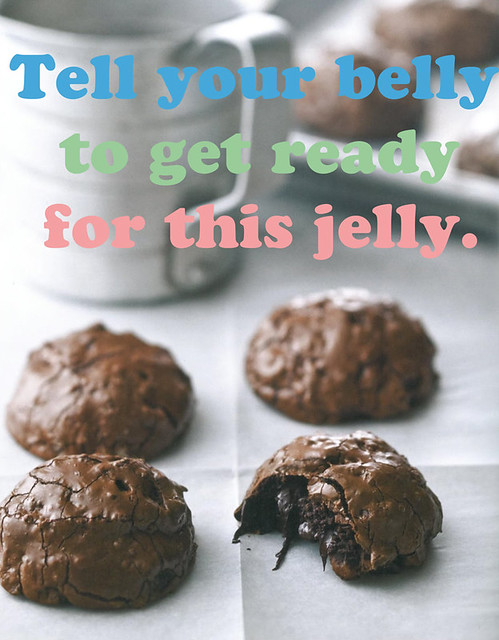
Sarabeth Levine's Chocolate Chubbies Cookies Recipe 

Chocolate Chubbies Cookies

BroDawgs and Dawgettes, I am totally serious. I am going to give you the recipe for the sweet morsels of heaven pictured above. It was a gift given to me from Sarabeth Levine, the Sarabeth behind the New York City chain Sarabeth's, which she had received from Soho Charcuterie, which I am in turn giving to you. You are so very welcome.

But before I do that, I think you might be interested in a little history about Sarabeth and her marvelous company. You can click here for a post specifically detailing some interesting facts about Sarabeth--I find her history fascinating, and think you will too.

Here's what Sarabeth has to say about 'em:

In my opinion, these are the moistest, most intensely chocolate chocolate chip cookies in the world. These are based on a recipe given to me many years ago from the SoHo Charcuterie, a restaurant that helped establish that Manhattan neighborhood as the place to go for anything chic and trendy, from art to food. For the best-looking cookies, a 2-inch ice-cream scoop is a must.

Chocolate Chubbies

Makes 2 dozen cookies

Ingredients

  • 8 tablespoons (1 stick) unsalted butter, cut into ½ -inch cubes
  • 9 ounces semisweet or bittersweet chocolate (no more than 62 percent cacao), finely chopped
  • 3 ounces unsweetened chocolate, finely chopped
  • ½ cup unbleached all-purpose flour
  • ½ teaspoon baking powder
  • ¼ teaspoon fine sea salt
  • 3 large eggs, at room temperature
  • 1 ¼ cups superfine sugar
  • 2 teaspoons pure vanilla extract
  • 2 cups (12 ounces) semisweet chocolate chips
  • 1 ½ cups (5 ½ ounces) coarsely chopped pecans
  • 1 ¼ cups (4 ½ ounces) coarsely chopped walnuts

Procedure

  1. Position racks in the center and top third of the oven and preheat to 350°F. Line two-half sheet pans with parchment paper.
  2. Bring 1 inch of water to a simmer in a medium saucepan over low heat. Put the butter in a wide heatproof bowl, and melt the butter over the hot water in the saucepan. Add the semisweet and unsweetened chocolate, stirring often, until melted and the mixture is smooth. Remove the bowl from the heat and let stand, stirring occasionally, until cooled slightly but still warm, about 5 minutes.
  3. Sift the flour, baking powder, and salt together into a medium bowl. Whip the eggs in the bowl of a heavy-duty stand mixer fitted with the whisk attachment on medium-high speed until the eggs are foamy and lightly thickened, about 30 seconds. Increase the speed to high and gradually add the sugar, then the vanilla. Whip until the eggs are very thick and pale yellow, about 3 minutes. Reduce the mixer speed to medium and beat in the tepid chocolate, making sure it is completely incorporated. Change to the paddle attachment and reduce the mixer speed to low. Gradually add the flour mixture. Remove the bowl from the mixer. Using a wooden spoon, stir in the chocolate chips, pecans, and walnuts, making sure the chunky ingredients are evenly distributed at the bottom of the bowl. (Do not turn the dough out onto the work surface because the chocolate dough makes a mess.) The dough will be somewhat soft.
  4. Using a 2-inch ice-cream scoop, portion the batter onto the prepared pans, placing the cookies about 1 ¼ inches apart. Bake the cookies immediately-if you wait, they won’t be shiny after baking. Bake, switching the position of the pans from top to bottom and front to back about halfway through baking, until the cookies are set around the edges (if you lift a cookie from the pan, the edges should release easily, even if the center of the cookie seems underdone), 17 to 20 minutes. Do not overbake. Cool completely on the baking pans. (The cookies can be stored in an airtight container at room temperature, with the layers separated by parchment paper, for up to 3 days.)
Monday
Jul162012

Magically Delicious: Rainbow Ice Cream Pops Recipe

It's a simple fact: food is more fun when it provides a pretty visual. And what could be a more fun way to enjoy the official treat of summer—ice cream—than in the form of rainbow ice cream pops?

How you attain your rainbow of ice cream hues is up to you. You can either use ice cream flavors which are naturally tinted in the colors of the rainbow (for example, strawberry for red; orange flavored for orange; French vanilla or banana for yellow; green tea or mint chocolate chip for green; any kid-friendly blue ice cream for blue; and blueberry for violet), or, if you don't want to invest in five ice cream flavors or feel that the flavors might not be harmonious, you can also attain this look by tinting vanilla ice cream with food coloring.

Rainbow pops

Assembly is easy: simply stack your colors in popsicle molds (I used the Orka mold) or even paper cups, insert a stick, and let them freeze. This recipe couldn't be easier, and the finished product is a pleasurable frozen treat with a visual twist that makes it that much more delightful to eat.

For the full entry and recipe, visit Serious Eats!

Wednesday
Jul112012

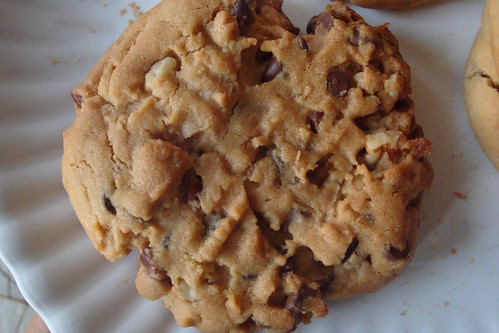
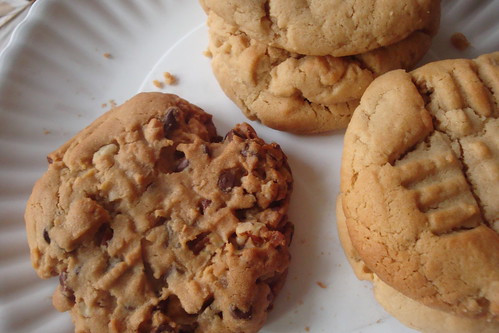
Chock Full O Nuts: Peanut Butter Cookies with Chocolate, Coconut, and Pecans

PB Cookie with chocolate chips, coconut, and pecans

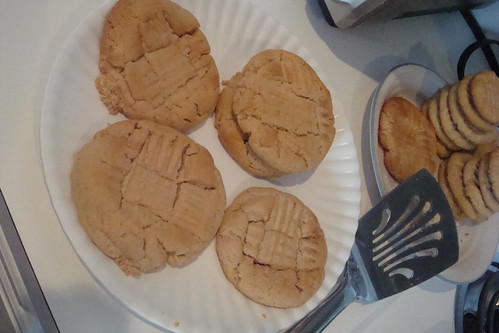
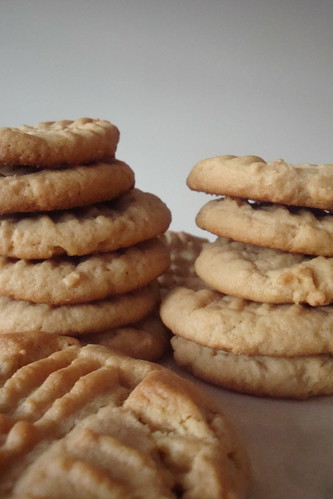
You already know that Peanut Butter Cookies are delicious. They're a classic. They're a practically perfect food. Don't try to argue. 

Peanut butter cookies

And yet.

Sometimes a classic can be improved by adding more awesome ingredients. Case in point: on a recent day, I was testing the recipe for peanut butter cookies to appear in my upcoming second book (it is going to be rad. In the meantime, buy my first book here). 

Peanut butter cookies

For the book, I needed a fairly classic peanut butter cookie recipe. But to heighten the enjoyment of some of the cookies from the batch, I threw in a mighty handful each of chocolate chunks, coconut flakes, and coarsely chopped pecans. They looked all nubbly and bumpy and cobblestone-y. In a good way. Here, you can see a tricked-out one next to plain ones.

PB Cookie with chocolate chips, coconut, and pecanse quite melding together perfectly. I didn't taste the coconut too much at all.


But then, the next morning, something magical had happened. Overnight, the flavors had magically melded, and where once peanut butter cookies with stuff added were, now was a new treasure entirely. Peanut butter! Coconut! Chocolate! Pecans! It was almost like a peanut butter cookie had a PG-rated makeout session with a Magic Cookie bar. Not like they had a baby, but like some of the flavor had rubbed off. In a good way. 

And for your approval, I submit the recipe. My apologies for not being exact with the quantities, but follow your heart. I'm sure it won't lead you astray. 

Peanut butter cookies

Ingredients

  • 2 ½ cups flour
  • 1/8 teaspoon salt
  • ½ teaspoon baking soda
  • 1 cup (2 sticks) butter, softened
  • 1 ¼ cup creamy peanut butter (mixed—not the kind with oil separated)
  • 1 cup white granulated sugar
  • 1 cup light brown sugar, packed
  • 2 eggs
  • a mighty handful each: flaked/shredded coconut (sweetened or unsweetened); chocolate chunks or chips; coarsely chopped pecans

 Procedure

  1. Preheat the oven to 375 degrees F. Line two baking sheets with parchment paper.
  2. Sift together the flour, salt, and baking soda. Set to the side.
  3. Mix the butter and peanut butter. Add the sugars.
  4. Beat well, until smooth and creamy. Add in the eggs, one by one, mixing well after each addition.
  5. Stir the dry mixture into the wet in 2-3 additions, scraping down the sides of the bowl to ensure all of the ingredients are combined. Fold in your extras (coconut, chocolate, nuts).
  6. Form the dough into small balls; put on a baking pan. Flatten with a fork, aligning the tines first in one direction and then the other to form a cross-hatch pattern.
  7. Bake for 10-15 minutes, or until golden on the edges. Let cool on the pans before transferring to a wire rack to cool completely.
Monday
Jul092012

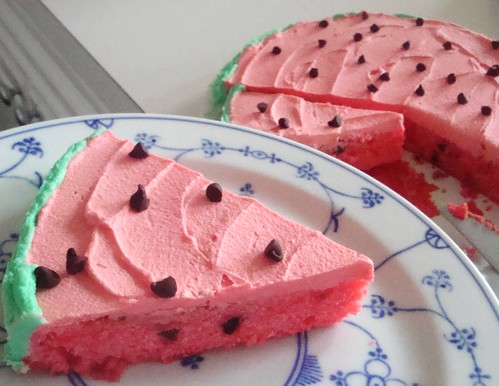
Refreshingly Sweet: Watermelon Cake Recipe

I love the look of a slice of watermelon: a prettily preppy green-and-pink color combination which is rather pleasing to the eye. But as pleasing as watermelon is as a palate cleanser or side dish, when it comes to dessert, I want something a little more substantial. So to get a pretty look but more of a sugary dessert wallop, I've created my own idealized version of watermelon, in cake form.

Watermelon cake

Made with sour cream and boasting an achingly delicate crumb, the cake is tinted pink and then studded with mini chocolate chips for "seeds". The finished cake is frosted with pink and green icing to bring home the watermelon effect. It's a decorating idea I've adapted from the Betty Crocker website.

Easy to make and extremely pleasurable to eat, this whimsical cake is bound to make people smile.

For the full entry and recipe, visit Serious Eats!

Monday
Jul022012

Totally Sweet American Flag Cake Recipe

When it comes to festive food for Independence Day, here's a sweet treat that really takes the cake: a layer cake decorated to resemble the American Flag!

Surprisingly easy to assemble (I used this tutorial as a starting point), this cake can really be made with any white cake recipe you'd like; just make three layers, one tinted red, one blue, and one left untinted for the white sections. But I found that the following cake recipe, which is fairly dense and egg-rich, yielded nice sturdy layers which, in addition to being pleasingly poundcake-y on the palate, were easy to cut and shape.

To get the desired height on each of the three layers, I suggest baking this as a 6-inch cake. But it's true that the resulting cake is fairly small. If you are using larger pans or prefer thicker layers, I suggest making two batches of the cake batter and dividing it among your three cake pans.

Happy Fourth of July!

For the full entry and recipe, visit Serious Eats!

Thursday
Jun282012

Raspberry Sorbet Recipe from Grace's Sweet Life

Raspberry sorbet

When I go through a new cookbook, I have a highly technical method of deciding which recipe to try first. It goes something like this.

1. Leaf through the pages of the cookbook.

2. Seek out the cutest photo.

3. Read the accompanying recipe to make sure I have all the ingredients or that I could easily obtain them.

And that's pretty much how I settled on the Raspberry Sorbet from the new cookbook by Grace's Sweet Life, entitled...well, Grace's Sweet Life.

Although sorbetto (a water-based fancy fruit slushie-type slurry) is vaguely healthy and definitely low in fat, it's still highly delicious, and after viewing the photo above, how could I resist that pretty pink color? It's a tasty recipe, and easy to boot. You're welcome. Here you go. 

Want more? Buy the book: Grace's Sweet Life.

Raspberry sorbet

Makes 1 quart

  • 1 cup water
  • 1 cup superfine sugar
  • 4 cups raspberries
  • 1 1/2 tablespoons freshly squeezed lemon juice
  • 2 ounces vodka
  • 1 large egg white

Procedure

  1. To make the sugar syrup, in a small saucepan over medium heat, bring the water and sugar to a boil, stirring to dissolve the sugar. Set aside to cool
  2. In a blender or food processor, process the raspberries and lemon juice to a smooth puree. Strain the puree through a fine-mesh sieve to remove the seeds (discard the solids).
  3. Stir the puree into the cooled sugar syrup, and then stir in the vodka.
  4. Transfer the mixture to a medium bowl, cover, and refrigerate until cold, 2 hours or preferably overnight.
  5. Immediately before churning the sorbet, use a handlheld mixer to beat the egg white at high speed to stiff peaks. Fold the whipped egg white into the cooled raspberry mixture.
  6. To ensure a seed-free sorbet, strain the mixture again through a fine-mesh sieve into a pourable container.
  7. Pour the raspberry mixture into an ice cream maker and process according to the manufacturer's instructions. The sorbet will be fairly soft but will become more firm as it freezes.
  8. Transder the sorbet to an airtight container. Cover and freeze until firm, at least 2 hours. 
  9. To serve the sorbet in its optimal form, remove from the freezer and transfer to the fridge 15 minutes before serving. It should be slightly soft, with a creamy consistency not unlike that of soft serve ice cream.
Monday
Jun252012

Grill It: Grilled Pound Cake Recipe for Serious Eats

Riddle me this: why should burgers and hot dogs have all the fun on your grill this summer?

They shouldn't, and here's the dessert to prove it: Grilled Pound Cake.

Simply butter slices of pound cake before putting them on either an outdoor or indoor stovetop grill, and let them get a little char. The nice part about this dessert is that it uses already-baked pound cake, so you can't under-bake it. The grilled toastiness of the cake makes it the perfect canvas for any number of toppings: I really enjoy ice cream and a seasonal fruit compote. Just be sure to prepare this before grilling meats, because you don't want to impart a burger flavor to your dessert!

For the full entry and recipe, visit Serious Eats!

Wednesday
Jun202012

Bananarama: Banana Split Ice Cream Cake Recipe

Banana Split Ice Cream Cake is a wonderful way to enjoy all of the classic flavors of a banana split, but in ice cream cake form. Assembling the Neapolitan flavors of ice cream with dividing levels of crumbled chocolate cake or cookies and a layer of banana slices makes for a pretty presentation. The dessert is assembled and then frozen, which allows the flavors to meld and lends a nice banana tone to the whole dessert once you're ready to eat it.

Note: You have some freedom in terms of the ice cream flavors used in this recipe. While I went for the classic vanilla-chocolate-strawberry combo, feel free to tailor the flavors to suit your tastes.

For the full entry and recipe, visit Serious Eats!

Friday
Jun152012

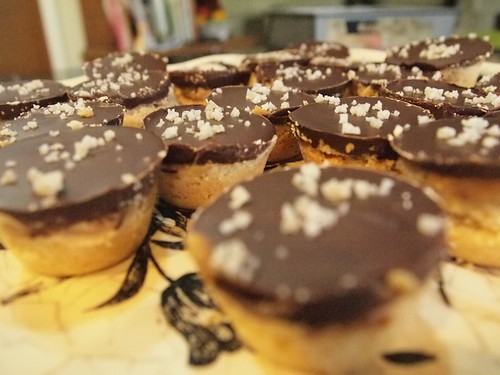
Sweet Fancy: Salted Chocolate Caramel Tarts Recipe

Salty caramel tarts

CakeSpy Note: this is a guest post from Adventure Food Love.

A long time ago before I was born, there was a lady down the the Bay of Plenty, New Zealand who had some of the best recipes around the country. But because she was a caterer she wouldn’t share them with any one. Until one day a pretty blonde american came to visit.

The pretty blond managed to charm her way into the ‘inner circle’ and because she lived across the other side of the world, the recipes she wanted were hers! YES! The other ladies were not happy, but the pretty yank would not give up the secrets she was in trusted with.

That pretty blond yank is my mother and the New Zealand caterer’s name is Paula. I'm not sure if she is still around today, but if she is I tip my hat…this recipe is good. Tweaked a little but really dang good.

Salted Chocolate Caramel Tarts Recipe


Shortbread base-bake then cool


Oven 300 F pan:9x13in buttered or 4 mini muffin tins, buttered
Sift together
10 ounces flour
4 ounces caster sugar (super fine sugar. but regular granulated will work in a pinch)
pinch X 2 salt
rub in 8 ounces butter
dough should resemble fine bread crumbs.
knead into a ball and press into evenly into the pan
bake about 25 minutes (for 9x 13) or 15-20 (for mini muffin tin) until very lightly brown
cool in the pan before adding the caramel


Part 2- Filling


slowly heat in a pan to disolve the sugar
8 ounces butter
4 level Tablespoons golden syrup (honey will work in a pinch)
8 ounces brown sugar
1 tin sweetened condensed milk
stir to disolve the sugar on a low heat, then bring to a boil and stir constantly while on a low boil for 7 minutes. Remove from heat, add 1/2 teasoon of vanilla and beat mixture well. Pour over the cooled base…leave to set before coating with melted chocolate. This takes some time.


Top


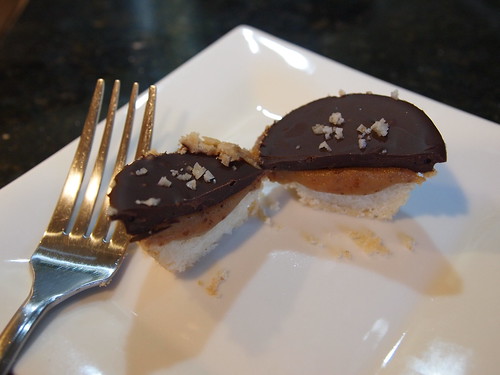
8-12 ounces of good quality chocolate melted. Spread on top, and leave to set. While still somewhat wet sprinkle lightly with some fancy salt for that lovely salted caramel chocolate perfectness. If you put the salt on too soon it will disolve… it will still taste good, but there will be no visual. Cut through chocolate before it is set to avoid cracking. Cut into small squares.  To remove from the muffin tins, run a knife around the edges and pop out.


Salted caramel tarts

Try not to eat 8 at once! PS - Thanks to Paula and Katie for sharing!


Wednesday
Jun132012

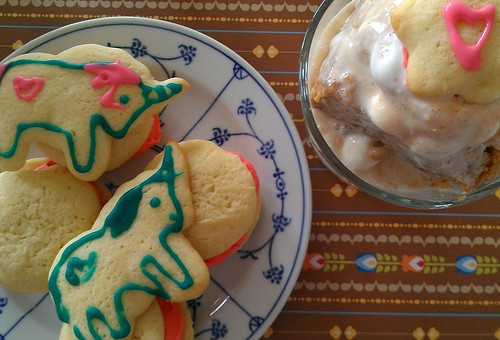
Unicorn-Shaped Cookies 

Snack time

Cutout sugar cookies are pretty fantastic.

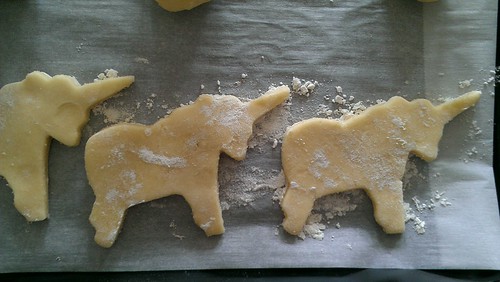
But they're even better when cut out into unicorn shapes. While technically, none of the ingredients are altered from a cutout cookie that could be used to cut out circles, hearts, or stars, it is pretty much scientific fact that shaping your cookies like unicorns adds enough magic to heighten your eating experience.

Unicorn cookies

Believe it or not, this recipe is adapted from an early Girl Scout Cookie recipe. It seems that in the early days of the cookie-fundraiser, the scouts actually made the cookies themselves, with their moms, for a merit badge. Well, certainly they found that their time was better spent selling than baking, judging by the flocks of the scouts who sell cookies by grocery stores each spring. Nonetheless, it's fun to taste these not-overly sweet, good basic cutout cookies and imagine them being sold at one of the first Girl Scout Cookie sales in the earlier part of the 1900s. 

Just be sure to let the dough chill before rolling, and roll in small batches and keep the remaining dough in the fridge, otherwise they will spread too much and will not keep their shape! Oh, and you can buy a unicorn cookie cutter here.

Unicorn Butter Cutout Cookies

Makes 4-5 dozen cookies
2 cups flour
1 teaspoon salt
2 teaspoons baking powder

1 cup butter
1 cup sugar
2 eggs
2 tablespoons milk
1 teaspoon vanilla

Unicorn cookie cutter

In a medium bowl, sift together the flour, salt, and baking powder.

In the bowl of a stand mixer fitted with the paddle attachment, cream the butter and sugar until light and fluffy, about 2-3 minutes on high speed.

Add the eggs, one at a time, pausing to scrape down the sides of the bowl with a rubber spatula after each addition. Add in the milk, alternately with the flour mixture, in 2-3 additions.

Form the dough into 2 balls. Cover tightly in plastic wrap. Refrigerate for at least 1 hour or up to overnight.

Preheat oven to 375 degrees F. Line two baking sheets with parchment paper.

On an extremely well-floured work surface, using a floured rolling pin, roll out the cookies. Use your unicorn cookie cutter to cut out cookies. Transfer to your prepared sheets using a spatula.

Bake 8 to 10 minutes or until the edges begin to brown.


© Cakespy, all rights reserved. Powered by Squarespace.