Home Home Home Home Home Home Home
CakeSpy

Featured: 

My adventure at Ben & Jerry's in Vermont!


Unicorn Love: the Eating Disorder Recovery Blog


 Buy my brilliant books!

Buy my new book!

Buy my first book, too! 

CakeSpy Online Retail!


Archives
Gallery

Fantastic appliance for cake making on DHgate.com

everyrecipe.co.nz

Craftsy Writer

Entries in recipes (704)

Thursday
Nov072013

The Bake-Off is Coming: Espresso Hazelnut Beignets

Espresso Hazelnut Beignets

CakeSpy Note: OMG! The 46th Annual Pillsbury Bake-Off is coming! Since I so deeply loved attending the 45th Bake-Off, I thought I would get you excited early by sharing some of the finalists' recipes. Do I need to tell you that the winner will receive one million dollars? My posting is on hyperdrive since the event is less than a week a day--check back often, because I will be posting three recipes a day until the big event! You can follow them by clicking the bakeoff tag below the post to see which ones have been posted so far. Enjoy! 

 Do you know what "beignet" means?

It translates, roughly, as "get your butt in the kitchen and make these, RIGHT NOW." Trust me. I'm sure that  Karyn Hentz of Arlington, Virginia would agree with my translation.

Espresso Hazelnut Beignets

Prep Time: 25 Min Total Time: 25 Min Makes: 8 servings

  • 4 cups Crisco Pure Canola Oil
  • 1/4 cup sugar
  • 1/2 teaspoon instant espresso powder
  • 1can Pillsbury Grands! Homestyle refrigerated buttermilk biscuits (8 ct)
  • 1/2cup Jif Mocha Cappuccino Flavored Hazelnut Spread

Procedure

  1. In 3-quart heavy saucepan, heat oil to 370°F. In shallow bowl or plate, mix sugar and espresso powder. Set aside.
  2. Separate dough into 8 biscuits. Press each biscuit into 4-inch round. Spoon 1 tablespoon of the mocha cappuccino hazelnut spread on each biscuit. Fold dough over filling; press edges to seal.
  3. Gently place 3 biscuits in hot oil. Cook 1 1/2 minutes or until deep golden brown. Using tongs, gently turn over. Cook 1 1/2 minutes or until deep golden brown. Remove to paper towels to drain. Roll in sugar mixture. Repeat with remaining biscuits, cooking 2 or 3 at a time. Serve warm.
Wednesday
Nov062013

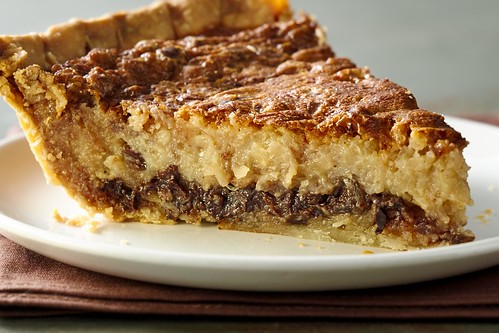
The Bake-Off is Coming: Chocolate and Coconut Pecan Custard Pie

Chocolate Coconut pecan custard pie

CakeSpy Note: OMG! The 46th Annual Pillsbury Bake-Off is coming! Since I so deeply loved attending the 45th Bake-Off, I thought I would get you excited early by sharing some of the finalists' recipes. Narrowed down from zillions of entries, I'll profile some of the 100 finalists--but of course, based on the subject matter of this site, I will focus on sweets! You can follow them by clicking the bakeoff tag below the post to see which ones have been posted so far. Enjoy! 

 This is one of my favorite entries yet. Why? Um, refer to the title of the recipe. It's got all things delicious! And it has only five ingredients. It practically bakes itself! THank you to Lauren Katz of Ashburn, Virginia, for dreaming it up.

Chocolate and Coconut Pecan Custard Pie  

Prep Time: 15 Min Total Time: 2 Hr 15 Min Makes: 8 servings

Ingredients

  • 1Pillsbury refrigerated pie crust, softened as directed on box
  • 1 can Pillsbury Creamy Supreme Coconut Pecan Frosting
  • 1 can (14 oz) Eagle Brand Sweetened Condensed Milk
  • 3 eggs
  • 1/2 cup semisweet chocolate chips
  • 1/4 cup shredded sweetened coconut

Procedure

  1. Heat oven to 350°F. Place pie crust in 9-inch glass pie plate as directed on box for One-Crust Filled Pie.
  2. In large bowl, beat frosting, sweetened condensed milk, eggs and 1/2 teaspoon salt with wire whisk until well blended. Stir in chocolate chips. Pour into crust-lined plate. Sprinkle with coconut.
  3. Bake 50 to 60 minutes or until golden brown, top is puffed and center is almost set. Cover crust with foil during last half of baking, if necessary, to prevent excessive browning. Cool at least 1 hour. Serve warm or cooled. Store covered in refrigerator.


Wednesday
Nov062013

Grenades: A Confection, Not an Explosion

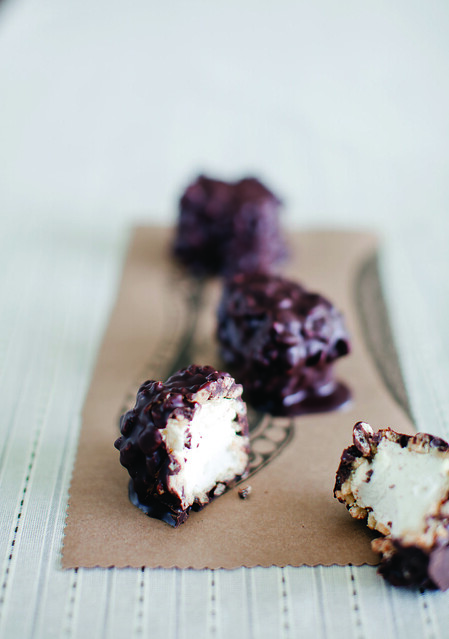
Grenades

I don't know if she remembers it, but I met the owner of Butter, a bakery in Vancouver, in a very sweet way. I was the "artist of the month" at Seattle knitting shop Hilltop Yarn--that makes sense if you consider the fact that I do artwork like this:

Knitting Cakes

So, said owner happens to be in Seattle that day and happens to walk in. We get to talking, given our mutual interest in sweets, and forever and ever on since then I've taken a deep interest in the goings-on at Butter. So I was so delighted when they came out with their great book, Butter Baked Goods: Nostalgic Recipes From a Little Neighborhood Bakery. I've already shared with you their marshmallow recipe, and now it's time to make it count, because you're about to get a new recipe that uses those marshmallows. But this is even better, because they are paired with cereal, chocolate, and sugar sugar sugar. Here's the 411 on Grenades:

This is a treat my young friend Kate introduced me to. The original version used Kraft marshmallows and melted Mackintosh’s Toffee, and it really was delicious. Our Butter version has a few more steps involved, but I think the end result is worth the effort. We had great fun coming up with different riffs on the classic combination. To date my favorite is a banana marshmallow rolled in peanut butter and Rice Krispies, then dipped in milk chocolate—proving once again that you are only ever limited by your imagination.

Grenades

MAKES: About 24 to 30 grenades

YOU WILL NEED: candy thermometer, cookie sheet lined with parchment paper

BEFORE YOU BEGIN: Prepare a batch of Butter’s Famous Marshmallows. You only need half the batch so will have lots left over.

From Butter Baked Goods: Nostalgic Recipes From a Little Neighborhood Bakery

Ingredients

  • 1⁄2 batch Butter’s Famous Marshmallows
  • 4 cups Rice Krispies
  • 2 cups heavy cream
  • 1⁄2 cup whole milk
  • 1 1⁄2 cups granulated sugar
  • 1 1⁄2 cups dark brown sugar
  • 1 teaspoon salt
  • 3 tablespoons butter
  • 1⁄2 cup light corn syrup
  • 1⁄4 cup water
  • 2 pounds dark chocolate (about 4 cups chocolate chips)

Procedure

  1. Place the Rice Krispies in a small bowl and set aside.
  2. In a large saucepan over medium heat, combine the cream, milk, both sugars, salt, butter, corn syrup and water. Clip the candy thermometer to the side of the saucepan to monitor the temperature. Use a whisk to stir the caramel mixture constantly until it reaches 220°F. Remove from the heat and allow to cool for 1 minute (don’t wait too long or the caramel will start to firm up.)
  3. Use a fork to dip each marshmallow into the caramel mixture and gently move it around to coat the whole surface. Lightly tap the fork on the side of the bowl to remove any excess .
  4. Immediately drop the marshmallows into the Rice Krispies and roll them around until completely coated. Place on the prepared cookie sheet.
  5. Temper the dark chocolate (need a primer? Check on this post I did for Craftsy).
  6. Use a fork to dip each marshmallow in the tempered chocolate. Lightly tap the fork on the edge of the bowl to help remove any excess. Place back on the cookie sheet, lined with fresh parchment paper.
  7. Allow the chocolate to set for at least 1 hour before you enjoy (or place in the refrigerator to speed things up).
Wednesday
Nov062013

The World-Famous Marshmallow Recipe from Butter

I'm a big believer in the fact that if a food is made well, even if it's not a foodstuff you typically like, it can make you a believer.

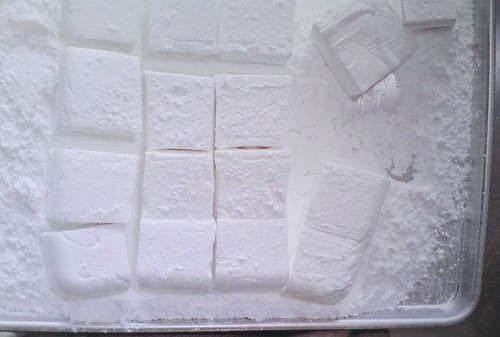
Marshmallows from butter

Such is the case with the homemade marshmallows at Butter, a bakery in Vancouver. They were kind enough to share their recipe, from the newly released book, Butter Baked Goods: Nostalgic Recipes From a Little Neighborhood Bakery. Here's the recipe, starting with the headnote:

If there is one item that really put Butter on the map, I would have to say it’s our marshmallows. Back in 2007, when Butter first opened, the gourmet marshmallow was still a bit of a mystery. Most people didn’t know there was a tasty alternative to store-bought marshmallows available. But word soon got out, people started talking, and my brain got ticking. Butter now makes 18 flavors of marshmallows, and I’m always coming up with new varieties—but Butter’s Vanilla Marshmallows are the classic we opened our doors with.

Butter’s Famous Marshmallows

MAKES: About 64 (1- × 1-inch) marshmallows YOU WILL NEED: (9- × 9-inch) baking pan, buttered

From Butter Baked Goods: Nostalgic Recipes From a Little Neighborhood Bakery

  • 1 cup water
  • 3 envelopes unflavored gelatin
  • 2 cups granulated sugar
  • 1⁄2 cup light corn syrup
  • 1⁄2 teaspoon salt
  • 2 tablespoons pure vanilla
  • Generous amount of icing sugar to coat the marshmallows, about 2 cups

Procedure

1. In a stand mixer fitted with a whisk attachment, pour in 1⁄2 cup of the water and sprinkle with the gelatin. Set aside to allow the gelatin to soak in.

2. In a medium saucepan over high heat, add the sugar, corn syrup, salt and remaining 1⁄2 cup of water. Bring to a rolling boil and continue to boil for 1 minute. Remove from the heat.

3. Turn the mixer to low and mix the gelatin once or twice to combine it with the water. Slowly add the hot sugar mixture, pouring it gently down the side of the bowl, and continue to mix on low. Be really careful at this point because the sugar mixture is smoking hot! It’s not a job for little ones.

4. Turn the mixer to high and continue to whip for 10 to 12 minutes until the marshmallow batter almost triples in size and becomes very thick. Scrape down the sides of the bowl frequently to avoid the batter overflowing as it grows. Stop the mixer, add the vanilla, and then whip briefly to combine.

5. Transfer the mixture to the prepared baking pan and use a spatula or bench scraper to spread it evenly in the pan. Work quickly, as the marshmallow becomes more difficult to manipulate as it sets.

6. Grease a sheet of plastic wrap with butter and lay it across the top of the marshmallow. Press down firmly on the plastic wrap, to seal it smoothly and tightly against the mixture.

7. Leave the marshmallow to set at room temperature for at least 3 hours or, even better, overnight. The marshmallow will be too sticky and soft to cut if you try too soon.

8. Sprinkle a work surface or cutting board with the icing sugar. Run a knife along the top edge of the pan to loosen the marshmallow slab. Invert the pan and flip the marshmallow out onto the counter or board. Scoop up handfuls of the icing sugar and rub all over the marshmallow slab.

9. Use a large knife to cut the slab into 1- × 1-inch squares. Roll each of the freshly cut marshmallow squares in the remaining icing sugar to coat them completely. If you—and most of your kitchen—are speckled with marshmallow by the time you finish this recipe, fear not! It’s mostly sugar, so a little hot water and elbow grease will have things as good as new in no time.

Marshmallow Variations


  • TOASTED COCONUT MARSHMALLOWS My personal favorite! Just substitute the 3 cups icing sugar with 3 cups unsweetened shredded coconut. To prepare the coconut: Preheat the oven to 325°F. Sprinkle the coconut onto a cookie sheet in one even layer and bake in the preheated oven for 15 minutes, until the coconut is a lovely golden brown, stirring every 5 minutes to make sure it toasts evenly. Remove from the oven and allow to cool. Follow Steps 8 and 9 to coat the marshmallows completely in toasted coconut.
  • RASPBERRY MARSHMALLOWS In a small saucepan over medium heat, warm 1⁄4 cup raspberry jam (any variety will do) until it becomes runny, about 3 minutes. Remove from the heat. Place a fine sieve over a small bowl and pour the warm jam through the sieve to catch any seeds and create a puree. Add the puree and one drop of red food coloring at Step 4 of the recipe.
  • MINT MARSHMALLOWS These are fantastic in hot chocolate! Add 1 teaspoon of mint extract and 1 drop of green food coloring at Step 4 of the recipe. Make sure you do this at the end of the whisking process—if you add it too early it prevents the marshmallow from achieving its proper volume.
  • COFFEE MARSHMALLOWS Add 1⁄2 cup of strongly brewed coffee or espresso instead of the water in Step 1, and add another 1⁄2 cup instead of the water in Step 2.
  • CINNAMON MARSHMALLOWS Another yummy option for your hot chocolate or, even better, melted on top of your sweet potatoes at Thanksgiving. Add 2 teaspoons of ground cinnamon at Step 4.


Tuesday
Nov052013

Breakfast is Served: Easy Crescent Roll Danish

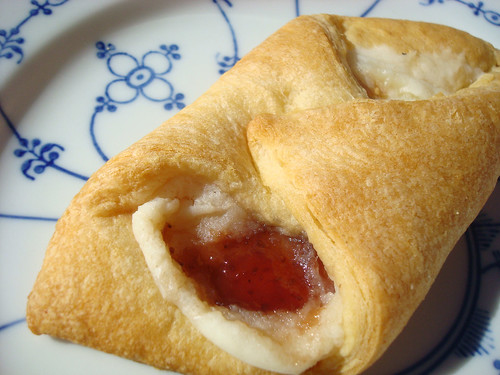
Crescent roll danish

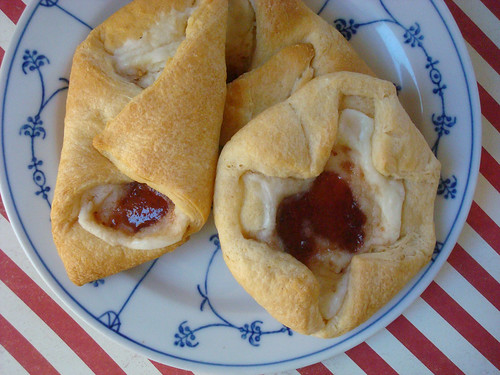
Do you want a delicious cream cheese danish, but can't make yourself wait for yeasted dough to rise? Well, because I am a genius, I have figured out that you don't need to do all that--all you need to do is go to the grocery store and buy some crescent rolls. You know, the kind you buy in the tube, that makes that satisfying "pop!" sound when you open them.

All you need to do, really, is make the high-fat filling.

Coming together in minutes, you fold the crescent rolls around aforementioned high-fat and highly scrumptious cream cheese filling for a crowd-pleasing morning treat. It's a fantastic breakfast that feels like the weekend but is easy enough to make on a weekday. YES!

Crescent Roll Danish

Active time: 5 minutes Total time: 30 minutes Makes 8 pastries

Ingredients

  • 1 tube Crescent Rolls (don't waste your time using low-fat)
  • 1 package (8 ounces) cream cheese, softened (do not use low-fat)
  • ½ cup confectioners’ sugar
  • 1 teaspoon lemon juice
  • 8 teaspoons strawberry jelly or preserves (or flavor of your choice)

Procedure

  1. Preheat the oven to 350 degrees F. Line a baking sheet with parchment paper.
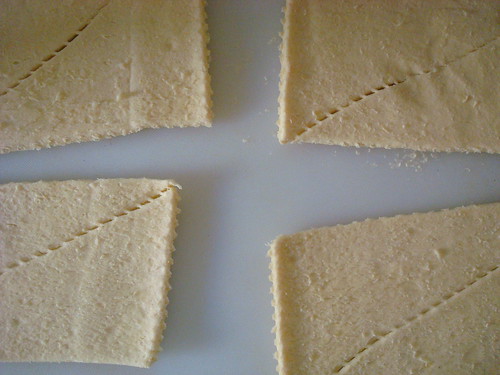
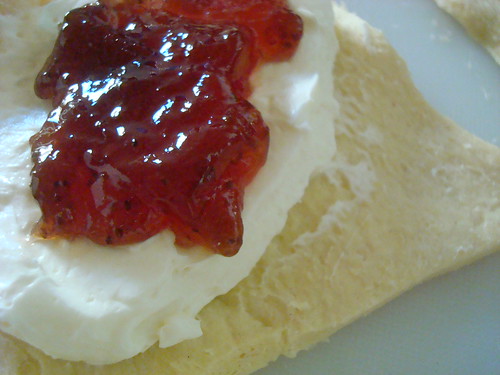
  2. Unroll the Crescent Rolls dough. Separate the dough into four rectangles with triangle perforations. On each rectangle, gently use your fingers to incorporate the perforations into the dough. Now you have four un-perforated rectangles. Cut each rectangle in half, so that you have two squares. Now, cut each into 4 parts. You will end up with 8 squares. Danish 
  3. Transfer them to the baking sheet, evenly spaced, and aligned with a point toward you so that they look like diamonds.
  4. In a large bowl, by hand or with an electric mixer, combine the cream cheese, confectioners’ sugar, and lemon juice. Mix until thoroughly combined and light and fluffy. Cream cheese
  5. Spoon a heaping tablespoon of the filling on the center of each pastry. Lightly spread it so that it is slightly flatter, but leave about 1 inch on all sides. If desired, spoon a teaspoon of strawberry jelly on top of the cream cheese mixture. 
  6. Easy danish
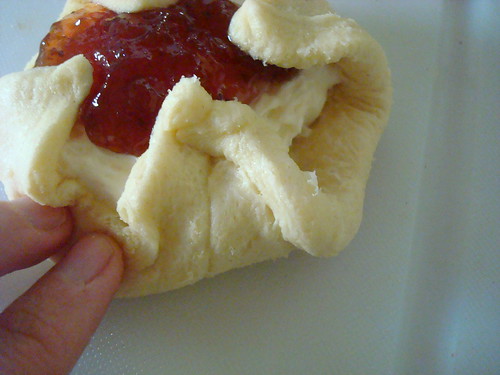
  7. Gently fold the left hand side of the dough on top of the filling, and bring the right side of the dough on top of that, so that the two sides form a seal. Gently press to ensure that they adhere, as they could unravel in the oven if you don’t. So now, it looks like two little arms hugging the filling, with the top and bottom exposed. Or, fold up the sides so that each grasps the filling in a little "bowl". Be sure to pinch the sides to form a seal if you do this.
  8. Danish Danish
  9. Bake in the preheated oven for 15 to 18 minutes, or until the pastries are golden. Remove from oven and let cool until warm. Serve warm.
  10. Crescent roll danish
Thursday
Oct312013

Happy Halloween: Candy Corn Pecan Pie

If you've ever found yourself thinking "this pecan pie simply isn't sweet enough", here's a seasonal variation which is bound to make your dentist cringe: Candy Corn Pecan Pie.

Listen, I wish I could take credit for this idea. But it was the brilliant Rachel of Coconut & Lime who planted the seed in my head and who also (thank you!) gave her blessing for me to make this monstrous bit of Halloween magic happen.

The idea is simple: classic pecan pie, plus candy corn. The candy corn melts so beautifully into the corn syrup and brown sugar mixture that it must feel like it's coming home; it adds a nice, vanilla-y sweetness to the pie that will satisfy even the sweetest of tooths. In fact, it's so sweet that you may push your candy sack aside after a slice. So you see, it's the perfect food to enforce moderation!

Find the recipe on Serious Eats!

Tuesday
Oct292013

The Bake-Off is Coming: Peanut Butter Caramel Sticky Rolls

Peanut butter caramel sticky rolls

CakeSpy Note: OMG! The 46th Annual Pillsbury Bake-Off is coming! Since I so deeply loved attending the 45th Bake-Off, I thought I would get you excited early by sharing some of the finalists' recipes. Narrowed down from zillions of entries, I'll profile some of the 100 finalists--but of course, based on the subject matter of this site, I will focus on sweets! You can follow them by clicking the bakeoff tag below the post to see which ones have been posted so far. Enjoy! 

Wendy Wiseman of Bella Vista, Arkansas is my new favorite person. Why? Because she's the one who dreamed up these decadently dreamy Peanut Butter Caramel Sticky Rolls. I have no doubt that sticky fingers are a problem around these rolls, not only because well, they're sticky, but also because people will want to steal an extra after they've had a taste! 

Here's how you make 'em.

Peanut Butter Caramel Sticky Rolls

Prep Time: 20 Min Total Time: 55 Min Makes: 12 servings

Ingredients

  • 1/2 cup powdered sugar
  • 1/2 cup Caramel Flavored Topping
  • 1/4 cup Creamy Peanut Butter
  • 2 cans Pillsbury Crescent Recipe Creations refrigerated seamless dough sheet
  • 1/2 cup Chocolate Flavored Hazelnut Spread

Procedure

  1. Heat oven to 400°F. Place paper or foil baking cup in each of 12 regular-size muffin cups. Generously spray with No-Stick Cooking Spray.
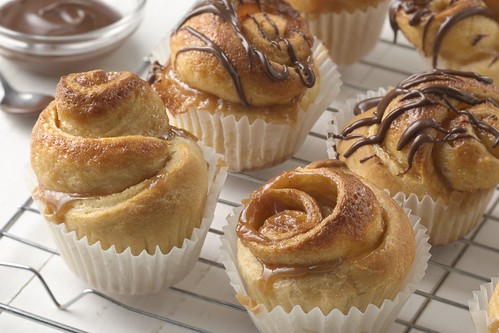
  2. In small bowl, mix powdered sugar, caramel topping and peanut butter until blended. Unroll both cans of dough. Spread half of the caramel mixture evenly over each dough sheet to within 1/2-inch of edges. Starting on short side, roll up each dough sheet. Cut each roll crosswise into 6 pieces. Place cut sides up in muffin cups.
  3. Bake 12 to 18 minutes or until golden brown. Remove from pan to cooling rack. Cool 15 minutes.
  4. Meanwhile, in small microwavable bowl, microwave chocolate hazelnut spread on High 30 to 60 seconds. Drizzle over rolls.


Monday
Oct282013

Tipsy Tastiness: Margarita Jell-O Shot Cake Recipe

Today, I'm going to tell you about a business I really like. Don't worry, it involves cake. This cake.

Poke cake

Recently, I was contacted by a business called Butter & Scotch, the beautiful partnership of Keavy Blueher of Kumquat Cupcakery (aka Butter) and Allison Kave of First Prize Pies (definitely Scotch). They are soon-to-be (with the help of Kickstarter!) Brooklyn's first dessert & craft cocktail bar.

They've already raised most of the money, but they need a little help, so they asked if I could share the business on CakeSpy. "OK," I said, "but first, show me the cake." After all, how can I expect people to support a business if you have no idea what they do?

So, they put their cake where their mouth is (what?) and shared this wondrous recipe for a Margarita Jell-O Shot Cake. Yep, you heard that right.

Poke cake

As recipe designer Keavy writes, "This is such a silly cake and I totally love it! I was taste testing it all morning yesterday and I do believe I accidentally got a little drunk so be careful!" 

Sounds like a tipsy pleasure to me. If you enjoy this cake as much as I did, please consider helping Butter & Scotch via Kickstarter!


Poke cake

Margarita Jell-O Shot Cake

Vanilla cake (mine is below but you can use whatever recipe is your favorite.....or boxed!)

  • 1 cup butter
  • 1/4 cup cream cheese
  • 1 1/2 cups sugar
  • 2 whole eggs
  • 2 egg yolks
  • 1 tbls vanilla
  • 2 1/2 cups flour
  • 1/2 tsp baking powder
  • 1/2 tsp baking soda
  • 1/2 tsp salt
  • 1 1/2 cups milk, heavy cream, or buttermilk

Boozy Lime leche!

  • Zest of 2 limes
  • 1 can sweetened condensed milk
  • 1/2 cup tequila Fresh lime

Jell-O shot mix

  • 1 cup lime juice
  • Zest from 2 limes
  • 1/2 cup tequila
  • 1/2 cup water
  • 2 tbls gelatin
  • 1/2 cup sugar

Whipped cream topping

  • 2 cups heavy cream
  • 1/8 cup sugar
  • 1 tbls vanilla

Topping

  • Lime zest
  • Flaky sea salt

Procedure

  1. Make cake: preheat oven to 350 degrees.
  2. Cream butter, cream cheese and sugar together on medium high speed. Add eggs and yokes and beat till incorporated. Add vanilla. Turn off mixer an mix together dry ingredients: flour, baking powder, baking soda, salt. Turn mixer on to slowest speed and add the dry ingredients. Immediately after add milk or cream and let it all come together keeping it on slowest speed.
  3. Pour cake into a 9" square baking dish. Bake for 30-40 min or until toothpick comes out clean. While cake is baking make leche and jello.
  4. Leche: mix lime zest, tequila and condensed milk in a small bowl and set aside.
  5. Jello: add gelatin to cold tequila, lime juice, and zest and let bloom for 2-3 min. Heat water an sugar to almost a boil and mix with gelatin mix.
  6. Assemble it all: Once cake is out of the oven (no need to cool it) use a chopstick to poke it generously with holes all over and then pour the leche and jello over the top. Put in the refrigerator for 1-2 hours until cold.
  7. Make the whipped cream topping! Add heavy cream, sugar, and vanilla to a mixer and beat on high speed till cream forms stiff peaks. Spread onto cake and top with line zest and a sprinkling of flaky sea salt.

What's your favorite boozy dessert?

Wednesday
Oct232013

Candy is Dandy: Candy Corn Milk Recipe

Candy corn milk

Some days, you're all "Oh, I love eating organic and stuff. Let's go to Whole Foods and get our gluten-free on!"

But other days, you're like "eff everything and everyone. All I feel like doing is mainlining some candy corn."

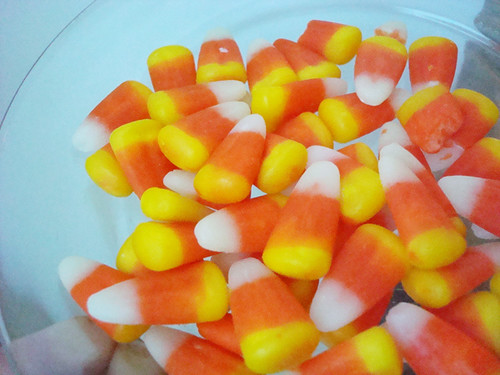
Candy corn

Okay, so maybe that exact thing has never happened to you. But it has happened to me. And there is no quicker or more enjoyable way to mainline that candy corn sugary goodness straight to your system than via candy corn milk. So in case you ever have felt this way, or ever do in the future, here's an extremely useful recipe for Candy Corn Milk to keep at the ready.

The idea formed in this way. At Momofuku, they've built a brand around what to many of us is a byproduct (albeit a delicious one): cereal milk. So I found myself thinking, when faced with half a bag of candy corn left over after I made a spectacular pie which will be featured soon on Serious Eats...

CakeSpy to self: "Why don't I make this into Candy Corn Milk?"

Self back to CakeSpy: "Fantastic idea! Let's do it!"

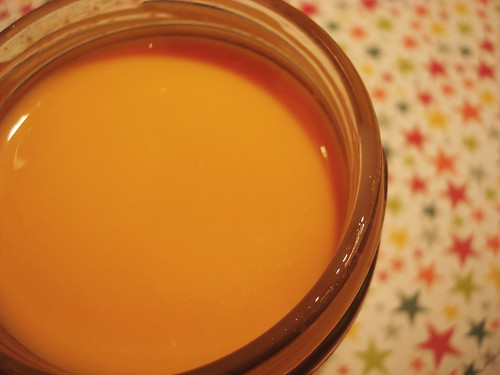
I treated the official Cereal Milk (tm) recipe as my North Star when creating this recipe. I didn't toast the candy corn (don't be stupid! It would melt!) but I did the steeping and straining as specified in the recipe. Then, I transferred the mixture to jars, so I could readily reach for candy corn milk any time I was feeling low. This stuff has enough sugar to give you pep even on the most Monday of Mondays, or any otherwise somewhat low energy or gloomy day. So it's a perfect fall food! 

Candy corn milk

If you're feeling naughty and know something about cocktails, I suppose it might make a nice addition to a Halloween drink. But I don't know so much, so I guess I will just drink it straight. If you were so inclined, I believe this recipe could rock your sugary world if you used it as your milk to put on cereal, or served it alongside a bowl of creamed candy corn.

Why don't you join me?

Candy Corn Milk - adapted from Momofuku's Cereal Milk (tm)

  • 1 cup candy corn
  • 2 cups cold milk
  • 1/8 tsp salt

Bowls, and a fine mesh seive or strainer, and jars or a jug to store the finished milk

Note: As with cereal milk (tm), taste your candy corn milk after you make it. if you want it a little sweeter, add some brown sugar. if you want it more mellow, add a splash of fresh milk and a pinch of salt.  

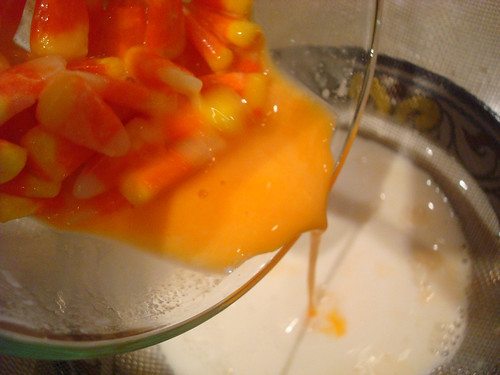
Place the candy corn in a bowl. Pour the milk right on top.

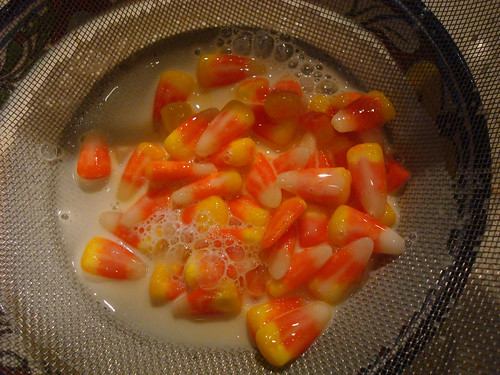
Let steep for 20 minutes at room temperature. The milk will start to change color.

Candy corn milk

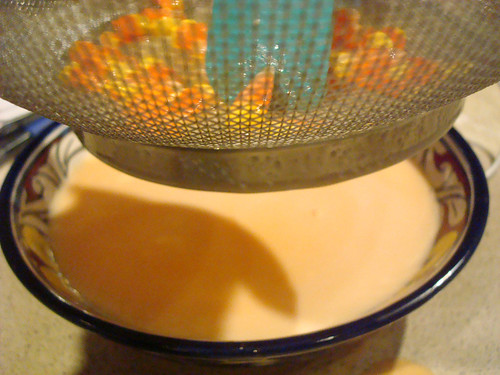
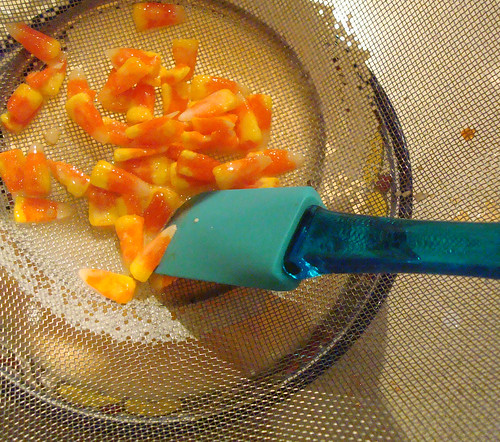
Strain the mixture through a fine-mesh sieve, collecting the milk in a medium bowl. the milk will drain off quickly at first, then become thicker toward the end of the straining process. Candy corn milk Candy corn milk

Use the back of a spoon or spatula to get all the tasty thick gooey milk out. Don't be too forceful, because you don't want to jam the melty candy corn bits into your strainer (big pain to clean out).

Candy corn milk

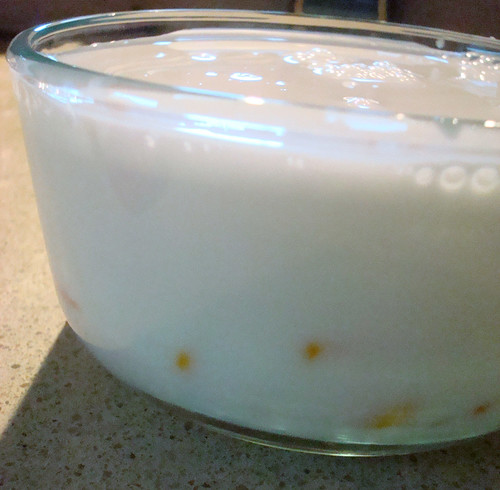
Give it a whisk, adding the salt at this point. Store in a pitcher or in mason jars (that's what I did), refrigerated, for up to a week.

Candy corn milk

Note: this recipe also works with mellowcreme pumpkins. 

Thursday
Oct172013

Season of the 'Wich: Peanut Butter and Jelly Sandwich Bread Pudding Recipe

Peanut butter and jelly sandwich bread pudding

Should you ever find yourself with a stockpile of five or so extra peanut butter sandwiches, have I ever got the recipe for you.

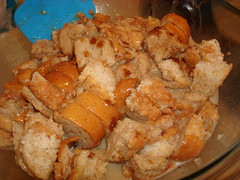
It's bread pudding, but with a big difference: instead of using plain old stupid bread, you're using peanut butter and jelly sandwiches, cut into cubes, soaked in a luxuriant custard mixture and baked to golden perfection.

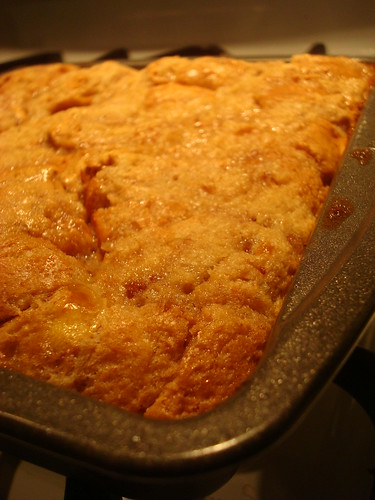
Peanut butter and jelly sandwich bread pudding

Seriously. Your glass of milk is going to slap away peanut butter and jelly sandwiches forever after this, demanding this pudding instead. 

Peanut butter and jelly sandwich bread puddingPeanut butter and jelly sandwich bread pudding

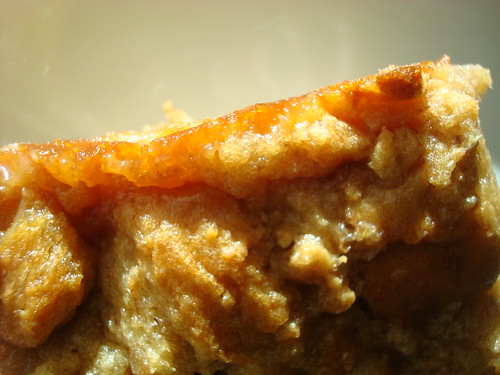
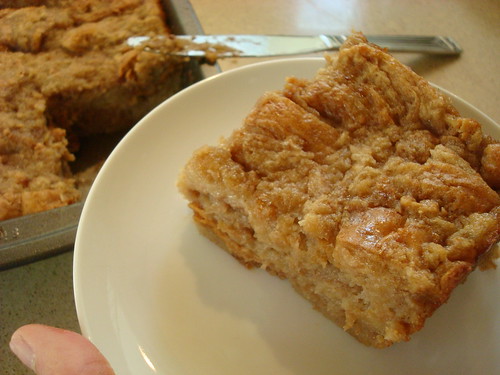
The center is just solid enough to stay firm when sliced, but turns into a wondrous custardy, creamy, peanut buttery goo in your mouth, ribboned with sweet strawberry jelly. Peanut butter and jelly sandwich bread pudding

The top is lightly crispy and golden, and portions of jelly on the top and sides sort of caramelize into a slightly crackly but oh so pleasing candy-like consistency. All of the combinations of flavors and textures coming together, plus the nostalgia aspect of peanut butter and jelly sandwiches but the joy of a grown-up recipe, makes for a highly pleasing dessert.

Peanut butter and jelly sandwich bread pudding

You're welcome. Now, here's how you make it at home.

Peanut butter and jelly sandwich bread pudding

Peanut Butter and Jelly Sandwich Bread Pudding

Makes 9 servings 

  • Five peanut butter and jelly sandwiches on a standard white bread sized bread
  • 2 cups whole milk or cream
  • 3 eggs
  • 1 cup brown sugar
  • 1 stick salted butter 
  • 1/4 cup jelly (same kind you used in the sandwiches)

Procedure

  1. Preheat the oven to 400 degrees F. Generously grease a 9x9-inch pan.
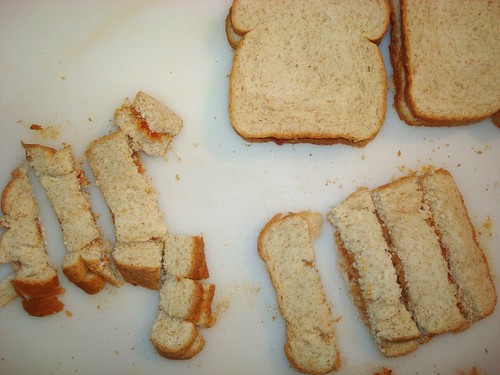
  2. Slice the sandwiches into approximately 1-inch squares. Clean the knife between cuts if it starts to get sticky. Place all of the pieces in a large bowl.
  3. In a large bowl, mix the 2 cups of milk with the eggs, until combined. Set aside for a moment.
  4. In a saucepan over low heat, melt the butter, brown sugar, and jelly. If you don't have salted butter, use unsalted but add a teaspoon of salt. It makes a difference. Once they are all melted and cohesive, remove from heat. Gently pour the warm mixture into the milk and egg mixture, whisking constantly to keep the eggs from scrambling. 
  5. Pour the mixture over the sandwich cubes, very gently stirring to ensure even coverage while not letting the sandwiches come apart.
  6. Spoon the thick mixture into the prepared pan. It's OK to be 3/4 of the way full, but don't fill it all the way. Gently press down the pieces on the top one more time, to ensure that they have penty of custardy coating.
  7. Bake for 15 minutes, or until golden on top and just lightly wobbly in the middle. Let cool in the pan for at least 45 minutes before serving, or until set. Store leftovers in the refrigerator. This pudding can be served warm or cold.
© Cakespy, all rights reserved. Powered by Squarespace.