Home Home Home Home Home Home Home
CakeSpy

Featured: 

My adventure at Ben & Jerry's in Vermont!


Unicorn Love: the Eating Disorder Recovery Blog


 Buy my brilliant books!

Buy my new book!

Buy my first book, too! 

CakeSpy Online Retail!


Archives
Gallery

Fantastic appliance for cake making on DHgate.com

everyrecipe.co.nz

Craftsy Writer

Entries in recipes (704)

Wednesday
Aug212013

Chocolate Cookies With Real Pieces of Cookie Monster

Cookie monster cookies

As Aunts go, I am probably the worst and most evil one in the world. I realize that you probably think I am joking, but allow me to illustrate this statement with an example.

So. My young nephew, Dylan (code names: Dilly, Dil, Dillybar), age three, just loves a flavor of ice cream from Hoffman's Ice Cream called Cookie Monster. It's a blue ice cream with all sorts of cookies mashed into it. The last time I took him for ice cream, I asked if he knew why it was blue. He indicated that he did not in fact know, so I revealed "that's because it's made with real pieces of the Cookie Monster!".

Now, I'll tell you what happened then. Dylan stopped eating ice cream, and his lower lip kind of started trembling. I'll tell you the truth--he was closer to crying than not.

"Oh my god! I mean, gosh!" I said. " Aunt Jessie was just kidding. It's blue because it's cookie monster's favorite flavor!".

Thankfully, this weak save was sufficient and the happy ice cream twinkle came back into his eye and he continued eating. I did notice, however, that the next time we went to Hoffman's he ordered Mint Chocolate Chip. 

Now, don't tell my sister (Dylan's mother) because I'm sure that she will agree that this is proof that I am the absolute worst Aunt ever, not only because I scared her son but because I took him out for ice cream at a non-approved snack time. 

Chocolate Cookies

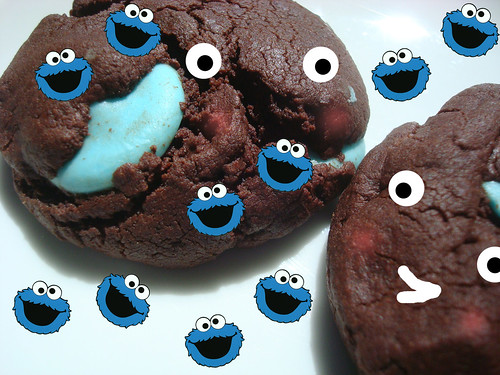
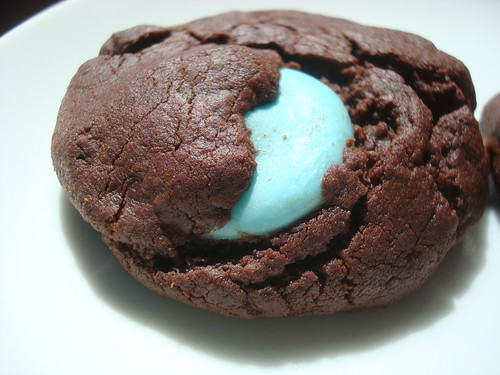
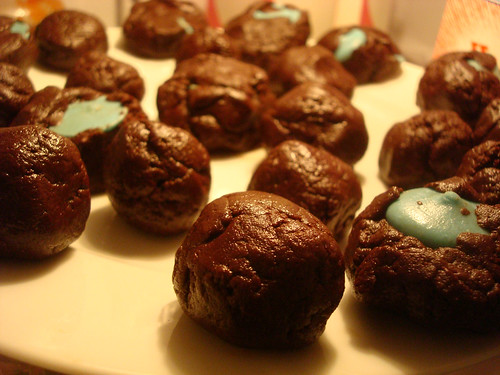
But since I apparently cannot learn my lesson, I made these chocolate cookies recently and couldn't resist adding some blue candy melts. You know, to give the look of real pieces of cookie monster melted into the batter. I'm dedicating them to young Dylan, and can't wait to tell him that they're made with real pieces of cookie monster.

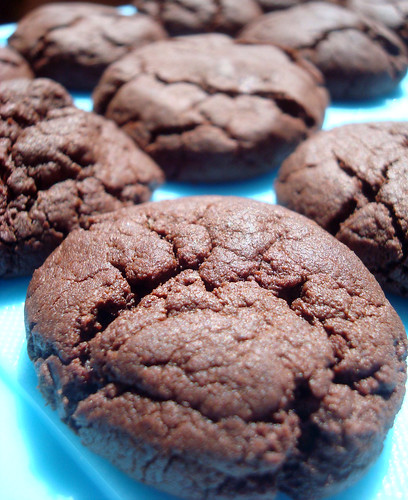
Joking aside, these cookies are fantastic. They are surprisingly light in texture for their extreme chocolate to other ingredients ratio, but very flavorful. I added a dash of dark coffee to the mix to heighten the chocolate flavor, I trick I learned from the BAKED brownie recipe. It worked well.

This is a great cookie to have in your jar. And they taste great without the candy melts, too.

Chocolate Cookies

Chocolate Cookies With Optional Real Pieces of Cookie Monster

Makes about 24 - printable version here

  • 1 2/3 cups (10-oz. pkg.) Dark Chocolate Morsels
  • 1 cup all-purpose flour
  • 1/4 cup unsweetened cocoa
  • 1 teaspoon baking soda
  • 1/2 teaspoon salt
  • 1/2 cup (1 stick) butter, softened
  • 1/2 cup packed light brown sugar
  • 1/4 cup granulated sugar
  • 1 large egg
  • 1/2 teaspoon vanilla extract
  • 1/2 teaspoon strong brewed coffee (optional)
  • 1 healthy handful light blue candy melts

Procedure

  1. Preheat oven to 325° F. Line baking sheets with parchment paper.
  2. Melt the morsels in in a saucepan or in the microwave. If on the stovetop, stir frequently to prevent scorching. Set aside.
  3. Sift the flour, cocoa, baking soda and salt into a medium bowl.
  4. Cream the  butter, brown sugar and granulated sugar until smooth and light, 3 to 5 minutes.
  5. Add melted chocolate and mix well. Add egg and vanilla extract, mixing until well blended, about 1 minute. Add flour mixture, mixing just until blended. If you want, press a couple of blue candy melts into the cookies.
  6. Chocolate Cookies
  7. Shape into balls and place them on to your prepared baking sheets.
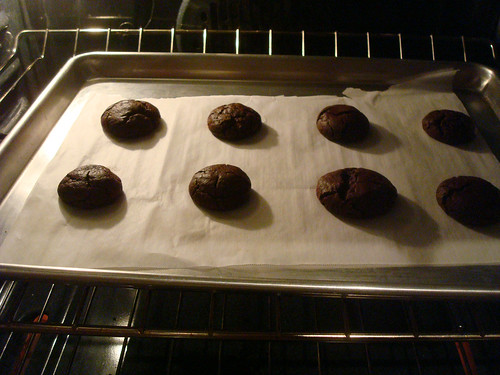
  8. Bake for 16 to 18 minutes or until wooden pick inserted in center comes out with moist crumbs and the tops have a cracked appearance.
  9. Chocolate Cookies
  10. Cool on baking sheets for 5 minutes before transferring to a wire rack to cool completely.
 

Wednesday
Aug212013

Double Trouble: Double Crust Chocolate Chip Cookie Dough Pie

Frisbee pie

Have you ever eaten a chocolate chip cookie and found yourself thinking “if only this had more carbohydrates...”?

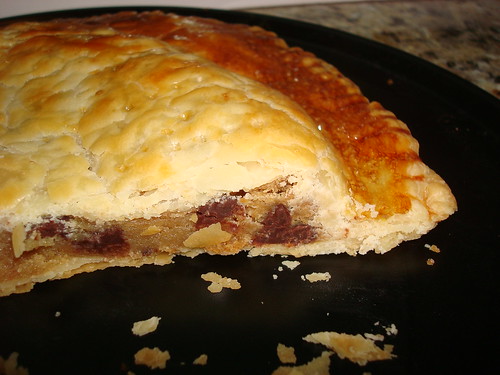
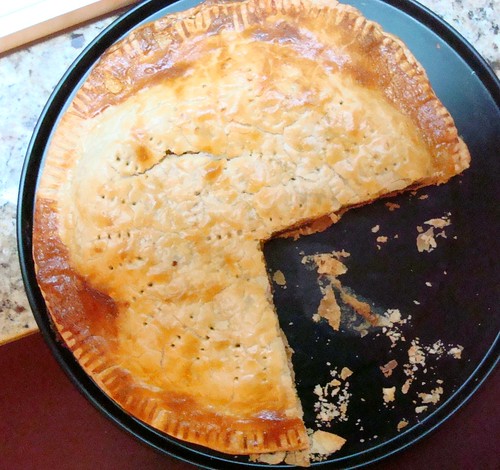
If so, you're not alone, and boy, oh boy, do I have a recipe for you. Double Crust Chocolate Chip Cookie Dough Pie.

Cookie Pie

It starts with rich, decadent chocolate chip cookie dough that is given a bear-hug by a deliciously carbohydratey pie crust.

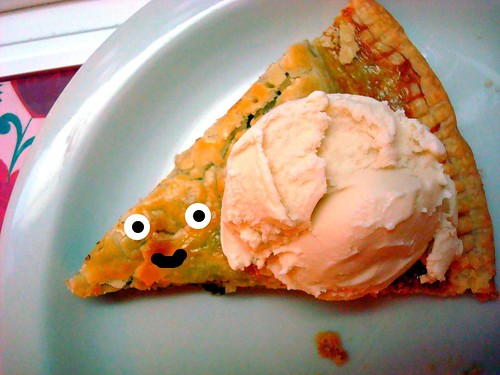
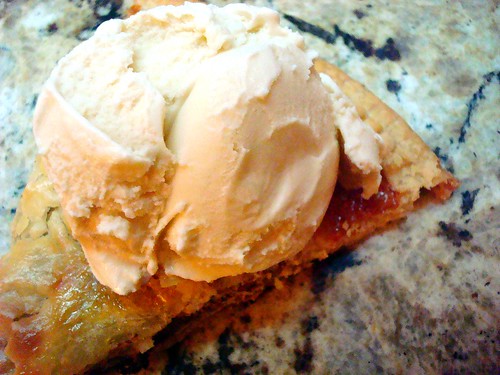
PieThis treat is truly a delight, and works beautifully when served a la mode. And by "a la mode" I mean with ice cream, lots and lots and lots and lots of it.

A perfect late summer treat. Enjoy!

pie

Double Crust Chocolate Chip Cookie Dough Pie

For the crust


  • 2 cups all-purpose flour
  • 1 teaspoon salt
  • 1 cup shortening
  • 1/2 cup water

For the filling

  • 16 ounces chocolate chip cookie dough
  1. In a large bowl, combine flour and salt. Cut in shortening until mixture resembles coarse crumbs. Stir in water until mixture forms a ball. Divide dough in half, and shape into balls. Wrap in plastic, and refrigerate for 4 hours or overnight.
  2. Roll out one of the balls of dough to about 10 inches in diameter. On top of this, pat the cookie dough into a circle, leaving about 1 ½ inches in diameter uncovered.
  3. Brush part of the egg wash around the uncovered diameter.
  4. Roll out the second round of dough to about 10 inches; place this on top of the cookie dough topped round, and press down on the sides, crimping the edges with your fingers or a fork.
  5. Poke the top of the dough several times with a fork for ventilation. Brush with the remaining egg wash.
  6. Bake in a 400 degree oven for 15-20 minutes, or until golden in the middle and medium- brown on the edges.
  7. Serve with ice cream.
Tuesday
Aug062013

Fat and Sweet: Roly Polies Recipe

Making Pie crust with Spymom

Growing up, when SpyMom brought out the pie plate and the rolling pin, the entire family got very excited. 

You may assume that it was because it was pie time.

I know what time it is.

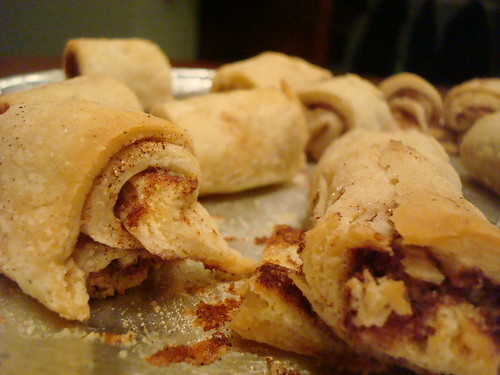
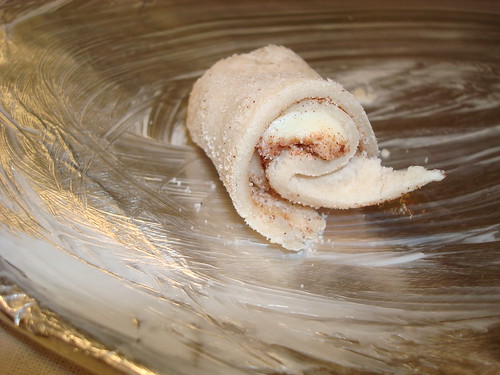
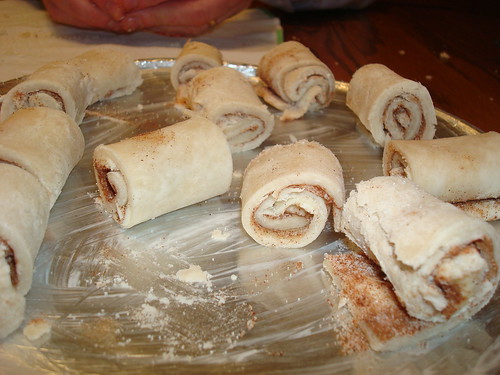
But, well, you'd be wrong. Because although we weren't going to turn away one of SpyMom's pies, what we really craved were the precious bits created with the leftover scraps of dough, which she'd polka-dot with butter then sprinkle with cinnamon and sugar and then roll into spirals, baking them in the residual heat of the oven and presenting them to her hungry masses under the name Roly Poly. 

I have no idea why SpyMom called them Roly Polies--she said that she had started making them because that's how she'd been taught to use the leftover pie dough from a neighbor, when she was a girl. It's likely owing to their short and squat nature. After all, when I just now looked up the definition of "roly-poly" in the dictionary (it was there!), it said "A short plump person or thing."

Making Pie crust with Spymom

I don't know how to scientifically explain how such a simple thing as coating pie crust with butter, cinnamon, and sugar creates a treat with an almost crack-like addictive quality. But just take a bite. You'll lose yourself in the gooey midsection of this pie crust cookie-treat, which is soft, but lightly salty, and gooey. You'll want more. I guarantee it.

And to prove it, I will present evidence of how beloved these treats have become in my family. No longer are they the way to use up leftover pie crust: my mom will actually make up an extra batch just to make roly polies.

Making Pie crust with Spymom

Me, I'm just as happy cutting simple strips. You can see for yourself the next time you've got some extra pie crust rolling around--but be warned, you may be setting yourself up for a lifetime of craving.

Roly Polies

Ingredients

  • Leftover pie crust
  • Butter
  • Cinnamon
  • Light or dark brown, or granulated sugar

Is your oven already heated? If not, preheat it to 400 degrees F.

Making Pie crust with Spymom

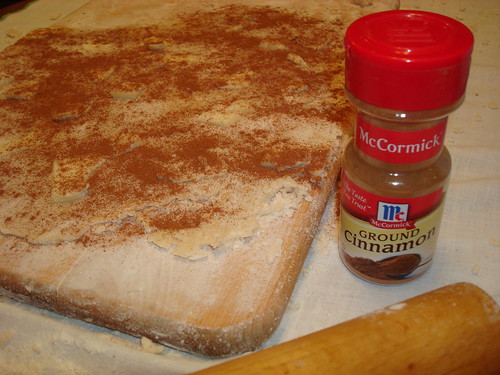
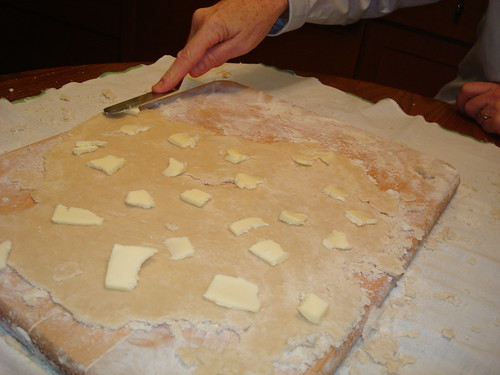
Dot the crust all over with butter. Making Pie crust with Spymom

Now, coat it with cinnamon. If you want, give it a sprinkle of sugar, too. Making Pie crust with Spymom

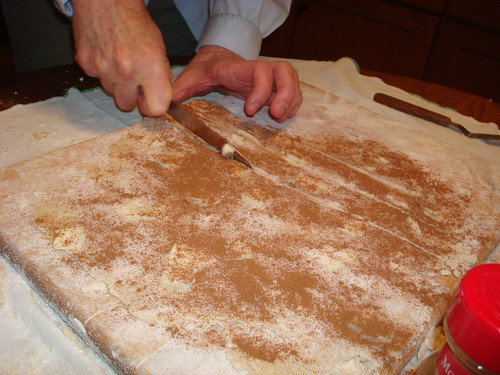
Now, slice it into strips.

Making Pie crust with Spymom

And then roll them up.

Making Pie crust with Spymom

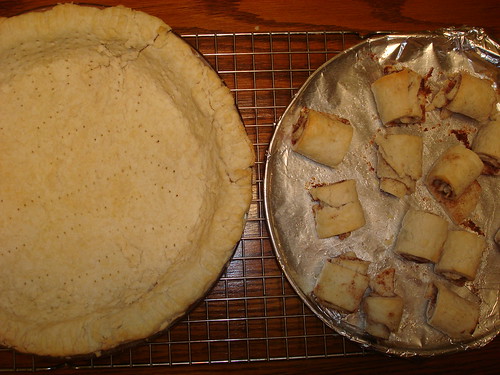
Place them on a greased baking sheet. Making Pie crust with Spymom

Bake for 5-10 minutes, or until golden.

Enjoy! Did you have any treats like this in your house while you were growing up?

Monday
Aug052013

Ingredient Availability Cake: Brown Sugar Congo Cake

Brown sugar congo cake

Something I really, truly love is the phenomenon of how recipes evolve over time. What makes a recipe change? I suppose a number of things play into it: modern tastes, ingredient availability, time constraints, technological advances. Sometimes all of these things. Sometimes just one. 

I bring this up because it's a very roundabout path that led me to sharing this cake recipe with you. 

Brown sugar congo cake

What happened first, many years ago, before I was a professional CakeSpy, was that a little boy brought Congo Bars (made by his mother perhaps) to a class event. A little girl who may have already taken a shine to the boy for SURE took a shine to these bars, and kept the recipe. When she went to college, she began baking, but the recipe changed because of her limited equipment and ingredients. One notable change, for the better, she thought, was swapping out vanilla for kahlua or Baileys or liqueur. It didn't hurt anything, she realized.

I'm not this girl, but I met her recently. She brought these Congo Bars to my book signing in Collegeville, PA, and was kind enough to share the recipe with me.

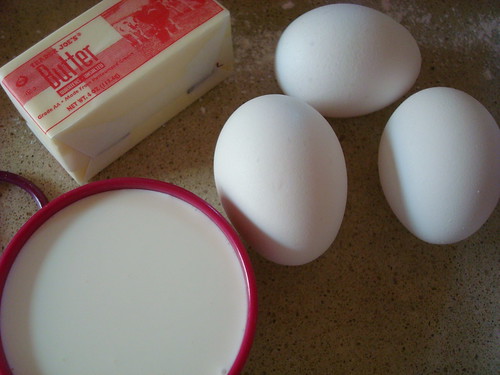
But then, the other day, when I pulled out the recipe, I realized there were several alterations I'd have to make. For one thing, the recipe didn't include how many eggs went into it, so I took a guess and decided on three, because I have a blondie recipe that has that many eggs. Why not?

Second, I realized that I only had one stick of butter; the recipe called for two. So I wondered...what would happen if I used half butter and half cream?

Brown sugar congo cake

Third, I decided that since I was messing with the formula anyhow, why not try making them more in the method of the Katharine Hepburn brownies from my book? So, I messed with the recipe again in that way.

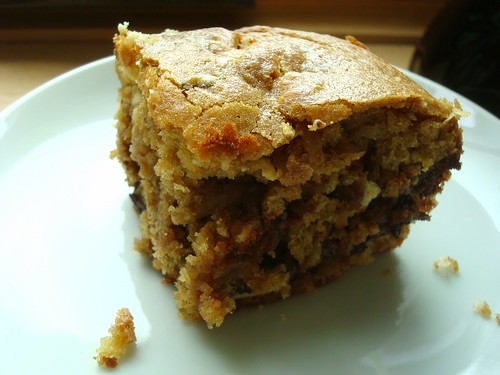
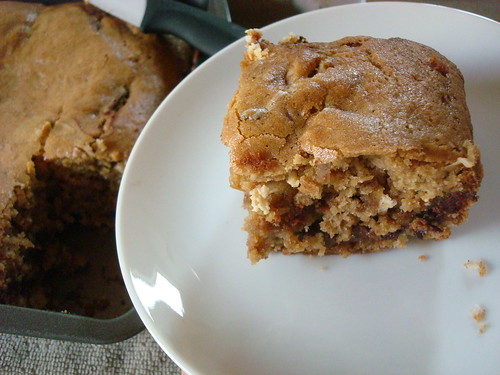
The resulting recipe differed quite a bit from the delicious Congo Bars that were brought to the event, so I am going to save that recipe and share it with you another time. But I can say that while my result was very different, it was still pretty darned good. So here's the recipe as I made it, which I'll dub Brown Sugar Congo Cake.

Brown sugar congo cake

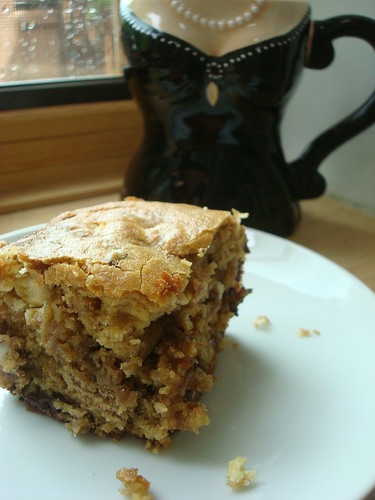
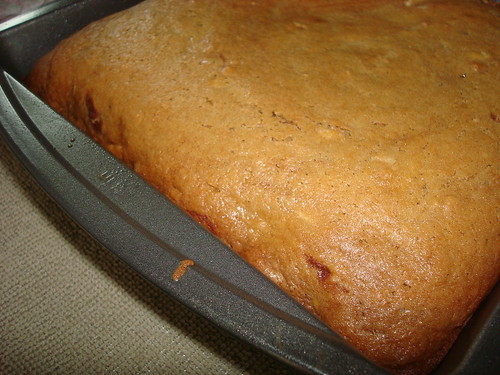
This light and fluffy cake is nicely chewy in the areas that have chocolate or gooey fillings, and it actually seems appropriate as a morning cake. I found it was especially lovely when topped with cream cheese or almond butter. 

Brown sugar congo cake

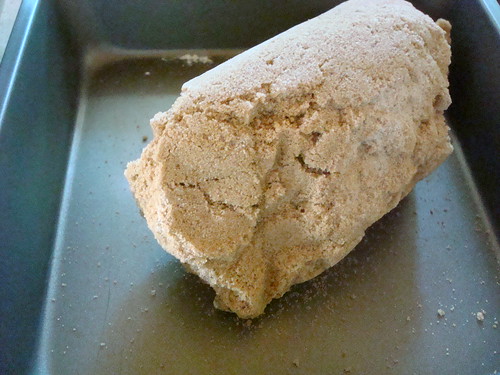
I should also tell you that the brown sugar I used was hard as a rock. But it wasn't a worry! All I did before making the recipe was heat the oven to 300, and then place the rock of brown sugar on a large plate and into the oven. After a few minutes the heat made it soften enough that I could break it up. Keep in mind, though, that this method must only be used pretty directly before baking, as the sugar will re-harden after an hour or so if not used. 

Brown sugar congo cake

Brown Sugar Congo Cake (Printable version here)

Makes 9 servings

Ingredients

  • 2 cups flour
  • 1 tsp baking powder
  • 1/4 tsp baking soda
  • a hefty pinch of salt
  • 1 stick butter
  • 1/2 cup heavy whipping cream
  • 2 cups brown sugar (light or dark. Your preference. I used light.)
  • 3 eggs
  • 2 tbsp. Coffee Liqueur or any liqueur that strikes your fancy.  
  • 12 oz chocolate chips or discs (semi-sweet)
  • 1/2 cup toasted sweetened shredded coconut
  • 1/2 cup toasted almonds
  • 1/2 cup toasted pecans

Procedure

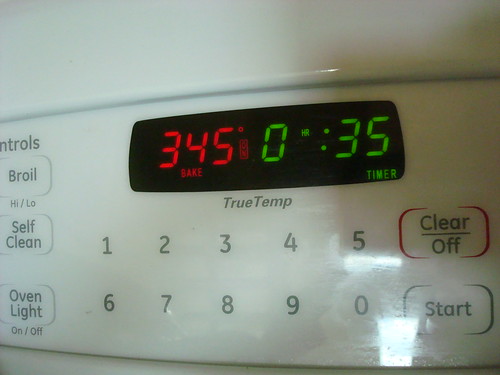
  1. Preheat your oven to 345 degrees (yep-- not 350).
  2. Brown sugar congo cake
  3. Sift together the dry ingredients; set to the side. Grease (with BUTTER) an 8x8-inch pan very well, especially the corners.
  4. In a large saucepan over medium-low, melt together the butter and cream, until the butter has completely disappeared. Add the brown sugar, stirring until completely dissolved into the mixture. Remove from heat.
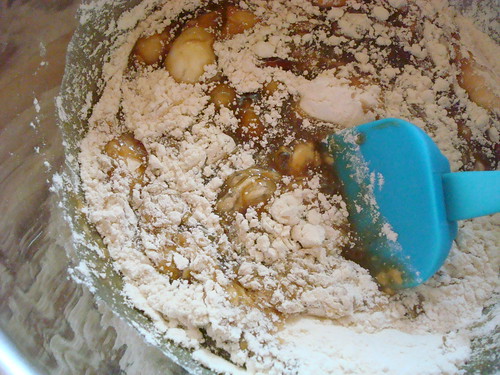
  5. Add eggs, and mix until smooth. Add the dry ingredients in 3 batches.
  6. Brown sugar congo cake
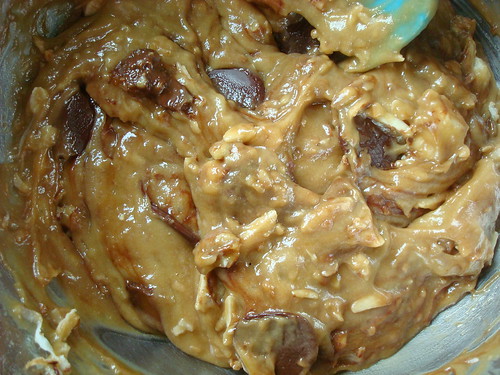
  7. Mix in chocolate chips and any other stuff you want to add.
  8. Brown sugar congo cake
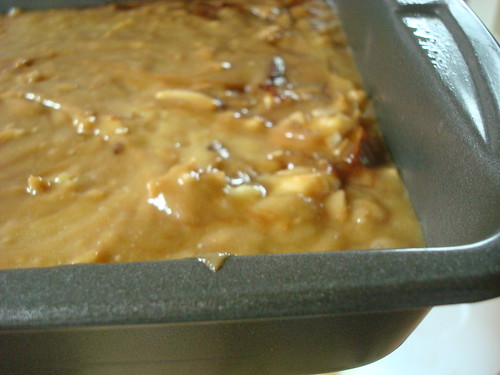
  9. Pour mixture into pan and spread evenly.
  10. Brown sugar congo cake
  11. Bake in your preheated oven for 30-35 minutes, or until golden on top and a cake tester comes out mostly clean.
  12. Brown sugar congo cake
  13. Remove from oven. Let them cool, and serve! Great in the morning with cream cheese or almond or peanut butter; great at night with ice cream. 
Wednesday
Jul312013

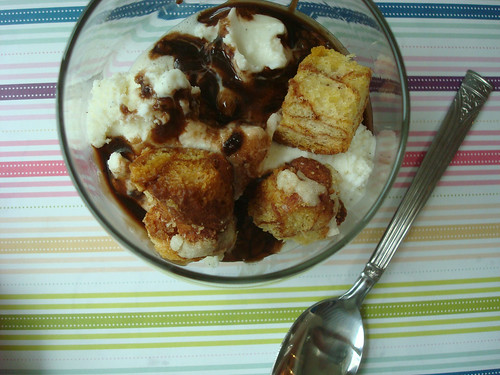
Sweet Finish: Dessert Croutons Recipe 

Dessert Croutons

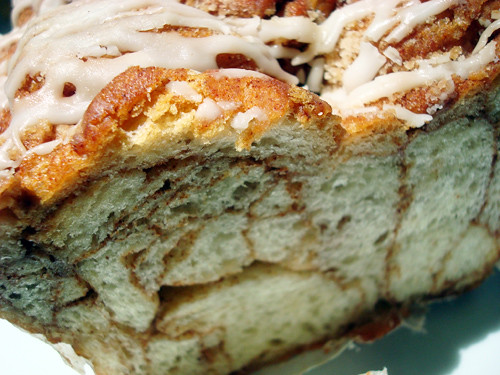
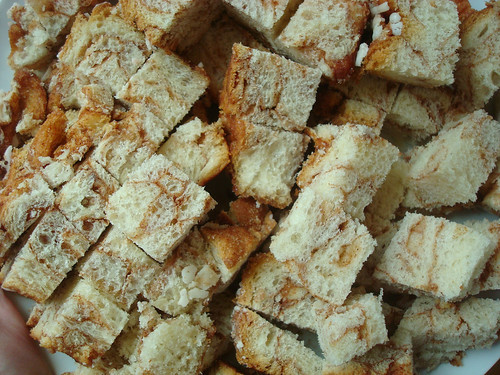
Recently, while making bread pudding, I found myself in posession of a unique problem: too many cubes of bread. The recipe I was using required about 5 cups of cubed day-old bread, and I had about 7 cups. It was a good bread, too: a loaf of Rubicon Bakery's cinnamon bread (something they make exclusively for Whole Foods, I just learned while looking at their website).

Homemade bread pudding

It's a very nice loaf of bread, so I didn't want to waste the cubes by throwing them out. But then again, it was too many cubes to use in the recipe...so what to do?

Homemade bread pudding

That's when it hit me. I would exactly what I would if it were a non-sweet bread: I'd make croutons. Only since this bread was already sweet, I wouldn't try to make them savory croutons for salads--I'd make them sweet croutons, for dessert toppings.

Dessert Croutons! Are you not shivering with sweet anticipation right now?

I looked at a homemade crouton recipe as a reference, and then set to tailoring the recipe to work as a sweet dish.

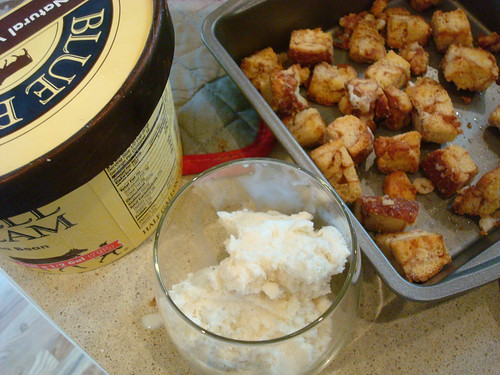
I was going to cover them with butter, but then I realized I had no butter. But I did have olive oil. I remember hearing a radio interview in which Alice Medrich gushes about the utter loveliness of olive oil on ice cream, so I thought...why not give this a try? If the dessert croutons are made with olive oil, maybe they'll work really nicely with ice cream. 

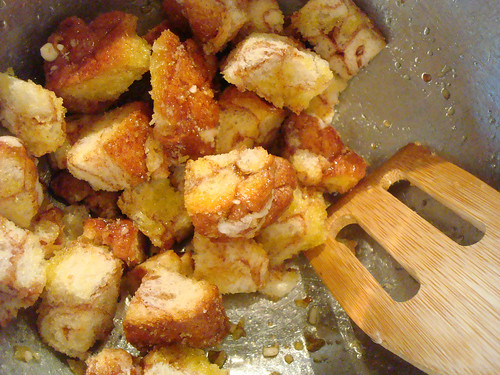
So, I preheated the oven then coated the cubes with some olive oil and gave them a gentle but thorough stir. Then, I dusted them with a little cinnamon sugar (why not?). 

Dessert Croutons

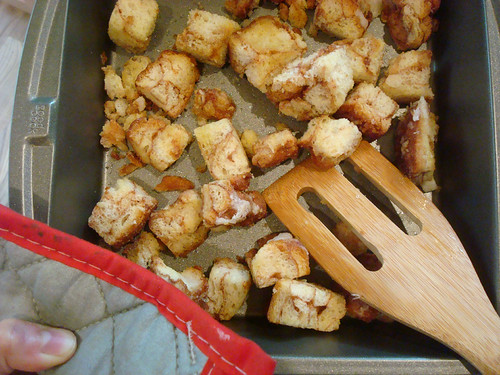
Then, I put them in a pan.

Dessert Croutons

Then, I baked 'em up, pausing to flip them over after about 8 minutes.

At about 16 minutes, I took them out. I let them cool for a while, then broke out the ice cream.

Dessert Croutons

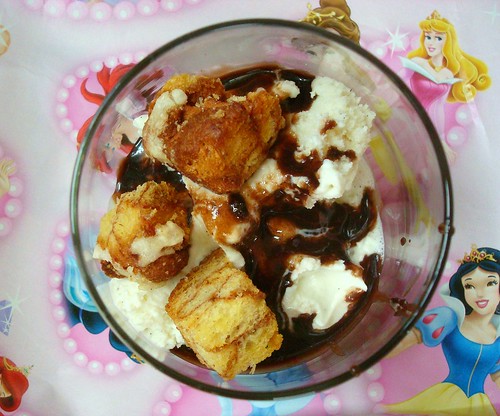
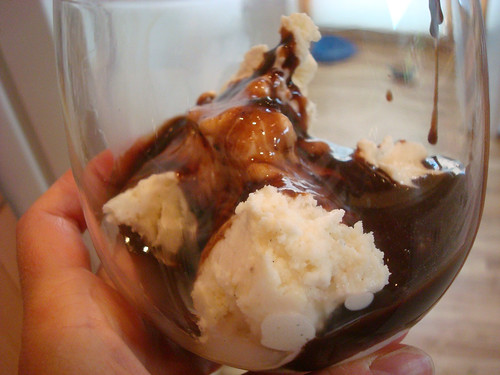
Wait...I think I'll add some chocolate sauce, too. That never hurts anything. Plus, I reasoned, it would add a color contrast and help the croutons stick for a nice photo. I am, after all, a food blogger.

Dessert Croutons

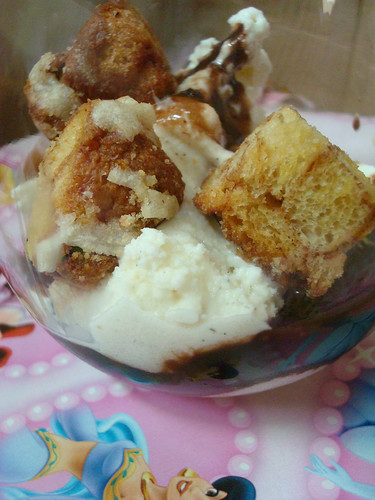
Now let's add those croutons...

Dessert Croutons

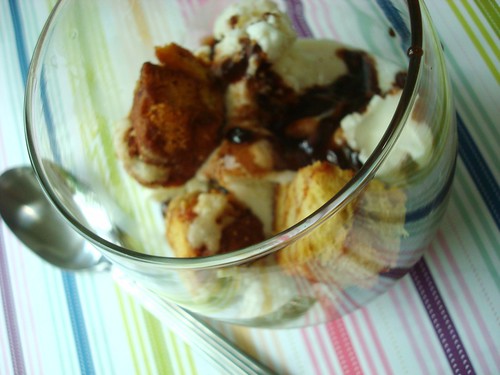
YES! Just look at how the cinnamon swirl adds a pretty echoing color to the chocolate sauce. Look at how wonderfully golden and toasty they look. 

Upon tasing them, these croutons were proclaimed a rousing success. They're not as sweet as crumbled cookies or cake, but they act in the same manner as an ice cream topping: adding a little extra flavor and texture. The crunchiness was also more intense than that of a cookie or cake crumb, so it added a really nice contrast to the soft ice cream and chocolate sauce. The ideal moment was about 1/4 to 1/2 of the way in, when the croutons just started to become soft as they absorbed the ice cream and chocolate. Perfect. 

Dessert Croutons

The olive oil actually worked out excellently. It acted as a nice counterpart to the sweetness of the other toppings, and added a complexity to the other flavors--especially the chocolate. The glaze on the bread, too, contributed to the deliciousness: in the oven, it appeared to have melted into the bread, but upon crunching into one of the croutons, I learned that it actually formed a sort of sweet shellac all over them. It also made for a fascinating flavor combination with the olive oil.

While I am eager to try this again with butter, I have to say, I was really rewarded by the olive oil version. 

Dessert Croutons

Here's the recipe so you can try it out at home! Keep in mind since you're probably using this recipe with leftover bread, I am going to make it open ended for you. 

Dessert Croutons--a field guide (printable version here)

Ingredients

  • Cubed day old bread (at least a cup's worth, to make it worth your while)
  • Olive oil or melted butter--about 2 tablespoons per 1 cup of bread
  • Cinnamon and sugar, to taste 

Procedure

  1. Preheat the oven to 300 degrees F.
  2. While the oven preheats, put the cubed bread in a large bowl. Drizzle evenly with the olive oil or butter, stirring so that everything gets coated. You can add more if you feel that they're too dry. 
  3. Add cinnamon and sugar, if desired, and stir to coat.
  4. Transfer the cubes to a baking pan where they can lie in a single, flat layer. 
  5. Place in the preheated oven, and bake for anywhere between 15 and 25 minutes (it will vary depending on the bread you use). Turn the croutons about 8-10 minutes in, so that they will be browned evenly. You'll know they're done when they're golden and toasty.
  6. Remove from the oven and let cool before using. Store leftovers in an airtight container. They'll keep very well for a few weeks.


Sunday
Jul282013

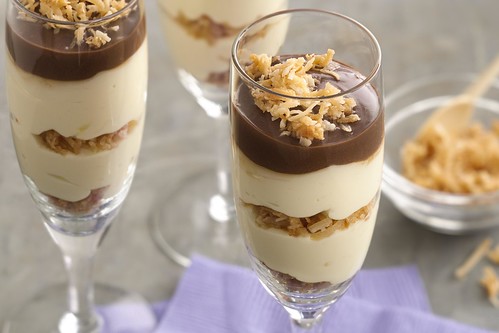
The Bake-Off is Coming: Toasted Coconut Cheesecake Parfaits

Bakeoff recipe - mini cheesecake parfaits

CakeSpy Note: OMG! The 46th Annual Pillsbury Bake-Off is coming! Since I so deeply loved attending the 45th Bake-Off, I thought I would get you excited early by sharing some of the finalists' recipes. Narrowed down from zillions of entries, I'll profile some of the 100 finalists--but of course, based on the subject matter of this site, I will focus on sweets! You can follow them by clicking the bakeoff tag below the post to see which ones have been posted so far. Enjoy! 

Hey! Did you know that today (July 28) is National Milk Chocolate Day? And Tuesday (July 30) is National Cheesecake Day? It's true. And it's a great day to enjoy these easy to prepare Toasted Coconut Cheesecake Parfaits, which, as the name might imply, are packed with tasty stuff--including milk chocolate frosting! Therefore, it's the perfect sweet to celebrate this extra special week. This recipe is from Bake-Off finalist Gloria Seymour of Rohnert Park, California.

Toasted Coconut Cheesecake Parfaits

Prep time 30 minutes - Total Time 1 hour, 30 minutes

Makes 12

  • 1 1/2 cups sweetened flaked coconut
  • 1 tablespoon Smucker's® Caramel Flavored Topping
  • 1/2 cup Pillsbury® Creamy Supreme® Milk Chocolate Frosting
  • 2 teaspoons brewed coffee, room temperature
  • 3 packages (8 oz each) cream cheese, softened
  • 1 can (14 oz) Eagle Brand® Sweetened Condensed Milk
  • 2 tablespoons vanilla instant pudding and pie filling mix (from 4-serving size box)

Procedure

  1. Heat oven to 350°F.
  2. Spread 1 cup of the coconut in ungreased shallow pan. Bake 5 to 7 minutes, stirring occasionally, until golden brown. Cool 15 minutes.
  3. In small bowl, mix toasted coconut and caramel topping. Meanwhile, in small microwavable bowl, microwave frosting on High 15 seconds or until smooth and creamy. Stir in coffee until well blended. Set aside.
  4. In large bowl, beat cream cheese with electric mixer on medium speed until fluffy. Gradually beat in sweetened condensed milk, scraping bowl occasionally until smooth. Add remaining 1/2 cup coconut and pudding mix; beat on low speed until well blended.
  5. To assemble, spoon 1 1/2 teaspoons of the toasted coconut mixture into each of 12 (4 oz) glasses. Top with 3 tablespoons of the coconut cream cheese mixture, 1 teaspoon of the toasted coconut mixture and remaining coconut cream cheese mixture. Top each with about 2 teaspoons frosting mixture; sprinkle with remaining toasted coconut mixture. Refrigerate 1 hour. Store in refrigerator.
Thursday
Jul252013

The Bake-Off is Coming: Red White and Blue Dessert Tacos

Dessert tacos

CakeSpy Note: OMG! The 46th Annual Pillsbury Bake-Off is coming! Since I so deeply loved attending the 45th Bake-Off, I thought I would get you excited early by sharing some of the finalists' recipes. Narrowed down from zillions of entries, I'll profile some of the 100 finalists--but of course, based on the subject matter of this site, I will focus on sweets! You can follow them by clicking the bakeoff tag below the post to see which ones have been posted so far. Enjoy! 

The first recipe I'll feature? A wonderful one: Red, White, and Blue Dessert Tacos. Created by Charlotte Giltner of Mesa, AZ, all you have to do is "Fold flaky biscuits around whipped cream and berries to create a taco-inspired dessert." Easy and sweet! Here's the recipe.

Red, White, and Blue Dessert Tacos

Total time: 30 minutes

8 servings

  • 2 cups sliced fresh strawberries
  • 1cup fresh blueberries
  • 2/3 cups sugar
  • 1 cup whipping cream
  • 1 can Pillsbury® Grands!® Flaky Layers refrigerated Butter Tastin'® biscuits
  • 2 tablespoons Pillsbury BEST® All Purpose Flour
  • 1/4cup Crisco® Pure Vegetable Oil


  1. In medium bowl, gently mix strawberries, blueberries and 4 tablespoons of the sugar. Cover; refrigerate, stirring occasionally.
  2. In small bowl, beat whipping cream with electric mixer on low speed until slightly thickened. Increase speed to medium. Slowly add 2 tablespoons of the sugar, beating until stiff peaks form. Cover; refrigerate.
  3. Separate dough into 8 biscuits. Sprinkle flour on work surface; press or roll each biscuit into 6-inch round.
  4. In 12-inch skillet, heat 2 tablespoons of the oil over medium-high heat. Add 2 biscuit rounds to skillet; cook 30 seconds to 1 minute on each side or until light golden brown. Repeat with remaining biscuit rounds, adding more oil as needed. Drain on paper towels. Sprinkle one side of the biscuit rounds with the remaining 4 tablespoons sugar.
  5. With slotted spoon, spoon 1/3 cup fruit mixture lengthwise in middle of unsugared side of each biscuit round. Spoon rounded 1/4 cup whipped cream along outside edge of fruit; fold biscuit round over to form taco. Serve immediately.

For more Bake-Off fun, visit the official website.

Wednesday
Jul172013

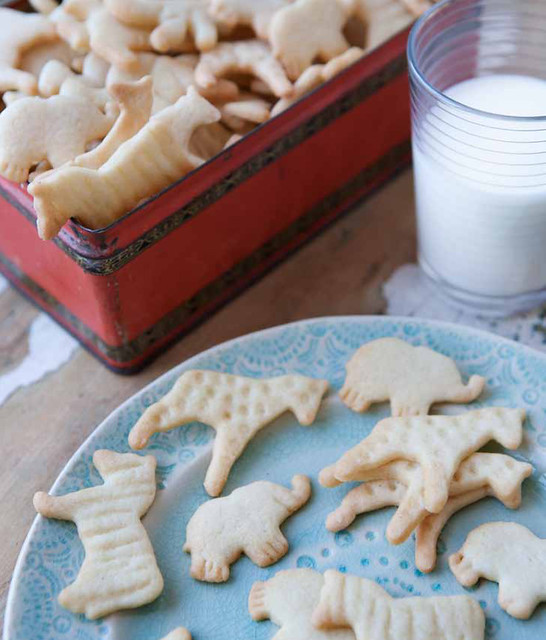
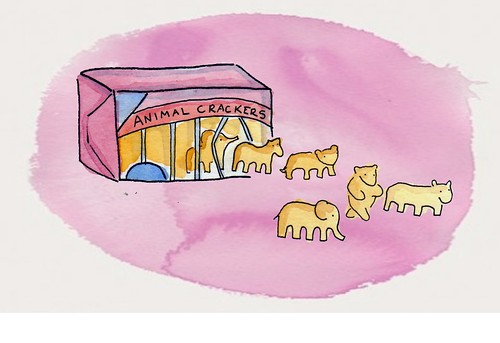
The Story of Animal Crackers

Animal crackers

CakeSpy Note: Sometimes, I like doing sweet things for you, readers. And so I decided to share an inside look at one of my favorite stories--and recipes!--from my new book, The Secret Lives of Baked Goods: Sweet Stories & Recipes for America's Favorite Desserts. This tale is all about animal crackers. Enjoy! 

“Animal crackers and cocoa to drink that is the finest of suppers I think; when I am grown up and have what I please I think I shall always insist upon these.”

—Actor and writer Christopher Morley

Everyone loves those curious animal-shaped cookies that pack a crunch and are called “crackers.” But how is it that these proud little animals began marching their way into our mouths and hearts?

Well. The custom of crafting cookies that resemble creatures is nothing new— as early as the 1600s in Germany, bakers were making sweet treats resembling savage beasts. But it wasn’t until the 1800s that the wheels began to turn, set- ting off the chain reaction that made these sweet crackers a snacking staple. For this we owe a thank-you to the industrial revolution: that’s when biscuits, cookies, and crackers began to be manufactured in factories.

In Victorian England, “crisp biscuits”—that’s sweet, cracker-like cookies, to Americans— were very popular. Some of these biscuits were shaped like animals. A hint of things to come was evident when Zoologicals, animal-shaped cook- ies made by Philadelphia baker Walter G. Wilson, were sold at the Centennial Exposition of 1876—the first world’s fair in America. (This pivotal event yielded many innovations, including the introduction of the Dewey Decimal system, the ice cream soda, and the grand debut of the Statue of Liberty’s torch, before it was affixed to the rest of her body in New York City.)

After acquiring two New York City bakeries that produced animal-shaped biscuits, the National Biscuit Company (later Nabisco) began producing animal-shaped biscuits on a commercial scale which allowed for widespread distribution.

Animal Crackers

Serendipitously, this timing coincided with P. T. Barnum’s growing reputation as an international showman and circus owner. Perhaps sensing a sales opportunity, several companies had begun marketing foods of all sorts with circus-themed packaging, and these biscuits were a natural tie-in. The National Biscuit Company did it most famously, with their 1902 debut of the animal-shaped crackers. Marketed as a specialty holiday item, they were sold in a small box resembling a circus cage with a handle at the top, for displaying as an ornament.

The crackers proved so popular that they were soon being produced year-round, the ornament string promoted as an easy way for children to transport the cookies. In 1948, they were renamed Barnum’s Animal Crackers, which is what they’re still called today. But for all the glittering success of the Barnum associa- tion, the circus man did not receive payment for the use of his name: according to an article in the Washington Post, he never got a cent for the crackers.

Ready for a recipe? Here's an adaptation of the one in the book. For more sweet stories and recipes, buy the book: The Secret Lives of Baked Goods: Sweet Stories & Recipes for America's Favorite Desserts.

Homemade Animal Crackers (Printable version here)

Makes about 6 dozen

Ingredients

  • 2 1⁄2 cups all-purpose flour
  • 1⁄4 teaspoon salt
  • 1 teaspoon baking powder
  • 1⁄8 teaspoon cinnamon
  • 3⁄4 cup (1 1⁄2 sticks) unsalted butter, softened to cool room temperature
  • 1 cup sugar
  • 1 egg
  • 1 1⁄2 teaspoons vanilla extract

Procedure

  1. In a medium bowl, stir together the flour, baking powder, salt, and cinnamon. Set aside.
  2. In the bowl of a stand mixer fitted with the paddle attachment, cream the butter and sugar on medium speed until light and fluffy, 3 to 5 minutes. Add the egg and vanilla, stirring until combined.
  3. Add the flour mixture in 3 additions, mixing after each addition just until incorporated. Scrape down the sides of the bowl as needed.
  4. Form the dough into 2 disks and wrap well with plastic; refrigerate for at least 2 hours or overnight. Chilling the dough will ensure that the shapes hold once cut out and that the dough will not spread too much during baking.
  5. Preheat the oven to 350 degrees F. Line 2 baking sheets with parchment paper and set aside.
  6. Allow the cookie dough to warm slightly at room temperature before rolling it. On a floured work surface, use a floured rolling pin to roll the dough to about 1⁄4 inch thick. Use small animal-shaped cut- ters to cut the dough (of course, other small cutters will work, too). Using a metal spatula, transfer the cookies to the prepared baking sheets. Gather up the dough scraps and re-roll to make more cookies. Leave a small amount of room around each cookie to allow for spreading. If desired, you can use toothpicks to enhance the details on the animals, or add faces.
  7. Let the cookies chill (on the baking sheets) in the refrigerator for 30 minutes before baking. This will ensure even further that the dough retains any details you’ve added.
  8. Bake for 12 to 15 minutes ,or until firm, just lightly brown on the edges, and with a dull finish on top. Let cool on the pan for several minutes, then transfer to a flat surface (they may fall through a wire rack) to cool completely. Store the cookies in an airtight container for up to 7 days.

And in closing:

Per Panati's Extraordinary Origins of Everyday Things, children across America tend to “nibble away at the animals in definite order of dismem- berment: back legs, forelegs, head, and lastly the body.”

Monday
Jul012013

Taste of Summer: Cherry Pie Shortbread Bars

Cherry pie shortbread bars

Confession: I love cherries, but I do not love cherry pie. I can't tell you why. Maybe because it tastes like health food to me? 

But, you know, I believe that every now and again it's worth taking a moment to re-evaluate your likes and dislikes. Like, do you actually despise cherry pie, CakeSpy? Or is it a notion that you have about yourself that you haven't bothered to challenge for a while? 

I figured that if there was going to be a way to make cherry pie into something loveable for me, I figured that adding shortbread probably be a good place to start.

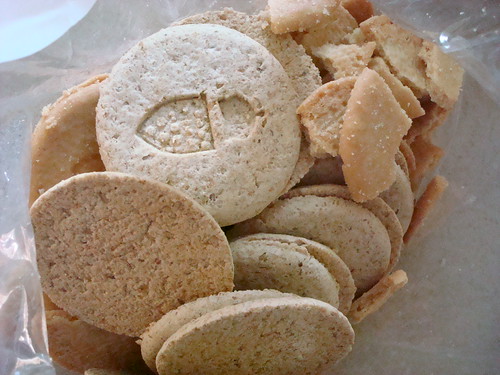
Biscuits

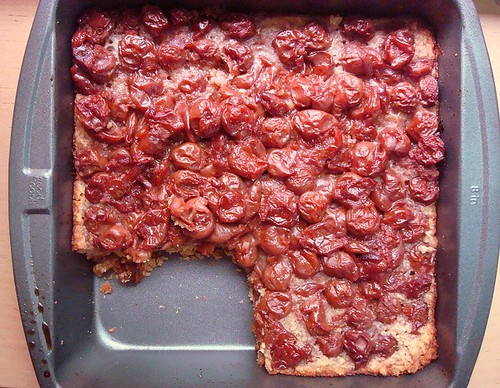
Basically, I altered a cherry pie recipe into one for bar cookies. I swapped the typical pie crust for a pressed crust of mashed shortbread, and then topped the crust layer with a fairly classic cherry pie filling. I baked for the same amount of time specified in the recipe, and hoped for the best.

But oh, oh, oh! They turned out even better than I thought.

Cherry Pie Shortbread bars

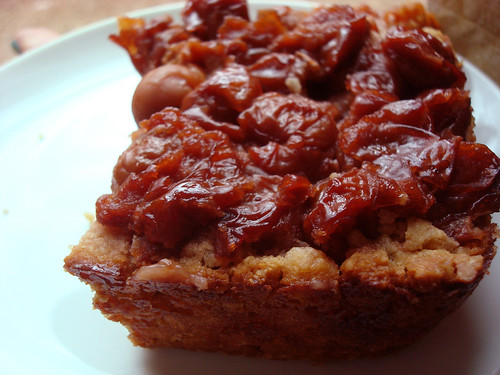
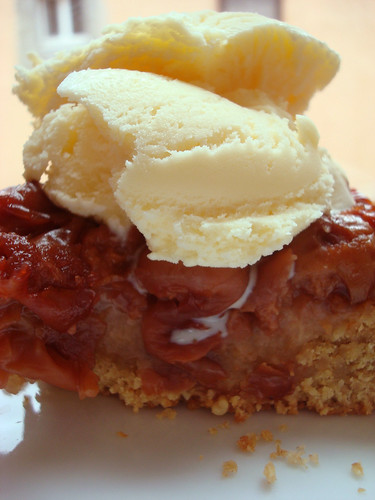
For one thing, they sliced cleanly and beautifully, even while still warm (who can wait til it cools entirely?). For another, the tart cherries I used were wonderful--not overly sweet, and beautifully paired with the slightly oaty shortbread I used--they almost tasted like cherry pie mashed together with an oatmeal cookie (no raisins!). 

Cherry pie shortbread bars

They made for a true taste of summer: tart and sweet and refreshing, but that shortbread and butter crust kept it firmly in dessert, and definitely not health food, territory.

Oh, and in case you're wondering if they go well with ice cream...don't be stupid. Of course they do!

Cherry Pie Shortbread bars

A fantastic recipe to try!

Cherry Pie Shortbread Bars (Printable version here!)

For the crust

  • 2 boxes Duchy Shortbread (I used one box of the plain butter kind, and one box of the "Oaten Biscuits")
  • 2 tablespoons melted butter

For the topping


  • 2 cups pitted sour cherries  
  • 1 cup white sugar 
  • 1/3 cup cornstarch 
  • 1 tablespoon butter 
  • 1 teaspoon vanilla extract

Procedure

  1. Preheat oven to 375 degrees F.
  2. Mix together the crushed cookies and butter; press into a well greased 8-inch square pan. Set aside.
  3. Place the cherries, sugar, and cornstarch in a medium-sized non-aluminum saucepan. Allow the mixture to stand for 10 minutes, or until the sugar draws out the cherries' juices. Bring to a boil over medium heat, stirring constantly. Lower the heat; simmer for 1 minute, or until the juices thicken and become translucent. Remove pan from heat, and stir in butter and vanilla. Allow the filling to cool to lukewarm.
  4.  Pour the filling on top of the crust. Bake in a preheated 375 degree F oven on the baking tray for 45 to 55 minutes, or until the crust is golden brown. Allow to cool for several hours before slicing.
Tuesday
Jun182013

Shortbread Cookie Truffles Recipe

Shortbread truffles

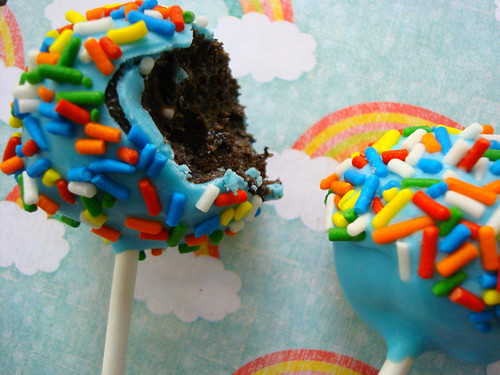
Recently, I wrote up a tutorial on How to Make Oreo Cake Pops for the lovely and amazing website Craftsy.com. An important life skill if ever there was one!

And naturally, they were delicious. Here's a sneak peek:

Oreo Cake Truffles

and gosh are they tasty! (tutorial for those can be found here).

But the process got me thinking...could I do this with other flavor combinations? For instance, could I substitute shortbread cookies for Oreos, and fancy chocolate for the candy melts?

Why the heck not?, I thought, especially as I have a boatload of freebies I'd recently received, including tasty shortbread (Duchy Originals) and Tcho Chocolate. I thought: I'm going to make some shortbread cookie truffles, or die trying!

Actually, it wasn't so dramatic. I didn't actually think death was a possibility. But I suspected deliciousness was dangerously close!
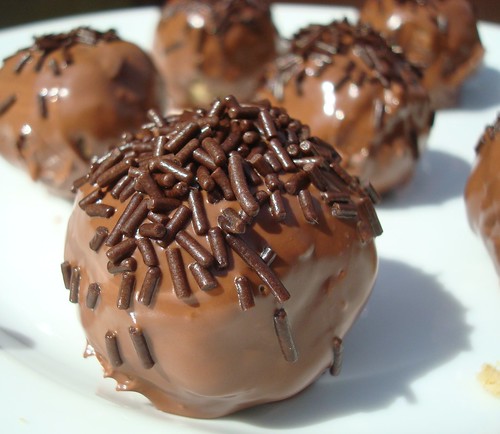
So, I won't keep you in suspense. Here's how they came out:
Shortbread Truffles

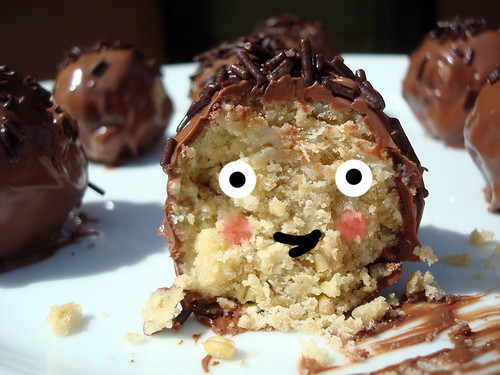
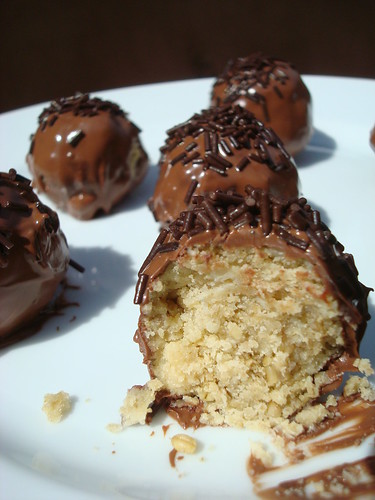
I know, beauties, right? Here's an inside shot. 

Shortbread Truffles

And I am happy to report that they taste as good as they look. Lightly salty. Very buttery. A little nutty, owing to the fact that I used part regular shortbread and part "oaten biscuits". Nice and moist inside--the shortbread didn't crumble as much as I thought it might. And the chocolate was to die for. I used the Tcho Milk Chocolate discs (from their baking chocolate series), and I can say with no hesitation that this is not your typical milk chocolate. It almost tasted...caramelly. The flavor just lingered in your mouth. Yum yum yum yum yum. They're pricey, but if you have a recipe that will really let the chocolate shine, I say go for it. 

Nice little morsels--decadent, but hey, that's why they're in small portions, right? Next time I try this recipe, I'd like to try using dulce de leche or melted caramels instead of the cream cheese to moisten the crumbled cookies. Yep: I have visions of Millionaire's Shortbread Truffles dancing in my head! 

But for now, here's the simple version. Gosh-darn are they good.

Shortbread Cookie Truffles (Printable version? Right here.)

Makes 12-16

  • 2 boxes Duchy Shortbread (I used one box of the plain butter kind, and one box of the "Oaten Biscuits")
  • 1/2 block cream cheese (4 ounces)
  • 1 bag chocolate morsels (I used an 8 ounce bag of Tcho Milk chocolate)
  1. Prepare the truffle innards. First, prepare a baking sheet like so: lay a sheet of waxed or parchment paper on top, and set to the side. You’ll be happy to have this handy a few steps down the line.
  2. Now, you need to crush the cookies. If you have a food processor, put the whole cookies inside, and pulse several times, until the cookies have been reduced to fine crumbs. If you don’t have a food processor, place the cookies into a heavy duty plastic bag and crush using the bottom of a heavy tumbler or the side of a rolling pin. This is very fun for kids (with supervision, of course!)!
  3. Once the cookies are completely crumbled, place them into a large bowl. Add the cream cheese, and using your impeccably clean hands, thoroughly mix the cookie crumbs and cream cheese. Since the shortbread is already pretty buttery, it should be able to form nicely into balls.
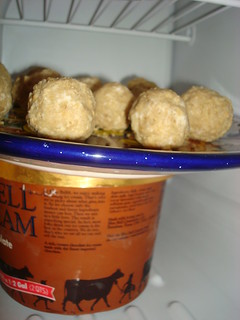
  4. Clean your hands so that you have a clean surface to roll the “dough” by hand. Roll it into balls, about 1 inch or so in diameter. Maybe an inch and a half. Place them on the baking sheet. If you're lazy, you can also just put them on a plate, but they might stick a little bit. I'll be honest. While I want to tell you how to do it the "right way", I in fact did not. I put them on a plate in the freezer on top of some ice cream. 
  5. Shortbread Truffles
  6. Speaking of which, you do want to chill them. Place the baking sheet into the refrigerator for an hour, or the freezer for about 20 minutes.
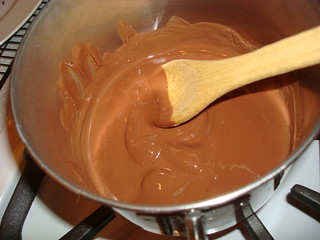
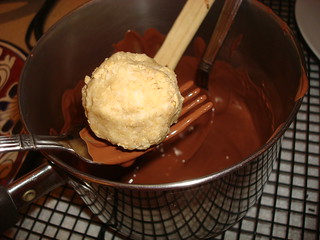
  7. With the dough still in its chilling place, begin to melt your chocolate over low heat.
  8. It will gradually begin to melt and become smooth. Once mostly melted, the last bits will melt rapidly in the residual heat, so keep a close eye on the pan. 
  9. Shortbread Truffles
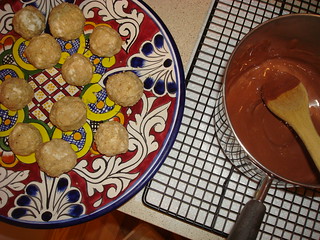
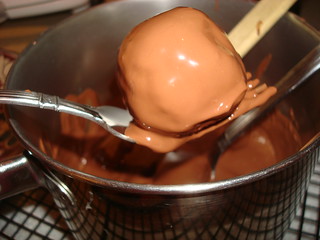
  10. Remove from heat, and take your baking tray out of the refrigerator or freezer. It's time to enrobe.
  11. Shortbread Truffles
  12. I like to place the dough on a fork and drip the chocolate on top using a spoon--the tines seem to allow the excess coating to drip off.
  13. Shortbread Truffles Shortbread Truffles
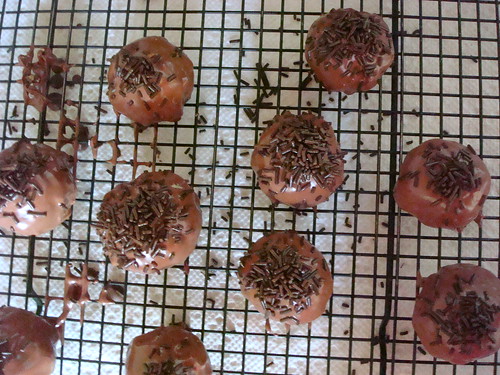
  14. Transfer to a wire rack with a sheet of waxed paper or paper towels beneath, to catch drips.
  15. If desired, drizzle sprinkles over the truffle. You need to do this directly after dipping or they will not stick.
  16. Shortbread Truffles
  17. Let set for at least an hour before serving.


© Cakespy, all rights reserved. Powered by Squarespace.