Home Home Home Home Home Home Home
CakeSpy

Featured: 

My adventure at Ben & Jerry's in Vermont!


Unicorn Love: the Eating Disorder Recovery Blog


 Buy my brilliant books!

Buy my new book!

Buy my first book, too! 

CakeSpy Online Retail!


Archives
Gallery

Fantastic appliance for cake making on DHgate.com

everyrecipe.co.nz

Craftsy Writer

Entries in recipes (704)

Wednesday
Oct152014

Union Pie: The State of the Union is Delicious

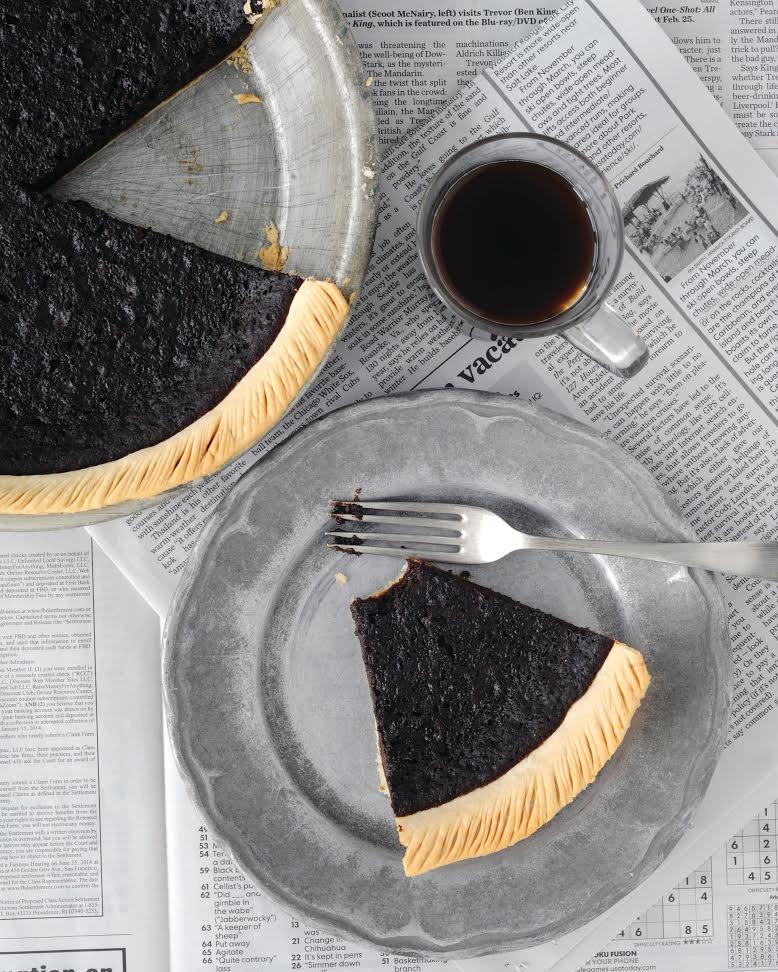
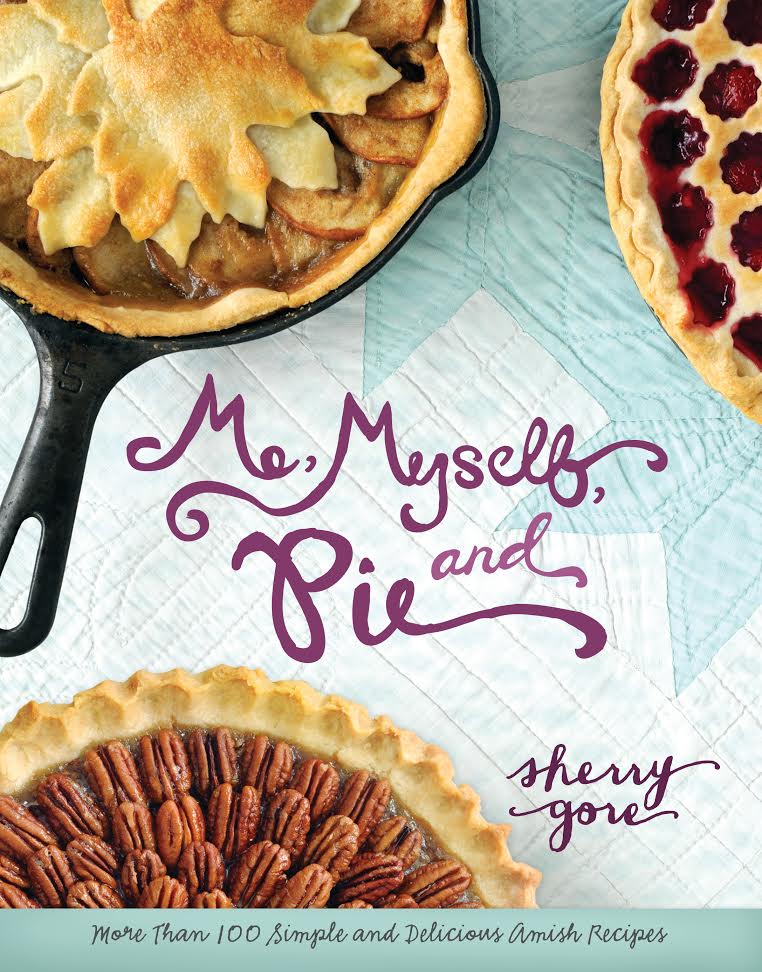
Image: Me, Myself and Pie by Sherry GoreIf there's one thing that I gained during my year living in Philadelphia, it was a deep love of Amish cuisine. Living next to the Reading Terminal Market, it was all at my fingertips--well, from Wednesday through Saturday, that is. 

This is all to say that I am immediately intrigued when I see a new book featuring Amish recipes. So suffice it to say that I was super excited to receive the new, pie-centric Me, Myself, and Pie by Sherry Gore. And guess what? It's as awesome as you might think an Amish pie recipe book would be. Full of recipes from the expected (Shoofly Pie) to the downright unusual (Union Pie, which is featured here) and with many lovely sweet and savory recipes in-between, I think that this book is a fine addition to any baker's repertoire, especially if you liked my second book, The Secret Lives of Baked Goods: Sweet Stories & Recipes for America's Favorite Desserts, and have an interest in the stories behind sweets. (Like how I just plugged my book there? Yup, just did it. BUY IT.)

I am excerpting the recipe for "Union Pie" from the book. This recipe immediately intrigued me because A) I'd not seen it before, and B) in the picture, it looked almost like a pie filled with tar, so dark was the filling. Turns out it's a slurry made primarily of molasses, buttermilk, sour cream, and spices. Well. I'll let Sherry Gore take it from here with the headnote and recipe--enjoy!

Thanks to Harper Collins for letting me reprint the recipe, which is from Me, Myself, and Pie by Sherry Gore.

Union Pie

I love this pie! Made with sour cream, buttermilk, and dark molasses, this custard confidently charges in like a brisk cup of licorice coffee to preserve the harmony between your fork and your sweet tooth. United we stand, indeed.

FOR THE CRUST

  • One 9-inch unbaked pastry pie crust

INGREDIENTS

  • 1/2 cup sour cream
  • 1/2 cup buttermilk (or sour milk)
  • 1/2 cup molasses
  • 1 large egg, beaten
  • 1/2 cup sugar
  • 1 tablespoon plus 1 teaspoon flour
  • 1/4 teaspoon baking soda
  • 1/2 teaspoon ground cinnamon
  • 1/2 teaspoon ground nutmeg

TO PREPARE

  1. Preheat oven to 400°F.
  2. In a bowl, combine sour cream, buttermilk, molasses, and egg.
  3. In a separate bowl, combine flour, baking soda, cinnamon, and nutmeg. Pour the flour mixture into the sour cream mixture and combine thoroughly.
  4. Pour the mixture into the unbaked pie crust.
  5. Bake at 400°F for 10 minutes. Reduce heat to 350°F and continue baking for 20–25 minutes, until a knife inserted into the center comes out clean.

Have you ever heard of Union Pie?

Tuesday
Oct142014

Pillsbury Bake-Off Countdown: Creamy Peanut Butter-Filled Chocolate Cupcakes

CakeSpy Note: OMG! It's getting to be that time of year again. The Pillsbury Bake-Off is coming in November! Since I so deeply loved attending the 45th Bake-Off as well as the 46th Bake-Off, I thought I would get you excited the 47th one early by sharing all of the sweet recipes in the running. I will focus on sweets! You can follow them by clicking the bakeoff tag below to see the recipes posted so far (as well as recipes from previous Bake-Off events). 

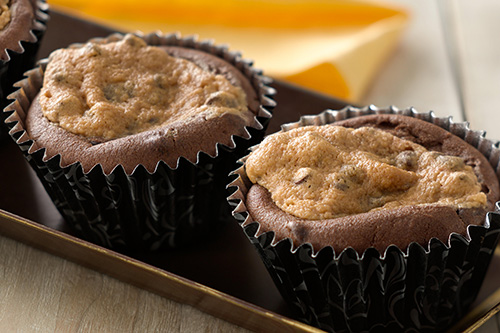
 What is better than peanut butter and chocolate? Cupcakes jammed with the killer combo, of course! This recipe takes a good thing and makes it even better with the addition of cake (which is cleverly made with gluten-free cookie dough!). Thanks to Klaren Gerhart of Bloomfield Hills, Michigan, for coming up with this clever and tasty recipe.

Creamy Peanut Butter-Filled Chocolate Cupcakes

  • Prep Time: 20 Min
  • Total Time: 1 Hr 45 Min
  • Makes: 12 cupcakes

Ingredients

  • 1 container Pillsbury Gluten Free refrigerated chocolate chip cookie dough
  • 1/4 cup unsweetened baking cocoa
  • 2 tablespoons white vinegar
  • 1 teaspoon Watkins Original Double Strength Vanilla Extract
  • 3/4 cup creamy peanut butter
  • 1/3 cup granulated or powder sugar
  • 1/2 cup miniature semisweet chocolate chips

Procedure

  1. Heat oven to 350°F. Let cookie dough stand at room temperature 10 minutes to soften. Line 12 regular-size muffin cups with baking cups.
  2. In large bowl, break up cookie dough. Add cocoa, vinegar, vanilla and 1/2 cup water. Beat with electric mixer on low speed 2 minutes or until well blended. Spoon about 1/4 cup batter into each muffin cup, filling about 2/3 full.
  3. In a small bowl, beat peanut butter and sugar with electric mixer on medium speed, scraping bowl occasionally, 2 minutes or until well blended; stir in chocolate chips. Spoon or pipe 1 rounded tablespoonful peanut butter mixture in center of each muffin cup.
  4. Bake 23 to 26 minutes or until toothpick inserted in cake around edges comes out clean. Cool 15 minutes; remove from pan to cooling rack. Cool completely, about 20 minutes. Store in covered container.


Tuesday
Oct142014

Prunes Are Not Just for Old People: Paczki With Prune Butter

Paczki - ovenly book

Prunes have a bit of a reputation for being a food beloved by cranky old people. I say this lovingly, because my grandma is one of those cranky old people. 

But here's the thing: I like prunes. And I think you will, too, especially when they're accompanied by deliciously fried paczki, a sort of Polish doughnut which is famous especially around Lent. This recipe is excerpted from Ovenly: Sweet and Salty Recipes from New York's Most Creative Bakery. Enjoy!

PS: If prunes aren't your bag, there's a blueberry jam recipe at the bottom, too. 
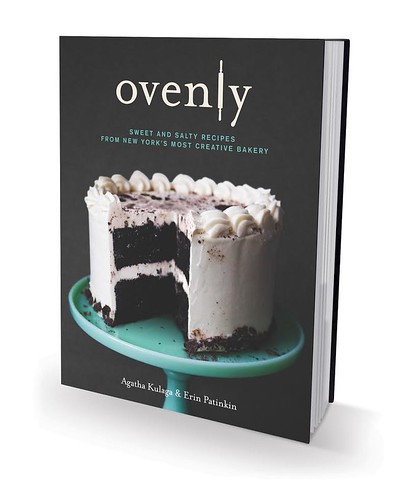
Ovenly book

PĄCZKI WITH PRUNE BUTTER

Yield: approximately 20 pączki

I kinda hate doughnuts. An unfortunate mishap involving a cruller at a gas station in rural Wisconsin when I was ten years old scarred me for life. But then came pączki. Pączki (pronounced ponch-ky) are served in Poland on Easter, and the first year we met, incredulous that I hated doughnuts, Agatha bought one for me from a local Greenpoint bakery. Hot, crispy, tender and sweet, she proved to me that doughnuts could be awesome (though I’m still cruller averse). For our cookbook, Agatha’s dad, Zdzislaw, sent us a recipe from Agatha’s great aunt, with a serious note reminding us that pączki are good to make no matter the time of year. In homage to Eastern Europe, we’ve stuffed our version with prune butter, but any fruit spread will do.

Ingredients


  • 1½ cups whole milk + more for thinning the dough
  • 3 tablespoons + 2¼ teaspoons (1¼ ounces) active dry yeast
  • 1 tablespoon + 4 tablespoons + ½ teaspoon sugar
  • ½ cup + 5¾ cups all-purpose flour, sifted + more for kneading
  • 1½ tablespoons unsalted butter
  • 4 egg yolks
  • ¼ cup rum or spirytus (neutral spirits)
  • 3 cups safflower or peanut oil, for frying + more for oiling the bowl
  • Prune butter or homemade jam, for filling
  • Confectioners’ sugar, for dusting


Procedure

1. Heat the whole milk in a small saucepan over medium-low heat, to 110⁰F to 115⁰F.

2. Dissolve the yeast in the warm milk in a medium bowl. Add 1 tablespoon of the sugar and a ½ cup of the flour, whisk together thoroughly and set aside.

3. In a small saucepan or in a small, microwave-safe bowl in a microwave oven, melt the butter and set aside to cool.

4. In a separate small bowl, vigorously whisk together the remaining 4 tablespoons and ½ teaspoon sugar, egg yolks and rum until frothy.

5. Place the remaining 5¾ cups flour in a large bowl. Whisk the yeast mixture again, and pour it over the flour. Add the egg mixture, and mix with a wooden spoon or a spatula until the dough just starts to come together. Add the melted butter, and combine until smooth.

6. Liberally flour a work surface, and turn the dough out onto it. Knead the dough until it comes together and no longer sticks to your hands when worked. If the dough seems dry, add a little more milk and knead. If the dough seems too wet, add a bit more flour.

7. Lightly oil a large bowl and place the dough in it. Cover with a towel or plastic wrap, and let rise in a warm area until it doubles in size (about 1 hour).

8. Punch the dough down and separate it into 2 balls. Flour your work surface again, and roll the first ball into a disk about ½-inch thick.

9. Using a 3-inch cookie cutter or an inverted drinking glass, cut rounds out of the dough. Set the scraps of dough aside.

10. Place 1 tablespoon prune butter in the center of 1 of the rounds. Top it with another round, and pinch the seams with your fingers to seal the edges. Then bring together the edges of the dough on 1 side to create a sphere (see process below), and pinch to make a new seam. Reshape each ball with your hands to re-form it into a fluffy round shape. Repeat this process for the remaining rounds. Set each filled pączki on a floured surface.

11. Repeat this process with the remaining ball of dough. Reroll all the scraps of dough, and repeat this process again.

12. Let the filled pączki rise for 20 minutes, or until fluffy.

13. After the pączki have risen for 15 minutes, heat the oil in a heavy-bottomed steel or cast-iron skillet to 350ºF on a candy thermometer, and line a large plate or a cooling rack with paper towels.

14. Once the oil is ready, use a slotted spoon to carefully place 3 or 4 pączki in the hot oil. Fry for 45 seconds, or until golden brown on 1 side. Flip the pączki and fry on the other side until golden brown, about 25 to 35 seconds.

15. Remove the pączki from the oil immediately and transfer to the prepared plate or cooling rack.

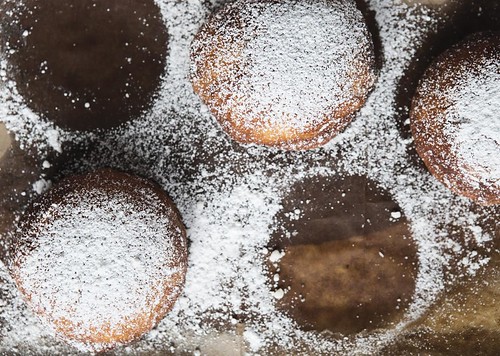
16. Let the pączki cool completely. Using a fine-mesh sieve, sprinkle them with confectioners’ sugar. Serve immediately.

Pączki Process:

  1. Once the prepared dough is rolled out, use a 3-inch cookie cutter or an inverted drinking glass to cut rounds out of the dough.

  2. Place the filling in the center of 1 of the rounds.

  3. Top it with another round.

  4. Repeat this process with the remaining rounds.

  5. Pinch just the ends with your fingers to seal the edges securely.

  6. Reshape the pączki so that they are fluffy and round, and set them aside to rise for 20 minutes.

  7. Heat the oil in a skillet to 350ºF. Fry the pączki until they are golden brown on each side.

  8. Remove the pączki from the oil and transfer them to a plate or a cooling rack lined with paper towels to drain.

  9. Using a fine-mesh sieve, sprinkle the cooled pączki with confectioners’ sugar.

Note:  To ensure your pączki are perfectly fried but not greasy, heat your oil to 350⁰F before frying and reheat it to 350⁰F between batches.

QUICK & EASY BLUEBERRY JAM

Yield: approximately 1½ cups

What better accompaniment to a scone than butter and jam? Since we sell a lot of scones at Ovenly, we go through a lot of fixin’s, as well. With all the fruit we have on hand, it was a no-brainer for us to start making our own jam. Don’t be intimidated: all you have to do is throw everything into a large pot, heat and…wait.


  • 2 pounds fresh or frozen blueberries
  • ¼ cup honey


1. Place the blueberries and honey in a medium saucepan. Heat over medium-high heat, stirring constantly to prevent burning, for 4 minutes.

2. After about 4 minutes, the blueberries will start to sweat. Turn the heat up to high, and stir until the liquid comes to a boil. Then reduce the heat to medium-low and allow the mixture to simmer for about 18 to 20 minutes, stirring every 3 to 4 minutes. The mixture thickens as it reduces.

3. For a juicier jam, reduce the cooking time by a few minutes. For a thicker consistency, cook the jam for the full 20 minutes. The longer you cook the jam, the thicker it will be.

4. Set the jam aside to cool and thicken fully. Store it in the refrigerator for up to 1 week.

Credit: “Excerpted from Ovenly by Agatha Kulaga & Erin Patinkin (Harlequin Nonfiction). Copyright © 2014. Photographs by Winona Barton-Ballentine.”


Tuesday
Oct142014

Pillsbury Bake-Off Countdown: Glazed Orange Muffins

Orange muffins - Bake-Off

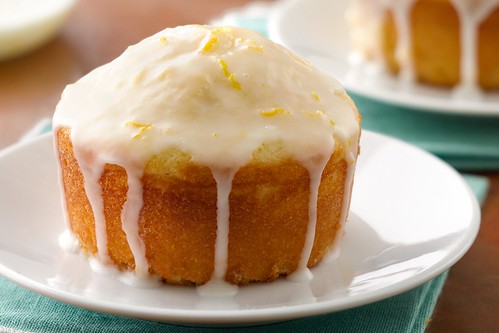
Paula Mahagnoul of Keystone, South Dakota knows what the keystone of an awesome breakfast is: muffins made with sugar cookie dough. Yep, that's right!

These zesty muffins come together in minutes and guarantee warm feelings on chilly mornings. Good luck at the Bake-Off!

Glazed Orange Muffins

  • Prep Time: 20 Min
  • Total Time: 1 Hr
  • Makes: 6 muffins

Ingredients

  • 1 roll Pillsbury refrigerated sugar cookie dough
  • 1/2 cup buttermilk
  • 1 egg
  • 1 1/2 teaspoons Watkins™ Pure Orange Extract
  • 2 1/2 teaspoons grated orange peel
  • 1/2 teaspoon baking powder
  • 1 cup powdered sugar

Procedure

  1. Heat oven to 350°F. Spray 6 jumbo muffin cups with Crisco® Butter Flavor or Original No-Stick Cooking Spray, or place Reynolds® Baking Cup in each muffin cup.
  2. In large bowl, break up cookie dough. Add buttermilk, egg, 1 teaspoon of the orange extract, 2 teaspoons of the orange peel and the baking powder. Beat with electric mixer on low speed 30 to 60 seconds or until well blended. Spoon about 1/3 cup batter into each muffin cup, filling about two-thirds full.
  3. Bake 25 to 30 minutes or until toothpick inserted in center comes out clean. Remove from pan to cooling rack. Cool 10 minutes.
  4. Meanwhile, in small bowl, mix powdered sugar, remaining 1/2 teaspoon of the orange extract, remaining 1/2 teaspoon of the orange peel and 2 to 3 teaspoons water until smooth and thin enough to glaze. Remove baking cups from muffins, if used. Spoon and spread glaze over muffins, allowing some to drip down sides. Serve warm. Store covered.

Note: the Pillsbury Bake-Off is coming in November! Check out my coverage of the 45th and 46th Bake-Off, and follow the recipes posted so far by clicking the bakeoff tag below.

Tuesday
Oct142014

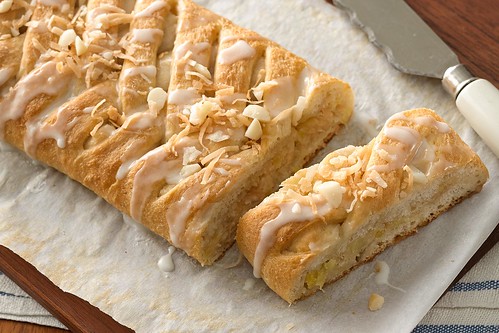
Pillsbury Bake-Off Countdown: Glazed Hawaiian Braid

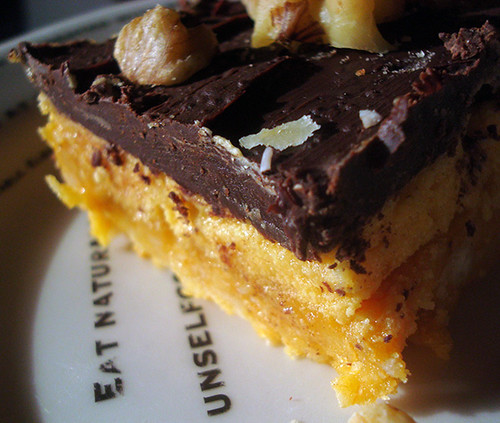
Hawaiian bread

CakeSpy Note: OMG! It's getting to be that time of year again. The Pillsbury Bake-Off is coming in November! Since I so deeply loved attending the 45th Bake-Off as well as the 46th Bake-Off, I thought I would get you excited the 47th one early by sharing all of the sweet recipes in the running. I will focus on sweets! You can follow them by clicking the bakeoff tag below to see the recipes posted so far (as well as recipes from previous Bake-Off events). 

Is it cold where you are right now? It suddenly and relentlessly got cold here, so I am dreaming of the tropics. Cindy Nerat of Menominee, Michigan must have heard me, because she came up with this dreamy glazed Hawaiian bread as her entry to the Pillsbury Bake-Off. Sounds like a getaway breakfast is in order!

Glazed Hawaiian Bread

  • Prep Time: 15 Min
  • Total Time: 1 Hr
  • Makes: 12 servings

Ingredients

  • 3/4 cup coconut, toasted
  • 1/2 cup macadamia nuts, chopped
  • 1/2 cup mascarpone cheese (4 oz)
  • 1 cup powdered sugar
  • 2 teaspoons orange extract
  • 1 can (8 oz) crushed pineapple, drained, juice reserved
  • 1 can Pillsbury refrigerated crusty French loaf

Procedure

  1. Heat oven to 350°F. Line large cookie sheet with parchment paper.
  2. In small bowl, mix 1/4 cup of the coconut and 2 tablespoons of the macadamia nuts; set aside. In medium bowl, mix mascarpone cheese, 1/2 cup of the powdered sugar and the orange extract until well blended. Stir in pineapple, remaining 1/2 cup coconut and remaining macadamia nuts.
  3. Carefully unroll dough on work surface; press to form 12x10-inch rectangle. Fold dough rectangle into thirds; transfer to cookie sheet. Unfold dough rectangle. Spread mascarpone mixture down center of dough in 4-inch-wide strip to within 1/2 inch of short ends. Using kitchen scissors or sharp knife, make cuts 1 inch apart on long sides of dough to within 1/2 inch of filling. Fold strips of dough diagonally over filling, alternating from side to side, stretching dough as needed.
  4. Bake 22 to 32 minutes or until tops of strips are golden brown. Cool about 10 minutes.
  5. Meanwhile, in small bowl, mix remaining 1/2 cup powdered sugar and 4 to 5 teaspoons of the reserved pineapple juice until smooth and thin enough to drizzle. Drizzle glaze over braid; sprinkle with reserved coconut mixture. Serve warm.
Tuesday
Oct142014

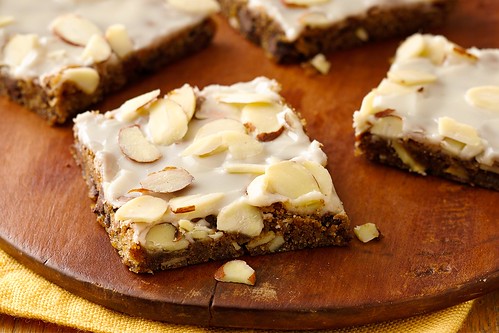
Pillsbury Bake-Off Countdown: Chocolate Chip-Espresso-Almond Bars

Espresso chocolate chip almond bars

Um, yum? I would like to enjoy one or possibly ten of these chocolate chip espresso almond bars. It's like a candy bar, coffee shop visit, and cookie, all at once! Thanks to Sharon Kershner of Fleetwood, Pennsylvania for dreaming up these sweet treats. Good luck at the Bake-Off!

Chocolate Chip-Espresso-Almond Bars

  • Prep Time: 20 Min
  • Total Time: 1 Hr 30 Min
  • Makes: 24 bars

Ingredients

  • 1 container Pillsbury™ Gluten Free refrigerated chocolate chip cookie dough
  • 1/2 cup sliced almonds
  • 1 tablespoon instant espresso coffee powder or granules
  • 1/2 teaspoon Watkins™ Imitation Almond Extract
  • 1 cup powdered sugar
  • 1 to 2 tablespoons milk
  • 1/2 teaspoon Watkins™ Pure Vanilla Extract

Procedure

  1. Heat oven to 350°F. Spray 13x9-inch pan with Crisco® Original No-Stick Cooking Spray.
  2. In medium bowl, break up cookie dough. Add 1/4 cup of the sliced almonds, the espresso powder and almond extract. Mix with wooden spoon, or knead with hands until well blended. Press dough evenly in bottom of pan. Bake 13 to 18 minutes or until golden brown and center is set. Cool completely, about 30 minutes.
  3. Meanwhile, in medium bowl, stir powdered sugar, 1 tablespoon of the milk and the vanilla until smooth; add additional milk, 1 teaspoon at a time, until desired spreading consistency. Spread glaze over cooled bars; sprinkle with remaining 1/4 cup sliced almonds. Refrigerate about 10 minutes or until glaze is set. Cut into 6 rows by 4 rows.

Note: the Pillsbury Bake-Off is coming in November! Check out my coverage of the 45th and 46th Bake-Off, and follow the recipes posted so far by clicking the bakeoff tag below.

Monday
Oct132014

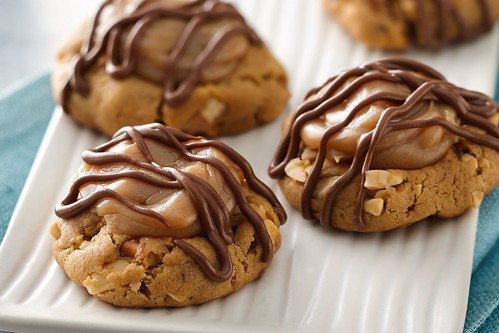
Pillsbury Bake-Off Countdown: Peanut and Pretzel-Peanut Butter Thumbprints

Peanut and Pretzel-Peanut Butter Thumbprints

Sometimes you can just tell that a recipe is going to enter your permanent rotation. These clever cookies by Barbara Estabrook of Rhinelander, Wisconsin are just such a recipe. Sweet and salty all at once, the rich peanut butter is what will keep me coming back.

Peanut and Pretzel-Peanut Butter Thumbprints

  • Prep Time: 30 Min
  • Total Time: 1 Hr 35 Min
  • Makes: 30 cookies

Ingredients

  • 1 can (14 oz) Eagle Brand® Sweetened Condensed Milk
  • 1/2 cup creamy peanut butter
  • 1 teaspoon vanilla extract
  • 1 roll Pillsbury™ refrigerated peanut butter cookie dough
  • 2/3 cup chopped unsalted roasted peanuts
  • 1/2 cup coarsely chopped mini-pretzel twists
  • 1/2 cup milk chocolate chips

Procedure

  1. Heat oven to 350°F. In 1-quart heavy saucepan, heat condensed milk and peanut butter over medium-low heat 8 to 10 minutes, stirring frequently, until slightly thickened. Remove from heat; stir in vanilla until well blended. Refrigerate about 20 minutes or until thickened.
  2. Meanwhile, in large bowl, break up cookie dough. Add peanuts and pretzels. Mix with wooden spoon, or knead with hands until well blended. Shape dough into 30 (about 1 1/4-inch) balls. Place 2 inches apart on ungreased cookie sheets. Bake 5 to 10 minutes or until edges are light golden brown. Remove from oven; immediately press back of teaspoon into center of each cookie to make indentation. Cool 2 minutes; remove from cookie sheets to cooling racks. Cool completely, about 20 minutes.
  3. Place peanut butter mixture in large resealable food-storage plastic bag. Cut off small corner of bag. Squeeze bag to pipe about 1 tablespoon mixture in center of each cookie to fill indentation.
  4. In small microwavable bowl, microwave chocolate chips uncovered on High 40 to 60 seconds, stirring once, until chips can be stirred smooth. Place melted chips in small resealable food-storage plastic bag. Cut off tiny corner of bag. Squeeze bag to drizzle melted chips over cookies. Let stand 10 minutes. Store covered.

Note: the Pillsbury Bake-Off is coming in November! Check out my coverage of the 45th and 46th Bake-Off, and follow the recipes posted so far by clicking the bakeoff tag below.

Monday
Oct132014

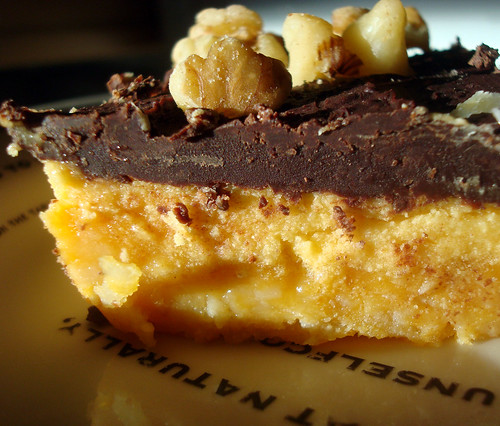
Fall, Canadian-Style: Pumpkin Nanaimo Bars

Although Nanaimo bars are perfect just as they are, sometimes it's nice to get celebratory about the season.

Just as people enjoy putting on sweaters and drinking pumpkin spice lattes, Nanaimo bars like to get their Fall on. These ones are a lovely fall treat, with pumpkin and pumpkin pie spice mixed into both the bottom and middle layers. Now, the pumpkin in the bottom layer does make them moist to the point that you want to keep them in the refrigerator, but I think the slightly annoying texture will be forgiven when you take your first creamy, custard-y, kissed with earthy pumpkin-flavored bite. 

Pumpkin Nanaimo Bars

Many of the key components of a Nanaimo bar remain constant: nuts and coconut in the crust, the Bird's custard in the middle section, and of course the chocolate topping. I tested out white and butterscotch chips on the topping, and while they looked pretty, chocolate definitely won the taste test.

Feel like getting your fall on with a tasty Canadian treat? Let's go. 

For the bottom layer

  • 1/2 cup (1 stick) butter
  • 1 tablespoon pumpkin puree
  • 1 teaspoon pumpkin pie spice
  • 1/4 teaspoon salt
  • 1 large egg, beaten
  • 1 cup shredded sweetened coconut
  • 2 1/4 cups finely crushed sugar cookies
  • 1/2 cup finely chopped nuts (almonds are traditional; pecans or walnuts work well, too)

For the middle layer

  • 1/2 cup (1 stick) butter
  • 2 tablespoons heavy cream
  • 1/4 cup pumpkin puree
  • 2 tablespoons Bird’s Custard Powder, or substitute vanilla pudding powder (instant)
  • 2 cups confectioners’ sugar, sifted
  • 2 teaspoons pumpkin pie spice

For the top layer

  • 4 ounces chocolate (or white chocolate or butterscotch morsels), coarsely chopped
  • 1 1/2 tablespoons butter

Step 1: Prepare the bottom layer.

Pumpkin Nanaimo Bars

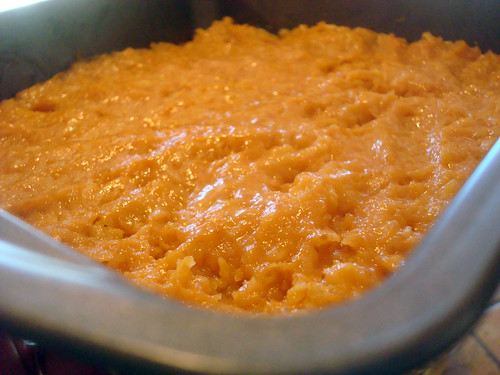
Melt the butter, pumpkin, salt, and spice in a medium saucepan over low heat until fully incorporated, but do not let the mixture come to a boil. Add the beaten egg and stir constantly until the mixture begins to thicken, less than 5 minutes. Remove from heat and stir in the cookie crumbs, coconut and nuts. Press down firmly into a greased 8″ by 8″ pan; try to make the mixture as flat as possible in the pan. Let this cool for about 20 minutes in the freezer (you want it to be as firm as possible, and the pumpkin variation never becomes quite as firm as the bottom of a traditional Nanaimo bar).

Step 2: Prepare the middle layer.

Pumpkin Nanaimo Bars

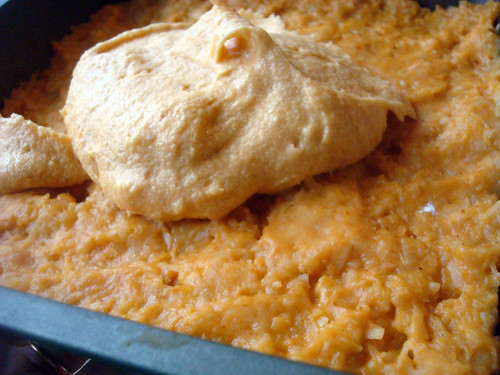
In a stand mixer fitted with the paddle attachment, cream the butter, cream, pumpkin, spice, custard powder and confectioners’ sugar together until very light and fluffy, 3 to 5 minutes. Spread over the bottom layer, taking care to spread it as flat and evenly as possible. Consider flattening with an offset spatula.

Basically, the flatter this level, the flatter the chocolate will lie on the top. Return the pan to the refrigerator while you prepare the topping.

Step 3: Prepare the top layer.

Pumpkin Nanaimo Bars

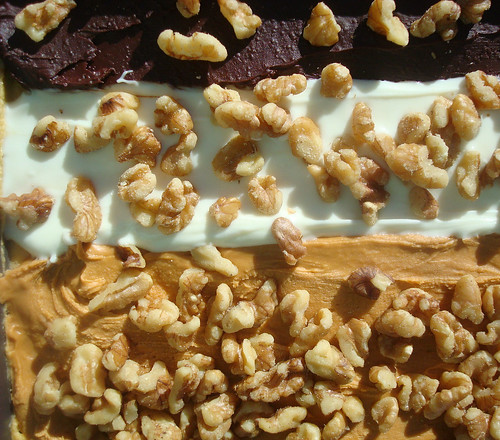
Can't decide whether you want chocolate, white chocolate, or butterscotch? Do as I did and make three separate batches! Or, stick to one fave.

In a medium saucepan or double boiler, melt the chocolate and butter over medium heat, stirring often to ensure that the mixture doesn’t scorch. Remove from heat. Let sit until the mixture is still liquid but very thick, then pour it over the second (middle) layer and gently spread it with a spatula to ensure even coverage

Note: Work carefully, because the still-warm chocolate will get messy if you press too hard while spreading it and tear up the buttery layer below.

Be sure to score the tops of the bars before the chocolate totally sets on top. This will make slicing them much easier later.

Typically, Nanaimo bars are sliced in fingers rather than squares. You can slice them any way you like, of course, but for an authentic look, split into eight rows in one direction and six rows the other way, so that they are slightly elongated when sliced.

Pumpkin Nanaimo Bars

Let the chocolate set on the bars, then place in the refrigerator for at least 20 minutes before serving. Run a knife under hot water and then dry off before slicing; this will help the knife go through the bars easily. Clean the knife frequently between cuts.

Have you ever tried a Nanaimo bar? If not, check out these other tasty variations:

Classic Nanaimo bars Triple chocolate Nanaimo bars

Shortbread Nanaimo bars

Conversation Heart Nanaimo bars

Saturday
Oct112014

Pillsbury Bake-Off Countdown: Cinnamon Roll-Pear Bread Pudding

CakeSpy Note: OMG! It's getting to be that time of year again. The Pillsbury Bake-Off is coming in November! Since I so deeply loved attending the 45th Bake-Off as well as the 46th Bake-Off, I thought I would get you excited the 47th one early by sharing all of the sweet recipes in the running. I will focus on sweets! You can follow them by clicking the bakeoff tag below to see the recipes posted so far (as well as recipes from previous Bake-Off events). 

What a fantastic pear-ing! Cinnamon rolls are a fantastic medium for baking bread pudding, but have you ever tried it with a ripe, juicy pear?

Elizabeth Albert of Highland Park, Illinois, did just that and it's put her in the running to win a million dollars at the Bake-Off, so perhaps it's something you should try (how about this weekend?).

Cinnamon Roll-Pear Bread Pudding

  • Prep Time: 15 Min
  • Total Time: 1 Hr 45 Min
  • Makes: 8 servings

Ingredients

  • 3 tablespoons butter
  • 1 can Pillsbury refrigerated cinnamon rolls with icing (8 rolls)
  • 1 can (14 oz) sweetened Condensed Milk
  • 2 eggs, beaten
  • 1 teaspoon vanilla extract
  • 1/4 teaspoon nutmeg
  • 2 firm ripe pears (1 lb), peeled, thinly sliced

Procedure

  1. Heat oven to 375°F. Grease bottom and side of 8-inch round cake pan with 1 teaspoon of the butter. Bake cinnamon rolls in pan as directed on can; reserve icing. Cool 10 minutes. Reduce oven temperature to 350°F. Grease bottom and sides of 9-inch square pan with 1 teaspoon of the butter.
  2. Meanwhile in medium bowl, beat sweetened condensed milk, 1/2 cup water, the eggs, vanilla and nutmeg with whisk until well blended.
  3. With serrated knife, cut each cinnamon roll in half, forming 2 layers. Place layers, cut sides up, in bottom of square pan, overlapping as necessary. Drop remaining butter by 1/4 teaspoons over rolls. Pour half of the egg mixture evenly over rolls and butter; layer pear slices over rolls. Pour remaining egg mixture over pears.
  4. Bake 40 to 50 minutes or until edges are golden brown and knife inserted in center comes out clean. Cool 15 minutes. Top each serving with about 1 1/2 teaspoons of the reserved icing.
Thursday
Oct092014

Pillsbury Bake-Off Countdown: Bacon and Date Cinnamon Roll Strata

CakeSpy Note: OMG! It's getting to be that time of year again. The Pillsbury Bake-Off is coming in November! Since I so deeply loved attending the 45th Bake-Off as well as the 46th Bake-Off, I thought I would get you excited the 47th one early by sharing all of the sweet recipes in the running. You can follow them by clicking the bakeoff tag below to see the recipes posted so far (as well as recipes from previous Bake-Off events).
 

Bacon might not make everything better, but the list of things it does improve is far longer than the list of things it doesn't. 

Still following? Good. It's time to explore a recipe which illustrates the above: Bacon and Date Cinnamon Roll Strata. This oeuvre was dreamed up by Rita Hattrup of San Rafael, California, and promises to make your next brunch extremely memorable.

Bacon and Date Cinnamon Roll Strata

  • Prep Time: 30 Min
  • Total Time: 1 Hr 45 Min
  • Makes: 8 servings

Ingredients

  • 1 can Pillsbury Grands! Flaky Supreme refrigerated cinnamon rolls with icing (5 rolls)
  • 1/2 lb thick-sliced bacon, cut into 1/2-inch slices
  • 3/4 cup chopped dates (from 8-oz box)
  • 3 oz cream cheese, cut into 1/2-inch cubes (from 8-oz package)
  • 3 cups milk
  • 4 eggs
  • 1/2 teaspoon almond extract

Procedure

  1. Heat oven to 350°F. Bake cinnamon rolls as directed on can; reserve icing. Remove from pan to cooling rack. Cool completely, about 20 minutes.
  2. Meanwhile, in 10-inch skillet, cook bacon over medium-high heat, stirring occasionally, until crisp; drain on paper towels. Brush about 1 teaspoon bacon drippings over bottom and side of 11x7-inch (2-quart) glass baking dish.
  3. Cut cinnamon rolls into 1-inch cubes. Place half of the cinnamon roll cubes in baking dish. Sprinkle with half of the dates and half of the bacon. Top evenly with cream cheese cubes. Repeat with remaining cinnamon roll cubes, dates and bacon.
  4. In large bowl, beat milk, eggs, almond extract and reserved icing with whisk until well blended. Pour over cinnamon roll mixture. Lightly press cinnamon roll cubes into egg mixture to moisten. Let stand 20 minutes.
  5. Bake 45 to 50 minutes or until center still jiggles slightly when moved and top is golden brown. Cool 10 minutes. Serve warm.
Page 1 ... 7 8 9 10 11 ... 71 Next 10 Entries »
© Cakespy, all rights reserved. Powered by Squarespace.