Prunes Are Not Just for Old People: Paczki With Prune Butter
 Tuesday, October 14, 2014
 Prunes have a bit of a reputation for being a food beloved by cranky old people. I say this lovingly, because my grandma is one of those cranky old people.
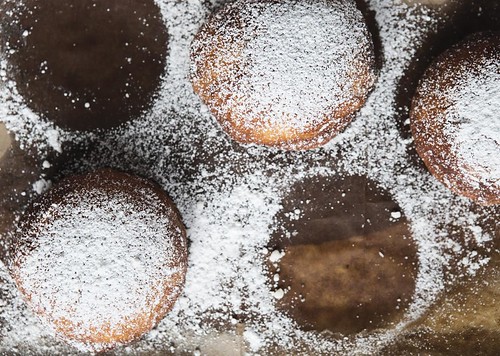
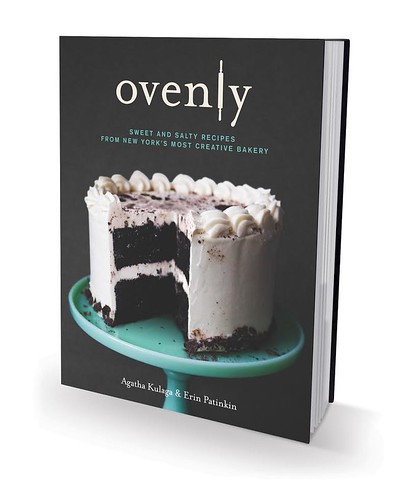
But here's the thing: I like prunes. And I think you will, too, especially when they're accompanied by deliciously fried paczki, a sort of Polish doughnut which is famous especially around Lent. This recipe is excerpted from Ovenly: Sweet and Salty Recipes from New York's Most Creative Bakery. Enjoy!
PS: If prunes aren't your bag, there's a blueberry jam recipe at the bottom, too.
PĄCZKI WITH PRUNE BUTTER
Yield: approximately 20 pączki
I kinda hate doughnuts. An unfortunate mishap involving a cruller at a gas station in rural Wisconsin when I was ten years old scarred me for life. But then came pączki. Pączki (pronounced ponch-ky) are served in Poland on Easter, and the first year we met, incredulous that I hated doughnuts, Agatha bought one for me from a local Greenpoint bakery. Hot, crispy, tender and sweet, she proved to me that doughnuts could be awesome (though I’m still cruller averse). For our cookbook, Agatha’s dad, Zdzislaw, sent us a recipe from Agatha’s great aunt, with a serious note reminding us that pączki are good to make no matter the time of year. In homage to Eastern Europe, we’ve stuffed our version with prune butter, but any fruit spread will do.
Ingredients
- 1½ cups whole milk + more for thinning the dough
- 3 tablespoons + 2¼ teaspoons (1¼ ounces) active dry yeast
- 1 tablespoon + 4 tablespoons + ½ teaspoon sugar
- ½ cup + 5¾ cups all-purpose flour, sifted + more for kneading
- 1½ tablespoons unsalted butter
- 4 egg yolks
- ¼ cup rum or spirytus (neutral spirits)
- 3 cups safflower or peanut oil, for frying + more for oiling the bowl
- Prune butter or homemade jam, for filling
- Confectioners’ sugar, for dusting
Procedure
1. Heat the whole milk in a small saucepan over medium-low heat, to 110⁰F to 115⁰F.
2. Dissolve the yeast in the warm milk in a medium bowl. Add 1 tablespoon of the sugar and a ½ cup of the flour, whisk together thoroughly and set aside.
3. In a small saucepan or in a small, microwave-safe bowl in a microwave oven, melt the butter and set aside to cool.
4. In a separate small bowl, vigorously whisk together the remaining 4 tablespoons and ½ teaspoon sugar, egg yolks and rum until frothy.
5. Place the remaining 5¾ cups flour in a large bowl. Whisk the yeast mixture again, and pour it over the flour. Add the egg mixture, and mix with a wooden spoon or a spatula until the dough just starts to come together. Add the melted butter, and combine until smooth.
6. Liberally flour a work surface, and turn the dough out onto it. Knead the dough until it comes together and no longer sticks to your hands when worked. If the dough seems dry, add a little more milk and knead. If the dough seems too wet, add a bit more flour.
7. Lightly oil a large bowl and place the dough in it. Cover with a towel or plastic wrap, and let rise in a warm area until it doubles in size (about 1 hour).
8. Punch the dough down and separate it into 2 balls. Flour your work surface again, and roll the first ball into a disk about ½-inch thick.
9. Using a 3-inch cookie cutter or an inverted drinking glass, cut rounds out of the dough. Set the scraps of dough aside.
10. Place 1 tablespoon prune butter in the center of 1 of the rounds. Top it with another round, and pinch the seams with your fingers to seal the edges. Then bring together the edges of the dough on 1 side to create a sphere (see process below), and pinch to make a new seam. Reshape each ball with your hands to re-form it into a fluffy round shape. Repeat this process for the remaining rounds. Set each filled pączki on a floured surface.
11. Repeat this process with the remaining ball of dough. Reroll all the scraps of dough, and repeat this process again.
12. Let the filled pączki rise for 20 minutes, or until fluffy.
13. After the pączki have risen for 15 minutes, heat the oil in a heavy-bottomed steel or cast-iron skillet to 350ºF on a candy thermometer, and line a large plate or a cooling rack with paper towels.
14. Once the oil is ready, use a slotted spoon to carefully place 3 or 4 pączki in the hot oil. Fry for 45 seconds, or until golden brown on 1 side. Flip the pączki and fry on the other side until golden brown, about 25 to 35 seconds.
15. Remove the pączki from the oil immediately and transfer to the prepared plate or cooling rack.
16. Let the pączki cool completely. Using a fine-mesh sieve, sprinkle them with confectioners’ sugar. Serve immediately.
Pączki Process:
-
Once the prepared dough is rolled out, use a 3-inch cookie cutter or an inverted drinking glass to cut rounds out of the dough.
-
Place the filling in the center of 1 of the rounds.
-
Top it with another round.
-
Repeat this process with the remaining rounds.
-
Pinch just the ends with your fingers to seal the edges securely.
-
Reshape the pączki so that they are fluffy and round, and set them aside to rise for 20 minutes.
-
Heat the oil in a skillet to 350ºF. Fry the pączki until they are golden brown on each side.
-
Remove the pączki from the oil and transfer them to a plate or a cooling rack lined with paper towels to drain.
-
Using a fine-mesh sieve, sprinkle the cooled pączki with confectioners’ sugar.
Note: To ensure your pączki are perfectly fried but not greasy, heat your oil to 350⁰F before frying and reheat it to 350⁰F between batches.
QUICK & EASY BLUEBERRY JAM
Yield: approximately 1½ cups
What better accompaniment to a scone than butter and jam? Since we sell a lot of scones at Ovenly, we go through a lot of fixin’s, as well. With all the fruit we have on hand, it was a no-brainer for us to start making our own jam. Don’t be intimidated: all you have to do is throw everything into a large pot, heat and…wait.
- 2 pounds fresh or frozen blueberries
- ¼ cup honey
1. Place the blueberries and honey in a medium saucepan. Heat over medium-high heat, stirring constantly to prevent burning, for 4 minutes.
2. After about 4 minutes, the blueberries will start to sweat. Turn the heat up to high, and stir until the liquid comes to a boil. Then reduce the heat to medium-low and allow the mixture to simmer for about 18 to 20 minutes, stirring every 3 to 4 minutes. The mixture thickens as it reduces.
3. For a juicier jam, reduce the cooking time by a few minutes. For a thicker consistency, cook the jam for the full 20 minutes. The longer you cook the jam, the thicker it will be.
4. Set the jam aside to cool and thicken fully. Store it in the refrigerator for up to 1 week.


Reader Comments