Home Home Home Home Home Home Home
CakeSpy

Featured: 

My adventure at Ben & Jerry's in Vermont!


Unicorn Love: the Eating Disorder Recovery Blog


 Buy my brilliant books!

Buy my new book!

Buy my first book, too! 

CakeSpy Online Retail!


Archives
Gallery

Fantastic appliance for cake making on DHgate.com

everyrecipe.co.nz

Craftsy Writer

Entries in cakespy mischief (125)

Wednesday
Jun032009

Faking It: How To Pass Off Store Bought Baked Goods as Your Own

How to fake it.
Let's be honest: there are times when you're just not feeling it. Don't worry: we're all tempted to fake it sometimes.

There are many reasons why you might want to pass off purchased baked goods as your own. Maybe you want people to think you're a better baker than you really are. Maybe you're pressed for time or ingredients. Maybe--let's be honest-- you're just plain lazy.

But don't despair. Whatever your reason may be, here are a few tips for faking it, dessert-style: by slightly editing store or bakery-bought baked goods to make them seem homemade. They're quick and easy, and bound to win you accolades--whether you deserve them or not, you lazy jerk.


Make them imperfect!Fry, baby!
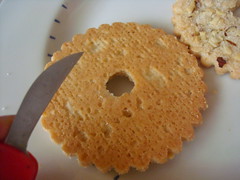
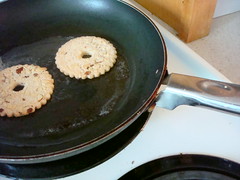
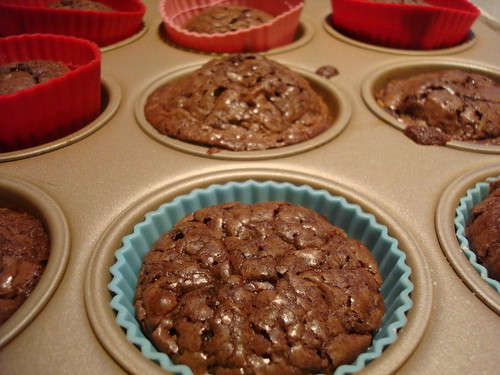
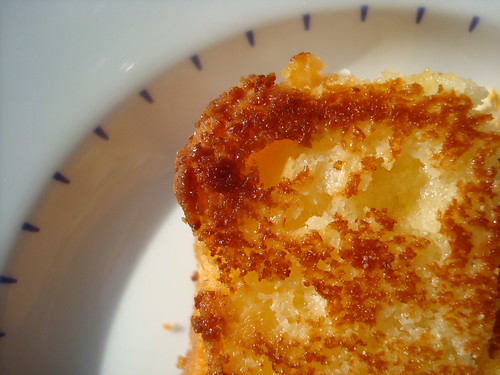
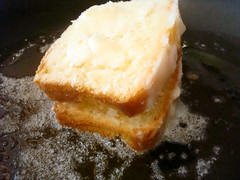
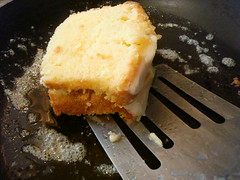
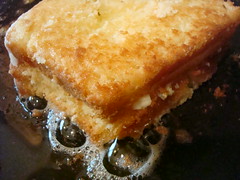
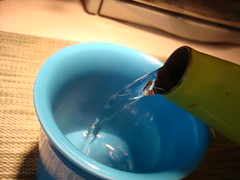
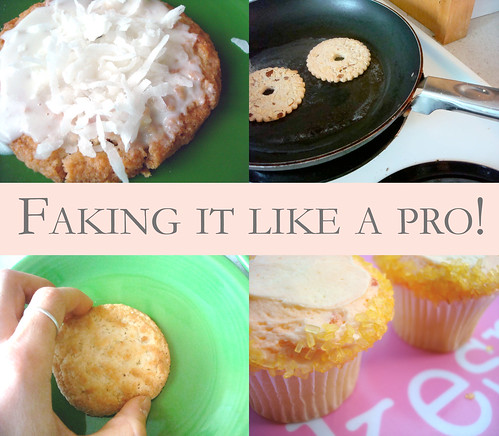
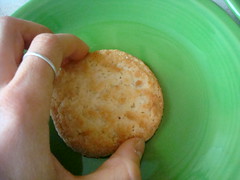
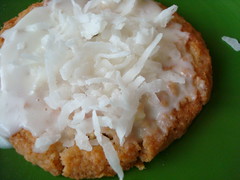
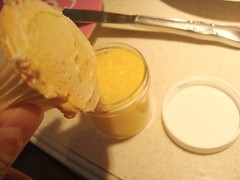
Cookies: One of the major challenges with store-bought cookies is that they are so--pardon the pun--cookie-cutter perfect. The solution? Put a pat of butter in a frying pan on medium heat. While it is heating up, take a lightly serrated knife (I used the mini one on the side of a waiter's corkscrew) and gently razor the edges of the cookie to create slight imperfections. Once the butter is lightly bubbling, place cookies in the pan. Leave them in just long enough so that they begin to brown on the bottom. Remove from heat, and with your (very clean) hand, slightly dent the tops and sides to create a slightly "homemade" look. The genius of this method is actually twofold: not only do you get a more homemade look, but the frying also gives them a buttery, freshly-baked aroma.

Shape themThis homemade cookie has a secret 
CakeSpy Note: Depending on the type of cookie, adding frosting on top is also a great added touch. Top with shredded coconut, sprinkles, or whatever you'd like for added authenticity.

Store bought sweet potato piePressing down on crust
Whipped creamSweet Potato Pie
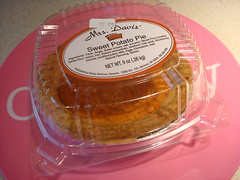
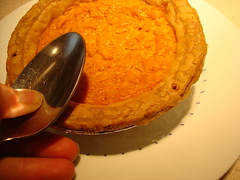
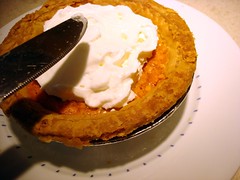
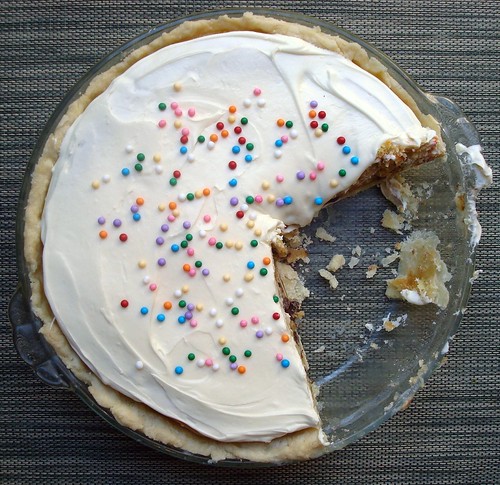
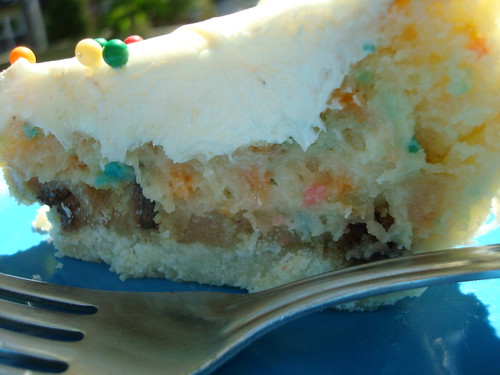
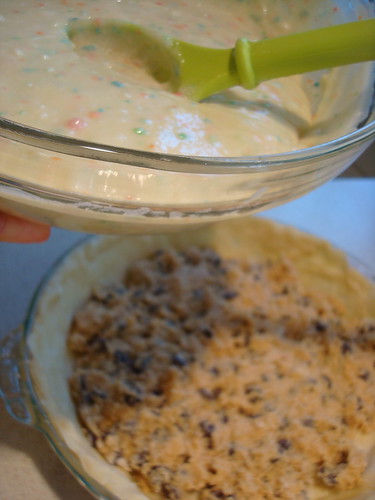
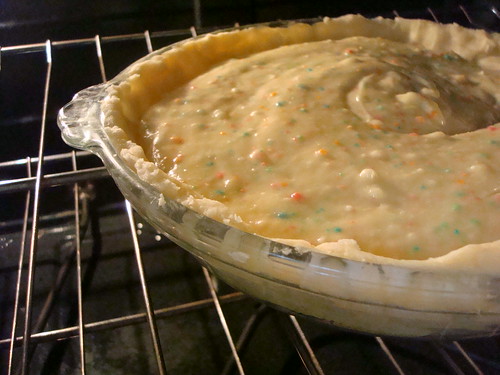
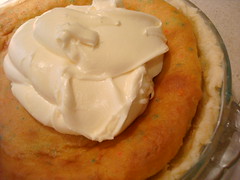
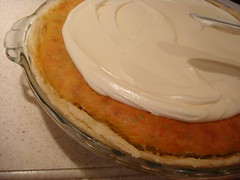
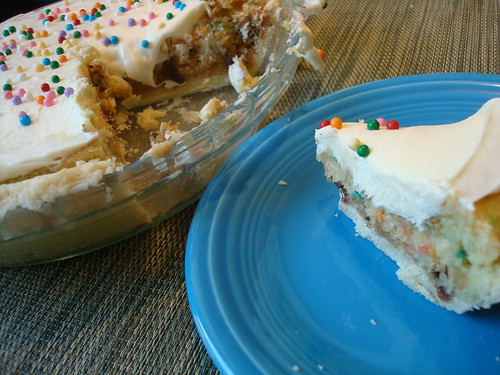
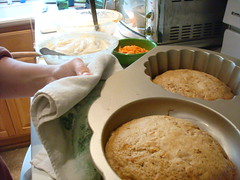
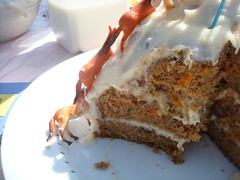
Pie: The problem with a store-bought pie can often be its too-perfect crust and perfectly even filling. What to do? First, you'll want to preheat the oven (I used 300 degrees). Once warm, place the pie in the oven for a short period of time--just about five minutes--until the crust has gotten a little bit soft. Once out of the oven, use the bottom side of a spoon to gently press down on the crust to create slight imperfections. As for that perfect topping? Cover it up! A generous topping of whipped cream, spread in a very homey, imperfect manner and then topped with cinnamon or nutmeg, gives a nice homemade touch.

Creamsicle CupcakesCupcakes
Dip it!Fake it!


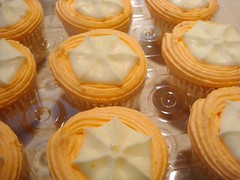
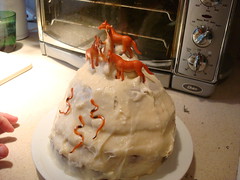
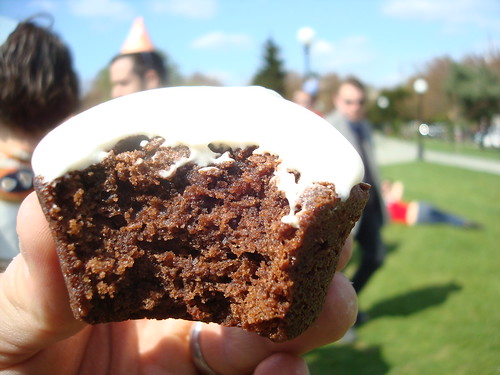
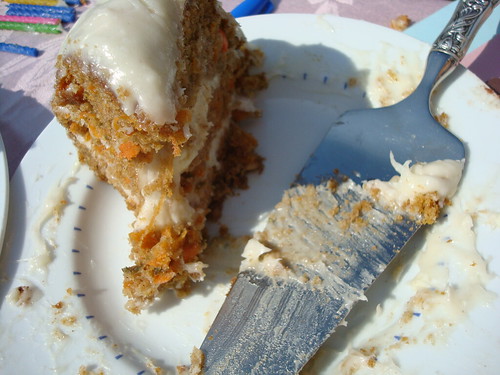
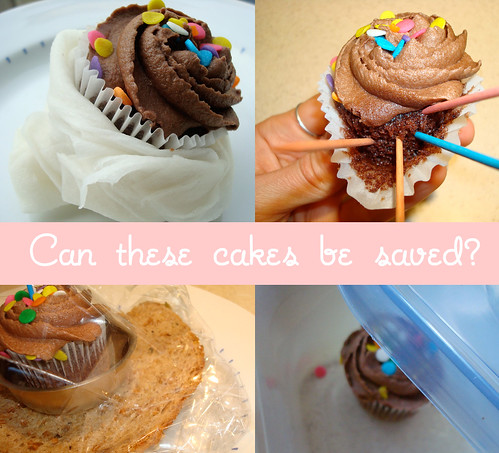
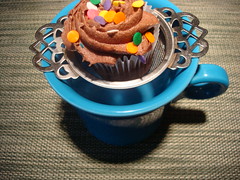
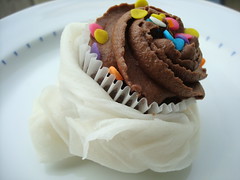
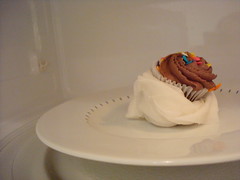
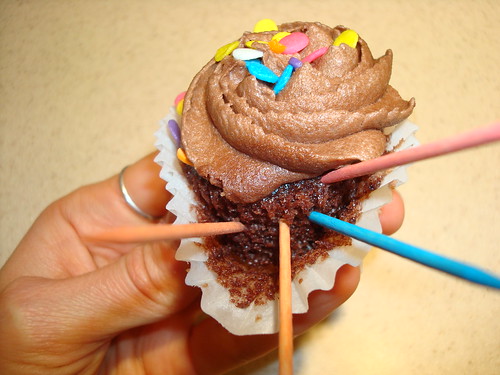
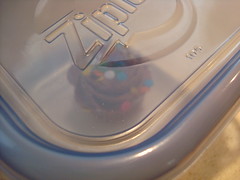
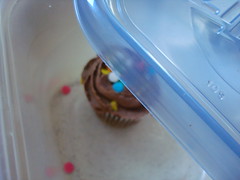
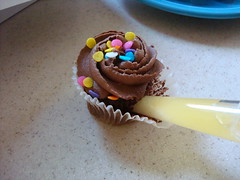
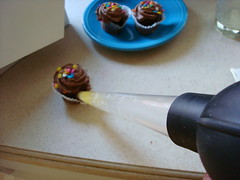
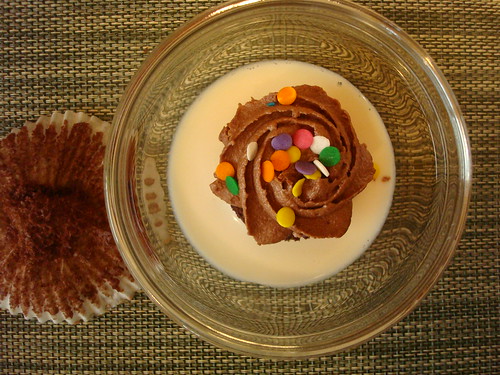
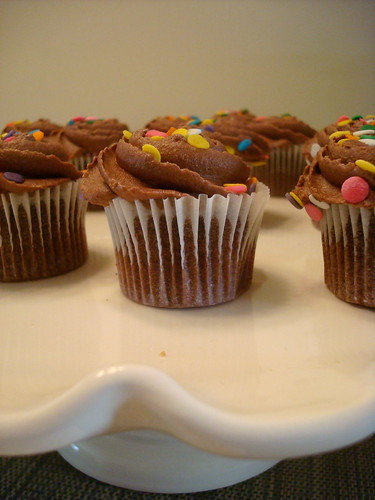
Cupcakes: The problem with cupcakes that you buy at the supermarket or at a bakery is that they are decorated just a little too beautifully. Though it might hurt you to do it, you're going to have to take them under the knife. Make sure the frosting is soft and doesn't have any crisp edges first, as they will cause weird little chunks in your reconstituted frosting. Using a butter knife, gently redistribute the frosting to look a little more homespun. To look like you tried to do something fancy at home, try dipping the sides into sprinkles. Just like homemade...sort of.

OK, so the ethics of these methods may be...questionable. But hey, it sure is fun to see if you can fool people. And nobody loses when you've got sweet treats!


CakeSpy Note: Should any of these treats arouse too much curiosity and/or inquiries about recipes, here are suggestions to nip any follow-up questions in the bud:
  • "It's my grandmother's secret recipe!"
  • "I found it on a blog...but forgot to bookmark it!"
  • "I'll email you the recipe!" (this said in a sort of "Check's in the mail", offhanded sort of way)
  • "That's weird--they do taste just like that bakery's (insert baked good here)! Excuse me." (beat a hasty exit)


Wednesday
May272009

Triple Threat: The Cookie Cake Pie

Cookie Cake Pie
Cookies, Cakes and Pies are basically the holy trinity of baked goods.

Separately, each is wonderful in its own way. Cookies and milk after school. Birthday cake. Pie at Thanksgiving.

But what if--just what if--all of this awesome could be combined into one singular sensation?

It's time to break out a seriously sweet triple play: the Cookie Cake Pie.
Cookie Cake Pie
I wish I had a more clever moniker for you, but really, the name does say it all: it's a cookie and a cake within a pie. This treat embraces the idea that if some is good, more is wonderful; it weighs more than any I've ever held in my arms, and it packs much more of a sugary punch. Excessive? Perhaps. But everyone who tried it all but licked the plate clean.

Want one of your very own? Here's what you need to do.

Cookie Cake Pie

You'll need:


Cookie Dough
First, prepare one batch of chocolate chip cookie dough. You can leave this in the fridge or to the side while you prepare the rest.

Next, prepare a single pie crust and line it into a pie plate. I considered blind-baking it, but ultimately did not, and I thought it turned out fine.
Cookie dough in pie crust
Place the cookie dough inside of the pie crust and using your fingers or a spoon, spread it so that it evenly coats the bottom of the crust. Mine was about an inch thick; I had enough cookie dough leftover to make about three big cookies, or one massive cookie dough snack.

At this point, you might want to pre-heat the oven. I considered each of the three recipes (pie, cookie and cake) and chose an average of 350 degrees.

Let the cookie-filled pie crust rest for a bit while you mix up some birthday cake. If I'm to be completely honest here, I used Rainbow Chip cake. Yes, from a mix. It just felt right, and it added such a nice color contrast. Don't judge me.
Pouring Cake Batter on Cookie dough in Pie Crust
Pour cake batter directly on top of the cookie dough til the pie crust is about 2/3 filled. The cake will rise, so you want to leave room for it. You will probably have leftover cake batter; why not make some cupcakes?
Let it Bake
Put this monster in the oven and check after about 25 minutes. I kept on checking every 5 minutes and think it ended up baking for about 30-40 minutes total. I took it out when the cake was golden around the edges. As an update, I have tried it again with other mixes and sometimes it takes up to 55 minutes.
Frost, GenerouslyFrost it!
Let cool, and frost generously with buttercream frosting (mine was approximately an inch thick--this is not the time for moderation). Garnish as desired; I thought sprinkles were festive and pretty.

Yum
Finally--and most importantly--enjoy.


Monday
May112009

Mommie Dearest: A Sweet Post-Mother's Day Treat

Mother's Cookies Truffles
Mother's Day is over--and now, with a big sigh of relief, we can go back to blaming her for everything for another year.

But there's no need to invest in a Starlee Kine-esque stint at the Hoffman Institute to work out all those mommy issues--here's a far better (and more delicious) way to take out some of that aggression: by seriously crushing some Mother's Circus Animal Cookies (which we scored through our friends at FoodBuzz!) and making delicious truffles out of them.

This is a variation of the Oreo Truffle recipe made famous by Bakerella; in this version, simply substitute a bag of the (newly re-released!) Carnival Animals by Mother's Cookies.


Mother's Cookies
Crush Your Mother's Cookies Truffles


  • 1 package Mother's Cookies
  • 1 8oz. package cream cheese (softened)
  • confectioner's dark chocolate, melted


1. Coarsely cut about six or seven cookies into small chunks. They'll be jagged and messy but that's ok, they're for garnish. Reserve for later.
Making Truffles
2. Crush remaining cookies and stir in softened cream cheese. Use the back of a large spoon to help mash the two together.
Mother?
3. Roll the mixture into 1" balls and place on waxed paper covered cookie sheet.
Truffles
4. You're supposed to melt chocolate as directed on the package and then dip balls into chocolate--but I'm lazy so I just poured it on top of each (which ended up giving them an extra chocolate "foot"--yum). Set aside on wax paper covered cookie sheet to dry. 

You can sprinkle the tops with the coarsely chopped cookies for decoration.
Insides
5. Once dry (if you can wait that long), refrigerate. Share with mom, if you dare.


Makes about 36 truffles.


Wednesday
Apr292009

Taking it to the Sweet: A Renegade Cake Party in Seattle

Renegade Cake Party!
At CakeSpy, the only thing that rivals the sweetness of the treats we eat is the awesome people we get to meet--bakers, artists, and sugar enthuiasts of all sorts. And I can say that without a doubt, one of the coolest people I've met in recent memory is Tuey. She contacted us a while back after reading about the Cupcake Street Art project--as it turns out, she's been making the world sweeter slowly but surely with monthly cake parties, mostly in Portland, at which she makes a cake and shares it with friends in the park--new friends and good times always ensued.

So when she asked if we'd be interesting in having a cake party here in Seattle, the answer was swift and decisive: YES.
Cake MakingCake
And so she came up from Portland, and the CakeSpy kitchen was employed to make a plethora of goodies. First on the roster was carrot cake--there were two--in which various goodies were hidden (including a mini Cuppie figurine!), and then we decorated them to look like mountains of sweetness, garnished with little figurines from Archie McPhee.


Hidden in the Cake!Cake!


Next came several batches of quite possibly the best brownies known to man, using the recipe from Baked: New Frontiers in Baking.
Brownies!

And then they were made even more awesome by the addition of rosemary whipped cream.
Brownies with Rosemary Whipped Cream

With all of this sweetness in tow, we headed over to Cal Anderson Park on a perfectly sunny Sunday.

And we brought Danny's band, Exohxo, with us--because what party would be complete without music?
Cake Party

As the band began to play, people began to drift over--and from then on, we just let the good times flow. Much cake was consumed, many lucky people received free CakeSpy buttons, and we made a lot of sweet new friends.


Cake Party!Cake Party!
At one point a police officer began to walk over as if to stop the band--but as we have been told by many eyewitnesses, as soon as he began to approach it seemed as if he had thought better of it--after all, we weren't hurting anyone.
Cake!Cake


At the end of the day, after taking Tuey back to the train for her journey home, we were all exhausted, but happily so: after all, we had all spent the day making the world a much sweeter place.


Renegade Cake Party


If you're interested, someone posted videos of the band playing too! Check 'em out here!

Wednesday
Apr222009

Grilled Cheesecake: A Sweet Take on a Classic Sandwich

Grilled Cheesecake Sandwich
With all this talk about the Grilled Cheese Invitational and all of the recipes featured on Good Food lately, I've had grilled cheese on the brain.

Grilled cheese is pretty much the best thing since sliced bread. After all, it is sliced bread--with the added awesomeness of cheese and butter. Can it really get any better?
After being hit with what can only be described as a stroke of pure genius, I can definitively say yes. It can get better.
Say hello to the grilled cheesecake sandwich.

Grilled Cheesecake Sandwich
"Is this serious?" you may be asking yourself. 
Oh yes. Made out of slivered cheesecake layered between slices of buttered pound cake, this sandwich is serious all right--as serious as a heart attack. 
Here's how it's done.
Grilled Cheesecake

Buttering the Pound CakeCheesecake
  • 2 slices pound cake (any flavor you like), buttered on the outside
  • 1 small slice cheesecake, slivered

Assembling the Sandwich
1. Assemble the sandwich as follows: one slice pound cake (butter side down), as many slivers as you'd like of cheesecake (we included bits from the crust for added crunch), and the other slice of pound cake, buttered side up. 
Hitting the pan
2. Put in a saucepan over medium-low heat.
Flipping it!
3. After about a minute and a half, gently lift with a spatula to see if it is lightly browned on the bottom. If it is browned to your liking, go ahead and flip; if not, let it brown just a little longer.
Bubbly and buttery
4. Once browned to your liking, carefully flip the sandwich. Press down on the top with the spatula to make everything kind of meld. The second side will brown faster than the first one did, so keep a close eye on it.
5. Remove from heat, turn off the heat, slice in half (if you're into that), and enjoy.
Serving note: For those of you who simply can't eat a grilled cheese without soup, I think a bowl of slightly melty strawberry ice cream would complement it quite nicely.


Friday
Apr172009

Saving Cake: Various Methods for Reviving Dried-Out Cake

Saving Cake: Can Dried-out cake be saved?

OK. So earlier this week, we bought a batch of cupcakes and purposefully let them dry out overnight. Why? Well, because we wanted to experiment and see if there really was a way to bring cake back to life if it were accidentally left out uncovered for a long period of time (hey, it happens). Well, thanks to your help and suggestions, we've tried out various theories, ranging from steaming to booze-infusing to acupuncture-esque procedures; here are our findings.
First, a few notes:
The cupcakes we used were a mass-produced variety, purchased at QFC (a local supermarket chain). Why so? Well, we weren't sure if they'd be delicious afterward, and we didn't want to waste good cupcakes on the experiment. However, the texture of the cake was moist to begin with. Please note, however, that results will differ depending on the type of cupcake!


Boiling waterLetting it steep

Solution 1: Let it Steep
What we did: Poured boiling water in a teacup and then suspended the cupcake in a tea strainer above. Boiling water was only poured to below the point where the strainer reached, so that the water didn't touch the wrapper.
The reasoning: The steaming water would infuse, and re-moisten, the cake.
The result: The texture of the sides and bottom of the cake did benefit from the steaming, however the inside of the cake was still rather hard and stale-tasting. The frosting began to melt on the sides. Overall, not worth the annoyance. Grade: C-


Steaming the cakeMicrowave!

Solution 2: It's a Wrap
What we did: Per the suggestion of a CakeSpy reader, we wrapped the cake in a wet paper towel and then microwaved it for 20 seconds (in two ten-second intervals).
The reasoning: You know, cos someone told us to. And we do what we're told.
The result: While we can't explain the science behind it, we can say that it worked! The cake was warmed and seemed to have been nicely moistened all the way through; the frosting was ever so slightly melty around the edges, but still solid. It is important to note, however, that if you use this method, the cake ought to be consumed immediately. Grade: A-

Cake and bread
Solution 3: Bread n Buttercream
What we did: We placed the cupcake in plastic with a slice of bread and let it sit for several hours.
The reasoning: A big shrug here--we read somewhere on the internet that this was a good solution.
The result: Like, OMG! It totally worked! After a few hours, a thin layer of condensation had formed on the bag; after about six hours when we removed the cake, it was--no joke--almost like new. One taster thought she detected--just maybe--a touch of yeastiness in the flavor, but she didn't stop eating it. This one yielded the best texture of all. Grade: A

Solution 4a: Simple Sugar Solution
What we did: Spooned simple syrup on the sides of the cake and let it sit for a few moments.
The reasoning: Simple syrup is an age-old trick used to keep cakes moist; if it's worked for others, it was worth a try!
The result: It had a nice effect, but only on the outer edges of the cake--the inside was still a bit hard. Grade: B+

Kill it!
Solution 4b: Simple Sugar Solution Part 2
What we did: Same as in the above, but this time instead of simply spooning it on the sides of the cupcake, we first pricked holes all throughout with toothpicks.
The reasoning: Poking the holes would allow the liquid to permeate more of the cake and give it a nicer, more moist, balance.
The result: It did work slightly better than simply applying the simple syrup to the sides, as the center of the cake seemed softer and slightly more yielding. Grade: A-

Solution 5: Booze it on Up
What we did: Once again, the cake was poked with toothpicks, but this time we poured some whiskey on.
The reasoning: Alcohol is a known preservative--and, you know, we like to party.
The result: In terms of moistness, this actually worked slightly better than the simple syrup; however, the flavor was rather assertively alcoholic and perhaps a bit much. Grade: B-

Airtight cakeUncovered

Solution 6: Signed, Sealed, Delivered
What we did: We sealed the cake in an airtight container for several hours.
The reasoning: We figured that this might capture some heat and moistness in the cake.
The result: Meh. It made a slight, but not large, difference in the cake. The frosting, however, did benefit from this method better than others. Grade: B-


Butter!Butter
Solution 7: Better with Butter
What we did: We filled a turkey baster with butter (a syringe would have worked better, natch, but this is what was around), jammed it into the cake and gave it a healthy squeeze.
The reasoning: The butter would infuse deliciousness throughout the cake from the inside out.
The result: Butter hasn't experienced such violation since Marlon Brando got his hands on it in Last Tango in Paris. Unfortunately, the butter didn't do much for the texture of the dried-out cake. It just made it kind of crunchy and greasy. Now, we're not opposed to a little grease now and then, but this time it just seemed unnecessary. Grade: D

So, having abused cake in so many ways, is there really a definitive answer? Can dried-out cake be saved? Well, it will never be the same as when it was freshly baked, but we certainly did learn some tricks for coaxing just a little bit more life out of a sweet morsel. Of course, sometimes you just hit the point where you've got to give up on the cake--at which point you might want to consider some of our other favorite suggestions: using the crumbled cake for bread pudding, as layers in a trifle, or simply eating it soaked in milk. Sublime.


Cake in milk


Wednesday
Apr152009

All Dried Out: Can Cake Make a Comeback?

Cupcakes

Recently, a baker we know confessed that one of her least favorite cake descriptors is "moist". Why? "It just sounds gross" she says. Seems she's not alone--when we asked around, many seemed to share her disdain for the word.
Is it simply semantics? Because when pressed, nobody confessed to preferring dry cake to...well, not dry cake.

Which leads us to believe that as bad as the word moist may be, it's nowhere near as bad as eating dry cake.
And that brings us to the point: the cursed dry cake. It happens to the best of us--we accidentally forget to cover a cake (or cover it carelessly) and that fine crumb becomes a hardened, crisp enemy. But is it really the end? Or can that cake be brought back to life?
We're set on finding out.

Cupcakes drying out
And so, in an effort of furthering Cake Science, we've purchased a batch of cupcakes which we are currently letting dry out, with a mind to test out some re-moistening procedures to see if it truly might be possible to bring them back to life. 
Will it work? Is it possible for cake to make a comeback, or is just better to let it rest in peace? 
We'll find out soon enough.
If you've got any suggestions for bringing dead cake back to life, let us know!


Monday
Apr062009

Master-Peeps Theatre: The Art of Messing With Easter Candy

Master-peeps Theatre: Starry night in Peeps

In terms of candy, is Easter the new Halloween? This may be arguable, but there's no doubt that messing with Easter Candy--especially Peeps and Cadbury Creme Eggs, it seems--is au courant. We, of course, are not immune to the lure of this trend: case in point, a CakeSpy fine art take on it can be seen above in our master-peeps recreation of Starry Night.
But what is it about messing with our Easter candy that captivates us so? Just a few theories:
We love it, but we don't actually want to eat it: We love Easter candy. We love the bright, sometimes garish, pastel colors; we love the cartoonlike egg, chick and rabbit imagery. We love the idea of it all--but we don't necessarily want to eat it. Because the fact is, sadly, that most Easter candy is not actually delicious. So perhaps the movement in food installations and art involving easter candy is just another way to celebrate it. All we can say is, Andy Warhol would have loved it.

Peeps S'mores
We're deeply cruel: We're a nation of misguided youth. Growing up with violent video games and movies, our senses have been dulled and we've become callous and violent ourselves. Guns don't kill people, people kill people. And apparently, people also kill peeps.
We've never grown up: As children, we were admonished to "not play with our food". But now that we're grown up (sort of), we can mess with it all we want! We don't have to eat our food, we can draw faces on it, destroy it, make art with it--and the internet is all over it. Booyea!
We're bored at work: Well, doesn't that say it all? In the war between, say, answering customer service emails and watching a peep being killed in over a hundred ways, we think the winner is totally obvious. Which leads into our last theory...

Creme Egg Closeup
It's totally fun and awesome to mess with Easter candy. This is a statement, not a theory. No follow up questions.
If you're totally fascinated with messing with your Easter candy, run, don't walk, over to these web pages for more:
  • Unlikely Words has compiled a comprehensive and fascinating study on Marshmallow Peeps and their place in culture. Read it now!
  • Here today, Goo Tomorrow: Even Cadbury is in on the action, hosting contests and providing bulletin boards for users to enter Creme Egg murders and discuss the lure of the most incredible edible egg.
  • If baking with Easter candy is your bag (or basket, as it were), be sure to check out Baking Bites (there is a side bar with easter ideas on the right hand side of the site) for plenty of creative and delicious-sounding recipes.
  • Last year, we messed with Easter candy in a variety of fun ways: check out our ideas for how to use your leftover easter candy, and our interview with a Cadbury Creme Egg.


Sunday
Mar292009

Foodbuzz 24, 24, 24: Like a Rolling Scone: A Collection of Rock N Roll Inspired Sweets

Foodbuzz 24, 24, 24
When this month's Foodbuzz 24, 24, 24 event came around, the inspiration came close to home for your dear Cake Gumshoes: we looked at the Seattle music scene to plan a musically-inspired menu of sweets! And so we hooked up with two local bands, Exohexo and Speaker Speaker, and took a collection of sweets inspired by famous rock stars on tour with them around the city, through rehearsals, recording and even a show. Would our theory that baked goods just wanna rock, and rockers just wanna eat baked goods, hold true? Only one way to find out; here are the sweet results.

Rolling Scones
What better way to start (well, that's relative--it was nearly noon) the day than with a baked good homage to one of the most influential rock bands out there--in morning pastry form as not Rolling Stones, but as Rolling Scones. As our musicians quickly discovered, there is no better way to get the day started than with one of these sweet babies under your thumb; complete with the slightest touch of brown sugar, they're a perfect way to get the day going. (see below for Danny warming up with a Keith Richards scone!). These ones will certainly gather no moss.
Danny with a Rolling Scone

Rolling Scones (adapted from this recipe)
  • 2 Cups of Flour
  • 1/4 Cup of granulated sugar
  • 1/4 cup of brown sugar
  • 1 Tablespoon of Baking Powder
  • 1/2 teaspoon of salt
  • 6 Tablespoons (3/4 of a stick) of butter
  • 1 Cup of whipping cream
Topping: Decorating markers, chocolate and vanilla frosting; red gel or decorating icing.


Preheat oven to 425 degrees.

  1. Mix the flour, sugar, baking powder and salt in a large bowl.
  2. Cut the butter into tiny pieces and add to the mixture.
  3. Using your hands, break up the butter into even smaller pieces while tossing with the flour until the largest pieces are no bigger than a pea.
  4. Make a well in the center of the mixture and pour the cream into the well.
  5. Using your hands, mix by hand until the dry ingredients are all moistened.
  6. Gather into a ball and place on a lightly floured board.
  7. Knead 10 times, pushing the dough with the heel of your hand and folding over until the dough is smooth.
  8. Pat the ball into a 9-inch circle about 1/2 to 3/4 inch thick.
  9. Cut into 8 to 12 wedges like a pizza
and to make them Rolling Scones:
  1. Shape into ovals, making sure to pinch the middle to form a little bit of a nose and facial structure.
  2. Brush the top with an egg wash (optional).
  3. Bake for 15 minutes or until golden brown and still slightly moist in the center
  4. Once cool, decorate with a dollop of frosting for hair, and draw in facial features with a food-safe marker as desired.

(Makes 8-12)


Rolling Scones


-------------------------------------------------------------------------
Pink Frosted Floyd Donuts
Of course, no morning would be complete without doughnuts, so we came up with these delicious (and easy!) Pink Floyd glazed doughnuts. These ones were easy--we picked up a few mini doughnuts at local legend Mighty-O and doctored them up a bit to pay homage to their iconic "Animal" album cover.
How can you make these adorable Pink Floyd inspired donuts? It's easy. Piggies
Pink (Frosted) Floyd Donuts
  • Mini Pink Frosted donuts
  • 2 pink jellybeans per donut
  • decorating gel for details
  • Small dab of pink frosting (to use as "glue" for the ears)
In the center of each mini donut, press a jellybean in the center; the frosting should hold it in place. If it doesn't, put a small dot of frosting on the back and it should make it adhere. Cut the second jellybean in half, and using your thumb and forefinger squeeze one end until it forms a triangle. Put a dot of pink frosting on the bottom of the triangle and adhere one to each side of the top of the donut (for pig ears). Using black decoraing gel, make two dots for eyes, two dots on the jellybean nose, and a smiley face for optimal cuteness. (see below for Hiromi, the violinist, getting some sweet energy from one of them!)


Hiromi with Pink frosted Floyd donut

-------------------------------------------------------------------------


Robert Palmier Girls
Of course, after unloading equipment and warming up a bit, the band was in need of some sweet caloric replenishment--enter the Robert Palmiers. No, Robert Palmer may not be the epitome of an exceedingly influential rock musician, but the kitsch value of his backup band--not to mention the easy pun--made for some delicious snacking.

PalmiersRobert Palmiers


Robert Palmiers

Ingredients:
  • 2 sheets puff pastry (or more, or less, to your preference)
  • 1 tablespoon sugar per pastry sheet (approx.)
  • Decorating gel in black and red
Preheat oven to 400°F.


  1. Sprinkle some sugar on a work surface and cover it with a puff pastry square sheet. Then sprinkle more sugar evenly over pastry sheet and roll it out into a 10-inch square with a rolling pin. 
  2. Fold in two opposite sides of the pastry sheet square so that they the sides meet in the center. Fold in same sides of the pastry again.
  3. Fold one half of the pastry over the other. Cut pastry crosswise into 1/2-inch-thick slices. Dip cut sides of each piece in sugar and arrange, cut side down, on an ungreased baking sheet. Repeat with three remaining pastry sheets.
  4. Bake palmiers in batches in middle of oven until golden on bottom, about 12 minutes. Turn over and bake until golden on bottom, 5 to 7 minutes more, then transfer to a rack to cool completely. Once cool, decorate with red lips and black "hair" for the full Palmer girl effect.
-------------------------------------------------------------------------
Ready for a tangent? We didn't have a chance to make it this time, but doesn't Milli VaNilla Wafer Pudding sound tasty? 
-------------------------------------------------------------------------
Otis Redding
And OK--everyone makes mistakes. So we've got to admit from the start there's a reason why the Otis Redding-themed cookies aren't as cleverly titled as the rest. Originally we mistakenly thought (bad gumshoes!) that "Sitting on the Dock of the Bay" was a Sam Cooke song--and Sam Cookies sure would have worked. It was only in the 11th hour that we realized it was actually Otis Redding--and so here they are, the O(h so delicious)tis Redding Cookies, served on homemade graham crackers made to simulate the cookies "sitting on the dock of the bay". We chose molasses because that's about how smooth and rich Redding's voice was. Oh well--Jasen, who plays both guitar and drums, didn't seem to mind sampling one during their show.
CookiesSam Cookies
Otis Redding Cookies (note: we adapted this from Epicurious)
  • 2 cups all-purpose flour
  • 1/4 teaspoon salt
  • 1 1/8 teaspoons baking soda
  • 1 teaspoons ground ginger
  • 3/4 teaspoons ground cloves
  • 3/4 teaspoons cinnamon
  • 1/2 stick (1/4 cup) unsalted butter, softened
  • 1/4 cup vegetable shortening
  • 1 3/4 cups sugar
  • 1/4 cup unsulfured molasses
  • 1 large eggs
  1. Preheat oven to 325°F. and lightly grease 1 large baking sheet.
  2. In a large bowl whisk together flour, salt, baking soda, ginger, cloves, and cinnamon.
  3. In another large bowl with an electric mixer beat together butter, shortening, and 1 1/2 cups sugar until light and fluffy and beat in molasses. Beat in egg until incorporated. Gradually beat in flour mixture and combine well.
  4. In a small shallow bowl put remaining 1/4 cup sugar. Form dough into 2-inch balls and roll in sugar. On baking sheets arrange balls about 4 inches apart and flatten slightly with bottom of a glass dipped in sugar.
  5. Bake cookies in middle of the oven 15 minutes, or until puffed and golden. (Cookies should be soft.) Transfer cookies with a metal spatula to racks to cool.
    -------------------------------------------------------------------------
As a brief interlude--if you're interested in maintaining that mellow, why not indulge in a Fleetwood Macaroon?
-------------------------------------------------------------------------


John Lemon Bars

When a band records, it's important to keep in mind what sound you're going for, and what might be your goals. So of course, we whipped out the inspiration bigtime by bringing out some bar cookies inspired by a former Beatle: the John Lemon Bars. Decorated with his signature self-portrait, these bars added a reminder of how the sour can mix with the sweet in the process: imagine how sweet the result can be. Jason (below) sure seemed to think they came out well. Did they make him a better bass player? We can't say for sure, but it couldn't have hurt.
Note: We used this recipe from Smitten Kitchen to make the John Lemon Bars

Jason playing bass and eating a John Lemon Bar
-------------------------------------------------------------------------
James Brownies
And once they get jamming, and start feeling good? OW! Of course, it's time for some James Brownies. Unfortunately, the likeness was perhaps not the best; working with chocolate syrup from a picture, and trying render it as quickly as possible resulted in some warping--it sort of resembles that portrait that Napoleon Dynamite did of his would-be prom date. But you know what? Nobody really cared, because did these brownies ever OW! Make them feel good.
James Brownies
James Brownies (Adapted from the brownie recipe found on Oprah's website):
  • 1 1/4 cups all-purpose flour
  • 1 teaspoon salt
  • 2 tablespoons dark unsweetened cocoa powder
  • 1 heaping tablespoon of peanut butter
  • 11 ounces dark chocolate (60 to 72% cacao), coarsely chopped
  • 1 cup (2 sticks) unsalted butter, cut into 1-inch pieces
  • 1 teaspoon instant espresso powder
  • 1 1/2 cups granulated sugar
  • 1/2 cup firmly packed light brown sugar
  • 5 large eggs, at room temperature
  • 2 teaspoons pure vanilla extract
Directions
  1. Preheat the oven to 350 degrees F. Butter the sides and bottom of a 9 x 13 glass or light-colored metal baking pan. (Note: we used a 10x10 pan)
  2. In a medium bowl, whisk the flour, salt and cocoa powder.
  3. Put the chocolate, butter, and instant espresso powder in a large bowl and set it over a saucepan of simmering water, stirring occasionally, until the chocolate and butter are completely melted and smooth. Turn off the heat, but keep the bowl over the water and add the sugars. Whisk until completely combined, then remove the bowl from the pan. The mixture should be room temperature.
  4. Add 3 eggs to the chocolate mixture and whisk until combined. Add the remaining eggs and whisk until combined. Add the vanilla and stir until combined. Do not overbeat the batter at this stage or your brownies will be cakey.
  5. In a small dish, microwave the peanut butter for 30 seconds or until melted. Pour into the batter and lightly stir.
  6. Sprinkle the flour mixture over the chocolate mixture. Using a spatula (not a whisk), fold the flour mixture into the chocolate until just a bit of the flour mixture is visible.
  7. Pour the batter into the prepared pan and smooth the top. Bake in the center of the oven for 30 minutes, rotating the pan halfway through the baking time, until a toothpick inserted into the center of the brownies comes out with a few moist crumbs sticking to it. Let the brownies cool completely, then cut them into squares (or large hunks) and serve.
  8. Tightly covered with plastic wrap, the brownies will keep for a few days--or so we hear. We didn't get the chance to find out, they disappeared so fast!

-------------------------------------------------------------------------
Cannoli-sa loeb
Perhaps she's not exactly a trailblazer, but there are few in the CakeSpy demographic that don't recall that so-awful-it's-catchy ode to the 90's called "Stay" by Lisa Loeb. Why not pay homage to this nostalgic cheesiness than by immortalizing it as a cheesy treat? In this case, the cheese was ricotta--stuffed inside of fried shells of cannoli deliciousness from one of the few places in Seattle that sells the Italian treat: Remo Borracchini. Decorated with some retro-cool glasses, sweet red "lipstick" and batting eyelashes, this one charmed even the baddest type of rock star. 

-------------------------------------------------------------------------
Crosby, Stills Ganache and YUM
We knew that we'd need to make something delicious at this point in the day for the final leg, so it was time to roll out the big one: Crosby Stills Ganache and Yum, a multilayered confection as intricately intertwined as the group for which it was named. Basically it was a riff on this chocolate topped princess cake we made a while back, except we swapped the inside cake for chocolate cake rather than sponge, and used crumbled up Graham (Nash) crackers instead of macaroons. Yum, indeed.
-------------------------------------------------------------------------
As a brief tangent, you know what would go well with this cake? Some hot cocoa--with marshmallows. Just like clouds in your coffee, but better.
-------------------------------------------------------------------------
Red Velvet Underground Cake
Finally, we've saved our favorite for last. Perhaps it's just our art-school background, but to many of us Cake Gumshoes, the The Velvet Underground is not just an influential band, but the influential band. After all, they've captured the hearts of musicians and artists alike--why not bakers? And so, the Red Velvet Underground Cake was born. We made ours using the famous Cake Man Raven recipe--using plenty of red food coloring for a viscerally red interior, we decorated it with an edible wafer printed with that famous banana; on the outer edges, we lined banana slices across the sides. The crowning glory? A slight touch of white pepper in the topping--now that's what we'd call a white light white heat cream cheese frosting!

-------------------------------------------------------------------------
Concert!
Of course, after all this awesome, does anyone have an appetite? Probably not. However, if anyone did, there are plenty of The Pixies' Stix on hand.
Of course, this is all some serious sweetness--but at the end of the day, what did the band have to say? Well, here's a special message.

Cue the chorus of "Pour Some Sugar on me"--repeat and fade! A rock n' roll fanta-sweet indeed! Thank you FoodBuzz for funding our fun times and once again helping us attain an extreme sugar high!

Foodbuzz!


Thursday
Mar192009

ShamRock Shake, Rattle and Roll

Shamrock Shake, Rattle and Roll
St. Patrick's day may be over, but the ultimate symbol of green excess is still available through the end of the month. No, we're not talking about green beer--we're talking about that green monster of a cold confection, the Shamrock Shake.

There's something delightfully trashy about this shake, which has clearly resonated with the public--there's even a movement to make it available year round. But somehow, as attracted as we are to this never-found-in-nature-green drink, we can't seem to make ourselves cross the threshold of those golden arches--must have seen Super Size Me one too many times.
Shamrocks
Luckily, we've come up with a solution to make something just as satisfyingly unhealthy at home--and this recipe actually has shamrocks. So bad it's good, in a rot-your-teeth-out sort of way; plus, with St. Patrick's day baking supplies on sale, it's also an extremely cost-efficient treat.

Shamrock shakeShamrock shake
Shamrock Shake
Ingredients:
  • A massive handful of green shamrock sprinkles (no, you may not substitute non-shamrock shaped green sprinkles)
  • 4 ounces or so milk (we used soymilk--yes, we see the incongruity in this)
  • A healthy scoop of ice cream 
  • Small handful of ice cubes
Directions: Pour in blender; blend until smooth. Pour in your favorite glass that will allow the green to show through. Bask in the sugary green glory. Serves one.
* Optional note: Feel free to add Bailey's Irish Cream, Creme de Menthe or straight whiskey to taste. 


Page 1 ... 6 7 8 9 10 ... 13 Next 10 Entries »
© Cakespy, all rights reserved. Powered by Squarespace.