Home Home Home Home Home Home Home
CakeSpy

Featured: 

My adventure at Ben & Jerry's in Vermont!


Unicorn Love: the Eating Disorder Recovery Blog


 Buy my brilliant books!

Buy my new book!

Buy my first book, too! 

CakeSpy Online Retail!


Archives
Gallery

Fantastic appliance for cake making on DHgate.com

everyrecipe.co.nz

Craftsy Writer

Entries from February 1, 2010 - February 28, 2010

Sunday
Feb142010

Sweets for the Sweet: Valentine's Day Cupcake Tutorial from Hello Naomi

Now would be an appropriate time for me to act very high and mighty on the subject of Hello Naomi in a "I discovered her way before the fact" sort of way. After all, she was first featured on CakeSpy over 2 years ago, while she was still a student and baked only as a Flickr-posting hobbyist. But I'm not gonna be like that--I can share.

Of course, awesome like hers couldn't be contained, and now she's moved on to wonderful things including starting her own baking business, and she's also dipped into party planning and works with a company that does invitation design

And happily, she's offered up a sweet tutorial for Valentine's Day Cupcakes. It's not too late to whip up a batch for your sweetie!

Valentines Day Cupcake Tutorial

Makes 12

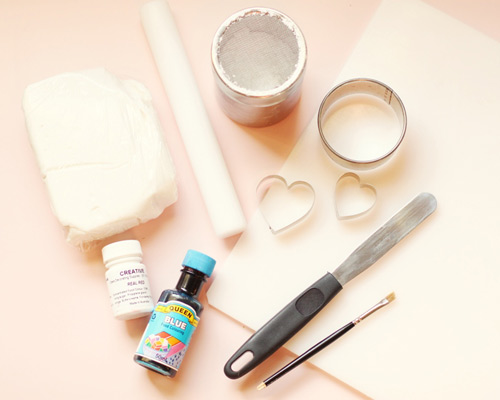
What you will need:
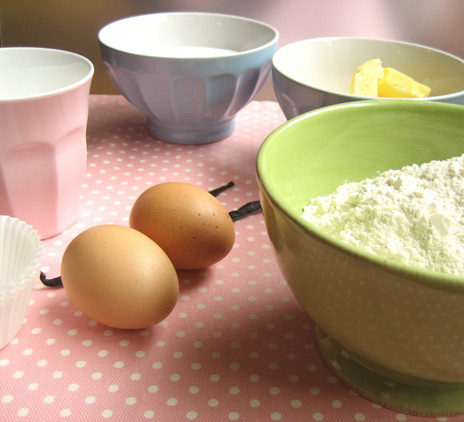
 

  • 12 vanilla cupcakes (here's Naomi's recipe)
  • 500g ready to roll white icing (fondant)
  • Red gel food dye
  • Blue food dye
  • Circle cutter (the same size as your cupcake tops)
  • 2 size heart cutters
  • Non-stick small rolling pin
  • Plastic mat
  • Pure icing sugar for dusting
  • Water or cake decorating glue w/ small paintbrush
 

 Procedure

  1. Divide the fondant into 4. Using a plastic mat, dye one lot of fondant red, one pink, one blue and leave the other white. Colouring is done by kneeding drops of colour into the fondant until mixed through evenly. Pink is made by using a small amount of the red dye, red is eventually achieved by using a fair amount of dye (using a gel dye is much faster than using liquid dye). Use sifted icing sugar to soak up any moisture from the dye and prevent sticking. Wrap each colour in cling wrap. Wipe mat after each colour.
  2. Roll out the white fondant until aprox ¼ inch thick. Dust icing sugar on the top and bottom if sticking and dust away excess.
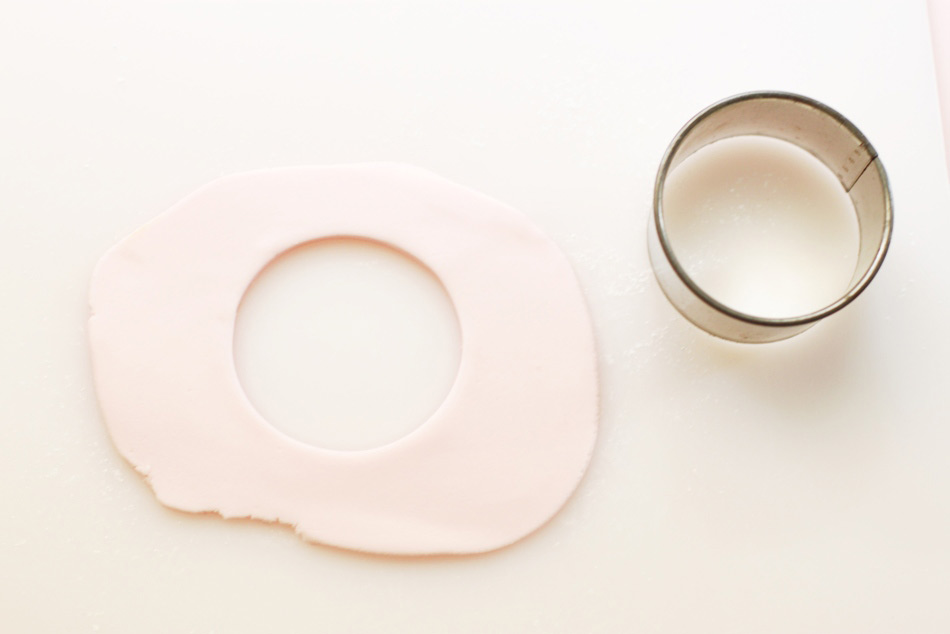
  3. Cut out 3x circles using the circle cutter. Using a pallet knife or flat knife lift each circle, lightly wet the back using a paint brush and place onto a cupcake. Smooth the top and edges using the palm of your hand. Wrap excess fondant in cling wrap.
  4. Repeat for 3 pink cupcakes and 6 blue ones.
  5. Once all the cupcakes are covered it is time to decorate them. Roll out the remaining pink fondant and cut out 3 large hearts. Lightly wet the back and place in the middle of 3 blue cupcakes. Roll out the remaining white fondant, cut out 3 large hearts, lightly wet the back and place in the middle of the remaining 3 blue cupcakes.
  6. Roll out the red fondant, cut out 12 hearts, lightly wet the back and place in the middle of each cupcake.
  7. Package them in a cute box with tissue paper, alternating designs, and give them to someone special!

About the contributor: Naomi was studying her PhD in Computer Engineering when she discovered her love of cake decorating. By posting photos onto the photo sharing website flickr under the user name ‘hello naomi’ she quickly became well known for her original designs and demand quickly grew to the point where she decided to start a business in 2009. Since then she has also ventured into party planning, collaborating with Imprintables invitations to form scissors.paper.cake.

Sunday
Feb142010

Sweet Cakes: Naomi Henderson's Vanilla Cupcake Recipe

Hello Naomi's Vanilla Cupcake Recipe 

Perfect for use with this tutorial for Valentine's Day Sweetheart Cupcakes!
Makes 12

Ingredients

  • 1/2 cup unsalted butter
  • 1 cup castor sugar
  • 2 vanilla beans or 1/2 teaspoon vanilla extract
  • 2 free range eggs
  • 1/2 cup milk
  • 3/4 cup self-rising flour
  • 3/4 cup all-purpose flour

Procedure

  1. Preheat the oven to 170°C (350°F ) . Line a 12 hole cupcake trays with standard size papers.
  2. Sift the flours together and set aside.
  3. Soften butter in the microwave.
  4. Warm the milk in the microwave to luke warm.
  5. Place the softened butter in a mixing bowl and beat with an electric mixer (med-low speed) for 1 min until smooth.
  6. Beat on med and add the sugar 1/3 at a time beating for a minute between additions. (The fluffier the butter and sugar is, the fluffier and higher your cupcakes will rise)
  7. Add the vanilla seeds or extract and beat though
  8. Add the eggs one at a time mixing on med-low and for a minute in between additions.
  9. Once the eggs are mixed remove mixing bowl from stand and using a wooden spoon mix in 1/3 of the flour. Mix until there are no lumps.
  10. Add 1/2 of the milk and mix until well combined.
  11. Add another 1/3 of the flour, mix until no lumps. Mix through the rest of the milk until well combined and then mix through the rest of the flour until there are no lumps.
  12. Spoon mixture into cupcake papers about 2/3 full using an ice cream scoop. Bake on the middle rack for 18-20 minutes until golden (rotate tray after about 15 min).
  13. Remove from trays and cool on a wire rack for at least 45 minutes before decorating.
  14. Frost as desired, or according to this awesome tutorial!

Store in an airtight container for up to 4 days.

Saturday
Feb132010

Je t'aDorie: Cookies from Dorie Greenspan's CookieBar Pop Up Shop, NYC

Regret: I did not have time to visit Dorie and Josh Greenspan's pop up shop, CookieBar, in NYC on my recent visit.

However, the earth does seem to balance itself out, and when I visited the Serious Eats offices, they happened to have a box of sweeties from the shop.

What does this mean? I got to try Dorie Greenspan's cookies, that's what it means (ok, ok, she also had some stellar bakers helping with the baking: per Serious Eats, helpers included Johnny IuzziniBradford Thompson, and Megan Fitzroy, along with volunteers fromThe French Culinary Institute.

I had chosen at random, and the one I chose, as it turned out, was the coconut lime cookie. It was a good decision.

Now, let me tell you about eating it. The first thing that hits you? The butter. The rich, tongue-coating buttery flavor.

And then a powerhouse of a sweet duel, from the sugar and the coconut, blossoming in perfect harmony with the butter and then giving a subtle sweet taste, which is then countered by the bright ray of zingy lime sunshine.

And then a small sea of more subtle flavors: the nuttiness of the coconut as an aftertaste, the lightest touch of bitterness (from zest perhaps?).

And finally--finally--the salt. And all Dorie stalkers--er, fans--know how important that is. As she says in Paris Sweets ,

salt is pastry's unsung hero...a pinch is enough to balance the sugar in a tart crust, underscore the flavor in any chocolate dessert, give caramel that certain je ne sais quoi.

In a word: perfection. Or should I say parfait?

Alas, the CookieBar was only open through February 12, but you can read all about it here, or read a comprehensive roundup of the deliciousness that was CookieBar at Serious Eats.

Friday
Feb122010

Cake for a Cause: A Sweet Event with CakeSpy, Electrolux, Kelly Ripa, Cake Boss, Foodbuzz and More!

From Left: Kelly Ripa, CakeSpy, Cake Boss, Kelly, Carlo's Bakery baker, ErikaI don't know how to tell you this...but I'm kind of a big deal.

OK, maybe not--but I sure did feel like one earlier this week when I was lucky enough to be part of the amazing "Kelly's Cake-Off" event in NYC.

What was the deal?

Dig it: So Foodbuzz, where I am a featured publisher and who helps me out with the advertisements you see to the right of the main body of this page, in collaboration with Electrolux's Kelly Confidential program, decided to put on an event in NYC wherein 15 lucky food bloggers would be flown out for an event, Kelly's Cake Off. They put us up in a totally sweet fancy hotel and fed us delicious vittles at the famous (and amazingly delicious) Spotted Pig restaurant. It was all coordinated by the fine folks at Weber Shandwick.

Basically, Kelly's Cake Off consisted of all of us gathering in a very cool space in the same building as the Food Network Studios and the Chelsea Market (also the former Nabisco factory!). We then learned some sweet cake decorating tips from Buddy Valastro, owner of Carlo's Bakery in Hoboken (and oh, you may know him as the Cake Boss from the TV) and Kelly Ripa, and then we were set into 5 teams of three to decorate cakes using fondant, buttercream, and various sugars and glazes (yum). Each team had a different cake: our theme was "Snow Day"--behold this beauty:

Our finished entries were then posted online, and for each vote received, Electrolux will donate $1 toward theOvarian Cancer Research Fund

Basically, this event was a triple threat of awesome. Sweet cake, sweet sponsors, and a super sweet cause. It was incredibly fun too, which certainly doesn't hurt--and oh man, the cake even tasted good! (um, so did the countless other pastries furnished by Carlo's Bakery).

But in case you don't believe me, you can see the video for yourself:

I've got to send my most sincere thanks to all of the awesome bloggersFoodbuzz, the Cake Boss and Carlo's Bakery crew, my amazing team (Erika and Kelly), Electrolux, and Kelly Ripa

How can you be part of the awesome? Go vote for my cake, the "Snow Day". Yes, you've got to sign up using your email address, but I'm totally worth it, am I not? Also, you can vote once a day, and I fully expect you to do so, or I will never talk to you again. And trust me, I will know.

Have I made myself clear? Vote here.

Friday
Feb122010

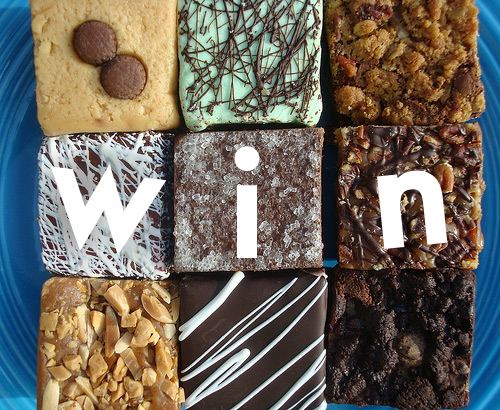
Brownie Points: a Simply Divine Brownies Giveaway!

Brownies are a masterpiece of American cookery. This is not opinion--it's fact. They are--to sum it up concisely--a simply divine treat.

Oh--what a perfect time to introduce the treasure of Portland, Maine--Simply Divine Brownies. They boast a retail bake shop, and will ship their brownies nationwide.

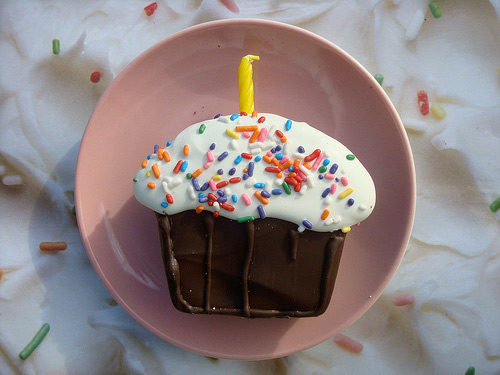
And oh, the brownies. At Casa de CakeSpy, we'd been mildly obsessed with these brownies since having discovered the adorable brownies that look like cupcakes, with the other items on the menu--like dense, chewy brownies in a plethora of flavors and sizes--just adding to the obsession.

And now, dear, lucky readers, you too can share this sweet joy.

Yup: Simply Divine has kindly offered a brownie care package for giveaway on this site.

What can you win? A parcel of pure pleasure, including a sampler of 12 assorted brownie flavors, a package of sweet brownie bites (perfect for smaller appetites, or, you know, eating 3 at a time), and one of those adorable aforementioned trompe l'oeil brownies. Not for nothin', but based on my calculations this is a parcel worth over $75, considering shipping and stuff.

Yeah, you wanna win this.

So how do you enter? It's easy. Just answer the following important brownie questions below in the comments section and you'll be entered to win this sweet package of postal bliss! Of course, if you couldn't possibly wait for brownie bliss, you can mos' def check them out online here and check out their blog here!

Fine Print: The giveaway will close on Sunday, February 22 at 12pm PST; the winner will be announced within the next 48 hours. Entrants in the US only, please. Good luck!

  1. What's your type of brownie: chewy, cakey, or fudgy?
  2. Frosting on brownies: yes or no?
  3. Which brownies in the pan do you covet most: edge or middle?

UPDATE: THE WINNER!

We have a winner, friends! It is Pruittiporn from New Haven, CT, who has this to say about the above brownie poll:

1. I oscillate between fudgy and chewy.

2. No - I prefer my brownie add-ons baked in!

3. I prefer edge, but I'm not opposed to the middle either

Friday
Feb122010

Baker's Dozen: A Batch of Sweet Valentine Recipe Ideas


Photo Credits, from top left clockwise: My Baking Addiction, Bake at 350, The Food Librarian, Taste of Home. Links to recipes below!Chocolate Cherry Silk Tart recipe from Seattle's Macrina Bakery: what's not to love?

Nanaimo bars are always something to be loved, but these ones are perfect for Valentine's Day!

Conversation heart chocolates, from the always wonderful Chic Cookie Kits.

...aaand, in case you forgot about them, the CakeSpy homemade conversation heart for Serious Eats!

Show your Gluten Free buddies some love with these Valentine's Day gluten free sugar cookies.

Love word games? Love cookies? You'll love these babies by Bake at 350, and so will your valentine!

Cupid's arrow has hit these cupcakes...why not share the love by baking some of your own?

Just cos you love someone doesn't mean you have to share--make these individual heart cakes!

Make perfect chocolate dipped strawberries with these tempering tips from Jacques Torres.

Meringue Swans! Precious!

Don't break dishes on the wall--make this strangely beautiful broken glass jello!

Making sweetie pies like these would win over just about anyone, I think.

Bakerella always offers something sweet for heart day, and this year's no exception: big cookies mean big love.

Friday
Feb122010

What Boys Like: Butch Bakery in NYC

Photo Credit: Butch Bakery, NYCIn my humble opinion, there are few guys who don't enjoy cupcakes--but a lot of them won't admit it because they find it hard to get past the whole...you know, cute thing. 

But I'm sure that they'll rejoice at the prospect of a more metrosexual cupcake-maker: NYC's Butch Bakery. Started by stock market alum David Arrick who took things into his own (manly) hands. Per DailyCandy,

His new venture, Butch Bakery, peddles big, boozy cupcakes with XY-approved patterns like camo, wood grain, and houndstooth. Manly flavors include rum-soaked Madagascar vanilla cake with cola Bavarian cream filling (Rum & Coke), chocolate beer cake with beer-infused buttercream and pretzels (Beer Run), and peanut butter cake with banana Bavarian cream and crumbled bacon.

No store front (yet) but the sweet treats are available for delivery in Manhattan, Brooklyn and Queens.

For more information, visit butchbakery.com.

Wednesday
Feb102010

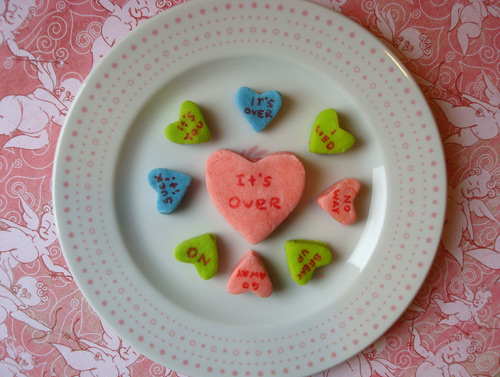
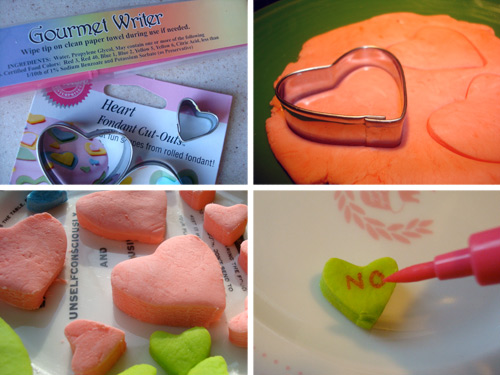
Sweet Hearts: Homemade Conversation Hearts for Serious Eats

Sure, conversation hearts are a sweet gesture. But are you sending the wrong message?

Do you really want, for instance, to say "text me" to someone from whom you'd rather not receive digital missives, or to downplay your serious crush by leaving it at "U R Special"?

Avoid etiquette blunders and tell them how you really feel by making your own personalized homemade conversation hearts. They're surprisingly easy to make, just as sweet as the store bought kind, and you have the freedom to set the tone you want--whether it's sweet, snarky, or confessional.

Find the full writeup and tutorial over at Serious Eats! Oh, and happy freaking Valentine's Day!

Wednesday
Feb102010

Seeing Stars: Star Wars Lego Cookies Tutorial

Legos! Star Wars! Cookies! These sweet treats are like veritable galactic minefield of awesome. And now, the force of deliciousness can be with you, too--CakeSpy reader Emily (who writes the wonderful blog Sugar & Meringue and also has a fantastic Etsy shop full of vintage cake finds!) has put together a tutorial on how to make your own!

Curious about Emily? Here's what she has to say about herself: I was born and raised in Nebraska. I grew up in a town with a population of about 650. I like to brag that I was the valedictorian of my class. (I just don't tell anyone there were only 18 people in my class!) Yep… I'm from the sticks.

Components needed:

  • Lego minifigure cookie cutter
  • Several pastry bags
  • Several writing tips- ranging in size from about 1 - 4 & couplers
  • Gel or paste frosting coloring: Ivory, Black, Peach, Copper, Brown & Royal Blue
  • A glass tumbler
  • Lots of bowls
  • A very small/fine artist liner paint brush - buy a new one and use it only for food

Royal Icing (See recipe below)

  • 6 cups powdered sugar
  • 2/3 cup water
  • 4 1/2 tablespoons meringue powder

Combine all ingredients and beat at medium/high speed until soft peaks form.

Procedure for Lego Cookies

  1. Make rolled sugar cookies using your favorite recipe. Make Royal Icing (you may need 2 bathces) and divide into 6 bowls. Add coloring to each bowl. You will need: white - shirt & pants ivory - vest brown - belt black - details peach - face copper - hair
  2. Next, divide each color in half and put in two separate bowls. (One half will be used for piping and the other half will be used for flooding.) Add water, a tiny bit at a time, to one of the halves so that the icing is the consistency of a thick cake batter. (It should be thin enough so that it will drip from a spoon and smooth itself out, but not watery)
  3. Equip one pastry bag with a #2 or 3 tip. Fill it with the UNTHINNED icing. Equip another bag with a #3 or 4 tip. Put the bag (tip down) in a glass tumbler and cuff the bag over the top of the glass so you can pour in the thinned icing.
  4. Begin by outlining Obi Wan’s vest with the unthinned icing. Then “flood” inside the outline with the thinned icing. You will follow the same procedure for the following steps.
  5. Now… STOP!!!!Now… STOP!!!! At this point you need to let the icing dry completely before going on to the next step so that the colors don’t bleed. You may want to let them dry overnight.
  6. Outline and flood belt with brown. Allow to dry. Then use a #1 tip to pipe on the black details and a #2 tip to pipe the eyes.
  7. Dab a tiny bit of royal blue coloring on some waxed paper and then, with your paint brush, paint the eyes.
  8. Pipe on hair and eyebrows. Outline then flood beard and mustache. When beard and mustache are dry, use paint brush to paint on the black lines with black coloring. Use ivory coloring to paint details on shirt/vest.

Want more? Remember, you can find more of Emily's work at Sugar & Meringue, and be sure to check out her Etsy shop!

Wednesday
Feb102010

Wining and Dining: Red Wine Valentine Cookies from The Hot Cookie

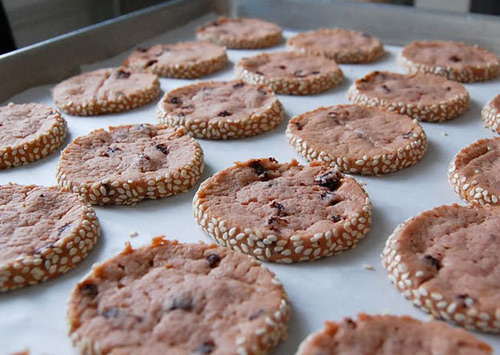
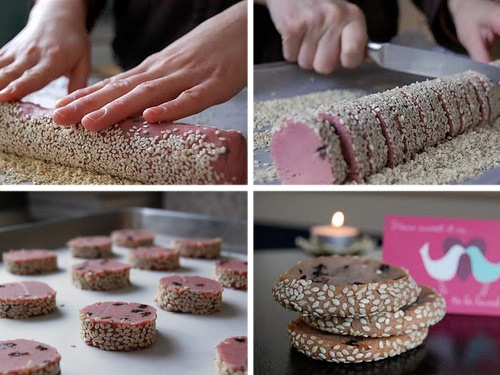
When CakeSpy contributor Sarah of The Hot Cookie sent over the recipe for these cookies, I first saw the light pink hue and sesame seeds in the rolling pictures (below) and thought "sushi cookies!". Well, no, but reading on I learned they were something far more delicious: Red Wine Valentines. Infused with buttery flavor cut with sweet and tart wine, these sweet treats will undoubtedly set the tone for romance--as Sarah wisely says,

Fewer things can be more meaningful than a homemade treat. Whether it's made by your own hands or crafted from an independent bakery, these Red Wine Valentine cookies will spark an interest in your other's eyes.

Here's the recipe:
Red Wine Valentines

Ingredients
  • ½ cup port wine
  • 2 Tbsp. beet juice*
  • 1 cup butter
  • 1 ¼ cup sugar
  • 1 egg
  • Zest of half an orange
  • 3 cups flour
  • ¼ tsp. salt
  • 1 tsp. baking soda
  • 1 cup dried currants
  • Sesame seeds
Procedure
  1. In a small sauce pan bring wine and beet juice to a boil. Once boiling occurs, reduce heat to medium and simmer for 20-22 minutes. Remove from heat and let cool.
  2. Sift together flour, salt, and baking soda. Set aside.
  3. Cream butter and sugar. Add egg, orange zest, and cooled wine/beet reduction. Mix until combined.
  4. Mix in flour mixture until just incorporated. Add currants.
  5. Divide dough into thirds and roll into logs about 2 inches in diameter. Wrap dough logs with wax paper or parchment paper and refrigerate for at least 4 hours.
  6. Preheat oven to 350 degrees F.
  7. Unwrap dough and roll/press dough into sesame seeds.
  8. Slice log into ¼ inch slices. Place on greased or parchment lined baking sheet.
  9. Bake for 10-12 minutes or until the edges are firm and centers appear undercooked. Let cool on baking sheet.

About the contributor: The Hot Cookie is a small, all-natural cookie company in Indianapolis run by two go-local/pro-green ladies with a thirst for life and a hunger for sweets. All of their two-bite cookies are made in small batches with as many high quality, local, and organic ingredients available.

You can shop here, visit the website here, and keep up to date via their blog!

© Cakespy, all rights reserved. Powered by Squarespace.