Home Home Home Home Home Home Home
CakeSpy

Featured: 

My adventure at Ben & Jerry's in Vermont!


Unicorn Love: the Eating Disorder Recovery Blog


 Buy my brilliant books!

Buy my new book!

Buy my first book, too! 

CakeSpy Online Retail!


Archives
Gallery

Fantastic appliance for cake making on DHgate.com

everyrecipe.co.nz

Craftsy Writer

Entries in Cookies (178)

Monday
Oct132014

Pillsbury Bake-Off Countdown: Peanut and Pretzel-Peanut Butter Thumbprints

Peanut and Pretzel-Peanut Butter Thumbprints

Sometimes you can just tell that a recipe is going to enter your permanent rotation. These clever cookies by Barbara Estabrook of Rhinelander, Wisconsin are just such a recipe. Sweet and salty all at once, the rich peanut butter is what will keep me coming back.

Peanut and Pretzel-Peanut Butter Thumbprints

  • Prep Time: 30 Min
  • Total Time: 1 Hr 35 Min
  • Makes: 30 cookies

Ingredients

  • 1 can (14 oz) Eagle Brand® Sweetened Condensed Milk
  • 1/2 cup creamy peanut butter
  • 1 teaspoon vanilla extract
  • 1 roll Pillsbury™ refrigerated peanut butter cookie dough
  • 2/3 cup chopped unsalted roasted peanuts
  • 1/2 cup coarsely chopped mini-pretzel twists
  • 1/2 cup milk chocolate chips

Procedure

  1. Heat oven to 350°F. In 1-quart heavy saucepan, heat condensed milk and peanut butter over medium-low heat 8 to 10 minutes, stirring frequently, until slightly thickened. Remove from heat; stir in vanilla until well blended. Refrigerate about 20 minutes or until thickened.
  2. Meanwhile, in large bowl, break up cookie dough. Add peanuts and pretzels. Mix with wooden spoon, or knead with hands until well blended. Shape dough into 30 (about 1 1/4-inch) balls. Place 2 inches apart on ungreased cookie sheets. Bake 5 to 10 minutes or until edges are light golden brown. Remove from oven; immediately press back of teaspoon into center of each cookie to make indentation. Cool 2 minutes; remove from cookie sheets to cooling racks. Cool completely, about 20 minutes.
  3. Place peanut butter mixture in large resealable food-storage plastic bag. Cut off small corner of bag. Squeeze bag to pipe about 1 tablespoon mixture in center of each cookie to fill indentation.
  4. In small microwavable bowl, microwave chocolate chips uncovered on High 40 to 60 seconds, stirring once, until chips can be stirred smooth. Place melted chips in small resealable food-storage plastic bag. Cut off tiny corner of bag. Squeeze bag to drizzle melted chips over cookies. Let stand 10 minutes. Store covered.

Note: the Pillsbury Bake-Off is coming in November! Check out my coverage of the 45th and 46th Bake-Off, and follow the recipes posted so far by clicking the bakeoff tag below.

Saturday
Oct112014

Pillsbury Bake-Off Countdown: Toffee and Almond Fudge Cookie Cups

CakeSpy Note: OMG! It's getting to be that time of year again. The Pillsbury Bake-Off is coming in November! Since I so deeply loved attending the 45th Bake-Off as well as the 46th Bake-Off, I thought I would get you excited the 47th one early by sharing all of the sweet recipes in the running. I will focus on sweets! You can follow them by clicking the bakeoff tag below to see the recipes posted so far (as well as recipes from previous Bake-Off events). 

Forget coffee: these cups are filled with toffee! And fudge and almond, all nestled in sugar cookie cups. This fantastical recipe was dreamed up by Amy Andrews of Macomb, Michigan. Her cup runneth over with luck: this recipe is a finalist at the Bake-Off this year! 

Good luck!

Toffee and Almond Fudge Cookie Cups

  • Prep Time: 25 Min
  • Total Time: 1 Hr 15 Min
  • Makes: 48 cookie cups

Ingredients

  • 2 packages Pillsbury Ready to Bake  refrigerated sugar cookies
  • 1/4 cup milk chocolate toffee bits (from 8-oz bag)
  • 1 can (14 oz) sweetened condensed milk
  • 1/3 cup creamy Almond Butter
  • 1/2 teaspoon vanilla extract
  • 1/4 cup sliced almonds, finely chopped
  • 1 can (6.5 oz) whipped cream topping (in aerosol can)

Procedure

  1. Heat oven to 375°F. Spray 48 nonstick mini muffin cups with non-stick cooking spray.
  2. Place 1 cookie dough round in each muffin cup. Sprinkle 2 tablespoons of the toffee bits evenly over cookie dough rounds. Bake 13 to 18 minutes or until light golden brown. Cool in pan 15 minutes. Loosen with tip of knife; carefully remove from pan to cooling rack. Cool completely, about 15 minutes.
  3. Meanwhile, in 1-quart heavy saucepan, heat sweetened condensed milk and almond butter over medium heat 5 to 6 minutes, stirring constantly, until mixture begins to bubble. Remove from heat; stir in vanilla. Cool 2 minutes. Spoon 1 heaping teaspoon condensed milk mixture into each cookie cup.
  4. In small bowl, mix remaining 2 tablespoons toffee bits and the almonds. To serve, top each cup with about 1 tablespoon whipped cream topping and about 1/4 teaspoon almond mixture.
Wednesday
Oct082014

Ghost Cutout Cookies: Doctored Cookie Mix

Photo: PillsburyI was super psyched when Pillsbury sent me their latest batch of Halloween-themed crafts, because while I'm sure it wasn't their primary goal, they actually ended up answering a question I've had for a long time:

Can you doctor refrigerated sugar cookie dough to make cutout cookies?

I've long wished it was so, because it would be so easy to test out decorating ideas if you could whip up a quick batch of cookies from a tube. But typically, the ones you buy spread too much to hold their shape.

In this clever recipe, the sugar cookie dough is fortified with additional flour to help them hold their shape, which then makes them the perfect canvas for decorating--around this time of year, these ghost designs are an awfully clever and cute use!

Here's the recipe.

Ghost Cutout Cookies

Courtesy Pillsbury

Ingredients

  • 1 roll Pillsbury refrigerated sugar cookies
  • 1/4 cup all-purpose flour
  • 1 container (1 lb) vanilla creamy ready-to-spread frosting
  • Black decorating icing, as desired

Procedure

  1. Heat oven to 350°F. In medium bowl, break up cookie dough; thoroughly work in flour. Work with half of dough at a time, refrigerating remaining dough until needed.
  2. On work surface sprinkled with flour, roll dough 1/4 inch thick. Cut with floured 2 1/2- to 3-inch ghost-shaped cookie cutter. Place 1 inch apart on ungreased cookie sheets. Repeat with remaining dough.
  3. Bake 9 to 12 minutes or until cookies are set and edges just begin to brown. Cool 1 minute; remove from cookie sheets. Cool completely, about 10 minutes. Meanwhile, in small microwavable bowl, microwave frosting uncovered on High 10 to 15 seconds or until easier to smooth onto cookie.
  4. Frost and decorate cookies with black icing as desired, using photo as a guide.
Friday
Sep262014

Pillsbury Bake-Off Countdown: Hot Chocolate-Marshmallow Cookies


CakeSpy Note: 
OMG! It's getting to be that time of year again. The Pillsbury Bake-Off is coming in November! Since I so deeply loved attending the 45th Bake-Off as well as the 46th Bake-Off, I thought I would get you excited the 47th one early by sharing all of the sweet recipes in the running. I will focus on sweets! You can follow them by clicking the bakeoff tag below to see the recipes posted so far (as well as recipes from previous Bake-Off events). 

What's better than hot chocolate with melty marshmallows? A cookie accompaniment, of course. These tasty treats take all the best parts of a hot chocolate experience and condense it into cookie form. The recipe was dreamed up by Sarah Meuser of New Milford, Connecticut...and on behalf of everyone, everywhere, I say "thank you"...and good luck at the Bake-Off!

Hot Chocolate-Marshmallow Cookies

  • Prep Time: 20 Min
  • Total Time: 55 Min
  • Makes: 12 cookies

Ingredients

  • 1 roll Pillsbury refrigerated chocolate chip cookie dough
  • 1 cup chocolate hazelnut spread
  • 3 tablespoons unsweetened baking cocoa
  • 3/4 teaspoon chili Powder
  • 1/2 teaspoon ground Saigon Cinnamon
  • 6 large marshmallows, cut in half

Procedure

  1. Heat oven to 350°F. Let cookie dough stand at room temperature 10 minutes to soften. Line 2 large cookie sheets with parchment paper.
  2. In large bowl, break up cookie dough. Add hazelnut spread, cocoa, chili powder and cinnamon. Beat with electric mixer on low speed about 2 minutes or until well blended.
  3. Shape dough into 12 (2-inch) balls. Flatten each ball into 3-inch round. Shape 1 cookie dough round around 1 marshmallow half, covering completely. Repeat with remaining dough rounds and marshmallows. Place 2 inches apart on cookie sheets.
  4. Bake 10 to 13 minutes or until surface of cookie appears cracked and marshmallow shows through. Cool 5 minutes; remove from cookie sheets to cooling racks. Cool 5 minutes. Serve warm. Store tightly covered.
Wednesday
Sep242014

Pillsbury Bake-Off Countdown: Triple Ginger-Lemon-Cornmeal Cookies

CakeSpy Note: OMG! It's getting to be that time of year again. The Pillsbury Bake-Off is coming in November! Since I so deeply loved attending the 45th Bake-Off as well as the 46th Bake-Off, I thought I would get you excited the 47th one early by sharing all of the sweet recipes in the running. You can follow them by clicking the bakeoff tag below to see the recipes posted so far (as well as recipes from previous Bake-Off events).

Thanks to enterprising bakers such as Amy's Bread and Momofuku, cornmeal in cookies is no longer a strange thing--in fact, it's an anticipated and delicious thing. You've probably even heard of them.

But you've never seen cornmeal cookies like these. Jennifer Gentry of Steamboat Springs, Colorado takes the concept several steps further with the zing of three types of ginger (!) and lemon. With a rich, sugar cookie dough base, these cookeis are a sweet treat indeed. Good luck at the Bake-Off!

Triple Ginger-Lemon-Cornmeal Cookies

  • Prep Time: 20 Min
  • Total Time: 1 Hr 5 Min
  • Makes: 16 cookies

Ingredients

  • 1 roll Pillsbury refrigerated sugar cookie dough
  • 1/2 cup stone-ground or yellow cornmeal
  • 1/2 cup finely chopped pecans
  • 1/2 cup (about 3 oz) finely chopped crystallized ginger
  • 1 teaspoon finely chopped gingerroot
  • 1 teaspoon grated lemon peel
  • 1/4 teaspoon ground Ginger

Procedure

  1. Heat oven to 350°F. Let cookie dough stand at room temperature 10 minutes to soften. Line 2 cookie sheets with Reynolds® Parchment Paper.
  2. In large bowl, break up cookie dough. Add remaining ingredients. Mix with wooden spoon, or knead with hands until well blended.
  3. Shape dough into 16x2-inch log. Cut dough into 1-inch slices with sharp knife. Place 2 inches apart on cookie sheet.
  4. Bake 10 to 12 minutes or until center is set and edges are dry to the touch. Cool 2 minutes; remove from cookie sheets to cooling racks. Cool completely, about 10 minutes. Store covered.
Wednesday
Jul162014

Unicorn Pom-Pom Puffs

Here's an important question to which I would like an honest response. It is this:

Would you rather eat a macaroon-esque "white chocolate coconut cluster"...

or a unicorn pom-pom puff?

Hey, remember how I said I wanted an honest answer? I lied: I don't even need or want it. Because I've made the executive decision: the unicorn ones are better.

Basically, I dreamed up this confection thusly: upon pondering a simple use for the white chocolate cache I had at the time, I discovered an easy way of combining melted white chocolate with shredded coconut to form a super-sweet (and simple) confection. I like multipurpose treats, though, so I thought "well, how could I make these a lure for unicorns in addition to satisfying my sweet tooth?". 

The answer was simple: add a little rainbow magic. By divvying up the mix and tinting portions in different colors before forming clusters, I ended up with fuzzy-cute treats that tasted like the Spirit Of Sugar had descended and was knocking right on my taste buds (that is to say--very sweet). I settled on the name "Unicorn Pom Pom Puffs" because, well, look at them.

Unicorn pom pom puffs

If you don't love white chocolate or coconut, make them anyway. You might just catch a unicorn!

Unicorn Pom-Pom Puffs

Unicorn pom pom puffs

  • 2 cups lightly toasted coconut (very light color is important)
  • 7 ounces white chocolate
  • food coloring

Procedure

  1. Melt the white chocolate. Remove from heat.
  2. Divide the chocolate into four separate bowls large enough to do some stirrin'.
  3. Tint each portion with the color desired (I used red, yellow, blue, and green) until it reaches the tone of your liking.
  4. Unicorn pom pom puffs
  5. Add 1/4 of the coconut to each bowl. Stir til combined.
  6. Unicorn pom pom puffs
  7. Gather a small lump of each color together, and clump them lightly so that they adhere. Place on a baking sheet as you finish them. Continue until you've used all of the mixtures.
  8. Unicorn pom pom puffs
  9. Let them set for an hour or more before eating for the best texture. Store leftovers at room temperature in an airtight container.

Taste the rainbow!

Wednesday
Jul092014

Waste Not Want Not: Compost Cookies Recipe

CakeSpy note: this is a guest post from Stefanie Ellis. When she's not busy masquerading as a giant Thin Mint, Stefanie writes about food and relationships. She is a former restaurant critic and food writer for the St. Louis Post-Dispatch and St. Louis magazine, and is the PR director for Girl Scouts of Western Washington. You can reach her via email here.

I have a confession to make: I don’t really like cookies. I’ve tried really hard to like them. I was even sprawled out on a settee while some handsome man fed some to me, and that STILL didn’t work. Crazy? Maybe. But I’m more of a cake kind of girl. I would ditch a handsome man if it meant I could spend an evening on my settee with a devil’s food cake slathered in bittersweet chocolate ganache. For me, cake takes the cake.

However, there have been a handful of experiences in my life where cookies have actually competed with my love for cake, and left a rather remarkable impression.

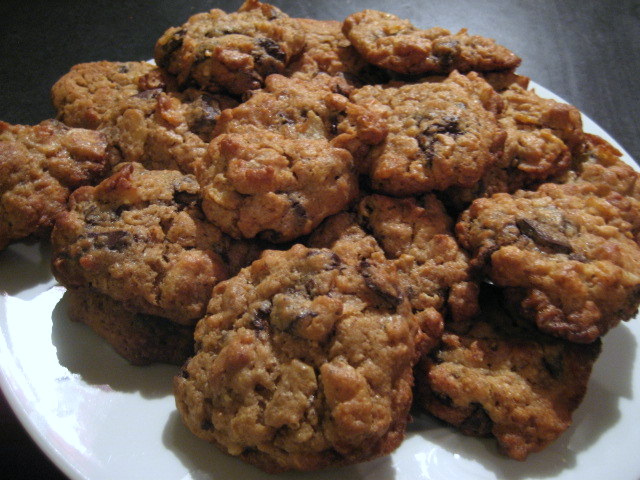
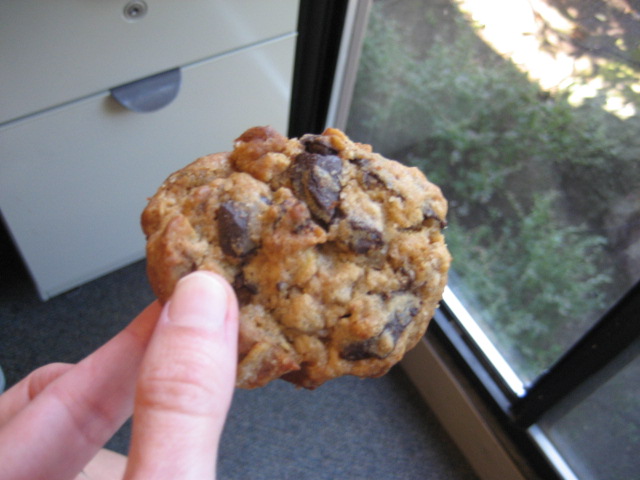
Like when I was little, and my mom would serve me chocolate chip cookies warm from the oven when I came home from school. I never knew when these magical, melty kitchen table sessions would happen, so it made it even more exciting. The chocolate would get all over my face, and we’d laugh and talk about our days. I can’t imagine anything more wonderful than that feeling, or that perfect marriage of sugar, butter and chocolate. My local grocery, Metropolitan Market, started making giant chocolate chip cookies with several types of chocolate. They make them every five minutes, so when you walk into the store, there’s always a fat, gooey cookie waiting for you. Instantly, I am catapulted back to my kitchen table, laughing with mom. Sometimes I eat one while I walk through the store, only to realize I had chocolate all over my face the whole time.


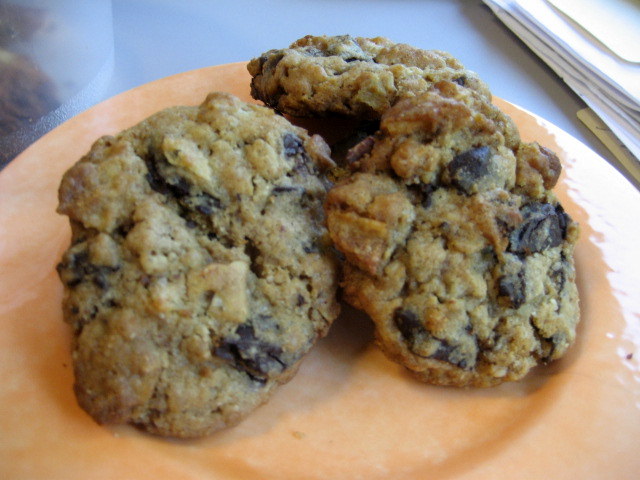
When I went to college, my grandmother would send me care packages filled with oatmeal cookies with apricots and pecans. I don’t like oatmeal cookies, but hers were saucer-sized orbs of the softest, silkiest, cinnamon-kissed dough I’ve ever tasted. The apricots paired beautifully with the cinnamon, and she ground the oatmeal so fine you didn’t even know it was in the recipe. These are the only oatmeal cookies I could ever imagine eating every day for the rest of my life.


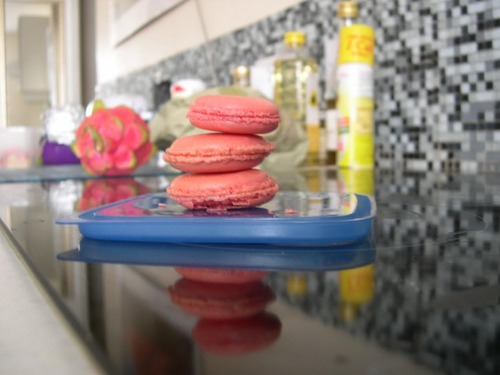
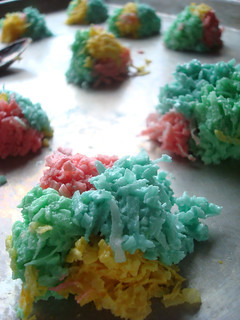
When I went to pastry school, I made my first macarons. They were pink. But more than that, they were so crisp and delicate, it seemed as though they might shatter if you laughed within close proximity. The insides were tender and ethereal, like a pillow made of cotton candy. When I melded the fragile shells together with homemade raspberry jam, it felt like I was painting the inside of a princess castle.

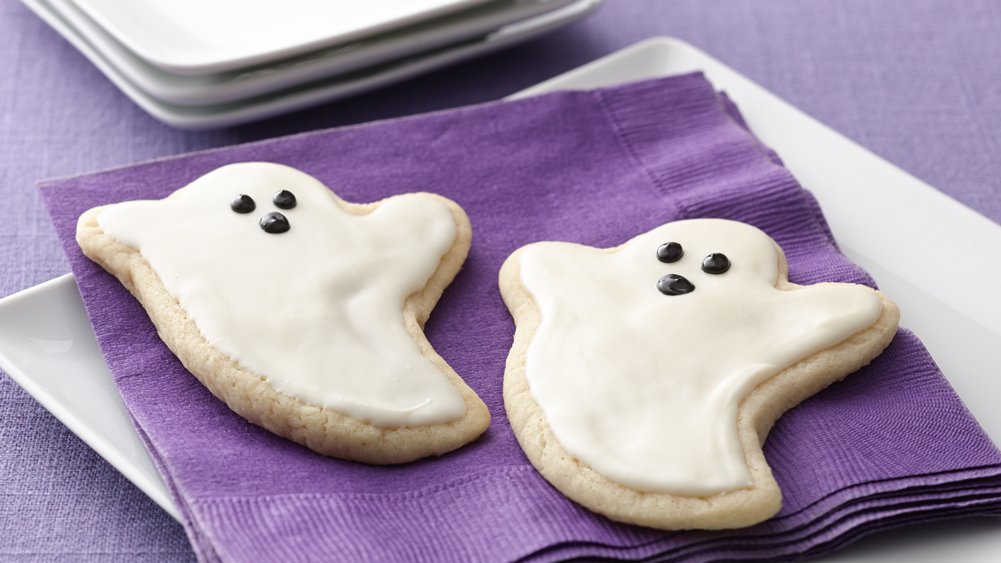
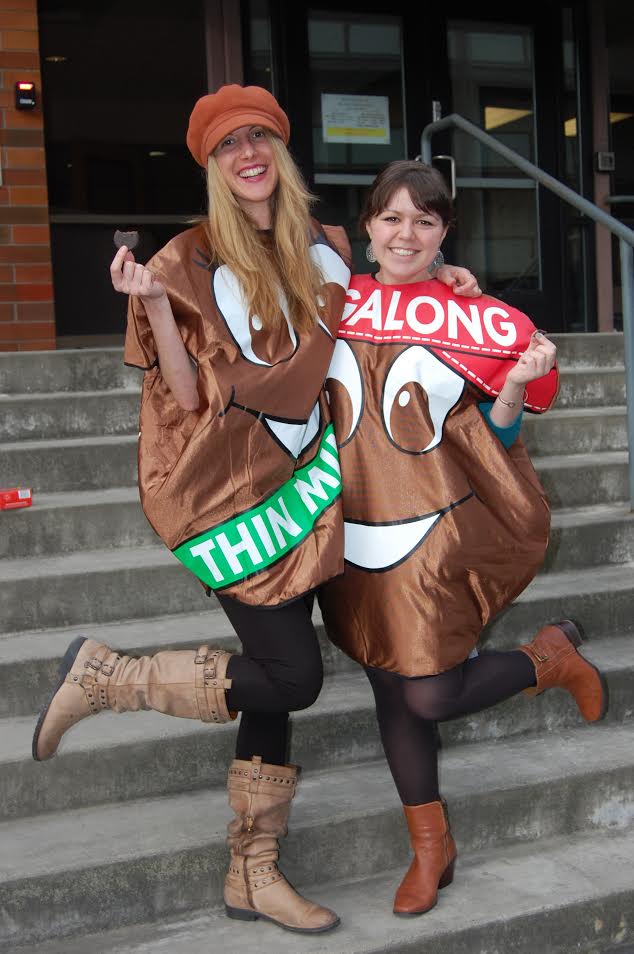
And let’s not forget Girl Scout Cookies. I’m not just saying this because I work for Girl Scouts. I couldn’t, even if I wanted. Girl Scout honor. I’ve had a love affair with Girl Scout Cookies ever since I can remember. To me, Samoas and Thin Mints are right up there with Nutella eaten straight out of the jar. They’re a luxury, and I don’t eat them year-round, as many people believe (people also think our office has stairs made of Do-Si-Dos). When I do eat them, I’m transported back to the sweetest moments in my childhood, when my biggest stressor was whether or not to play freeze tag, jump rope or eat the blackberries from my neighbor’s yard.

Each one of these cookie memories has been completely different – sort of like a bunch of different experiences were dumped into my brain and mixed around, creating a sweet feeling of joy in my heart.

I realize they’ve created the perfect base for these Crazy-Sexy Compost Cookies, my new favorite. Yes, that means I kind of like cookies now. I guess I can thank Christina Tosi for that. I’ve been hearing of her compost cookies from Momofuku Milk Bar for years, and love that her recipe uses coffee grounds. I’m a big compost geek. I have my master composter’s certification, and have even been known to take my compostables on planes from time to time.

I always have random bits of ingredients in my pantry that can never really be used for a single recipe, and that’s why I love these cookies so much. Have just a few ingredients that don’t go together at all? No problem! You might even find, as I have, that cookies are even better when you start adding in wacky ingredients. Goldfish crackers or Almond Roca, anyone?


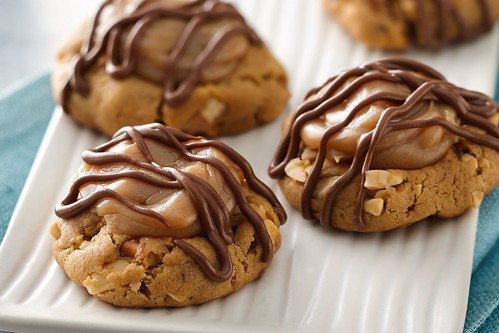
Tosi’s recipe calls for butterscotch, pretzels, graham cracker crust and oats, and I have eliminated those ingredients, replacing the oats with maple pecan granola, and adding in banana chips and crystallized ginger. I also use almond flour in place of some of the regular flour, which makes for a wonderful texture. All in all, this cookie has really challenged my perception of what a cookie can or should be. Not to mention it has done a nice job in helping me remember that cookies, like memories, are much better when you throw a bunch of different things together and mix them around to create a sweet feeling of joy in your heart – and in your stomach.

Crazy-Sexy Compost Cookies

Note: Compost cookies are trademarked by Momofuku. These cookies were not made for resale.

YIELD: Approximately 25 cookies

INGREDIENTS

1½ sticks butter, room temperature (12 T)

3/4 cup raw sugar

¼ cup coconut sugar

1 egg

1 teaspoon vanilla bean paste

1 cup unbleached flour

1/4 cup ground almonds

1/2 teaspoon baking powder

1/4 teaspoon baking soda

1 teaspoon salt

1 T maple agave syrup or maple syrup

1 cup dark chocolate chips

1/2 cup banana chips, crushed

2T candied ginger, finely chopped

1/2 cup granola, such as Trader Joe’s Maple Pecan

1 cup potato chips, crushed

Procedure


  1. Heat oven to 375 degrees.
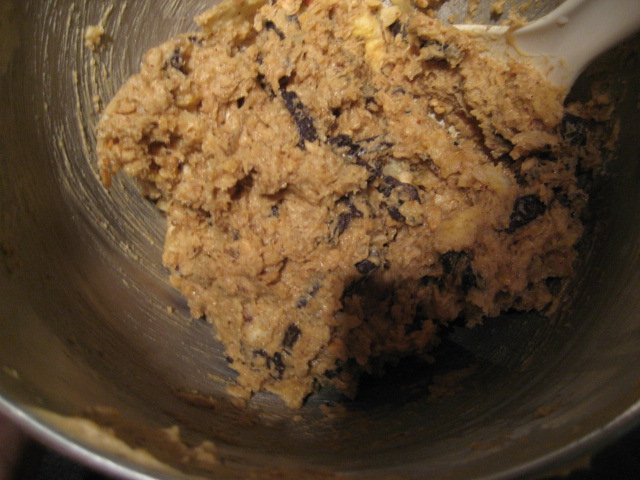
  2. Combine the butter and sugars in the bowl of a stand mixer fitted with the paddle attachment and cream together on medium-high for 2 to 3 minutes. Scrape down the sides of the bowl, add the egg and vanilla, and beat until well blended. Reduce the speed to low and add the flour, almond meal, baking powder, baking soda, and salt. Mix just until dough comes together, about 30 seconds. Do not over mix. Scrape down the sides of the bowl with a spatula.
  3. With a spatula, add the chocolate chips, banana chips, granola, maple agave syrup, ginger and potato chips. You’ll want to crush the ingredients a bit to make sure there aren’t large chunks, but do so judiciously, not incessantly.
  4. Refrigerate dough for 30 minutes to 1 hour.
  5. Arrange the chilled dough 4 inches apart on parchment or silicone baking mat-lined sheet pans. Bake for 15 minutes, or until the cookies are golden brown.


Cool the cookies completely before transferring to a plate or container for storage. At room temperature, cookies will keep fresh for 5 days; in the freezer, they will keep for 1 month.

Monday
Jul072014

Pastissets: A Party-Perfect Cookie Recipe from Spain

Pastissets

Last week, I was invited to a party. This was an exciting prospect, because typically at parties there is cake. Or as Julia Child once smartly and aptly put it, "a party without cake is just a meeting."

It was a potluck party, so naturally I decided to bring something sweet. Since these were new friends, I also wanted to kiss up a little bit. So in knowing that they had lived in Barcelona for a while (showoffs), I decided to find a recipe from Spain. Maybe a cake?

Well, almost: a cookie. In my brief research, I discovered a little something called pastissets. In looking at the recipe, which relied on lard for a tender texture and confectioners' sugar for a snowy coating, it struck me that these cookies seem very much like the love child of New Mexican biscochitos and Mexican wedding cakes (or snowballs, or whatever you want to call them). No nuts, but still that melt-in-your mouth texture. 

Pastissets

Apparently, in Spain sometimes pastissets are more like a sweet mini empanada cookie; it is in particular in Amposta that they're created in this way, sometimes with olive oil, sometimes with lard. The fact that some versions are made with anisette makes them only more similar to biscochitos!

I made mine with butter because I wasn't sure if any vegetarians would be in the house, and they went over quite well. I left some for my sweetie, who had to work, and he left me this note: 

Pastissets

So I would say they are a success.

Just to review: melt in your mouth. Nice and tender. Like Snowballs or Russian teacakes or Mexican wedding cakes but without the nuts!

I give them an A+. I hope you do too.

Pastissets

Makes about 24

  • 1 cup unsalted butter (original recipe called for 2/3 cup lard and 1/3 cup butter)
  • 1/2 cup sugar
  • 1 egg yolk
  • 1/2 teaspoon lemon peel, grated
  • 1/4 teaspoon cinnamon
  • 1 teaspoon vanilla extract
  • 2 cups flour
  • 2 teaspoons salt
  • confectioners' sugar, sifted ( for dusting)

Directions

  1. Preheat the oven to 350 degrees F.
  2. In a large bowl, cream the butter until smooth.
  3. Incorporate the sugar, egg yolk and lemon peel. Stir in the vanilla.
  4. In a separate bowl, combine the cinnamon, flour, and salt; work into the buttery mixture with your hands to form a smooth dough.
  5. Roll the cookies into 
  6. Pastissets
  7. Arrange cookies on a greased or parchment lined cookie sheet and bake for about 10 minutes, or until golden.
  8. Allow to cool briefly on the cookie sheet as they are delicate when warm. If one looks like it's trying to hide, eat that one first. 
  9. Pastissets
  10. Coat with confectioners' sugar twice: once after they've cooled for a few minutes, and again before serving. 
  11. Pastissets
Wednesday
Jul022014

American Flag Shortbread Recipe

When the settlers came over from Europe, they didn't just bring a will for freedom and revolution: they brought over their shortbread recipes. 

Shortbread is perhaps one of the world's most perfect, and most simple, foods. Consisting primarily of flour, butter, sugar, and salt, it can be prettied up in any number of ways, but is in its essence a humble food. 

American Flag shortbread

This recipe takes but one liberty: the addition of cornstarch to mimic the lower-protein flours which might have been used in old-school Europe; but otherwise it is fairly straightforward.

American Flag shortbread

To make it a bit more festive, I reserved about 1/8 of the dough, which tinted red. I then made the majority of the dough into a rectangle, removing a portion from the left hand corner to make the blue portion of the flag. I tinted it after I cut it out; this was how I ensured I had enough dough.

Now, I should tell you that decorating with tinted shortbread is tough because you can't really roll or shape it. So I gathered crumbles and kind of pressed them into stripes, and simply shaped and placed the blue portion where I had removed it initially. I used the leftover bits to form ugly multicolored balls of shortbread. They still tasted good. 

American Flag shortbread

It baked up pretty sweet, don't you think? Here's the recipe for shortbread--it's a keeper. 

How to make perfect shortbread

as seen on Craftsy

Ingredients:

  • 1 ¼ cups all-purpose flour (about 6 ounces)
  • 1 stick unsalted butter, softened (4 ounces)
  • ½ cup granulated sugar (about 2 ounces)
  • ¼ cup cornstarch (about 1 ounce)
  • Preheat the oven to 325 degrees F.

Procedure

  1. Cut the butter into pieces. Using a wooden spoon, mix the butter and sugar by hand until pale and creamy.
  2. Sift the flour, cornstarch and salt into the bowl of creamed butter and sugar, and mix well, continuing to use your wooden spoon. It will begin to come together in a somewhat crumbly dough, but it should very easily clump together if you gather it with your hand. If baking as a large round or as small cutout cookies, transfer to a parchment-lined baking sheet.
  3. Lightly flour a work surface. Place the dough on top. Roll out the dough until it is about ¼-inch thick.
  4. Decide what shape you’d like the shortbread in (follow the steps above, to flag-ify it). If you’d like it to be a round, shape it into a circle by hand. If you’d like it to bake in a pan, press it into a greased 8″ by 8″ pan. Or, simply cut the rolled dough using a lightly floured cutter. Score the dough if it will be sliced after baking, and lightly prick all over with the tines of a fork.
  5. Bake in the preheated oven for 25 minutes, or until the sides and bottoms are lightly browned but the top is just set. Step 7: Let cool on the pan for about 5 minutes before transferring to a wire rack to cool completely. Don’t get greedy, or you might burn your mouth.

Happy 4th of July! Don't forget to make some pop rocks cookies, too.

Monday
Jun302014

Millionaire's Shortbread Cookie Cups Filled with Milk

Milk filled cookie shooters

Cronuts. Brookies. Donnolis. S'moreos. The world of mash-up desserts, or the "hybrid trend", as it has been called by food consultants and PR peeps, has pretty much gotten out of control. But as annoyed as you may want to be with the trend, the fact is...if some is good, more has the potential to be amazing. And so we continue to--excuse the pun--eat it all up.

A recent dessert hybrid dreamed up by cronut creator Dominique Ansel was the chocolate chip cookie "milk shot"--a cup made of chocolate chip cookie, enforced so that it could hold milk long enough to take it as a "shot" and then eat the vessel from whence it came.

It never hit as big as the cronut, but I still think it's a pretty nifty idea, because how many desserts can actually allow you to utter the words "I'm gonna get milk and cookie CRUNK right now!"...? Seriously. No other dessert I can think of.

And an easy-to-make version hit my radar recently with an email from Pillsbury featuring several of their easy mash-ups (cannoli doughnuts, crescent bagels, etc). Their version included chocolate chip cookie dough baked in cupcake tins, then lined with chocolate, then filled with milk. Here's their version:


Milk Filled Chocolate Chip Cookie Cup

Looks yum, right?

But of course, I didn't want to do EXACTLY what they told me to, so I thought "why don't I do a Millionaire's shortbread spin?".

It was quite easy to do: I used sugar cookie dough instead of chocolate chip, then added a layer of caramel (since I think I'm pretty cool sometimes, I made my own) atop which I added a layer of chocolate. These fat cookie confections held the milk perfectly, and after a minute or two it begins to soak in to the rest of the cookie and soften the caramel. Milk filled cookie shooters You can either drink the milk then eat the cookie, or break it apart and then let the pieces "soak" in the spilled milk for a while longer.

Milk filled cookie shooters

No matter how you decide to eat it, the unrefutable truth is that these things are delicious. I mean, sugar cookie dough, caramel, chocolate, a touch of salt, and milk too? There is no part of this equation that is wrong or bad. The taste is classic, but the method of presentation and the mode of eating is fun. And isn't that what dessert is about, joy and fun?

Here's the recipe. 

Millionaire's Shortbread Cookie Cups Filled with Milk (printable version here)

You need: a cupcake tin (jumbo or regular, but not mini), parchment paper, spoons and spatulas

Ingredients

  • 1 box Pillsbury sugar cookie dough (or one batch of your favorite type), dough prepared per the package instructions but not baked
  • 1 bag chocolate morsels (12 ounces)
  • 1 cup sugar
  • Milk

Procedure

  1. Preheat the oven to 375. Generously grease the cupcake tin, sprinkle each cup with confectioners' sugar, and place a sheet of parchment along the bottom (for easy removal later). Why not just use cupcake cups? I didn't want the ridges on the sides. You can use the cups if you don't mind the ridges, though. No judgment. 
  2. Milk filled cookie shooters
  3. Grab big fistfulls of dough and press them into each of the cupcake cups. Milk filled cookie shooters Press a dent in the center. You want the cups to be about half full of dough. My entire batch was sufficient to fill a 6 cup "texas sized" cupcake pan. This is to say, these cups were no mere shot glasses. They were fatties. 
  4. Milk filled cookie shooters
  5. Now, bake the cookie cups. Since mine were so thick, they baked for about 25 minutes--longer than the time you'd bake the dough if you were making mere cookies. My advice? Keep an eye on their progress around the suggested cookie bake time, but then keep them in the oven until they are puffy and golden.
  6. Milk filled cookie shooters
  7. Once puffy and golden, remove from the oven. They will start to deflate in a matter of minutes. This is actually a good thing for you. 
  8. Milk filled cookie shooters
  9. After 5 minutes or so, approach with a spoon and knife. Milk filled cookie shootersFirst, use the knife to loosen the edges of each cookie cup to ensure easy removal later. But keep them in the cupcake tin. Now, use the spoon (or go ahead and use your impeccably clean hands) and press the cookies into a more pronounced cup shape. 
  10. Milk filled cookie shooters
  11. Let the cookies cool for about 30 minutes in the cups.
  12. Now, make your caramel. Simply put the sugar in a dry saucepan, and put it over medium-high heat. Caramelize it per the instructions in this tutorial. Once liquid, pour a little into each cookie cup and spread using a spoon to ensure even coverage inside of the cup. Milk filled cookie shooters Let the caramel set for about 30 minutes before proceeding.
  13. Now, melt the chocolate in the top of a double boiler. Once melted, pour some on top of the caramel layer in each cup and spread so it covers the inner cup evenly. Don't make it too thick or you won't have anywhere to put your milk.
  14. Milk filled cookie shooters
  15. Let the cookie cups set again, this time for 2 hours or so, until the chocolate has become firm. 
  16. Milk filled cookie shooters
  17. Once the chocolate is firm, you're ready to serve! Remove the cups from the cupcake tin. Place each serving in a shallow bowl (just nicer in case the milk seeps out). Fill each cup with milk--pour it right in. And serve!
  18. Milk filled cookie shooters
  19. It's nicest to let the milk sit for a minute or two before drinking and devouring--this will soften the caramel and chocolate and make it, in my opinion, a more enjoyable experience. Milk filled cookie shootersBut you follow your bliss. 

Enjoy!

© Cakespy, all rights reserved. Powered by Squarespace.