Home Home Home Home Home Home Home
CakeSpy

Featured: 

My adventure at Ben & Jerry's in Vermont!


Unicorn Love: the Eating Disorder Recovery Blog


 Buy my brilliant books!

Buy my new book!

Buy my first book, too! 

CakeSpy Online Retail!


Archives
Gallery

Fantastic appliance for cake making on DHgate.com

everyrecipe.co.nz

Craftsy Writer

Entries in Cookies (178)

Tuesday
Jun032014

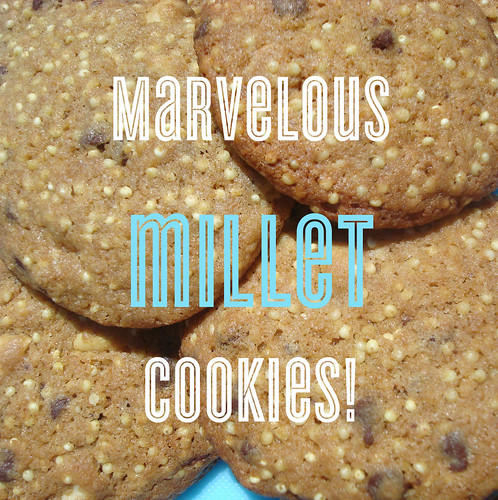
Best Health Food Ever: Millet Cookies

Millet cookies

I realize that I have something of a reputation for riding unicorns, wearing sparkles, and subsisting on a diet of mainly pink frosted treats. But the fact is this: I love a good hippie cookie every now and again. Whether it's the "Shazaam!" from my home base in New Jersey or a Power Cookie from Whole Foods, I enjoy these cookies with dessert-worthy delight. Something about the nuts, hearty hippie ingredients like nut or whole wheat flour, and a plethora of trail mix-esque mix ins just does it for me. 

So the other day when I found a bunch of millet in my cabinet, I decided to see if I could make it into a tasty cookie creation. I'll tell you right now, so you don't stress about it, that the cookies tasted delicious.

Millet cookies

I found a recipe for oatmeal millet cookies on Grateful Table, which I proceeded to so completely change that I wouldn't even feel comfortable saying I adapted it...more like used it as a springboard. Still, I do want to give the website a shout-out because these cookies also look highly delicious.

While I toasted some cashews and millet, I evaluated my ingredients. I realized I wanted to soften the butter which was totally cold, so I did something so forbidden: once the millet and nuts came out of the oven, I laid the cold butter on top of the millet. I turned the side every minute or so. Believe it or not, because it really seems like it shouldn't have worked, it did. 

Millet cookies

But I digress. Back to the cookies.

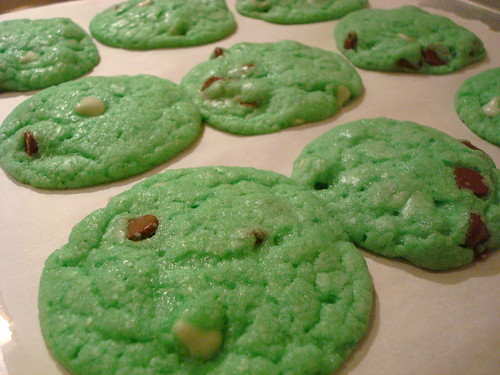
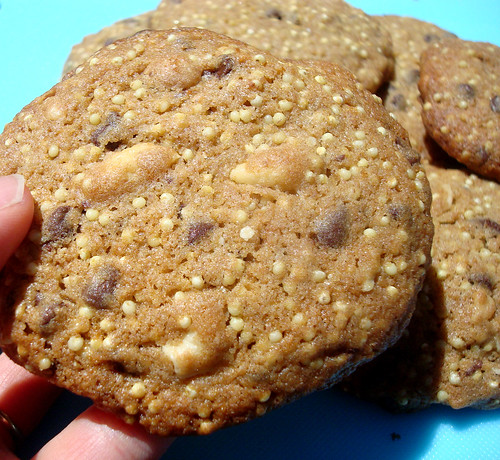
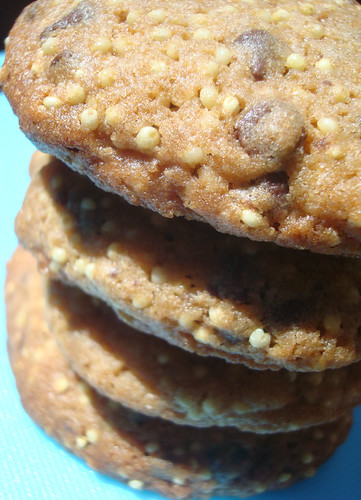
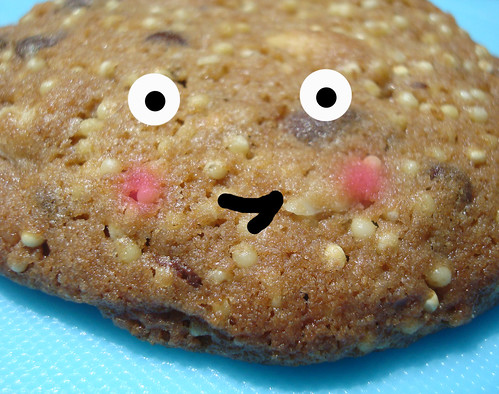
Toasty millet gives a fantastic crunch to the cookies, as well as a pleasingly nutty flavor that works in harmony with the flavor of the actual nuts and wheat flour. Perhaps because of all of the other ingredients, the wheat flour isn't as assertive tasting as it is in some recipes, and they maintain the identity of a cookie which happens to have healthy ingredients, rather than tasting like health food. 

Of course, the chocolate morsels don't hurt. Don't even think about skipping them. 

Millet cookies

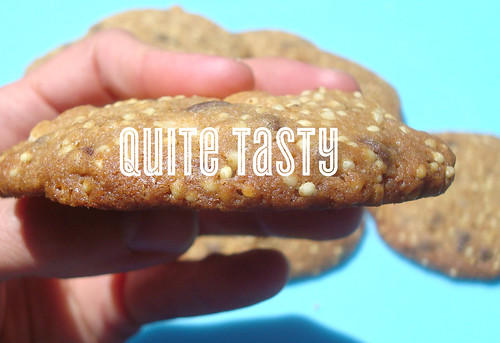
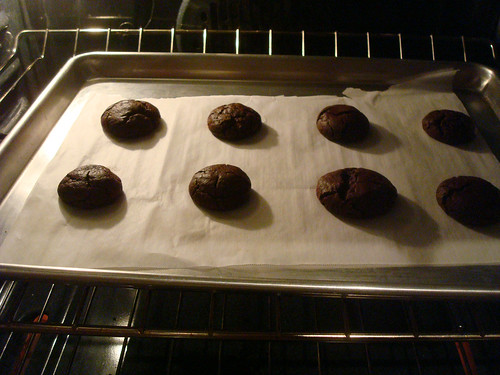
Nice and crispy on the outside, hearty and full flavored and slightly chewy on the inside. They may not be actual health food, but these cookies are awfully good.

Millet cookies

Millet cookies (not actually health food) - Printable version here

Makes about 30 cookies

Ingredients

  • 1 cup millet
  • 1 cup cashews, coarsely chopped
  • 1 1/2 cups whole wheat flour
  • 1/2 teaspoon baking soda
  • 1 teaspoon salt
  • 2 sticks unsalted butter, softened
  • 1 cup light brown sugar, packed
  • 2 large eggs
  • 1 teaspoon vanilla
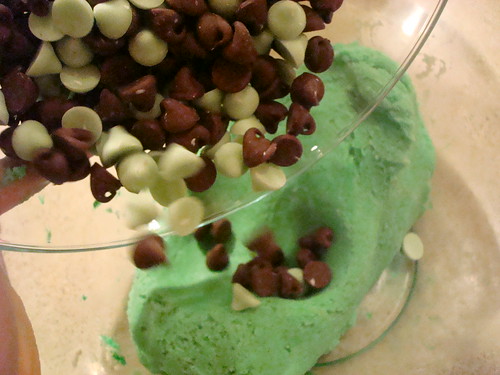
  • 1 cup chocolate morsels

Procedure

  1. First, preheat the oven to 350. Line two baking sheets with parchment paper.
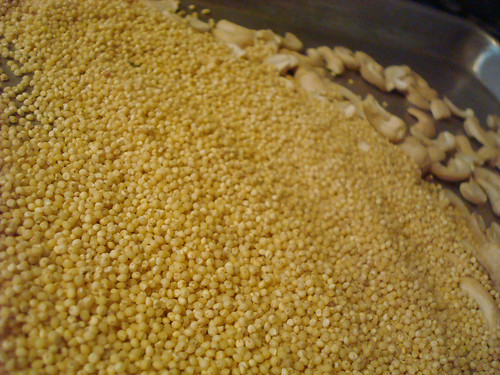
  2. Now, toast the nuts and millet on a baking sheet while the oven preheats. Because they toast at different rates, what I did was scatter the cashews on half of the tray and let them toast for about 5 minutes, then I took the sheet out, added the millet to the other side, then let the whole tray toast for five more minutes
  3. Millet cookies
  4. Remove the tray from the oven and put it somewhere so it can cool, so not on top of the oven (you don't want your mix-ins to be hot). Proceed with the rest of the steps as they cool.
  5. In a medium bowl, sift together the flour, baking soda, and salt. Set to the side.
  6. Cream the butter in a stand mixer until nice and fluffy, 3 to 5 minutes. Add the brown sugar and continue to mix until it becomes fluffy again, 3 to 5 more minutes. 
  7. Stop the mixer. Add the eggs one at a time, briefly mixing after each addition until incorporated. Stir in the vanilla. 
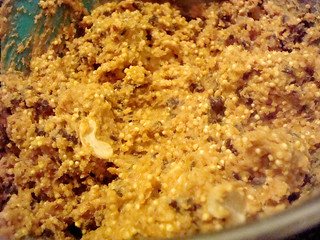
  8. Add the dry ingredients to the butter mixture, mixing as minimally as possible until everything is incorporated into a chocolate chip cookie-esque dough. 
  9. Now, add the toasted millet and cashews and the chocolate morsels. Fold gently into the dough until evenly incorporated. 
  10. Millet cookies
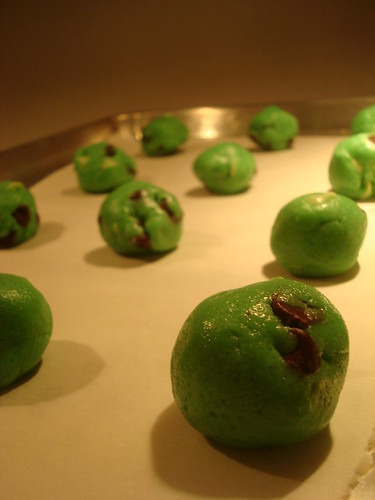
  11. Place the cookie dough with an inch or two of space around on all sides on the cookie sheet. Millet cookies
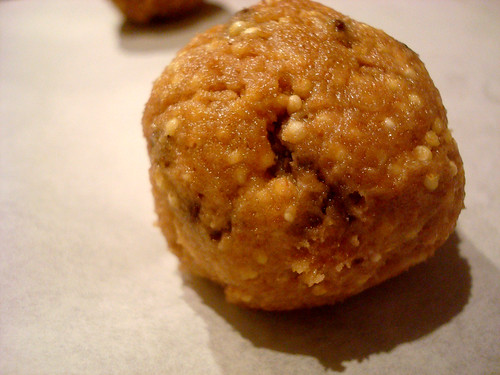
I made pretty fat cookies, a heaping tablespoon, but you make them however big you want them. 
  12. Bake for 12 to 15 minutes, or until toasty on the edges and set in the center. Remove from the oven. Let cool on the baking sheet for a minute or so before transferring to wire racks to cool completely. 

Millet cookies

Enjoy!

Sunday
Dec152013

Tubular: Easy Mint Chocolate Chip Cookies Using Refrigerated Sugar Cookie Dough

Cookie tree

Somehow, it's happened: you find yourself in need of a batch of homemade cookies, STAT. It might be for the cookie swap you thought was tomorrow, not today, or the school party you totally forgot, or maybe you just want to whip up something sweet in record time.

Green cookies

As these cookies prove, a time crunch need not mean that you sacrifice all the fun of baking--they are actually made from "doctored" refrigerated sugar cookie dough. They're assembled in less than five minutes and baked in about 10 minutes--even with cooling time, the process of going from mere ingredients to "let's party" all happens in about 30 minutes. 

ALL YOU NEED:

Green cookies

All you have to do? Mix that dough with mint and chocolate chips (they're easily found in the baking aisle this time of year), a teaspoon of peppermint extract and maybe a few drops of green food coloring. Roll into balls and bake as specified on the package. They bake up like a minty, buttery, sweet Christmas miracle!

Mint Chocolate Chip Cookies Using Refrigerated Sugar Cookie Dough

Makes about 24

  • 1 tube refrigerated sugar cookie dough
  • 1 teaspoon peppermint extract
  • 1 cup mint and chocolate chips, mixed together
  • 4-5 drops green food coloring

Preheat the oven to 350 degrees F. Line two baking sheets with parchment paper.

In a large bowl, break up the refrigerated cookie dough by hand. Add the food coloring and peppermint extract. Combine well.

Make them green

Add the morsels, mixing by hand to knead them evenly but gently throughout the dough.

Green cookies

Divide the dough into 24 equal parts. (First divide in two, then those two pieces into two to make four, then break each of those parts into three pieces, then divide those in two. You'll have 24. Don't get confused.)

Roll each piece into a ball and place on the baking sheet, well spaced. Green cookies

Bake for 8-11 minutes, or until soft in the center but lightly browned on the edges. I don't know how to say it other than this, but the middles might not look 100 percent set. They will bake a touch more when you remove the cookies, though, so it's ok.

Green cookies

Note: At this point, instead of baking, you can freeze the dough balls on the sheets if you prefer not to bake right now (if you want to do it in the morning, say). Just don't forget to turn off the oven and remember to preheat it again before you bake. 

Let the cookies cool on the sheets for 6 minutes before transferring to a wire rack to cool completely. Use a spatula for the transfer; if the cookies seem too soft, wait another minute or two before transferring.

Saturday
Oct122013

The Bake-Off is Coming: Lemon Pistachio Blackberry Thumbprints Recipe

Lemon cookies

CakeSpy Note: OMG! The 46th Annual Pillsbury Bake-Off is coming! Since I so deeply loved attending the 45th Bake-Off, I thought I would get you excited early by sharing some of the finalists' recipes. Narrowed down from zillions of entries, I'll profile some of the 100 finalists--but of course, based on the subject matter of this site, I will focus on sweets! You can follow them by clicking the bakeoff tag below the post to see which ones have been posted so far. Enjoy! 

I appreciate the power of a promise. And these cookies, designed by Joan Cossette of Colbert, WA offer a delectable one: "Each bite of these sugar cookies promises a bit of sweet jam and a drizzle of sweet icing." Oh, yum.

Lemon Pistachio Blackberry Thumbprints

Prep Time: 25 Min Total Time: 35 Min Makes: 36 servings

Ingredients

  • 1 roll Pillsbury refrigerated sugar cookie dough
  • 1/2 cup shelled salted roasted pistachios, chopped
  • 1/3 cup All Purpose Flour
  • 1 teaspoon grated lemon peel
  • 1/2 cup Blackberry Jam
  • 1 cup powdered sugar
  • 1 tablespoon honey

Procedure

  1. Heat oven to 325°F. Line large cookie sheets with parchment paper. Let cookie dough stand at room temperature 10 minutes to soften.
  2. In large bowl, break up cookie dough. Add pistachios, flour and lemon peel. Mix with wooden spoon or knead with hands until well blended.
  3. Shape dough into 1-inch balls.
  4. Place 2 inches apart on cookie sheets. With thumb or handle of wooden spoon, make indentation 3/4 inch wide in center of each cookie. Spoon about 1/2 teaspoon jam into each indentation.
  5. Bake 10 to 13 minutes or until set but not browned. Remove to cooling racks. Cool 3 minutes.
  6. In small bowl, mix powdered sugar, honey and 1 tablespoon water until smooth. If necessary, stir in water, 1 teaspoon at a time, until of drizzling consistency. Drizzle honey glaze over warm cookies. Store in covered container.
Wednesday
Aug212013

Chocolate Cookies With Real Pieces of Cookie Monster

Cookie monster cookies

As Aunts go, I am probably the worst and most evil one in the world. I realize that you probably think I am joking, but allow me to illustrate this statement with an example.

So. My young nephew, Dylan (code names: Dilly, Dil, Dillybar), age three, just loves a flavor of ice cream from Hoffman's Ice Cream called Cookie Monster. It's a blue ice cream with all sorts of cookies mashed into it. The last time I took him for ice cream, I asked if he knew why it was blue. He indicated that he did not in fact know, so I revealed "that's because it's made with real pieces of the Cookie Monster!".

Now, I'll tell you what happened then. Dylan stopped eating ice cream, and his lower lip kind of started trembling. I'll tell you the truth--he was closer to crying than not.

"Oh my god! I mean, gosh!" I said. " Aunt Jessie was just kidding. It's blue because it's cookie monster's favorite flavor!".

Thankfully, this weak save was sufficient and the happy ice cream twinkle came back into his eye and he continued eating. I did notice, however, that the next time we went to Hoffman's he ordered Mint Chocolate Chip. 

Now, don't tell my sister (Dylan's mother) because I'm sure that she will agree that this is proof that I am the absolute worst Aunt ever, not only because I scared her son but because I took him out for ice cream at a non-approved snack time. 

Chocolate Cookies

But since I apparently cannot learn my lesson, I made these chocolate cookies recently and couldn't resist adding some blue candy melts. You know, to give the look of real pieces of cookie monster melted into the batter. I'm dedicating them to young Dylan, and can't wait to tell him that they're made with real pieces of cookie monster.

Joking aside, these cookies are fantastic. They are surprisingly light in texture for their extreme chocolate to other ingredients ratio, but very flavorful. I added a dash of dark coffee to the mix to heighten the chocolate flavor, I trick I learned from the BAKED brownie recipe. It worked well.

This is a great cookie to have in your jar. And they taste great without the candy melts, too.

Chocolate Cookies

Chocolate Cookies With Optional Real Pieces of Cookie Monster

Makes about 24 - printable version here

  • 1 2/3 cups (10-oz. pkg.) Dark Chocolate Morsels
  • 1 cup all-purpose flour
  • 1/4 cup unsweetened cocoa
  • 1 teaspoon baking soda
  • 1/2 teaspoon salt
  • 1/2 cup (1 stick) butter, softened
  • 1/2 cup packed light brown sugar
  • 1/4 cup granulated sugar
  • 1 large egg
  • 1/2 teaspoon vanilla extract
  • 1/2 teaspoon strong brewed coffee (optional)
  • 1 healthy handful light blue candy melts

Procedure

  1. Preheat oven to 325° F. Line baking sheets with parchment paper.
  2. Melt the morsels in in a saucepan or in the microwave. If on the stovetop, stir frequently to prevent scorching. Set aside.
  3. Sift the flour, cocoa, baking soda and salt into a medium bowl.
  4. Cream the  butter, brown sugar and granulated sugar until smooth and light, 3 to 5 minutes.
  5. Add melted chocolate and mix well. Add egg and vanilla extract, mixing until well blended, about 1 minute. Add flour mixture, mixing just until blended. If you want, press a couple of blue candy melts into the cookies.
  6. Chocolate Cookies
  7. Shape into balls and place them on to your prepared baking sheets.
  8. Bake for 16 to 18 minutes or until wooden pick inserted in center comes out with moist crumbs and the tops have a cracked appearance.
  9. Chocolate Cookies
  10. Cool on baking sheets for 5 minutes before transferring to a wire rack to cool completely.


Sunday
May262013

Sweet Discovery: The Shazaam Cookie, Nature's Corner, Spring Lake NJ

I'm going to tell you the truth, here. Had I read the sign carefully, I might not have went for this cookie. After all, it is advertised as being "high fiber" and boasts its content of rice protein powder to satisfy appetite. Those selling points make the cookie sound suspiciously like health food.

It does make sense, of course--they are sold at a health food store in New Jersey. They're called the "Shazaam Cookie" and they're baked on site at Spring Lake Heights' Nature's Corner store (where health nuts and stoners from my neck of the woods have bought their hippie food since I was in high school). They're chock-full of whole grains, organic hemp seeds, organic rice protein powder, and organic coconut oil. As I learned on their website, the cookies "also have flavorless vegetable fiber to help regulate your digestive system. Yummy chocolate chips add just the right amount of sweetness."

Perhaps they sense that they might lose some people with this description, so they finish "Of course,  These cookies are fantastically popular, and we love making them fresh in store daily. Stop in today and give them a try!"

Now. I am going to tell you that even if health food scares you, you really must give this cookie a try. Because somehow, the little elves at Nature's Corner manage to make a healthy treat that is a seriously delectable sweet. It is soft and lightly crumbly--not like it will crumble apart, but like it will yield in your mouth. But then little pop-crunches from the hemp seeds. Nice texture. And then you get the chocolate chips, little bursts of deep chocolate flavor surrounded by a nutty, grain-y flavor that is a wonderful complement. They sort of remind me of the Urban Legend cookies from my new book, but like, their healthier cousin.

I found this cookie a wonderul surprise, and was so delighted to learn that they are baked on site. I can most certainly see how they've begun to garner a cult following, and they can certainly count me as one of their fans from now until forever. 

Nature's Corner,  2407 Route 71, Spring Lake Heights, NJ; online here. 

Saturday
Apr062013

Sweet Treats: Semolina Sesame Cookies

Have I ever told you that one of my favorite bakeries, not only in Seattle, but in the world, is Macrina Bakery? From their biscuits to their morning rolls to their cookies, I can't get enough of their sweet treats. Every month they share a recipe via their newsletter, and I in turn enjoy to share with you. 

This month it's Semolina Sesame Cookies. As the headnote says, "These cookies are inspired by acclaimed baker Carol Field, who gathered a collection of wonderful regional recipes from bakers, grandmothers, and chefs on her travels through Italy. The essence of this recipe came from one of her books (I have them all!), and is so typically Italian. The semolina, a coarsely ground wheat flour used widely for making pasta, lends a beautiful crisp texture, and the sesame seeds make them a classic accompaniment to a sweetened shot of espresso. Buttery annd not too sweet, they'll totally satisfy the 4 p.m. nosh need!"

Makes 18 3-inch cookies

  • 3/4 cup plus 2 tablespoons unbleached all-purpose flour
  • 1/3 cup plus 1 tablespoon semolina flour
  • 1/4 teaspoon kosher salt
  • 7 tablespoons unsalted butter, at room temperature
  • 1/3 cup plus 1 tablespoon sugar
  • 1 large egg
  • 1/4 cup sesame seeds

Procedure

  1. Position 2 racks in the center of the oven and preheat to 325°F. Line 2 rimmed baking sheets with parchment paper. Set aside.
  2. Sift together the flours and salt in a medium bowl.
  3. In the bowl of a stand mixer fitted with the paddle attachment or in a large bowl using an electric mixer, cream the butter and sugar. Start on low speed and increase to medium for a total of 5 to 8 minutes, stopping to scrape down the bowl with a rubber spatula as needed. The mixture will be light, fluffy, and pale. Add the egg and mix on low speed until fully incorporated, then scrape the bowl down again. Gradually add the dry ingredients mixing until they're just incorporated and the dough is smooth, about 1 minute. Be careful not to overmix: the cookies may become tough.
  4. Turn the dough out onto a lightly floured work surface. Divide it into 4 equal pieces, then roll each piece into a 1/2-inch-wide rope. Use a ruler to measure and then cut the rope into 5-inch segments. Each segment will become a cookie. If the dough is too soft, chill for 10 minutes to make it easier to handle.
  5. Lay each rope in an S shape, 1 inch apart, on the prepared baking sheets. Tuck the ends under and compress slightly. Chill the sheets in the freezer for 20 minutes to help the cookies hold their shape while baking. (You may also freeze the cookies at this point, covered tightly, for up to 1 week. Let them thaw for about 20 minutes before baking.)
  6. Brush each cookie with a little bit of water and top with the sesame seeds. Bake for 18-20 minutes, or until the cookies are light golden brown. Cool on the sheet for 5 minutes, then transfer to a wire rack to cool completely. Stored in an airtight container at room temperature, these cookies keep their great flavor for at least 1 week. 
Thursday
Apr042013

Thumbs Up: CakeSpy Samples Thumbs Cookies

Thumbs Cookies

Say hello to Thumbs Cookies. They're a tiny cookie that makes you feel fine about eating a baker's dozen of them because they are so small. They're tasty and crumbly and have a very nice sugar-crunch from their topping. After having received a delicious sample package including the original thumbs, chocolate thumbs (with a little dollop of Mast Brothers chocolate in the middle) and some if the little sandwiches with hazelnut choco filling, I can say: I approve of these cookies. But I also enjoy the fact that they come with an interesting story. I'll let Robyn, the baker behind the lilliputian treats, explain it, alongside my clever photos, OK?

Tom Thumb. Get it?

Here goes. (From Robyn): So, I launched Thumbs Cookies, Inc. about a year-and-a-half ago after I had baked someThumbs Cookies for a friend of mine who works at The Ace and she said, "how do we buy these?" 
But...let me back up.
 
As a little girl in Minnesota I grew up baking Thumbs with my mom, Barb. The smell of these tiny cookies would wake me up very early in the morning and I would see my mom rolling a tiny ball of dough and then placing it on the cookie sheet and finishing each one with athumb print. I was mezmorised.. Each one was so perfect. I asked if I could make them, too, and certainly she agreed. Mine however did not look so perfectly round and dainty, but she used them anyway. These quiet hours in the morning with my mom were some of my most treasured memories from growing up.  Over time,"Thumbs" became my mom's signature cookie for every occasion. Friends and family would always be asking for Barb's Thumbs! 

Rules of Thumb

These are some of my fondest memories and the cornerstone of the Thumbs Cookies story While I, too, wanted to share theses delicious bite sized, handmade cookies, I also wanted to celebrate the long time traditions of family time in the kitchen, and how that shapes many of us growing up. 

Under my Thumb

After living in Brooklyn for a few years as a struggling actress, I started to bake a lot. I found myself making lots of Thumbs. I started making variations such as Ginger Clove Thumbsand Thumb Pies (little sandwiches filled with chocolate hazelnut). After seeing how happy these little bite sized cookies made people, I wanted to share them with anyone I could!  
Thumb prints...or, Thumbs on a CakeSpy print!
Today, each Thumb is handmade with care. They are delicate, tiny and melt in your mouth. Many say that the taste makes them think of their childhood. That makes me very happy.  I have been working on several additional flavors, but for now I'd like to keep it simple-just as they started. 
Thumbs cookies
How did I market my wares at The Ace Hotel and Bedford Cheese Shop? Relationships. I actually work at The Ace and I am lucky enough to work at a place where people believe in their community and employees. I am a waitress in the Lobby. After the positivity of the first review from the Ace, the GM decided he wanted to order Thumbs Cookies weekly as a hotel amenity. Similarly, Stumptown Coffee at The Ace started to order them weekly as well. I brought them to The Bedford Cheese Shop and they seemed to be a good fit among the other "artisinal" products. The Bedford Cheese Shop has also been incredibly supportive and instrumental in helping me to further develop the  product's packing. 
Say hello to the bakers!
For more info on Thumbs Cookies, including where to buy, visit the website!
Tuesday
Mar052013

A Historical Look at the Mexican Wedding Cake Cookie

Mexican wedding cakes

Ah, Mexican Wedding Cakes: one of my favorite cakes that is not a cake at all, but a cookie!

And oh, what a cookie. These rich cookies rolled in confectioners' sugar to resemble sweet little snowballs crumble in your mouth in the most delightful way: basically butter and (usually) finely chopped nuts held together by flour and sugar, they begin to shatter and disintegrate the moment they hit your tongue. You may know them as Mexican Wedding Cakes. Or you might know them, with slight variations, under another name: Snowballs, Moldy Mice, Bullets, Russian Teacakes, Melting Moments, Mandulás kifli, Polvorones, Sand Tarts, Sandies, Butterballs, Almond Crescents, Finska kakor, Napoleon Hats (whew!). Mexican wedding cakes

These cookies hail from as many countries as they have names: talk about a universal cookie.

Mexican wedding cakes

Considering the many variations, is it possible to connect the cookie to a particular place? Well, you might first look back to sugar-rich medieval Arab cuisine. Sweetmeats, candies, and confections containing nuts (usually almonds) and spices were served at special occasions. Next, you spread it to Europe, a sweet tradition quickly adopted by Moors and taken to Spain. From then on it’s like playing Telephone: the concept of the cookie traveled far and wide, with each region taking on their own variations based on ingredients available at the time. This sweet cookie concept was then introduced to the New World by early explorers. Fast forward, and you've got a cookie tradition that has persisted due to the cookie's relative ease in preparation and simple but ultimately satisfying tastiness. 

Mexican wedding cakes In the 1950s, they started to appear in American cookbooks as Mexican Wedding Cakes, but it seems that it's really just a new name for an old cookie. They're nearly identical to Russian Teacakes, which were a popular dish at noble Russian tea ceremonies in the 1800s. A popular book in Russia from this era, entitled A Gift to Young Housewives, contains several morsels that are constructed similarly; it’s not hard to see how these treats came to be called Russian teacakes. So what's with the name's cultural makeover? I'm wondering if perhaps the name change was a Freedom Fries-esque name change in the 1950s and 1960s, when the Soviet Union and the United States were at odds with one another? It does seem to have coincided with a period during which TexMex cuisine made its entry into American culture in a big way.

But no matter what you'd like to call them, one thing remains true across cultures: these simple cookies are easy to make, and absolutely delightful to eat. Mexican wedding cakes

Mexican Wedding Cakes (Printable version here!)

Makes about 2 dozen 1-inch cookies

  • 1/2 cup unsalted butter
  • 1/4 cup confectioners' sugar
  • 1 cup all-purpose flour, sifted
  • 1/2 cup finely chopped walnuts or pecans 
  • 1 teaspoon vanilla
  • Confectioners' sugar, for rolling

 Procedure

  1. Preheat the oven to 325 degrees F. Line two baking sheets with parchment paper.
  2. In the bowl of an electric mixer, cream the butter and sugar until light and fluffy.
  3. Add the flour gradually, beating well after each addition; pause to scrape down the sides of the bowl with a rubber spatula.
  4. Add the nuts and vanilla; beat just until evenly mixed in.
  5. Shape the dough into balls about 1 inch in diameter and place on the cookie sheets.
  6. Bake for 15 to 18 minutes, rotating the position of the pans halfway through baking; the cookies are finished when they are lightly browned on the bottom and have a dull finish on top.
  7. Let the cookies cool on the pan for 5 minutes before transferring to a wire rack. While the cookies are still warm, gently roll them in a bowl of confectioners' sugar. Tap off the excess, and allow them to cool completely. When cool, roll them in the confectioners' sugar a second time before serving; the first coat tends to slightly melt into the cookie, and the second coat will ensure a pretty, snowy appearance.
  8. Store in a single layer in an airtight container for up to four days.
Thursday
Jan242013

Pastry Profiles: Hamantashen, Famous 4th Street Delicatessen, Philadelphia

Hamantashen, famous 4th street

I love Hamantashen. Those jaunty hat-shaped cookies may be most strongly associated with Purim, the Jewish holiday, but really, they taste great pretty much any day of the year. And luckily, they're available pretty much any time of the year at a delightful spot called The Famous 4th Street Delicatessen in Philadelphia. 

Famous 4th Street

The famous 4th Street is fantastic for many reasons, but most visually impressive is the sheer size of their baked goods. Seriously, the picture above doesn't quite give you an idea of scale. Their sweets are supersized: their cakes are baked in huge loaves, about 4 times the size of a regular piece of pound cake. Their coconut macaroons are the size of a softball;

Macaroon

the hamantashen measure about 5 inches across. While a mere look at the pricing might seem appalling ($3 for a hamantashen; $8 for an eclair), when considering the size of the goods, it's really quite appropriate.

Famous 4th street

But back to the hamantashen. Recently I picked up a few because I suspected that I would be able to double up and fill both my face and my soul with joy at once. 

Famous 4th Street

I was right.

IMAG1937

I'm not sure what experts would say, but for me, a successful hamantashen has a texture which falls somewhere between butter cookie and scone: very carb-y, lightly crumbly, but not crumble-apart. The Fourth street version managed to heighten my desired texture by attaining a crust that was flaky too. It was brushed with an egg wash for a pretty appearance and a nice light chewiness on top, which ensured that the cookie part crumbled and flaked in my mouth, not my hand. The cherry filling was good without being remarkable; the poppyseed and prune filling was more interesting, with a nice texture from the poppyseeds and the prune added a nice stickiness which contrasted the cookie with its mellow sweetness. It made me want to make like Dorothy in the Wizard of Oz and sleep in all that poppy-fueled joy.

These cookies were perfect when paired with milk, and a delight as both an after dinner treat and a breakfast item. If you love Hamantashen, or think you might be willing to try to love it, Famous 4th street is a good place to try, says this Spy.

Famous 4th Street Delicatessen, Philadelphia; online here. 

Wednesday
Jan162013

Sweet Treats: White Wine Cookies Recipe

Ciambelline

I am not a wine expert. Occasionally a birthday cake or Twinkie expert, but for me, wine is something I enjoy without necessarily having a great deal of knowledge. In fact, if I may, let me share a funny anecdote which illustrates just how much the opposite of a wine expert I am.

One day, I was at a store picking out some wine. As usual, I was scanning the shelves for cool-looking labels and then doing a cross-examination of the bottle's price. If it has a cool label and is under $10, it's great in my book. Choosing one that fit my needs, I plucked it from the shelf, only to turn around and see some dude looking at me. He then said, "you just picked that because of the label, didn't you". Note that it wasn't so much a question as a statement. Yup--busted.

Ciambelline

That tale is meant to amuse you, but also to lead into the fact that when I received some sample bottles from SkinnyGirl wine, I wasn't 100 percent sure how to feel about them. My sister wanted to open and try some, so we did. To me, it just tasted like wine. It didn't taste lower calorie or anything, although technically, it is.

But there was one thing I was sure of, and it was that if I was going to use it for baking, I'd definitely have to fatten it up. Really, there's some logic to this: after all, if you're depriving yourself of all those precious calories in the wine, you'll have to make it up some other way, right? So now, you can have your wine and eat your cookies too.

Ciambelline

And after a quick google search on the subject, I knew exactly how I wanted to do this: by making Italian Wine Cookies. I found a great-looking recipe here, and was happy to discover I already had all of the ingredients on hand, except anise. I don't like anise that much (personal thing), so I used vanilla extract instead.

While it's possible that mixing with a stand mixer instead of by hand made the texture of my cookies a little different, I've got to tell you that taste-wise, they came out very well. This is an intriguing cookie--not extremely sweet, 

Ciambelline - Printable recipe here!

Adapted from Olive and Owl

Makes about 30

  • 3 1/2 cups of flour 
  • 1/2 cup of sugar
  • 1 1/2 teaspoon of anise
  • 1/2 cup of olive oil
  • 1/2 cup of white wine
  •  a little extra wine and sugar for topping

Procedure

In a large bowl, mix together the dry ingredients.

Then pour in the wine and oil and mix by hand or on low speed with an electric mixer until it becomes a dough. It will be a fairly stiff dough. Roll the dough out to about 1/2 inch thickness. Cut into strips about the thickness and length of your index finger, about 3 inches long and 1/2 wide. 

Ciambelline

Wrap the strip of dough around your finger and crimp the ends shut.

Ciambelline

Then place on a baking sheet lined with parchment paper. Bake for 20 to 30 minutes at 350 until golden and crisp. Note: these will be fairly hard--they are a dunking cookie.

Ciambelline

Not necessary, but if you'd like, mix some more wine and a little confectioners' sugar to make a glaze; also not necessary but cute, why not top with sprinkles?

© Cakespy, all rights reserved. Powered by Squarespace.