Home Home Home Home Home Home Home
CakeSpy

Featured: 

My adventure at Ben & Jerry's in Vermont!


Unicorn Love: the Eating Disorder Recovery Blog


 Buy my brilliant books!

Buy my new book!

Buy my first book, too! 

CakeSpy Online Retail!


Archives
Gallery

Fantastic appliance for cake making on DHgate.com

everyrecipe.co.nz

Craftsy Writer

Entries in Cookies (178)

Tuesday
Dec142010

Apple of My Eye: Applescotch Cookies Made With Jiffy Baking Mix

I've always had a soft spot for "Jiffy" brand baking mixes. Not necessarily because of their superior taste (though I think they're perfectly serviceable) but because of their packaging. These petite packages have a distinctly retro look, but not in an ironic way--more like they've never changed the initial 1930 design (why mess with a good thing?). 

Unable to resist the packaging, I recently found myself in possession of a box of Jiffy Apple Cinnamon Muffin Mix. Two questions occurred to me:

  1. Where did these mixes come from?
  2. What can I make with this mix that is not muffins?

Where the magic happens! Photo: Chelsea MillingHappily, the Chelsea Milling website (their parent company) was able to shed light on both of these pressing questions. As for the history? Here it is, from their site:

Chelsea Milling Company is operated by a family whose roots in the flour milling business date back to the early 1800’s. We have been milling flour here in Chelsea for over 120 years.

Mabel White Holmes, grandmother of our President, Howdy S. Holmes, developed and introduced to the homemaker the first prepared baking mix product, “JIFFY” Baking Mix, in the spring of 1930. Currently we offer 22 “JIFFY” Mixes. Our mixes provide you, our consumer, with the best value available.

Chelsea Milling Company is a complete manufacturer. We store wheat. We mill wheat in to flour. We use that flour for our own mixes. We make our own “little blue” boxes. We do it all-that’s why our mixes provide you with the best possible value. Value is using the highest quality ingredients and the best price!

Our entire operation is located in Chelsea, Michigan and our product is shipped out to all 50 states, as well as some foreign countries through the United States Military.

Finding this pretty fascinating, I'd like to state for the record that if they invited me to come and tour their factory, it would be like the awesomest thing ever.

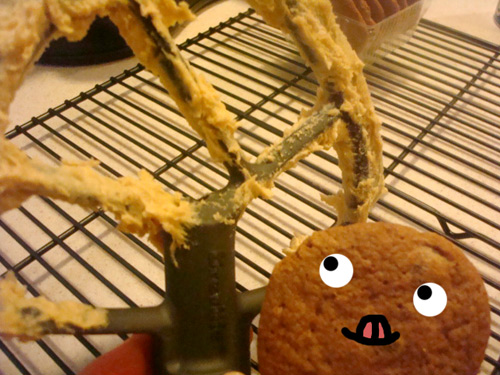
As for a recipe? Happily, they have a handy recipe finder by mix--and I quickly settled on the delectable-sounding "Applescotch Cookies". Incredibly easy to make, these cookies fall somewhere between cakey and chewy, and the mellow, buttery butterscotch flavor works extremely well with the apple-spice flavor from the mix. Here's the recipe.

Applescotch Cookies

  • 1 pkg. "JIFFY" Apple Cinnamon Muffin Mix
  • 1 Tbsp. instant butterscotch pudding
  • 1/4 tsp. nutmeg
  • 2 Tbsp. quick oats
  • 1 Tbsp. margarine or butter, softened
  • 1 egg
  • 1/3 cup butterscotch pieces

Procedure

  1. Preheat oven to 375°, grease baking sheet. 
  2. Mix together muffin mix, pudding and nutmeg.
  3. Cut in softened margarine or butter until mixture resembles fine crumbs. Add oats.
  4. Mix in egg until well blended. Add butterscotch pieces.
  5. Roll into 3/4 to 1" balls and place on cookie sheet.
  6. Bake 10-12 minutes, or until lightly browned on the edges.
Friday
Dec102010

Cookies, Cakes, Oh My: Sweetness from JustJenn Recipes and Designs

Photo: JustJenn DesignsSo, two things.

First, this recipe comes from the same person who designed the pins to the left. They say "I Like Big Bundts". Now that is hilarious!

But wait, there's more!

When Jenn sent me a parcel of said pins, she also sent a four-pack of some of the most amazing things I've put in my mouth recently: Cookie Cupcakes.

What are they, exactly? Cookie? Cupcake? The answer is YES. And deliciously so, on both counts. Served in cupcake liners, these are cakey, decadent cookies that are so full of butter and chocolate chips that you'll totally be ok with the lack of frosting. For reals.

Want a recipe? OK. You can also find it on JustJenn Recipes (that and so many more!).

Cookie Cupcakes

Ingredients

  • 1 1/2 cups all-purpose flour
  • 3/4 teaspoon baking powder
  • 1/4 teaspoon kosher salt
  • 1 cup (2 sticks) butter
  • 3/4 cup granulated sugar
  • 3/4 cup packed brown sugar
  • 3 large eggs
  • 1-1/2 teaspoons vanilla
  • 1/3 cup whole milk
  • 1 cup semi sweet chocolate chips
  • 1/2 cup cinnamon chips

Procedure

  1. Preheat your oven to 350 degrees. Prep a cupcake pan with liners.
  2. In a medium bowl whisk the flour, baking powder and salt. Set aside.
  3. In the bowl of an electric mixer beat the butter, sugar, and brown sugar. Once combined, add the eggs one at a time, then the vanilla.
  4. Alternate the flour mixture with the milk until combined. This will look like cookie batter!
  5. JustJenn Note: Cinnamon Chips are hard to find, but so worth the hunt. They are made by Hershey’s and as far as I can tell in the Los Angeles area they are only sold at Alberton’s. So weird! If you can find them – get them, you won’t be disappointed.
  6. Now fold in the chocolate chips and cinnamon chips.
  7. Fill your liners about 3/4 of the way full.
  8. Bake for 18-20 minutes until toothpick test says they’re done! Let cool on a wire rack.
Thursday
Dec092010

Sweet Giveaway: Cookbook and Cookies From Tate's 

Oh, hey. Remember how like two days ago I did this bake-off, comparing the homemade version of Tate's Bake Shop cookies versus their own mail-order version?

Well, obviously this experiment would be better if you did it yourself, so the fine folks at Tate's are offering up a sweet giveaway!

They're offering a copy of the Tate's Bake Shop Cookbook -- and a filled cookie jar full of their tasty cookies!

It's a fantastic prize package, fun to share with friends or to hoard and enjoy all by yourself (trust me, I won't judge you). Oh, and you should totally follow them on Facebook.

Want to enter yourself in the running? Well (US Residents only, please, since part of the parcel is perishable!), you can do just that by leaving a comment below telling me what kind of chocolate chip cookies you like best: chewy, gooey, or crunchy?

The winner will be chosen at random (and announced shortly thereafter) on next Thursday, December 16 at noon PST!

Friday
Nov262010

Kicking off Cookie Season: Mint Candy Butter Cookies Recipe from Crazy About Cookies by Krystina Castella

Thanksgiving's over. But don't cry into your empty pie plate (or empty Pumpkin Pie Shake), because that means it's officially Cookie Season.

And let's kick things off with one that is simple but classic and completely delicious: Mint Candy Butter Cookies from Krystina Castella's Crazy About Cookies (also check out the other posts from all week dedicated to Krystina's work: Pumpkin Cheesecake Pops, Zen Stone Cookies, and a giveaway featuring her super awesome book A World of Cake!). To get in a Christmas-y mood, I used candy canes. When served at the store, they disappeared in record time. Black friday was red and white and buttery all over, baby!

Mint Candy Butter Cookies

Adapted from Crazy About Cookies by Krystina Castella

  • 1 cup (2 sticks) butter
  • 1 cup superfine sugar
  • 1 large egg yolk
  • 1 large egg
  • 1/2 teaspoon salt
  • 2 teaspoons vanilla extract
  • 3 1/2 cups all purpose flour
  • Royal icing
  • 1 1/2 cups mint hard candies or candy canes, crushed

Procedure

  1. Beat the butter and sugar until light and fluffy. Beat in the egg yolk. Add the whole egg, salt, and vanilla, and stir to combine.
  2. Gradually stir in the flour. Form the dough into a flat disk, wrap in plastic wrap, and refrigerate for 30 minutes. 
  3. Preheat oven to 350. Get 2 cookie sheets ready to go, no need to grease 'em.
  4. Roll the dough out on a floured surface, to about 1/2 inch thick. Cut into 3-inch squares. Place the squares on the baking sheets and bake for 15-18 minutes, until the edges begin to turn golden. Transfer to a rack to cool completely. (Note: While still warm I cut the cookies into fourths, because I was sharing them at my store and wanted bite-sized cookies)
  5. Cover with icing. While icing is still wet, top with the crushed candies.
Wednesday
Nov242010

Peace and Sweetness: Zen Stones Cookie Recipe from Crazy About Cookies by Krystina Castella

Fact: you could use a little bit of zen before the tidal wave of holidays that's about to descend upon us. Or at least you could use a little something to get you through this sometimes supremely stressful time of year.

My advice: get stoned. That is to say...make Zen Stone cookies!

These cookies immediately appealed to me when I leafed through the newly-released Crazy About Cookies: 300 Scrumptious Recipes for Every Occasion & Craving by official CakeSpy foodie crush Krystina Castella (check out the giveaway of her book A World of Cake Here, and a recipe and some love for her book Pops! Icy Treats for Everyone here). Why choose these cookies? Because, you know, they kinda looked cool. And appearance definitely matters.

Happily, these groovy-patterned cookies are also super-easy to make, super-delicious, and will keep you occupied just long enough to avoid your awkward Uncle Harry's bad jokes or Great-Aunt Patricia's tales of medical woes... and they'll also keep your family satisfied with sugary goodness so they won't get on your case about all those things families love to get on your case about during the holidays. Not that I'd know.

Zen Stone Cookies

Note: While Castella has suggested this recipe as a use for leftover shortbread butter cookie doughs from the book, I actually used leftover scraps of dough from two different batches of chocolate and butter cookies, using the recipe more for construction; it worked out fine, so I think you could probably use a variety of different buttery cookie doughs to make these; just be sure to adjust the baking time and temperature accordingly.

Ingredients

  • Scraps of chocolate and shortbread butter cookie dough 
  • 1 cup assorted candies, malt balls, chocolates, and chocolate raisins (I used a mix of chocolate candies and walnuts)
  • Royal icing

Procedure

  1. Preaheat oven to 350. Line 2 cookie sheets with parchment paper (depending on how many scraps you have, it might be just one sheet)
  2. Gather the scraps to form 1-inch balls, hiding the candy in the center. Place the balls on the cookie sheets 1 1/2 inches apart. Bake for 10-15 minutes or until firm. Transfer to a rack to cool.
  3. Color the icing and put in a pastry bag with a small tip. Pipe lines where the doughs meet, or in whatever trippy patterns / directions your freak flag wants you to fly in.
Tuesday
Nov092010

Table Fare: Salt-N-Pepper Sandwich Cookies Recipe from Baked Explorations

I'm here today to tell you that you really, really, really need to buy Baked Explorations: Classic American Desserts Reinvented, the new book by Matt Lewis and Renato Poliafito.

Of course, to offer full disclosure, I should probably tell you first that I am hopelessly and madly in love with these two adorable NYC-based bakers.

There are a few reasons why:

1. Their two bakeries, Baked, in Brooklyn and South Carolina, respectively, are to die for.

2. Their first book, Baked: New Frontiers in Baking is not only an essential baking tool full of some of the best recipes I've ever tried, but it's beautiful and fun to look at too.

3. They're both adorable, talented, and have a great sense of humor--and can wax philosophical about the joys of crumb cake and peanut butter-chocolate combos like nobody I've ever met.

4. Oh, and Porkchop approves:

Now, if you're not already halfway in love with them already, buy the new book and you will be. It's the perfect follow-up to their bestselling first book, this time featuring classics from all around America. Featuring gorgeous pictures and plenty of baked good lore, this one is full of treasures that you'll be delighted to discover.

Here's my first discovery from the book, the cover recipe for Salt-N-Pepper Sandwich cookies. I first heard about these babies on Good Food, and have been intrigued ever since. Happily, they were worth the wait: though mine were more free-form in terms of the final look, I made mine with fancy Cherry Almond Pistachio sea salt and brought them to the Jill Labieniec artist reception at my store, and they disappeared in record time.

Salt-N-Pepper Sandwich Cookies

Adapted from Baked Explorations

Ingredients for the cookies

  • 3 1/2 cups flour
  • 3/4 teaspoon salt
  • 1/4 teaspoon fleur de sel or fancy sea salt (I used Secret Stash Sea Salt)
  • 2 teaspoons white pepper
  • 1/4 cups (3 sticks) unsalted butter, cut into 1-inch cubes, cool but not cold
  • 1 1/4 cups granulated sugar
  • 1 3/4 cups confectioners' sugar
  • 3 large egg yolks
  • 1 tablespoon pure vanilla extract
  • 3 ounces good quality dark chocolate, melted

Ingredients for filling

  • 5 ounces vegetable shortening, room temperature
  • 4 tablespoons (1/2 stick) unsalted butter, cut into small chunks, at room temperature
  • 3 1/4 cups confectioners' sugar, sifted
  • 1 tablespoon pure vanilla extract
  • 1 teaspoon light rum (I didn't use this and it came out fine)

Procedure

  1. In a large bowl, sift together flour, salt, fleur de sel, pepper, and cocoa powder. Set aside.
  2. In the bowl of a stand mixer fitted with the paddle attachment, beat the butter and sugars together until light and fluffy, about 3 minutes. Scrape down the bowl, and add the egg yolks, one at a time, beating until each is incorporated. Add the vanilla and melted chocolate and beat until uniform in color. Scrape down the sides and bottom of the bowl and beat again shortly, until incorporated.
  3. Add half of the dry ingredients and beat for 15 seconds. Again, scrape down the bowl and give it a quick second mix to incorporated.
  4. Loosely shape the dough into two balls, wrap tightly in plastic wrap, and refrigerate for at least 3 hours (note: I did make some right away, and while the texture wasn't as good they tasted fine).
  5. Preheat the oven to 350 F. Line two baking sheets with parchment paper.
  6. Unwrap one ball of dough and divide into two equal portions. Place the first portion on a lightly flour-dusted surface and return the other half to the fridge.
  7. Use your hands to knead the dough until pliable. The original recipe calls for rolling it into a disc (to use cookie cutters) but I actually rolled it into a log to slice and bake my cookies. If you want to do it their way, use a 2-inch round cookie cutter to create the tops and bottoms, and transfer to your waiting baking sheet, leaving about 1 inch of space around each cookie. If you want to go my route, roll the dough into a log and slice 1/2 inch thick slices, using your hands to make them pleasingly round if the dough gets too soft, and place on the baking sheet.
  8. Sprinkle the tops of the cookies with a little extra fancy salt, and then bake them for 10-12 minutes, rotating the sheets halfway through the baking time. The tops of the cookies will look dry and may have small cracks on top--don't worry, it's ok. Place the baking sheets on wire racks to cool for 5 minutes, and then use a spatula to transfer the cookies to racks to cool completely.
  9. While they cool, make up your filling. In the bowl of a stand mixer fitted with the paddle attachment, beat the shortening and butter until lump-free and smooth. Add the sugar in three parts, mixing each part until just combined. Add the salt, vanilla, and rum and beat again for 10 seconds. The filling should be thick, but spreadable (like Oreo filling). If it is too thick, add a drop or two of water as needed. If the mixture is too thin, add a little extra confectioners' sugar.
  10. Assemble the cookies. Use a pastry bag or small spoon (I used a small knife) to spread a dab of filling onto the flat (bottom) side of a cookie. Place another cookie, flat side down, on top. Press down slightly so that the filling spreads to the edges of the cookie. Repeat with the remaining cookies. Let them sit for about 15 minutes before serving. Store the cookies at room temperature in an airtight container for up to three days.
Tuesday
Oct262010

Trick or Sweet: Peanut Butter Cookies on a Stick for Peanut Butter and Co.

CakeSpy Note: You knew I did recipes for Peanut Butter & Co., right? Here's my latest one.

There are probably foods out there that aren’t improved by being served on a stick, but none come to mind at the moment.

But which one is the most fun to serve around Halloween? My vote goes to these peanut butter cookies on a stick. They’re part trick, decorated to look like pumpkins–but they’re even more treat, with a rich, cakey texture and rich, peanut buttery flavor that is far more delicious than any fun-size candy bar could ever hope to be.

For the full entry, visit Peanut Butter & Co.!

Monday
Oct042010

Trick or Sweet: Candy Corn Kaleidoscope Cookies for Serious Eats

It's October, and you know what that means: it's officially candy corn season.

But if you appreciate the iconic look more than the mellowcreme taste of the stuff, here's a solution: a reconfiguration of the Kaleidoscope Cooky (yes, cooky) from the Betty Crocker's Cooky Book, made to resemble the tricolor confection. Lightly crumbly, very buttery, and extremely crowd-pleasing, these cookies are a totally sweet tricked-out treat.

Note: This recipe is designed to feed a crowd; I have in the past halved it with fine results. Also, if shaping the dough into the candy corn shape seems too fussy, they're just as festive as Halloween-hued rounds.

For the full entry and recipe, visit Serious Eats!

Wednesday
Sep082010

Curiosity Killed the Cookie: Another Experiment in How Not To Make Chocolate Chip Cookies

Not sure about whether or not curiosity killed the cat, but it sure did compromise these cookies. 

That's right: I've been messing with chocolate chip cookies again. It all started about a week ago, after a lifetime of conscientiously creaming the butter and sugar at the beginning of making chocolate chip cookies. I had received a big ol' parcel of freebies from Nestle Toll House (giveaway coming in a few days!) and had cookies on the mind.

A question occurred: "what would happen if I swapped the order in which the flour and sugar are added?".

Well, needless to say I was gonna find out.

And so, instead of creaming the butter and sugar, I "creamed" the butter and flour, and then added the sugar in, bit by bit, later on in the recipe, at the time when I would normally be adding the flour. I didn't mess with the actual measurements of the ingredients, though.

So what happened?

Well, the fact that these were going to come together differently was evident right away. The flour clumped up with the butter like...well, pie crust. (this makes sense, right?)

And then, adding in the eggs and other ingredients, things seemed to start looking like normal cookie batter.

Adding in the sugar, bit by bit, the dough looked, smelled, and felt pretty normal. I added in the vanilla and chocolate chips.

I let it chill for a while. Normal-looking. I spooned it on to the baking sheet, finishing off some of the cookies with these cute Nestle chocolate and white chocolate chip mini morsel toppers.

When the cookies came out of the oven, they looked completely perfect: lightly browned on the edges and bottom, soft in the middle.

But then something strange happened. As the cookies cooled...they turned into cookie crackers!

They looked right. They smelled right. They even tasted pretty right. But the texture was...well, disappointing. Crackery. Weird.

As I found out on Baking911.com, I had basically skipped an important step by making this switcheroo: "Creaming incorporates the maximum amount of air bubbles so a recipe will rise in the oven and be light in texture." So while I can't get technical about the chemistry of why this crackery texture was the result, I can say that while I was happy to have seen for myself what happens when you skip this step, I'm not likely to do it again.

Here's the recipe I used--feel free to try my experiment for yourself, or honor the good Mrs. Paul Franklin, Wife of Governor, from Phoenix, AZ, and follow the directions correctly (listed correctly below). By the way, this is the book the recipe is from--isn't the cover just too much?

Chocolate Chip Cookies

From Favorite recipes of America desserts Including Party Beverages, Vol 1  

Ingredients

  • 1/2 cup butter
  • 1/2 cup white sugar
  • 1/2 cup brown sugar, packed
  • 1 egg, well beaten
  • 1 cup, plus 2 tablespoons, sifted flour
  • 1/2 teaspoon baking soda
  • 1/2 teaspoon salt
  • 1/4 teaspoon hot water
  • 1 6-ounce package semisweet chocolate morsels or pieces
  • 1/2 cup chopped nuts (optional)
  • 1/2 teaspoon vanilla

Procedure

Cream butter and sugars; add egg and beat well. Sift together dry ingredients (except for chocolate); add to creamed mixture. Add hot water; mix until well blended. Add chocolate pieces, nuts, and vanilla, and blend just until incorporated. Drop from teaspoon onto greased cookie sheet. Bake in a 375-degree oven for 10-12 minutes. Makes 3 1/2 dozen small cookies.

Friday
Aug132010

Dough-Eyed: Cookies and Controversy from My Dough Girl in Salt Lake City, Utah

Which would you like first? The good news or the bad news?

The good news: My Dough Girl Cookies, a bakery in Salt Lake City, makes amazingly delicious cookies. I mean, like, really good. Fat, chewy, buttery, and flavorful morsels, sweetly packaged in the cutest retro sleeves. I recently had the good fortune to try several when SLC-based Cake Gumshoes Rob and Carol came to Seattle for a visit and brought me four specimens for me and Mr. Spy to sample.

We tried the "Lilly" (lemon sugar cookie with lemonheads and lemon glaze), which was bright and sunny and -- surprise, crunchy!--from the addition of sweet-sour lemonhead candies, the "Sandy" (the special flavor of the month, with macadamia nuts, zucchini, and milk chocolate), which was an unlikely, but oddly addictive combination--

--as well as a rich, filled chocolate cookie, and what I think may have been the "Betty" (oatmeal cookie with fruit bits), which was moist, buttery, and not at all as healthy-tasting as it may sound. In a good way.

The bad news: My Dough Girl Cookies won't exist for much longer. You see, one chubby little white guy doesn't like this Utah-based bakery's name very much at all--the Pillsbury Dough Boy. As it turns out, owner Tami Cromar recently received a cease and disist" order from General Mills, saying that she'd better change the name of her bakery.  According to The Salt Lake Tribune

The national company, which owns Pillsbury, said the name is too similar to its iconic Dough Boy character and represents trademark infringement. The letter also suggests that because My Dough Girl sells frozen take-and-bake cookie dough — just like Pillsbury —the Utah product could tarnish the company’s reputation.

Rather than fight, Cromar has decided to comply with the request, which includes a gag order that forbids her to talk to news media. She referred calls and text messages from The Salt Lake Tribune to her attorney, Catherine Lake. Calls to Lake’s office also weren’t returned.

But don't despair, because there's more good news: Although the name will change, the cookies will not. As the article goes on to say,

"I have to stick to baking so cookies can still be a part of all our futures,” Cromar wrote earlier this week. “ If the Dough Girl fights, there will be no cookies."

And that would be seriously bad news.

Whatever you want to call them, you can find 'em at 770 South 300 West, Salt Lake City, Utah; online here.

My Dough Girl on Urbanspoon

© Cakespy, all rights reserved. Powered by Squarespace.