Home Home Home Home Home Home Home
CakeSpy

Featured: 

My adventure at Ben & Jerry's in Vermont!


Unicorn Love: the Eating Disorder Recovery Blog


 Buy my brilliant books!

Buy my new book!

Buy my first book, too! 

CakeSpy Online Retail!


Archives
Gallery

Fantastic appliance for cake making on DHgate.com

everyrecipe.co.nz

Craftsy Writer

Entries in cakes (67)

Saturday
Sep242011

Fair and Sweet: Prizewinning Maui Banana Bread Coffee Cake Recipe

I just received the sweetest note from the PR department at the Puyallup Fair.

Apparently, at the baking contest, Coffee cake was taken to the next level by the winning entries of the Dillanos Best Quick Bread Coffee Cake Contest. The creative coffee cake creations left judges wanting more.

Marina Cervantes of Lakewood gave the judges a taste of vacation with her “Maui Banana Bread Coffee Cake” that won her first place and $100 cash.  And guess what? She was willing to share the recipe. Here it is:

Maui Banana Bread Coffee Cake

Marina Cervantes - recipe courtesy Puyallup Fair (running through Sept. 25)

Cake:

  • 4 eggs
  • 1 cup vegetable oil
  • 2½ cups flour
  • 2 tsp baking powder
  • 2 tsp baking soda
  • 1 tsp salt
  • 1½ cups sugar
  • 3 cups mashed banana (ripe bananas preferred)
  • 1 tbsp banana liqueur (maybe rum could work too?)
  • ½ tsp vanilla extract
  • ½ cup coconut flakes

Strudel Filling:

Mix together- 

  • 2/3 cup brown sugar
  • ½ cup macadamia nuts, chopped
  • 2 tbsp butter, soften
  • 2 tsp. cinnamon

Directions:

  1. Beat eggs and oil.
  2. Sift all dry ingredients and add to egg mixture, mixing well.
  3. Add sugar, bananas, liqueur, extract, and mix well.
  4. Fold in coconut flakes.
  5. Pour half of the batter into a bundt pan that has been sprayed with non-stick spray.
  6. Sprinkle half the strudel mixture over batter, and then cover with rest of batter and sprinkle top with rest of strudel mixture.
  7. Bake at 350 degrees for 60-70 minutes.
Saturday
Sep172011

Taste the Rainbow: Rainbow Cake for Serious Eats

Want a cake that will turn any frown upside down? Well, you've got it—with magic to spare—in this Rainbow Layer Cake.

A six-layer cake in all the colors of the rainbow, this one is dramatic to cut into and always seems to elicit an "oooooooh" response. It is impossible to be unhappy while eating this cake. Special thanks go to Karen of the blog, off the (meat)hook, whose pictures of a similar cake inspired me to create this recipe.

Of course, the recipe is from my upcoming book .

Read the full entry at Serious Eats!

Saturday
Jun252011

Double Trouble: Cheesecake-Stuffed Carrot Cake Recipe from Rice Kernel

CakeSpy Note: This is a guest post from The Rice Kernel. Named for a little boy who came along and transformed one family's kitchen experiences, Rice Kernel features wholesome, homemade recipes to help you achieve a "rainbow a day" of colorful and nutritious foods.  For the sweets lover, Rice Kernel's "rainbow" includes plenty of indulgences, often made over with healthful ingredients.  This triple strawberry cheesecake is the perfect collaboration of creamy, decadent cheese and fresh, tart summer berries. The recipe originally appeared as part of this post.

This two-in-one cake has a sweet secret: what appears to be a traditional carrot cake is actually stuffed with cheesecake! As Rice Kernel puts it,

While my humble looking cake doesn’t hold a candle to the professional ones, the combination of smooth cheese and flavorful carrot cake is undeniable.  Beneath the unpretentious appearance lies a creamy cheesecake sandwiched by layers of moist, mildly spiced cake flecked with carrots and pineapple.  As if the layers aren’t enough, the cakes are enveloped by a generous coating of marshmallow cream cheese frosting.  (Marshmallow optional, but this is an all-out recipe with granulated sugar and a generous amount of oil.  It is butter-free, if that counts.)  You could certainly interchange the carrot cake layers for flavors of your choosing; a red velvet cake would be a beautiful contrast.

Luscious Carrot Cake, from Whipped

3 cups all-purpose flour
3 cups granulated sugar
1 teaspoon salt
1 tbsp baking soda
1 tbsp ground cinnamon
1 1/2 cups canola oil
4 large eggs, lightly beaten
1 tbsp vanilla extract
1 1/2 cups shelled walnuts, chopped
1 cup shredded coconut
1 1/2 cups pureed cooked carrots
1 small 8 oz. can of crushed pineapple, drained
1/2 cup walnuts for the top (optional)

For the Cheesecake Layer

2 oz. white chocolate, chopped
16 oz. cream cheese, room temperature (2 packages)
1/2 cup + 2 tbsn. sugar
1 tablespoon flour
2 eggs, room temperature
1 teaspoon vanilla
1 tablespoon heavy cream

For the Frosting

8-oz cream cheese, room temperature
1 1/4 cups marshmallow creme (7-oz)
1 tsp vanilla extract

Procedure 

  1. Prepare the carrot cake layer. Preheat oven to 350 degrees F. Grease two 9 inch cake pans. Line the bottoms with parchment paper. Peel and cook carrots until a fork easily can be poked in to them. One small bag of full sized carrots should yield about the right amount of pureed, cooked carrots. Drain the carrots and purree while still warm in a blender or food processor until they are smooth. Measure out 1 1/2 cups of the carrot puree and set aside.
  2. Sift dry ingredients into a bowl. Stir dry ingredients together with a whisk to combine well. Add oil, eggs and vanilla. Beat well for about 2 minutes. Fold in walnuts, coconut, carrots and pineapple. Pour equal amounts of batter into each pan. Set in the middle of the oven and bake for about 50 minutes or until edges have pulled away from sides and toothpick inserted in middle comes out clean.
  3. Remove from oven and let sit in pans 10 minutes. Turn out onto a rack and cool completely.
  4. Prepare the cheesecake layer. Preheat the oven to 350 degrees F. 
  5. Melt the white chocolate, set aside to cool slightly.
  6. In a large bowl using an electronic mixer, mix the cream cheese on low speed until creamy. Add the sugar and mix slowly until smooth. On low speed, mix in the flour. Turn off the mixer and scrape down the bowl and beater with a rubber spatula. Add one egg at a time, mixing well after each addition, scraping the sides of the bowl. Mix in the vanilla and cream until the mixture is smooth. Using a large spoon, stir in the melted white chocolate until incorporated.
  7. Pour the batter into a parchment paper lined 9-inch spring form pan. Bake for about 30 minutes or until the center is set when you slightly shake the pan. Allow to cool before removing from the spring form pan. Allow to cool completely before assembling the cake.
  8. While you're waiting for the cakes to cool, go ahead and make the cream cheese frosting. Combine all ingredients in a medium bowl and beat with an electric mixer at medium-high speed until smooth and fluffy. Set to the side for once the cake is assembled.
  9. ASSEMBLE IT ALL. Place your bottom layer of cake on the dish/ plate you will be serving it on with the leveled side facing up.
  10. Spread a thin layer of cream cheese frosting on top – it doesn’t matter how messy it looks since it will be covered.
  11. Transfer the cheesecake to the top of the cake, then spread another thin layer of cream cheese frosting on top of the cheesecake.
  12. Top with the remaining layer of cake – leveled side down so that you have a clean surface. Use the rest of the cream cheese frosting to frost the entire cake.
  13. Top with optional nuts or shredded coconut.
Thursday
Jun232011

Ooey Gooey: Chocolate Gooey Butter Cake Recipe for Serious Eats

Gooey Butter Cake: there is no part of these three beautiful words that is wrong. This cake, which is actually more like a two-part bar cookie, is the pride of St. Louis, MO, a cake steeped in legend and even a little controversy.

It is also unique in that recipes almost always call for a cake mix, and many will argue that this is the "traditional" method of preparation—and yields the best end result.

This version twists the tradition slightly, using a chocolate cake mix instead of the usual yellow, and employs cocoa in the filling. The result is an addictively sweet variation on this rich regional treasure.

For the recipe, visit Serious Eats!

Monday
May232011

Sweet Mystery: Lowry's Fudge Cake Recipe and Story

Recently, I came into contact with a new type of cake: Lowry's Fudge Cake. Or was it Lowery's? I'm not completely sure, because based on anecdotal evidence, I see it both ways.

To the best of my sweet sleuthing, this cake--really more like bar cookies, really--made a name for itself in the kitchen of the Lowry's Motel restaurant in Greenville, IL. I found this small recipe headnote on Recipe Circus:

No Greenville native of a certain age will ever forget the pleasure of biting into a piece of Lowery's Fudge cake. It was sold exclusively at the old Lowery's Motel. We still remember how it was cut into squares and neatly wrapped in wax paper. After the Lowery ladies died and the motel restaurant became but a fond memory, custody of the fudge-cake recipe was passed to another lady of the church. It still arrives for the reception in perfect squares, wrapped in the traditional wax paper, though now the ladies of the Pastoral Care Committee unwarp it and arrange it on a silver tray. It never lasts long.

...and yet when I tried to find "Lowery's Motel" I drew a blank, but I did find evidence of a Lowry's, as noted in the obituary of Mariam T. Lowry (which references a motel in the family), and this vintage postcard:

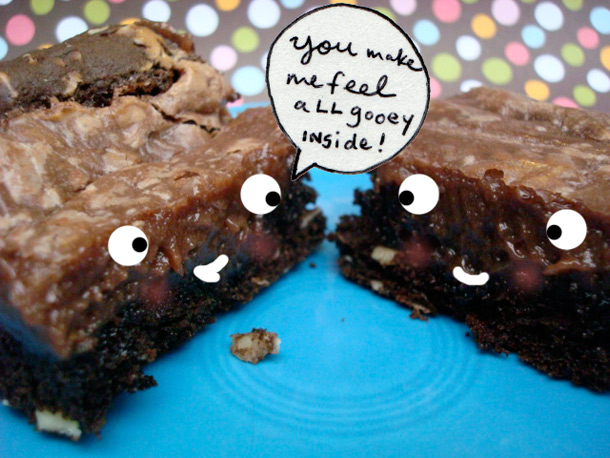
...so sadly, while I was unable to find out much more about who created this recipe, one thing is not shrouded in mystery: the cake's deliciousness. As previously noted, it really is more like a cross between a cake and a bar cookie, kind of like a chocolate gooey butter cake with a crumb topping. Very decadent, very delicious. Happily, I was able to find a recipe--here it is for you. The one I tried (pictured top, not baked by me) also had a brown sugar crumb topping. Feel free to leave any more lore about the cake in the comments section!

Lowry's (or is it Lowery's?) Fudge Cake

  • 2 sticks of butter
  • 4 squares semisweet chocolate
  • 1 3/4 cups sugar
  • 4 eggs
  • 1 cup flour, sifted
  • pinch of salt
  • 1 tsp vanilla
  • 1 cup pecans, chopped

Recipe

  1. Preheat oven to 300F.
  2. Melt the butter and chocolate together. Add the sugar, Stir until melted. Cool slightly. With a wooden spoon, mix in the eggs, one at a time. Fold in flour and salt. Add vanilla and chopped pecans. Some people like alot of vanilla and a lot of nuts. I suggest 1 tsp vanilla and 1 cup chopped nuts. 
  3. Pour the mixture into a buttered 9X11 inch pan. Bake for about 40 minutes. Start testing at 30-35 minutes. To be a purist, your straw for testing should come out clean. Cool on wire rack.


Sunday
May152011

Chocolate Love: Mom's Chocolate Cake Recipe from Macrina Bakery

Photo: Macrina BakeryIt's the most wonderful time of the month, a week in, when the rent has already been paid and we all receive Macrina Bakery's recipe of the month in our inbox. Le nom!

This month, they've featured "Mom's Chocolate Cake", which is introduced thusly: "This dessert is named in honor of those homemade chocolate cakes that moms are famous for. I like to apply the frosting in big swirls."

Here's how to make it happen at home.

Mom's Chocolate Cake

INGREDIENTS:

Makes 1 (9-inch) layer cake
For the cake: 

2 eggs
3/4 cup whole milk
1/3 cup canola oil
2 teaspoons pure vanilla extract 
1-3/4 cups granulated sugar
1-1/2 cups unbleached all-purpose flour
1/4 cup dark cocoa powder, sifted
1 teaspoon baking powder
1 teaspoon baking soda
3/4 teaspoon salt
3/4 cup boiling water

For the vanilla syrup: 
1/4 cup pure vanilla extract
1/4 cup granulated sugar
1/4 cup water

For the chocolate frosting: 
12 ounces unsweetened chocolate, coarsely chopped
1 pound (4 sticks) unsalted butter, at room temperature 
3-1/2 cups powdered sugar, sifted
2 tablespoons pure vanilla extract

PREPARING THE CAKE LAYERS:
Preheat the oven to 325°F. Prepare a 9 x 3-inch cake pan by brushing the inside with oil, then lining the bottom with a 9-inch circle of parchment paper. Set aside.

Combine eggs, milk, canola oil, and vanilla extract in a medium bowl and mix well with a whisk. Set aside.

Sift sugar, flour, cocoa powder, baking powder, baking soda, and salt into the bowl of a stand mixer. Toss with your hands to combine. Attach the bowl to the stand mixer. Add the wet ingredients to the bowl of dry ingredients. Using the whisk attachment, mix on medium speed until combined, about 2 minutes. Keep mixing as you add the boiling water in a slow stream, mixing just until the water is incorporated, about 30 seconds.

Pour the batter into the prepared cake pan. Place pan on center rack of oven and bake for 55 to 60 minutes or until cake is set in the center. Test center with a skewer to make sure the cake is done. Remove from the oven and let cool in the pan on a wire rack for at least 30 minutes.

PREPARING THE VANILLA SYRUP: 
Combine ingredients in a small saucepan and bring to boil over medium-high heat. Stirring frequently, cook until sugar is dissolved and the liquid is syrupy, 2 to 3 minutes. Remove from heat and let cool.

PREPARING THE CHOCOLATE FROSTING: 
Place chocolate in a medium stainless steel bowl. Place bowl on top of a saucepan filled with 2 inches of simmering water, making sure that the bottom of the bowl does not come in contact with the water. It’s important that the water be just simmering; if it’s too hot it will scorch the chocolate. Stir chocolate with a rubber spatula until all of the pieces have melted and reached a smooth consistency. Remove the bowl from the heat and let cool to room temperature.

Combine butter and powdered sugar in the bowl of your stand mixer. Using the paddle attachment, mix for 5 to 8 minutes to cream the butter. Start on low speed and gradually increase to medium. Starting out on a higher speed will likely result in a snow storm of powdered sugar, a real mess. When the butter mixture is light and fluffy, add the melted chocolate and mix until incorporated. Add the vanilla extract and continue mixing a few more minutes until the frosting is thick enough to spread. If the frosting gets too soft, simply chill it in the refrigerator to firm it up. If it stays in the refrigerator for too long, let it sit out for a few minutes and then re-whip it.

ASSEMBLING THE CAKE 
Invert the cooled cake to remove it from the pan. If it sticks, run a  sharp knife around the sides of the cake to release it from the pan. Peel the parchment paper off the bottom of the cake. Using a sharp bread knife, carefully cut the cake horizontally into 3 equal layers. Place the bottom layer on a serving plate or cardboard cake circle and brush it with a little vanilla syrup. Spread a generous amount of chocolate frosting (about 1/4 inch) over the cake. Top it with another layer of cake and repeat the process. Add the final cake layer. Place a dollop of frosting on top of the cake and spread it 1/8 inch thick, spreading any excess frosting down onto the sides. Spread a little more frosting on the sides until the entire cake has what bakers call a crumb coat: a thin underlayer of frosting that keeps crumbs out of the final layer of frosting. Crumbs will be clearly visible through the frosting. Chill the cake in the refrigerator for 20-30 minutes. The remaining frosting can stay at room temperature while the cake chills.

Remove the cake from the refrigerator and add the final layer of frosting. I like to create a swirl pattern in the frosting, just like the cakes I remember from childhood. Store in the refrigerator for up to 2 days. This cake is best served at room temperature, so remove it from the refrigerator 1 hour before serving. 

Tuesday
Feb222011

Baked, Not Stirred: Fresa Breeze Margarita Cupcakes Recipe from Robicelli's

Who knew? February 22 is National Margarita Day. But how to celebrate? Well, naturally, you should indulge in a margarita or seven. But you'll need something to soak up all of that blissful booze, so may I suggest a Margarita Cupcake? Here's a recipe sent on care of Partida Tequila, developed specially for them by Robicelli's (who you know I have a cake crush on!).

Margarita Cupcakes

Cake
3/4 stick butter, melted & cooled
3 eggs
1/4 heavy cream
1/4 cup Partida Blanco tequila
1 cup flour
3/4 cup sugar
1 teaspoon baking powder
1/2 tsp salt
Zests of 2 limes

Cream cheese frosting
1 tsp Partida Blanco Tequila
1/2 stick butter, softened
1 package cream cheese, softened
3 cups powdered sugar

Strawberry salsa
1 large container strawberries, stems removed and chopped 
1/4 cup seedless cucumber, peeled, seeded and diced
1/3 cup sugar
2 Tbsp Partida Tequila
One Lime, juiced
1/2 teaspoon Sea Salt

Strawberry Salsa:
1.  Combine all ingredients in a bowl and cover with plastic wrap.  Refrigerate for at least 30 minutes.

For Cake:
1. Preheat oven to 350.
2. Beat eggs until well mixed, then add butter, cream, tequila & salt.  Mix until combined.
3. Sift together flour, sugar and baking powder.  Add to wet mixture and stir until smooth.
4. Divide amongst 12 cupcake tins and bake for 16-18 minutes, or until the tops just spring back when touched.

Cream Cheese Frosting:
1.  Beat together tequila, softened butter and cream cheese on high speed until light and fluffy.
2.  Add powdered sugar 1/2 a cup at a time, beating well after each addition.
3.  Once all sugar is added, beat for an additional 3 minutes to incorporate air.
To assemble:
1.  Strain salsa, reserving liquid.  Using a pastry brush, brush the top of each cupcake with the liquid.
2.  Frost cupcakes with the cream cheese & tequila icing.  Using a teaspoon, scoop out an indentation in the middle of each cupcake.
3. Place a heaping spoonful of the strawberry salsa in each indentation.
4.  Garnish with a sliver or lime.

Saturday
Feb192011

Dark But Sweet: Bittersweet Chocolate Gateau Recipe from Macrina Bakery, Seattle

Image: Macrina BakeryTopping the list of things that make you go NOM? Howsabout a big slice of Bittersweet Chocolate Gateau? It's the recipe of the month from Seattle's famous Macrina Bakery, and I don't know about you, but I think it would be a perfect cake to enjoy for breakfast, lunch, dinner, or all of the above.

Bittersweet Chocolate Gateau

  • 10 ounces bittersweet chocolate
  • 9 eggs
  • 12 tablespoons (1-1/2 sticks)
  • unsalted butter, at room temperature
  • 3/4 cup granulated sugar
  • 1/4 cup dark cocoa powder, sifted
  • 2 cups (1 pint) fresh raspberries
  • Lightly Sweetened Whipped Cream (recipe follows)
  • Powdered sugar


Procedure

  1. Preheat oven to 350°F. Oil a 9 x 13-inch springform pan. Set aside.
  2. Chop chocolate into small pieces and place in a small stainless steel bowl. Place bowl on top of a saucepan filled with 2 inches of simmering water, making sure that the bottom of the bowl does not come in contact with the water. It’s important that the water be just simmering; if it’s too hot it will scorch the chocolate. Stir chocolate with a rubber spatula until all of the pieces have melted and reached a smooth consistency. Remove the bowl from the heat and set it on the stovetop to keep it slightly warm.
  3. Separate eggs, placing yolks in a small bowl and whites in a medium bowl. Set bowls aside.
  4. Combine butter and sugar in the bowl of a stand mixer and using the paddle attachment, mix on low speed for 1 to 2 minutes. Increase speed to medium and mix for about 5 minutes more to cream the butter. The mixture will become smooth and pale in color. Start adding the egg yolks, 2 at a time, taking care to mix each addition fully before adding more yolks. Scrape down the sides of the bowl with a rubber spatula as needed. After all of the yolks are incorporated, add the sifted cocoa powder and continue mixing until combined.
  5. Remove the bowl from the stand mixer and fold in the melted chocolate with a rubber spatula. The batter will thicken. Using a whisk or hand-held mixer, whip egg whites until medium-stiff peaks form. Gently fold the whipped egg whites into the batter, one third at a time. Continue folding the batter until there are no visible white streaks; it is important that the whites be fully incorporated into the batter. The final mixture should have a sponge-like texture. Pour the batter into the prepared springform pan and scatter half of the raspberries over the top. Poke the berries down with your fingers until they are just below the surface.
  6. Place pan on center rack of oven and bake for 45 to 50 minutes, or until the center is set. Let cool on a wire rack for 30 minutes. Release the sides of the pan and lift, leaving the cake on the pan bottom. Dust the top of the cake with powdered sugar and garnish with the remaining raspberries. Serve with Lightly Sweetened Whipped Cream. It’s best to enjoy this cake the day it’s baked, but it can be stored at room temperature for up to one day. It will become very dense and fudge-like if kept in the refrigerator.
  7. It's also most excellent with freshly whipped cream!
Monday
Jan312011

Whole Hog: Groundhog Day Cake for Serious Eats

My family has an unusual tradition: we celebrate Groundhog Day. In a completely non-ironic way. And to herald the occasion, there is always a cake-homage to the skittish little critter.

Why? Well, my dad is a surfer, and he carefully follows Punxsutawney Phil's yearly emergence. If he does not see his shadow, it means spring is coming, and thus surf season will come sooner. And also because, well, cake is very delicious.

Of course, no matter whether you're in a rush for spring to come, it's a pretty sure thing that this Groundhog-themed cake will brighten your day—and the remaining crumbs will cast minimal shadows.

For the full entry and recipe, visit Serious Eats!

Tuesday
Jan182011

Mix it Up: Funfetti Cakelets in the Toaster Oven

Picture this: you've just filled up a cake tin's worth of cupcakes, and you have a dollop of batter left. What to do?

Now, you may think that the possibilities stop at A) Swipe it with your finger (or a spatula) and eat it...or B) Put it in a cupcake liner and bake it all by its lonesome.

Now, these are respectable options, for sure. But I'd like to present another option: bake it in the toaster oven.

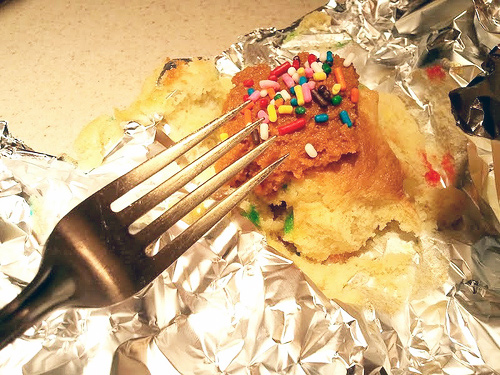
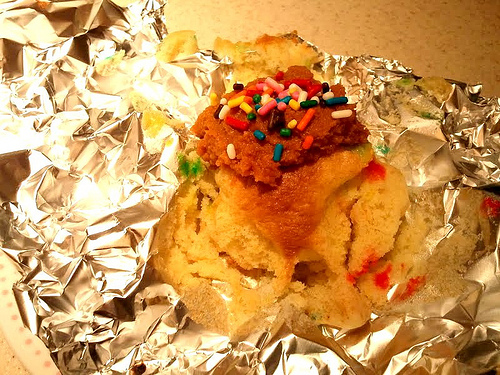
I did this recently, and while I wouldn't call it an amazing success, it was thoroughly eatable, and a great sweet fix in a pinch (or late at night, when these things seem like a great idea). And it sure was fun to do.

Here's how I did it.

Toaster Oven Cakelets

 Ingredients

  • 1 dollop leftover Funfetti batter, prepared per box instructions
  • a piece of aluminum foil to bundle it in

Procedure

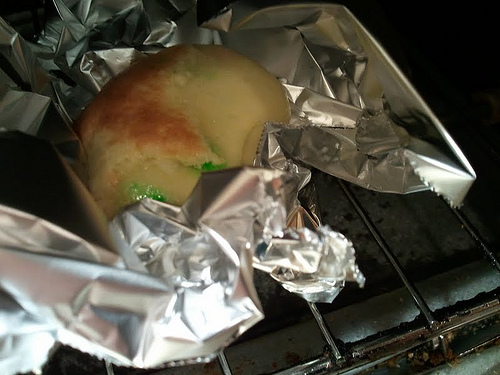
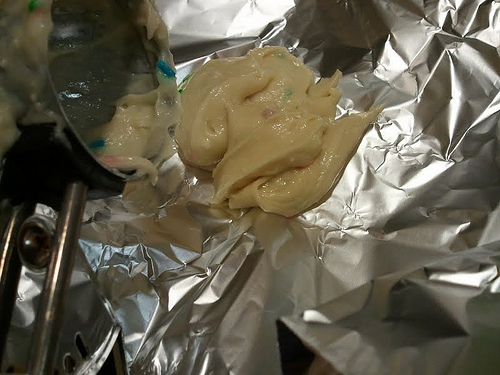
  1. Place your dollop of cake batter on the center of the aluminum foil. Bunch the sides up around it, to form walls so that the batter won't seep through.
  2. Place the wad in the toaster oven and toast (you heard me, toast) it on medium heat (350 if you have such settings) until it is browned on top, about 15 minutes. Lightly peel away the foil from the side to see if it is baked through. If so, remove from toaster oven, cool, and top with frosting, a dab of ice cream, etc, and enjoy.


© Cakespy, all rights reserved. Powered by Squarespace.