Home Home Home Home Home Home Home
CakeSpy

Featured: 

My adventure at Ben & Jerry's in Vermont!


Unicorn Love: the Eating Disorder Recovery Blog


 Buy my brilliant books!

Buy my new book!

Buy my first book, too! 

CakeSpy Online Retail!


Archives
Gallery

Fantastic appliance for cake making on DHgate.com

everyrecipe.co.nz

Craftsy Writer

Entries in bar cookies (28)

Thursday
Oct272011

Smear Campaign: Smearcase Recipe for Serious Eats

If you ask me, a baked good had better be great to get away with an exceedingly unappetizing name like Smearcase.

And happily, it is—this little-known Baltimore specialty, introduced to me by Rachel Rappaport of Coconut & Lime, is sort of like a thinner-crusted cousin to the pride of St. Louis known as Gooey Butter Cake. A dense, cakey crust encases a big ol' smear of gooey cream cheese-based custard filling; when sliced into squares, it's sort of like cheesecake condensed into a bar cookie form.

Note: While not strictly traditional, I added a handful of lightly roasted walnuts to the top of my Smearcase, with delicious results.

For the full entry and recipe, visit Serious Eats!

Thursday
Jun162011

Pastry Profiles: Oatmeal Fudge Brownie at Gill's Deli, Rutland VT

Gill's Deli in Rutland, VT, is famous for its sandwiches.

But, you know, they also have a nice little array of home-baked goodies too.

When I went to Gill's as a sandwich ambassador for Serious Eats (my title, not theirs) I was able to scope out the bakery case, too, and pick up some treats.

But the one I want to tell you about is the Oatmeal fudge brownie.

Sort of like a chocolate fudge bar cookie on the base, this baby was studded with a sweet, crunchy oat topping which added a nice, nutty flavor, as well as a satisfying heartiness to the bar. Not a fancy treat by any means, it was a nostalgic, lunchbox style treat that was charming to find among the sandwiches, and worth picking one up if you find yourself in the environs.

Gill's Deli, Rutland, VT. Online here.

Gill's Delicatessen on Urbanspoon

Thursday
May192011

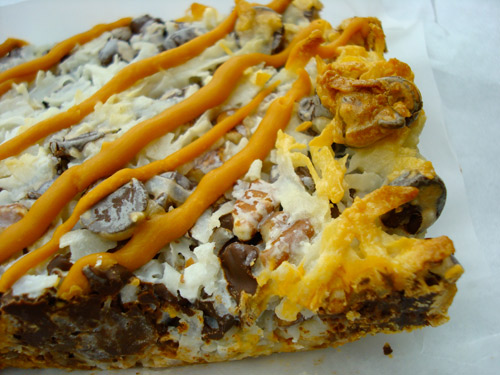
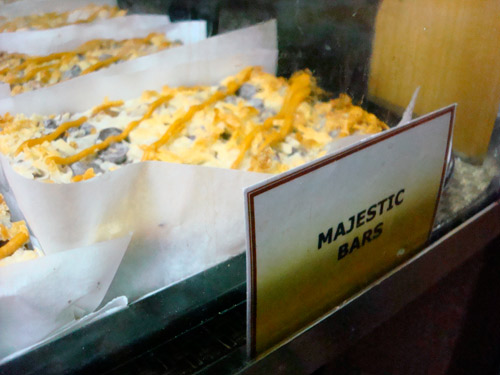
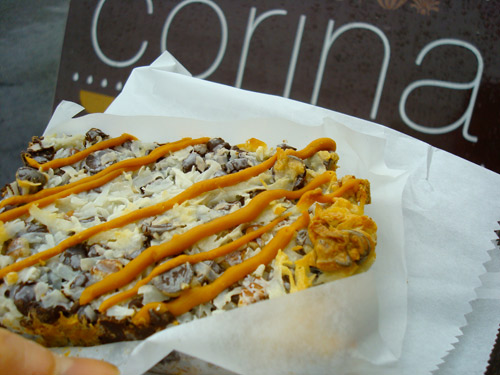
Pastry Profiles: The Majestic Bar from Corina Bakery, Tacoma WA

Riddle me this. What's a Majestic Bar?

No, it's not a bar at which they serve grandiose alcoholic beverages (though, come to think about it, such an establishment wouldn't be so bad, would it be?).

No, the Majestic Bar, at least at the lovely and amazing Corina Bakery in Tacoma, WA, was described like this to me:

"Like a magic cookie bar but with frosting & MORE chocolate chips." 

I know--like poetry, right? Of course, if you're not familiar with the Magic Cookie Bar (also called Hello Dolly Bars and 7 Layer Bars, and other names), let me give you a primer. This decadent bar cookie starts out with a graham cracker base upon which several layers of deliciousness are piled, including but not limited to sweetened condensed milk, chocolate chips, butterscotch chips, coconut, and nuts. They are rich and delicious. They also make a great pie, with the ingredients distributed slightly differently.

But when you make the upgrade to the Majestic Bar, you're on decadence overload, in the best way possible.

To sum it up: If you are what you eat, you might just become the Monopoly Man by the time you finish this big bar of awesome.

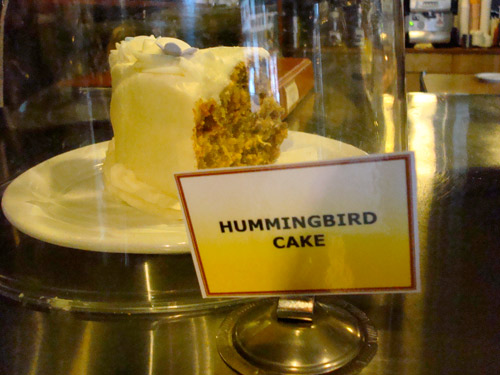
Of course, Corina also has a very worthy case full of other stuff, like this:

The Majestic Bar, available at Corina Bakery, 510 6th Avenue, Tacoma WA; online here.

Corina Bakery on Urbanspoon

Tuesday
May172011

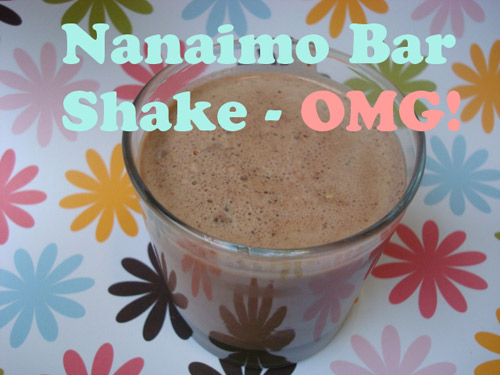
Make it in a Shake: Nanaimo Bar Milkshake Recipe

File under "Unholy, but Wholly Delicious": The Nanaimo Bar Shake.

That's right.

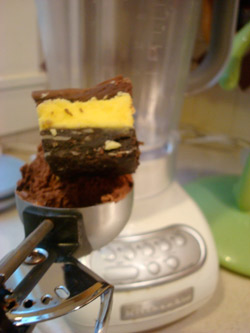
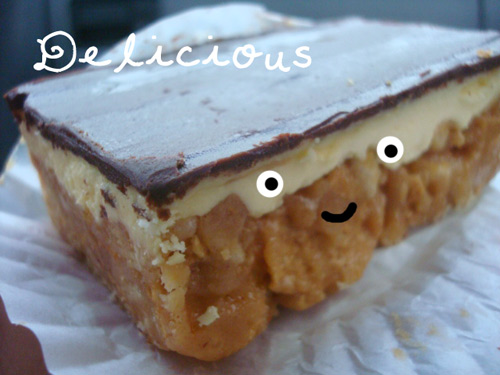
When I recently found myself with an excess of Nanaimo Bars--to the point where they were just on the verge of getting stale--I thought to myself, "how can I revive these sweet treats for an extra-awesome treat?". The answer was swift and obvious: make it in a shake!

The result when you give the richest, most decadently addictive bar cookie on earth gets a butterfat upgrade? You have yourself a frosty froth of fantastic, that's what you've got. 

Here's how to make this magic happen at home. 

You're welcome.


Nanaimo Bar Shake

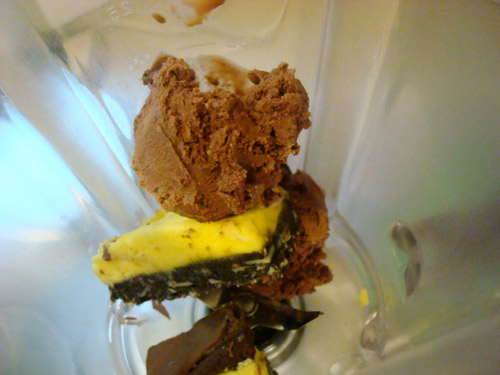
  • 1 Nanaimo Bar
  • 2 scoops ice cream, vanilla or chocolate, or one of each
  • milk or cream, to thin (up to 1/4 cup)

 Procedure

But in a blender. Blend. Add more milk/cream if you want it more sippable. Enjoy.

Tuesday
Mar292011

Sweet and Salty: Closeup on the Maple Canadian Bacon Nanaimo Bars Recipe


CakeSpy Note: by popular request, here's an individual post, all on its own (originally part of this massive Nanaimo Bar oeuvre), for the Maple Canadian Bacon Nanaimo Bars. Um, plus I thought it would make for a great entry in the Denny's / Foodbuzz Baconalia challenge for a chance to win! Enjoy!

Inspired by two other Canadian specialties, these bars were made with a "blonde" (sans cocoa) bottom layer, topped with a maple-infused buttercream center, all of which was topped off with a thick layer of white chocolate sprinkled with brown sugar and Canadian bacon baked until crispy with a maple glaze.

Makes 24-36 bars, depending on how hungry you are

Bottom Layer

  • ½ cup unsalted butter
  • ¼ cup sugar
  • 1 egg beaten
  • 1 ¼ cups graham wafer crumbs
  • ½ c. finely chopped pecans
  • 1 cup coconut
Middle Layer
  • ½ cup unsalted butter
  • 2 Tablespoons cream
  • 2 teaspoons maple syrup (I used grade B)
  • 2 Tbsp. vanilla custard powder or vanilla instant pudding powder
  • 2 cups confectioners' sugar
Top Layer
  • 3-4 slices canadian bacon
  • 2 teaspoons maple syrup
  • 3/4 cup white chocolate chips
  • 2 tablespoons brown sugar

 Procedure

  1. Melt the butter and sugar in the top of double boiler. Add egg and stir to cook and thicken. Remove from heat. Stir in crumbs, coconut, and nuts. Press firmly into an ungreased 8" x 8" pan.
  2. Cream butter, cream, custard powder, sugar, and syrup together well. Beat until light. Spread over bottom layer, making sure that it is as smooth and flat as possible. 
  3. Prepare the bacon. Preheat your oven to 400 degrees and line a sheet with parchment. Place the canadian bacon slices on top of the parchment, and drizzle with the maple syrup. Place in the oven until it is very crispy, turning after about 5 minutes. For me, the slices were fairly thin so it only took about 10 minutes total to get them very, very crispy. Remove from the oven and let cool while you prepare the rest of the topping.
  4. Melt white chocolate in the microwave in 20 second increments, stirring after heating, until it is melted and smooth enough to spread on top of the buttercream layer. Spread it on top as quickly and smoothly as you can.
  5. Sprinkle the brown sugar on top of the white chocolate, and then crumble the bacon on top, making sure to get even coverage. 
Monday
Feb142011

Triple Chocolate Nanaimo Bars: A Delicious Valentine's Day Recipe for Serious Eats

Why are forks more popular in February? Because they have Valen-tines!

And happily, there's still time to make up something tasty for those tines: Triple Chocolate Nanaimo Bars. Now, in case you're not familiar with Nanaimo bars, they're a fairly perfect food to begin with: a decadent three-part confection made up of a chocolate graham cracker crust, a (vanilla) custardy middle section, and chocolate topping.

Of course, like so many things, they're even better with more chocolate—and this version, with a rich dark chocolate center and a high quality bittersweet chocolate topping, might just make you fall in love, à la black widow spider, with the whole tray. Hey, nobody says you have to share.

For the full entry and recipe, visit Serious Eats!

Tuesday
Dec282010

Intensely Delicious: Chocolate Cake Bars Recipe Adapted from Intensely Chocolate by Carole Bloom

I'll tell you the truth: I kind of fainted when I got a personal email from cookbook author and baking legend Carole Bloom. After all, I consider her book The International Dictionary of Desserts, Pastries, and Confections: A Comprehensive Guide With More Than 800 Definitions and 86 Classic Recipes to be an essential reference guide, and every other thing little thing she's done is magic, too. 

But for real, there it was: an invitation to check out her newest book, Intensely Chocolate. With a name like that, what wasn't to love? Sign me up!

Well. Here's the first recipe I tried. Her version is for "Individual Chocolate Bundt Cakes With White Chocolate Passion Fruit Frosting", but you know, I'm not too-too fancy, so I baked the cake batter in a single pan instead, and topped it with delectable brown sugar frosting and Peanut Butter M+M's. But my baking experiment only serves to prove Bloom's prowess: this recipe is easily dressed up or down, and is completely delicious either pinkies-out fancy or footloose and fancy-free.

Chocolate Cake Bars with Brown Sugar Frosting and Deeply Un-Fancy M+M's

Ingredients

  • 6 ounces unsweetened chocolate, finely chopped
  • 1 3/4 cups cake flour
  • 1 teaspoon baking soda
  • 1/2 teaspoon kosher or fine grained sea salt
  • 1 stick (4 ounces) unsalted butter, softened
  • 1 cup superfine sugar
  • 2/3 cup firmly packed light brown sugar
  • 2 large eggs, room temperature
  • 2 teaspoons pure vanilla extract
  • 1 cup sour cream (I used yogurt)

For the topping

  • 1/2 cup heavy cream
  • 1/4 cup brown sugar
  • 1/2 teaspoon vanilla extract
  • 3 tablespoons unsweetened cocoa powder

Procedure

  1. Position the oven rack in the center position. Preheat oven to 350. Coat an 8x8 or 9x13-inch pan with nonstick spray, and line with parchment paper.
  2. Melt the unsweetened chocolate in the top of a double boiler over low heat, stirring often with a rubber spatula to ensure even melting. Remove from heat and set to the side for a moment.
  3. Over a bowl, sift together the flour and baking soda. Add the salt and toss into the blend.
  4. Beat the butter in the bowl of an electric stand mixer using the flat beater attachment until soft and fluffy, about 2 minutes. Add the superfine sugar and brown sugar and beat together well, stopping occasionally to scrape down the sides of the bowl.
  5. Use a fork to lightly beat the eggs and vanilla extract in a small bowl. Add to the butter mixture. Mix together, stopping to scrape down the sides of the bowl every now and again. The mixture may look curdled at first, but as you continue to mix and scrape down the bowl, it will become smooth.
  6. Add the dry ingredients and sour cream in alternate stages, making for about 4-5 total stages of adding ingredients. Mix thoroughly after each addition.
  7. Add the melted chocolate and blend completely.
  8. Pour into your prepared pan.
  9. Bake for 35-50 minutes (since the original recipe for bundt cakes, it called for a bake time of 25-30 minutes, but baking it in a pan takes longer). It's done when a cake tester / toothpick comes out mostly clean.
  10. Remove from oven and transfer to rack to cool completely before cutting. I topped mine with frosting AFTER cutting.
  11. While you wait for the cakes to cool, make yo'self some frosting. Pour the heavy cream into a medium bowl, and whip with an electric mixer. Add sugar, vanilla and cocoa powder; whip until stiff and spreadable. Refrigerate until needed.
  12. Top each cake with a dollop, and with candy if desired (I had extra m+m's from making cornflake wreaths so used them on top).
Friday
Nov192010

Happy Hour: The Breckenridge Bar Cookie

Say hello to my new favorite thing in the world: the Breckenridge Bar Cookie.

My fortuitous meeting with La Breckenridge took place at Half Price Books, where I stumbled on a slim volume entitled Creme De Colorado Cookbook. This book piqued my interest for two reasons: first, I have a rather keen and slightly obsessive interest in regional cuisine, and second, I've never been to Colorado, so I was very interested in the foods that might constitute the creme de Colorado.

Flipping to the dessert section, I found the Breckenridge Bar right away. I already knew that Breckenridge must be a delicious place based on Rainy Day Gal's guest post on the fair city, but this bar looked like an exceptional specimen of sweethood: comprised of rich layers of chocolate cake, coconut and condensed milk, and chocolate topping. Unfortunately, the cookbook didn't offer any story behind the bar's history or development, so I can only imagine that it is called the Breckenridge Bar because people are eating them all day, every day, there.

Of course, upon reviewing the original recipe it seemed a little low-fat for my taste, so I made it slightly awesomer by adding brown sugar crumb topping and toasty almonds on top, making for a final result which fell, taste-wise, somewhere between brownie, Almond Joy, and crumb cake. A delicious adaptation, if I do say so myself.

Breckenridge Bars

Adapted from the Creme De Colorado Cookbook

Makes 24-30 bite-sized bars

Ingredients for base


  • 1/2 cup butter, softened
  • 1 1/4 cups granulated sugar
  • 3 eggs, lightly beaten
  • 1 cup all purpose flour
  • 3 tablespoons plus 1 teaspoon cocoa powder
  • 1/2 cup walnuts or pecans (optional)

Ingredients for middle layer

  • 14 ounces sweetened condensed milk
  • 2 cups shredded coconut (sweetened)

For the topping 

  • 1 ounce unsweetened chocolate
  • 1 tablespoon butter
  • 2 cups confectioners' sugar
  • 2 tablespoons whole milk
  • 1 teaspoon vanilla extract

For the crumb topping, if you want it (you do!), adapted from Arthur Schwartz

  • 1 stick unsalted butter
  • 1 1/4 cup flour
  • 3/4 cup dark brown sugar
  • 3/4 teaspoon vanilla extract
  • 1/4 teaspoons salt
  • A handful of sliced almonds or nuts, if desired

 Procedure

  1. Preheat oven to 350.
  2. In a stand mixer, cream the butter and sugar. Add eggs one at a time, beating well after each addition. Add cocoa and flour, mixing until incorporated. Add nuts, if adding.
  3. Spread into a floured and buttered pan (original recipe called for 9x13-inches; I didn't have one handy so used an 8x8-inch pan).
  4. Bake at 350 for about 20 minutes. While baking, mix the condensed milk and coconut; add this to the top of the baked bottom crust and bake for 18-20 more minutes at 350.
  5. Immediately after removing from oven, add chocolate topping, and then the crumb topping on top of that. Turn off the heat, then put back in the oven for about 10-15 minutes to heat in the residual heat. Once lightly but not completely cooled, cut into squares. (Note: The original recipe simply called for the bars to be removed from the oven and frosted while still warm and that was it--but I think because mine were thicker in the smaller pan, the extra baking time helped them set up better).
  6. Let cool completely (I put mine in the fridge to set for several hours) before serving.

To prepare frosting:

In a double boiler, melt chocolate and butter until smooth. Add the rest of the ingredients until well mixed.

To prepare crumb topping:

  1. Melt the butter in a medium saucepan over a low flame. Remove from the heat and cool for about 5 minutes, but do not allow the butter to become cold.
  2. Add the flour, brown sugar, salt, vanilla extract, and cinnamon. Stir with a table fork until the mixture forms small crumbs. 
Tuesday
Nov022010

Happy Overload: Peanut Butter Crispy Nanaimo Bar from Savary Island Pie, West Vancouver, BC

If the subject of Canada comes up in conversation, chances are you're going to hear all about my deep and undying love for the Nanaimo Bar

If you don't know what a Nanaimo Bar is, then clearly you've been wasting your life up until today. It's a no-bake bar composed of three layers of pure pleasure: base of graham cracker crumb, cocoa, coconut and nuts all held together with butter, a middle layer of rich, buttercream custard, and a top layer of firm chocolate. They're messy, they're hella buttery, and they are pretty much the most delicious and decadent thing you could dream of eating.
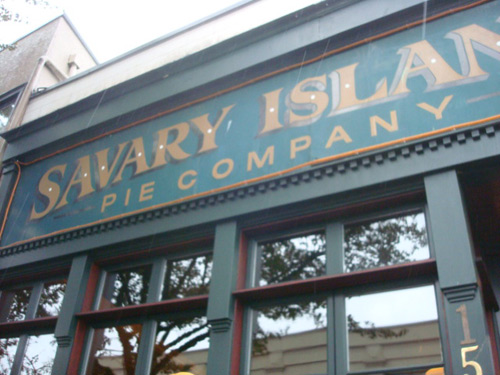
And while I've embraced variations in the past, recently I came across one that stopped me in my tracks: the one at the Savary Island Pie Company (not a typo; pronounced the same as "savory" or, you know, since they're in Canada, "savoury") in West Vancouver.
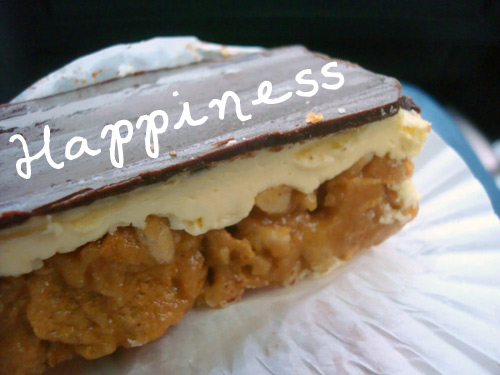
What we thought was a Nanaimo Bar was actually referred to as a peanut bar--because you see, the bottom layer was not the chocolate crumb mixture, but instead it was like a peanut butter cereal treat.

It does bring up the important question: is it ok to mess with the perfect balance of a classic?

In this case, when you're doing a sort of scotcheroo-meets-Special K bar-meets-rice-krispie-treat-Nanaimo Bar-mashup, it's so, so very OK.

The crispy crunch of the base adds a wonderful texture contrast to all the soft creaminess on top, and the peanut butter offers a satisfyingly savory dimension to the flavor. 

All things considered? A successful riff on a sweet treat that I wouldn't dream of sharing with Mr. Spy (though he was quite satisfied with his raspberry rhubarb pie).

You can find this magic at the Savary Island Pie Company, 1533 West Marine Drive, West Vancouver, BC.

Savary Island Pie Company on Urbanspoon

Thursday
Aug122010

Bar Hopping: Peanut Butter and Chocolate Chip Topped Bar Cookies Recipe

If I were, on this very day, pressed to answer the question "what treat would you most enjoy eating until you descend into morbid obesity?" I would have a ready answer: Peanut butter and Chocolate Chip-Topped Bar Cookies.

It all happened recently while baking the "Dream Bars" from Betty Crocker's Cooky Book and realizing that--duh--I basically had none of the ingredients for the top layer, which was meant to be made up of an almond-coconut topping. So there I was, with a somewhat sad expanse of beige batter for a bar cookie base.

Turning to my pantry (OK, my cabinet), I found half a jar of old-fashioned chunky peanut butter and half a bag of milk chocolate chips. Yes! In the mix they both went, scattered irregularly on top of the batter.

The result? Something lovely and amazing. Moist blondie-esque cookie bars with pockets of gooey-crunchy peanut butter and smooth, delicious chocolate. Something you won't...be...able...to...stop...eating. And if you don't like them? No problem, I'll finish the tray for you.

Peanut Butter and Chocolate Chip-Topped Bar Cookies

adapted from Betty Crocker's Cooky Book

Ingredients

  • 1/2 cup butter
  • 1/2 cup brown sugar, packed
  • 1 cup flour
  • 1/2 jar (about a cup) peanut butter (I used chunky)
  • 1/2 bag (about a cup) milk chocolate chips

Procedure

  1. Heat oven to 350 F.
  2. Mix the butter and sugar thoroughly. Stir in flour. Press and flatten with hand to cover the bottom of a parchment-lined oblong pan, 13x9-ish. 
  3. Bake 10 minutes, then spread with the topping (irregularly spooned globs of peanut butter and a sprinkling of chocolate chips).
  4. Return to the oven and bake for 25 minutes more, or until golden brown. Cool slightly, then cut into bars. Makes about 20.
© Cakespy, all rights reserved. Powered by Squarespace.