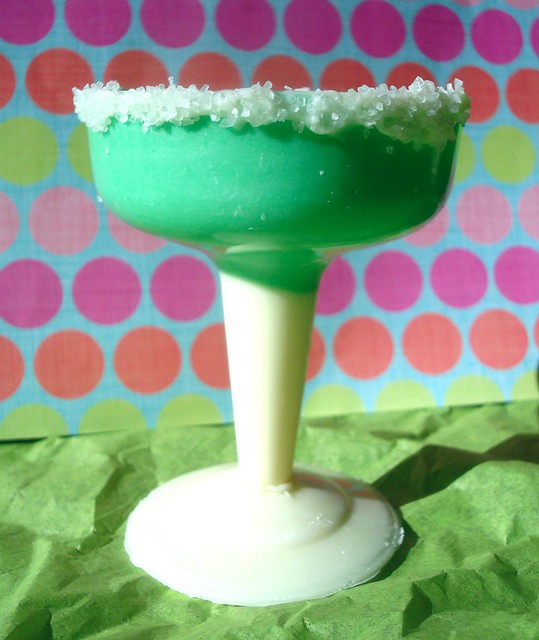
White Chocolate Dessert Cups that Look Like Margarita Glasses
 Monday, January 12, 2015
 Today, let's forget about everything else and focus on a life skill that will serve you as long as you are breathing and are able to feel delight:
How to make edible dessert cups that look like margarita glasses.
This is a riff on a "How to make edible chocolate dessert cups" post I wrote for Craftsy--whilst I was writing it, I realized that, OMG, the plastic champagne coupes I was using as molds actually kind of resembled margarita glasses, too. So I decided to amp up the association by tinting the chocolate so that it would resemble a margarita in a cup.
Don't try to take a sip: this is solid white chocolate, decorated with a salty (that's real salt--I think dessert loves salt!) rim. While yes, it's fine for out-of-hand eating, I think it's extra special when you fill it with a pudding (how about a margarita pudding?), mousse, or even whipped cream. It's a whimsical and true delight-giving treat.
How to make a chocolate cup
Makes 4-6 dessert cups
Adapted from Taste of Home
Ingredients
- 12 ounces (1 bag) white chocolate morsels
- flavorings or food colorings of your choice (optional)
- coarse sugar for the "rims"
Equipment
- Dollar store champagne coupes with removable bases
1. Divide the chocolate into two portions: 1/4 and 3/4. I found it easier to melt each batch separately; the small portion plain, and the larger portion with green coloring. You can learn how to melt white chocolate here.
2. Separate the removable bases from the cups of your champagne coupes. Start with four of them, and if you still have a good amount of the mixture when you’ve filled all of them, you can use the other two coupes (this will depend on how thickly you apply the candy).
3. Fill each hollow stem with your melted white chocolate mixture, up the stem. Switch to the green chocolate. Now, use a pastry brush or spoon to brush the sides and "bowls" of the cups (author's note: I started with a spoon for filling the stem, and then graduated to a pastry brush to apply chocolate to the sides of the cup). Set the tops back on the bases (they'll remain upright this way), and place in the refrigerator for about 15 minutes, or until set.
4. Once your 10 minutes are up, remove from the refrigerator and give them a generous second coat with the green, putting emphasis on the sides of the cup. Place back in the refrigerator on the bases until set.
5. Remove the tops from the bases; the chocolate should be set to the point where you can set the coupes on their sides while you proceed. Grab those bases, and invert them.
6. Fill each of the bases with most of the remaining melted white mixture, leveling the top. Place them with the coupes in the refrigerator. You should have a little white chocolate left — keep it on hand.

7. Once everything is set (that is to say, the chocolate is completely hard and firm), remove from the refrigerator (to keep things cool, remove the coupes and bases one at a time). Gently, using a sharp knife, ease the edges of the plastic from the chocolate. The pieces should come out without too much trouble.
If the plastic cracks or breaks, that’s ok — you only spent a dollar on these! If there is some breakage on your candy cups, don’t panic. You can place the cracked bit in place, and press it together using the remaining white chocolate mixture as “glue”.

8. Use a little white chocolate or icing along the edge of the top of the cups, and adhere some coarse sugar along the rim.
9. Adhere the bases and cups using the remaining white chocolate as glue. Let them set again in the refrigerator for about 20 minutes before filling with the dessert of your choice. If not using immediately, let them rest in the refrigerator until ready to serve your dessert so that any ambient heat doesn't make the base and top separate.


Reader Comments (8)
I am glad I started following your blog.