Home Home Home Home Home Home Home
CakeSpy

Featured: 

My adventure at Ben & Jerry's in Vermont!


Unicorn Love: the Eating Disorder Recovery Blog


 Buy my brilliant books!

Buy my new book!

Buy my first book, too! 

CakeSpy Online Retail!


Archives
Gallery

Fantastic appliance for cake making on DHgate.com

everyrecipe.co.nz

Craftsy Writer

Entries in recipes (704)

Friday
Nov162012

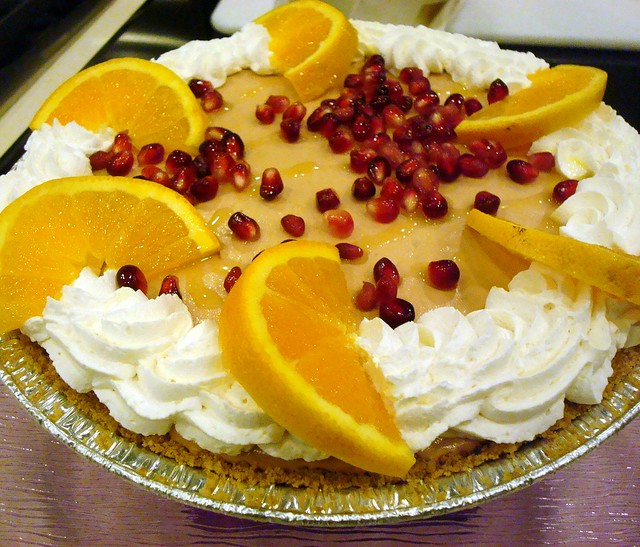
Pom-tastic: Pomegranate Mousse Pie Recipe

Pomegranate pie, Pie Mania in Santa Fe

A pomegranate is a pretty special thing. Once you get past the exterior, it's like a jewelbox full of rubies.

But if pomegranates are like little rubies, then this is the dessert equivalent of surrounding the rubies with diamonds and pearls and other sparkly wonderful stuff. Pomegranate Mousse Pie. Doesn't the name just make you tingle a little? It takes the pretty pomegranate, with its tart-sweet flavor, and gives it an awesome upgrade by way of mousse-ifying it to creamy perfection.

The creamy mousse is somewhat startling in its delightful tartness, which is a wonderful contrast to the creaminess. It works wonderfully together, and when paired with a crunchy cookie crust, you've got yourself a highly crave-able dessert.

I was lucky enough to sample this pie, created by Stacy Pearl of Walter Burke Catering, at the Pie Mania event in Santa Fe, NM; the pie-maker was generous enough to share the recipe. Lucky you! 

Pomegranate Mousse Pie

By Stacy Pearl, Executive chef,  Walter Burke Catering; recipe also appears here.

Makes two pies

Ingredients

Per pie crust (make this twice):

  • 1 ½ cups cookie crumbs- Graham cracker, chocolate wafers, vanilla wafers, or gingersnaps
  • 6 ounces melted butter

For the filling

  • ¼ cup pomegranate juice
  • 1 pack (2 ¼ teaspoons) gelatin
  • ½ teaspoon ground cardamom
  • 1 cup Pomegranate Molasses
  • 2 cups heavy cream divided ( 2 tablespoons added to white chocolate)
  •  4 ounces chopped white chocolate
  • ½ teaspoon almond extract
  • ½ teaspoon vanilla extract
  •  ½ cup powdered sugar

Procedure


  1. To make the crust, mix melted butter with the cracker crumbs and press into the bottom of two 9 inch pie pans. Refrigerate till needed.
  2. To make filling, put the pomegranate juice in a small bowl and sprinkle gelatin over the top then stir a little with a spoon to mix it up.
  3. In a small saucepan heat the pomegranate molasses with the cardamom till it comes to a boil. Pour over the softened gelatin and stir. Let cool to room temp.
  4. In the meantime, melt the chopped white chocolate in the top of a double boiler with 2 tablespoons of heavy cream. Let cool. Whip up the remaining heavy cream till it starts to thicken and then add the extracts and the powdered sugar. Scrape down sides of the bowl and mix a little more. Now add the white chocolate and whip to incorporate. Next add the pomegranate gelatin mixture and mix till smooth.
  5. Pour mixture into prepared crusts and refrigerate for at least 3 hours till firm. Best if made the night before. Serve with a drizzle of orange rosewater syrup ( recipe to follow) and a sprinkling of fresh pomegranate seeds. This recipe makes two 9 inch  pies. This pie may be frozen.


Orange Rosewater Syrup

Ingredients

  • 4 cups sugar
  • 3 cups water
  • ½ cup rosewater
  • ½ cup OJ concentrate
  • ½ cup orange juice
  • ¼ teaspoon orange oil

Procedure

Boil the water and sugar till sugar is dissolved and then add the other ingredients. Simmer 5 minutes to thicken.

Tuesday
Nov132012

Million Dollar Shortbread Bars

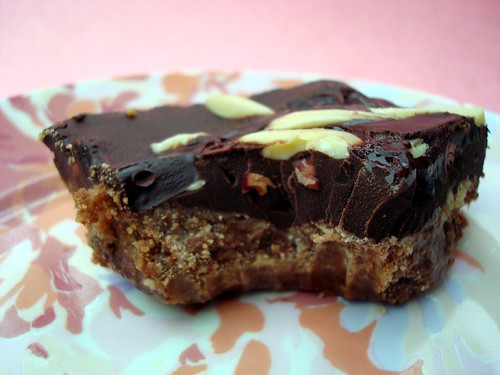
Million Dollar Shortbread Bars

If you are what you eat, then I'm rich, good-looking, and incredibly easy. Wait, what? Well, luckily I'm not what I eat, but what I'm calling Million Dollar Shortbread Bars (as a sort of homage to Millionaire's Shortbread, to which I'd consider these a cousin) are all of those things and more. 

Let me explain. It all went down after Walker's Shorbread sent me a big box of their goodies to use in my inventive baking experiments (hard life, I know). Now, I consider their shortbread good already, but I thought I could really make it sing by mashing it together with chocolate and almonds. And butter. Because...

Fact:

Oh, I should also mention that I needed something fast--with no dessert on hand, this was something of a dessert 911. But who knew that what began as a quest for a quick and tasty dessert would yield such a treasure?

Here's what I did.

First, I crushed a box of Quadruple Chocolate Crunch Biscuits and a box of Pure Butter Vanilla Shortbread, mashing them together on pulse mode in a powerful blender, along with 3 tablespoons of melted butter. On a whim, I decided to add about 3 ounces of almond paste (you know, the kind in the silver tube). I pulsed until it was all nicely incorporated. Then, I pressed it into a pan and baked until nice and toasty.

Meanwhile, I melted about 4 ounces of chocolate with half a stick o' butter. When I took the crust out of the oven, I poured the melty chocolate on top, then sprinkled it with some toasted almonds (I toasted them in the residual heat of the oven after baking the crust) and a sprinkling of salt. 

40 Million Dollar Bars

And Oh. My. God. How to describe the experience of biting into one of these nuggets of pure pleasure? They are the perfect marriage of chocolate and shortbread and almonds, all wrapped together in a big, buttery hug. Oddly but not unpleasantly, the almond paste in the crust paired with the chocolate almost gave it a cherry-ish taste. A single bite is a powerhouse, stopping you in your tracks because you simply don't know how to handle all the awesome in your mouth. How could such complexity come from such a seemingly humble bite? Moreover, this is a dessert that is surprising, sublime, and overwhelming--so decadent that you think you should probably stop, but you just can't. Proof is evident by the fact that a friend and I ate almost the entire pan in one sitting (no, really). That's why all the pictures are of the same two little pieces of the bars. They were all that was left!

40 Million Dollar Bars

As previously mentioned, I've named them to give homage to Millionaire's Shortbread, but I've changed the name because they're related, but not quite the same. 

Million Dollar Bars

Million Dollar Shortbread Bars

Crust

  • 1 box Quadruple chocolate crunch biscuits
  • 1 box Pure Butter Vanilla Shortbread
  • 3 tablespoons butter
  • 3 ounces almond paste

Topping

  • 4 ounces semisweet or dark chocolate
  • 1/2 stick butter
  • 1 cup sliced almonds
  • sea salt, for sprinkling on top

Preheat the oven to 350 degrees F. Grease an 8 or 9-inch square baking pan.

Combine the cookies and melted butter in a food processor or blender with a pulse mode. Press it into the pan and bake for about 10 minutes, or until lightly golden on the edges (hard to see because of the chocolate; look for a dull, toasty finish). Remove from the oven. You can toast the almonds at the same time for a few minutes during the baking (it will take about 5 minutes or so to toast 'em).

While this bakes, melt the chocolate and butter together over low heat. Gently pour over the finished crust (it's ok if it is still quite warm) and spread as gently as possible so you don't tear up the delicate crust. Sprinkle the toasty almonds on top, and add a generous sprinkling of sea salt.  Let them cool before serving for optimum prettiness, but if you're greedy like me, eat them right away with the chocolate still melty on top. 

Monday
Nov052012

Simply Sweet: Butter Cookies with Sprinkles

Butter cookies

I came across a wonderful quote, which goes as follows: "Cookies are made of butter and love." What a wonderful sentiment! I love the idea that these little sweet mouthfuls of sugary stuff are not only snacks, but also lumps of love. 

Speaking of lumps of love, one of my favorite examples is a cookie called the Kaleidoscope Cooky, from the fantastic book (one of the top three in my rotation): Betty Crocker's Cooky Book. These cookies are a very pretty specimen, as you can see here.

Butter cookies

They're also very easy to make, with a wonderfully soft dough that yields a buttery, crumbly-chewy cookie. The only time consuming part really is tinting the dough and putting the pieces together to form multicolored treats.

Butter cookies

But as I recently discovered, they're equally tasty and can dress up quite nicely as a simple untinted butter cookie.

Butter Cookies

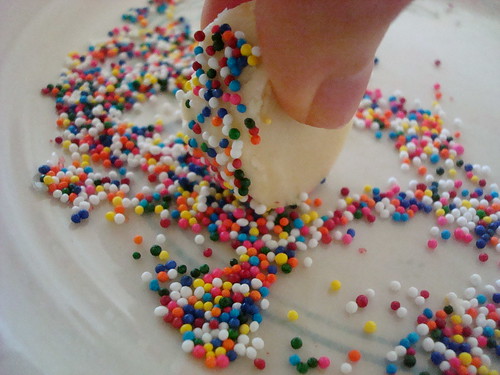
Really, all you have to do to add color is use some multicolored sprinkles on the sides of the cookies to make them all cute. They work quite well if you use toothpicks to draw shapes or letters on them too!

Butter Cookies with Sprinkles

adapted from Kaleidoscope Cookies, adapted from Betty Crocker's Cooky Book  

Makes many (like 60)

 Ingredients

  • 1 pound (4 sticks) unsalted butter, softened
  • 2 cups confectioners' sugar, sifted
  • 1/2 teaspoon salt
  • 2 teaspoons vanilla extract
  • 1 pound 6 ounces (about 4-½ cups) all-purpose flour
  • 1 cup or so sprinkles or colored decorating sugar

 Procedure

  1. In an electric stand mixer, beat the butter with a paddle attachment until it is creamy. Add the confectioners' sugar and salt and beat for several minutes, until all of the ingredients are well incorporated and no lumps of powdered sugar remain. Beat in the vanilla extract, then add the flour and beat until a soft dough forms.
  2. Roll the dough into several logs about 1 foot long each. Place the sprinkles or decorating sugar on a large, shallow plate and roll each log to coat. Wrap the logs in wax or parchment paper and chill overnight or freeze up to a month.
  3. Remove the dough from chilling--if it was in the freezer, let it warm up just until you can handle it, but not until it is soft Preheat oven to 375 F.
  4. Unwrap the logs and, with a sharp knife, slice them into coins about 1/3-inch thick. Give 'em another roll in sprinkles for maximum coverage (optional). Place on ungreased cookie sheets (the cookies will not spread much as they bake).
  5. Bake two sheets at a time for about 7-9 minutes, rotating halfway through baking, until the cookies have firmed up but are not browned. Remove the cookies to a wire rack to cool completely. Store in an airtight container.

Butter cookies


Wednesday
Oct312012

Mega Fun-Size Candy Bar

Every year around this time, I feel the need to rage against Fun-Size candy bars. I mean, come on people! There is nothing fun about a teeny-tiny candy bar.

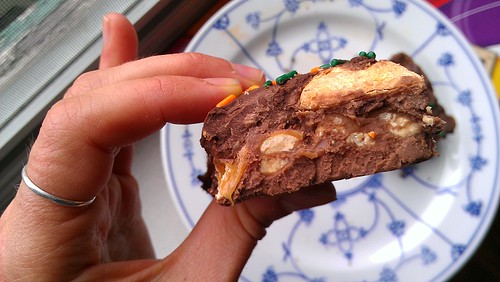
But then, I had the most incredible idea to make the tiny bars more fun: I'd melt together about 100 of the mini bars to form a monstrous Mega Fun-Size Bar! Now that sounds like fun.

After practically breaking a five-minute mile running to the store to pick up a bushel of bags of the tiny bars, I set to work. I lined a 9x13-inch pan with a patchwork of small Snickers, Nestle Crunch, Butterfinger and Baby Ruth bars, gently heated it in the oven until it melted together, smoothed over the top with melted chocolate chips to make it a cohesive chocolatey mass, and decorated it with some festive sprinkles. I consider it a masterpiece: the different textures and flavors of the candy bars meld together in your mouth to form a treat that is mega-fun to eat. Say hello to the new fun-size.

Mega Fun-Size Bar

Makes 1 bar

Ingredients

  • 4 bags (approximately 12 ounces each) Fun-Size candy bars; about 80-90 bars
  • 2 cups (about 12 ounces) milk chocolate or semisweet morsels

Procedure

  1. Preheat the oven to 300°F. Line a 9- by 13-inch pan with aluminum foil. Unwrap all of your fun-size candy bars. This may take a while.  
  2. Line the bottom of the pan with your unwrapped candy bars. To keep things interesting, alternate the styles so that the different flavors are mixed up, forming a sweet sort of chocolate patchwork.  
  3. Once you have lined the bottom of the pan with candy bars, make a second row, aligning the candy bars perpendicular to the ones below. This will help things melt fairly evenly.  
  4. Place the pan in the oven until things start to get shiny and melty, about 10 minutes.
  5. Remove from the oven and scatter the chocolate morsels evenly on top of the candy bars. Return the pan back to the oven until the morsels have begun to melt, about 5 minutes longer.  
  6. Remove the pan from the oven and place it on a towel or heatproof surface. Very gently, so as not to burn yourself on the sides of the pan, use a butter knife or spatula to evenly smooth and spread the chocolate. You'll want to do this gently but fairly quickly.  
  7. If desired, garnish with sprinkles. Let cool completely before serving (otherwise it will be very messy). Enjoy!

IMAG2752

Tuesday
Oct232012

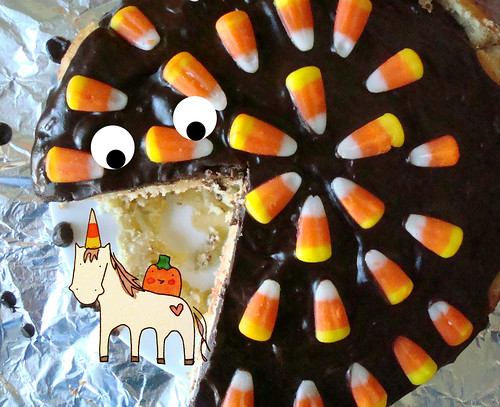
Candy Corn Boston Cream Pie

Candy Corn boston cream pie

Happy National Cream Pie Day!

Wait, you did know it was National Boston Cream Pie Day, didn't you? 

Well, it's ok, because even if you didn't, I did. And I also had the foresight to notice that October 23 is pretty darned close to Halloween, and so in an effort of Seasonal Fusion, I'd like to present the famous pie all gussied up for the holiday! That's right. Candy Corn Boston Cream Pie! 

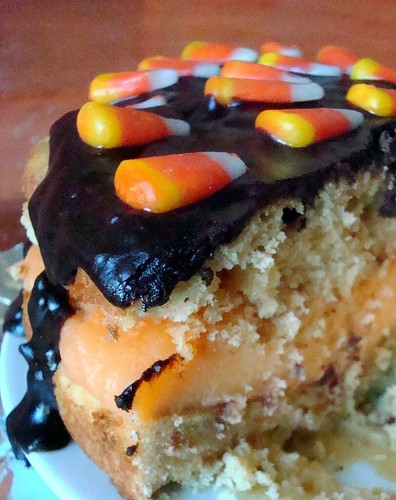
Boston cream pie

This recipe is pretty classic, but with a heaping handful of candy corn in every step for added awesome; also, I top mine with a ganache because I really didn't have the time to do a homemade chocolate fondant (and also, to be quite honest, I like the ganache better. It's a lot creamier. C.R.E.A.M. Yes!

Adding Candy Corn isn't necessary to make this Boston Cream Pie delicious, but it adds a fun lowbrow turn to a fancy-ish dessert. Plus, it's fun and sweet. VERY sweet.

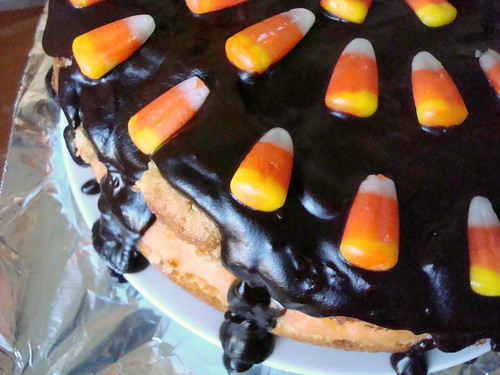
Boston cream pie

Candy Corn Boston Cream Pie

Makes about 8 servings

For the Cake
  • 7 large eggs, separated
  • 1 cup sugar, divided
  • 1 cup all-purpose flour
  • 2 tablespoons butter, melted
  • 1 cup candy corn (divided; use 1/2 cup for the cake, 1/2 cup or to taste for garnish)
  • Pastry cream (recipe follows)
  • Glaze (recipe follows)

Procedure

  1. Preheat the oven to 350 degrees F. Grease and flour the bottom and sides of a 10-inch springform pan.
  2. Carefully separate the eggs, putting the whites and the yolks in a separate large bowls; make sure there are no specks of yolk in the egg whites (the whites won't whip properly if there are bits of yolk mixed in). Add ½ cup of sugar to each bowl.
  3. In the bowl of an electric mixer fitted with the whisk attachment, beat the egg whites on medium-high speed until they form stiff peaks; set aside. Using an electric mixer or by hand, beat the egg yolks until they are thick and pale yellow in color. Stir about one quarter of the whites in to the yolks to lighten the batter, then gently fold the rest of the whites into the yolk mixture.
  4. Whisk the flour into the egg mixture using a large balloon-type whisk, working carefully to minimize the deflation of the batter. Then, still using a whisk, stir in the melted butter. Fold in the candy corn. Pour the batter into the prepared cake pan, filling it about ¾ of the way, and bake for 15 to 20 minutes, or until a toothpick comes out clean when it's inserted into the center of the cake. Let the cake cool in the pan for about one-half hour, then remove it from the pan and transfer to a wire rack to cool completely.
  5. To assemble the cake, using a long serrated knife, slice the cake horizontally into 2 equal layers. Place one of the cake layers, cut side up, on top of a sheet of parchment paper (this will catch any drips, and allow easy cleanup before transferring it to a serving platter). Spoon the pastry cream onto the center of the bottom layer, leaving an inch and a half uncovered on all sides—the weight of the top cake layer will spread it to the edges. 
  6. Place the second layer of cake on top of the pastry cream. Using a ladle, spoon the still slightly warm chocolate glaze on the top of the cake, allowing it to gently drip over the sides of the cake. Gently press the candy corn around the sides or on the top. Serve immediately at room temperature, or refrigerate for up to 2 days, well wrapped, and bring to a cool temperature before serving. Boston cream pie

Pastry cream

Ingredients

  • 1 tablespoon butter
  • 2 cups milk (whole or 2%)
  • 2 cups heavy cream
  • ½ cup sugar
  • 3½ tablespoons cornstarch
  • 6 large eggs
  • 1 cup candy corn

Procedure

  1. In a medium saucepan over medium-high heat, combine the butter, milk, and cream. Bring to a simmer, then remove from heat.
  2. In a medium bowl, whisk the sugar and cornstarch until combined. Add the eggs, beating until the mixture is light yellow and form ribbons when you lift the whisk, about five minutes.
  3. Slowly pour the milk mixture into the egg mixture, whisking until completely combined.
  4. Pour the mixture into a medium-size pot and place over medium heat. Cook, whisking constantly to keep the eggs from scrambling, until the mixture begins bubbling. Continue whisking until the mixture has thickened to the consistency of a pudding; this will happen shortly after it comes to a boil, about 15 minutes. If any bits of egg have cooked, forming lumps, strain the mixture through a mesh sieve.
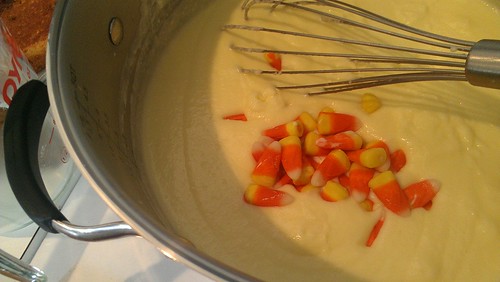
  5. Transfer to a bowl and fold in the candy corn. They will "bleed", giving the cream a light orange color. Press plastic wrap directly onto the surface of the custard, to keep a skin from forming. Let cool completely in the refrigerator before using.

Chocolate Glaze

  • 1 cup heavy cream
  • 8 ounces semisweet chocolate, finely chopped

In a medium saucepan over medium heat, bring the cream to a boil. Place the chocolate in a medium bowl; pour the hot cream over chocolate, stirring until chocolate is melted and well combined. Set aside to cool slightly, about 10 minutes.

Monday
Oct222012

Lemon Meringue Pie in a Chocolate Cookie Crust

Pie

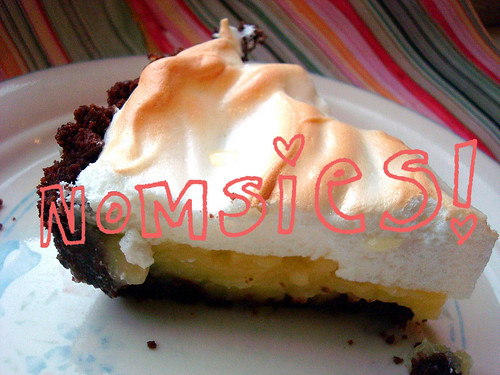
Here's the thing about Lemon Meringue Pie. It's beautiful. It's like a skyscraper of a pie. A pie-scraper? It's an architectural feat of a dessert, and it even has clouds on top. It looks very pretty in diner cases. 

But when it comes to eating it, I so often find it a disappointment. The lemon part is way too sweet, the meringue part just has a weird texture, and the crust is gluey. It's like eating a slice of homework, that's about how much joy it gives me.

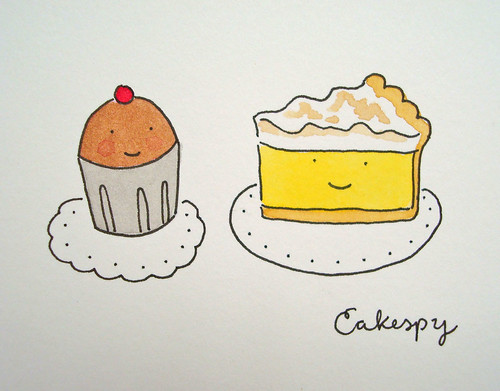
Chocolate Cupcake and Lemon Meringue Pie

But while working on my upcoming book (to be released in spring of 2013, but in the meantime, please buy book #1, CakeSpy Presents Sweet Treats for a Sugar-Filled Life), one of the recipes I worked on and researched was lemon meringue pie. It has a very long and interesting story, involving Quakers, Italians, watchmaker's wives, the Parker House Hotel, and diners. But you'll have to buy the book for that. Right now we're talking about the pie itself.

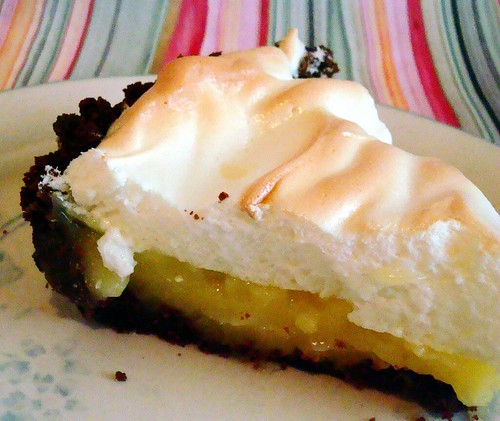
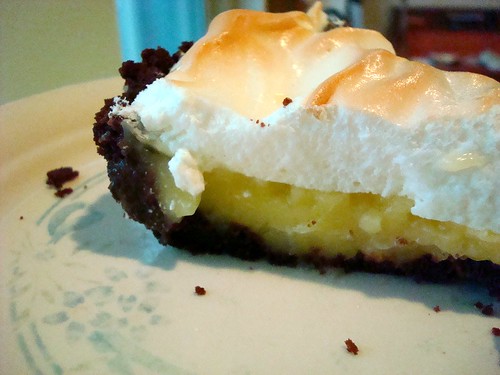
Lemon meringue pie in a chocolate cookie crust

In baking this pie multiple times, I had a chance to experiment a little bit with it, and had one version that I tried mostly as a lark, because I had no regular pie crust on hand and didn't feel like making it. I thought, I wonder what the pie would taste like made with a cookie crumb crust? And then, even further, I thought, why not try it with a chocolate cookie crumb crust? This thought was likely brought on because I had about a dozen whoopie pie cookie shells which were slowly and gently becoming stale on my counter.

Well, I figured at least it would be interesting. 

So I crumbled up the cookies, mixed them with butter, and baked the crust until crispy. Then I topped with the usual lemon custard and meringue topping and baked it up. I thought that visually, it was quite pretty.

Lemon meringue pie in a chocolate cookie crust

I was genuinely surprised by the end result. The chocolate crust gave the pie a certain depth--a dark contrast to the sweet, tart lemon. It was intriguing, and I enjoyed my slice thoroughly.

Don't get me wrong, if you are not a lemon meringue lover, this will probably not turn you around. But if you do like lemon meringue pie, this is a solid recipe, and the chocolate crust is something to try. 

Note: this picture was taken the morning after I baked it, and some of the condensation made little drips on top. Let it cool and dry completely before refrigerating!

Lemon Meringue Pie in a Chocolate Cookie Crust

For the crust:

  • 2 cups' worth of crumbled chocolate cookies or wafers (I used unfilled, crumbled whoopie pie cookies)
  • 3 tablespoons butter, melted

For the pie filling

  • 4 egg yolks
  • 1½ cups sugar
  • ⅓ cup cornstarch
  • 1½ cups water
  • 3 tablespoons butter
  • 2 teaspoons finely grated lemon zest
  • ½ cup freshly squeezed lemon juice
  • 2-3 drops yellow food coloring (optional)
  • 3 cups Meringue Topping

Meringue Topping

  • 3 egg whites
  • ¼ teaspoon cream of tartar
  • 6 tablespoons sugar
  • ½ teaspoon vanilla extract

Procedure

  1. Preheat the oven temperature to 400 degrees F. 
  2. Prepare the crust. In a large bowl, combine the crumbled cookies with the melted butter. Mix by hand until it's incorporated. Press into a well greased pie plate. 
  3. Bake for 10-15 minutes or until crispy. Let cool completely before filling.
  4. To make the filling, in a small bowl, beat the egg yolks with a fork. In a 2-quart saucepan, mix the sugar and cornstarch; gradually stir in water. Cook over medium heat, stirring constantly, until the mixture comes to a boil. Continue stirring for 1 minute, until the mixture thickens.
  5. Immediately pour about half of the hot mixture into the egg yolks; when well combined, pour this mixture back into the saucepan. Boil and stir for 2 minutes; remove from heat. Add the butter, lemon zest, lemon juice, and food coloring. Stir until the butter is melted and everything is well combined. Pour the hot filling into the pie crust.
  6. In a very clean medium-size bowl, beat the egg whites and cream of tartar with an electric mixer on high speed until foamy. Add the sugar 1 tablespoon at a time and continue beating until stiff and glossy. Beat in the vanilla.
  7. Spoon the meringue onto the filling. Spread it evenly over the filling, carefully sealing the meringue to the edges of the crust to prevent shrinking or weeping. Using a knife, form the top meringue into little peaks (think punk hairdo) or make swirls on the top for a pretty finish.
  8. Bake for 8 to 12 minutes, or until the meringue is light brown. Set the pie on a wire cooling rack and allow to cool in a draft-free place for about 2 hours. Cover and refrigerate the cooled pie until serving. Store any leftover pie in the refrigerator.
Sunday
Oct212012

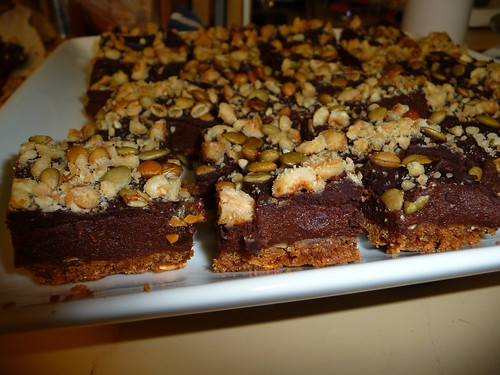
Raising the Bar: Pumpkin Nutella Bars Recipe

Pumpkin nutella bars

I received this message from CakeSpy reader Jill S., who is currently ranking high on my list of favorite people:

I have come up with a pretty awesome recipe that I wanted to share with you! It's pumpkin baking season, and I love pumpkin, but I adore Nutella -- and I wanted a way to combine the two of them. I've seen pumpkin recipes with Nutella fillings and toppings, and I like to spread it on pumpkin bread, but I never saw anything that actually stirred them together as an ingredient. And then I made it all fancy, too. ;) So, here is my invention: Pumpkin Nutella Bars! I hope you enjoy!

Pumpkin nutella bars

Jill, I do enjoy. And you can, too! Here's the recipe.

Pumpkin Nutella Bars

Pumpkin nutella bars

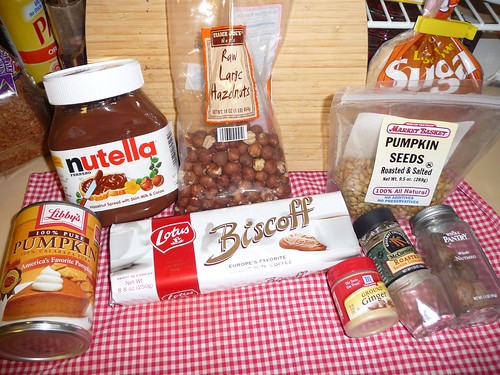
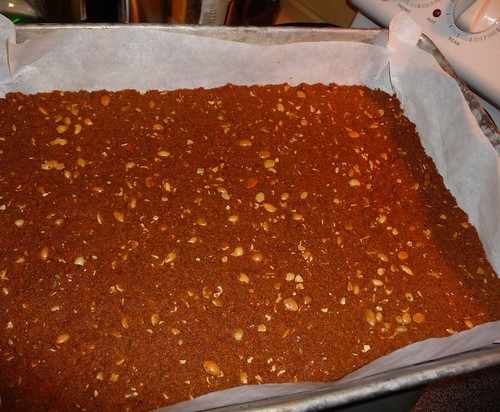
Crust

  • 1/2 cup toasted, salted pumpkin seeds, crushed in a food processor
  • One 8.8 oz package Biscoff cookies, crushed in a food processor
  • ½ cup butter, melted

Procedure: Press into a 9x13-inch pan. Bake 12-13 minutes at 350 degrees F.

Pumpkin nutella bars

Filling

  • One 15 oz. can pumpkin + 1 Tbsp cinnamon + 1 tsp ginger + 1 tsp allspice + fresh grated nutmeg to taste (all of these to taste, really)
  • 1/4 cup brown sugar
  • 12 oz Nutella

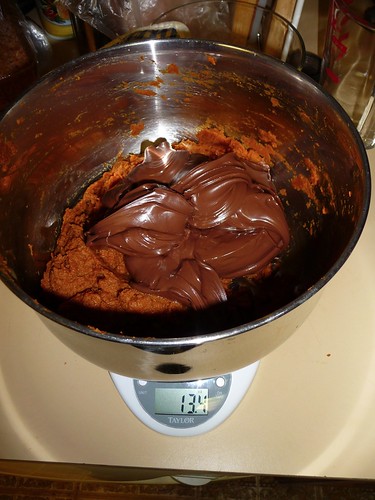
Procedure: Cook pumpkin, sugar, and spices on low heat 30-40 minutes until dark orange and reduced to about 60-70% of original volume. (This is pumpkin butter, and it tastes great on its own as a spread or topping!) When slightly cooled, stir in Nutella Spread cooled filling mixture over cooled crust, refrigerate while you make the ganache.

Ganache

  • 2/3 cup heavy cream
  • 7-8 ounces dark chocolate

Procedure: Heat cream to a simmer, stir in chocolate and let stand. When the chocolate has melted, stir and allow to cool. Spread over the filling and sprinkle with topping.

Pumpkin nutella bars

Topping

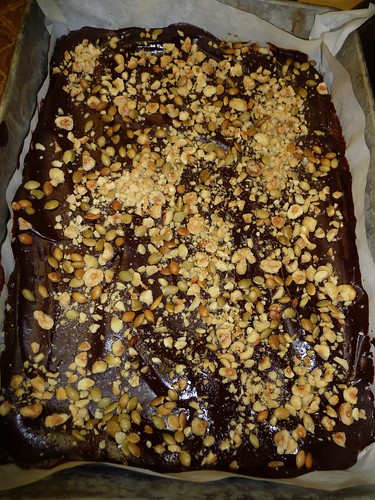
  • 1 cup chopped toasted hazelnuts
  • 2 tbsp toasted salted pumpkin seeds

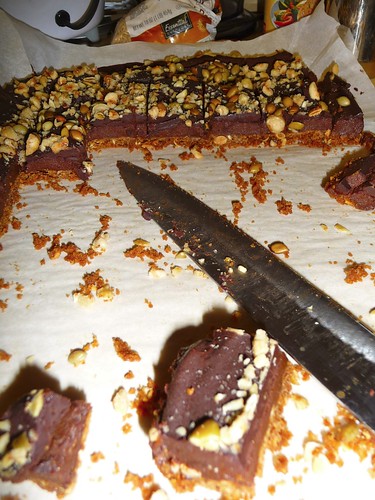
Procedure: Sprinkle topping over ganache; refrigerate for at least an hour before slicing into squares.

Pumpkin nutella bars Now, eat them all!


Thursday
Oct182012

Sweet Potato Pecan Pound Cake With Maple Buttercream

Sweet potato pecan cake

I have a problem.

The problem is that this cake is so delicious that I want to die. And I want the cause of my death to be "eating 200 pounds of this cake". It is seriously that good.

Of course, if you don't like sweet potato or maple (or joy) you should probably not bother with this cake. But if you do like these things, then you're in for a treat. A rich, buttery, spicy pound cake, decadently moist from the sweet potato and lightly crunchy from the addition of toasted pecans would probably be just fine all on its own or with a dusting of confectioners' sugar, but let's be honest: it's even better with buttercream. This simple maple buttercream is a joy to eat, subtle and mellowly sweet. Add a few more toasted pecans on top and you'll be joining me in "want to die a sweet autumn binge eating death" territory.

Here are a few process shots, and then the recipe. Enjoy.

Sweet potato pecan cake

Here is the batter being made. Um, the recipe doesn't require that many eggs. I was doing other stuff too.

Sweet potato pecan cake

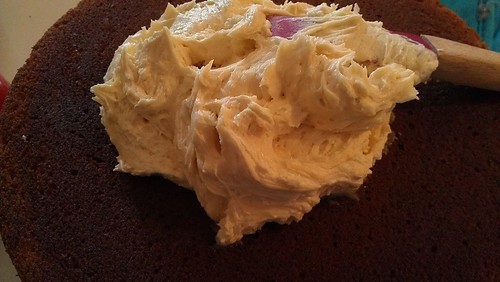
Here's the first delicious slather of buttercream meeting cake.

Sweet potato pecan cake

Here's the batter in the pan.

Here's the recipe.

Sweet Potato Pecan Pound Cake with Maple Buttercream

Makes 2 8-inch cakes, 24 cupcakes, or one 2-layer cake

  • 3 cups all-purpose flour
  • 1 teaspoon baking powder
  • 1/2 teaspoon baking soda
  • 1/2 teaspoon salt
  • 3 teaspoons ground cinnamon
  • 1 teaspoon ground nutmeg
  • 1 cup unsalted butter, softened
  • 1 cup granulated sugar
  • 1 cup light brown sugar, packed
  • 4 large eggs
  • 2 cups canned sweet potato pie filling
  • 1/3 cup milk
  • 1 cup toasted pecans, coarsely chopped

Frosting

  • 2 sticks (1 cup) butter, softened
  • 4 cups confectioners’ sugar
  • 2 tablespoons pure maple syrup
  • 1 teaspoon vanilla
  • more toasted pecans, for garnish

Procedure


  1. Heat oven to 350°. Line two 8-inch cake pans with parchment paper, and grease generously. You can also bake these as cupcakes, but you'll reduce the baking time later.
  2. In a medium bowl, combine the flour, baking powder, soda, salt, and spices; set aside.
  3. Cream the butter with sugars until light and fluffy, 3 to 5 minutes. Beat in eggs, one at a time, scraping down the sides of the bowl with a rubber spatula with each addition and mixing well. Beat in the vanilla and sweet potato until blended.
  4. Stir the dry ingredients into the batter in 2-3 increments,  alternating with the milk, until blended. Fold in the nuts.
  5. Spoon the batter into the prepared cake pans.
  6. Bake for 40-50 minutes, or until a cake tester or toothpick inserted in the center comes out clean. 
  7. Cool in the pan for about 15 minutes before turning the cakes out on to wire racks to cool completely before frosting.
  8. Time to make the frosting. In a stand mixer fitted with the paddle attachment, cream the butter and maple syrup for 3 to 5 minutes, until smooth. Stir in the vanilla. Add the confectioners’ sugar, cup by cup, until your desired spreading consistency has been reached. Scrape down the sides of the bowl as needed with a rubber spatula. If the frosting becomes too stiff, stir in a small quantity of milk to thin. 
  9. Frost the cakes generously, and garnish with more toasted pecans and cinnamon and nutmeg.


Tuesday
Oct162012

Trick or Sweet: Candy Corn Upside Down Cake

Recently, I asked my favorite Pineapple Upside-Down Cake recipe a serious question: "What would you like to be for Halloween this year?".

After considering various options, such as Doughnut Upside-Down Cake, Tarte Tatin, and various other options for the inverted dessert, we decided to go with something festive: Candy Corn Upside-Down Cake.

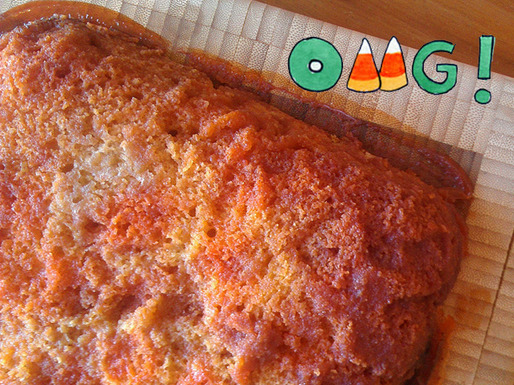
It was simple enough to do: just substitute candy corn for the pineapple requested in the original recipe. But what happened when I baked it up was a surprise: the brown sugar and butter topping fused with the melted candy corn to form some sort of unholy, monstrous Halloween caramel-sugar topping, which dripped back into the cake when inverted. The result? The entire buttery cake tasted like it had been basted in candy corn. And if you're a candy corn lover, that might just be a beautiful thing.

Even Unicorn agrees!

Candy Corn Upside Down Cake

9 servings

  • 1/3 cup (about 5 tablespoons) butter, plus 1/2 cup (1 stick) butter, softened and divided
  • 2/3 cup (about 6 ounces) packed light brown sugar
  • 1 1/2 cups candy corn
  • 1 1/2 cups (7 1/2 ounces) all purpose flour
  • 1 teaspoon baking powder
  • 1/2 teaspoon salt
  • 1 cup (about 7 ounces) granulated sugar
  • 2 large eggs
  • 3/4 cup milk (whole or 2 percent)

Procedure

  1. Preheat the oven to 350°F. Place the butter in a 9-inch square baking pan, and set it in the oven until melted (it is fine to do this as the oven preheats). Remove the pan from the oven and gently tilt so that the butter coats the entire bottom of the pan. Sprinkle brown sugar evenly over the butter. Sprinkle candy corn evenly on top.
  2. In a medium bowl, sift together the flour, baking powder, and salt.  
  3. In the bowl of a stand mixer fitted with the paddle attachment, cream the butter and granulated sugar on medium speed until light and fluffy, 3 to 5 minutes. Add the eggs, mixing until incorporated. Add the flour mixture alternately with the milk, in 2 to 3 additions, pausing to scrape down the sides of the bowl with each addition. Beat on low speed until fully incorporated. Pour the batter into the pan, taking care not to dislodge the carefully planted candy corn.  
  4. Set a cookie tray under the cake in the oven, in case the candy bubbles or drips. Bake until a toothpick inserted in the center comes out mostly clean, 45 to 50 minutes.  
  5. Immediately place a heatproof serving plate upside down over the pan; in one swift, sure motion, flip the plate and pan over so that the cake is now on the plate. Leave the pan in place for several minutes so the gooey mixture can drip down over the cake. After the dripping is done, lift off the pan. Serve still slightly warm. Store, loosely covered, at room temperature.
Monday
Oct152012

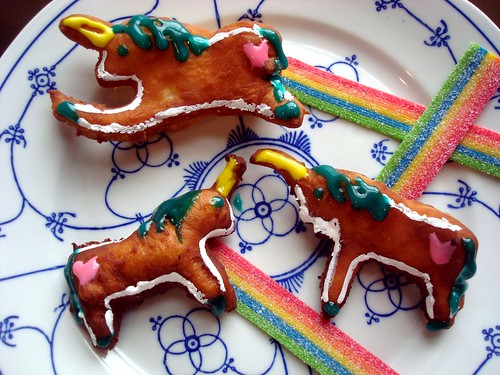
Unicorn Doughnuts

Unicorn doughnuts

This morning, I awoke knowing exactly what I needed, above and beyond any other thing on earth.

Unicorn Doughnuts.

Good rainbow-colored gravy, how could I make this miracle happen, I wondered?

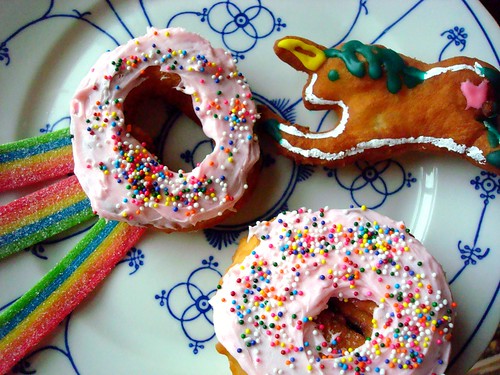
Well, I guess it could start with making doughnuts. I made up a batch of dough. You can find the recipe below. Technically, it is for "regular" doughnuts. That means you could make round doughnuts. Unicorn doughnuts

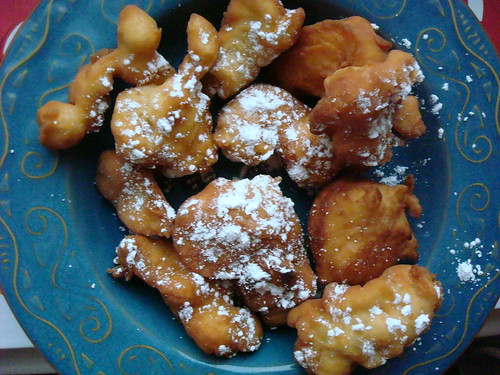
Or you could even free-form and drop dollops of dough into the oil to make a homemade funnel cake! Funnel cake

But right now, we are talking about unicorn doughnuts.

Now, I have learned through trial and error that this dough is much easier to work with if you let it chill for a good long while. So I let it chill for about 3 hours total. 

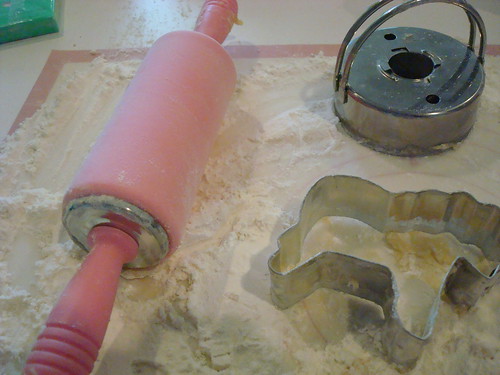
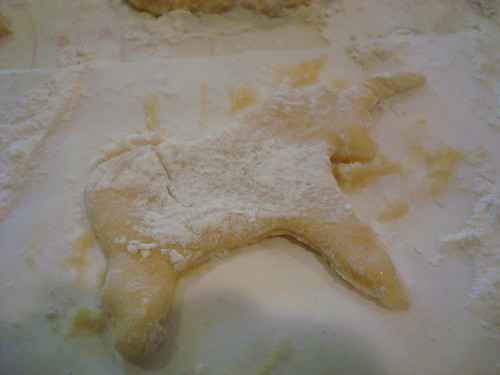
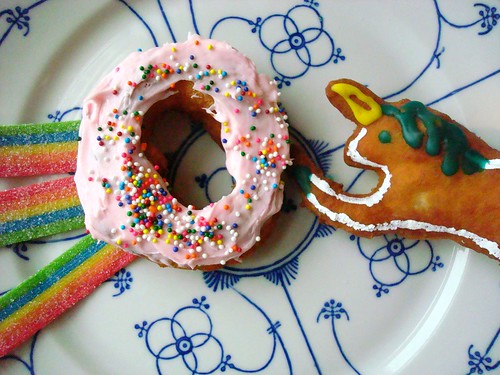
And when it came time to roll out the dough, I brought out my secret weapon: the unicorn cookie cutter. It made fast friends with doughnut cutter.

Unicorn Doughnuts

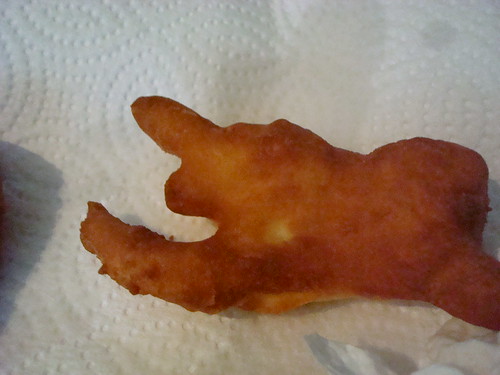
Now, after my first try cutting out a unicorn, I can see why unicorn doughnuts are not in regular rotation. It's very hard to get a clean cut and then transfer it to the frying oil. They come out mangled. Booooo. 

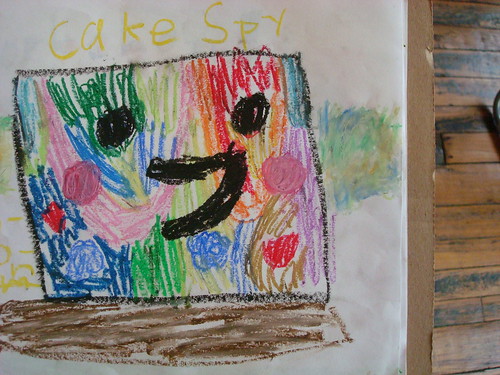
But I didn't get discouraged. For inspiration I looked at this drawing done by a 6-year old friend, which reminded me that my website is capable of magic!

Magical

And so I got back to work. And here's what ultimately worked best. 

I got a small piece of parchment paper, and sprinkled flour on it.

I rolled out a tiny piece of dough to about 1/4 inch thick on top of it. Rolling out tiny dough is cuter with a tiny rolling pin, btw.

I then floured the cookie cutter and imprinted the dough. I delicately removed the dough on the sides of it before lifting the cutter.

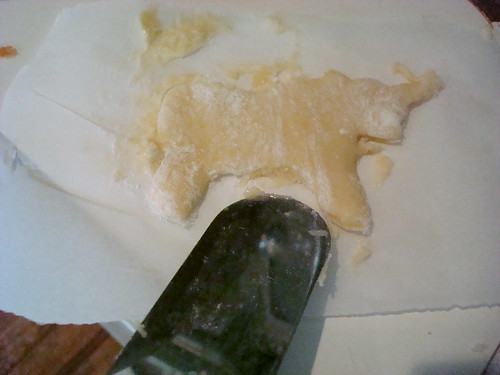
I then put this sheet with the unicorn in the freezer. Not for long, just for maybe 15 minutes. While the oil heated.

Unicorn Doughnut cutout

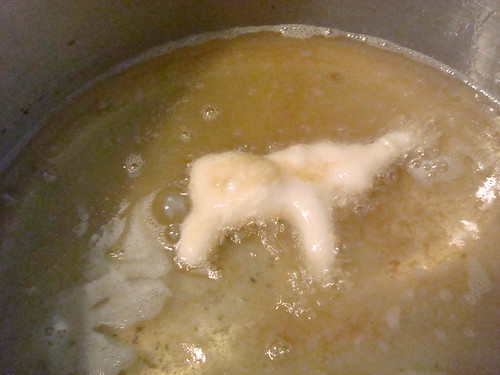
When the oil was ready, I removed the unicorns from the freezer, and delicately extracted them from the parchment using an offset frosting spatula. I dropped them into the oil.

Unicorn Doughnuts

And...it worked!

Fry, unicorn doughnut!

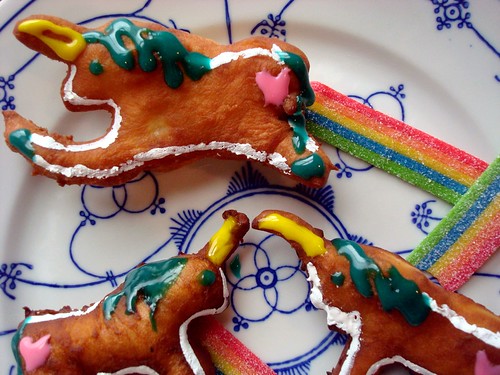
Some of them get a little mangly but it's ok. Because once you decorate them, what looks like a weirdly long leg...becomes a prancy leg! 

Unicorn Doughnuts Unicorn doughnuts

Decorating them like I did is not strictly necessary, but I thought it was fun. I used some writing icing, and applied the white part using a small brush (I won't be using that one to paint again!). 

Homemade Doughnuts

Unicorn doughnuts

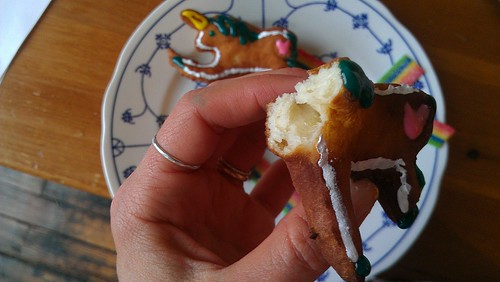
Yum.

Unicorn doughnuts

Here's the recipe.

Unicorn Doughnuts

Makes about 20 

Ingredients

  • 3 3/4 cups flour
  • 2 teaspoons baking powder
  • 1/4 teaspoon salt
  • 2/3 cup sour cream
  • 1/3 cup buttermilk
  • 3/4 cup sugar
  • 3 large eggs
  • 1 teaspoon vanilla extract
  • 6 to 8 cups vegetable/canola oil, for deep frying
  • various frosting, writing icing, or just confectioners' sugar, for finishing off
  • Unicorn Cookie Cutter (like this one)

Procedure

  1. In a large bowl, sift together the flour, baking powder, and salt. Set aside.
  2. In another large bowl, whisk the sour cream, buttermilk, and sugar, until smooth and combined.
  3. Beat in the eggs and vanilla until just combined. If needed, scrape the sides of the bowl with a rubber spatula.
  4. In 2-3 increments, add the flour mixture to this wet mixture, stirring with a wooden spoon until just combined. The dough will be quite sticky. Refrigerate it for about 2 hours, or until completely chilled.
  5. Turn the dough on to a very generously floured surface. Knead for 2 minutes, or until the dough is smooth and elastic. Return the dough to the fridge for another hour. This will make certain that the dough does what you want later.
  6. Assemble several sheets of parchment paper (one or two unicorns per sheet for easy handling). Roll out to a 1/2 inch thickness on top of the floured parchment paper. Using a floured cutter, imprint the dough and remove excess dough around it (this helps keep the perfect unicorn shape). Remove the cutter and clean up dough as needed. Put the dough, right on the parchment paper, in the freezer. Repeat with the remaining dough.
  7. In a heavy medium pot or a deep-fat fryer, put enough oil to achieve a depth of about 4 inches; heat it to 375 degrees F. Gently transfer the unicorns from the parchment paper to the oil, removing from the paper using a spatula. Fry the unicorns, 2-3 at a time, until golden brown on each side (less than 3 minutes). Remove with a slotted spoon and place on paper towels to blot excess oil. Repeat with remaining doughnuts.
  8. You're going to have to wait til the doughnuts are cool to decorate them like I did, but if you're greedy, just dust them with confectioners' sugar and eat them while warm. Either way, these magical doughnuts are best consumed the same day they're made.
© Cakespy, all rights reserved. Powered by Squarespace.