Home Home Home Home Home Home Home
CakeSpy

Featured: 

My adventure at Ben & Jerry's in Vermont!


Unicorn Love: the Eating Disorder Recovery Blog


 Buy my brilliant books!

Buy my new book!

Buy my first book, too! 

CakeSpy Online Retail!


Archives
Gallery

Fantastic appliance for cake making on DHgate.com

everyrecipe.co.nz

Craftsy Writer

Entries in cupcakes (63)

Monday
Jan252010

Pony Up: Kentucky Derby Bourbon Cupcake-Pies by Cake Gumshoe Melanie

The Kentucky Derby may not be 'til May, but the chocolate-nut flavors associated with the race are delicious all year long. But unless you want to get sued for using the copyrighted "Derby Pie" moniker, you'd better get creative, like CakeSpy reader Melanie , who recently sent on the recipe (and gorgeous photos) for "Kentucky Derby Bourban Cakes", wherein cupcakes are served inside of a pie shell for ultimate carbohydrate bliss and complete deliciousness. Run, don't walk, to the kitchen for this:

Kentucky Derby Bourbon Cakes

Ingredients

  • 2 boxes Jiffy Pie Crust mix (love it in a pinch!)
  • 1 box butter cake mix or yellow cake mix(and ingredients on box)
  • 1/2 cup Kentucky Bourbon
  • 1 3/4 cups walnuts (some to sprinkle on top)
  • 1 1/2 cup chocolate chips Bourbon Fudge Ganache (recipe follows)

 Procedure

  1. Prepare the Jiffy pie crusts as directed on the box. Chill dough until ready to assemble cupcakes for baking. (Note: I would start the Bourbon Fudge Ganache now, as it needs to cool in the fridge for some chill time!)
  2. Prepare the cake mix as instructed and then mix in bourbon.
  3. Roll the pie dough out to 1/4 inch on a floured surface. Cut (approximately) 5 inch circles out of dough using a large cup or bowl as a guide.
  4. Gently fit the circles into 2 cupcake pans prepared with nonstick spray. Press the dough into the bottom and up the sides.
  5. Place approximately 1 tsp. each of walnuts and chocolate chips in the bottom of each cupcake/piecrust.
  6. Spoon approximately 1 1/2 tablespoons of cake batter into each cupcake (until it looks 2/3 (plus a little) full. You can’t put as much batter as usual cupcakes since the crust/nuts/chips are in the bottom!
  7. Bake at 350 degrees for 18-20 minutes (’til they don’t jiggle in the middle!). Remove cupcakes and allow them to cool on a wire rack, and then use a butter knife to loosen and remove each cupcake.


Bourbon Fudge Ganache

Ingredients

  • 12 ounces semisweet chocolate chips
  • 1 cup (8 ounces) heavy cream
  • 4 teaspoons of Kentucky Bourbon ( or more if you like it strong!!!)

Procedure

  1. Place the chocolate in a large bowl.
  2. Heat the cream in a saucepan until it just starts to boil. Pour the cream over the chocolate.
  3. Cover the bowl, and allow the cream to melt the chocolate. Add the bourbon.
  4. Whisk the chocolate until its dark and shiny. Place the icing in the refrigerator until the cupcakes are cooled.
  5. Check frequently, and give it a quick stir. When it gets to a spreadable consistency, pull it out. Otherwise, it will be too firm(like fudge…yummm!). Either spread the ganache on the top of the cupcakes or pipe it with a bag. Sprinkle each cupcake with some walnuts. Then let the race to your belly begin!!!
Monday
Jan112010

Batter Up: Deep Fried Cupcakes on a Stick for Serious Eats

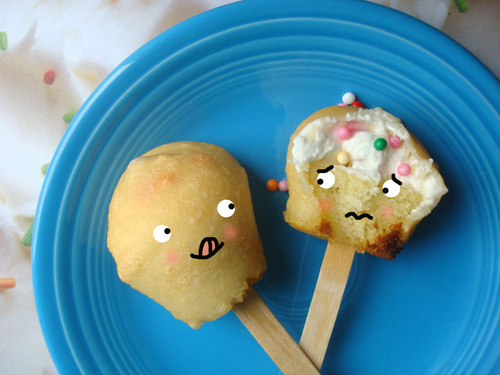
This one's dedicated to all of you who made New Year's resolutions to eat healthier: deep fried cupcakes on a stick.

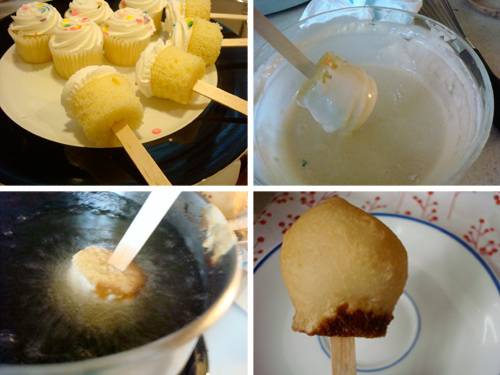
These babies were made for the weekly CakeSpy installment on Serious Eats, inspired by a deep fried candy bar recipe; each little cake was speared on a stick, chilled, then battered up and fried until it reached a perfect golden hue. The resulting taste, which falls somewhere between childhood nostalgia and greasy fair food, is alarmingly addictive.

And hey, if it is in fact a one way ticket to Heart Attack City, at least we had a good run.

For the full scoop plus recipe and tutorial, visit Serious Eats!


Saturday
Jan022010

Slow and Steady: Tortoise Vs. Hare Cupcakes Recipe from Cake Gumshoe Melanie

Tortoise Vs. Hare Cupcakes, from Cake Gumshoe Melanie

They say that slow and steady wins the race, but these cupcakes seem to inspire a race to see how quickly you can get them in your belly. CakeSpy reader Melanie recently sent on this recipe for Tortoise Vs. Hare cupcakes which combine carrot cake with turtle confections--and all I can say is that they are making me want to run, not walk, to the grocery store to buy the ingredients. Based on Melanie's lovely pictures though, it looks like both tortoise and hare win this one!

Tortoise vs. Hare Cupcakes

- Recipe c/o Melanie H. -


  • 2 cups all-purpose flour
  • 1 teaspoon baking soda
  • 1 teaspoon ground cinnamon
  • 1/2 teaspoon baking powder
  • 1/2 teaspoon salt
  • 1/4 teaspoon ground nutmeg
  • 2 large eggs
  • 1 cup sugar
  • 1/3 cup lightly packed brown sugar
  • 1/2 cup butter-room temp.
  • 1/4 cup milk
  • 1 teaspoon pure vanilla
  • 1 1/2 cups grated carrots
  • 1/2 cup pecans
  • 3/4 cup chocolate chunks (of your liking!)


Thick Caramel Icing (from Chokylit)


  • 1/2 cup butter
  • 1 cup packed brown sugar
  • 1/2 cup light corn syrup
  • 6 ounces sweetened condensed milk
  • 1 tablespoon heavy cream
  • 1 teaspoon vanilla
  • 1/2 teaspoon salt


Directions for cake


  1. Preheat oven to 350 degrees F.
  2. Line 18 muffin cups.
  3. Whisk together flour, soda, cinnamon, baking powder, salt, and nutmeg.
  4. In another bowl, beat eggs, sugar, brown sugar, butter, and milk.
  5. With mixer on low, add flour mixture a little at a time until just blended. Stir in vanilla, carrots, pecans, and chocolate chunks.
  6. Bake 20-22 minutes.


Directions for icing


  1. Bring the butter, brown sugar, corn syrup and sweetened condensed milk to a boil over medium-high heat stirring to combine.
  2. With a wooden spoon, stir all ingredients together and then slowly add the heavy cream.
  3. Continue to stir for about 20 minutes until the caramel reached 248 degrees. It is important to continuously stir the mixture and to allow it to reach temperature.
  4. Remove from heat and stir in the vanilla and salt. Transfer to a bowl and continue to stir for 2-3 minutes allowing the caramel to cool slightly.


Wednesday
Nov182009

Gobble Gobble: A Turkey Cupcake Tutorial From Meringue Bake Shop

Turkey Cupcake Tutorial c/o Meringue Bake Shop
Thanksgiving. The holiday of food, er giving thanks for life’s bounty. A few days to indulge in excess of food, family, travel and shopping--that is to say, a great holiday. No worrying about giving and getting presents: just a day to enjoy stuffing ourselves, making more room and saying thanks for that delicious turkey.
Back when I first started exploring baking creatively, I came across this idea for making Thanksgiving turkey cupcakes. At first I was a little skeptical because it looked like a lot of work and up to the point my decorating skills consisted of a butter knife and a slab of frosting from a can. But I couldn’t resist, and I found that these were really easy to make and so irresistibly cute. This is also a great thing to give kids something to do later in the day. They can assemble their turkeys and throw a turkey parade to rejoice for those birds that survived another year. Or the kids can make them ahead of time and you can use them as your table centerpiece. Just arrange on a platter and stick some flowers in between the cupcakes.

Turkey Cupcakes
-makes 24 -

Note: For these cupcakes, the base and frosting can be pretty much whatever you want. I used a yellow cake recipe and tinted it with some orange food coloring. And I used a chocolate buttercream because, it’s brown like turkeys, and I really like yellow cake with chocolate frosting. Peanut butter frosting would be good too. Yum!

Ingredients

  • 1 package of Nutter Butters
  • 1 package of fruit roll ups, fruit leather or airheads. (starburst could even work here but would require more effort)
  • Jumbo heart sprinkles (can be found at your local craft store or online)
  • Bag of mini chocolate chips or mini M&Ms (you could use leftover Halloween candy, but who are we kidding? There is no such thing by now, right? Especially if you made this pie)
  • Maple leaf cookie cutter (I used this set)
  • Candy corn
  • Cornstarch (for dusting)
  • Powdered sugar
  • Cocoa
  • Meringue Powder
  • 24 cupcakes, baked but unfrosted
  • Frosting (homemade or from a can – if you use a can, buy two)
  • Piping bag or gallon plastic zipper bag
  • Tip (I used a 1G Wilton tip) 
Guest blog post from Meringue Bake Shop
  • Optional: 100 Calorie packs (you may be wondering what the 100 calorie packs are for, you’ll see later on in the post!) 

Got your ingredients? Good. Let's get started:

Guest blog post from Meringue Bake Shop
1. Make the feathers. Grab a cutting board and lightly dust with cornstarch. Unroll the fruit roll ups, separate the colors and lay them on the board. Dust a little more cornstarch on top. I also dust some on a concentrated area that I can use to dip in my cookie cutter. Note: I tried Fruit by the Foot and only realized after I’d opened it that they print images on the fruit strips so I couldn’t use that. Also if you are going to use Airheads or starbursts, you might need to microwave them, out of their packages, for a couple seconds to get them more pliable. Then you’ll need a rolling pin or glass with some cornstarch on it to thin them out. Your hands can work too.
2. Next, make some royal icing. I halve this recipe but I add a little bit more water, like an extra teaspoon.
3. Put the icing in a piping bag or zipper bag and cut a tiny bit off the tip so you have about a 1/8 of an inch size hole. I also slightly snip the seams on my pastry bags so that I get a circle when I squeeze instead of a line.

Guest Post from Meringue Bake Shop

4. Grab a nutter butter. Pipe on two dots for the eyes and a dot with the line heading down the length of the cookie.
Guest post from Meringue Bake ShopGuest post from Meringue Bake Shop
5. Stick the jumbo red heart with the pointy part up on the line of royal icing. Then place one mini chocolate chip on each dot you placed for the eyes.

6. Snap off the end of a piece of candy corn, leaving the white tip and little bit of the orange. Eat the remaining piece. (Shhh, I won’t tell). You might need to add some royal icing to the candy corn piece and then glue the bits together...but now you're finished!
Guest post from Meringue Bake Shop
7. Now make 23 more. (Patiently waiting)

Guest post from Meringue Bake Shop
8. Ok! On to frosting. Fit a piping bag or zipper bag with a tip. Or you can cut the tip of the bag in a + shape to get a similar shape in your frosting. Fill bag with frosting of your choice.
Swirl on the icing and then add a little edge of frosting. This is where the feathers will rest.

9. Pick up a turkey and stick him towards the front of the cupcake, into the cupcake. You can press a little hard here. Make sure he is in the cupcake and not just in the frosting.
Guest Post from Meringue Bake Shop
10. Then start placing your feathers--I did 3 but you can do more if you like. Overlapping would look cool.

Guest Post from Meringue Bake Shop
And a turkey is born! Isn’t he cute! You almost don’t wanna eat him… almost.

Extra Credit: So you may still be wondering about those 100 calorie snack bags in my early photo. I made baby turkeys! This is a great option if you want to utilize mini cupcakes as well.
Guest Post from Meringue Bake ShopGuest Post from Meringue Bake Shop
1. Using the same method for the large nutterbutters, place two dots of royal icing on the cookie and add mini chocolate chips. Add another dot and either add another jumbo heart or for this one I used some leftover heart-shaped cinnamon red hots also purchased at my local craft store.
Guest Post from Meringue Bake Shop
2. Frost a swirl of buttercream on top of the mini cupcake. Insert one of the baby turkeys, then add your feathers. I used a tear drop cutter for the baby turkey feathers. So cute!!
Now, your turkeys are ready to party!
Come back!

...wait, come back, Turkey!

About the Cake Gumshoe: Kristin Ausk owns Meringue Bake Shop, a custom cupcakery located in Orange County, California. She uses high quality ingredients, pop culture, and nostalgia to come up with unique and flavorful cupcakes. All of her cupcakes are made-to-order, so every cupcake you order was made just for you. Kristin’s love of baking began when she was 7 yrs old and entered a baking contest held by her local paper and won! (an honorable mention). But that only encouraged her more. And two years ago, at the request of her coworkers, friends, and family, she decided to turn her love into a side business. You’ll find her trying out new recipes in her kitchen with her husband, Lyle, and her two dogs, Klondike & Miles. Keep updated daily with her Twitter updates!

Monday
Aug242009

Put a Lid On It: How To Ship Cupcakes in Mason Jars, from Beantownbaker.com

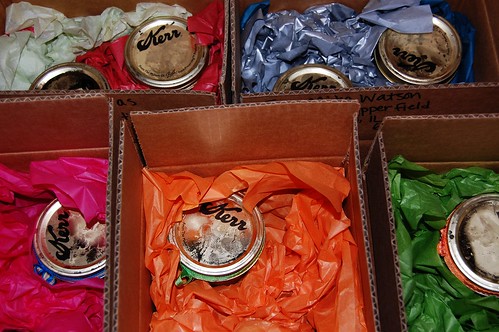
How-to: Cupcakes in Jars, a guest blog post from Beantown baker
Continuing our monthlong celebration of birthdays and all things sweet, Jen from the very sweet site Beantown Baker has dreamed up a thoughtful way to share birthday cake with friends who are far away: cupcakes baked in Mason Jars! Here she goes:

One of the things I love most about baking is sharing my baked goods with other people. Whether it's baking something for a friend who had surgery, got a promotion, or for no reason at all, I get real joy out of baking for other people. Since most of my family is 1000+ miles away, they don't usually get to experience my baked goods. Last fall when we were coming into what I call birthday season, 6 birthdays from Oct-Dec, I really wanted to bake for my family members with birthdays coming up.

Since cupcakes are my favorite thing to bake, I decided to send them cupcakes. I had seen this idea online and decided to give it a shot. I sent cupcakes in a jar to family members across the country. They were all pretty shocked when the packages came. It was fun to get the phone calls from each of them thanking me for the creative way to share my baking with them. My Dad loved it so much, I've been told that he tells everyone about it. As a not-so-subtle hint, he also gave me a box of new jars for my birthday. I think he's expecting more cupcakes in a jar this year for his birthday!
Cupcakes in Jars: Guest Blog from Beantown BakerCupcakes in Jars: Guest Blog from Beantown Baker

How to Make and Ship Cupcakes in Mason Jars


You'll need: a batch of cupcakes (Jen's recipe for Funfetti cupcakes with chocolate frosting follows); one half-pint Mason jar per cupcake, plus ribbon for garnish.
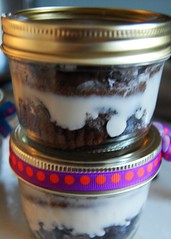
  1. Bake cupcakes as directed and allow to cool completely. Remove cupcake liner and cut cupcake in half either vertically or horizontally. Place 1/2 of the cupcake into a sterilized 1/2 pint wide mouth jar. Add frosting to jar. At this point, add some fun extra, such as crushed Oreos or sprinkles. Place the other half the the cupcake in the jar (if you cut the cupcake vertically, it is easier to put both halves in the jar and pipe frosting between the two pieces). 
  2. Frost the cupcake as if it weren't in a jar. Add lid and ring to jar. Decorate with ribbon if you want. Be sure to tell your recipients to slide the lid off the jar as opposed to just pulling it up. Otherwise half of the frosting will stick to the lid.
  3. Mail immediately or place in freezer for a day or two then mail them. I like to freeze them and let the thaw as they are traveling to the unsuspecting recipients.

Cupcakes in Jars: Guest Blog from Beantown Baker
Yellow Funfetti Cupcakes
  • 3 cups cake flour
  • 1 Tbsp baking powder
  • 1/2 tsp salt
  • 1 cup unsalted butter, cubed and softened to room temperature
  • 2 cups sugar
  • 5 large eggs
  • 2 tsp vanilla
  • 1 1/4 cups buttermilk
  • 1/4 cup sprinkles
Directions:
  1. Preheat oven to 350. Butter and line with parchment paper two 8×2-inch pans (These cakes rose over the top of my 2-inch pans - you could very well have a mess on your hands if you try 1.5 inch pans). Set aside.
  2. In a medium bowl, sift together the flour, baking powder, and salt. Place butter in the large bowl of an electric mixer, fitted with a paddle attachment. Beat for 3 minutes on MEDIUM-HIGH speed until the butter is light and creamy in color. Stop and scrape the bowl. Cream the butter for an additional 60 seconds.
  3. Add the sugar, 1/4 cup at a time, beating 1 minute after each addition. Scrape the sides of the bowl before each addition. Add the eggs one at a time. Reduce the mixer speed. Stir vanilla into the buttermilk. Add the dry ingredients alternately with the buttermilk. Mix just until incorporated. Scrape the sides of the bowl and mix for 15 seconds longer. Stir in sprinkles.
  4. Spoon the batter into the prepared pan and smooth the top with a knife or off-set spatula. Lift up the pan with the batter, and let it drop onto the counter top a couple of times to burst any air bubbles and allowing the batter to settle. Center the pans onto the lower third of the oven and let bake 45 to 50 minutes or until the cake is lightly brown on top and comes away from the sides of the pan and a toothpick inserted in the center comes out clean.
  5. Let cool completely in the pans before removing the cakes and frosting.

Chocolate frosting
  • 1 stick (1/2 cup) butter or margarine
  • 1/3 cup HERSHEY'S Cocoa
  • 3 cups powdered sugar - I used 2 1/2 cups
  • 1/3 cup milk
  • 1 teaspoon vanilla extract
Directions: 
Melt butter. Stir in cocoa. Alternately add powdered sugar and milk, beating to spreading consistency. Add small amount additional milk, if needed. Stir in vanilla. About 2 cups frosting.


Keep updated on all of Jen's sweet adventures on beantownbaker.com!


Sunday
Aug162009

Taste the Rainbow: A Homemade Funfetti Recipe from iheartcuppycakes

Sprinkles have been spilled.
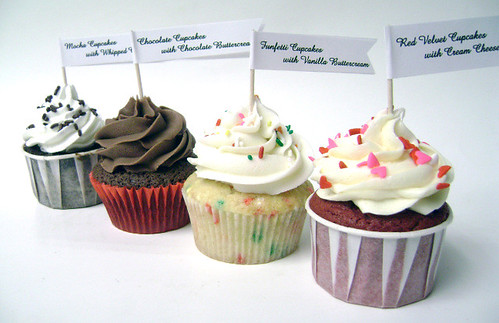
Continuing our monthlong celebration of birthdays and all things sweet, CB from the inimitable iheartcuppycakes.com has kindly donated not only some sweet birthday memories, but also her super sweet recipe for homemade Funfetti Cupcakes. All the fun of a classic childhood treat--but grown up for more adult palates. Here goes:

My birthday is in July. I'm an Independence baby. Tom Cruise eat your heart out! When I was very little my mom would make me a Funfetti birthday cake from cake mix while I "helped" by licking the beaters. It was my favorite part! Even to this day. Don't judge me! It's Funfetti. HA! I think that's why I am not as anti-cake mix like some other bakers because of those great birthday memories with my mom.
Guest post from iheartcuppycakes

Here is my recipe for homemade Funfetti Cupcakes:

Funfetti Cupcakes


Recipe adapted from Cupcakes by Shelly Kaldunski


Makes about 12 cupcakes

For the cupcakes

  • 1-1/4 cups AP flour
  • 1-1/2 tsp baking powder
  • 1/4 tsp salt
  • 3/4 cup sugar
  • 6 tbsp butter, room temperature
  • 1 large egg + 1 egg white, room temperature
  • 1 tsp vanilla extract
  • 1/2 cup milk (I used half-and-half instead)
  • 2 tbsp rainbow sprinkles

For vanilla buttercream
  • 2 sticks butter
  • 7 cups powdered sugar, sifted
  • 1/4 cup milk
  • 1 teaspoon vanilla

Guest post from iheartcuppycakes
Instructions


To make cupcakes—

  1. Preheat oven to 350F.
  2. Line cupcake pan with paper liners.
  3. In a large bowl, sift flour, baking powder and salt. Set aside. In a stand mixer, fitted with flat beater, beat the sugar and butter until well combined, about 2-3 minutes. Add egg and egg white, one at a time, beating on low.
  4. Then add vanilla. Gradually add flour mixture in 3 additions, alternating with milk in 2 additions, ending with the flour mixture. Fold in rainbow sprinkles.
  5. Fill cupcake liners about 1/2-2/3 full. Bake for about 17-20 minutes or until a toothpick inserted in the middle comes out clean. Remove from pan and cool completely on a wire cooling rack before frosting.

To make buttercream—
In a stand mixer, fitted with flat beater, beat butter until creamy, about 2-3 minutes. Add 5 cups of sifted powdered sugar, milk, and vanilla, beat until combined. Add more powdered sugar until you get to the consistency you want.


[NOTES: I think I added about 6-1/2 cups, give or take a few tbsp, to get the consistency I wanted. If its too stiff, you can add a little more milk.]

Frost with vanilla buttercream and garnish with more rainbow sprinkles.

ENJOY!


Keep up with CB at iheartcuppycakes.com or via her twitter feed!


Thursday
Aug132009

Guest Blog Post: Lemon Berry Cupcakes by Pâtisserie Natalie

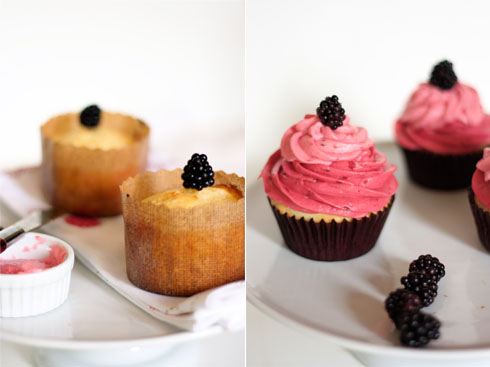
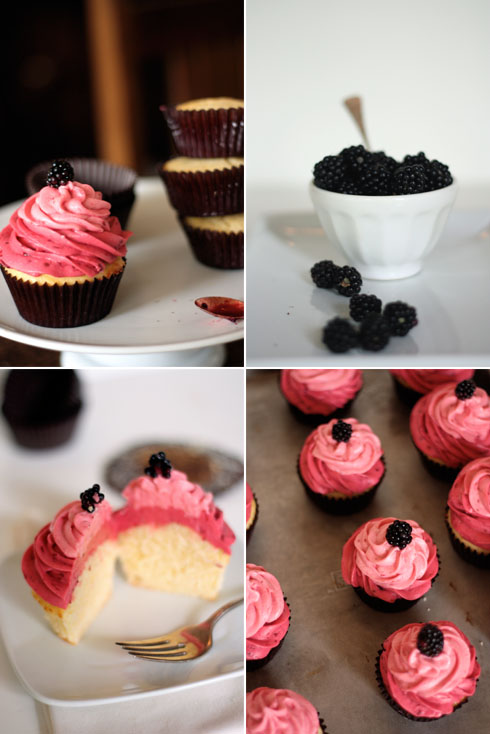
Lemon Berry Cupcakes by Pâtisserie Natalie
When you visit Pâtisserie Natalie, you'll undoubtedly be impressed. The pictures are simply gorgeous; the recipes are creative and sophisticated, yet unfussy.

But you'll be even more impressed knowing that the baker/writer/photographer behind it all is still in high school. No, really.

With a professional-looking portfolio of photographs and recipes already under her belt, Natalie's future sure does look sweet; happily, she has prepared a guest post exclusively for CakeSpy.com! Here goes:

Hi, my name is Natalie, from Pâtisserie Natalie. I'm so excited to get to do a guest post for CakeSpy; I've been a fan for a long time. I'm a high school student from Seattle who loves photography, food styling, and baking. I've been interested in the arts since I was really little, and found my real calling through blogging. I didn't discover the food blogging world until recently. I also didn't realize how much I would love it. My blog gives me a way to share my design and creative flow with other people, as well as see other artist's work.

Lemon Berry Cupcakes by Pâtisserie Natalie
I started baking more seriously about 2 years ago, but it is now an addiction. Ask anyone who knows me and they will tell you I am more frequently in the kitchen then not. I absolutely cannot stay away from my kitchen aid mixer and my camera. I am self-taught in html/css coding, and do all my own graphics and layout work for my blog (CS Note: she's interested in pursuing a career in web/graphic design and photography).


I decided to make these Lemon Berry Cupcakes because as many people know, Seattle doesn't have that many sunny days during the year. Summer flavors for me are lemon and berries. Seeing as the sunny days are limited, I felt that I needed to make something that used those flavors. While I don't mind the rain at all (I love it, actually), many people are a little bummed that our summer days here are ending. With that in mind, I made these cupcakes as a sort of "summer revival." I've been working on the recipe for this lemon pound cake for a while, but I think I've finally got it. I'm often disappointed by lemon cake, as it doesn't actually taste lemony. That is not a problem for this cake at all. It's very moist and soft, which is not usually the case with pound cake. The frostings are made from raspberries and blackberries, which is why those frostings are so pink.


Lemon Pound Cake

  • 3 cups all purpose flour
  • 1 teaspoon salt
  • 1/2 teaspoon baking powder
  • 1/2 teaspoon baking soda
  • 2 sticks unsalted butter; softened
  • 2 cups sugar
  • 3/4 cup plain yogurt
  • 3 tablespoons lemon zest
  • 2/3 cup lemon juice
  • 5 eggs
  1. Preheat oven to 350 degrees F.
  2. Sift together the flour, salt, baking powder, and baking soda. Whisk together in a large bowl thoroughly, and set aside.
  3. In a stand mixer, beat butter and sugar until smooth.
  4. In a medium bowl, stir together yogurt, lemon zest, and lemon juice.
  5. Add the eggs to the butter and sugar one at a time, beating in between each addition.
  6. With the mixer on a low speed, add the flour mixture in 3 parts, alternating with the yogurt mixture in 2 parts. Start and end with the flour mixture.
  7. Line a muffin pan with paper liners and scoop even amounts of the batter into the cups, filling almost to the top.
  8. Bake for 16 minutes, rotating the pan after 8 minutes. Once golden brown around the edges, remove from oven and place on a cooling rack for at least 2 hours before icing.


Lemon Berry Cupcakes by Pâtisserie Natalie
Blackberry & Raspberry Buttercreams

  • 2-1/2 sticks unsalted butter; softened
  • 1 teaspoon salt
  • 2-1/2 cups powdered sugar; sifted
  • 1/4 cup blackberry sauce
  • 1/4 cup raspberry sauce
  1. Beat butter and 1 cup of powdered sugar until smooth. Divide into two parts, removing half from the mixer bowl. Add the blackberry sauce to the mixer bowl, along with 3/4 cup of powdered sugar. Place buttercream in a piping bag and pipe a circle around the outer edge of the cupcake top, spiraling in towards the center.
  2. In the same mixer bowl, add the remaining half of the butter and powdered sugar that was set aside. Add the raspberry sauce and 3/4 cup powdered sugar and beat until smooth. Place in a piping bag and pipe an extra dollop on top of the blackberry buttercream.

Blackberry Sauce
  • 1 cup blackberries
  • 2 teaspoons sugar
  • 1 teaspoon lemon or lime juice
Combine ingredients in a sauce pan and place over medium heat. Stir frequently until juices from berries boil. Using a wooden spoon, crush the berries in the pan. Let boil for 2 minutes to make sauce more dense. Strain the mixture if you prefer to have smoother frostings. Cool in refrigerator.

Raspberry Sauce
  • 1/2 cup raspberries
  • 2 teaspoons sugar
  • 1 teaspoon lemon or lime juice
Combine ingredients in a sauce pan and place over medium heat. Stir frequently until juices from berries boil. Let boil for 2 minutes to make sauce more dense. Cool in refrigerator.


Sunday
Aug092009

More is More: Decadent Poundcake Cupcakes with Peanut Butter Frosting

Peanut butter cupcakes
There are those people who say that pound cake is a dessert that needs no garnish, rich and decadent as it is on its own. 

I am not one of those people, however, so when I recently prepared the pound cake recipe featured on the absolutely amazing Smitten Kitchen site, while the cakes (which I baked in cupcake-cups) were absolutely delicious, I couldn't help but feel that it was a beginning, not an end: they needed something serious--no delicate fruit toppings here, please--to balance out that lightness.

And what could be more decadent than topping an already-buttery cake with peanut butter buttercream frosting?

Peanut Butter Frosting
Happily, I had just received a sweet sample pack from Superior Nut which included a decadent peanut butter dessert topping (think peanut butter, but sweeter and with the consistency of a thick hot fudge), which was easily incorporated into a batch of buttercream which was then used to frost the baby-poundcakes; it was all topped off with some sea salt and roasted peanut chunks. The result? Astoundingly sweet, rich, and satisfyingly salty cupcakes which prove that while sometimes less is more, sometimes more is best.  

Want a piece of this awesome? Here's how I did it:

Peanut butter cupcakes
Poundcake Cupcakes With Peanut Butter Frosting


For the Cake: For a light and versatile poundcake, check out this recipe on Smitten Kitchen; I made my batch with two major changes: first, vanilla extract was used in place of cognac; second, they were baked them as cupcakes instead of one large cake (this reduced the baking time by about 5-7 minutes). It made about 15 cupcakes. Some of them were a little bit short, but extra frosting compensated quite nicely.

For the Frosting: I doctored up a batch of Magnolia Bakery's famous buttercream:
  • 1 cup (2 sticks) unsalted butter, softened
  • 4 to 6 cups confectioners’ sugar (less than in the original recipe, since the Peanut butter topping was sweetened)
  • 1/2 cup light cream
  • 2 teaspoons vanilla extract
  • 2 heaping tablespoons of Superior Nut's Peanut Butter topping (or, I'm sure you could make due with a similar amount of lightly melted peanut butter or other nut butter, but you might want to add a little more confectioners' sugar)
  • Optional: Sea salt and Roasted Peanut Chunks for garnish

Place the butter in a large mixing bowl. Add 2 cups of the sugar and then the cream and vanilla. On the medium speed of an electric mixer, beat until smooth and creamy, about 3-5 minutes. Gradually add the remaining sugar, 1 cup at a time, beating well after each addition (about 2 minutes). After incorporated, add the peanut butter topping to the mix and put back on low speed until the icing is thick enough to be of good spreading consistency; you might need to add a little extra sugar but probably not. Do not refrigerate this frosting, or it will become a brick; it can be stored in an airtight container for up to 3 days.

Finally, enjoy. These cakes were brought to CakeSpy buddy Dave's birthday party, and apparently had the birthday crowd in a sugar coma even the next day.


Tuesday
Jul212009

Tongue in Cheek Sweets: Cupcakes by Cynically Delicious

Cynically Delicious Cupcakes
Now, it shouldn't surprise you that on our recent San Francisco trip, our sightseeing didn't involve Alcatraz, the Fisherman's Wharf or the Golden Gate bridge--it was more of the cookie, cake, ice cream and pie variety.

One of our favorite discoveries? SF-based special-order cupcakery Cynically Delicious, who serendipitously happened to be seated next to us at the Renegade Craft Fair.

Their mission statement is fun:

she's got great taste in shoes...

no offense to your mom, but we probably don't bake like her.

cynically delicious is a boutique cupcakery that combines the joys of food with the fun of art. we don't take ourselves too seriously, but we do use serious ingredients.


Cynically Delicious Flavors
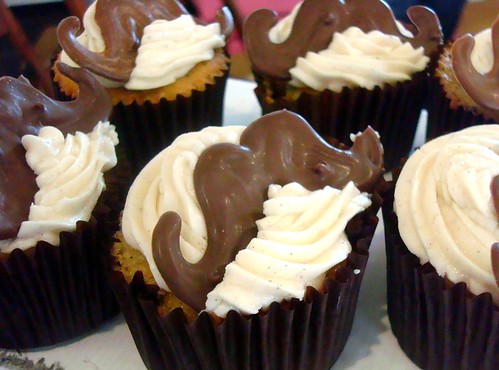
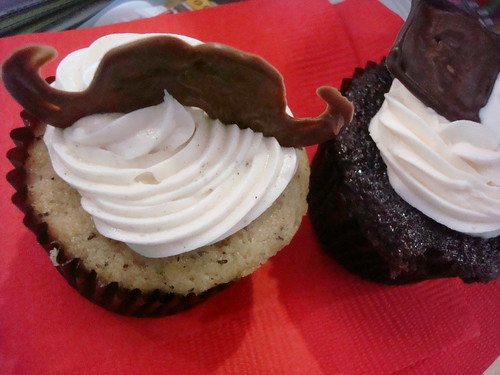
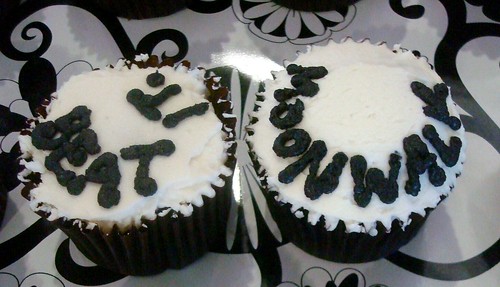
But their cupcakes, wrought with pop-culture references, are even funner. At the show they were serving the "MJ" Michael Jackson tribute (chocolate on the inside, vanilla outside, ordained with his black shoes and white socks); the "Crap Cake" (ghiradelli chocolate cake with cayenne cinnamon frosting with marzipan flies buzzing on top); the "Fuzzy Navel" (peach cake with champagne frosting); and the "Slumdog Selleck" (chai cake with cardamom cream cheese frosting, topped with a Selleck-inspired moustache).


Cynically Delicious Cupcakes
And at just $2 a pop, they were an easy sell. I tried the Slumdog; and while the spicy cake was pleasingly moist and gorgeously complemented by the rich cream cheese frosting, it would be a lie if I didn't admit that it was really the chocolate moustache that "made" the cake. Mr. Spy went for the MJ (after all he's a musician) and raved about the rich chocolate cake, but ultimately got jealous of my mustachioed cake and had to get a Slumdog for himself, and declared it the better flavor.


MJ Cupcakes by Cynically Delicious
The attitude that surrounds these cupcakes is very fun, and it makes the cupcakes a pleasure to eat--we're so glad to have discovered you, Cynically Delicious.
"Crap Cake" by Cynically Delicious
For more information (or if you're in the Bay Area and want to place an order), visit cynicallydelicious.com.


Thursday
May142009

Holey Cake: When Doughnuts and Cupcakes Collide

Doughnut Cupcakes c/o JustJenn
Photo c/o Justjennrants.blogspot.com

It seems that after the recent list of doughnut links, some additional commentary is necessary on the subject of the doughnut-cupcake combination.

When doughnut muffins reached the mainstream, it was only a matter of time before a slightly more awesome counterpart, the doughnut cupcake, entered the scene.


And they've entered in a big way, with all sorts of delicious variations. Here are just a few:


I do think pastry on pastry is a bit over the top - I feel like I've just made the turducken of desserts.
Of course, there is no mention of anyone declining a bite of these sweet treats.
  • On the lovely and amazing Bake & Destroy, Natalie made probably the best use ever of the new Starbucks VIA instant coffee by mixing it into the cupcakes and buttercream, and then topping it all off with a powdered sugar doughnut for a dizzying rush of sugar and a satisfying mixture of textures and tastes.
  • Of course, if you like the doughnut muffin style, on Elle's New England Kitchen, the doughnut muffin gets a sweet makeover with the addition of frosting and sprinkles--um, Elle, we think that means it's a doughnut cupcake now. And oh, so deliciously so.
  • In that vein, at Retro Bakery in Las Vegas, they they have not one, not two...but three doughnut cupcake varieties on their menu: the "Glazed Donut" (Vanilla cake drenched in donut glaze), the "Sprinkled Donut" (Vanilla cake dipped in chocolate fudge ganache and rainbow jimmies) and "Coffee and Donuts" (Vanilla cake covered in donut glaze and topped with a dollop of coffee buttercream). Oh yes.


© Cakespy, all rights reserved. Powered by Squarespace.