Home Home Home Home Home Home Home
CakeSpy

Featured: 

My adventure at Ben & Jerry's in Vermont!


Unicorn Love: the Eating Disorder Recovery Blog


 Buy my brilliant books!

Buy my new book!

Buy my first book, too! 

CakeSpy Online Retail!


Archives
Gallery

Fantastic appliance for cake making on DHgate.com

everyrecipe.co.nz

Craftsy Writer

Entries in cake (16)

Saturday
Jan172009

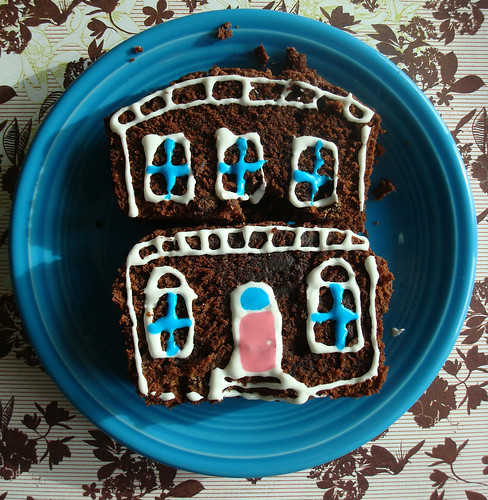
She's a Brick House: The NYC Brownstone Front Cake

Brownstone front cake
What's in a name? They say that a rose by any other name would smell as sweet--but would it be as compelling? 

Take for instance the New York City Brownstone Front Cake. Certainly that's a much more appealing and interesting name than say, "Chocolate Loaf Cake"--and certainly the name is what lured us to learn more about, and bake, this cake. 

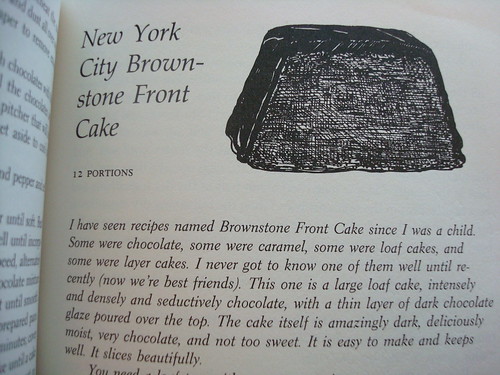
New York City Brownstone Front Cake

As Maida Heatter notes above, the Brownstone Cake is not something easily defined: the name has been used to describe cakes of caramel and chocolate, served as loaves or as layer cakes (if you're interested in learning more about its history, click here). But what holds true in each version is that this is a serious, dare we say brick house, of a cake: moist, rich, and very dense. 
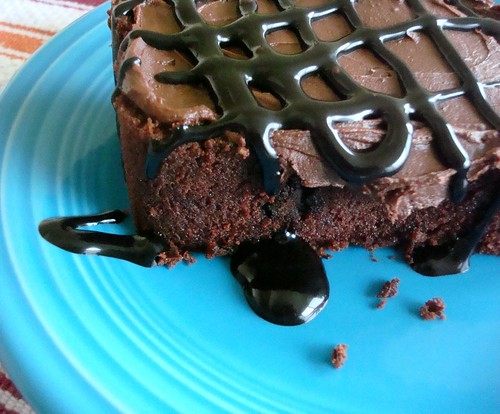
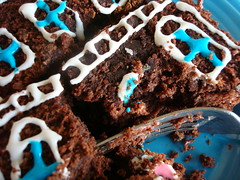
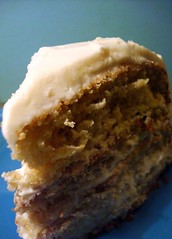
Using Maida's recipe as a starting point, we made our own version of the Brownstone cake, in a loaf pan. The result was an almost brownie-like cake. Because it was a large one, we let it stand as a loaf and let each eater choose their own adventure with their slice. It's an easy one to enjoy plain, iced (top picture), a la mode, or completely over the top-chocolatey (below). 

Ridiculously over the top chocolate brownie cake

New York City Brownstone Front Cake (adapted from Maida Heatter)
  • 2 ounces unsweetened chocolate
  • 1 cup boiling water
  • 1 tsp. dry instant coffee
  • 1 3/4 cups unsifted unbleached flour
  • 1/4 cup unsweetened cocoa powder (we used Hershey's Special Dark)
  • 1 tsp. baking soda
  • 1/8 tsp. salt
  • 4 ounces (1 stick) unsalted butter 
  • 1 3/4 firmly packed cups light brown sugar
  • 2 large eggs
  • 1 tsp. vanilla extract
  • 1/2 cup sour cream
  • *Optional Cakespy additions for added decadence and deliciousness:
  • 2 heaping tablespoons dark chocolate peanut butter--this gave it a richer, deeper dark chocolate color than some other examples of the cake we've seen.
  • 1 generous handful chocolate chips
Directions:
  • Adjust a rack one-third up from the bottom of the oven and preheat the oven to 325 degrees. You need a loaf pan with a 9-cup capacity (we didn't so we made two loaves using a smaller loaf pans). Butter the pan. (The original recipe calls for a breadcrumb mixture to line the pan but we didn't do that).
  • Chop the chocolate into coarse pieces and place it in a small saucepan off the heat. Add the boiling water and instant coffee. Stir until the chocolate is melted. (Maida's note: the mixture is in a saucepan so that if necessary it can be placed over heat until the chocolate is melted). Stir to mix and set aside.
  • Sift together the flour, cocoa, baking soda, and salt and set aside.
  • In the large bowl of an electric mixer beat the butter until soft. Add the sugar and beat until well mixed. Beat in the eggs one at a time, and then beat in the vanilla. On low speed add about half of the dry ingredients and beat to mix. Beat in the sour cream and then the remaining dry ingredients. Still on low speed, gradually add the melted chocolate mixture, scraping the bowl as necessary with a rubber spatula and beating until thoroughly mixed.
  • *At this point, figuring it would be delicious, we also stirred in a generous handful of chocolate chips, and about 2 heaping tablespoons' worth of dark chocolate peanut butter (we used Peanut Butter and Co.'s), in little chunks here and there in the batter.
  • Pour the batter into the prepared pan(s). 
  • Bake for about 1 1/2 hours or until a cake tester gently inserted in the middle comes out dry.
  • Cool the cake in the pan for about fifteen minutes. Then cover with a rack, turn the pan and rack upside down, and remove the pan, leaving the cake upside down to cool on the rack.

Empty pan, baby!Brownstone Front cake deliciousness

Now, this is the point at which we split paths with Maida. Rather than making her suggested Brownstone Icing,  as mentioned above, we left the cake as-is and let each eater choose their own adventure; the most delicious variation was undoubtedly the over-the-top chocolatey slice, on which we slathered on a bit of leftover chocolate buttercream frosting from a recent bout of baking and topped it with Hershey's chocolate syrup; to those who might consider this a bit excessive, it really is quite good lightly iced or even plain as well.


*As an added note, those who find this cake of interest may also get some extreme enjoyment out of David Lebovitz's Devil's Food Cake recipe.

Sunday
Jan042009

Well-Dressed: The Salad Dressing Cake

Salad Dressing Cake
The New Year is upon us, and with it comes that most dreaded, terrible custom: The New Year's Resolution. Proclamations of healthy eating and new gym memberships are as plentiful as the popping of champagne corks less than a week before. However, as we all know, few stick to those resolutions--so when you've given up, when you're ready to come back to the dark side, we present the Salad Dressing Cake.

Now, the name "Salad Dressing Cake" can be misleading--this is not some sort of exotic balsamic-glazed confection. No sir, the dressing we're talking about here is the one that dresses salads of the potato and macaroni varieties: mayonnaise. Now, for all those naysayers, a few points. If you're disgusted by this cake but you're one of the many who indulged in bacon-flavored baked goods in the past year, you take a long look at yourself in the mirror before you judge the mayo cake. Because what makes up mayonnaise--egg yolks, oil, vinegar--is all stuff that would go into a cake anyway. And as a note to vegan readers, the recipe works just fine with Vegenaise as well.

Cake
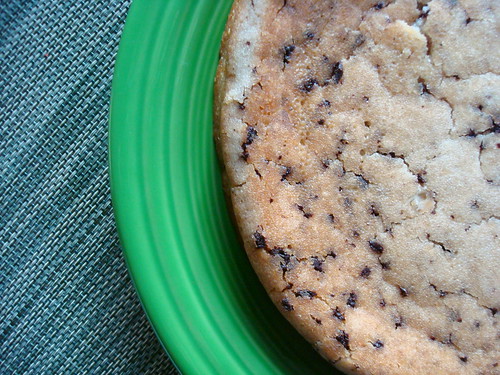
We were surprised by this cake. It's probably the most dense, moist, rich cake we've ever made--it has a slightly tangy flavor, not unlike a sour cream cake. In our version, instead of using 4 tbsp of cocoa powder as in the original recipe, we substituted the same amount of ground Callebaut chocolate--this not only gave the cake a nice added texture and color, but added a nice bittersweet flavor contrast. Topped with a simple buttercream frosting, it's actually quite a pleasant cake. 
Moreover, the biggest problem with this cake is not the flavor but the gross-out factor--no matter how you put it, no matter how many justifications you have, Salad Dressing Cake does not sound delicious or appetizing. Still, once you get past that hurdle, you might be pleasantly surprised. Our advice? Serve now, and tell the tasters what they ate later
Salad Dressing Cake


Salad Dressing Cake (Via reliableanswers.com)

  • 2 cups Flour
  • 2 teaspoons Baking Soda
  • 1 cup Sugar
  • 4 tablespoons cocoa (we used ground chocolate--see above)
  • 1 cup warm water
  • 1 cup Miracle Whip or mayonnaise salad dressing (or vegenaise for a vegan option)
  • 1 teaspoon Vanilla
  1. Mix all ingredients together, beat until smooth. Grease a 13"x9" cake pan (we used a circular pan) and dust with flour. Bake at 350° for 30-minutes or until a toothpick inserted in the center comes out clean.
  2. Frost when cool; we used this simple buttercream frosting:
  • 2 cups (4 sticks) unsalted butter, room temperature
  • 1 pound confectioners' sugar, sifted
  • 1 teaspoon vanilla extract
  • 1/8 teaspoon salt
  1. In a mixer bowl fitted with a paddle attachment, combine butter, sugar, vanilla, and salt. Beat on high speed 2 to 3 minutes, scraping down the sides of the bowl occasionally.
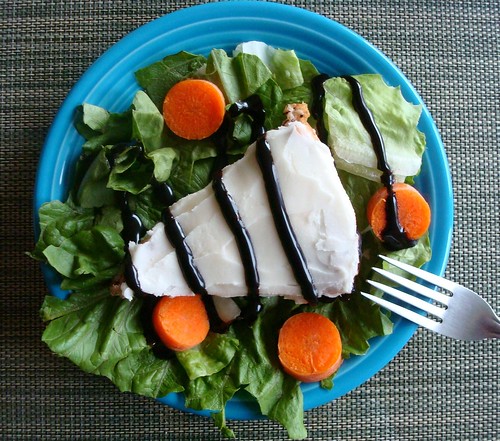
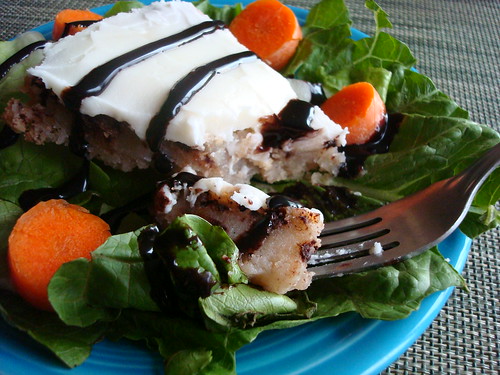
If desired, serve on top of a real salad for a delightfully mischievous presentation.


Sunday
Mar302008

Cutting (Cake) Corners: Cakespy Experiments with a Daring Bakers Challenge

Mischief
In case you didn't know it, the Cakespy team is part of a group called the Daring Bakers. Each month, a challenge is posted for members, and each member posts their results on the same day on their websites. This month, we were encountered by a challenge that was tres exciting to us: the Perfect Party Cake by Dorie Greenspan. But--and here's a moment of honesty--when we started looking through the recipe, it seemed awfully...involved. (Of course, at Cakespy, as much as we admire fine baking, we are the first to call ourselves expert tasters, novice bakers). And so, making like Shary Bobbins in the Simpsons, we decided to see how much we could get away with by "cutting every corner". But truly, this was an experiment of curiosity rather than pure brattiness. Though we suspected that our end result would be less than bakery-caliber, we wanted to know--would it be completely inedible? Or would it be, you know, kind of ok? Here's how it went.


Here's the original recipe, and the ways we messed around with it in blue italics:

For the Cake
  • 2 1/4 cups cake flour (we used all-purpose)
  • 1 tablespoon baking powder
  • ½ teaspoon salt
  • 1 ¼ cups whole milk or buttermilk (we used soy milk)
  • 4 large egg whites
  • 1 ½ cups sugar
  • 2 teaspoons grated lemon zest (we left this out)
  • 1 stick (8 tablespoons or 4 ounces) unsalted butter, at room temperature (we got impatient so we nuked it)
  • ½ teaspoon pure lemon extract (we left this out--no lemon handy)

For the Buttercream
  • 1 cup sugar
  • 4 large egg whites
  • 3 sticks (12 ounces) unsalted butter, at room temperature
  • ¼ cup fresh lemon juice from 2 large lemons (we left this out)
  • 1 teaspoon pure vanilla extract

For Finishing (we left this out--just frosted it, plain and simple)
2/3 cup seedless raspberry preserves stirred vigorously or warmed gently until spreadable
About 1 ½ cups sweetened shredded coconut


Getting Ready
Centre a rack in the oven and preheat the oven to 350 degrees F. Butter two 9 x 2 inch round cake pans and line the bottom of each pan with a round of buttered parchment or wax paper. Put the pans on a baking sheet. (We didn't have parchment or waxed paper so we just buttered those babies and hoped for the best.)

To Make the Cake

  1. Sift together the flour, baking powder and salt.
  2. Whisk together the milk and egg whites in a medium bowl.
  3. Put the sugar and lemon zest in a mixer bowl or another large bowl and rub them together with your fingers until the sugar is moist and fragrant. (since we had no lemon zest, we just added it to the butter and proceeded to step #4)
  4. Add the butter and working with the paddle or whisk attachment, or with a hand mixer, beat at medium speed for a full 3 minutes, until the butter and sugar are very light.
  5. Beat in the extract, then add one third of the flour mixture, still beating on medium speed. (we just added the flour mixture).
  6. Beat in half of the milk-egg mixture, then beat in half of the remaining dry ingredients until incorporated.
  7. Add the rest of the milk and eggs beating until the batter is homogeneous, then add the last of the dry ingredients.
  8. Finally, give the batter a good 2- minute beating to ensure that it is thoroughly mixed and well aerated.
  9. Divide the batter between the two pans and smooth the tops with a rubber spatula.
  10. Bake for 30-35 minutes, or until the cakes are well risen and springy to the touch – a thin knife inserted into the centers should come out clean
  11. Transfer the cakes to cooling racks and cool for about 5 minutes, then run a knife around the sides of the cakes, unfold them and peel off the paper liners. (ours came out just fine! yess!!)
  12. Invert and cool to room temperature, right side up (the cooled cake layers can be wrapped airtight and stored at room temperature overnight or frozen for up to two months). (We put it in the fridge to kind of speed up the process, but then got nervous about it cooling unevenly and took it back out again to do it Dorie's way).
CakeCake 
To Make the Buttercream
  1. Put the sugar and egg whites in a mixer bowl or another large heatproof bowl, fit the bowl over a plan of simmering water and whisk constantly, keeping the mixture over the heat, until it feels hot to the touch, about 3 minutes.
  2. The sugar should be dissolved, and the mixture will look like shiny marshmallow cream. (Ours did, sort of).
  3. Remove the bowl from the heat.
  4. Working with the whisk attachment or with a hand mixer, beat the meringue on medium speed until it is cool, about 5 minutes.
  5. Switch to the paddle attachment if you have one, and add the butter a stick at a time, beating until smooth.
  6. Once all the butter is in, beat in the buttercream on medium-high speed until it is thick and very smooth, 6-10 minutes.
  7. During this time the buttercream may curdle or separate – just keep beating and it will come together again. (It did curdle, but we beat on and it did come together again--whew!).
  8. On medium speed, gradually beat in the lemon juice, waiting until each addition is absorbed before adding more, and then the vanilla. (We had no lemon juice to add).
  9. You should have a shiny smooth, velvety, pristine white buttercream. Press a piece of plastic against the surface of the buttercream and set aside briefly.

Sweet Cake MischiefSweet, Sweet Mischief 
To Assemble the Cake
  1. Using a sharp serrated knife and a gentle sawing motion, slice each layer horizontally in half.
  2. Put one layer cut side up on a cardboard cake round or a cake plate protected by strips of wax or parchment paper. (We just put it on a plate).
  3. Spread it with one third of the preserves. (We skipped this, and just applied the buttercream to the sides and top).
  4. Cover the jam evenly with about one quarter of the buttercream.
  5. Top with another layer, spread with preserves and buttercream and then do the same with a third layer (you’ll have used all the jam and have buttercream leftover).
  6. Place the last layer cut side down on top of the cake and use the remaining buttercream to frost the sides and top.
  7. Press the coconut into the frosting, patting it gently all over the sides and top. (We didn't use any coconut, but we topped it with our favorite melty mints, which made it very happy-looking and, you know, covered a multitude of sins).
DSC06586
And so, having broken half of the rules in the recipe, how did it all turn out? Well, if we're completely truthful, our result was more "charming" in that only-a-mother-could-love-it kind of way, as opposed to say, showstoppers like this or this (both entrants who *ahem* followed the recipe...or, more so than us anyway). While the taste was good--certainly, our plates were cleaned without effort or complaint--it wasn't truly great. Ultimately, each step or ingredient that we deemed unnecessary during the baking process showed its importance in the final result--it lacked the certain je ne said quoi that the lemon likely lends to the final product; the presentation, while "rustic", lacked the panache and beauty that the preserves and strawberry would have given.
So, would we do it again? Well, OK, we might not be completely converted to following the recipe exactly--but we'll likely try much harder next time. After all, a lot of thought, testing and tasting goes into these recipes--and by people far better at baking than us--and hey, it's the least we can do to try to honor that expertise if we want a truly delectable baked good.


Tuesday
Feb192008

Happy Cakes: Cakespy Offers Sweet Prozac Alternatives for Dull Winter Days

The chocolate boxes are empty; the red roses are wilting. Without a doubt, post-Valentine's Day can be a bummer time of year, with not much other than the chance green-dyed pastry and Irish Soda bread between now and Easter Candy. Happily for you, Cakespy has put together a list of some confectionery Prozac alternatives: happy desserts, perfect for the dark winter days still ahead.


Topping off the list is the Basque Cake (or, if you're feeling authentic and/or fancy, the Gâteau Basque). Really, the Basque cake is probably the embodiment of sunshine in a cake; not a bread, not a pie, not a cake, but some delightful amalgamation of all three, with all sorts of variations depending on where your recipe comes from geographically. As its name would imply, it hails from the Basque region, a magical area that straddles the border between Southern France and Spain, and is traditionally served in June when cherries are plentiful (there's even a cherry festival each June in the town of Itxassou). Just a taste of this cake, with a fruit complement, is like tasting the sun itself, transporting your tastebuds to a warmer climate, surrounded by trees bowed with the weight of their own fruit. Basque in the sun, indeed. Recipe listed below.

Still not happy? What can we say: when life's a drag, get dragées! San Francisco-based Miette Patisserie has just revamped their site and added an online store, so these Frenchie treats can be delivered right to your home. While dragées may also refer to the crunchy-silver ball bearing-esque cake toppings that have been banned in California, the type we're referring to here are what may also be known as Jordan Almonds; entire almonds coated with a sugary shell and finished in lovely pastel colors which the French have been serving up since the 13th century. The contrast of the tender almond with the crunchy, ever-so-slightly vanilla-y sugar coating never fails to bring a smile to our faces; you too can have this joy for just $5 plus shipping by visiting miettecakes.com.


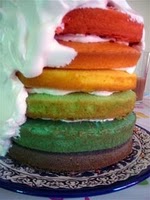
Frown not upside down yet? While personally we've begun to suspect that you might be soulless, nonetheless we've got one more fail-safe happy idea, provided by Cake Gumshoe Karen (who also works at a very cool company, Mailbox Tees): an over-the-top Rainbow Layer Cake! While some may say (shun the non-believers) that simply adding food coloring doesn't change a cake's taste and character, we suggest that you hold off on making judgements til you taste this rainbow; we think you'll find that yes, magic does add a little something to the mix. Recipe listed here.


Gâteau Basque (Basque Cake)

Servings: 8
Preparation time: 15 minutes
Cooking time: 25 minutes
Ingredients:
  • 2 cups flour
  • 6 oz (12 Tbs) butter
  • 2 eggs
  • 3/4 cup sugar
  • 1 teaspoon baking powder
  • 1/2 cup black cherry jam
  • 1/2 Tbs butter and 1 Tbs flour to prepare the mold
  • 1 yolk for decorating the cake
Directions:


Pre-heat the oven to 400 Degrees Fahrenheit.
Using 1/2 Tb, butter a round 7" pan. Coat the pan with flour.
In a bowl, mix flour, sugar and baking powder together and then add eggs and soft butter.
Split the dough into 2 parts, roll one out and place it in the pan, rising up the side of the pan by 1/2”.
Pour the jam on top of the dough.
Roll the second part of the dough on the table (after sprinkling some flour on the table) to form a round crust the same size as the pan.
Put it on top of the jam and stick the edges with the bottom dough. It is important to keep the jam inside the crust.
Mix an egg yolk with a few drops of water. Paint it on top of the crust.
Place in the oven for 25 minutes.

Recipe thanks to France Monthly.

Want to learn more about all things Basque? Check out The Basque History of the World: The Story of a Nation by Mark Kurlansky. Planning a visit to la belle France? We suggest trying to fit in a visit to the Gâteau Basque Museum (it exists!); find out more at legateaubasque.com


Thursday
Aug232007

The Next Big Thing: Tres Leches Cake


Through our lives, we've seen so many cake phases come and go. There was the Funfetti phase; the ice cream cake phase; the cupcakes baked in sugar cones phase. We've seen cakes come and go out of vogue. Carrot cakes have made way for Hummingbird cakes; Red Velvet was tacky, but now it's kind of cool again.

Well, it's time to make way for the new cake on the block: Tres Leches (or, Pastel de Tres Leches, literally meaning "cake of three milks"). It's long been a staple dessert in Latin America, and it's coming to the USA with the fervor of Selena's crossover album. Usually made sans butter and soaked in three types of milk (evaporated milk, condensed milk and either whole milk or cream), in spite of being so dairy-dominant, the cake remains quite light and unsoggy when made correctly.

We predict you'll be seeing it a lot more in the future, but for the meantime check out these places in the Seattle area:

Borracchini's Bakery: Who would have thought an old-school Italian bakery would be on to this trend? 2307 Rainier Ave. S (between S. Walker St. & S. College St.); online at nowcake.com.

El Diablo Coffee Co.: Call for availability; their menu rotates. 1811 Queen Anne Ave. N (between W. Howe St. & W. Blaine St.); online at eldiablocoffee.com.

Salvadorean Bakery: Don't go here for the ambience--it's in a strip mall--but rather go for the authentic cakes. 1719 SW Roxbury St (between 17th Ave. SW & 18th Ave. SW).

NB: We've also heard it's on the menu at El Camino (607 N. 35th St b/t Evanston Ave. N & Fremont Pl. N; online at elcaminorestaurant.com) and Senor Moose Cafe (5242 Leary Ave. NW b/t 20th Ave. NW & NW Ione Pl.; online at senormoose.com.)

Tuesday
Aug212007

All Dolled Up


Good news: getting all dolled up doesn't just mean a hasty trip to Forever 21, nylon tips and "borrowing" your roommate's pushup bra for a night out in Pioneer Square anymore.

Now you can accessorize--your cakes that is--with paper doll cupcake picks by Katydid Designs. Featuring imagery like mini Jackie-O and Shirley Temple-looking doll faces as well as lilliputian Our Lady of Guadalupe cutouts, the picks bring a certain kitschy-cool aspect to even the most unassuming cakes and pastries. And at just $5 for a pack of six, you can afford to spread this style around.

Page 1 2
© Cakespy, all rights reserved. Powered by Squarespace.