Home Home Home Home Home Home Home
CakeSpy

Featured: 

My adventure at Ben & Jerry's in Vermont!


Unicorn Love: the Eating Disorder Recovery Blog


 Buy my brilliant books!

Buy my new book!

Buy my first book, too! 

CakeSpy Online Retail!


Archives
Gallery

Fantastic appliance for cake making on DHgate.com

everyrecipe.co.nz

Craftsy Writer

Entries from September 1, 2011 - September 30, 2011

Saturday
Sep172011

Taste the Rainbow: Rainbow Cake for Serious Eats

Want a cake that will turn any frown upside down? Well, you've got it—with magic to spare—in this Rainbow Layer Cake.

A six-layer cake in all the colors of the rainbow, this one is dramatic to cut into and always seems to elicit an "oooooooh" response. It is impossible to be unhappy while eating this cake. Special thanks go to Karen of the blog, off the (meat)hook, whose pictures of a similar cake inspired me to create this recipe.

Of course, the recipe is from my upcoming book .

Read the full entry at Serious Eats!

Friday
Sep162011

Baker's Dozen: A Batch of Sweet Links

Sweet cupcake art! Not by me but still awesome! Thanks Mariah for sharing!

Sweet Nostalgia: I enjoyed browsing these retro dessert recipes.

Great moments in the life of the Twinkie. Ah, yes.

A dessert worthy of a happy dance: Cherries Jubilee!

Totally not kidding: Strawberry pretzel salad.

I know it's not Girl Scout Season...but just looking at these Samoas Cupcakes makes me happy.

What a tart: well, these ones taste very good.

Watch an interview with me. I am like, so photogenic.

Bakery I wanna visit: http://lonardosgourmetbakerie.virb.com/

How did I not know this existed? American Pieways.

Like, whoa: Mario and Luigi (you know, of video game fame) Cake Pop Cake!

Whoopie! I enjoyed this entry on the Red Velvet Whoopie pie on the Starbucks blog.

Thursday
Sep152011

Sweet to Eat: Chocolate Salted Caramel Lollipops Recipe from Sweet Confections by Nina Wanat

Photo by White On Rice CoupleSo, the other day I received a review copy of this book. It had a gorgeous cover, and an alluring title: Sweet Confections: Beautiful Candy to Make at Home. The book was written by Nina Wanat, whom I have never met but would like to, for several reasons, including:


  1. She grew up in New Jersey (like me!)
  2. She is the founder of Bonbonbar Confections in San Francisco. OMG!
  3. She has a sweet blog called Sweet Napa.
  4. This book totally rules. It's user-friendly, has gorgeous pictures by the folks who run the website White on Rice. My apologies for messing with their lovely photo above.


here's a sneak peek at my favorite recipe from the book so far: Chocolate Salted Caramel Lollipops!

Chocolate Salted Caramel Lollipops

Makes, like, 20.

 Equipment

  • Lollipop molds or silicone mat and baking sheet
  • 1-quart saucepan
  • Heatproof silicone spatula
  • 2-quart saucepan
  • Candy Thermometer
  • Large spoon
  • Lollipop Sticks

Ingredients

  • 1 tablespoon corn syrup 
  • 1 tablespoon butter
  • 3/4 tablespoon kosher salt
  • 1/2 cup cream
  • 1 cup sugar
  • 1.5 ounces chocolate, chopped
  • Flaky sea salt, for garnish

Procedure

  1. If you don't have lollipop molds, place a silicone mat on a baking sheet.
  2. Boil the corn syrup, butter, and kosher salt, and cream in a 1-quart saucepan over medium heat. Meanwhile, caramelize the sugar over medium-high heat with a heatproof spatula in a 2-quart saucepan. When the sugar is caramelized, immediately reduce the heat to low, and add the cream mixture, scraping the pan. Stir over medium-high heat until the mixture is smooth. Add the chocolate. Cook to 274 degrees F, stirring slowly but constantly.
  3. Remove from heat and quickly drop the syrup from the tip of a large spoon into the cavities of the lollipop molds, if using. Alternatively, drop the syrup onto the silicone mat so that it forms 2-inch discs, placed to lave space for the sticks. Place a lollipop stick in the center of each disc, and twist it 180 degrees so that it is fully covered by the syrup. Sprinkle the coarse salt on top, crushing it between your fingers as you sprinkle it so it is not too jagged. Let cool completely. Peel off the lollipops, and store in an airtight container.
Tuesday
Sep132011

30 Uses for Leftover Birthday Cake

Fact: when you have over 30 birthday cakes, you're bound to have some leftovers. And after my BYOC (Bring Your Own Cake) birthday party to celebrate my recent 30th birthday, I found myself with over 36 types of cake. What to do to maximize the leftovers in such a situation? Luckily, I had a few ideas. Here they are, in case you ever find yourself in such a situation:

  1. Enjoy it the morning after, straight from the fridge or freezer. It's not elegant, but it has its charms.
  2. Birthday Cake Bread Pudding.
  3. Leave it at the bus stop in a tupperware container with a note for someone to find it. I'd eat that if I found it at a bus stop.
  4. Birthday Cake French Toast.
  5. If it's cupcakes...Bake 'em in MORE cupcakes!
  6. Chocolate Covered Cake on a Stick. Hey, they do it with cheesecake and Key Lime pie!
  7. Use one of these tricks to bring it back to life.
  8. Cake Crumb Cookies. I'd never heard of them til today!
  9. If one of them was a cheesecake, make a Grilled Cheesecake.
  10. Make trifle.
  11. More specifically, make a "Russian Cake" or "Creole Truffle". 
  12. Share it with the public (that's what I do at my store!).
  13. BIRTHDAY CAKE SHAKE!
  14. Crumble it up and use it as an ice cream topping or mix-in.
  15. Use it as a cinnamon roll filling! Like this recipe, but with cake instead of cookie dough.
  16. Slice it into thin slivers and use it to line a pie plate. Prepare a batch of your favorite no-bake pudding or cream pie filling, and pour it into the cake-sliver "crust". Possible flavor combinations: Hummingbird cake with banana pudding filling.
  17. Crumble it and make cake pops, adding a little extra frosting or butter if needed to make the filling hold together; coat with melted chocolate or candy coating as in this recipe.
  18. Similar, but with booze: make rum balls.
  19. Make Birthday Cake Soup.
  20. Make "chocolate salami". No, I am not kidding. And no, I didn't invent it, but I'm glad it exists.
  21. Use two thin slices as the bookends to an especially decadent ice cream sandwich.
  22. Make a cake-plate sampler and share it with your next-door neighbors. Extra points if you give it to a neighbor you've never met before.
  23. Make cake croutons, the perfect topping for candy salad!
  24. Use it (cake only, no frosting) to line a tart or pie pan before baking (it will keep things from sticking).
  25. Make a charlotte, using sliced birthday cake in place of bread or ladyfingers.
  26. Crumble up an entire slice and bake into a batch of brownies. You'll be rewarded with crunchy bits and swirls of buttercreamy frosting. 
  27. Top it with jam and eat instead of toast for breakfast. Healthy!
  28. Birthday cake cereal. Cut it into half-inch cubes and put in a bowl. Pour milk over it and eat with a spoon. Better than granola!
  29. Cube it and entomb it in an awful but awesome-looking jell-o mold.
  30. Deep-fry it. On a stick, if desired.


Saturday
Sep102011

September 11th, and Basbousa in Brooklyn

So, pretty much everyone remembers where they were on September 11, 2001. It was a Big Bad sort of day. And I'm no exception, but my memory also involves cake.

Here's what I remember about that day.

I had just started my junior year at Pratt Institute in Brooklyn. I was studying Illustration. 

And this year was a Big year. I had moved out of the campus dorms to my first "real" apartment--in Greenpoint, Brooklyn, at the intersection of Norman and Jewel, where three rooms in a third story walkup were shared by four people. I paid, I think, $425 a month.

The previous two years, I had worked at the Pratt Art Supply store in the basement of the main building on campus. This year, to raise extra funds for my rent and tuition, in addition to this job (and being a full-time student), I also worked six nights a week at a Middle Eastern restaurant on Atlantic Avenue called Bedouin Tent. It's still there, you should go. 

Side effect of working two jobs, being a full-time student, and being on the G train line: I was always tired, and often running late. And on September 11, 2001, when I was supposed to be at Pratt Art Supply by 9, I found myself scurrying through the Pratt gates toward work when I simply had to pause, look up at the sky, and think to myself: "this is an exceptionally beautiful day."

I remember, several minutes later, walking into work and hearing the news that the first tower had been hit. The reporter was just freaking out. We listened to the news for a while, but after the second plane hit, all of the employees pretty much left the store and ran up the six flights to the roof of the building. We stared at the buildings smoking. We saw the first tower disintegrate in a puff of smoke and glittery glass. I remember saying "Oh, my, god." Some of my fellow students were not as delicate.

We watched the second tower go down too, and then we all kind of looked at each other, like "what now?". Nobody know. Me? I went back to work. I remember my boss was mad that we had all gone up to the roof.

Not many people came in to buy art supplies, but some people did. But school closed, I think, or at least I left after my shift was done. I walked from Pratt along Bedford Avenue, all the way back to Greenpoint. There was a place just as you entered Williamsburg called Diner. I think it's still there. They had a sign on the door that said "CLOSED" and there was smoke coming from under the door. It smelled strongly of cannabis.

Along Williamsburg, you can see the Manhattan skyline--it was coated with smoke. I remember I stopped at a bodega and bought a candy bar, Hershey's Cookies N Cream.

When I got home, my roommates and I wordlessly watched the news all day. And then at 4pm, I did what I did six days a week--I headed to work.

I forget if I took the subway or walked, but I remember that Atlantic Avenue--a Middle Eastern neighborhood--was a very somber place to be on that day. At my workplace, I held not only the status of the only female on staff, but also the only American. The rest of the employees were dudes, from Egypt, Jordan, and Yemen. They always had to stop work and pray during the dinner rush, I remember.

On that day, they were all scared. They thought that they would have to leave America. They were scared of mobs. They were scared people would think they did it.

And yet, we got our work done. It was actually a pretty busy night. But somehow there was no stress about getting people their food on time, it had a good flow and people tipped well, if not extravagantly.

But something that started to happen, very early on in the shift and that lasted until we ran out, was that we gave out free dessert to everyone. We didn't really discuss it--we just started doing it. Customers, people who just walked in needing the bathroom, even an office worker type guy covered in dust who walked in and asked "Can I use your phone?". It wasn't working, but we let him try. And we gave him cake. We gave everyone cake. Baklava, but mostly basbousa--because it was easier to cut into bite-sized pieces, and not as sticky.

I'm not sure how many pieces of basbousa we gave out. It felt like hundreds, but it could have been just twenty. But what I do remember is that this small, sweet gesture, was received with such gratitude by every single person to whom it was offered. Whether or not they liked it or even ate it didn't matter--it was an exchange of sweetness, and a small, cautiously optimistic wordless agreement that life could still be sweet.

Here's a recipe for basbousa and sweet thoughts for everyone.

Basbousa (as seen on Serious Eats)

  • 1 stick unsalted butter, softened
  • 2 cups semolina flour
  • 3/4 cup sugar
  • 1 cup plain yogurt (or 1 cup of whole milk)
  • 1 1/2 teaspoons vanilla extract
  • 1 tablespoon baking soda
  • 2 eggs
  • Blanched sliced almonds for garnish
  • 1 cup confectioners' sugar
  • 1 cup water
  • 1 tablespoon honey
  • 1 generous squeeze of lemon juice (or, 1 teaspoon lemon juice)


  1. Preheat oven to 350°F. Grease a 9 x 13-inch baking pan.
  2. In a medium bowl, combine the semolina and baking soda. Set to the side.
  3. In a large mixing bowl, cream the butter and sugar; once fluffy, add vanilla and eggs, one at a time, beating until incorporated.
  4. Spoon the batter into the greased baking pan, smoothing the top with a spatula.
  5. Bake for 20 to 25 minutes, or until golden around the edges.
  6. While baking, prepare the honey glaze. Heat sugar, water, and honey over medium heat, stirring frequently, until the sugar is fully dissolved.
  7. Let the mixture simmer for about five minutes; once it has reduced to a maple syrup sort of thickness, add the lemon juice and stir just until incorporated.
  8. Once the basbousa has come out of the oven, pour the glaze directly on to the still-hot cake, being sure to cover it uniformly. The glaze will sink into the cake, but the top should be slightly sticky. Top with the almonds. Let cool for at least 30 minutes; slice into squares or diamonds before serving.


Saturday
Sep102011

Carnival Cookies Recipe from Super Natural Every Day

I will tell you the truth. When I first encountered the recipe for Carnival Cookies in the lovely and amazing cookbook Super Natural Every Day: Well-loved Recipes from My Natural Foods Kitchen by Heidi Swanson, the first thing that captured my attention was the name. Carnivals are fun! But as I scanned the ingredients, I became alarmed: "these sound sort of healthy." But then, the more I lingered on the entire list, I thought "gosh, these sound fairly delicious, in spite of some alarmingly healthy-sounding ingredients!".

And you know what? I was rewarded when I tried them out in my own kitchen. They tasted vaguely granola-y, but not in a bad way. In a decadent way. But...here's the thing. (Duh) I forgot to photograph these beauties before bringing them to an event, but you can find some pretty pictures here.

Carnival Cookies

Ingredients

  • 1 1/2 cups well-mashed bananas
  • 1 teaspoon pure vanilla extract
  • 1/4 cup barely warmed (not solid) extra-virgin coconut oil
  • 1 1/2 cups rolled oats
  • 1/2 cup almond meal
  • 1 teaspoon aluminum free baking powder
  • 1/2 teaspoon ground cinnamon
  • 1/2 teaspoon fine-grain sea salt
  • 2/3 cup shelled whole peanuts
  • 1 cup dark chocolate chips
  • 1 1/2 cups popped corn

Procedure 

  1. Preheat oven to 350 with racks in the top and bottom third of the oven. Line two baking sheets with parchment paper.
  2. In a large bowl, combine the bananas, vanilla, and coconut oil. Set aside. In another bowl, whisk together the oats, almond meal, baking powder, cinnamon, and salt. Add the dry ingredients to the wet, stirring until combined. Fold in the chocolate, then the peanuts, and lastly the popped corn. The dough is looser than a standard cookie dough, but don't worry.
  3. Firmly shape balls with your hands, about 1 heaping tablespoon each, and place them about 1 inch apart on the prepared baking sheets.
  4. Bake 14-17 minutes, swapping the baking sheets from top to bottom once along the way, until the bottoms are deeply golden. Remove from the oven and allow the cookies to cool on a wire rack. Makes 24 cookies. 
Friday
Sep092011

Baker's Dozen: A Batch of Sweet Links

Hey dudes and dudettes. If you're in Chicago this weekend, come see me at the Renegade Craft Fair! If not, just click on these links and try not to cry.

Pop! Goes the...tart!? Pop-Tarts Confetti Burst Pops!

In Search of Piefection: Southwest Airlines' in flight magazine has a great suite of sweet articles!

Treats I want to eat: Trevani Truffles!

Sweeter than the SATs: Here's a dessert quiz!

Peachy: a good-lookin' tart on Food52.

Sweet destinations: travel-worthy sweet treats.

Who knew? A company specializing in Texas Fruit Cake.

Sweet reminder: Buy my book.

Bakery I want to visit: Bluepoint Bakery, Denver.

The cost of cheesecake: it's not the calories I'm talking here.

Doughnut stop believing: A Boston Cream-doughnut themed pie.

Sweet Fayetteville: I hear Cupcake Gallery in North Carolina is pretty swell.

Sweet memories: a cereal treat smackdown!

Thursday
Sep082011

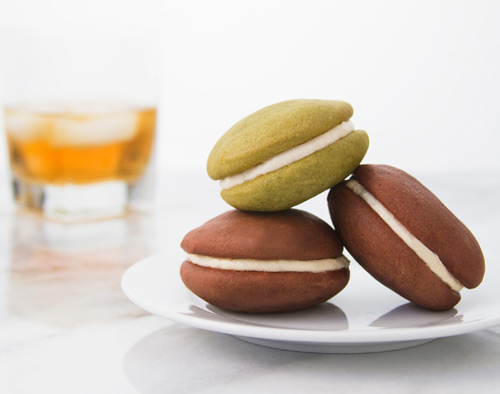
Gobba Gobba Hey: Matcha Gobs with Lemongrass-Ginger Filling Recipe from a Sweet New Gob Cookbook

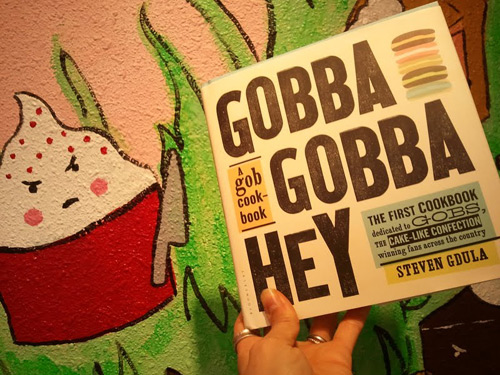
Photo: Gobba Gobba HeyTrue Story. Recently I received an email from an esteemed publisher you may know of called Bloomsbury, asking if I'd be interested in a review copy of their new release, entitled Gobba Gobba Hey: A Gob Cookbook. It was written by Steve Gdula, who owns a gob (um, whoopie pie) business by the same name in San Francisco.

As a lover of the Whoopie Pie or Gob (it's a geographical thing), even though I wouldn't call them "the new cupcake", I was beyond delighted to receive this sweet book in the mail, and even more delighted when I found the writing style to be engaging, the business backstory to be interesting, and the recipes to be delectable.

But one of my favorites from the book? Matcha Green Tea Gobs with Lemongrass-Ginger Filling. NOM!

And they were kind enough to allow me to reprint the recipe here. Lucky you! here goes:

Matcha Green Tea Gobs with Lemongrass-Ginger Filling

Recipe courtesy Gobba Gobba Hey

For the batter

  • 4 cups all purpose flour
  • 1/4 cup highest quality Matcha Green Tea powder
  • 1/2 teaspoon baking powder
  • 1.5 teaspoons baking soda
  • 1 teaspoon salt
  • 2 cups sugar, sifted
  • 8 tablespoons butter, softened, cut into 1/2 inch cubes
  • 2 eggs 
  • 1 teaspoon vanilla extract
  • 1 cup buttermilk, at room temperature
  • 2 tablespoons sour cream

For the filling

  • 8 tablespoons unsalted butter, softened, cut into 1/2 inch cubes
  • 12 tablespoons cream cheese, cut in 1/2 inch cubes
  • 1 teaspoon vanilla extract
  • 1-2 teaspoons fresh lemon juice
  • 3-4 tablespoons lemongrass-ginger syrup (steps to make below)
  • 2 cups confectioners' sugar, sifted

For the lemongrass-ginger syrup

  • 1 cup sugar
  • 2-inch pieces fresh ginger, sliced into four or five rounds, skin peeled
  • 1/2 cup lemongrass (about 3 stalks), outer husk and bottom tip removed, sliced in rounds
  • 1/2 cup water
  • juice of 1 lemon
  • 1/2 cup loosely packed Rau Ram leaves (optional)

Procedure

  1. Make the cookies. Preheat the oven to 350 F. Line three 8x13-inch cookie sheets with parchment paper.
  2. In a large bowl, sift together the flour, matcha powder, baking powder, baking  soda, and salt. Whisk together until they're evenly green in color.
  3. In another large bowl, cream the sugar and butter with a mixer on medium speed. Add the egg yolks to the creamed ingredients and mix on medium. Add the egg whites and vanilla, and mix on medium-high until the mixture looks like a dense pudding.
  4. Alternate adding the dry ingredients and the buttermilk to the egg mixture, mixing on medium speed after each addition. Then add the sour cream, and mix well. 
  5. Using a tablespoon or pastry bag, drop 1 1/2 inch rounds of batter on the prepared cookie sheets, leaving 1 inch between each round. Bake 8 minutes, or until the gob domes have risen. Remove the gobs to a wire rack to cool.
  6. Make the filling, part 1. First, make the lemongrass-ginger syrup which you'll set to the side. Place the sugar, ginger, and water in a saucepan. Bring the liquid to a boil over medium heat, stirring to dissolve the sugar. Add the lemon juice and the rau ram leaves, if using, to the syrup, and stir well. Remove the pan from heat and set aside, covered, to let the syrup steep for at least 20 minutes. Strain out the lemongrass, rau ram leaves, and ginger and lemon seeds and pulp, and reserve the syrup for the gob filling. This mixture will keep, tightly covered, in the fridge for up to a week with the rau ram, 2 weeks without it.
  7. Make the filling, part 2. Cream together the butter and cream cheese with a mixer on medium speed.
  8. Add the vanilla, 1 teaspoon lemon juice, 3 tablespoons of the lemongrass-ginger syrup, and confectioners' sugar; beat on medium high, scraping down the bowl as needed to reincorporate the ingredients. Taste and add another teaspoon of lemon juice or another tablespoon of lemongrass-ginger syrup if you'd like.
  9. To frost your gobs (I love saying that), flip the baked gob domes over on a cookie sheet and match up similarly shaped and sized domes. Add 1 tablespoon of filling to the flat side of an overturned dome, then place another dome on top, sandwich-style. Allow the gobs to fully set by refrigerating them on a baking sheet for at least 1 hour. Wrap the gobs in plastic wrap to keep them from drying out.
Wednesday
Sep072011

Sweet Sleuth: Who Invented S'mores?

Is this how the S'moreo was born?Today, while eating a delicious s'more, I found myself thinking that if I could go back in time, at that moment my destination would be to visit the person who invented the s'more so I could thank them. With emotion and enthusiasm.

It was with deep sadness that I realized I would not know who that person was, so I hit the books to find out more about this sweet treat.

This s'more was made using a portion of Snickers Bar.The name seems self-explanitory enough: a slurring of "Gimme some more" would naturally become S'more. Why did it settle on this particular sweet treat? No idea, but I have the thought that it is like a nickname: this one just stuck.

As for who invented it? As What's Cooking America advises,

No one is really sure who invented S'mores, because the recipe has basically been passed around by word of mouth since then. The first known recipe appeared in the 1927 Girl Scout hand book called Tramping and Trailing with the Girl Scouts.

The recipe is credited to Loretta Scott Crew, so happily I would at least have a person to go back in time and thank, because while she probably didn't invent the confection, hers is the first known published recipe for the delicious triple-threat of graham cracker, marshmallow, and chocolate.

So how did this trinity of awesome come together?

What seems pretty reasonable (to me, anyway) is that what really kept this treat going was the producers of the products. Concurrently, marshmallows were becoming commercially available for the first time; Graham crackers had gained much popularity after their invention by Sylvester Graham (described as "a New England health advocate with a passion for temperance and fiber"), and the recipe had been picked up and gained popularity (as well as evolving into a sweeter, more cookielike cracker) after being mass-produced by Nabisco. I must make a side note to wonder "What would Sylvester Graham think of S'mores?". Somehow I don't think it's what he envisioned his legacy to be.Sta-Puft could make so many S'mores.

But I digress. My theory about products coming together in the right place at the right time is supported by an article on Slashfood, which also brings up an interesting point on other popular confections which debuted in the same era:

The true origin of the snack is unknown, as camping recipes tended to be passed from person to person and family to family - often over the campfire itself. The first recipe for s'mores was published in 1927 in the Girl Scout Handbook and the event marked the official introduction of the s'more into popular culture.

The publication of the s'more recipe was not the first pairing of chocolate, marshmallow and cookies. In 1913, the Mallomar cookie was introduced to market, followed in 1917 by the Moon Pie. Both products have a graham cracker-like base - a sandwich, in the case of the Moon Pie - and are topped with marshmallow and a layer of chocolate.

 so, maybe it was a Girl Scout reaction to popular treats around the time, which themselves were the result of these new products?

As for their enduring popularity? As Liesl Schillinger (a documented s'more hater) says,

they're easy-to-make, guaranteed nostalgia-inducers, well within the reach of any parent's budget. Others may disagree, but I suspect that most us don't eat them for the taste. We eat them to relive our first s'mores experience, back when our taste buds were so rosy new that any sugar was ecstasy; back when our parents were the age we are now … and younger. S'mores take us back in time. You don't have to like them to love them.

Well put.

Want s'more? You may enjoy:


Wednesday
Sep072011

Pumpkin Pull-Aparts Recipe

I don't have a bread machine. But if you do, have I ever got a good use to suggest for it: Pumpkin Pull-Aparts. Especially now that it is post-Labor Day and it's time to put away your white shoes and flavor EVERYTHING with pumpkin.

This recipe was shared with my by the fine folks at Robert Rose publishing, who recently released The Artisan Bread Machine: 250 Recipes for Breads, Rolls, Flatbreads and Pizzas. Here's the recipe:

 Pumpkin Pull-Aparts

adapted from The Artisan Bread Machine: 250 Recipes for Breads, Rolls, Flatbreads and Pizzas by Judith Fertig

Equipment: bread machine with a 1 1/2 lb capacity, Rolling pin

9-inch square pan, greased

  • 1/3 cup granulated sugar
  • 1/2 teaspoon salt
  • 1 large egg, beaten
  • 2/3 cup canned pumpkin puree
  • 1/3 cup lukewarm buttermilk
  • 2 tablespoons unsalted butter, softened
  • 2 2/3 cups all purpose flour
  • 2 tsp instant yeast

Filling

  • 1/2 pumpkin or apple butter
  • Topping 
  • 2 tablespoons sugar mixed with 1 teaspoon cinnamon

Procedure

  1. Add sugar, salt, egg, pumpkin, buttermilk and butter to the bread pan. Spoon flour on top of liquid. Add yest.
  2. Select dough cycle and press start.
  3. When the cycle is finished, transfer to a floured surface and punch down gently. Lightly dust with flour and roll out onto a 12 by 10 inch rectangle, with the long side closest to you.
  4. Prepare the filling. Spread the pumpkin or apple butter over the dough, leaving a half-inch perimeter along both long sides. Lightly brush the long edge further from you with water. Starting with the opposite long side, roll dough into a tight cylinder and pinch seam to seal. Using dental floss or a sharp knife, cut cylinder into 9 slices.
  5. Dip both spiral sides of the rolls in cinnamon sugar. Place spiral side up in prepared pan. Cover with plastic wrap and let rise in a warm, draft-free place for 30 minutes. Side remaining cinnamon sugar to the side. Meanwhile, preheat oven to 350F.
  6. Remove plastic wrap and sprinkle reserved cinnamon sugar over rolls. Bake for about 30 minutes or until risen and lightly browned and an instant-read thermometer reads 190F. Cool in pan on a wire rack; serve while still warm.
© Cakespy, all rights reserved. Powered by Squarespace.