CakeSpy Note: This is part of a series of Pie Slam Profiles, featuring the recipes and stories of each of the 9 entrants in last week's Pi(e) Day Pie Slam! This entry is for Blueberry pie, by Wendy Johnson. Here's her story, followed by her recipe.
Pie : a (true) love story
Did Grandma Radi make pies? I asked.
No, that’s the one thing she couldn’t cook. They came out tough.
And Grandma Johnson?
No, she couldn’t really cook anything.
Well, how did you start making pie?
I just taught myself, the first pie I made was when we were first married, maybe just a week. That was the best pie I ever made, I could never get them to turn out as good.
What kind was it?
Lemon meringue.
Mom was red-eyed, staring out the passenger window as we drove through the stultifying Texas landscape of oil wells, pawn shops and used car dealerships.
She would silently work a crossword for awhile, or concentrate on her knitting, and then suddenly start in about how they met, about the awful yellow sweater he was wearing when his friends came up to her friends after a Sweet Home High School Basketball game.
Or about how he courted her in his father’s 1960 dark blue Buick LeSabre convertible with the white ragtop. Ray Charles would’ve been singing “I can’t stop loving you.” They’d put the top down, blast the heat and cruise around Buffalo, New York in the chilly spring of 1962.
As we neared Birmingham Alabama, she told me without malice of how dad’s parents had offered him money to prevent the marriage of their son to the daughter of Italian immigrants. Of how my Grandmother, on her death bed, had said to my mom, “I was pretty hard on you wasn’t I? I’m sorry for that.”
The Lemon Meringue was the first tradition that they alone owned. Not from his family or hers. My mother created pie for my father. Over the years they shared, almost 50, she honed her skill, her deft first generation hands turning flour and butter and fruit and sugar into expertly sculpted deliciousness, perfectly balanced between sweet and tart, between lightness and substance.
And what about the last pie, do you remember what it was?
It must’ve been blueberry. Your father loved blueberry.
Here's the recipe:
Blueberry Pie
For the Butter Pastry:
2 cups all purpose unbleached white flour
1 teaspoon kosher salt
1 cups unsalted butter (or 2/3 cup butter and 1/3 cup leaf lard.)
1/3 cup cold water (may add 1-2 tsp cider or white vinegar.)
Put everything in the refrigerator for an hour or so before making the pastry (the mixing bowl, the water, the lard, the butter). Preheat the oven to 350. Combine the flour, salt, and butter in a large mixing bowl and work with a pastry cutter until the butter chunks are the size of peas. You should still be able to see small pieces of butter. Transfer the mixture to a large mixing bowl and use your hands to flatten some of the bits of fat into flakey pieces. Add the water all at once and gather the jumble together without really stirring or kneading, just until the mixture comes together to form a shaggy mass. Without handling the dough any more than necessary, divide in half and press each half into a disk. Wrap in plastic wrap and refrigerate it while preparing the berries.
Wash fresh berries, or use frozen. Put all berries in bowl and toss with sugar, cornstarch, lemon juice and spices. Add more sugar or spices to taste, but be careful not to over sweeten.
On a well-floured surface, roll out one disk of the pastry into a 12-inch circle onto floured parchment paper. Lift the parchment paper and place dough-side down into a buttered 10-inch pie pan. Press the pastry into place and pour in the berry mix. Roll the second disk of dough into a 12-inch circle and plant it squarely on top of the filling. Crimp the edges together to create a seal, then trim off an excess dough. Pierce the top crust with a fork or knife to vent juices. Bake until the crust is golden brown and the filling is boiling out of the crust a bit, about 1 hour. Cool thoroughly on a rack before slicing.
Click here for the download-able version!Guess what? Jane and Michael Stern, those Roadfood warriers willing to eat the fattiest and most delicious and interesting regional foods, have joined forces with Taste of Home.
And I would officially like to commend them on their Very Good Decision. Why? Because they are in good company--I work with Taste of Home, too!
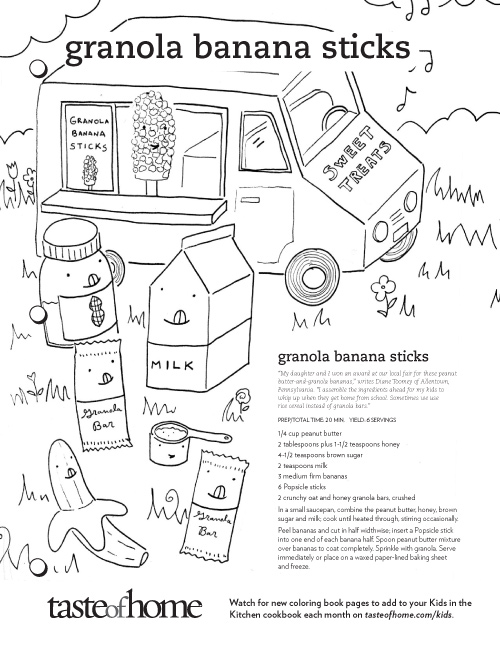
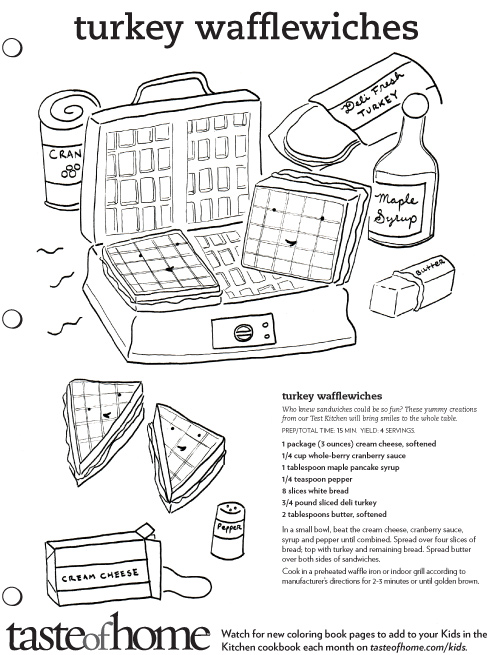
And it's because of that I feel that I am very well qualified to say that Taste of Home is totally sweet. I know this because I have visited their test kitchens, have done illustrations for the print magazine, and am a regular contributor to their website, where I design kid's coloring book pages.
CakeSpy Note: if you follow me on facebook or Twitter, you probably know I'm partial to adding bits of sweetness to my daily surroundings, via sidewalk chalk, small cutouts, and the like--I call it "gentle street art". I've decided to start posting a daily feel-good photo, for no particular reason other than to showcase these sweet little nothings, in hopes that they'll make you smile. Here's the first of...well, what promises to be many sweet images!
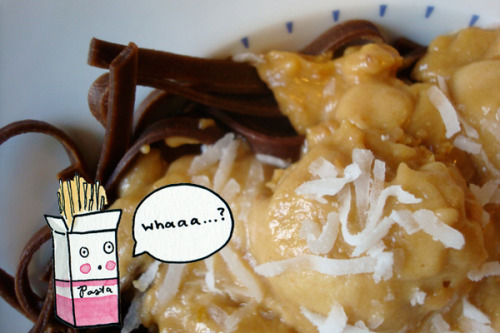
Oh, I’m sorry. Are you still eating regular pasta, like a jerk?
Time to get with the program: I’m talking chocolate pasta. It’s readily available online, and it’s well worth the investment.
But even an inherently perfect product like this can stand to become slightly awesomer, and so I propose Chocolate Pasta served with peanut butter cookie “meatballs” and a rich, crunchy peanut butter buttercream sauce. It may not be pretty, but it tastes like heaven on a plate. In fact, the only thing that might make it better is a thick slice of buttered pound cake on the side.
Lastly, this makes a swell April Fools’ dessert for someone or some people you love to have fun with
Usually, when someone brings you back a souvenir from their vacation, it's a cheesy t-shirt or small creature made from shells or snowglobe or something.
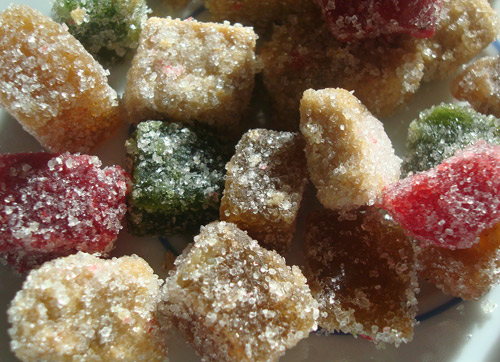
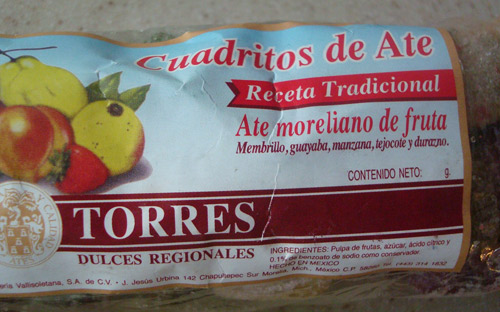
But not Diane, who you may know as the hottie who drives the truck called Street Treats in Seattle. When she recently took a Mexican getaway, she not only thought of me when she tried a local specialty called Ate, but she brought me back a big sack of this sweet stuff.
What is Ate? First off, let's make sure you're pronouncing it right. It's "ah-tay", so basically say "latte" but take off the L.
As to what it is, it's fairly simple: dried fruit paste coated in sugar. Kind of like real-fruit gumdrops. While it appears that quince is a popular variety, the bag Diane brought me has a mix of (if I translated it right) quince, guava, apple, and Mexican Hawthorn and peach (thanks Adela). The candies are lightly crunchy on the outside but tender on the inside, and what is nice is that they actually taste like fruit--not merely fruit-flavored candy. They are very sweet, however, so a little goes a long way.
Want to eat some Ate? You might have luck purchasing at a Mexican grocery store, if you've got one in your area; otherwise, find a recipe here. Thanks again to Diane from Street Treats for introducing me to this delightful treat!
Fact: earlier this week I called SpyMom and said "So much good stuff is happening right now, I'm scared that it means something bad is going to happen". SpyMom (in that no-nonsense New Jersey-for-life way she has) said "Quit being so Italian about it. Just enjoy it." Well, we are not Italian, but my grandma grew up in an Italian section of the Bronx, so I guess that counts.
Basically, that was the long way of telling you about all of this awesome stuff which has been going on:
And upon a walk to my closest newsstand, I found this to be fact. And picked up a stack. OK, so I knew it was going to happen. I just thought it was a few more days til it would appear on the street.
This was a very fun photo shoot, thanks to photographer Ingrid Pape-Sheldon, who is German, and while she speaks fluent English, there was just enough of a communication gap to make it very funny when she arrived to my store and said "I have seen many pictures of you on the internet". She then proceeded to tirelessly tease the best possible photo out of me, urging me to channel my "inner cupcake ninja" and telling me to "be fierce". No, really.
The article features a plethora of talented Seattle ladybloggers (yes, really just said that), including a few names you may recognize from bestseller lists and Martha Stewart and stuff, including (alphabetically) Shauna Ahern, Keren Brown, Alice Currah, and Molly Wizenberg. And you know, all of them look totally hot in the photos (perhaps they were all urged to "be fierce" as well).
...oh, and finally, not to sound bossy or anything, but my awesome book is now available for pre-order on Amazon. Just do it. You know you want to. Buy one now, forget about it, and buy another in October, when I come to your town on my (to be announced) book tour. It has, by the way, been deemed "the cutest book cover ever" by the esteemed Amster-Burton family. And this family is made of cute, so listen to them.
It is with a heavy heart full of sadness that I realize that many of you have never even heard of--much less tasted--the wonderful thing that is the Nanaimo Bar.
But it is with the lightness and joy of 99 luftballoons floating in the summer sky that I realize that I am going to show you the light, in the most delicious way possible.
That's right. It's time for an absolute education and delicious extravaganza featuring the Nanaimo Bar. This post is my entry for the Foodbuzz 24x24 project, and it's broken down into three parts: History (wherein you will get educated on the ways of the Nanaimo), Recipes (I made 7 different versions!), and Testimonials (loving thoughts and odes from eager eaters).
You say Nanaimo...
First things first. It's pronounced "Nuh-nye-moe". And it's named after the city where, if not officially where the bar was invented, the city where it came into its own. But don't worry, I'll tell you much, much more.
As previously mentioned, I realize that it is possible that you have never tried--or even heard of--the Nanaimo Bar, which I lovingly refer to as “the best thing Canada has ever invented”. Let me briefly try to explain its wonder of this three-layer no-bake bar cookie, building it from the bottom up:
The bottom layer is a sturdy, tightly packed layer of chocolate, graham cracker and coconut, bound together with melted butter. The middle layer is a buttery, frosting-y, creamy, custard-y stuff that is so much the opposite of low-fat that it makes you want to weep with pleasure. The top layer is a solid chocolatey layer, which is firm but not hard.
As you may have come to suspect, each layer is tasty enough to stand on its own--but when combined, you’ve basically got a triple threat of intensely rich, decadently condensed deliciousness.
That is to say--super yum.
But where did this bar come from?There’s a popular story about how the bars were the winner in a baking contest, invented by a housewife who named them Nanaimo Bars in a burst of civic pride. While said housewife does figure into the equation (see below), it’s definitely not the whole story.
There are several purported predecessors of the bar going by “New York Slice”, “Chocolate Slice”, “Refrigerator Cake”, “Miracle Bars”, “Ribbon Bars”, “Smog Bars” (or “London Smog Bars”).
It’s those Smog Bars, though, that seem to be the closest relative to the Nanaimo Bar, as evidenced by an interview with Jan Pare, who wrote Company's Coming: 150 Delicious Squares, who spent her formative years (1927-47) in Alberta, Canada:
"Nanaimo Bars were originally called Smog bars, and everybody made them: graham-cracker crust, cocoa, Bird's Custard in the filling. My Grandma Locke made smog bars, so did my mother."
Proof is in the pudding--or rather, custard: Bird’s Custard, a popular custard powder invented in the UK and a key ingredient in Nanaimo bars, easily could have immigrated to the area in the early 1900s when there was a large wave of new immigration from Europe; this would have been well-timed with the advent of iceboxes as a common household item in Canada, which would explain for the bar’s UK influence but Canadian birth.
In fact, the first published instance of the phrase Nanaimo Bars dates back to 1953, in the Vancouver Sun, but the recipe itself is for London Smog Bars, with a footnote that “These are also known as Nanaimo Bars”.
It doesn’t seem too far-fetched then, to conjecture that this confection, like those European settlers, migrated westward; a recipe that resembles the Nanaimo bar in basically all but name, entitled “Chocolate Slices”, was submitted by a Mrs. E. MacDougall in 1952 Women’s Auxiliary Cookbook.
But regardless of how they got there, one thing is for certain: even if they weren’t invented in Nanaimo, it is where the treat took root. And it’s here that the humble housewife mentioned earlier shows her important role: Mrs. Mabel Jenkins of Cowichan Bay submitted her recipe for the bars to the annual Ladysmith and Cowichan Women's Institute Cookbook, which was sold in the early 1950s in the region as a fundraiser. It was a popular favorite in the book, and because the bars are ridiculously delicious and keep well, the recipe gained popularity in the province's households and working-class towns, and was sold in many of the coffee shops on Nanaimo’s Commercial Street.
In more recent years, the bars have been called “Canada’s Favourite Confection”, and all I can say is, Butter Tarts never stood a chance.
Part 2: The Recipes
How did I do it? I made a variety of different types, starting with the traditional recipe, then creating several riffs on it (many inspired by other Canadian specialties!). I then got testimonials and stories from the eaters (scroll to below the recipes for those), who ranged from professional Nanaimo Bar eaters to first timers. Some were even Canadian.
Recipe 1: OFFICIAL NANAIMO BAR RECIPE
Bottom Layer
½ cup unsalted butter (European style cultured)
¼ cup sugar
5 tbsp. cocoa
1 egg beaten
1 ¼ cups graham wafer crumbs
½ c. finely chopped almonds
1 cup coconut
Melt first 3 ingredients in top of double boiler. Add egg and stir to cook and thicken. Remove from heat. Stir in crumbs, coconut, and nuts. Press firmly into an ungreased 8" x 8" pan.
Middle Layer
½ cup unsalted butter
2 Tbsp. and 2 Tsp. cream
2 Tbsp. vanilla custard powder (Cake Gumshoe Kate adds that if you don't have or can't find custard powder, instant vanilla pudding works in a pinch)
2 cups icing sugar
Cream butter, cream, custard powder, and icing sugar together well. Beat until light. Spread over bottom layer.
Top Layer
4 squares semi-sweet chocolate (1 oz. each)
2 Tbsp. unsalted butter
Melt chocolate and butter over low heat. Cool. Once cool, but still liquid, pour over second layer and chill in refrigerator.
---------------------------------
Recipe 2: Maple Nanaimo Bars
Bottom Layer
½ cup unsalted butter
¼ cup sugar
5 tablespoons cocoa
1 egg beaten
1 ¼ cups graham wafer crumbs
1 cup coconut
½ cup finely chopped walnuts
Middle Layer
½ cup unsalted butter
1 tablespoon cream
1 1/2 tablespoons maple syrup (the darkest you can find)
2 tablespoons vanilla custard powder (instant vanilla pudding works in a pinch)
2 cups confectioners' sugar
Top Layer
4 ounces good quality dark chocolate
2 tablespoons unsalted butter
Directions:
Prepare the bottom layer. Melt butter, sugar and cocoa in top of double boiler. Add egg and stir to cook and thicken. Remove from heat. Stir in crumbs, coconut, and nuts. Press firmly into an ungreased, parchment-lined 8" x 8" pan. Let chill in the refrigerator until cool to the touch.
Cream butter, cream, custard powder, maple, and confectioners' sugar together well. Beat until light; it should be a thick consistency, but still spreadable. If desired, stir in food coloring until completely mixed in. Spread over bottom layer, making sure that it is as flat as possible (I use a metal spatula to "scrape" it into a flat top). Return to the fridge until the middle layer is completely set. Sometimes I even put them in the freezer so that they will be extremely firm before adding the top layer.
Melt chocolate and butter over low heat. Once cool, but still liquid, pour over second layer, very gently spreading so that it covers the entire layer--you will need to do this fairly quickly so that the second layer doesn't start to melt or meld with the top layer. Let chill in the refrigerator for at least a half-hour. Serve lightly chilled, or let come to room temperature. When you're ready to serve, use a sharp knife to slice the bars, and keep a towel on hand to clean the knife frequently between cuts to ensure clean, good-looking bars which showcase the pretty layers.
----------------------------------------
Recipe 3: Blonde Nanaimo Bars
These have a white chocolate topping and a mix of cocoa and brown sugar in the base, making for maybe more of a dirty-blonde, but a very delicious variation.
Bottom Layer
½ cup unsalted butter
¼ cup granulated sugar
2 tablespoons brown sugar
3 tablespoons cocoa
1 egg beaten
1 ¼ cups graham wafer crumbs
1 cup coconut
½ cup finely chopped walnuts
Middle Layer
½ cup unsalted butter
1 tablespoon cream
2 tablespoons vanilla custard powder (instant vanilla pudding works in a pinch)
2 cups confectioners' sugar
Top Layer
3/4 cup white chocolate chips (I like Ghiradelli)
Directions:
Prepare the bottom layer. Melt butter and sugar in top of double boiler. Add egg and stir to cook and thicken. Remove from heat. Stir in crumbs, coconut, and nuts. Press firmly into an ungreased, parchment-lined 8" x 8" pan. Let chill in the refrigerator until cool to the touch.
Cream butter, cream, custard powder, maple, and confectioners' sugar together well. Beat until light; it should be a thick consistency, but still spreadable. If desired, stir in food coloring until completely mixed in. Spread over bottom layer, making sure that it is as flat as possible (I use a metal spatula to "scrape" it into a flat top). Return to the fridge until the middle layer is completely set. Sometimes I even put them in the freezer so that they will be extremely firm before adding the top layer.
Make the topping. Melt the white chocolate either in 20 second intervals or over low heat until it is smooth and creamy. Once cool, but still liquid, pour over second layer, very gently spreading so that it covers the entire layer--you will need to do this fairly quickly so that the second layer doesn't start to melt or meld with the top layer. Let chill in the refrigerator for at least a half-hour.
------------------------------------------------
Recipe 4: Maple Canadian Bacon Nanaimo Bars
Inspired by two other Canadian specialties, these bars were made with a "blonde" (sans cocoa) bottom layer, topped with a maple-infused buttercream center, all of which was topped off with a thick layer of white chocolate sprinkled with brown sugar and Canadian bacon baked until crispy with a maple glaze.
Bottom Layer
½ cup unsalted butter
¼ cup sugar
1 egg beaten
1 ¼ cups graham wafer crumbs
½ c. finely chopped pecans
1 cup coconut
Middle Layer
½ cup unsalted butter
2 Tablespoons cream
2 teaspoons maple syrup (I used grade B)
2 Tbsp. vanilla custard powder or vanilla instant pudding powder
2 cups confectioners' sugar
Top Layer
3-4 slices canadian bacon
2 teaspoons maple syrup
3/4 cup white chocolate chips
2 tablespoons brown sugar
Procedure
Melt the butter and sugar in the top of double boiler. Add egg and stir to cook and thicken. Remove from heat. Stir in crumbs, coconut, and nuts. Press firmly into an ungreased 8" x 8" pan.
Cream butter, cream, custard powder, sugar, and syrup together well. Beat until light. Spread over bottom layer, making sure that it is as smooth and flat as possible.
Prepare the bacon. Preheat your oven to 400 degrees and line a sheet with parchment. Place the canadian bacon slices on top of the parchment, and drizzle with the maple syrup. Place in the oven until it is very crispy, turning after about 5 minutes. For me, the slices were fairly thin so it only took about 10 minutes total to get them very, very crispy. Remove from the oven and let cool while you prepare the rest of the topping.
Melt white chocolate in the microwave in 20 second increments, stirring after heating, until it is melted and smooth enough to spread on top of the buttercream layer. Spread it on top as quickly and smoothly as you can.
Sprinkle the brown sugar on top of the white chocolate, and then crumble the bacon on top, making sure to get even coverage.
-----------------------
Recipe 5: Butter Tart Nanaimo Bars
For these babies, combined the regular Nanaimo bar crust recipe with that of Butter Tart filling. I omitted the raisins - not my style.
Bottom Layer
½ cup unsalted butter
1 cup brown sugar
1 egg, beaten
3/4 cups graham wafer crumbs, very fine
½ cup finely chopped walnuts
1/4 cup raisins (optional)
Middle Layer
½ cup unsalted butter
1 tablespoon cream
1 1/2 tablespoons maple syrup (the darkest you can find)
2 tablespoons vanilla custard powder (instant vanilla pudding works in a pinch)
2 cups confectioners' sugar
Top Layer
4 ounces good quality dark chocolate
2 tablespoons unsalted butter
Directions:
Prepare the bottom layer. Melt butter and sugar in top of double boiler. Add egg and stir to cook and thicken. Press firmly into an ungreased, parchment-lined 8" x 8" pan; bake in a preheated 325-degree oven for about 10 minutes. Let cool.
Cream butter, cream, custard powder, maple, and confectioners' sugar together well. Beat until light; it should be a thick consistency, but still spreadable. If desired, stir in food coloring until completely mixed in. Spread over bottom layer, making sure that it is as flat as possible (I use a metal spatula to "scrape" it into a flat top). Return to the fridge until the middle layer is completely set. Sometimes I even put them in the freezer so that they will be extremely firm before adding the top layer.
Melt chocolate and butter over low heat. Once cool, but still liquid, pour over second layer, very gently spreading so that it covers the entire layer--you will need to do this fairly quickly so that the second layer doesn't start to melt or meld with the top layer. Let chill in the refrigerator for at least a half-hour. Serve lightly chilled, or let come to room temperature. When you're ready to serve, use a sharp knife to slice the bars, and keep a towel on hand to clean the knife frequently between cuts to ensure clean, good-looking bars which showcase the pretty layers.
---------------------------------
Recipe 6: Nougabricot Nanaimo Bars
What is Nougabricot? It's a Québécois preserve consisting of apricots, almonds, and pistachios, that's what. Here's a Nanaimo bar made with a white chocolate topping studded with apricot, almond, and pistachio, inspired by this specialty.
Bottom Layer
½ cup unsalted butter
¼ cup sugar
5 tablespoons cocoa
1 egg beaten
1 ¼ cups graham wafer crumbs
1 cup coconut
½ cup finely chopped walnuts
Middle Layer
½ cup unsalted butter
1 tablespoon cream
2 tablespoons vanilla custard powder (instant vanilla pudding works in a pinch)
2 cups confectioners' sugar
Top Layer
3/4 cup white chocolate chips
About 3/4 cup of a mix of almond bits, dried apricots, and pistachios (make the mixture to the proportions of your liking)
Directions:
Prepare the bottom layer. Melt butter, sugar and cocoa in top of double boiler. Add egg and stir to cook and thicken. Remove from heat. Stir in crumbs, coconut, and nuts. Press firmly into an ungreased, parchment-lined 8" x 8" pan. Let chill in the refrigerator until cool to the touch.
Cream butter, cream, custard powder, and confectioners' sugar together well. Beat until light; it should be a thick consistency, but still spreadable. If desired, stir in food coloring until completely mixed in. Spread over bottom layer, making sure that it is as flat as possible (I use a metal spatula to "scrape" it into a flat top). Return to the fridge until the middle layer is completely set. Sometimes I even put them in the freezer so that they will be extremely firm before adding the top layer.
Melt white chocolate in the microwave in 20 second increments, stirring after heating, until it is melted and smooth enough to spread on top of the buttercream layer. Spread it on top as quickly and smoothly as you can. Directly after adding the topping, scatter the fruit and nut mixture on top to ensure that it sticks to the still-tacky white chocolate. Let set before serving.
---------------------------------
Recipe 7: Poutine Nanaimo Bars
So, I thought to myself, "what if I used a Nanaimo bar as the base for a batch of Poutine?". Poutine, of course, being that famous Eastern Canadian dish consisting of french fries topped with gravy and cheese curds (in NJ, where I grew up, we had a decidedly less pinkies-out version consisting of Cheez Whiz and gravy on fries, known as "disco fries"). Guess what? Not delicious. But pretty fun to make.
Bottom Layer
½ cup unsalted butter
¼ cup sugar
5 tablespoons cocoa
1 egg beaten
1 ¼ cups graham wafer crumbs
1 cup coconut
½ cup finely chopped walnuts
Middle Layer
½ cup unsalted butter
2 tablespoon cream
2 tablespoons vanilla custard powder (instant vanilla pudding works in a pinch)
2 cups confectioners' sugar
Top Layer
1 cup cheese curds ( had fairly big ones, which I warmed and kind of squished into place, which gave them a sort of ricotta cheese look)
1/2 cup gravy
Directions:
Prepare the bottom layer. Melt butter, sugar and cocoa in top of double boiler. Add egg and stir to cook and thicken. Remove from heat. Stir in crumbs, coconut, and nuts. Press firmly into an ungreased, parchment-lined 8" x 8" pan. Let chill in the refrigerator until cool to the touch.
Cream butter, cream, custard powder, maple, and confectioners' sugar together well. Beat until light; it should be a thick consistency, but still spreadable. If desired, stir in food coloring until completely mixed in. Spread over bottom layer, making sure that it is as flat as possible (I use a metal spatula to "scrape" it into a flat top). Return to the fridge until the middle layer is completely set. Sometimes I even put them in the freezer so that they will be extremely firm before adding the top layer.
Place the cheese curds on top of the Nanaimo Bars. Let come to room temperature before serving; ladle a little gravy on each slice before serving.
-------------------------
Part 3: Nanaimo bar Testimonials
To get a variety of reactions on La Belle Nanaimo, I took it to the street--literally.
First, I took a batch to the Seattle waterfront, set myself up nearby the ferry to Canada and swapped treats for tales, asking eaters "What's the best thing about a Nanaimo Bar?".
Most people were quite receptive to swapping treats for short tales, and after about 20 minutes my batch was gone. Some remembered the bars as a childhood treat; some recalled them from ferry rides; one person said that the best ones are found at the grocery store baker's case; and for some people, this was their first-ever Nanaimo bar experience (I'm so glad I got to share it with them).
My favorite response, as it happens, was from a homeless guy who asked if he could have one. After taking a thoughtful bite, he told me that these were much better than "the package cookies". This made me feel sort of like laughing, and sort of like crying, all at once.
Mr. Spy expands on what is so great about a Nanaimo Bar, including how it is better than Rick Moranis:
A couple of other store visitors, upon tasting the Maple Canadian Bacon Nanaimo Bars and the Blonde Nanaimo Bars, respectively (both were first-time Nanaimo bar eaters!) had this to say:
...and yet more eaters had this to say:
...but I will tell you the truth, after one bite of the poutine version, it became very clear that this probably is not a food trend that will take off, so I didn't serve those.
All in all, people loved learning about and devouring these delicious bars, and I feel as if I have done my job to spread the word about this sweet Canadian treat. So...til next time...
This week, when Mr. Spy and I made our usual visit to Calamity Jane's for breakfast, we saw a most beautiful sight: American Pie, which has been "about to open" for a very, very long time, has now officially opened its doors in Georgetown, Seattle.
Sadly, they are not open on Sundays, though, so we didn't get to try the pies.
However, trusted CakeSpy comrade Terri, who works at Calamity Jane's, gave us the 411. Terri can most certainly be trusted, for many reasons, including but not limited to A) the fact that she was the first customer on the first day that American Pie opened; and B) She is the type of person who hosts butter parties.
Terri reports that she has tried several types of their pie, and has officially developed a deep love for their Chicken Pot Pie; on the sweet front, a blueberry pie with lattice-top crust and mini pecan pies have also struck her fancy. The crust is an exceptionally flaky, buttery specimen, adding a nice, savory contrast to sweet fillings, and a buttery complement to savory fillings.
They also sell a variety of empanadas and Spanish cookies, says Terri. While on the one hand it may seem funny that an establishment called American Pie sells a variety of ethnic sweets, it really is kind of all-American in that our nation truly is a melting pot.
Wary of yet more pie in Seattle? Well, as Terri so aptly put it, "I love pie. I mean, putting delicious things in buttery crust--what could be better than that?". Amen to that--bring on the butter, bring on the pie, bring on the sweet revolution!
Of course, if you're in Georgetown on a sunday, when American Pie is not open, Calamity Jane's does have dessert:
American Pie, 5631 Airport Way South, Georgetown, Seattle.
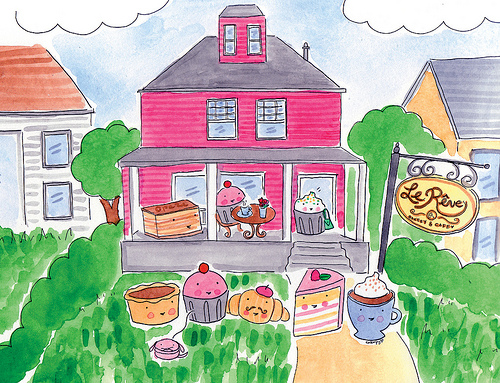
So. You probably already know that Seattle's Le Rêve Bakery is a sweet spot to pick up buttery Kouign Amann, croissants, and/or cloudlike macarons. In fact, I'd even deem it worth walking up Queen Anne hill (and to those who know this hill, this is very high praise).
But they're not just good bakers: they also have extremely good taste in art, as evidenced by the recent request of one of the owners that I create this custom piece, as a birthday surprise, for her co-owner! It features sweet treats (inspired by items on their menu) hanging outside of their bakery.
And then, upon receiving the finished artwork, she was so impressed that she commissioned a second one--for herself!
Now, if that's not a sweet story, I don't know what is.
Errors occurred while processing template[pageRendered/journal.st]:
StringTemplate Error: Can't parse chunk: {settingHomePageKBArticle}" target="_blank">Learn how.</a></li> <li>If you have already selected a front page, make sure it is enabled. Click on the Cubes icon (top right) and then click the "enable page" button.</li> </ol> </div>
: expecting '"', found '<EOF>'
StringTemplate Error: problem parsing template 'pageRendered/noDefaultModule': null
StringTemplate Error: problem parsing template 'pageRendered/noDefaultModule': null


 CakeSpy Note: This is part of a series of Pie Slam Profiles, featuring the recipes and stories of each of the 9 entrants in last week's Pi(e) Day Pie Slam! This entry is for Blueberry pie, by Wendy Johnson. Here's her story, followed by her recipe.
 No, that’s the one thing she couldn’t cook. They came out tough.
 Post a Comment