


Impress Your Friends: Stained Glass Cookies
Let's be honest. When we share our baked goods with others, it's not *only* to unselflessly share sweetness and love.
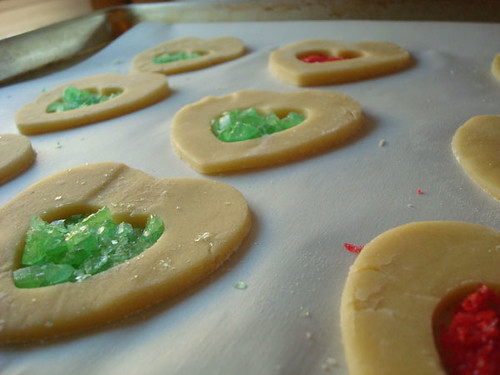
It's also to show off. And for a cookie that is really good for showing off, look no further than these stained glass cookies.
Guaranteed you'll get "oohs", maybe some coos, and a lot of questions about how on earth you did it. You don't have to tell; I'm not the boss of you.
But I will tell you how to do it, right here, right now. You start with a cutout cookie, fill it with crushed candy, bake it up, and voila. Total magic. And they taste good, to boot: buttery cookies with a sweet candy middle in whatever flavor you could possibly desire.
How's that for a Christmas miracle?

Stained Glass Cookies
Makes about 36 2 ½” cookies
- ¾ cup (1 ½ sticks) unsalted butter, at room temperature
- ¾ cup granulated sugar
- 1 large egg
- 1 teaspoon vanilla or almond extract
- ½ teaspoon salt
- 2 ½ cups all-purpose flour, sifted
- 6 to 8 ounces assorted translucent hard candies, such as Life Savers, divided by color and crushed finely
Procedure
- In the bowl of an electric mixer fitted with the paddle attachment, cream the butter on medium-high speed until creamy and smooth, about 2 minutes. Add in the granulated sugar and continue to beat on medium-high speed until light and fluffy, 2 to 3 more minutes.
- Reduce speed of the mixer to low, and stir in the egg, vanilla and salt. Scrape down the sides of the bowl if necessary using a rubber spatula. Stir until combined.
- With the mixer still on low, mix in the flour in 2-3 increments, pausing to scrape down the sides of the bowl as needed. Once it’s all been added, only mix until the dough comes together and there are no powdery traces of flour left. The dough may feel crumbly, but it should be easy to clump together.
- Divide the dough into two halves, and flatten into two disks. Wrap each in plastic wrap, and refrigerate until quite firm, at least three hours or up to overnight.
- Near the end of your cooling period, heat the oven to 350 degrees F. Line two baking sheets with parchment paper.
- Work with one disk of dough at a time to keep the dough from softening too much. Turn it out onto a lightly floured surface. Using a lightly floured rolling pin, roll the dough to an approximately 1/8″ thickness. Using 2″ to 2 1/2″ cookie cutters, cut the dough into shapes and place on your parchment-lined sheets. Using smaller cutters, cut the centers from each cookie.
- Note: If the dough is too firm to roll directly from the refrigerator, let it soften for a few minutes and then try again. It should become easier to roll after a few minutes at room temperature.
- Spoon about 1 teaspoon of crushed candy into the center of the cookie (a little more or less depending on the cutout size). You want to evenly cover the cutout portion with crushed candy, so that you can’t see the parchment below the candy and so that it reaches every nook and cranny of the cutout. If any candy-powder gets on the top of the cookies, dust it off.
- Bake until just golden at the edges and set on top, 7 to 10 minutes. Let the cookies cool on the baking sheets for 5 minutes before transferring with a spatula to wire racks to cool completely.
Store the cookies, layered between sheets of waxed or parchment paper, for up to a week in an airtight container.
 6 Comments
Reader Comments (6)
rae of <a href="http://www.lovefromberlin.net/">love from berlin</a>
Jess: I do like that candy taste. If you don't, I'd seek out fancier candies that you could melt down, at an artisan confectioner, or make your own hard candies!