Home Home Home Home Home Home Home
CakeSpy

Featured: 

My adventure at Ben & Jerry's in Vermont!


Unicorn Love: the Eating Disorder Recovery Blog


 Buy my brilliant books!

Buy my new book!

Buy my first book, too! 

CakeSpy Online Retail!


Archives
Gallery

Fantastic appliance for cake making on DHgate.com

everyrecipe.co.nz

Craftsy Writer

Entries in recipes (704)

Tuesday
Mar192013

2 Ingredient Chocolate Banana Pudding Recipe

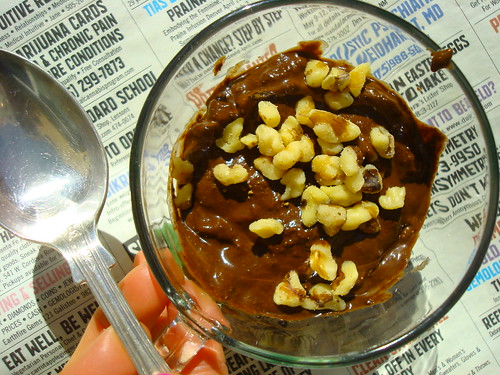
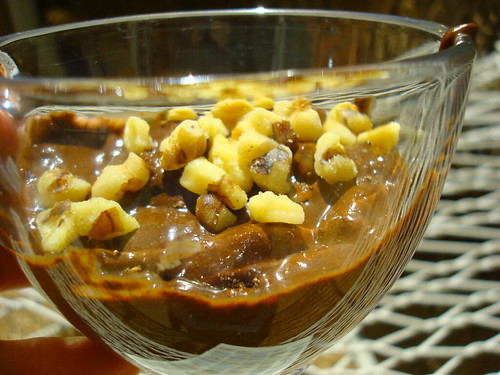
Chocolate Banana Pudding

Two ingredients, suckah! Well, OK, three if you include the optional garnish.

But wait. Let me back up and explain. 

If I were to make a list of "Highly Likely Places to Discover a Tasty Dessert", wellness blogs would probably not make the list. Nothing against wellness. But you know, those people who are dedicated to wellness frequently are not dedicated dessert-ers. 

Chocolate Banana Pudding

But I'll tell the truth, when I saw a recipe for Chocolate Banana Pudding on the Pacific Science Center's Wellbody Blog, I was curious. Especially since they advertised it as having 2 ingredients, and coming together in less than 2 minutes. Well, that sounded easy enough.

Chocolate Banana Pudding

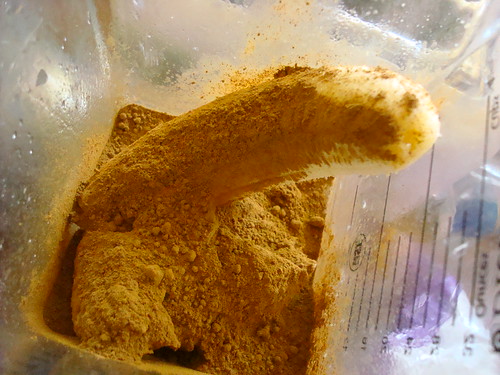
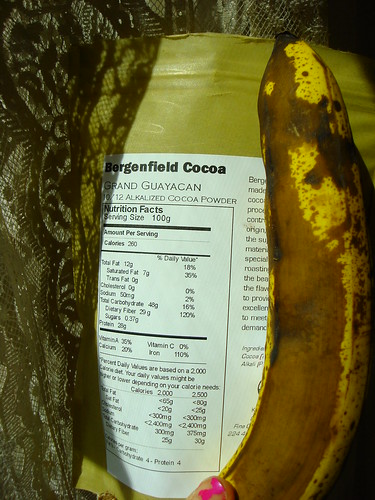
So, I grabbed a banana and put it in a blender with some cocoa powder I received as a sample (and P.S., I know my nails look terrible!). Chocolate Banana Pudding

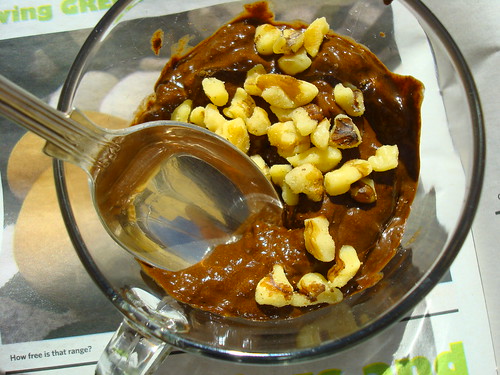
It's OK if the picture makes you titter. I blended til nice and combined and smooth. I put it in a cup. I added a few walnuts on top. And wouldn't you know...this stuff was really quite tasty. So, wellness blog, kudos! I'm happy to spread the word about this delicious and simple dessert which just so happens to be vegan and gluten-free.

Chocolate Banana Pudding

But don't be scared off by that, non vegans and gluten-lovers. This is tasty stuff. And you could always add ice cream if it seems too virtuous. 

2 Ingredient Banana Chocolate Pudding

  • 1 banana (ripe)
  • 1 tablespoon to 1/4 cup (whatever amount suits your taste) unsweetened cocoa powder, minimally processed

Mash the ingredients together until smooth. You can do this by hand, or (quicker) in a blender or food processor. If desired, garnish with nuts, fruit, or chocolate chips. Enjoy immediately.

Monday
Mar182013

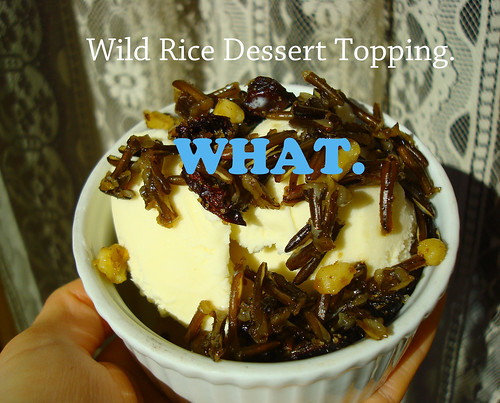
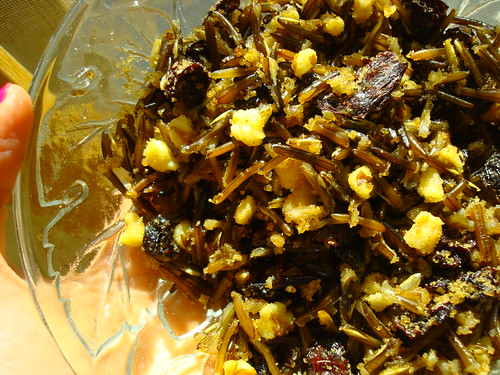
Unusual Sweet from Wisconsin: Wild Rice Dessert Topping

Wild Rice Dessert Topping

Recently, I found myself poring over the fantastic volume Hungry for Wisconsin: A Tasty Guide for Travelers. The reason why I was looking through this book is this: I was seeking out unusual regional specialties or bakeries that I simply needed to visit. What can I say? I love armchair food travel. 

Wild Rice Dessert Topping

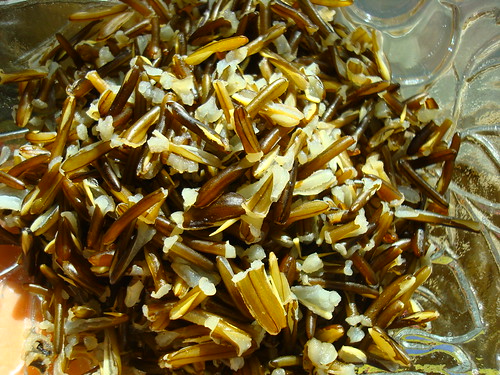
One thing caught my eye right away, as in on page 2: a story about wild rice in Wisconsin. As it turns out, wild rice is a pretty big deal in what many would consider the Dairy State. It grows "freely in cool, northern rivers, shallow lakes, and other wetlands", and commands a high price, because the harvest is done by hand. This love and care gives it a unique, nutty flavor that Uncle Ben could only dream of attaining. 

For generations, the Native Americans of the area have harvested rice in a ritual that brings together the whole family. Unfortunately, this tradition seems to have been dying in recent years. 

But at least a few brave Wild Rice soldiers want to bring back the tradition. And as part of their dedication to bringing back the wild rice harvest, the fine people of Bear Clan Wild Rice do various events to raise awareness.

Wild Rice dessert Topping

At these events, they hand out recipes for wild rice, including this unusual one, which is in the book and caught my attention right away: Wild Rice Dessert Topping. At first it struck me as an odd recipe, but when I thought about it further, it came to me sort of like this: I like rice. I like dessert. I think rice pudding is great, but why should it have all the fun?

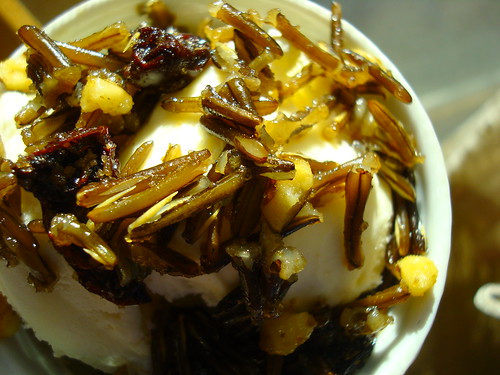
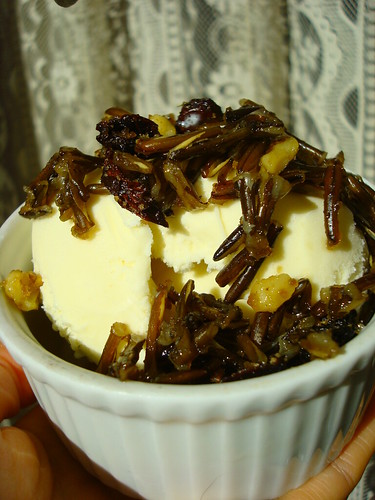
And so I gave it a try. If you have wild rice on hand, the recipe is a snap. Getting used to the flavor might involve a learning curve--it's definitely different. Earthy, and nutty, sort of granola-esque but with that distinct rice flavor, it works best with fairly neutral flavored desserts--I tried it on top of vanilla ice cream. It's a fascinating flavor, and once I got past the "oh! weird!" aspect of it, I found it highly enjoyable.

Wild Rice Dessert Topping (Printable recipe here!)

  • 1 cup cooked wild rice
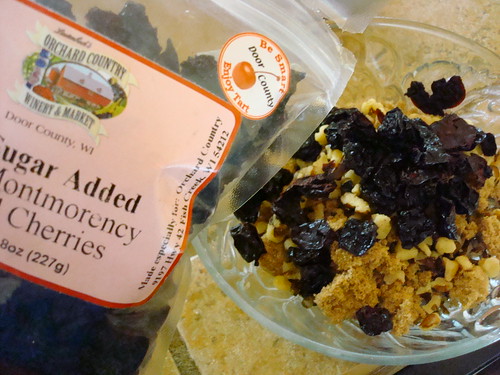
  • 1/2 cup brown sugar or maple sugar
  • 1/2 cup dried cherries (original recipe suggests dried cranberries or raisins)
  • 1/2 cup chopped walnuts (original recipe calls for pecans)

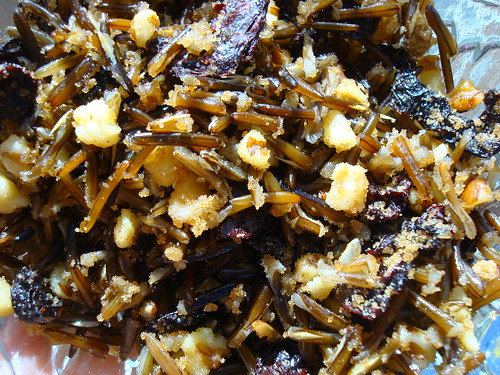
Combine all the ingredients together in a bowl. Wild Rice Dessert Topping

Cover and refrigerate for at least 20 minutes, so that it can all meld together. Wild Rice Dessert Topping Wild Rice Dessert Topping

Spoon the mixture over ice cream, custard, or pudding directly before serving.

Wild Rice Dessert Topping

Tuesday
Mar052013

A Historical Look at the Mexican Wedding Cake Cookie

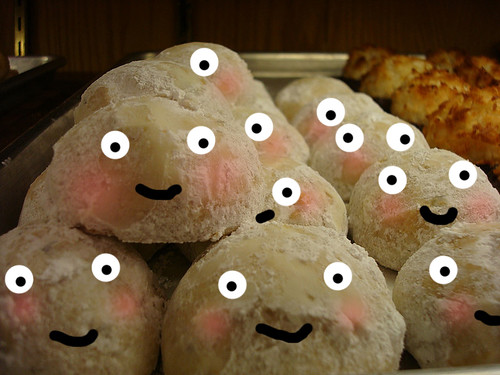
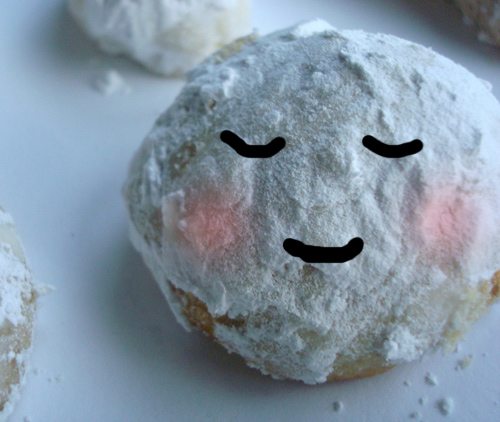
Mexican wedding cakes

Ah, Mexican Wedding Cakes: one of my favorite cakes that is not a cake at all, but a cookie!

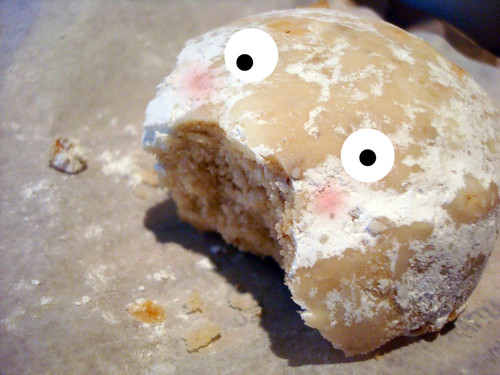
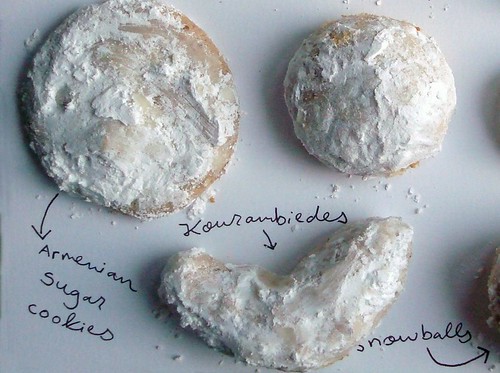
And oh, what a cookie. These rich cookies rolled in confectioners' sugar to resemble sweet little snowballs crumble in your mouth in the most delightful way: basically butter and (usually) finely chopped nuts held together by flour and sugar, they begin to shatter and disintegrate the moment they hit your tongue. You may know them as Mexican Wedding Cakes. Or you might know them, with slight variations, under another name: Snowballs, Moldy Mice, Bullets, Russian Teacakes, Melting Moments, Mandulás kifli, Polvorones, Sand Tarts, Sandies, Butterballs, Almond Crescents, Finska kakor, Napoleon Hats (whew!). Mexican wedding cakes

These cookies hail from as many countries as they have names: talk about a universal cookie.

Mexican wedding cakes

Considering the many variations, is it possible to connect the cookie to a particular place? Well, you might first look back to sugar-rich medieval Arab cuisine. Sweetmeats, candies, and confections containing nuts (usually almonds) and spices were served at special occasions. Next, you spread it to Europe, a sweet tradition quickly adopted by Moors and taken to Spain. From then on it’s like playing Telephone: the concept of the cookie traveled far and wide, with each region taking on their own variations based on ingredients available at the time. This sweet cookie concept was then introduced to the New World by early explorers. Fast forward, and you've got a cookie tradition that has persisted due to the cookie's relative ease in preparation and simple but ultimately satisfying tastiness. 

Mexican wedding cakes In the 1950s, they started to appear in American cookbooks as Mexican Wedding Cakes, but it seems that it's really just a new name for an old cookie. They're nearly identical to Russian Teacakes, which were a popular dish at noble Russian tea ceremonies in the 1800s. A popular book in Russia from this era, entitled A Gift to Young Housewives, contains several morsels that are constructed similarly; it’s not hard to see how these treats came to be called Russian teacakes. So what's with the name's cultural makeover? I'm wondering if perhaps the name change was a Freedom Fries-esque name change in the 1950s and 1960s, when the Soviet Union and the United States were at odds with one another? It does seem to have coincided with a period during which TexMex cuisine made its entry into American culture in a big way.

But no matter what you'd like to call them, one thing remains true across cultures: these simple cookies are easy to make, and absolutely delightful to eat. Mexican wedding cakes

Mexican Wedding Cakes (Printable version here!)

Makes about 2 dozen 1-inch cookies

  • 1/2 cup unsalted butter
  • 1/4 cup confectioners' sugar
  • 1 cup all-purpose flour, sifted
  • 1/2 cup finely chopped walnuts or pecans 
  • 1 teaspoon vanilla
  • Confectioners' sugar, for rolling

 Procedure

  1. Preheat the oven to 325 degrees F. Line two baking sheets with parchment paper.
  2. In the bowl of an electric mixer, cream the butter and sugar until light and fluffy.
  3. Add the flour gradually, beating well after each addition; pause to scrape down the sides of the bowl with a rubber spatula.
  4. Add the nuts and vanilla; beat just until evenly mixed in.
  5. Shape the dough into balls about 1 inch in diameter and place on the cookie sheets.
  6. Bake for 15 to 18 minutes, rotating the position of the pans halfway through baking; the cookies are finished when they are lightly browned on the bottom and have a dull finish on top.
  7. Let the cookies cool on the pan for 5 minutes before transferring to a wire rack. While the cookies are still warm, gently roll them in a bowl of confectioners' sugar. Tap off the excess, and allow them to cool completely. When cool, roll them in the confectioners' sugar a second time before serving; the first coat tends to slightly melt into the cookie, and the second coat will ensure a pretty, snowy appearance.
  8. Store in a single layer in an airtight container for up to four days.
Wednesday
Feb272013

Teatime Tastiness: Lady Baltimore Cake Story and Recipe

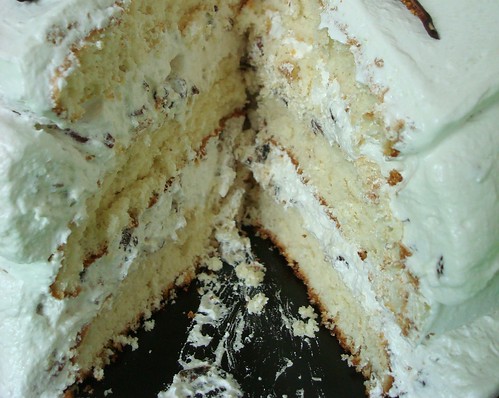
Lady Baltimore cake

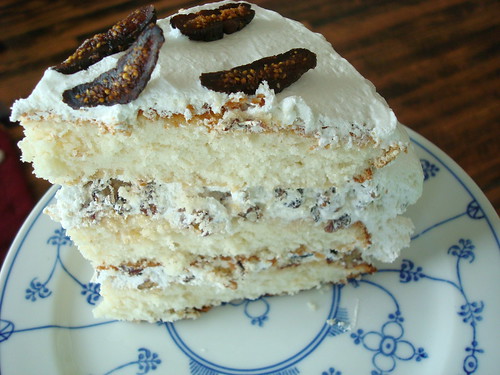
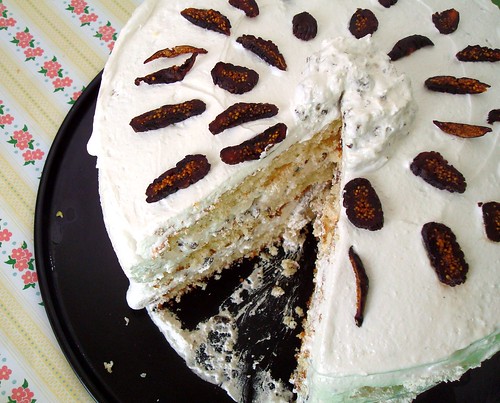
Here’s a cake that was built for genteel tea parties: a large layer cake filled with chopped nuts and dried fruits and topped with a dramatic (but ever ladylike) billow of boiled frosting. But while one might suppose that this distinguished cake was named after Lady Baltimore, that's not quite how the story went. Like many cakes, its origins are disputed--but like any teatime gossip, this makes the story so much more fun to delve into. A very helpful resource in my delving was The Old Foodie, by the way. Oh, and if you like tales like this, you should probably pre-order my new book, The Secret Lives of Baked Goods: Sweet Stories & Recipes for America's Favorite Desserts.

Lady Baltimore Cake

Let's start with the tales that are likely false. First: the Lady Baltimore connection. Highly unlikely that the cake dates back to her day: the Lady, whose Irish husband inherited Maryland in the mid-seventeenth century, never even lived in America, and in any case baking powder leavening agents were not invented until well into the nineteenth century – making a cake of this sort not very likely to have been invented as a casual teatime treat during her day. The Big Fella of American Cookery, James Beard, says of Lady Baltimore that it is “said to have originated in Maryland, this one one of the first fine-textured cakes mentioned in old cookery books. It required a delicate touch in mixing and exact measurements--this, in the days of no standard measuring cups, teaspoons, or tablespoons.” Second: the Dolley Madison connection. Some say that the cake rose in popularity due to the fact that it was similar to a cake enjoyed by Dolley Madison, the fourth First Lady but this story fails to explain why it is not then called Dolly Madison cake. Also, she's already got an ice cream named after her—isn't that enough?

And now, the favored explanations for the cake—likely, the true story is a combination of the two. First: It originated in Charleston at the end of the nineteenth century, at “The Lady Baltimore Tearooms”, and was a variation of another popular cake.

Lady Baltimore Cake

Second: novelist Owen Wister is the one who made this cake famous--while writing his 1906 romance, Lady Baltimore, set in a fictional city based on Charleston, he was extremely taken with the city and a cake he ate there. In fictional form, it is described as being not unlike a wedding cake, and the suggestive passage is as follows:

"I should like a slice, if you please, of Lady Baltimore," I said with extreme formality. I thought she was going to burst; but after an interesting second she replied, "Certainly," in her fit Regular Exchange tone; only, I thought it trembled a little.

I returned to the table and she brought me the cake, and I had my first felicitous meeting with Lady Baltimore. Oh, my goodness! Did you ever taste it? It's all soft, and it's in layers, and it has nuts--but I can't write any more about it; my mouth waters too much.

Upon reacting in a strongly favorable way, the narrator realizes that the girl he’d been speaking to was the cake-maker. He finds that it has broken the ice, and their sweet flirtation continues. Some say that it is an instance of art imitating life: could it be possible that Wister had been served some delicious cake by an appealing Southern belle, and was inspired to immortalize the experience?

Supporting this is the fact that there seems to be no mention anywhere of a cake called “Lady Baltimore” until the first known publication of the recipe in 1906. Suddenly there was a flood of newspaper articles mentioning the cake; one writer in 1907 only agreeing to part with the recipe ‘with the sanction of Owen Wister’. Most likely? The cake preceded Wister's novel, but was renamed toute-suite after the novel's popularity became evident. Perhaps some entrepreneurial cake-shop owner took note after reading the book and tweaked the recipe to live up to the novel. Perhaps it was even the ladies at the Lady Baltimore Tea Rooms in Charleston.

Lady Baltimore, in cake form, has a male companion: the Lord Baltimore Cake. This yellow cake variation was created as a clever way to use up all of the egg yolks discarded while making the Lady version of the cake, yielding a rich, decadent counterpart.

Lady Baltimore Cake

Delicate and fine-crumbed, this cake is nicely paired with the rich fillings and toppings which keep it from being too light and angel food-like. Precision with the cake is necessary to get the “lift” from the egg whites, but it's worth the effort: it makes for sweet, easy eating, and the cake's history will make for some fascinating conversation.

Lady Baltimore Cake (printable recipe here!)
16 servings

  • 3 cups flour
  • 1 tablespoon baking powder
  • 1/2 teaspoon salt
  • 1 cup (2 sticks) unsalted butter, softened
  • 2 cups sugar
  • 2 teaspoons vanilla extract
  • 1 cup milk
  • 7 large egg whites
  • 1/4 teaspoon cream of tartar

Boiled frosting (recipe follows)

  1. Preheat the oven to 325 degrees F. Grease and flour the bottoms and sides of three 8-or 9-inch round cake pans; line with rounds of parchment paper.
  2. In a large bowl, sift together the flour, baking powder, and salt. Set aside.
  3. In the bowl of a stand mixer fitted with the paddle attachment, cream the butter with the sugar until the mixture is light and fluffy, about 3-5 minutes on medium speed. Stir in the vanilla.
  4. Add the flour mixture to the butter mixture in 2-3 additions, alternately with the milk, and stir the batter until it is just combined.
  5. In another large bowl, beat the egg whites, cream of tartar, pinch of salt until they form stiff peaks.
  6. Stir a portion of the egg whites into the batter to lighten the mixture; follow by gently folding in the remaining whites.
  7. Divide the batter evenly among the prepared pans. Use a spatula to smooth the top of the batter in the pans.
  8. Bake for 25-35 minutes, or until a tester comes out clean.
  9. Let the cake layers cool in the pans on racks for 10 minutes, turn them out onto the racks, and let them cool completely. If the cakes have formed a dome on top, slice using a serrated knife to level. 

Boiled frosting

  • 6 large egg whites
  • 2 cups sugar
  • 3/4 cup water
  • 2 teaspoons vanilla extract
  • 1/2 cup finely chopped dried figs plus sliced dried figs for garnish
  • 1 cup pecans, toasted lightly and chopped fine, plus pecan halves for garnish
  • 1/2 cup raisins, chopped
  1. In the bowl of a stand mixer, beat the egg whites until they hold soft peaks. Set aside.
  2. In a small saucepan over medium-high heat, combine the sugar and the water, stirring occasionally. Once it comes to a boil, continue stirring, more frequently, until the sugar is dissolved; boil the syrup until it registers 248 degrees F on a candy thermometer.
  3. With the mixer running add the hot syrup to the egg whites, in a slow, steady stream.
  4. Add the vanilla, beating the icing until it is smooth and cool.
  5. Transfer two cups of the frosting to a bowl. With the remaining portion of frosting, fold in the chopped figs, pecans, and raisins.
  6. Place the first cake layer on a serving plate, flat (un-cut) side up. Spread it with half of the fruit and nut-filled frosting, keeping a ½ inch margin around the edges—the weight of the next layer will spread the filling to the edges. Place another cake layer on top of the frosting, once again so that the flat side faces up. Spread the remaining fruit and nut-filled frosting on top of this layer, once again leaving a margin. Place the third cake layer on top, flat side up. Use the reserved plain frosting to frost the top and sides of the cake. Garnish with any remaining fruit or nuts.
Thursday
Feb142013

Salted Butterscotch Cashew Shortbread Bars 4 Eva

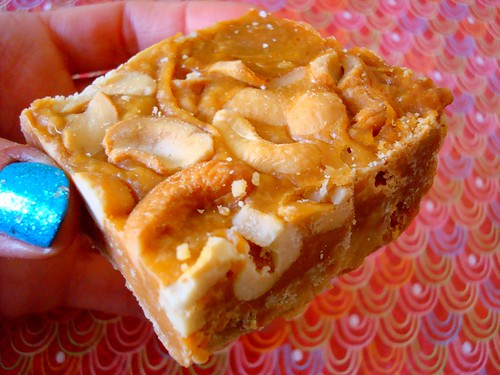
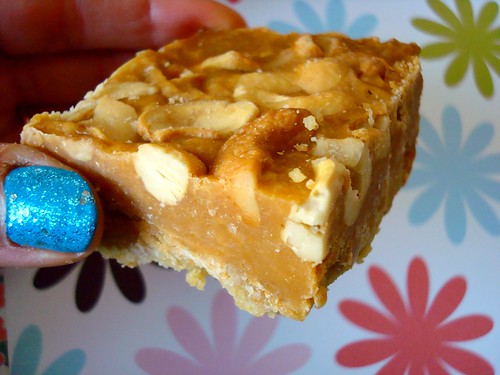
Salted butterscotch cashew shortbread bars

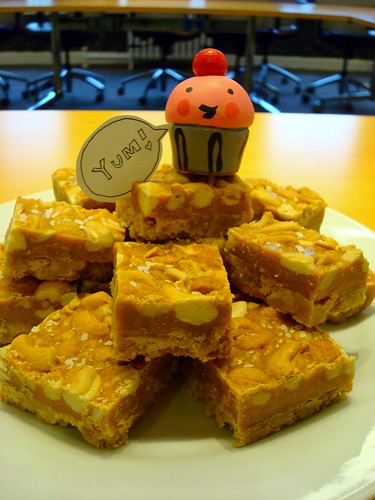
Salted. Butterscotch. Cashew. Shortbread Bars. It's necessary to pause while considering the sum of these awesome parts, which heighten the experience of each to a sort of baked goods nirvana state.

It's a recipe that I came up with for the Walkers Shortbread challenge, but for the event, I honed and perfected it, and here is what I consider the absolute ideal version of the recipe. 

Salted butterscotch cashew shortbread bars

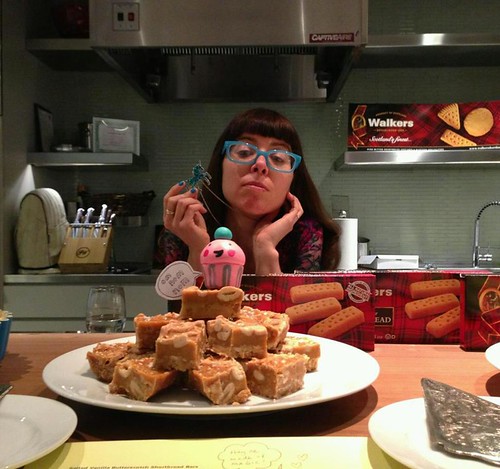
I'll tell you the truth: I didn't win the competition with these. But I think that I win at LIFE, because I have the ability to make this recipe whenever I want! Me and my Salted butterscotch cashew shortbread bars Plus, when it came to the end of the event, there were only a few left, so I think the crowd liked 'em! 

Salted butterscotch cashew shortbread bars

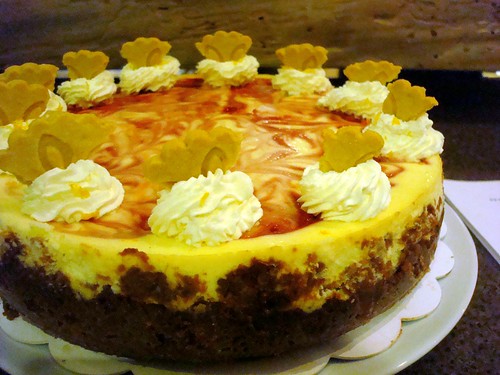
I should mention that it was a great event, btw. I got to meet Susan of Girl in the Little Red Kitchen, who brought a killer cheesecake (and who like me is a proud pug parent): Walkers shortbread event

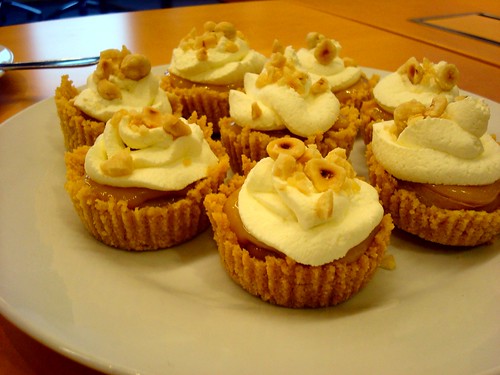
Serena of Big Apple Nosh, who brought these ridiculous Hazelnut Banoffee Tartlets: Walkers shortbread event

and Emily of Nomnivorous, who brought the most beautiful boozy pie I've ever seen; I got to hang out with Alejandra Ramos and a bunch of other cool dudettes (and a couple of dudes).

Oh oh oh! Here is the recipe. I should note that you'll see that the pan I used is bigger--I doubled the recipe and it worked fine.

Oh, and--you're so very welcome.

Salted butterscotch cashew shortbread bars

Printable Recipe here!

Salted Butterscotch Cashew Shortbread Bars
Makes 1 big serving (kidding. sort of)

  • 2 boxes Pure Butter Shortbread
  • 3 tablespoons butter
  • 1 package (10 to 11 ounces) butterscotch chips
  • 1/2 cup light corn syrup
  • 3 tablespoons butter
  • 2 teaspoons cream
  • 1 teaspoon vanilla
  • 1 cup coarsely chopped nuts (I suggest cashews or pecans)
  • coarse sea salt

Procedure

  1. Preheat the oven to 350 degrees F. Grease an 8 or 9-inch square baking pan.
  2. Combine the cookies and melted butter in a food processor or blender with a pulse mode. Press it into the pan. Bake for about 10 minutes, or until lightly golden on the edges. Remove from the oven.
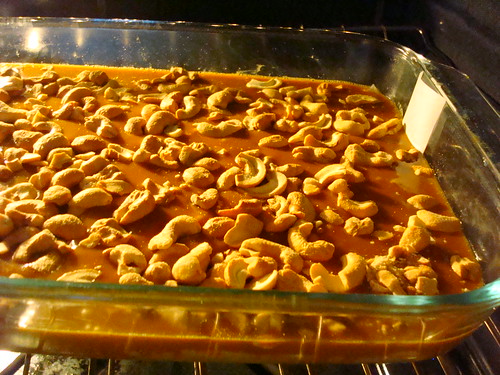
  3. Meanwhile, in a small saucepan, combine the butterscotch chips, corn syrup, butter, cream, and vanilla. Cook and stir over medium heat until smooth.
  4. Spread over crust. Sprinkle with the nuts; press down lightly. Bake for 11-13 minutes or until topping is bubbly and lightly browned. Cool on a wire rack. Sprinkle with coarse sea salt. Cut into bars when totally cool. 
Tuesday
Feb122013

Heart Shaped Peanut Butter and Jelly Roll Cake for Peanut Butter and Company

I’m not saying that you should totally ignore chocolate on Valentine’s Day. But…why not also include a cake that is more fun to make with a partner: the Peanut Butter and Jelly Roll! If you’ve ever made a Jelly Roll cake at home, you know that it can be hard to handle the rolling of the cake while baking solo–so why not employ your Valentine with this most delicious task? You’ll be rewarded with a delicately spongy cake which gives way to a rich, deliciously smooth white chocolate peanut butter filling, beautifully paired with sweet strawberry jelly. Bonus points if you roll it into the shape of a heart! This is an adaptation of a classic Jelly Roll recipe I discovered in Taste of Home.

For the full post and recipe, visit Peanut Butter and Company!

Wednesday
Feb062013

Salted Vanilla Butterscotch Shortbread Bars Recipe

Salted Vanilla Butterscotch Shortbread Bars

I need to tell you about a bar I love. No, it's not a place to get crunk and meet people to hook up with. It's a bar cookie. Its name (happy dance) is Salted Vanilla Butterscotch Shortbread Bar. And what a bar cookie it is. And it's one that I give myself credit for: It's a bar I dreamed up for an upcoming Walkers Shortbread event, and for which I was given Walkers Shortbread cookies to bake with. Yeah! 

Salted Vanilla Butterscotch Shortbread Bars

This was my "dry run" for the event, which will be next Monday, and I am quite happy with them. When it comes to the bar's taste experience, let me be to the point. This is a perfect bar cookie. It's buttery, butterscotchy, rich and gooey, nutty-crunchy, and then oh my god there's salt on top sort of treat. I'd like to offer you one, but I think I am going to hoard them.

Salted Vanilla Butterscotch Shortbread Bars

One thing I think I will change for the event is the type of nuts. The pecans I used this time make them LOOK like your typical pecan bar, which is not such a bad thing, but the taste is rather different. So I think I may use cashews or walnuts for the event. Feel free to use whatever type of nuts you'd like, of course. 

Salted Vanilla Butterscotch Shortbread Bars

Salted Vanilla Butterscotch Shortbread Bars (Printable recipe here)

Makes 1 big serving (kidding. sort of)

  • 2 boxes Pure Butter Shortbread rounds
  • 3 tablespoons butter
  • 1 package (10 to 11 ounces) butterscotch chips
  • 1/2 cup light OR dark corn syrup (whichever you prefer!)
  • 3 tablespoons butter
  • 2 teaspoons cream
  • 1 teaspoon vanilla
  • 1 cup coarsely chopped nuts (I suggest cashews or pecans)
  • coarse sea salt
  1. Preheat the oven to 350 degrees F. Grease an 8 or 9-inch square baking pan.
  2. Combine the cookies and melted butter in a food processor or blender with a pulse mode. Press it into the pan. Bake for about 10 minutes, or until lightly golden on the edges. Remove from the oven. 
  3. Meanwhile, in a small saucepan, combine the butterscotch chips, corn syrup, butter, cream, and vanilla. Cook and stir over medium heat until smooth.
  4. Spread over crust. Sprinkle with the nuts; press down lightly. Bake for 11-13 minutes or until topping is bubbly and lightly browned. Cool on a wire rack. Sprinkle with coarse sea salt. Cut into bars. 
Wednesday
Jan302013

Pudding Made With Pudding: Superpudding!

Superpudding

When I looked "pudding" up in the dictionary, it was defined as "a cooked sweet dish served after the main course of a meal: example, rice pudding". Another dictionary defined it as "a dessert with a creamy consistency". I'm going to be so bold, at this point, to say that the dictionary's definitions are highly underwhelming and don't do pudding justice at all.

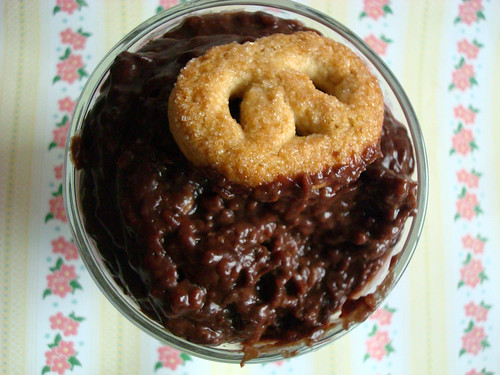
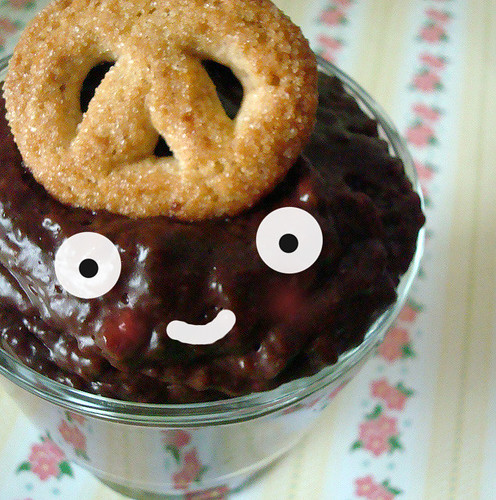
Especially when it's pudding like the specimen pictured above, and which I'd like to talk about with you today, which I am going to try to sum up in a single, humble word by calling it...SUPERPUDDING.

You see, it must be called Super because if all pudding is at least good, this one is great. The secret to its success? It's made, instead of milk, with pudding. I know--your head just exploded at the mere concept.
Superpudding

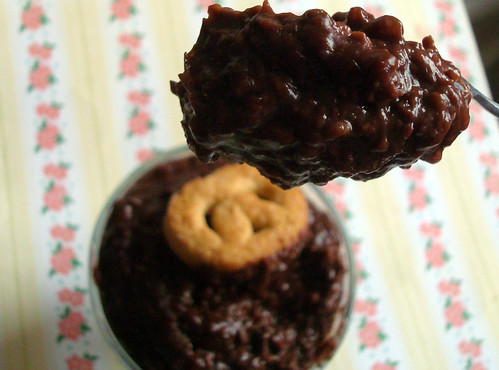
You heard that right. The pudding is mixed with...well, pudding, to create a new variety of the dessert you thought you knew. What separates it from the rest is most notably consistency. If you like a pudding that has the texture of loose yogurt, then don't bother, just go to another website.. But if you like a pudding that is so thick and flavor-packed that it coats the tongue, then this one is for you.

In fact, it is so thick that if you turn a spoonful of it upside down...it will stick to the spoon. I'm totally not kidding.
Superpudding

But how do we mere mortals make this ambrosial dish? It's easy.

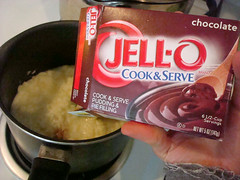
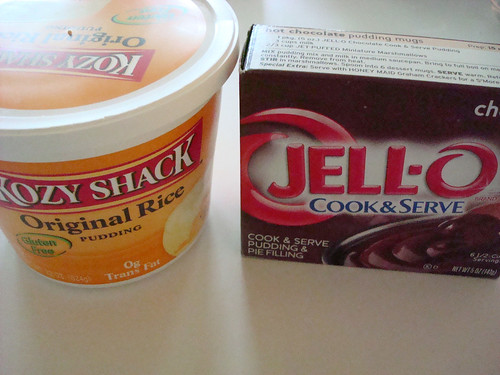
All you do is get a box of cook and serve pudding. And you follow the package instructions. But instead of milk, you use pudding. Pre-made. It can be homemade, but you might lose your sense of urgency by waiting for it to cool. 
Superpudding

The pudding mix requested 3 cups of milk; the pudding was just under 3 cups' worth, so I figured...meh, close enough. So I just replaced "milk" with "rice pudding" in the recipe. Superpudding
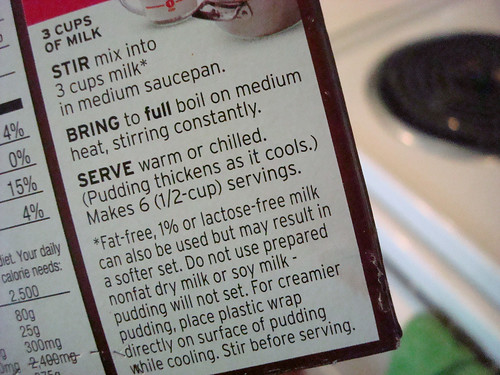
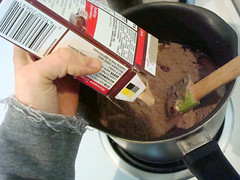
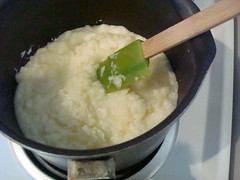
I started by pudding the rice pudding in a saucepan. Then I added the pudding mix.
SuperpuddingSuperpudding


SuperpuddingSuperpudding

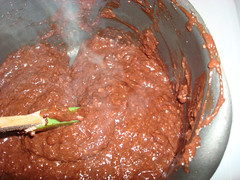
Then, I heated it up. I shoud tell you, though, pudding does not heat like milk. It won't start to simmer, it will start to scorch. So you just keep stirring like your life depended on it so it doesn't scorch, and when it starts to thicken, remove it from the heat.

Give it another stir or two, transfer to a heatproof bowl, and let it chill out in the fridge for a while. Unless you like warm pudding, in which case you can just let it cool until it's warm and not tongue-burningly hot.

Either way, it's going to thicken...a LOT. 
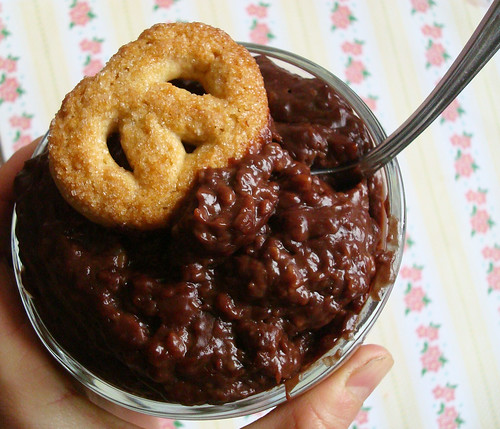
Superpudding

I put mine in pretty parfait cups, and so it didn't look like a chocolate mess, I added a butter cookie for a little color contrast. 

So, let me tell you more about the pudding. Like I have mentioned...it's so thick. To make a comparison, it's almost like the difference between a generic supermarket yogurt and a very thick greek yogurt in terms of how thick it is. 

I loved the combination of rice pudding and chocolate, too. The thickness really seemed to compress everything into an intensely textured and flavored treat. It tasted far more decadent than your everyday chocolate or rice pudding. I was curious to see how it might fare if I let it cool even more, put it into molds or ice cube trays and let it freeze--it seemed like it might be like a frozen truffle or something. Or at least a super-tricked out pudding pop. 

I love you, Superpudding. 
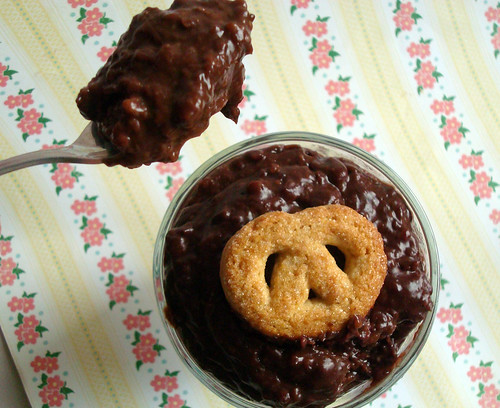
Superpudding 

Superpudding

  • 1 22 ounce tub of pudding (I used Kozy Shack rice pudding)
  • 1 box cook and serve pudding (I used a 6 ounce box of chocolate pudding)

Procedure

  1. Combine pudding and pudding mix in a medium saucepan on low heat. Stir constantly; after a while, the heated mixture will scorch if you are not constantly stirring. At this point, remove from heat. Put in a heatproof bowl and place plastic wrap directly on top, to keep a skin from forming. 
  2. Let cool entirely, if you like your pudding cold. Serve in pretty cups. Keep leftovers refrigerated.


Tuesday
Jan292013

Sweet Attempt: Mac and Cheese Cookies Recipe

Mac N Cheese Cookie

We all have baking failures. Until yesterday, I considered Mac and Cheese Cookies one of mine. I mean, seriously. Mac and Cheese is delicious. Cookies are delicious. But when I tried to combine them into one unholy cookie foodstuff, it was so clearly a mistake. They're from different worlds! This is an ill-fated love story that really has no happy ending.

Until yesterday, that is, when someone spied the old photo of these cookies on Flickr and sent me an email imploring, "Please, please, please can you give me more info on these? Did you make them? Do you have a recipe? Were they as delicious as they look?"

Well, yes, dear reader, I can send you a recipe. But no, I wouldn't say they were delicious. They were strange, not rocking the sweet and salty thing the way that some cookies can, too savory to be dessert-ish but not sweet enough to be a true cookie experience. I think that maybe without the noodles they would stand a chance, might even be good...but...as much as I wanted it to work, no.

Mac and Cheese Cookies

All the same, it is a fun memory for me. I remember how excited I was about the cookies; I remember how very badly I wanted them to taste good. They might be right up someone's alley--but I don't think they're quite ready for the masses yet. Or maybe they are? Just in case, from the archives, here's the recipe. Choose your own adventure!

Mac and Cheese Cookies (Printable Recipe Here!)


  • 1 cup cooked elbow macaroni
  • 1 cup grated cheddar cheese
  • 1/2 cup unsalted butter, softened
  • 1 cup sugar
  • 1 egg
  • 3/4 cup light cream
  • 2 cups flour
  • 1/2 teaspoon baking soda
  • 1/2 teaspoon salt


For the icing

  • 1 cup grated cheddar cheese
  • 1/4 cup cream
  • 2 cups confectioners' sugar
  • more cream, to thin


  1. Make the cookies. Blend flour, baking soda, and salt together in a large bowl; put off to the side.
  2. Mix butter, sugar and egg until fully incorporated; Stir in cream.
  3. Add flour mixture little by little, stirring well with each addition, until fully incorporated. Stir in the cheese and elbow macaroni.
  4. Allow the dough to chill for about an hour.
  5. Preheat oven to 400°F.  
  6. MacnCheese Cookies
  7. Using a teaspoon or a mini ice cream scoop, drop rounds of dough on your lightly greased cookie sheet, leaving at least 2 inches around each dough ball.
  8. Mac and Cheese Cookies
  9. Bake for 8 to 10 minutes. The cookies will not be brown on top, but will have a slight toasty color on the bottom. Let them cool on the sheet for a few minutes before transferring them to a wire rack to cool completely.
  10. Mac and Cheese Cookies
  11. Make the icing. In a small saucepan over low heat, melt the cream and grated cheese. Once melted and liquid, begin to stir in the sifted confectioners' sugar. If it gets too thick, add a little more cream. Use to glaze over the cooled cookies.


Monday
Jan282013

Staples Sells Sweets and I Made Something Tasty With Them

Buttery cookie bars

Let's say I was a bit surprised when Staples contacted me to ask if I wanted to do a review for them. My response was something like, "dudes, you do know this is a dessert blog, right?"

But I stayed with them, and I was glad I did. Because for one thing, I learned that apparently supplying food (including snacks and sweets) to offices and corporate accounts is a very big part of Staples' business. Who knew?

Additionally, I was glad because they offered to give me a tablet to test out with my bloggity-blogging. I was just fine with this. I like stuff like that.

Whoa

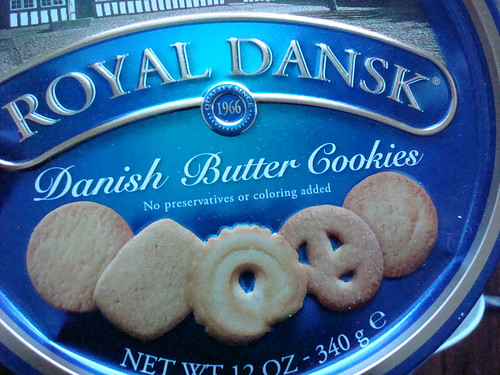
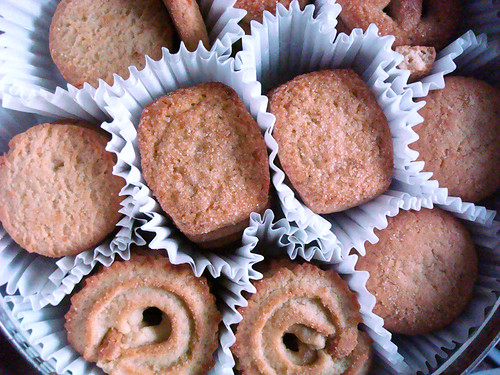
 So Staples went ahead and sent me a parcel including a tablet--the Nexus 7--and a big tin of cookies. The picture to the left shows me taking a picture of the tablet with my phone after opening it. Whoa, technology rabbit hole! I was especially excited about these Dansk cookies, because my grandma always used to buy them for us, and I would zero right in on the pretzel cookies. I mean, they're sweet! Cookies! But they LOOK like pretzels! It confounded my 6-year old mind. I was happy to see the cookies again.

Cookies

So, first, since they were nice enough to send it, my thoughts on the Nexus. I connected it to my at home wifi connection and used it to find some baking ideas which I could use with the butter cookies. I found that it connected very fast, seamlessly, and that the visuals were very nice. I also found that it was VERY handy to use for displaying recipes in the kitchen--so much easier than a laptop. And easier to clean. 
Also nice--the Nexus was easy to hook up my google account with, so it was very easy to plug in all of my info. I found that while it wasn't quite easy to say, create a blog post, on the tablet, it was very easy to log in and make changes to existing blog posts or respond to comments.
But anyway, let's get back to those cookies. Like I said, apparently Staples sells a lot of food. And surprisingly, a lot of it is dessert or sweet stuff. 

Buttery cookie bars

What I did with those cookies is this. First, I opened them up and took a nice long look. Then I asked, "are you ready to meet your destiny?". There was no response.

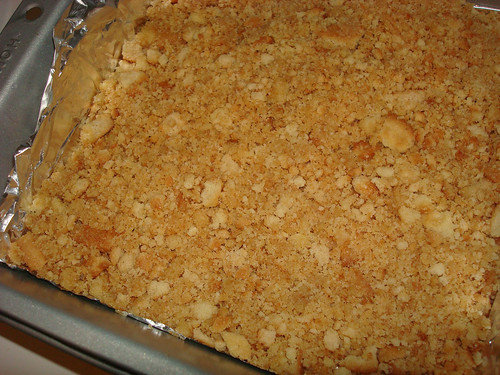
Then, I mashed them all up and mixed them with half a stick of butter. I then pressed it into a foil-lined 8x8-inch pan.

Buttery cookie bars

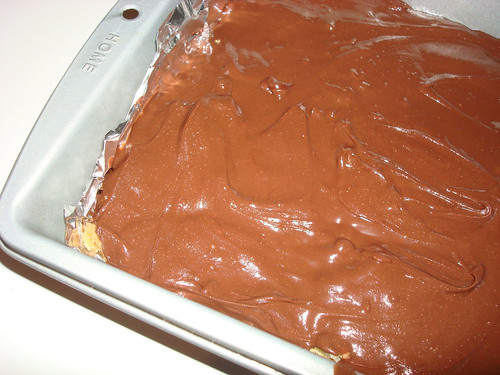
Next, I warmed a jar of dark chocolate peanut butter, and poured it right on top. I spread it as gently as possible.

Buttery cookie bars

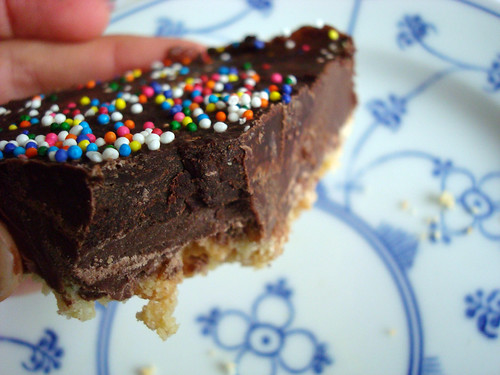
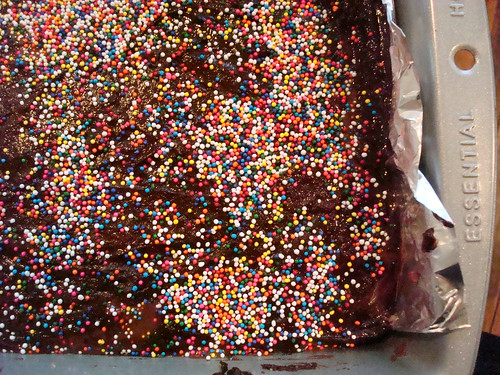
After that, I melted 4 ounces of semisweet chocolate and spread it on top (again as gently as possible). Then I topped it all with sprinkles.

Buttery cookie bars

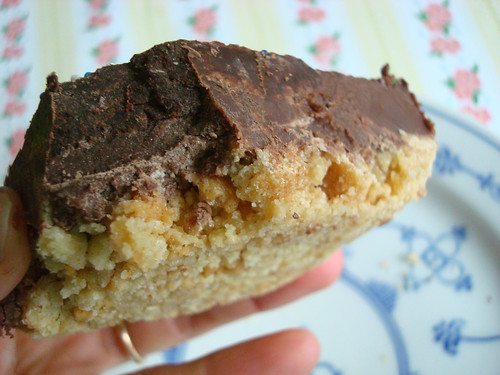
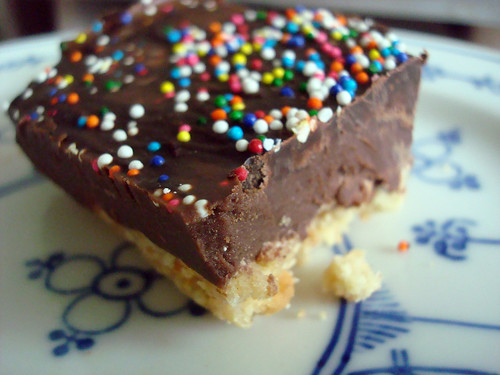
I let it chill in the fridge overnight, and in the morning I had a deliciously decadent snack. Shortbready! Chocolatey! Peanut buttery! Swoon. Staples may have given me the means, but I made it even better. YUM.

Buttery cookie bars

Buttery Chocolate Peanut Butter Cookie Treats (Printable recipe here!)

Ingredients

  • 3/4 tin of Dansk Cookies (about 30 cookies)
  • 1/2 stick unsalted butter, melted
  • Dash salt, if you want
  • 1 jar peanut butter (I used Dark Chocolate Dreams by Peanut Butter and Co.)
  • 4 squares semisweet chocolate (1 ounce each)

Procedure

  1. Line an 8x8-inch pan with foil. Set aside.
  2. Crush the cookies until they are fairly fine crumbs. Mix with the butter, stirring well. Add in the salt.
  3. Press into the bottom of the foil lined pan. Press it down well.
  4. Warm the peanut butter until it is pourable. Pour on top of the cookie crust. Spread with a spatula, trying not to upset the cookie crumbs below. Put the pan in the fridge for the moment.
  5. In a double boiler, melt the semisweet chocolate. Once melted and pourable, remove the pan from the fridge; gently pour the chocolate over the peanut butter layer on your bars. Use a spatula to spread. Try to do this quickly as the peanut butter will get soft and start to mix with the top layer.
  6. Top with sprinkles, if desired. Put back in the fridge and let set until firm before serving (2 hours or so). Keep chilled. 

Buttery cookie bars

 Full disclosure, Staples provided me with this Nexus tablet. However, the words and opinions expressed in this review are strictly my own. To see the full line of tablets visit Staples.com.

© Cakespy, all rights reserved. Powered by Squarespace.