Home Home Home Home Home Home Home
CakeSpy

Featured: 

My adventure at Ben & Jerry's in Vermont!


Unicorn Love: the Eating Disorder Recovery Blog


 Buy my brilliant books!

Buy my new book!

Buy my first book, too! 

CakeSpy Online Retail!


Archives
Gallery

Fantastic appliance for cake making on DHgate.com

everyrecipe.co.nz

Craftsy Writer

Entries in history (40)

Sunday
Mar272011

Foodbuzz 24x24: Nanaimo Bar Extravaganza

It is with a heavy heart full of sadness that I realize that many of you have never even heard of--much less tasted--the wonderful thing that is the Nanaimo Bar.

But it is with the lightness and joy of 99 luftballoons floating in the summer sky that I realize that I am going to show you the light, in the most delicious way possible.

That's right. It's time for an absolute education and delicious extravaganza featuring the Nanaimo Bar. This post is my entry for the Foodbuzz 24x24 project, and it's broken down into three parts: History (wherein you will get educated on the ways of the Nanaimo), Recipes (I made 7 different versions!), and Testimonials (loving thoughts and odes from eager eaters).

You say Nanaimo...
First things first. It's pronounced "Nuh-nye-moe". And it's named after the city where, if not officially where the bar was invented, the city where it came into its own. But don't worry, I'll tell you much, much more.
As previously mentioned, I realize that it is possible that you have never tried--or even heard of--the Nanaimo Bar, which I lovingly refer to as “the best thing Canada has ever invented”.  Let me briefly try to explain its wonder of this three-layer no-bake bar cookie, building it from the bottom up:

The bottom layer is a sturdy, tightly packed layer of chocolate, graham cracker and coconut, bound together with melted butter.
The middle layer is a buttery, frosting-y, creamy, custard-y stuff that is so much the opposite of low-fat that it makes you want to weep with pleasure.
The top layer is a solid chocolatey layer, which is firm but not hard.

As you may have come to suspect, each layer is tasty enough to stand on its own--but when combined, you’ve basically got a triple threat of intensely rich, decadently condensed deliciousness.

That is to say--super yum.

But where did this bar come from? There’s a popular story about how the bars were the winner in a baking contest, invented by a housewife who named them Nanaimo Bars in a burst of civic pride. While said housewife does figure into the equation (see below), it’s definitely not the whole story.

There are several purported predecessors of the bar going by “New York Slice”, “Chocolate Slice”, “Refrigerator Cake”, “Miracle Bars”, “Ribbon Bars”, “Smog Bars” (or “London Smog Bars”). 

It’s those Smog Bars, though, that seem to be the closest relative to the Nanaimo Bar, as evidenced by an interview with Jan Pare, who wrote Company's Coming: 150 Delicious Squares, who spent her formative years (1927-47) in Alberta, Canada:

"Nanaimo Bars were originally called Smog bars, and everybody made them: graham-cracker crust, cocoa, Bird's Custard in the filling. My Grandma Locke made smog bars, so did my mother."

Proof is in the pudding--or rather, custard: Bird’s Custard, a popular custard powder invented in the UK and a key ingredient in Nanaimo bars, easily could have immigrated to the area in the early 1900s when there was a large wave of new immigration from Europe; this would have been well-timed with the advent of iceboxes as a common household item in Canada, which would explain for the bar’s UK influence but Canadian birth.

In fact, the first published instance of the phrase Nanaimo Bars dates back to 1953, in the Vancouver Sun, but the recipe itself is for London Smog Bars, with a footnote that “These are also known as Nanaimo Bars”.

It doesn’t seem too far-fetched then, to conjecture that this confection, like those European settlers, migrated westward; a recipe that resembles the Nanaimo bar in basically all but name, entitled “Chocolate Slices”, was submitted by a Mrs. E. MacDougall in 1952 Women’s Auxiliary Cookbook.

But regardless of how they got there, one thing is for certain: even if they weren’t invented in Nanaimo, it is where the treat took root. And it’s here that the humble housewife mentioned earlier shows her important role: Mrs. Mabel Jenkins of Cowichan Bay submitted her recipe for the bars to the annual Ladysmith and Cowichan Women's Institute Cookbook, which was sold in the early 1950s in the region as a fundraiser. It was a popular favorite in the book, and because the bars are ridiculously delicious and keep well, the recipe gained popularity in the province's households and working-class towns, and was sold in many of the coffee shops on Nanaimo’s Commercial Street.

In more recent years, the bars have been called “Canada’s Favourite Confection”, and all I can say is, Butter Tarts never stood a chance.

Part 2: The Recipes

How did I do it? I made a variety of different types, starting with the traditional recipe, then creating several riffs on it (many inspired by other Canadian specialties!). I then got testimonials and stories from the eaters (scroll to below the recipes for those), who ranged from professional Nanaimo Bar eaters to first timers. Some were even Canadian.

Recipe 1: OFFICIAL NANAIMO BAR RECIPE

Bottom Layer
  • ½ cup unsalted butter (European style cultured)
  • ¼ cup sugar
  • 5 tbsp. cocoa
  • 1 egg beaten
  • 1 ¼ cups graham wafer crumbs
  • ½ c. finely chopped almonds
  • 1 cup coconut

Melt first 3 ingredients in top of double boiler. Add egg and stir to cook and thicken. Remove from heat. Stir in crumbs, coconut, and nuts. Press firmly into an ungreased 8" x 8" pan.

Middle Layer
  • ½ cup unsalted butter
  • 2 Tbsp. and 2 Tsp. cream
  • 2 Tbsp. vanilla custard powder (Cake Gumshoe Kate adds that if you don't have or can't find custard powder, instant vanilla pudding works in a pinch)
  • 2 cups icing sugar

Cream butter, cream, custard powder, and icing sugar together well. Beat until light. Spread over bottom layer.

Top Layer
  • 4 squares semi-sweet chocolate (1 oz. each)
  • 2 Tbsp. unsalted butter
Melt chocolate and butter over low heat. Cool. Once cool, but still liquid, pour over second layer and chill in refrigerator.
---------------------------------

Recipe 2: Maple Nanaimo Bars

Bottom Layer

  • ½ cup unsalted butter
  • ¼ cup sugar
  • 5 tablespoons cocoa
  • 1 egg beaten
  • 1 ¼ cups graham wafer crumbs
  • 1 cup coconut
  • ½ cup finely chopped walnuts

Middle Layer

  • ½ cup unsalted butter
  • 1 tablespoon cream
  • 1 1/2 tablespoons maple syrup (the darkest you can find)
  • 2 tablespoons vanilla custard powder (instant vanilla pudding works in a pinch)
  • 2 cups confectioners' sugar

Top Layer

  • 4 ounces good quality dark chocolate
  • 2 tablespoons unsalted butter

Directions:

  1. Prepare the bottom layer. Melt butter, sugar and cocoa in top of double boiler. Add egg and stir to cook and thicken. Remove from heat. Stir in crumbs, coconut, and nuts. Press firmly into an ungreased, parchment-lined 8" x 8" pan. Let chill in the refrigerator until cool to the touch.
  2. Cream butter, cream, custard powder, maple, and confectioners' sugar together well. Beat until light; it should be a thick consistency, but still spreadable. If desired, stir in food coloring until completely mixed in. Spread over bottom layer, making sure that it is as flat as possible (I use a metal spatula to "scrape" it into a flat top). Return to the fridge until the middle layer is completely set. Sometimes I even put them in the freezer so that they will be extremely firm before adding the top layer.
  3. Melt chocolate and butter over low heat. Once cool, but still liquid, pour over second layer, very gently spreading so that it covers the entire layer--you will need to do this fairly quickly so that the second layer doesn't start to melt or meld with the top layer. Let chill in the refrigerator for at least a half-hour. Serve lightly chilled, or let come to room temperature. When you're ready to serve, use a sharp knife to slice the bars, and keep a towel on hand to clean the knife frequently between cuts to ensure clean, good-looking bars which showcase the pretty layers.

----------------------------------------

Recipe 3: Blonde Nanaimo Bars

These have a white chocolate topping and a mix of cocoa and brown sugar in the base, making for maybe more of a dirty-blonde, but a very delicious variation.

Bottom Layer 

  • ½ cup unsalted butter
  • ¼ cup granulated sugar
  • 2 tablespoons brown sugar
  • 3 tablespoons cocoa
  • 1 egg beaten
  • 1 ¼ cups graham wafer crumbs
  • 1 cup coconut
  • ½ cup finely chopped walnuts

 Middle Layer

  • ½ cup unsalted butter
  • 1 tablespoon cream
  • 2 tablespoons vanilla custard powder (instant vanilla pudding works in a pinch)
  • 2 cups confectioners' sugar

 Top Layer

  • 3/4 cup white chocolate chips (I like Ghiradelli)

Directions:

  1. Prepare the bottom layer. Melt butter and sugar in top of double boiler. Add egg and stir to cook and thicken. Remove from heat. Stir in crumbs, coconut, and nuts. Press firmly into an ungreased, parchment-lined 8" x 8" pan. Let chill in the refrigerator until cool to the touch.
  2. Cream butter, cream, custard powder, maple, and confectioners' sugar together well. Beat until light; it should be a thick consistency, but still spreadable. If desired, stir in food coloring until completely mixed in. Spread over bottom layer, making sure that it is as flat as possible (I use a metal spatula to "scrape" it into a flat top). Return to the fridge until the middle layer is completely set. Sometimes I even put them in the freezer so that they will be extremely firm before adding the top layer.
  3. Make the topping. Melt the white chocolate either in 20 second intervals or over low heat until it is smooth and creamy. Once cool, but still liquid, pour over second layer, very gently spreading so that it covers the entire layer--you will need to do this fairly quickly so that the second layer doesn't start to melt or meld with the top layer. Let chill in the refrigerator for at least a half-hour. 

 ------------------------------------------------

Recipe 4: Maple Canadian Bacon Nanaimo Bars

Inspired by two other Canadian specialties, these bars were made with a "blonde" (sans cocoa) bottom layer, topped with a maple-infused buttercream center, all of which was topped off with a thick layer of white chocolate sprinkled with brown sugar and Canadian bacon baked until crispy with a maple glaze.

Bottom Layer
  • ½ cup unsalted butter
  • ¼ cup sugar
  • 1 egg beaten
  • 1 ¼ cups graham wafer crumbs
  • ½ c. finely chopped pecans
  • 1 cup coconut
Middle Layer
  • ½ cup unsalted butter
  • 2 Tablespoons cream
  • 2 teaspoons maple syrup (I used grade B)
  • 2 Tbsp. vanilla custard powder or vanilla instant pudding powder
  • 2 cups confectioners' sugar
Top Layer
  • 3-4 slices canadian bacon
  • 2 teaspoons maple syrup
  • 3/4 cup white chocolate chips
  • 2 tablespoons brown sugar

 Procedure

  1. Melt the butter and sugar in the top of double boiler. Add egg and stir to cook and thicken. Remove from heat. Stir in crumbs, coconut, and nuts. Press firmly into an ungreased 8" x 8" pan.
  2. Cream butter, cream, custard powder, sugar, and syrup together well. Beat until light. Spread over bottom layer, making sure that it is as smooth and flat as possible. 
  3. Prepare the bacon. Preheat your oven to 400 degrees and line a sheet with parchment. Place the canadian bacon slices on top of the parchment, and drizzle with the maple syrup. Place in the oven until it is very crispy, turning after about 5 minutes. For me, the slices were fairly thin so it only took about 10 minutes total to get them very, very crispy. Remove from the oven and let cool while you prepare the rest of the topping.
  4. Melt white chocolate in the microwave in 20 second increments, stirring after heating, until it is melted and smooth enough to spread on top of the buttercream layer. Spread it on top as quickly and smoothly as you can.
  5. Sprinkle the brown sugar on top of the white chocolate, and then crumble the bacon on top, making sure to get even coverage. 

-----------------------

Recipe 5: Butter Tart Nanaimo Bars

For these babies, combined the regular Nanaimo bar crust recipe with that of Butter Tart filling. I omitted the raisins - not my style.

Bottom Layer

  • ½ cup unsalted butter
  • 1 cup brown sugar
  • 1 egg, beaten
  • 3/4 cups graham wafer crumbs, very fine
  • ½ cup finely chopped walnuts
  • 1/4 cup raisins (optional)

Middle Layer

  • ½ cup unsalted butter
  • 1 tablespoon cream
  • 1 1/2 tablespoons maple syrup (the darkest you can find)
  • 2 tablespoons vanilla custard powder (instant vanilla pudding works in a pinch)
  • 2 cups confectioners' sugar

Top Layer

  • 4 ounces good quality dark chocolate
  • 2 tablespoons unsalted butter

Directions:

  1. Prepare the bottom layer. Melt butter and sugar in top of double boiler. Add egg and stir to cook and thicken. Press firmly into an ungreased, parchment-lined 8" x 8" pan; bake in a preheated 325-degree oven for about 10 minutes. Let cool.
  2. Cream butter, cream, custard powder, maple, and confectioners' sugar together well. Beat until light; it should be a thick consistency, but still spreadable. If desired, stir in food coloring until completely mixed in. Spread over bottom layer, making sure that it is as flat as possible (I use a metal spatula to "scrape" it into a flat top). Return to the fridge until the middle layer is completely set. Sometimes I even put them in the freezer so that they will be extremely firm before adding the top layer.
  3. Melt chocolate and butter over low heat. Once cool, but still liquid, pour over second layer, very gently spreading so that it covers the entire layer--you will need to do this fairly quickly so that the second layer doesn't start to melt or meld with the top layer. Let chill in the refrigerator for at least a half-hour. Serve lightly chilled, or let come to room temperature. When you're ready to serve, use a sharp knife to slice the bars, and keep a towel on hand to clean the knife frequently between cuts to ensure clean, good-looking bars which showcase the pretty layers.
---------------------------------

Recipe 6: Nougabricot Nanaimo Bars

What is Nougabricot? It's a Québécois preserve consisting of apricots, almonds, and pistachios, that's what. Here's a Nanaimo bar made with a white chocolate topping studded with apricot, almond, and pistachio, inspired by this specialty.

Bottom Layer

  • ½ cup unsalted butter
  • ¼ cup sugar
  • 5 tablespoons cocoa
  • 1 egg beaten
  • 1 ¼ cups graham wafer crumbs
  • 1 cup coconut
  • ½ cup finely chopped walnuts

Middle Layer

  • ½ cup unsalted butter
  • 1 tablespoon cream
  • 2 tablespoons vanilla custard powder (instant vanilla pudding works in a pinch)
  • 2 cups confectioners' sugar

Top Layer

  • 3/4 cup white chocolate chips
  • About 3/4 cup of a mix of almond bits, dried apricots, and pistachios (make the mixture to the proportions of your liking)

Directions:

  1. Prepare the bottom layer. Melt butter, sugar and cocoa in top of double boiler. Add egg and stir to cook and thicken. Remove from heat. Stir in crumbs, coconut, and nuts. Press firmly into an ungreased, parchment-lined 8" x 8" pan. Let chill in the refrigerator until cool to the touch.
  2. Cream butter, cream, custard powder, and confectioners' sugar together well. Beat until light; it should be a thick consistency, but still spreadable. If desired, stir in food coloring until completely mixed in. Spread over bottom layer, making sure that it is as flat as possible (I use a metal spatula to "scrape" it into a flat top). Return to the fridge until the middle layer is completely set. Sometimes I even put them in the freezer so that they will be extremely firm before adding the top layer.
  3. Melt white chocolate in the microwave in 20 second increments, stirring after heating, until it is melted and smooth enough to spread on top of the buttercream layer. Spread it on top as quickly and smoothly as you can. Directly after adding the topping, scatter the fruit and nut mixture on top to ensure that it sticks to the still-tacky white chocolate. Let set before serving.
---------------------------------

Recipe 7: Poutine Nanaimo Bars

So, I thought to myself, "what if I used a Nanaimo bar as the base for a batch of Poutine?". Poutine, of course, being that famous Eastern Canadian dish consisting of french fries topped with gravy and cheese curds (in NJ, where I grew up, we had a decidedly less pinkies-out version consisting of Cheez Whiz and gravy on fries, known as "disco fries"). Guess what? Not delicious. But pretty fun to make.

Bottom Layer

  • ½ cup unsalted butter
  • ¼ cup sugar
  • 5 tablespoons cocoa
  • 1 egg beaten
  • 1 ¼ cups graham wafer crumbs
  • 1 cup coconut
  • ½ cup finely chopped walnuts

Middle Layer

  • ½ cup unsalted butter
  • 2 tablespoon cream
  • 2 tablespoons vanilla custard powder (instant vanilla pudding works in a pinch)
  • 2 cups confectioners' sugar

Top Layer

  • 1 cup cheese curds ( had fairly big ones, which I warmed and kind of squished into place, which gave them a sort of ricotta cheese look)
  • 1/2 cup gravy

Directions:

  1. Prepare the bottom layer. Melt butter, sugar and cocoa in top of double boiler. Add egg and stir to cook and thicken. Remove from heat. Stir in crumbs, coconut, and nuts. Press firmly into an ungreased, parchment-lined 8" x 8" pan. Let chill in the refrigerator until cool to the touch.
  2. Cream butter, cream, custard powder, maple, and confectioners' sugar together well. Beat until light; it should be a thick consistency, but still spreadable. If desired, stir in food coloring until completely mixed in. Spread over bottom layer, making sure that it is as flat as possible (I use a metal spatula to "scrape" it into a flat top). Return to the fridge until the middle layer is completely set. Sometimes I even put them in the freezer so that they will be extremely firm before adding the top layer.
  3. Place the cheese curds on top of the Nanaimo Bars. Let come to room temperature before serving; ladle a little gravy on each slice before serving.

-------------------------

Part 3: Nanaimo bar Testimonials 

To get a variety of reactions on La Belle Nanaimo, I took it to the street--literally.

First, I took a batch to the Seattle waterfront, set myself up nearby the ferry to Canada and swapped treats for tales, asking eaters "What's the best thing about a Nanaimo Bar?".

Most people were quite receptive to swapping treats for short tales, and after about 20 minutes my batch was gone. Some remembered the bars as a childhood treat; some recalled them from ferry rides; one person said that the best ones are found at the grocery store baker's case; and for some people, this was their first-ever Nanaimo bar experience (I'm so glad I got to share it with them).

My favorite response, as it happens, was from a homeless guy who asked if he could have one. After taking a thoughtful bite, he told me that these were much better than "the package cookies". This made me feel sort of like laughing, and sort of like crying, all at once.

Next, I brought a big batch to the Bake it in a Cake Cupcake party at CakeSpy shop, where I got some real-live testimonials on the bars.

Mr. Spy expands on what is so great about a Nanaimo Bar, including how it is better than Rick Moranis:

A couple of other store visitors, upon tasting the Maple Canadian Bacon Nanaimo Bars and the Blonde Nanaimo Bars, respectively (both were first-time Nanaimo bar eaters!) had this to say:

...and yet more eaters had this to say:


...but  I will tell you the truth, after one bite of the poutine version, it became very clear that this probably is not a food trend that will take off, so I didn't serve those. 

All in all, people loved learning about and devouring these delicious bars, and I feel as if I have done my job to spread the word about this sweet Canadian treat. So...til next time...

Wednesday
Jan262011

Holey Grail: Why Do Doughnuts Have Holes?

If you are a truly devoted doughnut lover, it's likely that this doughy dilemma has come up in your mind: why do doughnuts have holes? 

Turns out, there are a few tales out there. Let's discover them together, shall we?
At least three versions of the story involve a Mr. Hanson Gregory, a seafarer who turned tall-tale-teller in his golden years. According to a 1938 article in The Tuscaloosa News,

it remained for an old New England Sea captain, one Hanson Gregory, from Camden, Maine, to introduce the hole in the doughnut, as we know it today. As an old man he liked to tell his story many times--how as a boy he had been watching his mother frying doughnuts and had noticed that the centers always remained partially uncooked and doughy. 'Mother', he said, "leave a hole in the center." Laughingly, she obliged him and never went back to the old way. Her method was widely copied.

There is also an unlikely, but wholly (holey?) enjoyable, version of the story, also involving Gregory, which goes thusly (according to the Lewiston Evening Journal): "one legend is that he liked to munch fried cakes while steering his craft. One day, in 1847, the seas were rough and he needed both hands to control the rudder. So he slapped several cakes on the spoke of his wheel, making holes."

And third, there is a lighthearted variation on the lightened fried doughnut rounds which states that Gregory purposefully poked a hole in the doughnut to lighten it up "because he had already lost six men overboard due to the heaviness of the doughnuts".

Of course, according to aforementioned Lewiston article, another New Englander, Henry Ellis, of Hyannis, MA, argued there was even a more outlandish story behind the doughnut hole: "An Indian's arrow aimed at a housewife pierced a round of fried cake". The article does not back this up with any evidence, but you know, this could just be further proof that it wasn't all making nice and Thanksgiving in the early US.

Of course, Hanson Gregory's tales get even more street cred based on the fact that he's the only one commemorated as doughnut hole inventor who boasts a historical plaque: it's true. In Rockport, ME, you can find a plaque inscribed with the following: "In commemmoration. This is the birthplace of Captain Hanson Gregory, who first invented the hole in the doughnut in 1847. Erected by his friends, Nov. 2, 1947."

And beyond that, the oldest article I could find on the subject points to Gregory as well (from the Washington Post, March 26, 1916), which I found here:

Old Salt” Doughnut Hole Inventor Tells Just How Discovery Was Made And Stomach of Earths Saved 

Boston, March 25.—The man who invented the hole in the doughnut has been found. He is Capt. Hanson Gregory, at present an inmate in Sailor’s Snug Harbor, at Quincy, Mass. Doughnut cutters have made fortunes for men; millions eat doughnuts for breakfast and feel satisfied. Doctors do not assail the doughnut. And all of this owes its being to Capt. Gregory, who made the doughnut a safe, sane and hygienic food. 

It’s a long story, mates; but as the 85-year-old chap relates it, it’s only too short. Outside the fact that Capt. Gregory is a bit hard of hearing, he’s as sound as new timber. 

He’s a product of Maine; and so Maine can lay claim to the discoverer of the hole in the doughnut, along with the discoverer of new ways to evade the prohibition laws. But Capt. Gregory’s discovery is of real use in the world; millions have risen, and millions more shall rise up, and call him blessed. 

‘Bout ‘47 Was the Date. 
“It was way back—oh, I don’t know just what year—let me see—born in ‘31, shipped when I was 13—well, I guess it was about ‘47, when I was 16, that I was aboard ship and discovered the hole which was later to revolutionize the doughnut industry. 

“I first shipped aboard the Isaac Achorn, three-masted schooner, Capt. Rhodes, in the lime trade.  
Later I joined other crews and other captains, and it was on one of these cruises that I was mawing doughnuts. 

“Now in them days we used to cut the doughnuts into diamond shapes, and also into long strips, bent in half, and then twisted.  I don’t think we called them doughnuts then—they was just ‘fried cakes’ and ‘twisters.’ 

“Well, sir, they used to fry all right around the edges, but when you had the edges done the insides was all raw dough.  And the twisters used to sop up all the grease just where they bent, and they were tough on the digestion.” 

“Pretty d—d tough, too!” profanely agreed one of the dozen pipe-smoking fellows who were all eyes and ears, taking in their comrade’s interview by The Post reporter. 

With a glance at the perfervid interrupter, the discoverer continued: 

“Well, I says to myself, ‘Why wouldn’t a space inside solve the difficulty?’ I thought at first I’d take one of the strips (Col. 2—ed.) and roll it around, then I got an inspiration, a great inspiration. 

“I took the cover off the ship’s tin pepper box, and—I cut into the middle of that doughnut the first hole ever seen by mortal eyes!” 

“Were you pleased?” 

“Was Columbus pleased?  Well, sir, them doughnuts was the finest I ever tasted.  No more indigestion—no more greasy sinkers—but just well-done, fried-through doughnuts. 

“That cruise over, I went home to my old mother and father in Camden, Me., where I was born. My father, Hanson Gregory, sr., lived to be 93, and my mother lived to be 79. She was a pretty old lady then. I saw her making doughnuts in the kitchen—I can see her now, and as fine a woman as ever-lived, was my mother. 

Taught Trick to Mother. 
“I says to her: ‘Let me make some doughnuts for you.’ She says all right, so I made her one or two and then showed her how. 

“She then made several panfuls and sent them down to Rockland, just outside Camden. Everybody was delighted and they never made doughnuts any other way except the way I showed my mother. 

“Well, I never took out a patent on it; I don’t suppose any one can patent anything he discovers; I don’t suppose Peary could patent the north pole or Columbus patent America. But I thought I’d get out a doughnut cutter—but somebody got in ahead of me. 

Hole “Cut Out,” His Joke. 
“Of course a hole ain’t so much; but it’s the best part of the doughnut--you’d think so if you had ever tasted the doughnuts we used to eat in ‘31. Of course, lots of people joke about the hole in the doughnut.  I’ve got a joke myself:  Whenever anybody says to me: ‘Where’s the hole in the doughnut?’ I always answer: ‘It’s been cut out!’” and the old chap laughed loud and longat his little sally, while the rest joined in. 

So there he sits—in the Snug Harbor by the sea. And whenever there’s doughnuts on the day’s fare, Capt. Gregory takes a personal pride trying to do what nobody’s succeeded in doing yet—in trying to find the hole in the doughnut. And whenever the old salts rally him about it, he always springs his little joke: 

“The hole’s been cut out, I guess!” to the delight of the whole shipful. 

While Gregory certainly has the flashiest connections to the doughnut hole, I'd just like to offer up a couple more bits of food for thought: 

Some say that the Pennsylvania Dutch were responsible for making the first holey doughnuts in the US, cutting the centers to ensure even frying and easier dunking. 

Another theory that I personally have is that an explanation for the doughnut hole may be twofold: while the ease in even frying certainly makes sense, it also seems that the doughnut was rising in popularity in the US around the same time as the bagel, which were frequently sold on sticks on the Lower East Side of New York City. Could this easy mode of selling have perpetuated the ring around the doughnut?

Oh, and finally, what of the dough from the middle? Interestingly, those little doughnut dots we love so much aren't necessarily cut from the same dough as the doughnut: "commercially made ring doughnuts are not made by cutting out the central portion of the cake but by dropping a ring of dough into hot oil from a specially shaped nozzle. However, soon after ring doughnuts became popular, doughnut sellers began to see the opportunity to market "holes" as if they were the portions cut out to make the ring."

Seeking more holey grail? You might want to check out this article on Barry Popik, this one on Mr. Breakfast, or the fascinating Wikipedia entry. And of course, if you call yourself a doughnut devotee but don't own Donuts: An American Passion by John T. Edge, you really should remedy that immediately. It's a great book.

Tuesday
Dec142010

Apple of My Eye: Applescotch Cookies Made With Jiffy Baking Mix

I've always had a soft spot for "Jiffy" brand baking mixes. Not necessarily because of their superior taste (though I think they're perfectly serviceable) but because of their packaging. These petite packages have a distinctly retro look, but not in an ironic way--more like they've never changed the initial 1930 design (why mess with a good thing?). 

Unable to resist the packaging, I recently found myself in possession of a box of Jiffy Apple Cinnamon Muffin Mix. Two questions occurred to me:

  1. Where did these mixes come from?
  2. What can I make with this mix that is not muffins?

Where the magic happens! Photo: Chelsea MillingHappily, the Chelsea Milling website (their parent company) was able to shed light on both of these pressing questions. As for the history? Here it is, from their site:

Chelsea Milling Company is operated by a family whose roots in the flour milling business date back to the early 1800’s. We have been milling flour here in Chelsea for over 120 years.

Mabel White Holmes, grandmother of our President, Howdy S. Holmes, developed and introduced to the homemaker the first prepared baking mix product, “JIFFY” Baking Mix, in the spring of 1930. Currently we offer 22 “JIFFY” Mixes. Our mixes provide you, our consumer, with the best value available.

Chelsea Milling Company is a complete manufacturer. We store wheat. We mill wheat in to flour. We use that flour for our own mixes. We make our own “little blue” boxes. We do it all-that’s why our mixes provide you with the best possible value. Value is using the highest quality ingredients and the best price!

Our entire operation is located in Chelsea, Michigan and our product is shipped out to all 50 states, as well as some foreign countries through the United States Military.

Finding this pretty fascinating, I'd like to state for the record that if they invited me to come and tour their factory, it would be like the awesomest thing ever.

As for a recipe? Happily, they have a handy recipe finder by mix--and I quickly settled on the delectable-sounding "Applescotch Cookies". Incredibly easy to make, these cookies fall somewhere between cakey and chewy, and the mellow, buttery butterscotch flavor works extremely well with the apple-spice flavor from the mix. Here's the recipe.

Applescotch Cookies

  • 1 pkg. "JIFFY" Apple Cinnamon Muffin Mix
  • 1 Tbsp. instant butterscotch pudding
  • 1/4 tsp. nutmeg
  • 2 Tbsp. quick oats
  • 1 Tbsp. margarine or butter, softened
  • 1 egg
  • 1/3 cup butterscotch pieces

Procedure

  1. Preheat oven to 375°, grease baking sheet. 
  2. Mix together muffin mix, pudding and nutmeg.
  3. Cut in softened margarine or butter until mixture resembles fine crumbs. Add oats.
  4. Mix in egg until well blended. Add butterscotch pieces.
  5. Roll into 3/4 to 1" balls and place on cookie sheet.
  6. Bake 10-12 minutes, or until lightly browned on the edges.
Wednesday
Oct272010

Trick Or Sweet: A Look at the History of the Custom of Trick or Treating

Trick or treating. The very phrase evokes a shiver of sweet, sugary anticipation, because basically, it usually culminates in the consumption of candy.

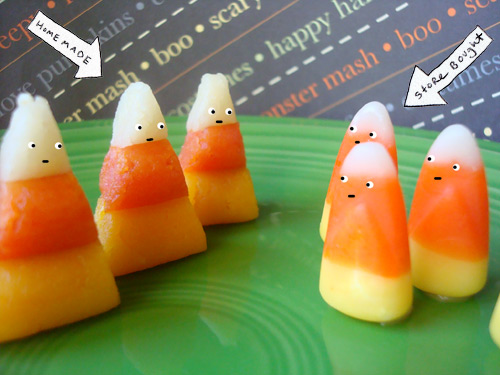
But where on earth did this sweet tradition come from? Let's learn a bit about the history of Halloween and how it ultimately equaled candy corn overdose, shall we?

First: What is Halloween? Per the Encyclopedia,

The word comes from medieval England's All Hallows' eve (Old Eng. hallow = "saint" ). However, many of these customs predate Christianity, going back to Celtic practices associated with Nov. 1, which was Samhain , the beginning of winter and the Celtic new year. Witches and other evil spirits were believed to roam the earth on this evening, playing tricks on human beings to mark the season of diminishing sunlight. Bonfires were lit, offerings were made of dainty foods and sweets, and people would disguise themselves as one of the roaming spirits, to avoid demonic persecution.

Per this site, it is the Celts who are credited with bringing Halloween stateside:

Halloween was brought to America in the 1840's by Irish immigrant fleeing their country's potato famine. New England added pranks like tipping over outhouses and unhinging gates to the practive of dressing up.

But what of Trick or Treating itself? From the same source cited above,

"Trick-or-treating" came from a 9th century European custom called "souling." On November 2, All Souls Day, Christians would walk from village to village begging for "soul cakes" made from bread and currants. People would offer paryers for the deceased believing it would speed up a soul's passage to heaven. The more cakes given out, the more prayers offered.

Of course, it wasn't really til the 20th century that Trick or Treating really began in earnest. Now, I'm just spitballing here, but it seems rather timely that this coincides with a large increase with commercial production of candy. Per an article I discovered on What's Cooking America,

"Sometime in the middle of the 1930s, enterprising householders, fed up with soaped windows and worse, began experimenting with a home-based variation on the old protection racket practiced between shopkeepers and Thanksgiving ragamuffins. Doris Hudson Moss, writing for American Home in 1939, told of her success, begun several years earlier, of hosting a Halloween open house for neighborhood children...The American Home article is significant because it is apparently the first time the expression "trick or treat" is used in a mass-circulation periodical in the United States...It is probably that trick-or-treating had its immediate origins in thy myriad of organized celebrations mounted by schools and civic groups across the country specifically to curb vandalism...It is the postwar years that are generally regarded as the glorious heyday of trick-or-treating. Like the consumer economy, Halloween itself grew by leaps and bounds. Major candy companies like Curtiss and Brach, no longer constrained by sugar rationing, launched national advertising campaigns specifically aimed at Halloween. If trick-or-treating had previously been a localized, hit-or-miss phenomenon, it was now a national duty." ---Death Makes a Holiday: A Cultural History of Halloween, David J. Skal [Bloomsbury:New York] 2002 (p. 52-5)

As I also learned on What's Cooking America,

After World War II, the American practice of Trick-or-Treat began in earnest. Sprawing suburban neighborhoods delighted in watching costumed boomer children "beg" from door to door. Traditional Halloween party foods (candied/toffee apples, popcorn balls, nuts) were proferred along with pre-wrapped commercial candies. Savvy candy companies capitalized on this lucrative opportunity by selling seasonal packages containing smaller sized products. "Back in the Day" (your editor trick-or-treated on Long Island in the 1960s) it was fairly usual to get little decorative halloween bags containing all sorts of things. These were assembled at home, usually composed of loose candies (candy corn, Hershey Kisses, marsmallows, MaryJanes or Tootsie Rolls, etc.), some pennies and maybe a small toy. We also carried little milk-carton shaped boxes distributed in school and said "Trick or Treat for Unicef." Beginning in 1952, UNICEF's halloween program thrives today.

As for the Fun-Size treat?

As I learned here,

The "fun size" candy bar was introduced in 1968 by the Mars candy company. The resulting "fun size" Milky Way candy bars were 25 percent lower in total calories and had 50 percent fewer calories from fat.

But knowing that doesn't change the fact that if I could, I'd go back in time and punch the inventor. Because seriously--there is nothing fun about less candy (but here are some suggestions for how to bring the "fun" back to fun size).

Have a happy, safe, and sweet Halloween!

Wednesday
Sep292010

Maybe I'm A-Maized: A Brief History of Candy Corn

Image originally used for Serious EatsEating seasonal is of interest to everyone these days, and the freshest produce in the world of sweets right now is corn--candy corn, that is.

But in the same way that one might want to meet the producer, why don't we get to know the backstory behind those little sugary cones of delicious sweetness?

Here goes.

First off: Who invented Candy Corn?

According to this article, "Bill Plumlee, the public relations manager of Brach's Candy Co., said George Renninger of the Wunderlee Candy Co. created candy corn in the 1880s."

And, to answer another question you have ("what's up with the colors, dude?"), as I also discovered in the same article,

Creators chose the three colors of candy corn, to reflect the colors of the real thing.

"It's supposed to mimic corn," Plumlee said. "Yellow on top, darker as it goes down and whitish as it nears the end."

Now, I have to squint really hard to see it that way, but maybe the inventor had very poor vision (or maybe he was color blind?).

Interestingly, as I found out on Slashfood,

 The design apparently made it popular with farmers when it first came out, but it was the fact that it had three colors - a really innovative idea - that catapulted it to popularity.

Of course, though Mr. Renninger is credited with coming up with this sweet idea, many actually assign credit to Goelitz (now part of Jelly Belly) as being the ones who really brought candy corn into the public eye:"1898. Goelitz Confectionery Company begins making candy corn or "chicken feed." They continue to make this Halloween favorite longer than any other company." ---Candy: The Sweet History, Beth Kimmerle (discovered via Food Timeline)

And to expand on that, according to the Jelly Belly site,

Our beginnings are traced back to a family named Goelitz. When two young brothers emigrated from Germany to make their mark in America, they set the family on its candymaking course. In 1869, just two years after arriving in America, Gustav Goelitz bought an ice cream and candy store in Belleville, Ill., and his brother, Albert was sent out in a horse drawn wagon to sell their sweets to nearby communities.

Then the second generation of the family jumped on the band wagon of candy innovations by making a new type of candy, then called "buttercream" candies, including Candy Corn, a sweet we've made since about 1900 (and still use the same recipe). These candies carried the family through the Great Depression and two world wars. Today, the great-grandsons of Gustav Goelitz, the fourth generation, are still carrying on the tradition of making candy.

Was it always a Halloween treat?

Interestingly, as I found on Food Timeline, candy corn wasn't always strictly associated with Halloween, but more with fall--the transition to "Halloween Candy" was perhaps a subtle shift: "Candy corn, like many other candies we enjoy at Halloween, was promoted as treats for Halloween by candy companies after WWII." (a time when, by the way, the art of Trick or Treating really began in earnest). As the writeup goes on, "Candy corn might have been especially popular because it was also a seasonal (fall) confection. Popcorn balls and candied apples are other seasonal (fall) treats conventinetly transitioned to Halloween."

How is it made?

As I learned from this interview on NPR,

In the early days, making candy corn was hard work. It was done by hand. The ingredients were cooked in huge kettles. Then, the hot candy was poured into buckets. Men poured the liquid candy corn from the buckets into kernel-shaped trays. The workers had to make three passes to create the white, yellow and orange layers. Production was so labor-intensive the candy corn was made only from March to November.

Of course, now candy corn is made by machine--I could try to explain it, but the Food Network can show you in living color:

But that's not the only thing that has changed. Per Slashfood, the ingredient list has, too:

Originally, candy corn was made of sugar, corn syrup (not HFCS), fondant and marshmallow, among other things, and the hot mixture was poured into cornstarch molds, where it set up...The recipe changed slightly over time and there are probably a few variations in recipes between candy companies, but the use of a mixture of sugar, corn syrup, gelatin and vanilla (as well as honey, in some brands) is the standard.

Of course, if you're brave, you can make candy corn at home too. I did it last year, for Serious Eats.

How do Mellowcreme Pumpkins play into it?

Mellowcreme pumpkins (and the other weird shapes that come in those "Autumn Mix" assortments) were a later addition:

Candy pumpkins first were produced in mid 20th century using a process similar to that of candy corn. Corn syrup, food coloring, honey, and sugar are beat and heated in large kettles to produce an ultra-sweet syrup.

This slurry generically is called "mellowcreme" by confectioners, since the resulting candy has a mellow, creamy texture.

They are said to appeal in a different way than candy corn because their different volume and weight makes for an "interesting texture". And in case you were wondering--yes, I prefer Mellowcreme pumpkins to candy corn.

The final word?

Even if you believe, like Serious Eats, that candy corn is "the fruitcake of halloween candy" and one of the 10 worst Halloween candies to give out, there's no denying its iconic status as a Halloween classic, and whether it's because of its classic look or simply because it's slowly going stale in your goodie bag, it's not going anywhere.

Saturday
Jul172010

Ask CakeSpy: How Are Oreos Made?

Best use of Oreos: as a s'mores base!Dear CakeSpy,

First off, I'd like to suggest that you start a column called "Ask CakeSpy". First question: How are oreos made? I've been contemplating this for a while.

Sweetly Inquisitive in Santa Cruz

- - - - - - - -

Dear Sweetly Inquisitive,

Do you want the short answer or the long one? How 'bout both?

As for the actual production process, no, they're not made from the leftover bits of other cookies, as one urban legend would have you believe. As I discovered,

According to a statement from Kim McMiller, an Associate Director of Consumer Relations, a two-stage process is used to make Oreo cookies. The base cake dough is formed into the familiar round cookies by a rotary mold at the entrance of a 300-foot-long oven. Much of current Oreo production is done at the Kraft/Nabisco factory in Richmond, Virginia. 

and also, as for the design, it is "stamped out by brass rollers passing over sheets of chocolate dough". (source: NY Times)

However, if you want to get a little more philosophical about how it is that Oreos came to exist, well, let's touch on that too. 

When was it invented? The Oreo, which was originally known as the Oreo Biscuit, made its debut in 1912 from the Nabisco Company in NYC (now the site of the Chelsea Market, btw).

Where does the name come from? Per Wikipedia,

Oreo comes from the Greek root for appetizing as in orexin or orexigenic (appetite stimulating) or anorexic (loss of appetite). There are many theories pointing to the origin of the name 'Oreo', including derivations from the French word 'Or', meaning gold (as early packaging was gold), or the Greek word 'Oros', meaning mountain or hill (as the original Oreo was mound shaped) or even the Greek word 'Oreo', meaning beautiful or nice. Other theories are that the 're' from cream was 'sandwiched' between the two Os from cookie, or the word 'just seemed like a nice, melodic combination of sounds'. A TV spot for the Got Milk? campaign showed a false etymology where, when at a board meeting to decide the name of the cookie, one of the members is asked for his opinion; the member, who just ate a cookie and does not have any milk to wash it down responds "I don't know," which is heard by the board member as "Oreo."

Why and how was it made? Some say that the cookie was developed to sell to the British market, whose cookies (biscuits, to them) were seen by Nabisco to be too humdrum. Originally, Oreo was mound-shaped (perhaps not unlike the cakester?) and available in lemon meringue and cream flavors. They were originally sold in novelty tin cans with glass tops, allowing customers to see the cookies. But, as I learned here, the recipe was changed before they became the oreos we know today:

A newer design for the cookie was introduced in 1916, and as the cream filling was by far the more popular of the two available flavors, Nabisco discontinued production of the lemon meringue filling during the 1920s. The modern-day Oreo was developed in 1952 by William A Turnier, to include the Nabisco logo.TKO: That's French for "Expensive Oreo".

A couple of other facts worth mentioning: 

  • If your mom, like my mom, insisted that Hydrox were "just as good", maybe you should have believed her: apparently, Hydrox cookies, which I'd always assumed to be an Oreo ripoff, were actually invented in 1908--before the Oreo (!).
  • The original Oreo cookies were made with lard in the cream filling; these days, it's made with vegetable oils, or, in some countries, coconut oil.
  • How did I miss this? Banana Split Creme Oreos were available for a limited time in 2008, consisting of cream with a light yellow color and banana flavor.
  • Knew it! Vending machine packs of Oreo cookies from vending machine 6-packs are smaller diameter Oreo cookies with about 10% less mass than regular Oreo cookies.
  • There was a Post cereal called Oreo O's. The cereal was discontinued in 2007.
  • Oreo is on YouTube. No, really.
  • At fancy bakery Bouchon, there is a fancy version of the Oreo called the TKO, "reinterpreted using...chocolate sable dough and a sweet white chocolate ganache filling." One cookie costs about as much as an entire bag of Oreos. I've totally bought one and had no regrets.
  • There is a place in New York called Oreo Way. It’s on 9th Avenue between 15th and 16th streets and was the site of the first Nabisco factory.
  • Oreos are a great s'more base. S'moreos!

Want more? Visit the Wikipedia page on Oreos, or the official Oreo website--you'll also find more on the European Oreo site. You'll also find plenty of lore on The Food Timeline. Got a pressing cake or sweet-related question? Email cakegumshoe@gmail.com!

Thursday
May132010

Prettier in Pink: An Updated History on Uncle Seth's Pink Frosted Cookie

It's fun to revisit the past sometimes, isn't it?

It's been a few years since this post about the history of Seattle regional specialty the Pink Frosted Cookie, so just to update you, here's the original post which included the history of the cookie from the official Pinks Original Bakery (formerly Mostly Muffins) site (the company which purchased the cookie's rights and recipe):

Uncle Seth’s Cookie was a concept developed from a passion of fun and feeling good. From the high mountain tops of Bali came the inspiration for the feel good cookie. Danny Brown, the originator and inventor of the Original Pink, also known as an Uncle Seth Cookie, found a kindred spirit in a man named Seth. Seth moved from a crazed urban setting better known as the City, to live his dream of peace in the mountains. The namesake of the Uncle Seth Cookie gave tribute to this man named Seth who changed his life for the sake of fun and happiness. To bring a bit of that passion and fun to light, Danny created a cookie that says eat me because you can. This cookie has a good aura. After nine years of hand rolling this Danish Shortbread, Danny too, decided to head for the hills. Mostly Muffins purchased Uncle Seth’s Cookies in 1996 and Danny was off to live in Hawaii!


Mostly Muffins now proudly carries on the tradition of fun and feeling good by serving the Original Pink to the entire Northwest community. Eat one of the Original Pink Cookies and you can’t help but smile!

But since this writeup, a few of the blanks have been filled in, per an email from a Provo, UT reader:

The Pink Cookies craze actually started in Provo, UT. (Danny's home town). I remember seeing the girls frosting the Pink cookies by hand in a little store front shop just South of the BYU campus. This was in 1983 - 1984 time frame. I lived across the street and I would buy the broken frosted cookies from them for real cheap,  The Pink Cookie craze grew all over Provo and then expanded to others area of Utah county and Salt lake City. 

Danny saw a good business idea and moved to Seattle to start the Pink Cookie craze in Seattle.  When he moved to Hawaii, he helped start a bakery in Halaiwa, on the North shore of Oahu. 

And even further, there is this tale from the Orem, UT-based Granny B, who also claims to have invented the cookie:

Granny B (Blackett) was born on November 08, 1915. She loved making cookies for others, and she loved sitting down with her children and enjoying these fresh-baked goodies. Using prized family recipes, Granny B learned to create the softest and most delicious cookies – cookies that tranformed every-day occasions into delightful celebrations. She would be tickled pink to know how many “celebrations” her Granny B cookies create for folks across the country every day.

Granny B passed on the love of baking delicious cookies to her daughter, Diane. As Diane remembers, “We would spend hours together talking and baking.  It was great fun and where I learned all the little baking secrets”  With Diane in the kitchen, the Blackett family cookies began decorating more events, celebrating more parties, and rewarding and motivating more good behavior from her brothers. The pink cookie became a family recipe for fun.

A magnet on the fridge read, “A balanced diet is a cookie in both hands.”

So, as it seems, the cookie does have a storied past in multiple cities--perhaps this also explains why such delicious variations (not pink frosted, but tastes just as good--even better) can be found in the Provo area!

But why is it that the cookie thrived in Seattle? I'm still sticking to my original theory: it comes down to two things. The first aspect is timing: the cookie got its start being sold in coffee carts just as the coffee business was starting up in earnest in Seattle; naturally, they would appeal for the same reasons that coffee is so popular in the area--the climate just begs for rich treats and coffee during those rainy days that take up oh, eight months of the year. The second and perhaps more important aspect? Duh--The frosting color. there's no secret that pink frosting tastes better than any other color.


Not in the Seattle or Provo area but want a pink frosted cookie? I hear you: similar-looking products can be found online at Granny B's here--or--even better, we found a recipe which is said to yield a very similar taste to the original Uncle Seth's Cookie, right here at allrecipes.com.


Wednesday
May122010

Bananarama: The Banana Jumbo Cookie

It's no secret that Betty Crocker's Cooky Book is like, my favorite cookbook ever.But one of the most interesting sections? The one called "Heritage Cookies", which is introduced thusly:

Recipes we know and use today came from 'round the wrold to the thirteen isolated colonies of America. Plain and hearty cookies were the gustatory pleasure of our pioneers...though our tastes may now be trained...to select a fancy frosted cooky...these cookies of our forefathers have won an enduring place in our hearts.

The recipe for the Banana Jumbo comes from this section of the book. And though these humble cookies are flavorful on their own, I had happened to receive a sample of Sassy Sauces in the mail around the same time I made these, and I learned that they are even better with a thick dollop of milk chocolate caramel sauce. And I totally don't consider this disrespecting the original recipe, 'cos you know what? Bet our forefathers would have used the chocolate sauce too, had it been at their disposal.

Banana Jumbos

Adapted from Betty Crocker's Cooky Book

Ingredients


  • 1 cup (2 sticks) butter
  • 1 cup brown sugar, packed
  • 2 eggs
  • 2 large, or 3 small, mashed very ripe bananas
  • 1/2 cup milk
  • 1 teaspoon vanilla
  • 3 cups flour
  • 1 1/2 teaspoons baking soda
  • 1 teaspoon salt

 Procedure 

  1. Make the cookies. Mix butter, sugar, and eggs thoroughly. 
  2. Stir in the bananas, milk, and vanilla.
  3. In a separate bowl, combine the flour, soda, and salt; stir in, bit by bit, until the mixture is fully combined.  
  4. Let the dough chill for 1-2 hours in the refrigerator.
  5. Preheat oven to 375 F. 
  6. Using an ice cream scoop, drop rounds of dough onto a lightly greased baking sheet, leaving at least 2 inches between cookies as they will spread a bit. 
  7. Bake for about 10 minutes, or until lightly browned on the edges. Let cool completely on a wire sheet. Now, they are delicious as-is, but as I found out, they're even better when drizzled with some sort of glaze or frosting. 
Tuesday
Mar302010

Cookie Question: What's the Difference Between Macarons and Macaroons?

It's a true cookie mystery: what's the deal with macarons and macaroons? After all, their names are very similar, but the cookies are seemingly very different: one is a refined, Frenchie sweetburger, and the other a frumpy lump of coconut flakes.

But you know what? They are in fact related. While they may not be part of the same immediate family, they definitely come from the same family tree. Here's an excerpt from a CakeSpy post on macaroons which was originally posted in April 2008.

The Macaron: While there is evidence of meringue-type cookies going as far back as the 1500s, as I learned from Wikipedia, the macaron in its current form is generally accepted as taking shape in the late 1700s when two Benedictine nuns, Sister Marguerite and Sister Marie-Elisabeth were seeking asylum in the town of Nancy during the French Revolution, and paid for their housing by baking and selling the macaron cookies. However, these original macarons were simply cookie rounds--it wasn't until the 1930s that fancy tea room Ladurée began serving the cookies in a new way, with a sweet ganache filling between two of the traditional rounds. Naturally, the sweet filling and flavor and texture contrast caught on, and the l'il Luxembourgers began to take the world by storm (read more about the Frenchie ones in this fantastic writeup by one of my favorite foodies, Robyn Lee).

The Macaroon: However, veering on a different path than Ladurée, as I learned from The Nibble, the cookie also gained popularity with the Italian Jewish population because it requires no flour or leavening (the agent that raises and lightens a baked good, like yeast, baking powder and baking soda—instead, macaroons are leavened by egg whites) and can be enjoyed during Passover. Naturally, due to a high level of deliciousness, it gained popularity all over Europe as a year-round sweet, and regional variations popped up. The coconut macaroon seems to have gained popularity first in Glasgow, Scotland; it is most likely from here that it hopped over the pond and captured the hearts of Americans.

So, there you have it--the story of one humble cookie which has taken two very different paths--with countless other small variations on both styles. Of course, as with so many things, this knowledge is best applied with real-life experience, and so I suggest you eat one of each, macaroon and macaron, as soon as possible.

Monday
Mar082010

Gimme More: Pisco-Infused Alfajores Recipe

C is for Cookie, but A is for Alfajor.

Say what?

If you've never heard of them, alfajores are definitely one to add to your alphabet of sweets: a delectable type of crumbly cookie commonly sandwiched with indulgent dulce de leche.

Though most commonly associated with South American countries such as Argentina, Uruguay, Ecuador, Paraguay, Chile, Perú and the South of Brazil, these cookies actually take their roots in the Arab World: per Wikipedia, "the name alfajor is derived from Arabic الفاخر, which means "fancy" or "great" sweets. The archetypal alfajor entered Iberia during the period of al-Andalus."

Though this sweet treat has a long history, I took a more modern approach by making a Pisco-infused batch (with thanks to Gran Sierpe, who kindly donated some Pisco, a Peruvian brandy, with which to test out some recipes). The brandy adds a slightly sophisticated bite to the sweet cookies, compelling you to take bite after bite to try to figure out the source of the je ne sais quoi.

Want to make your own? Here's the recipe I used.

Alfajores

Adapted from About.com's South American Food

Ingredients

  • 1 cup cornstarch
  • 1 3/4 cups flour
  • 1/2 teaspoon baking powder
  • 1 teaspoon salt 1 cup butter
  • 1/2 cup powdered sugar
  • 1 tablespoon Pisco (I used Gran Sierpe)
  • 1 teaspoon vanilla
  • 1 cup dulce de leche, OR 1 cup vanilla buttercream, for filling
  • 1/2 cup toasted coconut, finely chopped (optional)


Procedure


  1. Preheat oven to 350 degrees.
  2. Place the cornstarch, flour, baking powder, and salt in a bowl and mix briefly.
  3. Cut the butter into small pieces and add to the flour mixture, blending with your fingers until the mixture is smooth.
  4. Add the powdered sugar, vanilla, and Pisco, and mix with your hands until the dough is homogeneous and smooth. Let the dough rest in the refrigerator for 30 minutes.
  5. For this step, either follow the original recipe by rolling out dough to 3/8" thickness, and cutting into 2 inch circles--OR, do as I did and roll the dough into a log and then slice cookies to your desired thickness (I liked fat ones, maybe 1/4 inch thick).  Place cookies on baking sheet lined with parchment paper.
  6. Bake cookies for 10-15 minutes, until they are barely golden brown. Let cookies cook 5 minutes, then carefully transfer to rack to cool completely (they are quite fragile until they cool).
  7. To fill the cookies, spread one cookie with dulce de leche and top with second cookie (note: as I found out, buttercream works beautifully too--picture below). If desired, roll the edges in the coconut. Store in an airtight container.

© Cakespy, all rights reserved. Powered by Squarespace.