Home Home Home Home Home Home Home
CakeSpy

Featured: 

My adventure at Ben & Jerry's in Vermont!


Unicorn Love: the Eating Disorder Recovery Blog


 Buy my brilliant books!

Buy my new book!

Buy my first book, too! 

CakeSpy Online Retail!


Archives
Gallery

Fantastic appliance for cake making on DHgate.com

everyrecipe.co.nz

Craftsy Writer

Entries from January 1, 2012 - January 31, 2012

Saturday
Jan072012

CakeSpy Mischief: A Gentle Art Installation in Sweet Cookbooks

Donut Worry, Be Happy

What can I say? Even the sweetest of spies have sour days sometimes.

But recently when I found myself feeling not-so-swell, I decided to steer my destiny in a sweet direction and brighten my own day by adding a little magic to other people's lives.

How did I do it? It was very simple.

Sweet project

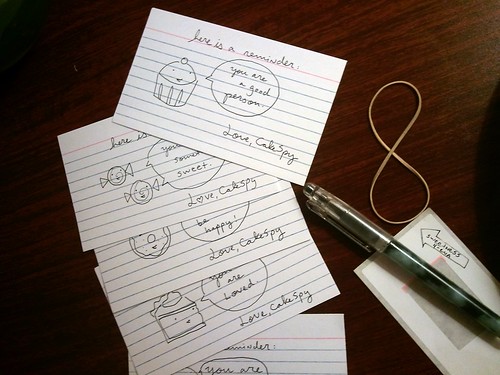
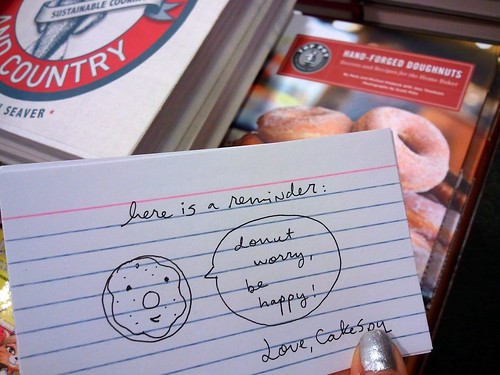
I grabbed a little stack of index cards, and wrote little notes on them--just little sweet reminders such as "you're sweet", "you are loved", and "you deserve something sweet!". 

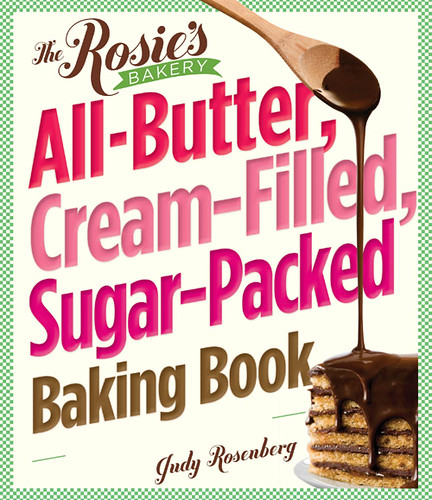
And then I walked over to the book store, where I put the notes inside of some of my favorite books. The idea? People who pick up books I like will find a special surprise in the pages. Obviously if they've chosen the magical books I favor, they will appreciate having a little extra sweet something hidden within the pages. And the cards are slim; there was not going to be any damage to the books. It's all good stuff, people.

I did several of these notes, but here are some highlights:

Walking to the bookstore in my cute boots

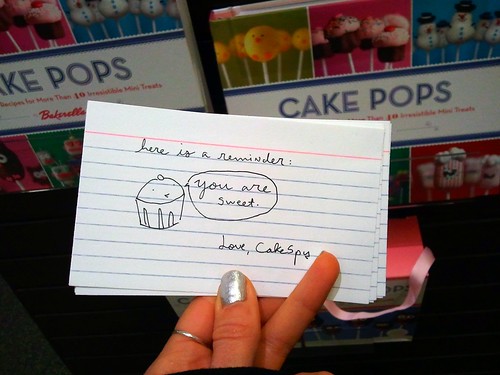
Naturally, Bakerella's book had to be involved!

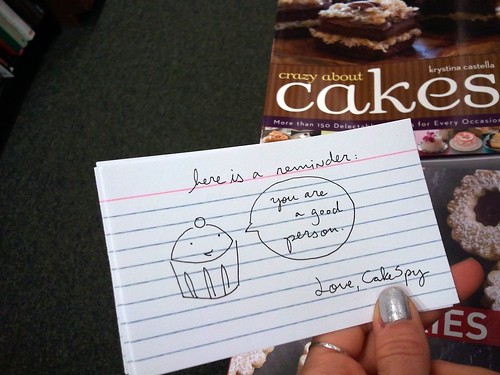
And of course, Krystina Castella's, too!

And (duh) mine too!

If you found one, I hope it made your day a little sweeter! I know that doing this made mine much nicer. Well, that and the ice cream sundae I ate after doing this (after all, being a do-gooder requires a lot of energy!).

If you liked this project, you may also get some joy from this faux cupcake installation I did a while back, too!

Friday
Jan062012

Gelat-o-Clock: Homemade Dulce de Leche Gelato Recipe

Dulce de leche gelato

There might be something better than homemade Dulce de Leche gelato.

But, you know, nothing is coming to mind just at the moment.

But I'm willing to wager a little bet.

My proposal? You spend a little while (or a long while, if you feel like making your own dulce de leche) making a list of things that are really delicious and might possibly be more delicious.

Dulce de Leche Gelato

Then, you taste the gelato. If this gelato were a person, it would be the absolute suavest of Italian playboys. It's just so smooth and gooooooood. It's creamy. It's sweet with just a little-baby-taste of salt. Like, just enough to keep you licking the spoon clean before the next spoonful. It's a master of keeping you coming back for more.

And I'm betting that after you taste it, you'll be hooked. And you, like me, might be at a loss for what could possibly be better. Well, except for pairing it with this cake.

Here's the recipe. If you feel like using store-bought dulce de leche, like I did, make sure you buy some of the good stuff and then just skip to step 3.

Dulce de leche Gelato

Recipe courtesy Emeril

  • 1 (14-ounce) can sweetened condensed milk (or purchased prepared dulce de leche)
  • 1/4 cup brown sugar
  • 1/4 cup water
  • 2 large egg yolks
  • 1 1/2 pints heavy cream
  • 1 tablespoon vanilla
  • 1/8 teaspoon salt

Procedure

  1. Fill a large pot 3/4-full with water. Place the unopened can of condensed milk in the water, making sure it is covered completely, and carefully bring to a gentle boil. Reduce heat and simmer for 3 hours, adding more water as necessary. Remove from the heat and let sit until completely cool. Watch the can carefully to make sure it does not start to bulge. If the can does begin to bulge, remove from the heat and let cool. Once cool, punch a small hole in the top of the can, return to the heat, and continue cooking. Although this is a traditional way to make this recipe, we suggest using the method below as a safe alternative to cooking an unopened can of condensed milk.
  2. Pour the condensed milk into the top of a double boiler set over simmering water. Cook, stirring every 5 minutes, until a caramel color is achieved, about 2 to 3 hours. Or, preheat the oven to 425 degrees F. Pour the condensed milk into a baking dish and cover with foil. Place the pan in a larger pan. Fill the larger pan with enough water to come halfway up the sides of the baking dish with the condensed milk. Bake until caramelized, about 2 hours.
  3. In a clean saucepan, combine the brown sugar and 1/4 cup water. Bring to a boil over medium heat. Reduce the heat and simmer, stirring, until the sugar is dissolved. Remove from the heat and let cool.
  4. In a metal bowl set over a pot of simmering water, whisk together the warm syrup and egg yolks. Whisk constantly until the mixture is a thick, pale yellow and reaches the ribbon stage. Remove the bowl from the heat, and beat with an electric mixer on low speed until cool. Whisk in the condensed milk, heavy cream, vanilla and salt. Strain through a fine mesh sieve into a clean container. Cover with plastic, pressing down onto the surface to prevent a skin from forming. Refrigerate until well chilled, at least 2 hours.
  5. Transfer to the bowl of an ice cream machine and process according to the manufacturer's instructions. Transfer to an airtight container and freeze until ready to serve.


Friday
Jan062012

Baker's Dozen: A Batch of Sweet Links

New year, new you! Instead of eating better, eat more butter. Let me help get you started:

Still one of my favorites: How to make a candy salad.

Breakfast of champions: Biscuits with sugar butter. Om nom nom.

Bump in the night: Bumpy Cake looks like a delight.

Cool! My site is now featured on Recipe.com's "Food Blogs we love".

A very sweet interview with a celebrity pastry chef on DessertBuzz!

Sad: the end of a kuchen era in Hebron, ND.

Angel Food, but not cake: Angel Biscuits, a story and recipe.

An oldie but goodie: Dreamy Donuts.

Ever heard of Trenary Toast? I hadn't either.

Delicious: Dulce de leche gelato. 

Things that have made me happy in the past: King Cake from Sucre in New Orleans.

Yum: Shirley Temple Cupcakes.

Sweet dishing: A fun interview on the Village Voice blog with the brains behind One Girl Cookies.

Thursday
Jan052012

Chocolate Delirium Recipe from Rosie's Bakery

Chocolate Delirium

CakeSpy Note: This is a guest post from Judy Rosenberg, owner of Rosie's Bakery in Massachusetts and author of the newly-released Rosie's All-Butter Fresh Cream Sugar-Packed Baking Book (love the title!!). Here goes:

In the old days before we became aware of all the allergies that people have towards gluten, we still baked a host of cakes that did not contain wheat flour and therefore can today be considered “gluten free”. Flourless chocolate cake has been a staple of many a great baker. Its origins are found in fancy European baking, especially that of France.

Most of today’s “gluten free” pastries involve substituting all kinds of alternative choices for wheat flour; this can require changes in the other ingredients due to the fact that the gluten in wheat flour has bonding qualities, and when it is not present, the texture of the cake can be greatly affected.

What is beautiful about the classic “flourless” cake is that no substitutions are required because there is no flour involved to begin with! The incorporation of beaten egg whites and/or whipped cream helps the cake to rise somewhat while baking. The outcome is a marvelously fudgy cake that really accentuates the flavor of the chocolate and the texture that is created when you blend chocolate, butter and sugar together.

I am always thrilled to be able to introduce my gluten free customers to cakes that have been enjoyed for the past 35 years by Rosie’s customers and that I know have stood the test of time!

Here’s a melt-in-your mouth, not-too-sweet, flourless chocolate cake from Rosie's All-Butter Fresh Cream Sugar-Packed Baking Book that makes a welcome dessert for all chocolate lovers, including those who are gluten intolerant. I like to serve this cake with whipped cream or coffee ice cream, and occasionally I will throw some toasted chopped almonds or walnuts on top. If you don’t want to bother with the Chocolate Ganache, just dust the cake with cocoa powder and you still have a winner. After the guests have gone, I have been known to crawl into bed with a small piece that I have heated in the microwave and topped off with a little more ice cream.

Rosie's-Bakery-All-Butter,-Cream-Filled,-Sugar-Packed-Baking-Book-2D

Chocolate Delirium
makes 12 to 16 servings


  • Butter for greasing the pan
  • 1 pound (4 sticks) unsalted butter
  • 1 cup sugar
  • 1 cup strong brewed coffee or espresso
  • 1 pound bittersweet chocolate (or a combination of 8 ounces unsweetened chocolate and 8 ounces semisweet), chopped into small pieces
  • 6 large eggs, at room temperature
  • 6 large egg yolks
  • 1/4 cup plus 2 tablespoons heavy (whipping) cream
  • chilled Chocolate Ganache (there's a recipe in the book, or use this one)
  • Whipped Cream (page 119) or ice cream of your choice, for serving

Procedure

  1. Place a rack in the center of the oven and preheat to 325°F. Lightly grease a 10-inch springform pan with butter. Line the bottom of the pan with a parchment circle or pan insert.
  2. Melt the butter with the sugar and coffee in a large saucepan over medium-low heat.
  3. Add the chopped chocolate to the butter mixture and stir. Turn the heat off, cover, and let sit until the chocolate has melted, about 10 minutes. Transfer to a large mixing bowl and stir with a whisk until smooth. Set aside.  
  4. Whisk together the whole eggs and egg yolks in a small mixing bowl. Pour this mixture in a stream into the chocolate mixture while stirring vigorously with the whisk until blended.
  5. Whip the cream in a small mixing bowl with an electric mixer until firm peaks form, about 40 seconds. Stir the whipped cream into the chocolate mixture until fully incorporated.  
  6. Pour the batter into the prepared pan. Bake until the center is set but still slightly spongy in texture and a tester inserted in the center comes out with moist crumbs, about 1 ½ hours.  
  7. Cool the cake in the pan on a rack for several hours.  
  8. Remove the side of the pan and flip the cake onto the rack. Remove the pan bottom and the paper. Place a second rack over a large piece of aluminum foil. Flip the cake right side up onto the rack.
  9. Pour the Chocolate Ganache over the top of the cake and use a frosting spatula to spread it evenly over the top so that it drips down the sides. Then use the spatula to lightly spread it around the sides of the cake. When the glaze sets, carefully lift the cake off the rack with a metal spatula and place it on a cake plate.
  10. Serve with Whipped Cream or the ice cream of your choice.


Thursday
Jan052012

Ride 'Em, Cowgirl: The Cowgirl Cookie from Arizmendi Bakery, San Francisco

Arizmendi Bakery, Cowgirl cookie

There is a word to describe how I feel about the Cowgirl Cookie from Arizmendi in San Francisco.

That word is Love.

Sort of like the love child of a raisin-free oatmeal cookie and a chocolate chip cookie, it's got a few other little somethings thrown in, and is of a perfect size: not huge, but not small—like the size of 1.5 smaller cookies. It's fat and dense but not leaden; it's crispy on the edges but soft and chewy on the inside. It's buttery and carbohydratey and sweet but a little salty-caramelly too.

It is a very good cookie.

But don't just go for the cookies: they also have delicious pizza, bread, and other carbohydrate-filled baked goods there, too. I'm just telling you what my current favorite thing is there. Plus, you can feel good about visiting this bakery because it's a co-op and their shared baking prowess and enthusiasm shows through in everything they do. So go ahead, get your hippie cookie on.

Arizmendi, various locations in the San Francisco bay area; I went to the one on Valencia Street. More information here.

Monday
Jan022012

La Dulce Vita: Almost Flourless Chocolate Cake with Dulce de Leche Recipe for Serious Eats

Around this time of year, an unnerving amount of people make declarations that they are going to avoid dessert, all under the alarming title of "New Year's Resolution".

Personally, I'd rather resolve to eat more deliciously. And if you resolve similarly, you'll undoubtedly get a lot of pleasure from Almost Flourless Chocolate Cake with Dulce de Leche.

This recipe is largely based on Evelyn Sharpe's 1969 recipe for "French Chocolate Cake", as discovered on Amanda Hesser's now-defunct Recipe Redux column, but is made even better with the addition of dulce de leche and ice cream or whipped cream on top.

For the full entry and recipe, visit Serious Eats!

Monday
Jan022012

Teeny's Tour of Pie: Petsi Pies, Somerville MA

CakeSpy Note: This is the second in Teeny Lamothe's Tour de Pie series on CakeSpy! Teeny is touring the country, learning how to make pies at some of the nation's sweetest bakeries. She'll be reporting here on each stop! This stop: Petsi Pies of Somerville, MA!

Where: Somerville, MA at Petsi Pies

When: November 1st through December 16th

Why: I knew that I needed to have at least one month in Boston or the surrounding area because that's where my boyfriend just happens to be going to grad school. I figured if I could combine my love for pie and my boyfriend's love for eating pie, I would be good to go. I was very persistent, perhaps to the point of badgering, but Rene McLeod, owner of Petsi, seemed more than happy to have me. They're also the place to get pie in Cambridge and Somerville. What began as an extra set of holiday hands turned into a full blown love of this Somerville shop and all the people that work there... I'll be back if I can. 

How: The few weeks before Thanksgiving were filled with figuring out the day to day routine of the bakery. Their full time baker for the scone shift (which is the evening shift that makes, bakes and boxes all of the wholesale) was out of commission for my first week, so I was able to step in and lend a hand with all of the scones and muffins that get sent out to the surrounding cafes and coffee shops. The second week I learned all there was to learn about crust before the Thanksgiving chaos ensued... and after that it was madness! We had over 2,000 pies to make in less than a week, and everything went swimmingly. I think if you can survive something like Thanksgiving pie making in a pie shop you reach automatic 'fast friends forever' status. The final few weeks were filled with a much more lackadaisical baking schedule. I think my time at Petsi Pies was absolutely wonderful. I was rather hesitant in the kitchen when I first started, but I was made to feel like a baker from the first day I walked into the shop. Over the month and a half I was there I became steadily more confident. I was put on the schedule, I was given a list of things to accomplish each day that I worked, and for the first time I felt as though I made friends. Plus, I survived my first Thanksgiving as a pie baker; the pie holiday, when millions of people who aren't necessarily pie eaters indulge for the day. 

Observations: I felt very settled at Petsi Pies and very much like an official baker. I loved coming into work, and having a list of things to accomplish before I left for the day. I also learned every aspect of being a baker. I learned the basics of making a Petsi Pie, of course, but I also learned a slew of their other pastries as well. I was in charge of apple cake and brownies, almond bars and brioche. Baking at Petsi made me realize that I was a baker of many things, and that there is an ease and a sense of fun that comes with spending time in the kitchen. 

Thanksgiving Dinner Pie

Ingredients

  • 2 tablespoons butter
  • 1 onion, chopped
  • 2 stalks celery, chopped
  • 3 carrots, chopped
  • 4 tablespoons flour
  • 4 cups chicken or turkey stock
  • 2 sweet potatoes, peeled and diced
  • 2 cups shredded turkey
  • 2 tablespoons poultry seasoning
  • 1/2 cup frozen peas, thawed
  • 1 cup fresh cranberries
  • 2 cups prepared stuffing 

Procedure

Preheat oven to 350 degrees F.

Melt butter in a large saucepan and cook chopped onion until tender. Stir in celery and carrots and cook for 2 minutes. Stir in flour and cook for 2 minutes. Add the chicken stock and bring to a simmer. Add the sweet potatoes and simmer until tender. Stir in turkey, poultry seasoning and peas. Salt and pepper to taste. Add cranberries and take off heat. Pour into a crust lined pie dish. Cover the filling with the stuffing, like you would with a crumble. Bake for 30 minutes at 350 degrees until crust and stuffing are golden brown. 

Page 1 ... 1 2 3 4
© Cakespy, all rights reserved. Powered by Squarespace.