Home Home Home Home Home Home Home
CakeSpy

Featured: 

My adventure at Ben & Jerry's in Vermont!


Unicorn Love: the Eating Disorder Recovery Blog


 Buy my brilliant books!

Buy my new book!

Buy my first book, too! 

CakeSpy Online Retail!


Archives
Gallery

Fantastic appliance for cake making on DHgate.com

everyrecipe.co.nz

Craftsy Writer

Entries from August 1, 2009 - August 31, 2009

Thursday
Aug202009

Sea Biscuit: The Hermit Cookie of 1880-90

Delicious Sandwich Cookie
The late 1800s were a pretty eventful time in the USA: in New York, the Brooklyn Bridge was opened and Lady Liberty was installed; in the West, Billy the Kid and Jesse James bit the dust; the nation also grew, officially adding Washington, Montana and the Dakotas to the Union. And according to Betty Crocker's Cooky Book, the cookie of the decade was the Hermit:

One of our earliest favorites--rich with spices from the Indies, plump with fruits and nuts, Hermits originated in Cape Cod in Clipper Ship days. They went to sea on many a voyage, packed in canisters and tucked in sea chests.


Now, you may be wondering where this morsel got its funny name. There are a few theories uncovered on historycook.com:


Some say that the cookies were named because they look like a hermit's brown sack-cloth robe, but the earliest recipes are for white and round cookies. One possible lead is that the Moravians, an ethno-religious group well-known for thin spice cookies in North Carolina and Pennsylvania, were sometimes called "herrnhutter" in German or Dutch, and that might have sounded like "hermits" to an English-speaking cook.


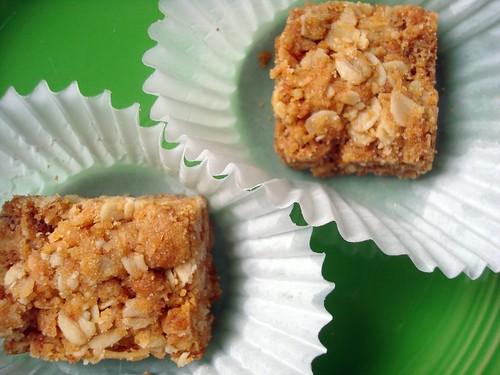
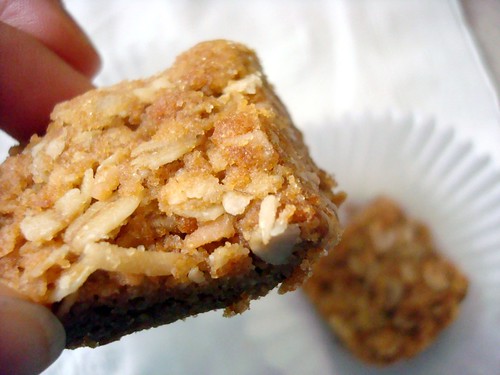
Funny name and hazy origins aside, there's definitely another reason why hermits have lingered in our cookie jars: they're rich, cakey, moist, and satisfying. Adding raisins makes them taste vaguely virtuous, if you're into that--I'm not, so I substituted chocolate chips, and it worked out quite deliciously. They got even better when I sandwiched a slab of cheesecake filling between two of them (I think frosting would also work fantastically).
Hermits
Hermits


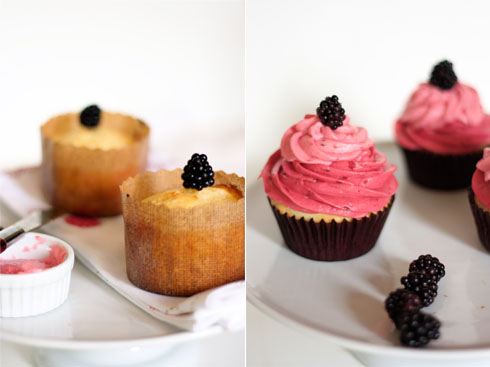
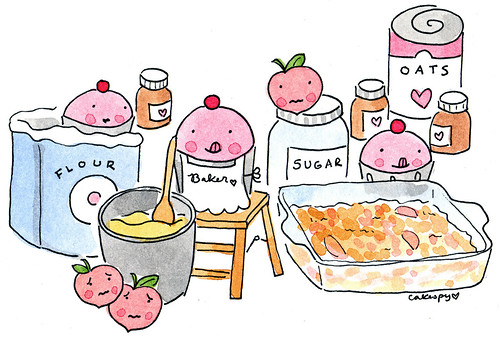
- makes about 3 dozen small cookies or 24 large cookies; if you're interested in the cheesecake filling shown in the top photo, you can find the recipe here -
 
  • 1/2 cup butter
  • 1 cups brown sugar, packed
  • 1 eggs
  • 1/4 cup cold coffee
  • 1 3/4 cups flour
  • 1/2 tsp baking soda
  • 1/2 teaspoon salt
  • 1/2 teaspoon nutmeg
  • 1/2 teaspoon cinnamon
  • 1 cup chocolate (or white chocolate) chips
  • 3/4 cup coarsely chopped nuts (I used walnuts)
  1. Mix butter, sugar and egg thoroughly. Stir in coffee.
  2. Sift dry ingredients together; mix bit by bit into the butter/egg mixture.
  3. Once incorporated, add the chocolate chips and nuts and stir only until incorporated.
  4. Chill dough for at least 1 hour.
  5. Heat oven to 400 F. 
  6. If you want small cookies, drop rounded teaspoonfuls of dough onto your cookie sheet; if you're not scared of a big cookie, do as I did and use an ice cream scoop. 
  7. Bake 8-10 minutes for small cookies, 12 or so minutes for larger ones, or until there is the slightest crispiness on the bottom (as they have a light brown hue from the coffee, you've got to be careful about this!).


Thursday
Aug202009

Cake Byte: The ClaireSquares Mini Debuts!

Custom ClaireSquares piece
As you probably know, me n' Mr. CakeSpy are pretty big fans of ClaireSquares, a San Francisco-based baking company which specializes in a sort of stylized take on Millionaire's Shortbread (they're able to ship them too--you can order here). But they've just introduced an adorable (and exceedingly decadent-sounding) new product: a chocolate-covered mini ClaireSquare! Here's the official announcement:

After six months in the test kitchen, our cutest addition to the Clairesquares family has finally arrived.

We created a bite size square made of Irish styled shortbread and caramel, then drenched it in Belgian chocolate.
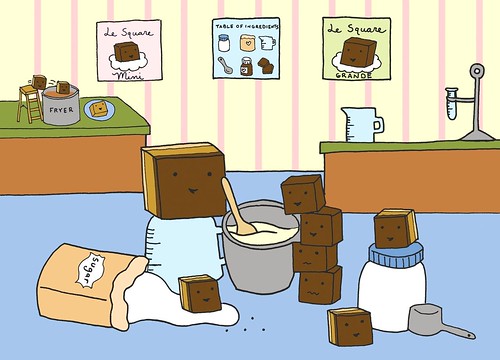
The first image shows mini squares passing through a curtain of chocolate; the second image shows Clairesquares' Minis passing out of the chocolate enrober cooling tunnel, ready for eating!


Starting on Saturday the 22nd at the San Francisco Street Food Festival, you can sample the sweet treats people have been raving about.


Upcoming Tasting opportunities:


  • This Saturday, 11am to 7pm on Folsom Street in front of La Cocina
  • Saturday 29th, 10am to 1pm Ferry Plaza Farmers Market, La Cocina booth.
  • Available exclusively at Andronico's Markets starting in September.


For more information, visit clairesquares.com or follow them via Twitter!


Tuesday
Aug182009

South African Munchies: Delicious Crunchies

South African Crunchies
I first discovered Crunchies, a (natch) crunchy South African bar cookie, when CakeSpy Buddy Naomi handed one to me and said "eat this". Of course I was more than happy to oblige. Now, these cookies (made by local catering company On Safari) vaguely resembled granola bars, but one bite made the difference achingly clear. These cookies have a flavor that granola bars could only aspire to: crunchy, salty-sweet, coconutty, and very buttery.

So what's the deal with these cookies?
South African Crunchies
As one South African blogger reminisced,

Growing up in South Africa, the one cookie-tin constant that every child will remember is crunchies. They were usually one of the first things that your mom let you bake and kept forever in an airtight container, so we all grew up on crunchies. To me, they were distressingly unglamorous....but they certainly were a stalwart of every cookie tin that I remember growing up.

Want to make some crunchies? While On Safari's recipe is proprietary, I did find a crunchie recipe on the Hulett's Sugars (a South African manufacturer of sweeteners) which seems pretty legit.


South African Crunchies

  • 310ml (1¼ cups) flour
  • 310ml (1¼ cups) breakfast oats
  • 310ml (1¼ cups) coconut
  • 185ml (¾ cups) Huletts White Sugar
  • 20ml (4 teaspoons) Huletts Golden Syrup
  • 125ml (½ cup) butter or brick margarine
  • 5ml (1 teaspoon) bicarbonate of soda
  • 45 - 60ml boiling water
  1. Combine dry ingredients.
  2. Melt the Huletts Golden Syrup and butter together. Combine the bicarbonate of soda with the water and add to the butter mixture.
  3. Mix together with the dry ingredients.
  4. Press the mixture into a Swiss roll tin (or for a thicker crunchie, bake in a square 20cm x 20cm tin) and bake for 20 minutes at 150ºC. Gently press down the sides if they seem to rise too much.
  5. When light brown, remove from the oven and cut into squares. Switch off the oven. Return crunchies to the oven, for about 10 minutes to dry out.
  6. Allow to cool before removing from tin.


Monday
Aug172009

All That Glitters: Golden Glow Cake With Chocolate Cream Cheese Frosting from Cupcake Project

Golden Glow Cake with Chocolate Cream Cheese Frosting
Continuing our monthlong celebration of birthdays and all things sweet, Stef from the amazingly creative site Cupcake Project has sweetly donated some of her sweet birthday memories--as long as a killer recipe for a classic Golden Glow Cake with an amazingly decadent chocolate cream cheese frosting. Here's her story (as well as a picture of her during her early days of caking it up):

Photo c/o cupcakeproject
I never understood why my friends enjoyed store-bought heavily buttercreamed birthday cakes. But, I don’t think my friends ever understood why I liked my birthday cakes. I was so excited for my mom’s homemade cake, but my friends would barely touch it. Oh well – more for me!

My birthday cake each year was a Golden Glow cake. It’s a somewhat dry yellow cake – not that exciting on its own. However, it was topped with homemade chocolate cream cheese frosting that I loved! To this day, chocolate cream cheese frosting is my favorite frosting.

Sure, I didn’t get professional decorations with cartoon characters, but nothing beats cake from mom! I should also mention that she got the recipe from her mom.

I have no proof that the above picture is from eating Golden Glow, but I wouldn’t be surprised.

Cuppies Making Golden Glow Cake
Golden Glow Cake with Chocolate Cream Cheese Frosting

- CakeSpy note: I made this recipe as cupcakes, and it yielded about 24. While Stef's comment that the cake is somewhat dry is true, the frosting really does "make" this recipe. -


BatterCupcakes

Cake
  • 2 1/4 c flour
  • 3 t baking powder
  • 1 t salt
  • 1 1/4 C sugar
  • 1/2 C butter
  • 3/4 C milk
  • 2 T milk
  • 2 eggs
  • 1 t vanilla

1. Preheat oven to 350 F.
2. Sift flour, baking powder, salt, and sugar.
3. Add butter and ¾ C milk and beat for two minutes.
4. Add remaining milk, eggs, and vanilla and beat for another two minutes.
5. Pour into well greased, lightly floured pan.
6. Bake 25 - 35 min.


Frosting
(CakeSpy note: the frosting in the pictures above looks thinner and glossier than it should; this is because we couldn't resist frosting some of the still-warm cakes and eating immediately)

  • 1 8 oz package of cream cheese
  • 3 T milk
  • 3 C powdered sugar, sifted
  • 2 squares (2 oz) of melted unsweetened bakers chocolate
1. Soften cream cheese by adding milk, 1 tablespoon at a time.
2. Add powdered sugar gradually, blending well after each addition.
3. Blend in melted chocolate.


Golden Glow Cake
Keep tabs on what's going on in Stef's sweet world on her site or via her Twitter feed!


Monday
Aug172009

Sweet Art: (Un) Wrapped for Illustration Friday

(un)wrapped for Illustration Friday
Cupcakes are awfully pretty when they're wrapped, but as Cuppie is discovering in what can only be described as a cupcake coming-of-age moment, they're pretty attractive when they're unwrapped, too. Done for this week's Illustration Friday theme of "Wrapped".

Monday
Aug172009

CakeSpy Sweetens Up Serious Eats With Pizza Pie!

CakeSpy for Serious Eats!
It's a pie all right, but that's not pizza. It's just dressed up to look like it: this sweet confection is comprised of pie crust heaped with fruit preserves, cheesecake and marzipan "leaves" to resemble a classic Neapolitan pie. Not only is it delicious, but it's fun to watch the reactions as unsuspecting guests bite into a slice.

And this sweet pie also marks CakeSpy's debut on Serious Eats (which, incidentally, is where you can also find the recipe)! Yup--I've joined forces with the premier food blog community on the interweb! You can look out for my contributions on Mondays at 3pm EST.

Looks like the internet just got sweeter!

If you haven't already, bookmark Serious Eats now and visit often!

Monday
Aug172009

Sweet Art: Just Baked in Michigan

Custom Piece for Just Baked Bakery
I have fallen in love, from afar, with Just Baked, a Detroit-area bakery. I discovered them recently when I was hired by a friend of the owner to do a custom painting depicting cupcakes from their menu hanging out in front of the shop.

But business mixed with pleasure the moment I took a look at their menu, which has a gorgeous array of cupcakes:


as well as other baked goods:


If you're in the Detroit area, well then, lucky you--because you can taste the magic for yourself! A second location is set to open very soon.

Just Baked is located at 33309 7 Mile Road, Livonia, MI, (248) 255-1441; online at justbakedshop.com‎.


Sunday
Aug162009

Taste the Rainbow: A Homemade Funfetti Recipe from iheartcuppycakes

Sprinkles have been spilled.
Continuing our monthlong celebration of birthdays and all things sweet, CB from the inimitable iheartcuppycakes.com has kindly donated not only some sweet birthday memories, but also her super sweet recipe for homemade Funfetti Cupcakes. All the fun of a classic childhood treat--but grown up for more adult palates. Here goes:

My birthday is in July. I'm an Independence baby. Tom Cruise eat your heart out! When I was very little my mom would make me a Funfetti birthday cake from cake mix while I "helped" by licking the beaters. It was my favorite part! Even to this day. Don't judge me! It's Funfetti. HA! I think that's why I am not as anti-cake mix like some other bakers because of those great birthday memories with my mom.
Guest post from iheartcuppycakes

Here is my recipe for homemade Funfetti Cupcakes:

Funfetti Cupcakes


Recipe adapted from Cupcakes by Shelly Kaldunski


Makes about 12 cupcakes

For the cupcakes

  • 1-1/4 cups AP flour
  • 1-1/2 tsp baking powder
  • 1/4 tsp salt
  • 3/4 cup sugar
  • 6 tbsp butter, room temperature
  • 1 large egg + 1 egg white, room temperature
  • 1 tsp vanilla extract
  • 1/2 cup milk (I used half-and-half instead)
  • 2 tbsp rainbow sprinkles

For vanilla buttercream
  • 2 sticks butter
  • 7 cups powdered sugar, sifted
  • 1/4 cup milk
  • 1 teaspoon vanilla

Guest post from iheartcuppycakes
Instructions


To make cupcakes—

  1. Preheat oven to 350F.
  2. Line cupcake pan with paper liners.
  3. In a large bowl, sift flour, baking powder and salt. Set aside. In a stand mixer, fitted with flat beater, beat the sugar and butter until well combined, about 2-3 minutes. Add egg and egg white, one at a time, beating on low.
  4. Then add vanilla. Gradually add flour mixture in 3 additions, alternating with milk in 2 additions, ending with the flour mixture. Fold in rainbow sprinkles.
  5. Fill cupcake liners about 1/2-2/3 full. Bake for about 17-20 minutes or until a toothpick inserted in the middle comes out clean. Remove from pan and cool completely on a wire cooling rack before frosting.

To make buttercream—
In a stand mixer, fitted with flat beater, beat butter until creamy, about 2-3 minutes. Add 5 cups of sifted powdered sugar, milk, and vanilla, beat until combined. Add more powdered sugar until you get to the consistency you want.


[NOTES: I think I added about 6-1/2 cups, give or take a few tbsp, to get the consistency I wanted. If its too stiff, you can add a little more milk.]

Frost with vanilla buttercream and garnish with more rainbow sprinkles.

ENJOY!


Keep up with CB at iheartcuppycakes.com or via her twitter feed!


Thursday
Aug132009

Guest Blog Post: Lemon Berry Cupcakes by Pâtisserie Natalie

Lemon Berry Cupcakes by Pâtisserie Natalie
When you visit Pâtisserie Natalie, you'll undoubtedly be impressed. The pictures are simply gorgeous; the recipes are creative and sophisticated, yet unfussy.

But you'll be even more impressed knowing that the baker/writer/photographer behind it all is still in high school. No, really.

With a professional-looking portfolio of photographs and recipes already under her belt, Natalie's future sure does look sweet; happily, she has prepared a guest post exclusively for CakeSpy.com! Here goes:

Hi, my name is Natalie, from Pâtisserie Natalie. I'm so excited to get to do a guest post for CakeSpy; I've been a fan for a long time. I'm a high school student from Seattle who loves photography, food styling, and baking. I've been interested in the arts since I was really little, and found my real calling through blogging. I didn't discover the food blogging world until recently. I also didn't realize how much I would love it. My blog gives me a way to share my design and creative flow with other people, as well as see other artist's work.

Lemon Berry Cupcakes by Pâtisserie Natalie
I started baking more seriously about 2 years ago, but it is now an addiction. Ask anyone who knows me and they will tell you I am more frequently in the kitchen then not. I absolutely cannot stay away from my kitchen aid mixer and my camera. I am self-taught in html/css coding, and do all my own graphics and layout work for my blog (CS Note: she's interested in pursuing a career in web/graphic design and photography).


I decided to make these Lemon Berry Cupcakes because as many people know, Seattle doesn't have that many sunny days during the year. Summer flavors for me are lemon and berries. Seeing as the sunny days are limited, I felt that I needed to make something that used those flavors. While I don't mind the rain at all (I love it, actually), many people are a little bummed that our summer days here are ending. With that in mind, I made these cupcakes as a sort of "summer revival." I've been working on the recipe for this lemon pound cake for a while, but I think I've finally got it. I'm often disappointed by lemon cake, as it doesn't actually taste lemony. That is not a problem for this cake at all. It's very moist and soft, which is not usually the case with pound cake. The frostings are made from raspberries and blackberries, which is why those frostings are so pink.


Lemon Pound Cake

  • 3 cups all purpose flour
  • 1 teaspoon salt
  • 1/2 teaspoon baking powder
  • 1/2 teaspoon baking soda
  • 2 sticks unsalted butter; softened
  • 2 cups sugar
  • 3/4 cup plain yogurt
  • 3 tablespoons lemon zest
  • 2/3 cup lemon juice
  • 5 eggs
  1. Preheat oven to 350 degrees F.
  2. Sift together the flour, salt, baking powder, and baking soda. Whisk together in a large bowl thoroughly, and set aside.
  3. In a stand mixer, beat butter and sugar until smooth.
  4. In a medium bowl, stir together yogurt, lemon zest, and lemon juice.
  5. Add the eggs to the butter and sugar one at a time, beating in between each addition.
  6. With the mixer on a low speed, add the flour mixture in 3 parts, alternating with the yogurt mixture in 2 parts. Start and end with the flour mixture.
  7. Line a muffin pan with paper liners and scoop even amounts of the batter into the cups, filling almost to the top.
  8. Bake for 16 minutes, rotating the pan after 8 minutes. Once golden brown around the edges, remove from oven and place on a cooling rack for at least 2 hours before icing.


Lemon Berry Cupcakes by Pâtisserie Natalie
Blackberry & Raspberry Buttercreams

  • 2-1/2 sticks unsalted butter; softened
  • 1 teaspoon salt
  • 2-1/2 cups powdered sugar; sifted
  • 1/4 cup blackberry sauce
  • 1/4 cup raspberry sauce
  1. Beat butter and 1 cup of powdered sugar until smooth. Divide into two parts, removing half from the mixer bowl. Add the blackberry sauce to the mixer bowl, along with 3/4 cup of powdered sugar. Place buttercream in a piping bag and pipe a circle around the outer edge of the cupcake top, spiraling in towards the center.
  2. In the same mixer bowl, add the remaining half of the butter and powdered sugar that was set aside. Add the raspberry sauce and 3/4 cup powdered sugar and beat until smooth. Place in a piping bag and pipe an extra dollop on top of the blackberry buttercream.

Blackberry Sauce
  • 1 cup blackberries
  • 2 teaspoons sugar
  • 1 teaspoon lemon or lime juice
Combine ingredients in a sauce pan and place over medium heat. Stir frequently until juices from berries boil. Using a wooden spoon, crush the berries in the pan. Let boil for 2 minutes to make sauce more dense. Strain the mixture if you prefer to have smoother frostings. Cool in refrigerator.

Raspberry Sauce
  • 1/2 cup raspberries
  • 2 teaspoons sugar
  • 1 teaspoon lemon or lime juice
Combine ingredients in a sauce pan and place over medium heat. Stir frequently until juices from berries boil. Let boil for 2 minutes to make sauce more dense. Cool in refrigerator.


Thursday
Aug132009

Love and Crumbs: A Peach Crisp Recipe from Moonrat

Happy Birthday to Moonrat
August is totally the sweetest month: it's the month during which CakeSpy was created, and it's also the month of your humble Head Spy's birthday! And so, in celebration of all of this sweetness, there's going to be a month-long celebration of birthday treats, featuring memories (and recipes) from a collection of CakeSpy pals. It kicks off with the lovely and amazing Moonrat, writer of the Editorial Ass blog, which gives a behind-the-scenes look at the publishing industry (and plenty of other fun social commentary). And--bonus--it happens to be her *actual* birthday! As for her laissez-faire birthday treat? Here goes:

Dadrat's Birthday Peach Crisp

When you're a kid, having a summer birthday seems like the short end of the stick. Not only are all your friends away on vacation when you want to have a party, but you can't even bring cupcakes into school for your class!

But I got over my righteous anger pretty quick, because I was a really, really lucky kid whose dad had a penchant for fruit trees. The white peach tree in our back yard would drop peaches at the exact right time each year for Dad to make me some of his peach crisp. Here's his recipe, Dadrat-approved.

Here's how Dadrat did it:

First, he'd make me collect all the peaches and check them for worms (pesky buggers; the antithesis of delicious!). But in case you don't have a white peach tree in your yard, or live in a cement box in the city (like yours truly), you can also buy peaches at the store. If you can find white peaches, they're really, really nice--softer, fibrous, tangy. You'll need about 4 cups. Unless you're doubling or tripling the recipe, which we usually do.


Then he'd preheat the oven to 425. Or around there; Dad dislikes numbers and favors cooking impressionistically. But let 425 be a guidepost for normal people.

Now while the oven is preheating, prep your peaches. You don't want any fuzzy skin in the crisp, so you're going to have to peel them. Luckily, there's a trick. If the peaches are fresh, put them in boiling water for about 30 seconds. Apparently this is called "blanching"--which is particularly humorous if you're using white peaches already. But anyway. Take them out and let them cool, and the skins will come right off. Definitely wait until they cool, though, so you don't burn your mitts. Peel, and slice.

Now stick your peach slices in a large bowl. Mix with:
  • 3/4 cup brown sugar
  • 1 tablespoon vanilla
  • 1 teaspoon of flour
  • 1 teaspoon cinnamon
  • 1/2 teaspoon nutmeg (if you like nutmeg, which I really really do)

Butter the bottom of a casserole and pour the peaches in. Squeeze some lemon (or lemon juice) over the peaches if you feel like it.


In a separate bowl, combine

  • 1/2 cup flour
  • 3/4 cup uncooked rolled oats
  • 1/4 cup brown sugar
  • 1/2 stick of cold butter, chopped up into little squares
If you want, you can throw in walnuts, too, which we never did when I was a kid, but which suddenly strikes me as an awesome idea, unless you are allergic to nuts, in whcih case I don't recommend it. But for everyone else, walnuts are both delicious and an excellent source of iron.


Sprinkle this dry mixture over the top of the peach mixture in the casserole. If you like--and I do--sprinkle an additional teaspoon of brown sugar over the top. It gets sweet and crusty.

Bake for about a half an hour. If you do it right, it doesn't turn to mush. My dad quothe, "The only reason to cook it is to heat it up."

Now you can eat it.


Keep up with Moonrat's rad adventures (and the occasional fuzzy animal picture) at editorialass.blogspot.com.


© Cakespy, all rights reserved. Powered by Squarespace.